| |
 12-20-2010, 07:42 PM
| #201 |
| I wanna be Dave Join Date: Feb 2009 Location: Cowtown, USA
Posts: 2,780
|
Umm...how does it feel to own the sickest yota on the forum? This truck is on my top 10!  |

|  |
| Sponsored Links | |
| | |
|
12-20-2010, 07:44 PM
| #202 |
| RCC Addict  Join Date: Mar 2007 Location: Penngrove
Posts: 1,809
|
Looks sick with the weathering...definitely not a cali truck anymore.
|
|
| |
|
12-20-2010, 09:25 PM
| #203 |
| I wanna be Dave Join Date: Apr 2009 Location: Unnecessary Surgery Land
Posts: 3,406
|
Did you get that dirty carpet idea from me? Just kidding, looks great all weathered. That rusting kit is pretty awesome and it only gets better over time. Rustall is ok for some things, it just takes a few layers before you start to get results. Are you going to dull the paint a bit for a nice sun beaten look?
|
|
| |
|
12-20-2010, 09:29 PM
| #204 |
| I wanna be Dave Join Date: May 2006 Location: FOUR 8 OH
Posts: 4,913
|
You just had to ruin a great thing. |
|
| |
|
12-20-2010, 10:25 PM
| #205 |
| Newbie Join Date: Oct 2007 Location: San Jose
Posts: 46
|
looks killer bro one of my fav builds for sure |
|
| |
|
12-21-2010, 06:53 AM
| #206 |
| Custom Carbon Fiber   Join Date: Oct 2007 Location: Connecticut :(
Posts: 4,501
|
That came out great, the frame and axle look perfect. Congrats on the Academy too ..... |
|
| |
|
12-21-2010, 09:09 AM
| #207 |
| Quarry Creeper Join Date: Jan 2008 Location: Hollister
Posts: 223
|
Looks SICK!!!!! Really like the missing fender |
|
| |
|
12-21-2010, 09:22 AM
| #208 | |||||
| Sinking with the ship  Join Date: Mar 2005 Location: El Capitan...sole survivor and sinking fast
Posts: 8,864
| Quote:
Quote:
Quote:
I actually hit the entire body with scotch bright pad, it was really shiny before, it looks a lot duller in person. I am still trying to figure out what to do with the bumpers and sliders and even the grill is wwwwwwaaaayyyyy to shiny. I also want to cut the grill out like you did as well and find someone to give up the photoetched grill emblem so I dont have to buy the entire Hilux decal sheet. Quote:
Quote:
| |||||
|
| |
|
12-21-2010, 10:48 AM
| #209 | |
| I wanna be Dave Join Date: Apr 2009 Location: Unnecessary Surgery Land
Posts: 3,406
| Quote:
| |
|
| |
|
12-21-2010, 12:53 PM
| #210 |
| I wanna be Dave Join Date: Aug 2005 Location: G6'N
Posts: 7,391
|
Mike, really like the rust look, great work! can you post a link or a part # or a name that others can use to get their trucks rusty too. |
|
| |
|
12-21-2010, 12:57 PM
| #211 |
| I wanna be Dave Join Date: Aug 2005 Location: NE Ohio
Posts: 8,817
|
Sophisticated finishes rust solution should be what your looking for  |
|
| |
|
12-21-2010, 10:22 PM
| #212 | |
| Sinking with the ship Join Date: Mar 2005 Location: El Capitan...sole survivor and sinking fast
Posts: 8,864
| Quote:
| |
|
| |
|
12-22-2010, 12:23 AM
| #213 |
| I wanna be Dave Join Date: Dec 2006 Location: In Cali.
Posts: 4,109
|
Let me know when you don't need it anymore. |
|
| |
|
12-22-2010, 09:59 AM
| #214 |
| ~THE SCALE SHOP~ Join Date: Apr 2006 Location: KILLEEN TX
Posts: 10,056
|
what metallic surfacer did you use. i have that kit and tried it last night and didnt get any rust. i have the steel surfacer, not the iron. and then put the rust liquid on after 5-10 minutes after the steel and didnt see anything happening.
|
|
| |
|
12-23-2010, 09:05 AM
| #215 | |
| Sinking with the ship Join Date: Mar 2005 Location: El Capitan...sole survivor and sinking fast
Posts: 8,864
| Quote:
| |
|
| |
|
12-26-2010, 05:32 PM
| #216 |
| Quarry Creeper Join Date: Nov 2010 Location: land of no rocks
Posts: 438
|
great build. i love the rust but being a noob here i might have missed it but where is the camero build. i saw a glimpse of it in one of you updates but that was it. any links? |
|
| |
|
12-26-2010, 06:10 PM
| #217 |
| RCC Addict  Join Date: May 2008 Location: Green Bay
Posts: 1,138
|
Here is a vid on it. I used the same stuff on My Willys. Works well. http://www.youtube.com/watch?v=IhSDc...e=channel_page |
|
| |
|
01-09-2011, 10:46 AM
| #218 |
| Sinking with the ship Join Date: Mar 2005 Location: El Capitan...sole survivor and sinking fast
Posts: 8,864
|
Thanks to http://www.rccrawler.com/forum/newre...31pardonmyn00b I now have a legit grill emblem 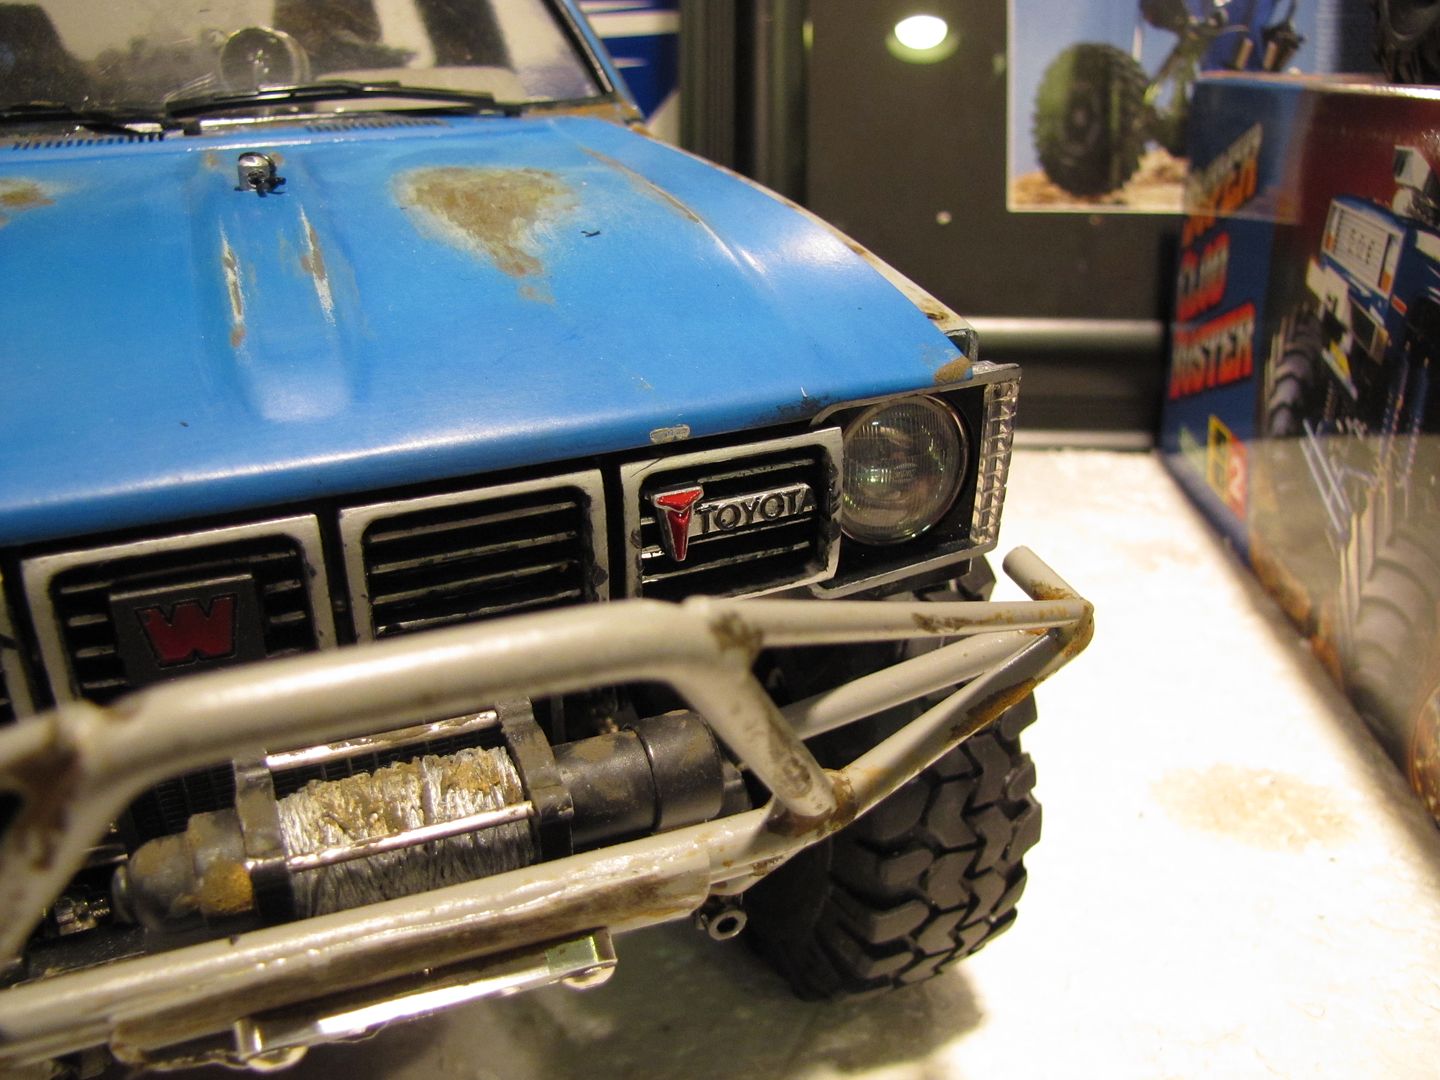 I also took the suggestion of a member on scale4x4 and weathered the bumper some as well. I hit them with rust mostly where the "welds" would be and on the under side of the sliders and rear bumper 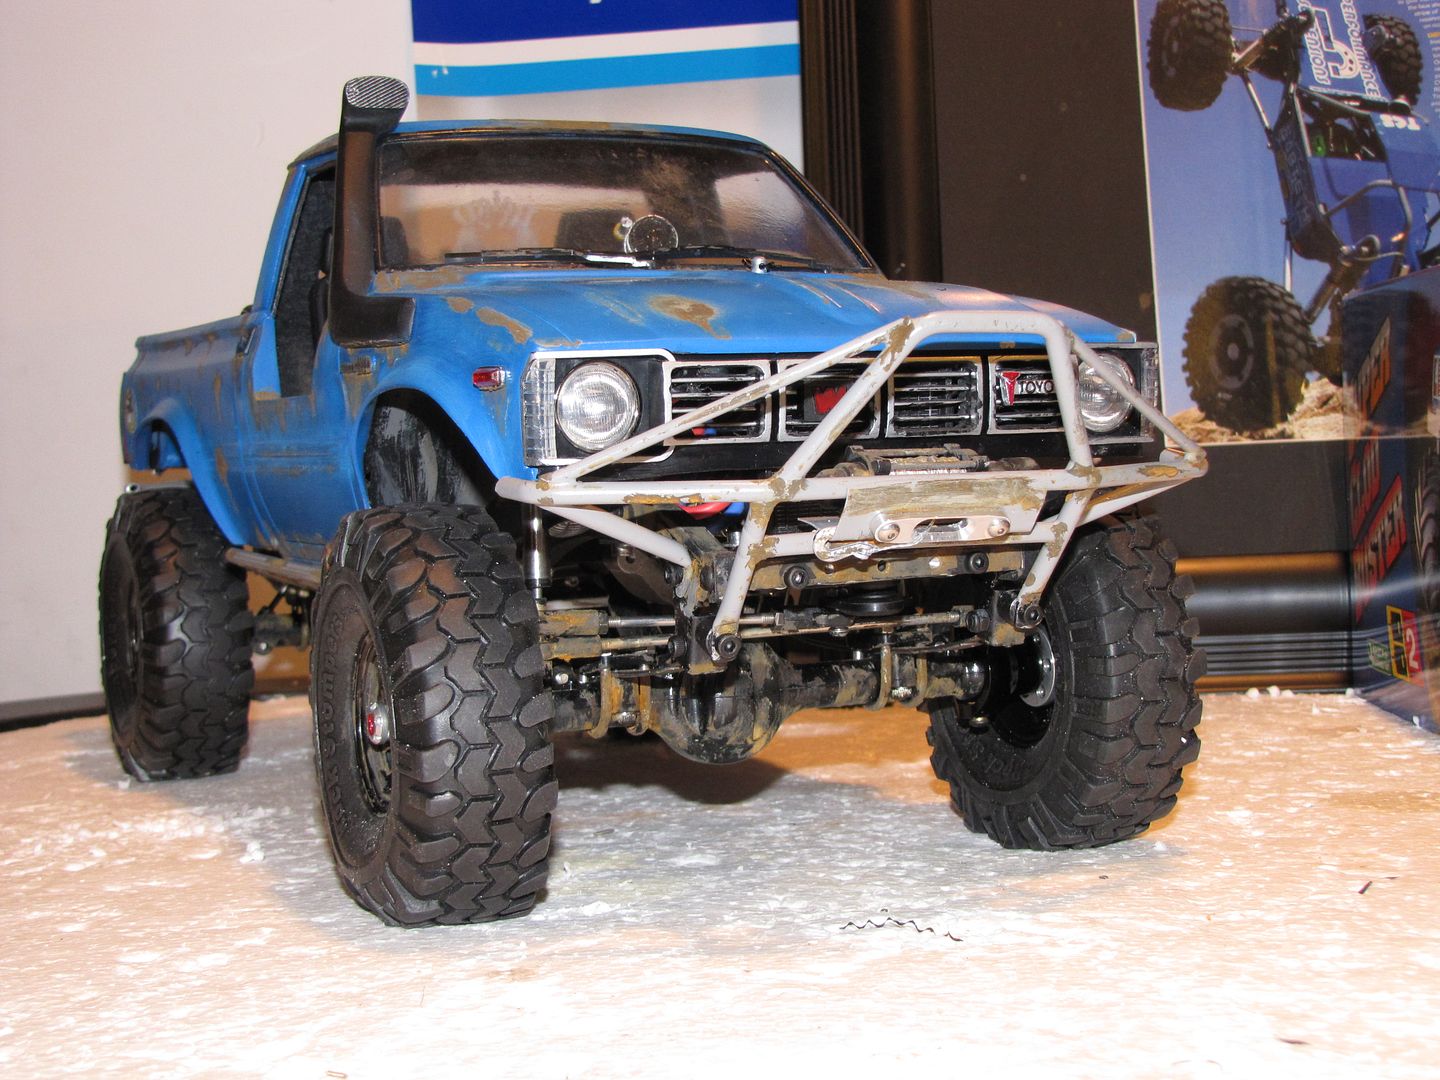 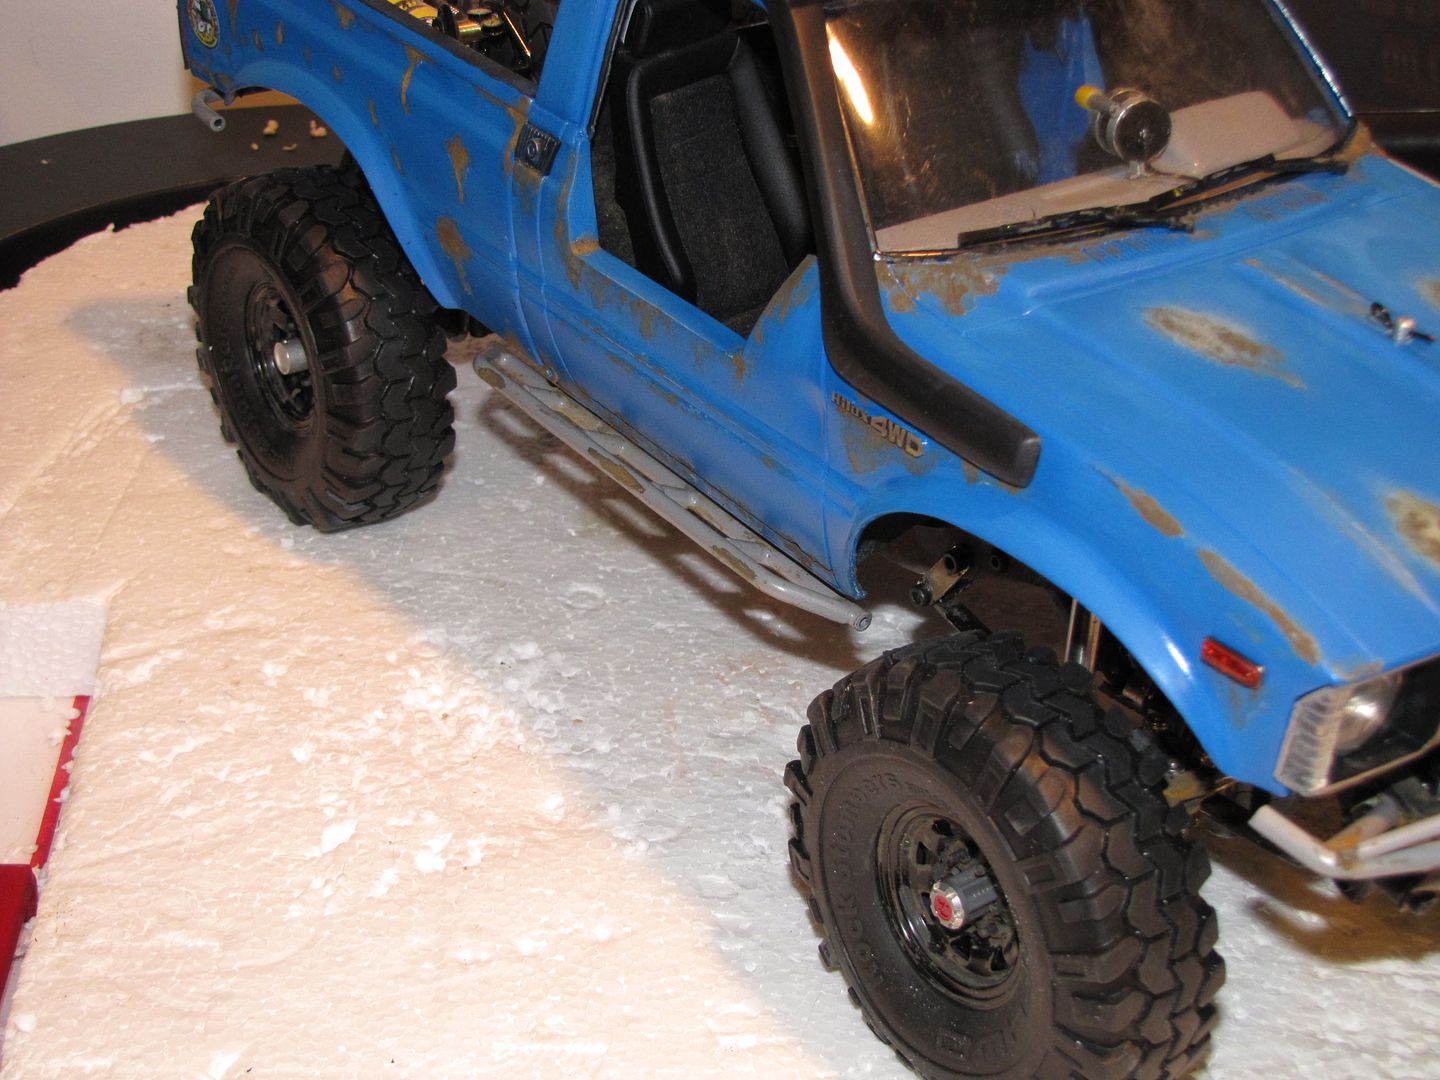 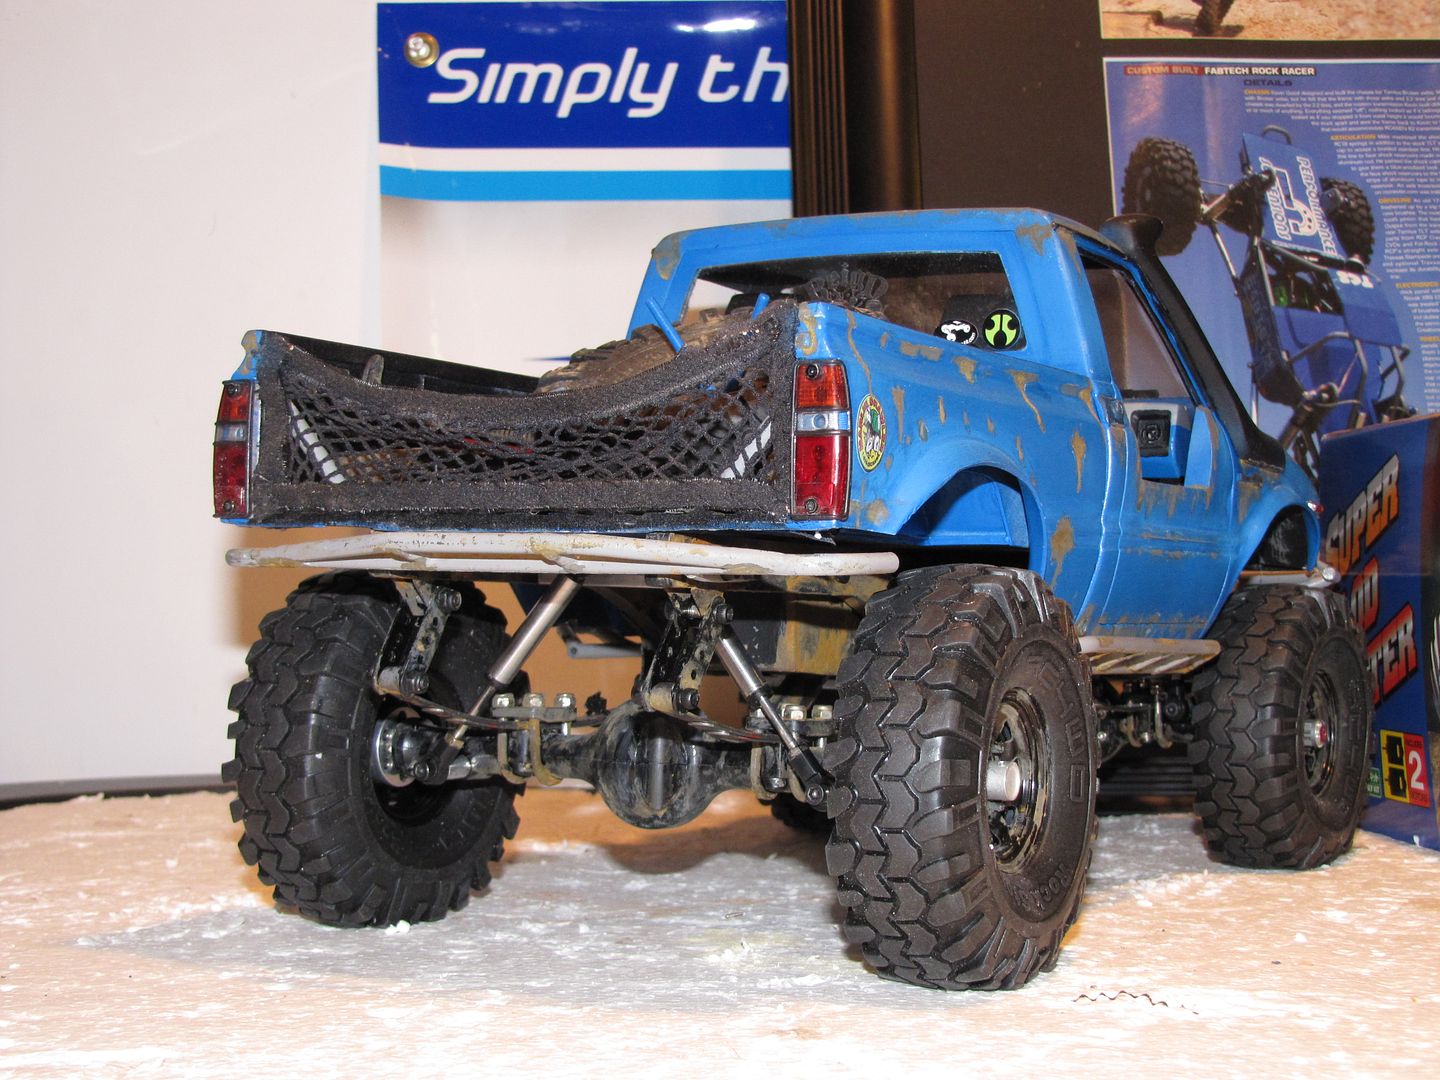 I purchased these from RPP Hobby http://www.rpphobby.com/product_p/3racad12v2go.htm but unfortunately I ran into several issues while trying to install them. 1st issue was the bearing size of the ultimate yota scale knuckles is different. I solved this by drilling out a a regualr 5x11 plastic bushing and fitting it around the supplied bearing. However, after fighting with that it wasnt going to work out anyways because the rotor would fit into the hex set up of the 1.5 steelies More to follow -Mike |
|
| |
|
01-10-2011, 10:03 AM
| #219 |
| RCC Addict Join Date: Oct 2007 Location: Long Island-Land of one batch of rocks in Sag Harbor and at least one fellow crawler
Posts: 1,371
|
It looks like this Lux is ready for a lil snow wheeling. Let's do it!
|
|
| |
|
01-10-2011, 11:26 AM
| #220 |
| Rock Crawler Join Date: Jun 2010 Location: Forsyth County, Georgia
Posts: 617
|
How do you like the performance of the rock stompers? Also did you make that interior or purchase it? Very nice yota btw |
|
| |
 |
 MSD UTE build: The Blue Lux - Similar Threads
 | ||||
| Thread | Thread Starter | Forum | Replies | Last Post |
| **MSD** UTE Montero charity build | pantablo | 1.9 Scale Rigs | 490 | 01-19-2011 06:01 PM |
| MSD Ute Chassis Re-Build | BENDER | 1.9 Scale Rigs | 15 | 12-27-2009 12:25 PM |
| *** MSD " UTE CHASSIS " Jeep JK Shop Truck Build | slobin3d | 1.9 Scale Rigs | 92 | 06-15-2009 12:36 PM |
| * MSD Tamiya FJ-45 " UTE " hilux Build * | Unimoger | 1.9 Scale Rigs | 19 | 12-14-2008 08:24 AM |
| MSD "ute" proto build! | XSRCdesign | 1.9 Scale Rigs | 11 | 11-23-2008 04:33 PM |
| |


 Linear Mode


