| |
 01-10-2011, 12:03 PM
| #221 |
| RCC Addict Join Date: Nov 2005 Location: Utah
Posts: 1,530
|
Hey mike, looks like the truck needs some serious restoration work. You don't want this thing, you'll run into a lot of head aches with all that rust and corrosion! (I love it!  ) ) |

|  |
| Sponsored Links | |
| | |
|
01-10-2011, 06:07 PM
| #222 | |
| RCC Addict Join Date: Oct 2007 Location: Long Island-Land of one batch of rocks in Sag Harbor and at least one fellow crawler
Posts: 1,371
| Quote:
| |
|
| |
|
01-15-2011, 01:28 AM
| #223 |
| REST IN ALOHA CHIP   Join Date: Nov 2005 Location: *
Posts: 3,549
|
hi shrek. miss you. |
|
| |
|
01-16-2011, 01:09 PM
| #224 |
| Pebble Pounder Join Date: Jun 2005 Location: west depford
Posts: 145
|
Stunning work great details
|
|
| |
|
01-16-2011, 08:39 PM
| #225 | ||||
| Sinking with the ship   Join Date: Mar 2005 Location: El Capitan...sole survivor and sinking fast
Posts: 8,864
| Quote:
Quote:
Quote:
Quote:
I snapped these pics today to enter the contest one scale4x4, figured I would share them here... I also went to the LHS to get some of the braided line for my brakes but they were out 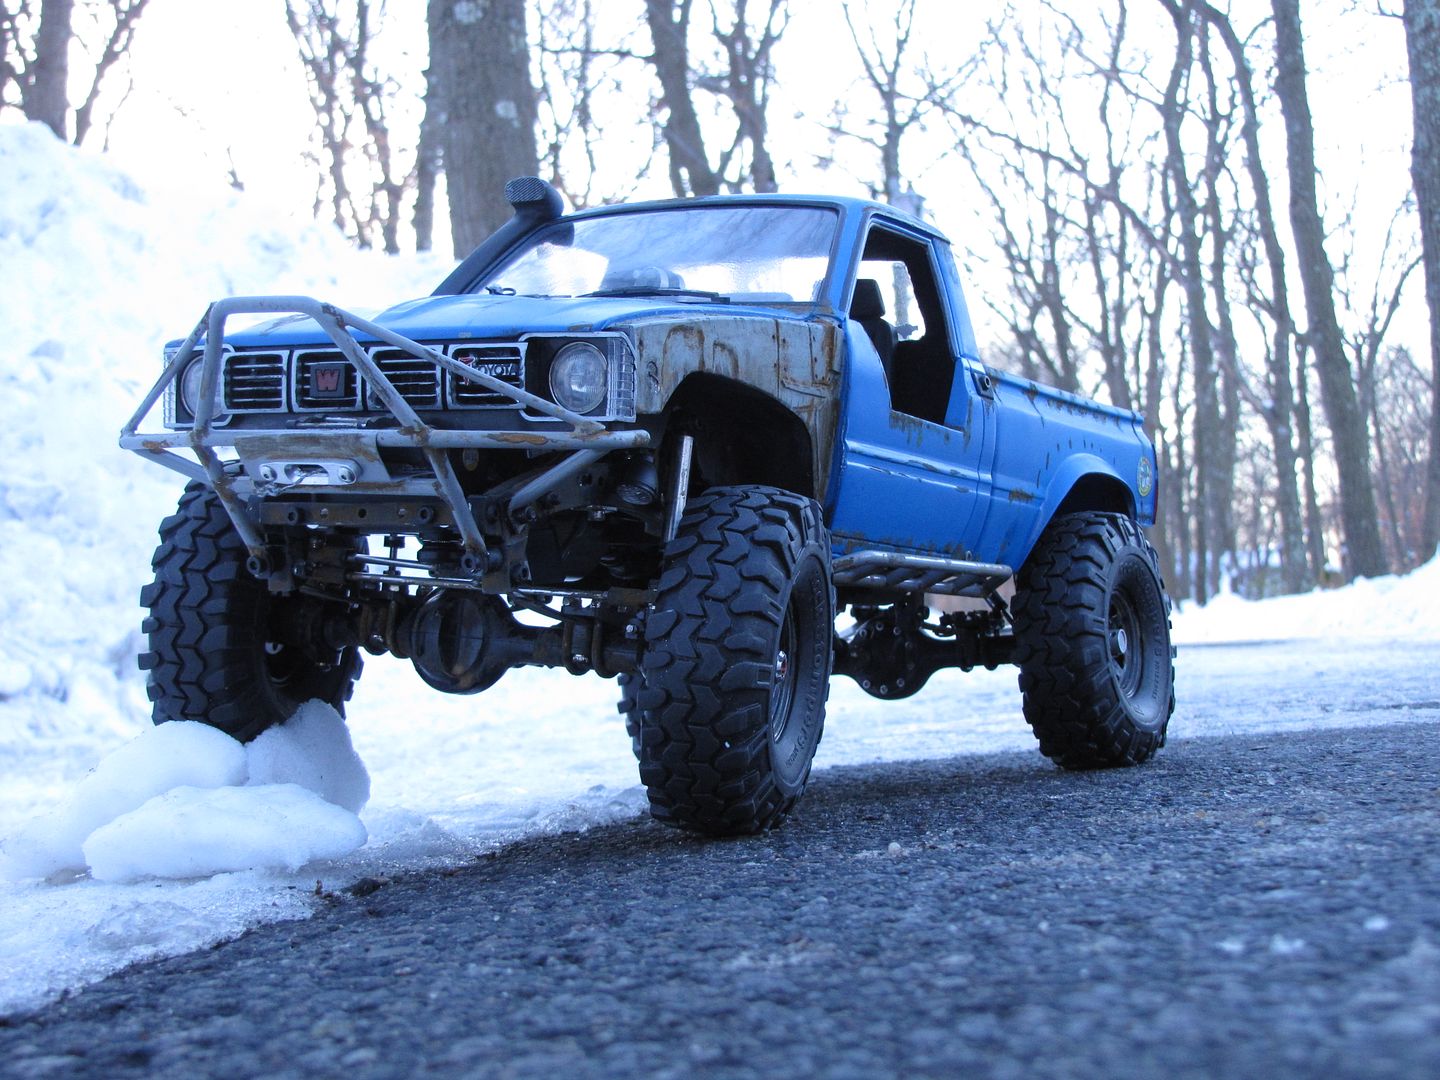 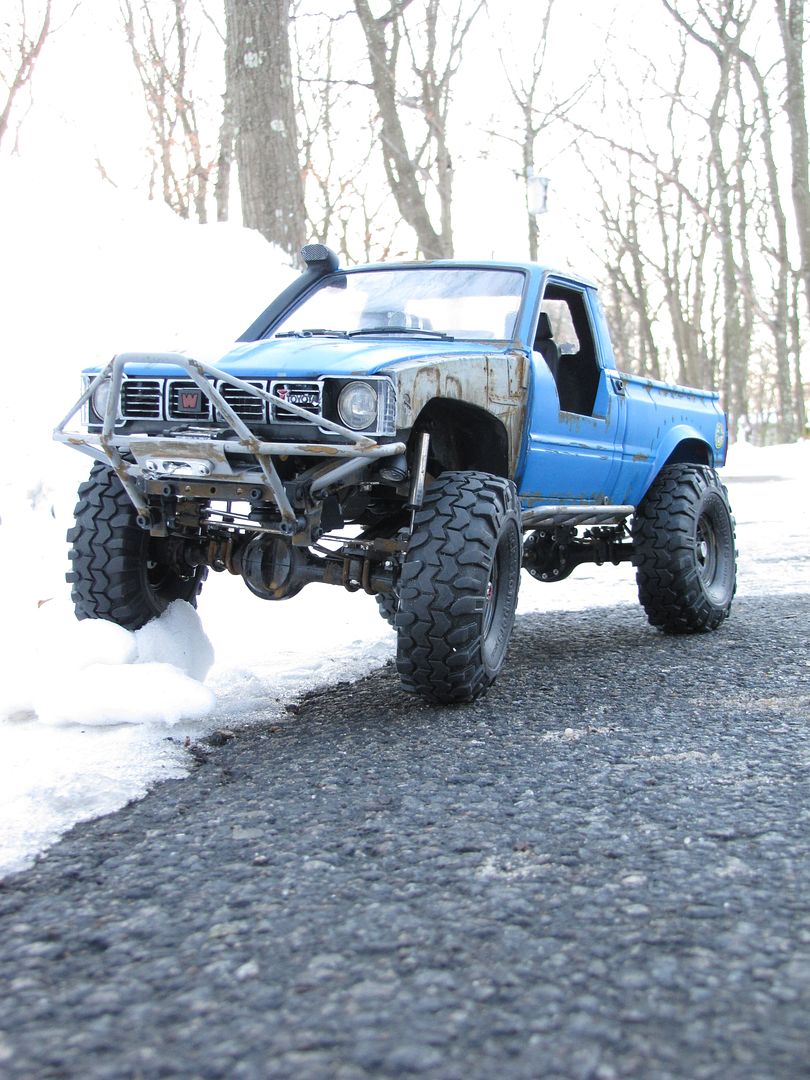 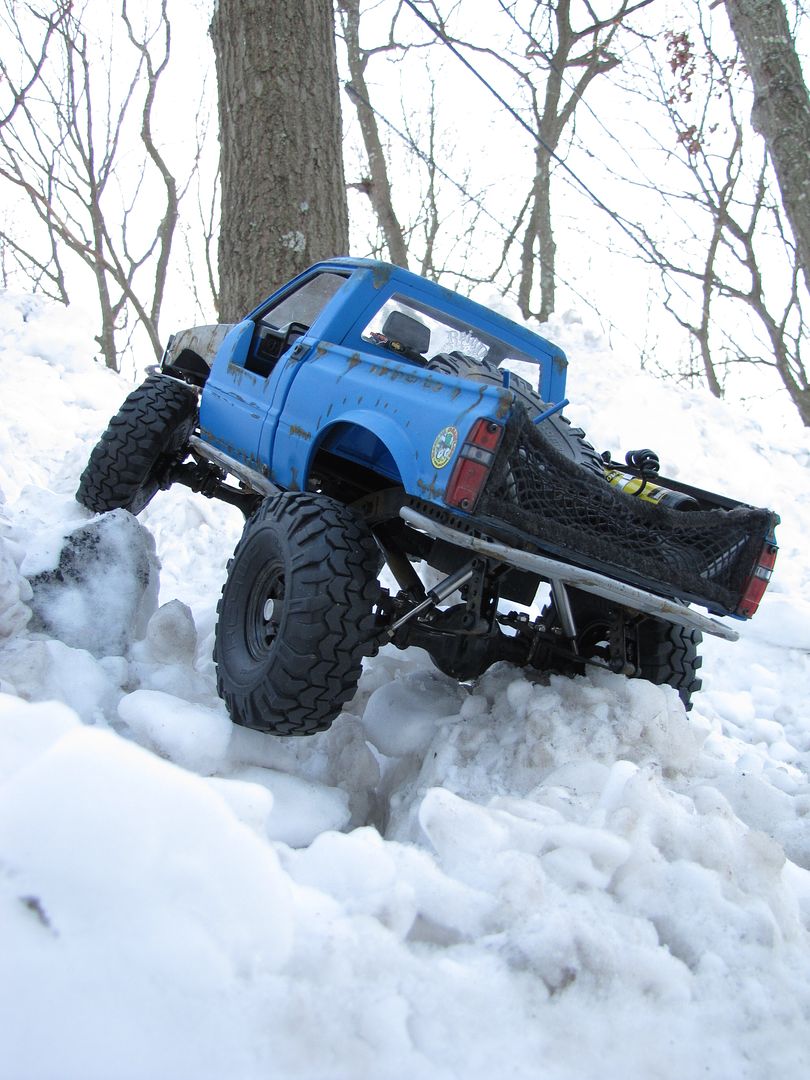 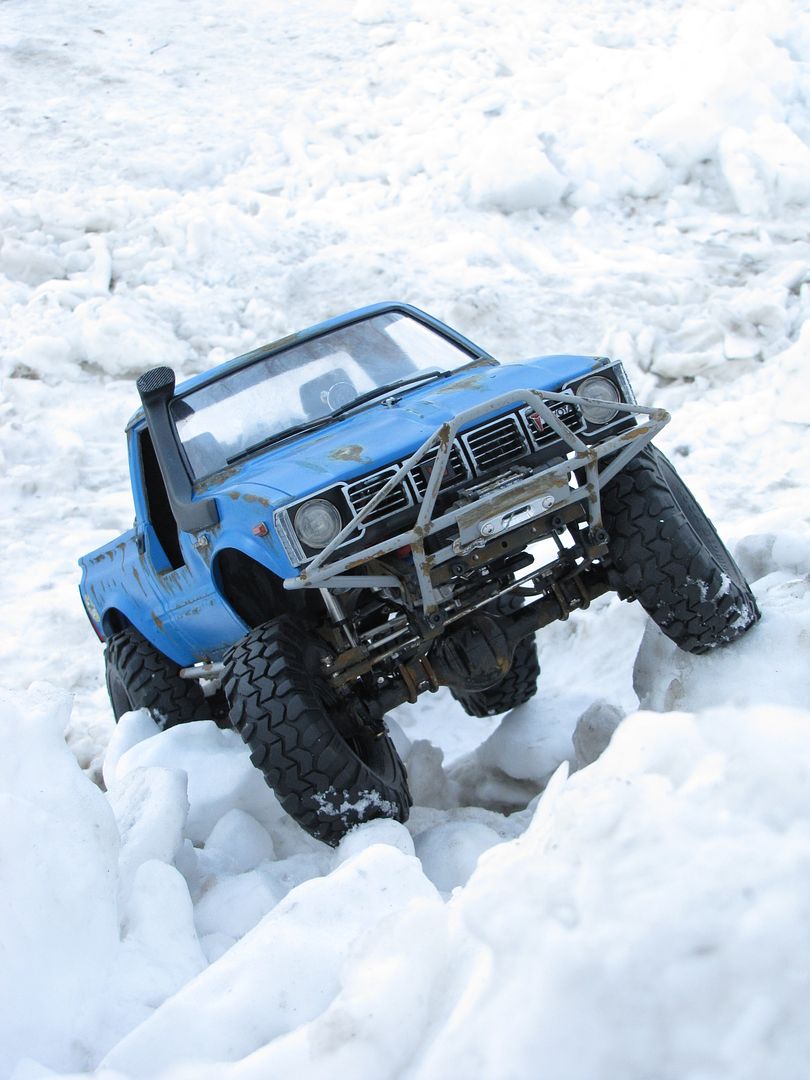 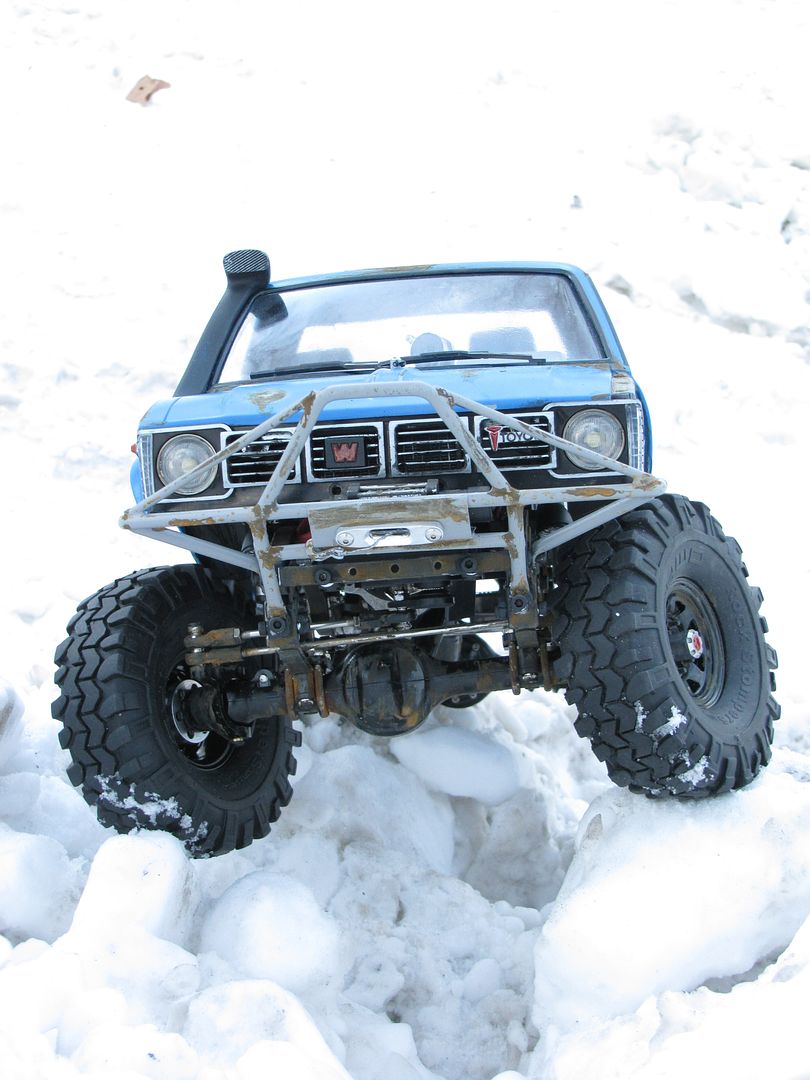 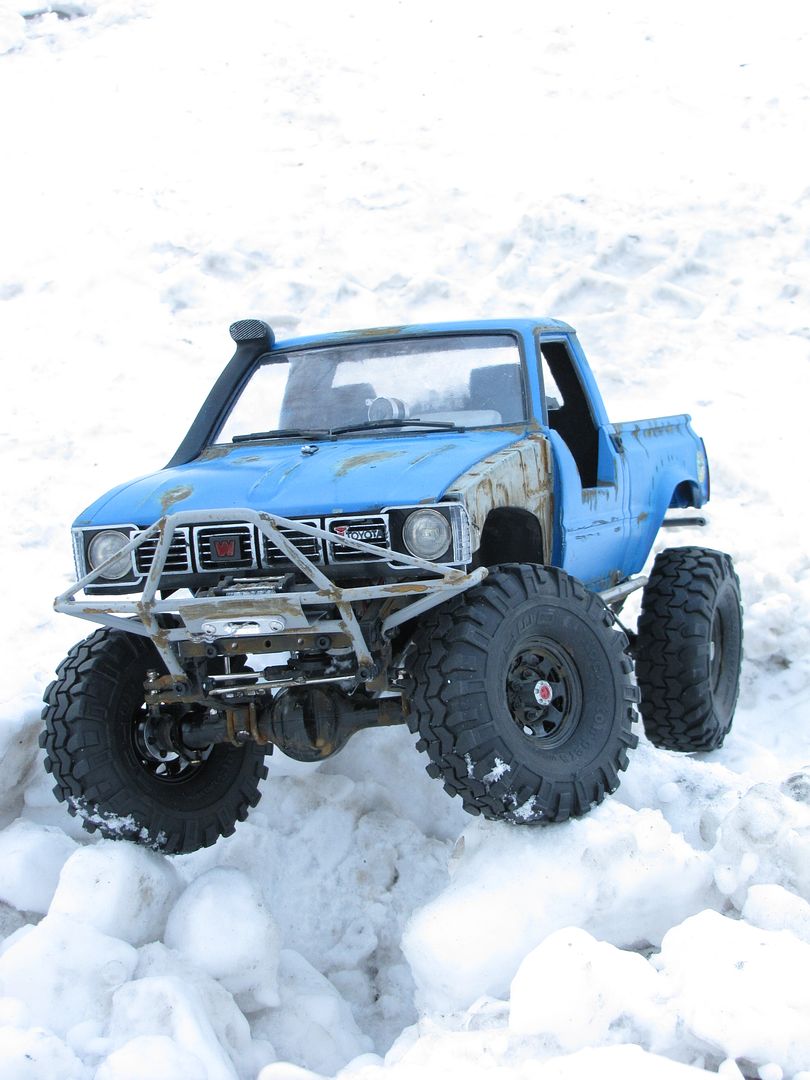 | ||||
|
| |
|
01-16-2011, 10:08 PM
| #226 |
| Rock Crawler Join Date: Sep 2008 Location: Delta B.C.
Posts: 554
|
wicked machine man, how do the yota axles hold up?..love the missing bodywork |
|
| |
|
02-25-2011, 03:06 PM
| #227 |
| RCC Addict Join Date: Jun 2006 Location: hillsborough
Posts: 1,031
|
wow looks soo good, one thing maybe scrub up the sidewalls on the tires and tread to look like they've been used.
|
|
| |
|
02-25-2011, 03:53 PM
| #228 |
| Quarry Creeper Join Date: Jan 2008 Location: Antioch
Posts: 230
|
If you get too much rust on a part, are you able to wipe it off or does it need to be sanded?
|
|
| |
|
02-25-2011, 09:26 PM
| #229 |
| Pebble Pounder Join Date: May 2008 Location: El Monte
Posts: 177
|
i swear! this truck is badass!! it can have anybody fooled but the seam accross the diff is a dead giveaway! good work on the truck bud |
|
| |
|
02-26-2011, 10:05 AM
| #230 |
| Newbie Join Date: May 2009 Location: Belgium
Posts: 43
|
Wow, first picture is awesome ! It looks so real !
|
|
| |
|
02-27-2011, 02:05 PM
| #231 | ||||
| Sinking with the ship Join Date: Mar 2005 Location: El Capitan...sole survivor and sinking fast
Posts: 8,864
| Quote:
Quote:
Quote:
Quote:
| ||||
|
| |
|
02-27-2011, 05:17 PM
| #232 |
| Quarry Creeper Join Date: Oct 2008 Location: Spanaway, Wa
Posts: 420
|
Awesome build......looks like many of the 1:1 Toy's here in the NW..... I need to build another Hilux....threads like these are a big motivator....but I can see my wife having an issue with the $$$ I'll be spending...haha.. |
|
| |
|
07-11-2011, 06:08 PM
| #233 |
| Sinking with the ship Join Date: Mar 2005 Location: El Capitan...sole survivor and sinking fast
Posts: 8,864
|
Been a little stressed with some stuff at home so I headed into the shop pulled the blue lux out of the show case and started on the scale brake system. My initial idea was to use some rotors that had calipers molded into them that I picked up from a member here...well they weren't large enough and just didn't look right. So I pulled out some of the old touring car plastic rotors and drilled out the centers to fit over the knuckle. I then sanded the chrome off and pin vised all the drilled rotor holes. After I attempted to make some calipers out of styrene but just wasn't happy with the the results. I decided to chop up the calipers from a brake set I got from rpp hobby. I made brake pads to fit inside the caliper with took up the necessary space needed for it to fit tightly over the rotor. I then drilled the top of the caliper and installed a small pc of styrene rod which I pin vised to fit the steel braided line. I have a detail masters line nut to go over it but havent had to the chance to install it yet. I painted the rotor and caliper and fitted it onto the truck and snapped a few pics...I think its looking pretty good.  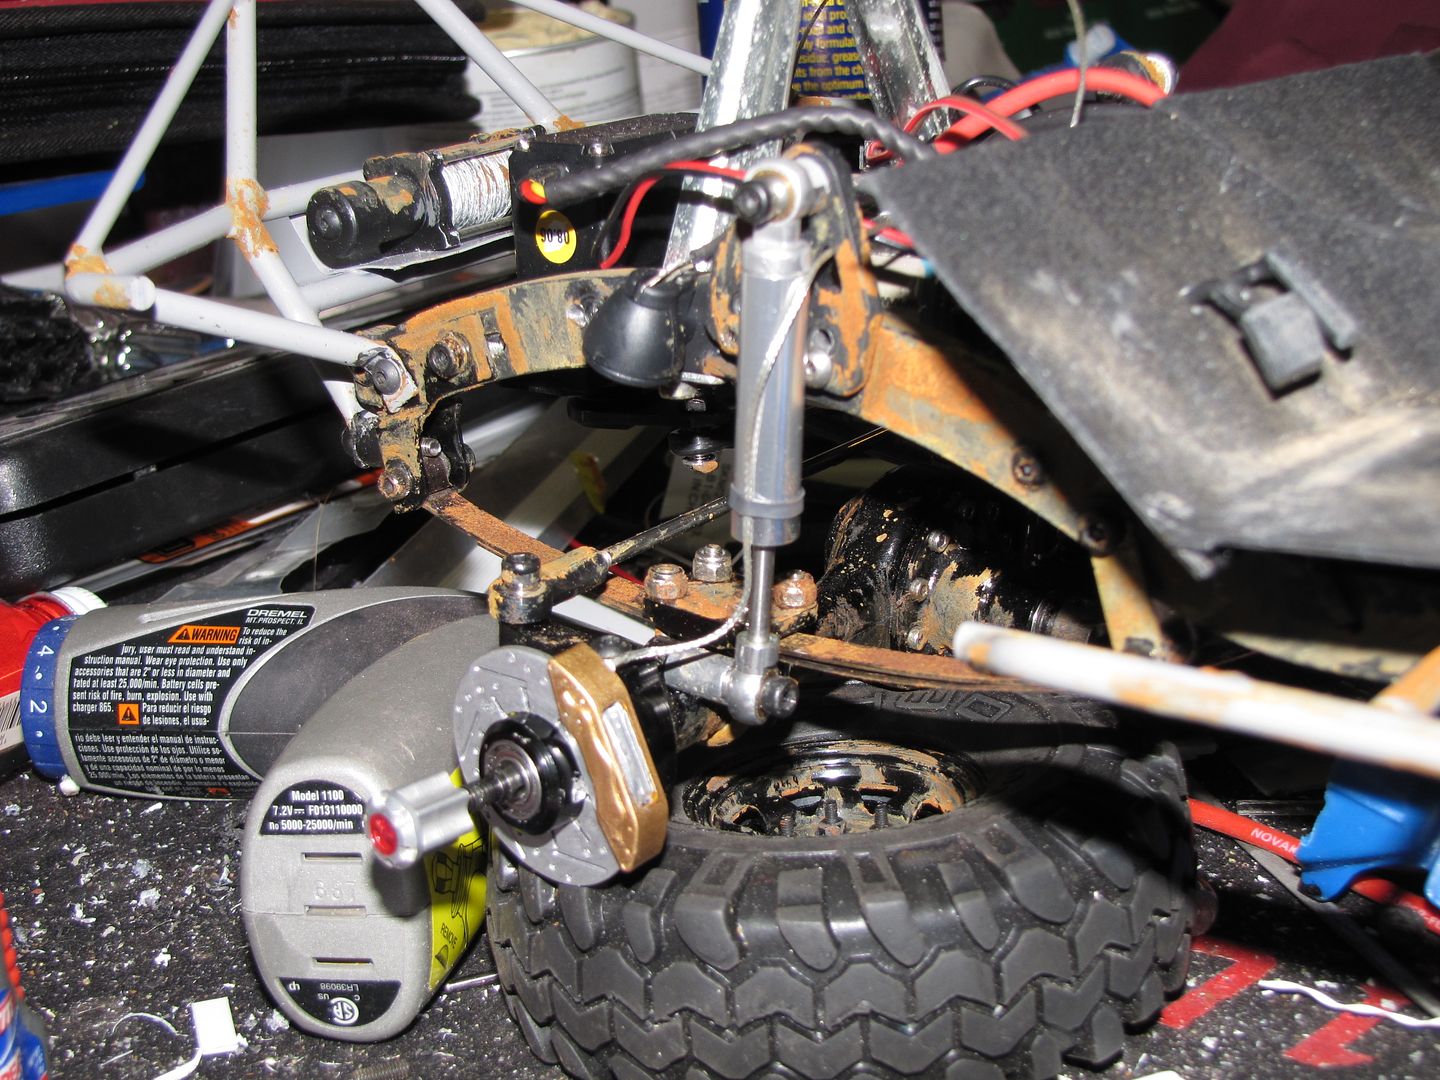 More to follow -Mike |
|
| |
|
07-12-2011, 10:00 AM
| #234 |
| Rock Stacker Join Date: Jul 2006 Location: San Francisco East Bay
Posts: 87
|
I just went through the whole thread. Awesome build. I'm saving the pages for future reference on my Hilux build. Jeff |
|
| |
|
08-26-2011, 06:27 PM
| #235 |
| Sinking with the ship Join Date: Mar 2005 Location: El Capitan...sole survivor and sinking fast
Posts: 8,864
|
Been trying to finish this thing up...started working on the brakes 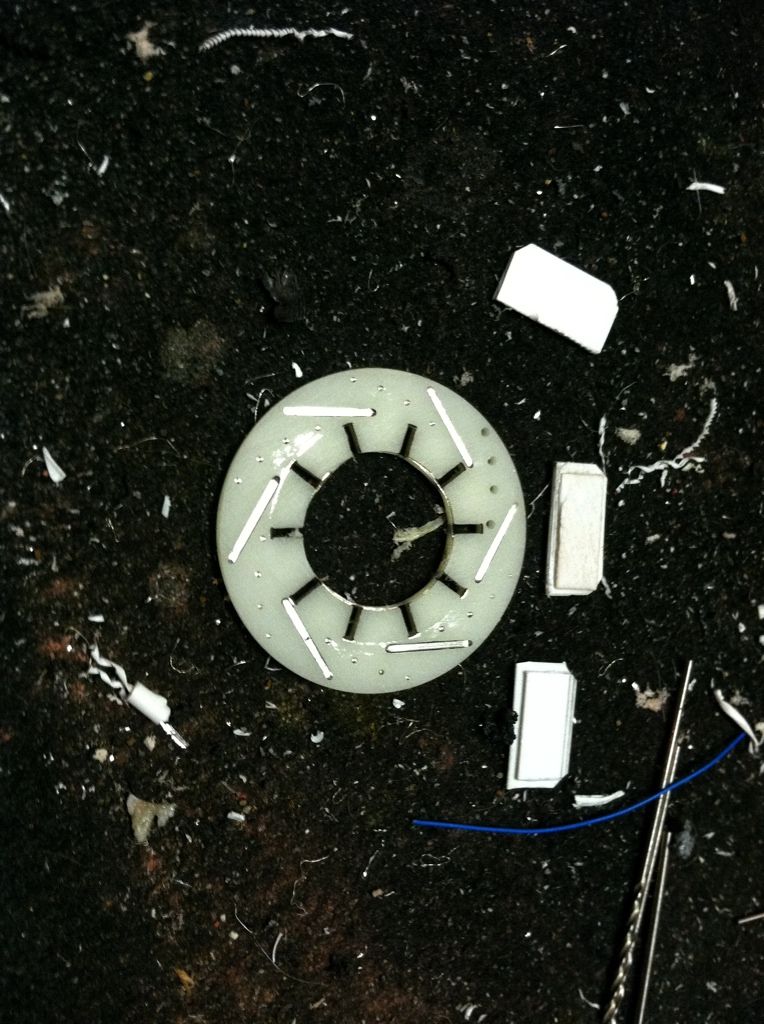 I cut the center out of the plastic drift car rotors so they could fit onto the round part of knuckles. I then made some brake pads and decided to chop up the brake caliper kit from rpp. I wanted to take this set up a step further from last time so I also picked some scale fittings and metal line when I ordered the braided line from detail master. I drilled a hole in the top of the calipers big enough to fit a styrene rod in it that the fitting fit tightly over it. I put a tiny pc of wire in the braided line so it sticks out just past the end of it and pin vised the styrene so it fits into it. Doing it this way makes for a much stronger set up. At the top, I used some channeled styrene with a fitting for the braided line to hook up to the metal line 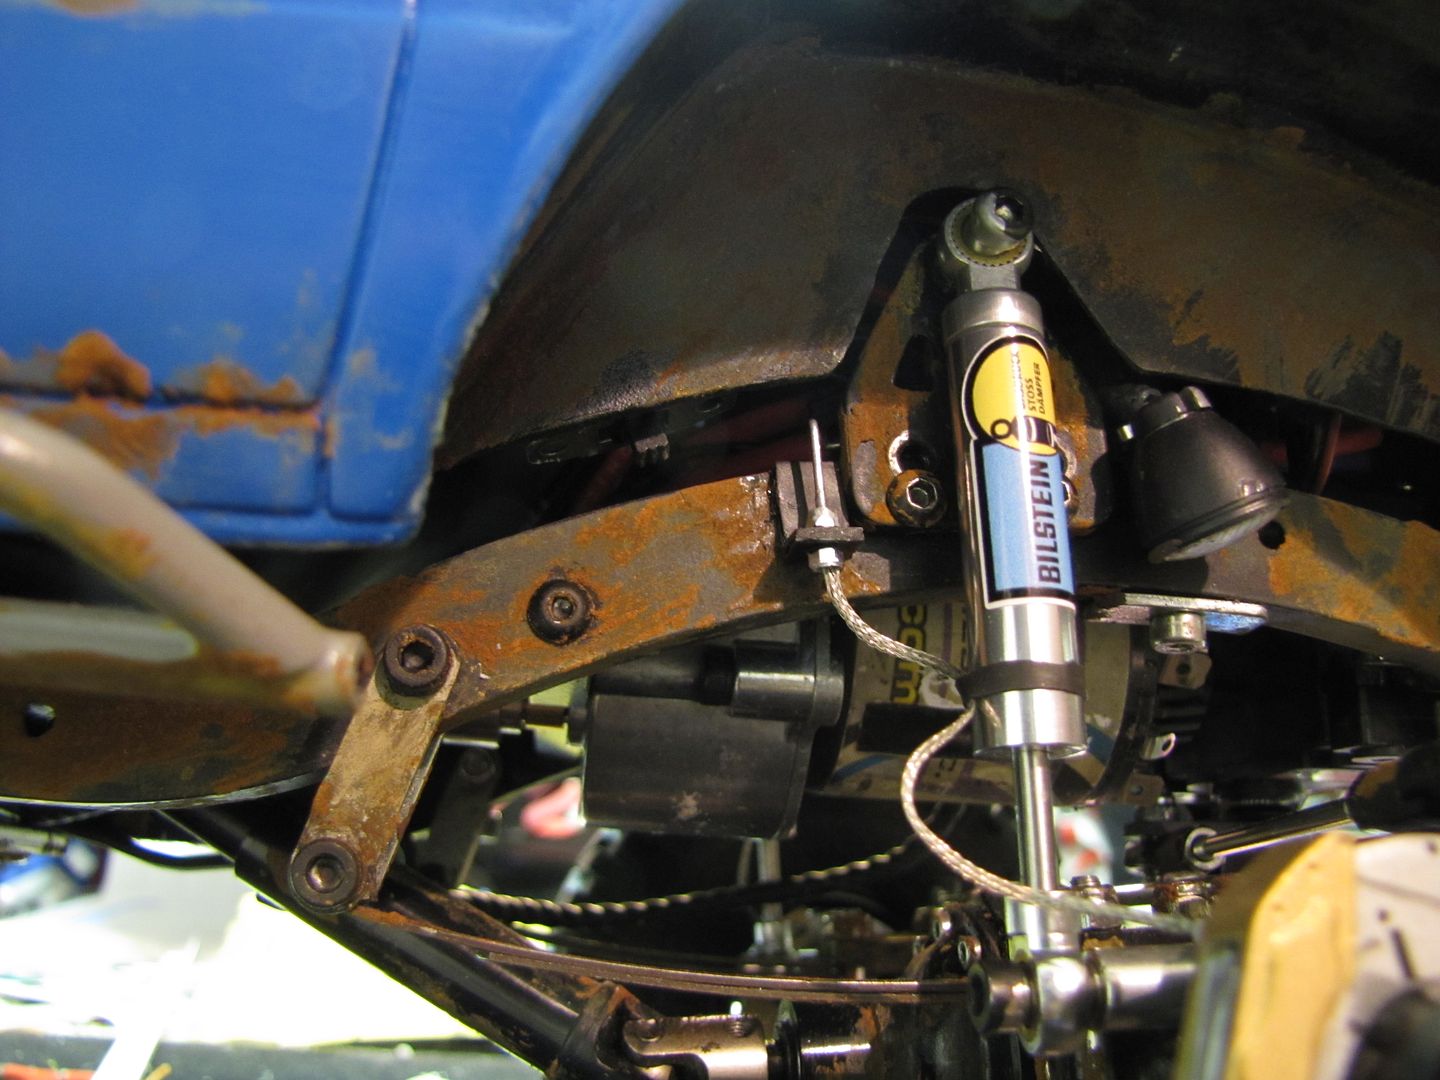 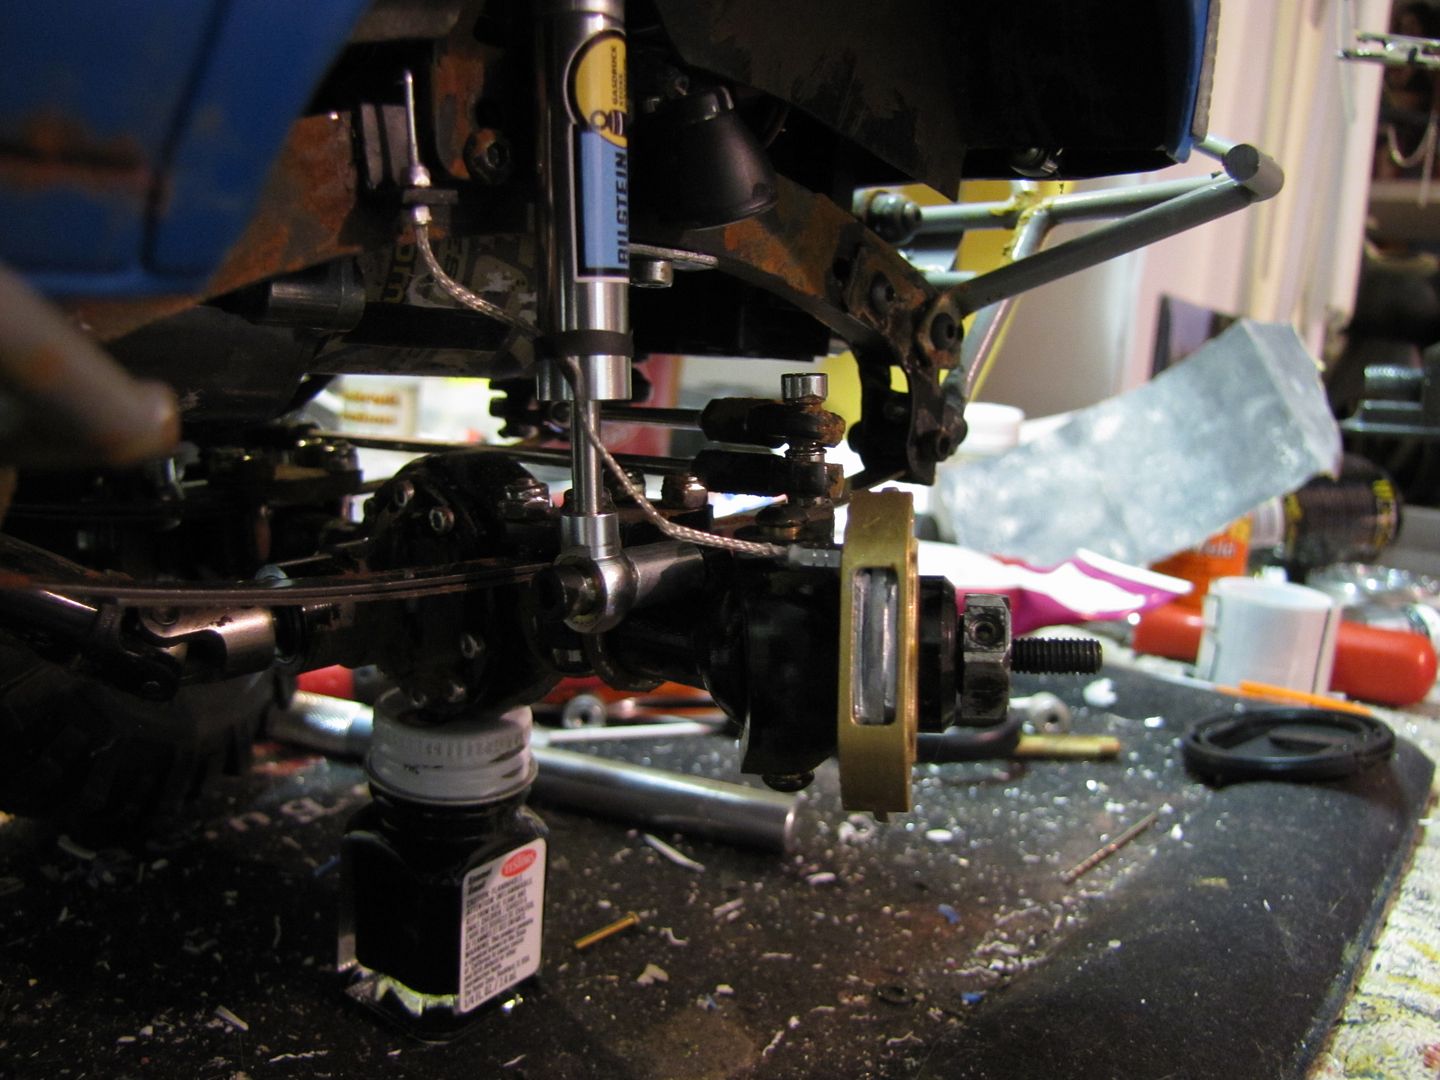 I secured the line to the shock body using a tiny pc of heat shrink which also hides the seam as well. 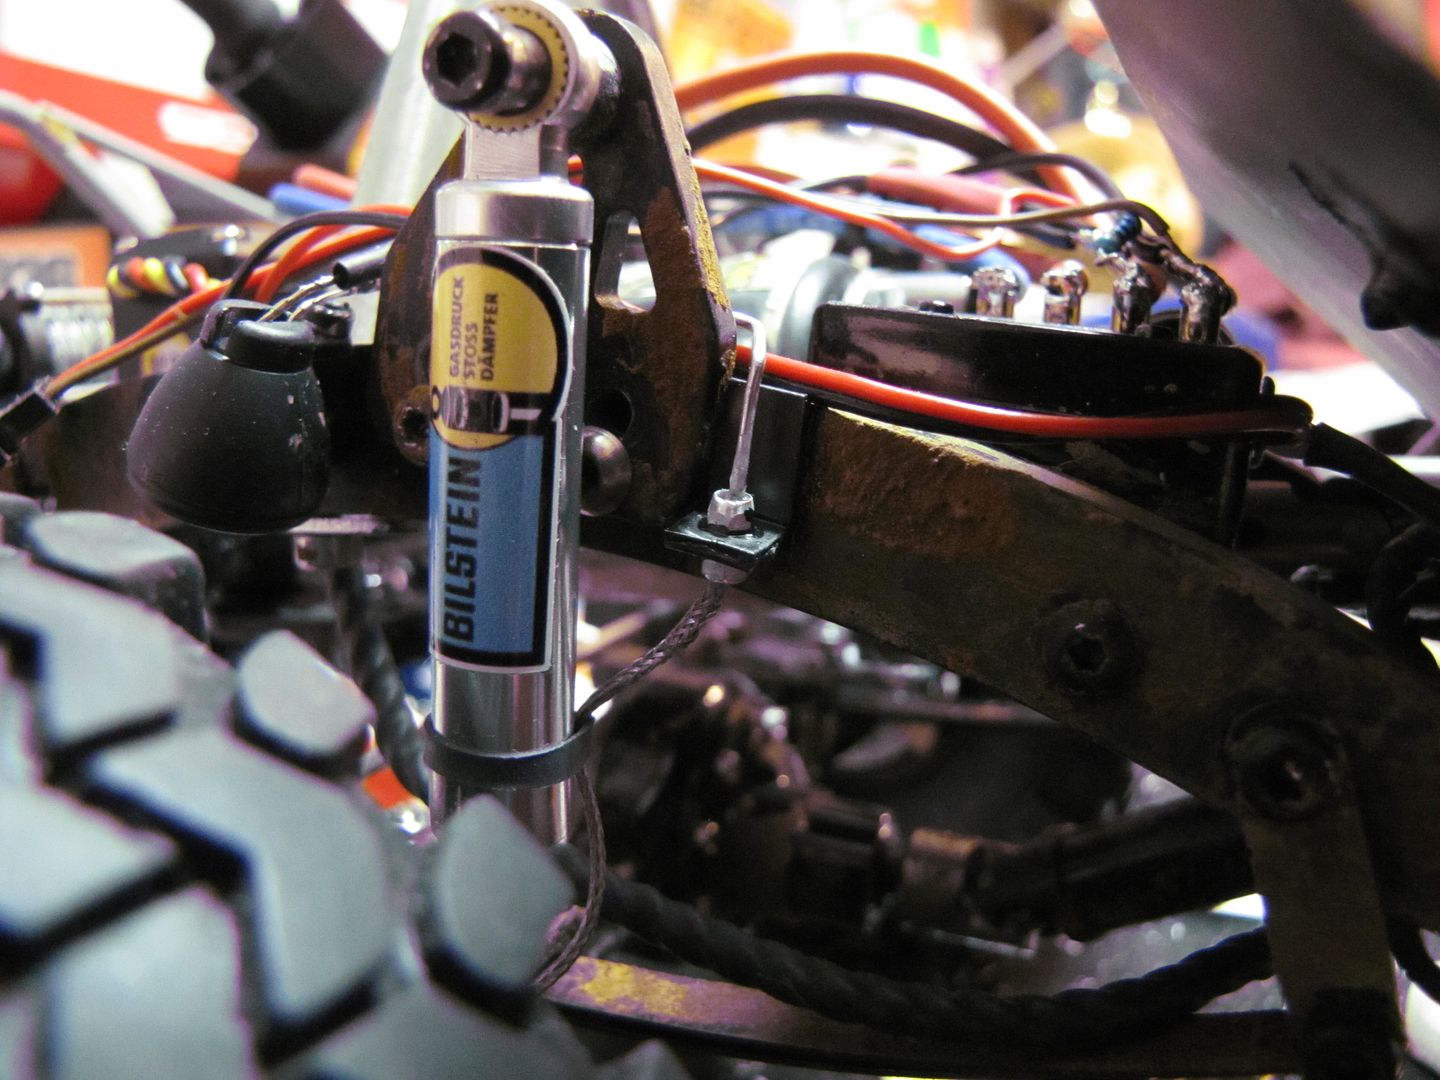 Onto the rear brakes. I used the tops from the .99 cent ice tea bottles as drums. I wanted both the front and rear brakes to spin with the wheels but the front just didn't work out with the 1.55 wheels. The rear drums I drilled out to match the bolt pattern of the wheels so they will spin separate of the backing plates.  The backing plates were made to fit over the very ends of the axle. I used micro size hardware from SOR to simulate backing plate shoe hold down pins, and added a bleeder above the brake line. I also added the slot in the bottom for the star adjuster. 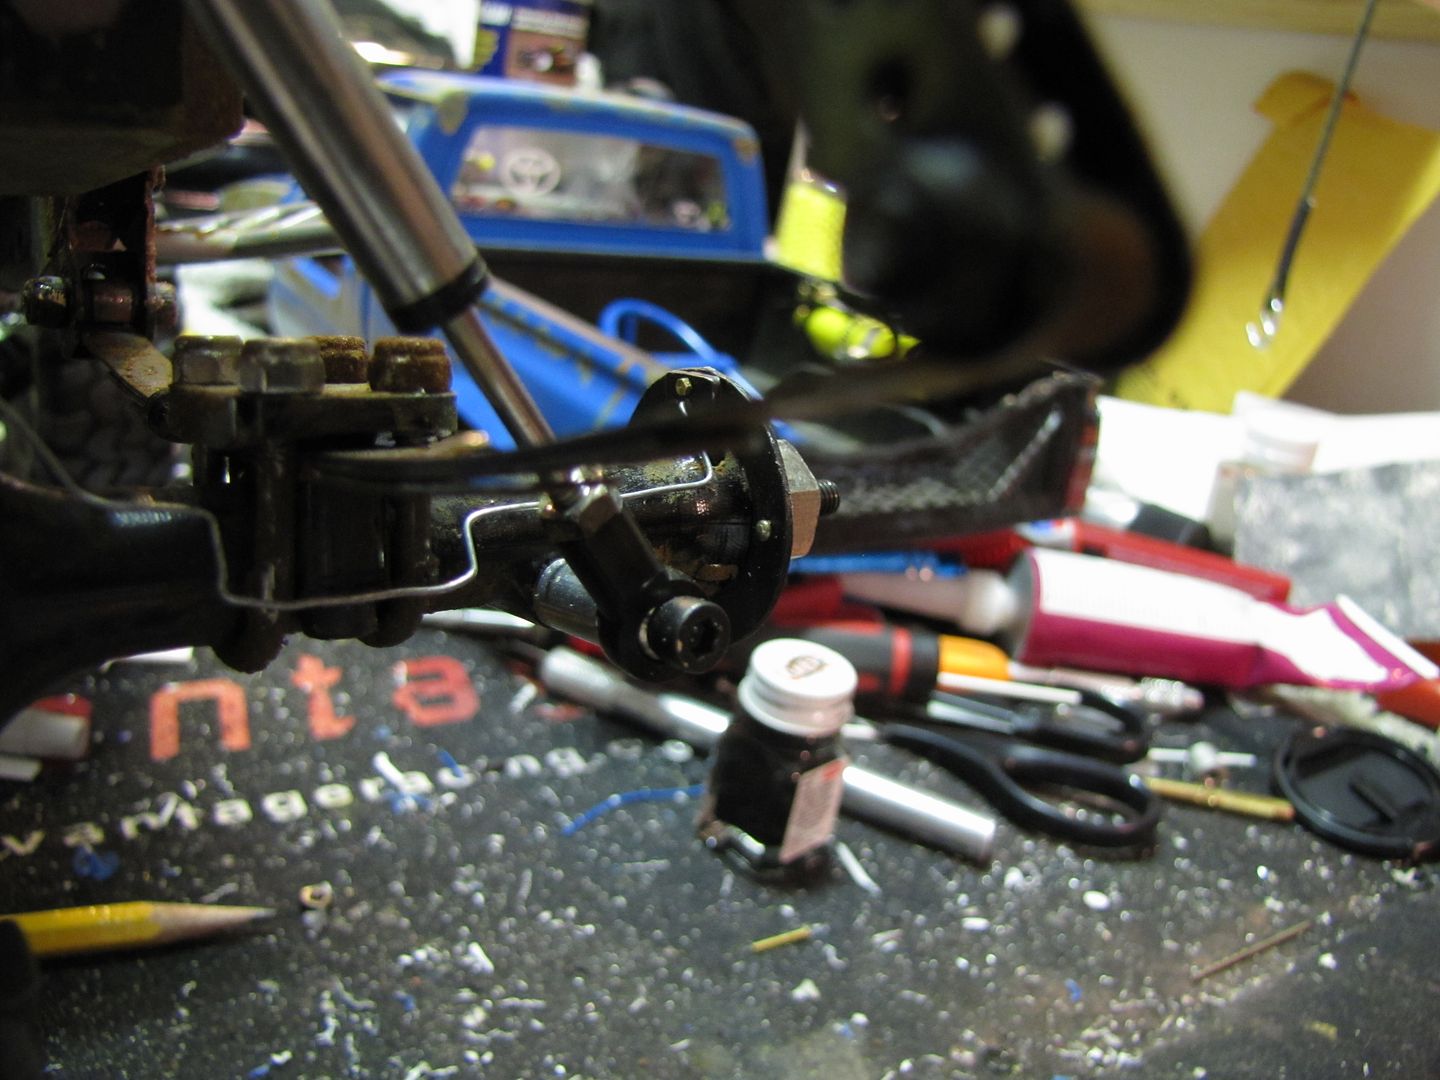 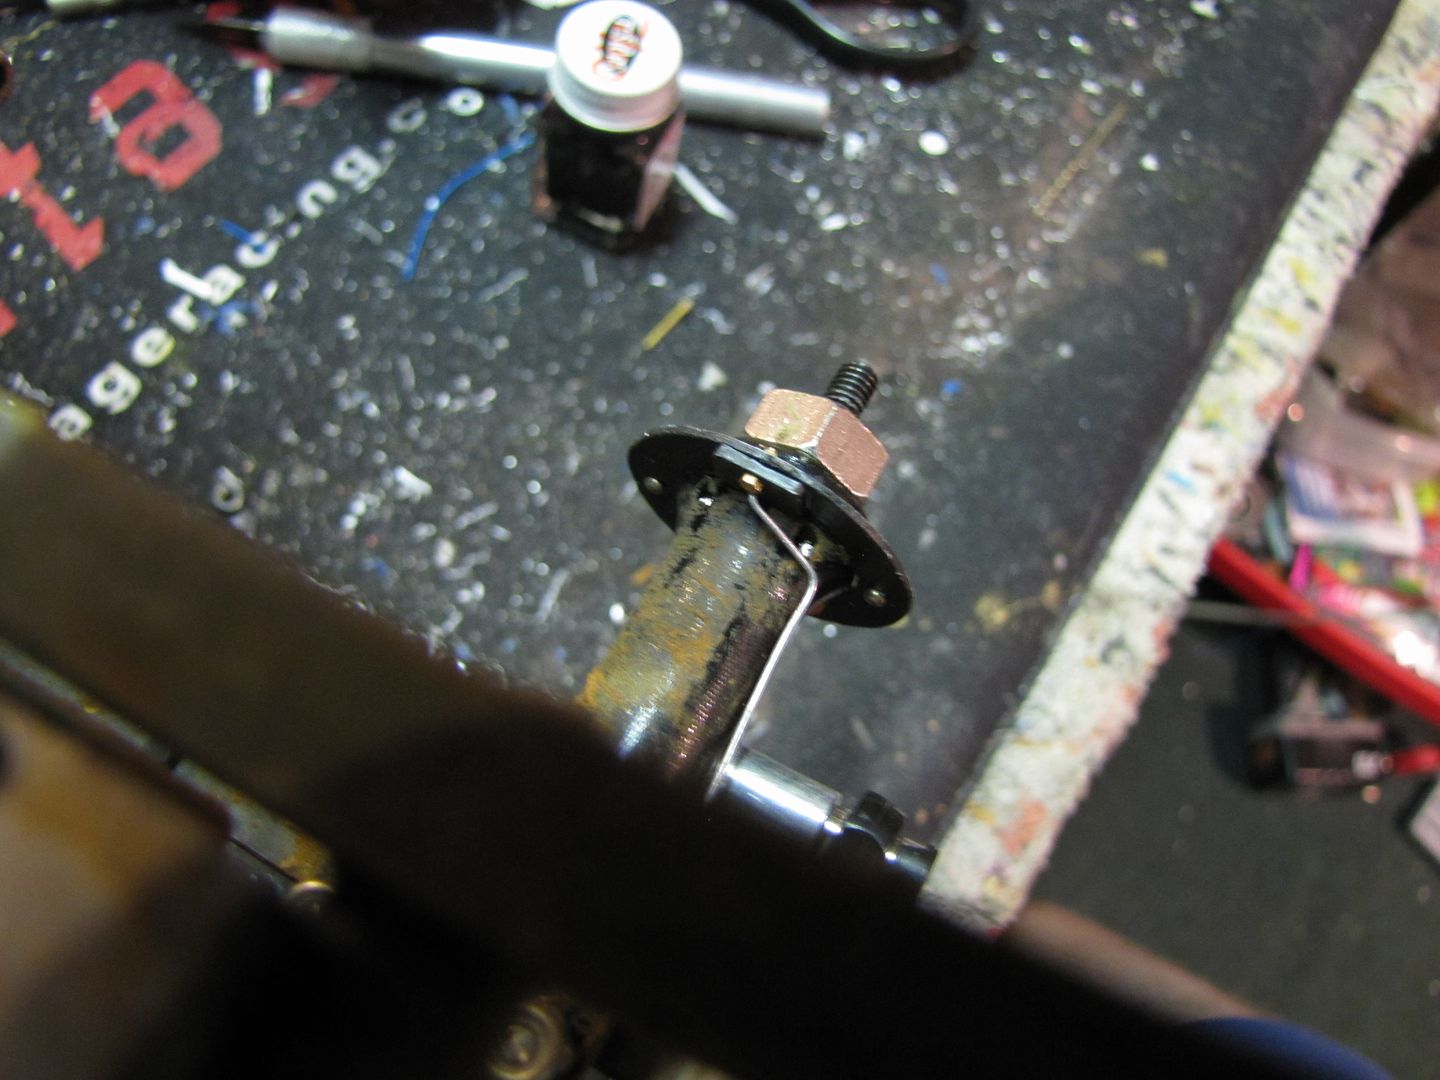 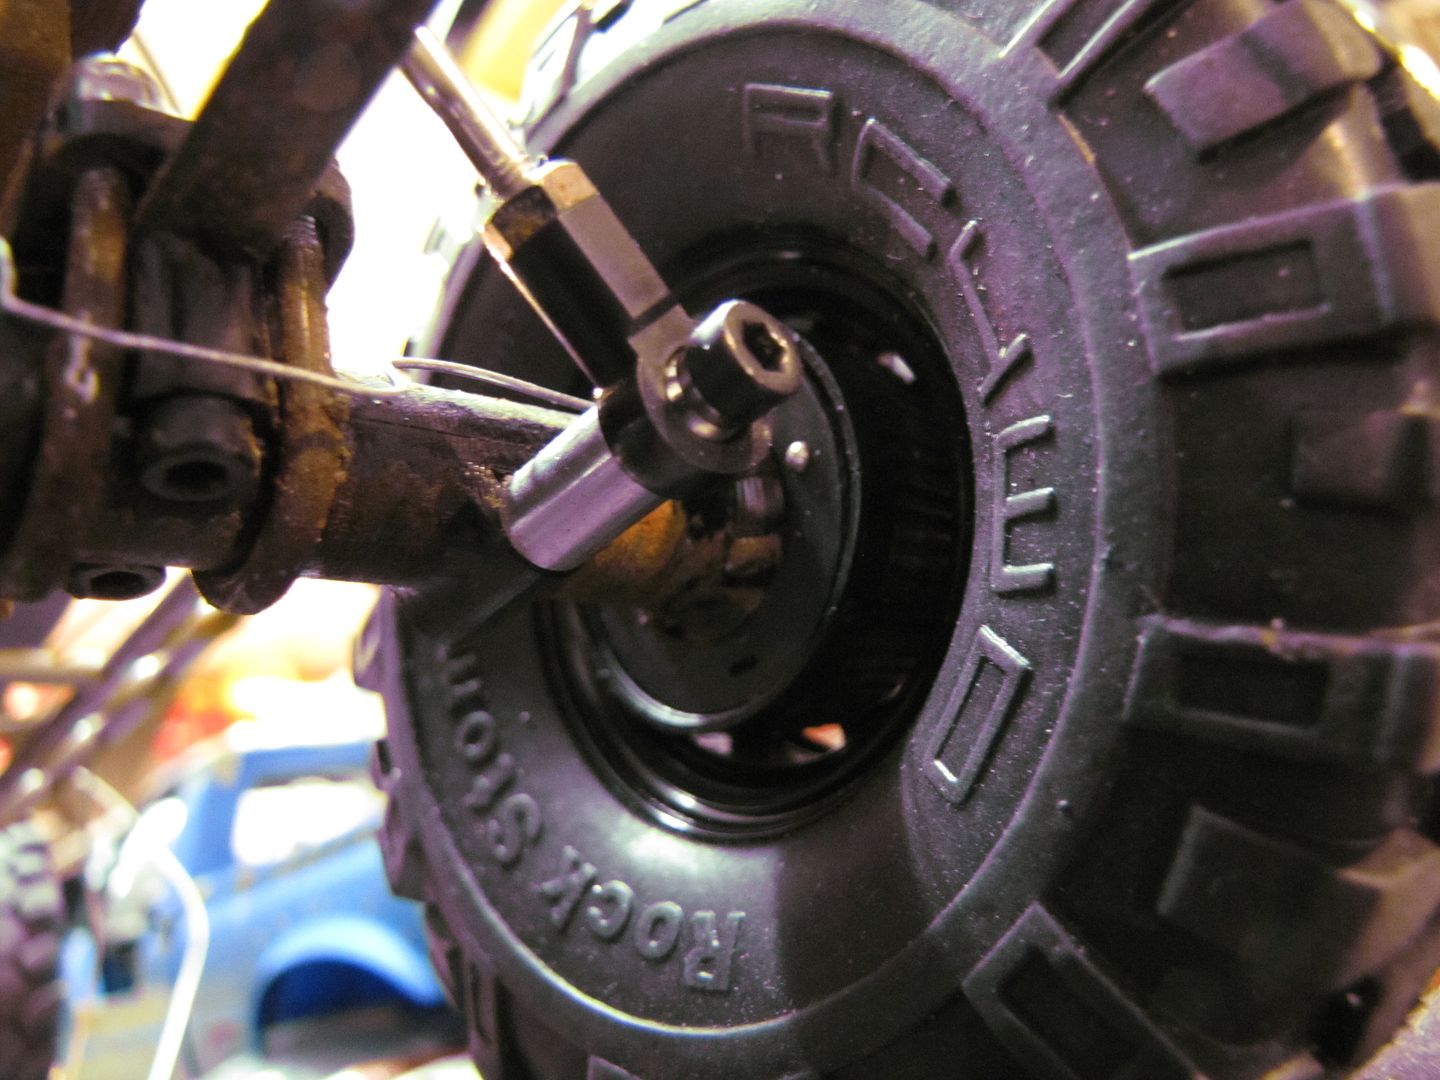 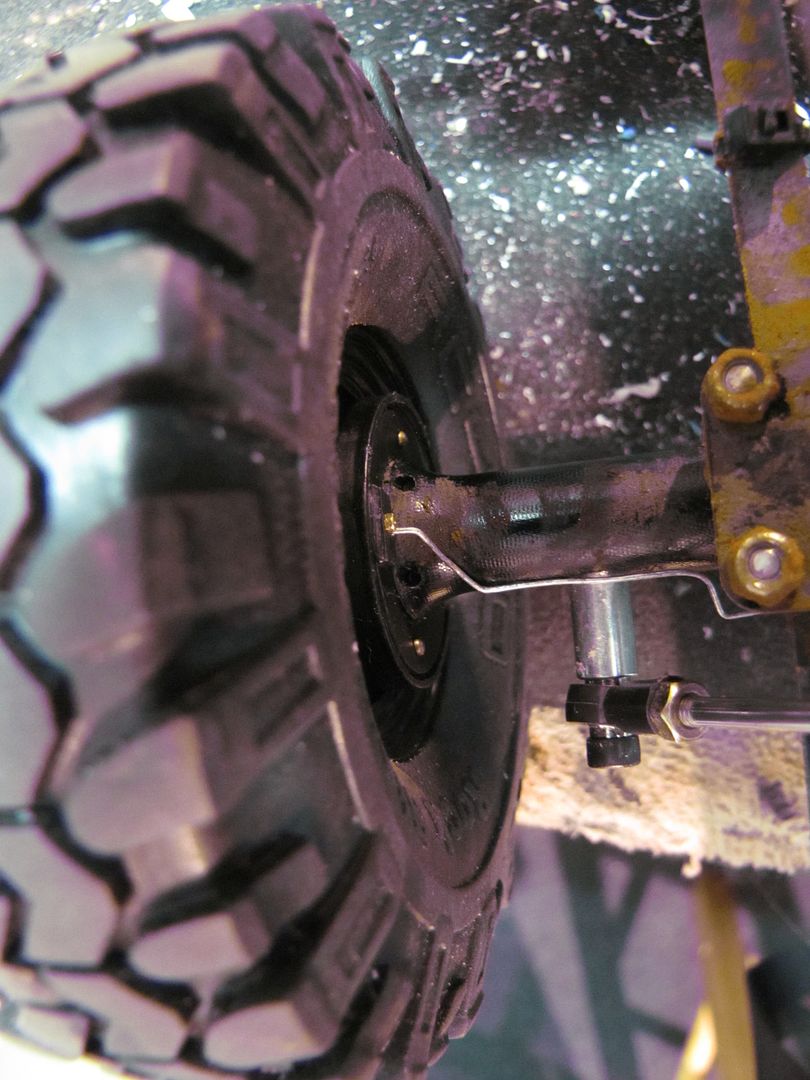 The rear metal lines go to the junction block on the center of the axle, I ended up using a thicker braided line after this picture was taken. Inset it up the same way I did the front caliper lines. 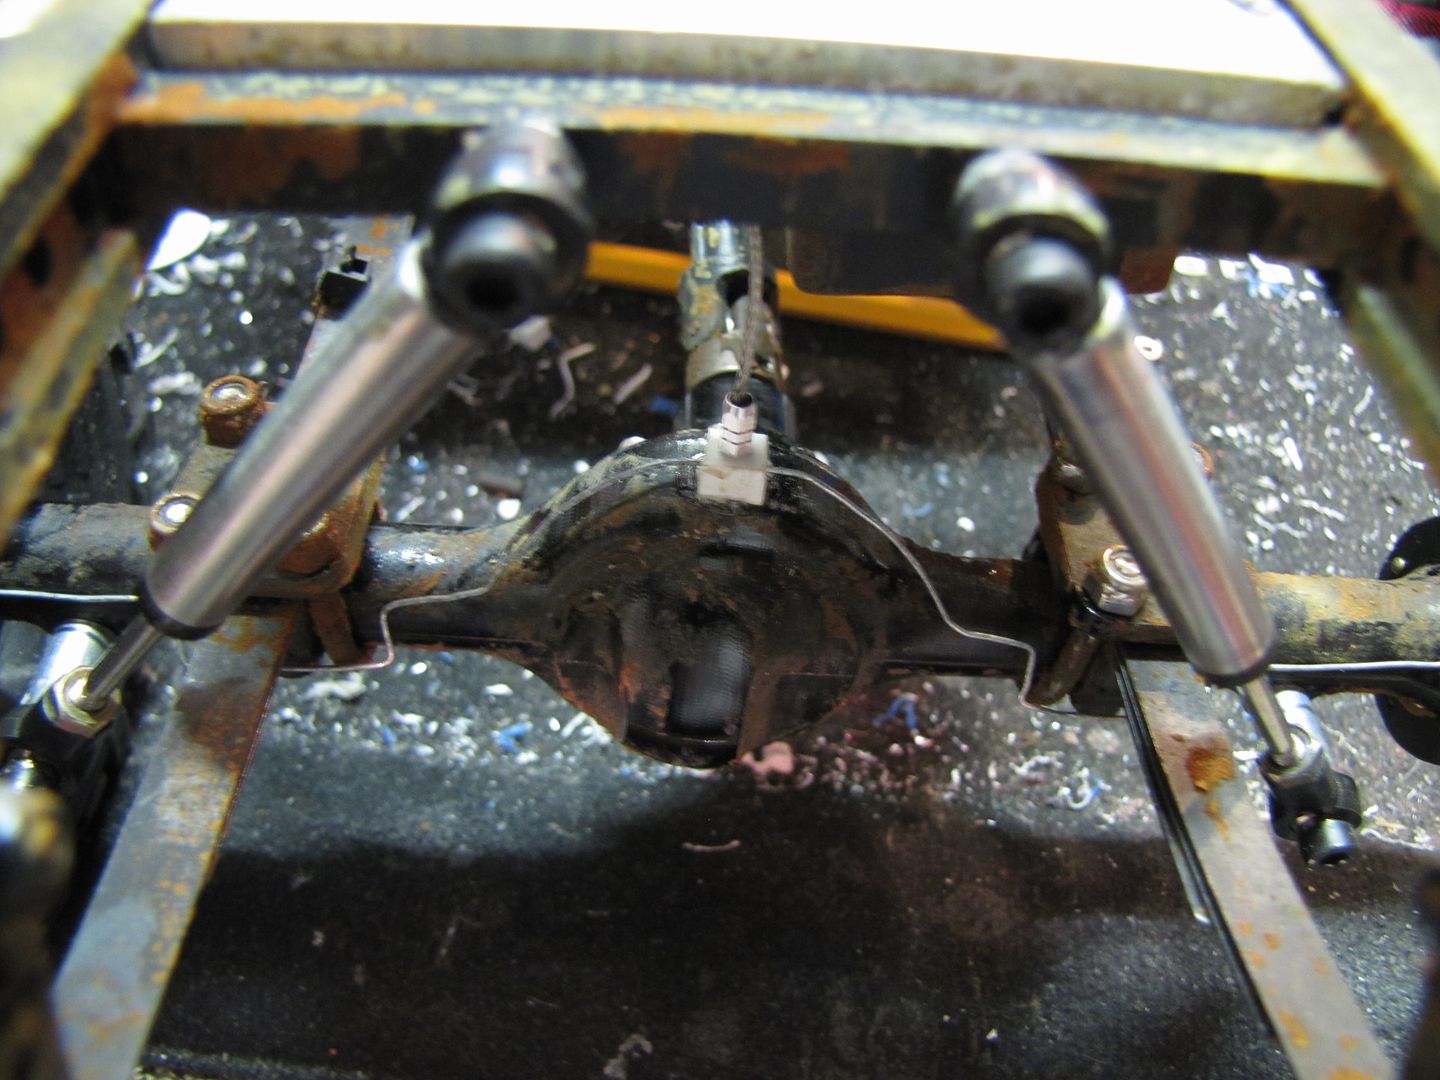 The metal line on the rear is from home depot, it's picture hanging wire. That's all for now...it's almost done...still gotta work up an exhaust and finish a few details and then I'm calling this one done! Thanks for looking Mike |
|
| |
|
08-26-2011, 07:27 PM
| #236 |
| Rock Stacker Join Date: Jun 2011 Location: on a rock at 8000'...
Posts: 71
|
killer build bro, amazing detail! |
|
| |
|
08-26-2011, 08:10 PM
| #237 |
| I wanna be Dave Join Date: Aug 2005 Location: NE Ohio
Posts: 8,817
|
Dude... wow, you have issues, but wow |
|
| |
|
08-26-2011, 10:56 PM
| #238 |
| Quarry Creeper Join Date: Aug 2009 Location: Syracuse
Posts: 455
|
i wish my hilux was 1/5 as good as yours |
|
| |
|
08-26-2011, 11:13 PM
| #239 |
| RCC Addict Join Date: Feb 2006 Location: Bellflower, CA
Posts: 1,028
|
Freakin sweet brake job! Thats on mu to do list for my jeep builds.
|
|
| |
|
08-30-2011, 09:18 AM
| #240 |
| Pebble Pounder Join Date: Aug 2011 Location: Holland
Posts: 140
|
Hi 1BJB, Lovin ur yota rusty looks May I ask where to get this Rust from Michael's.Thanks |
|
| |
 |
 MSD UTE build: The Blue Lux - Similar Threads
 | ||||
| Thread | Thread Starter | Forum | Replies | Last Post |
| **MSD** UTE Montero charity build | pantablo | 1.9 Scale Rigs | 490 | 01-19-2011 06:01 PM |
| MSD Ute Chassis Re-Build | BENDER | 1.9 Scale Rigs | 15 | 12-27-2009 12:25 PM |
| *** MSD " UTE CHASSIS " Jeep JK Shop Truck Build | slobin3d | 1.9 Scale Rigs | 92 | 06-15-2009 12:36 PM |
| * MSD Tamiya FJ-45 " UTE " hilux Build * | Unimoger | 1.9 Scale Rigs | 19 | 12-14-2008 08:24 AM |
| MSD "ute" proto build! | XSRCdesign | 1.9 Scale Rigs | 11 | 11-23-2008 04:33 PM |
| Thread Tools | |
| Display Modes | |
| |


 Linear Mode


