| |||||||
Loading
 |
| | LinkBack | Thread Tools | Display Modes |
| |||||||
 |
| | LinkBack | Thread Tools | Display Modes |
| | #1 |
| Rock Crawler Join Date: Jan 2013 Location: Australia
Posts: 541
|
I was originally going to build a Suburban, but, they are practically everywhere now. OK, maybe 2 with a couple more in the planning. So while looking at Suburbans via Google I discovered the other variants. And to me here in Australia, where these trucks don't really exist, it was quite the revelation. And so a new plan came together and I settled on a theme to go with it. Here are some pics of some parts I have acquired and of the inspiration images. 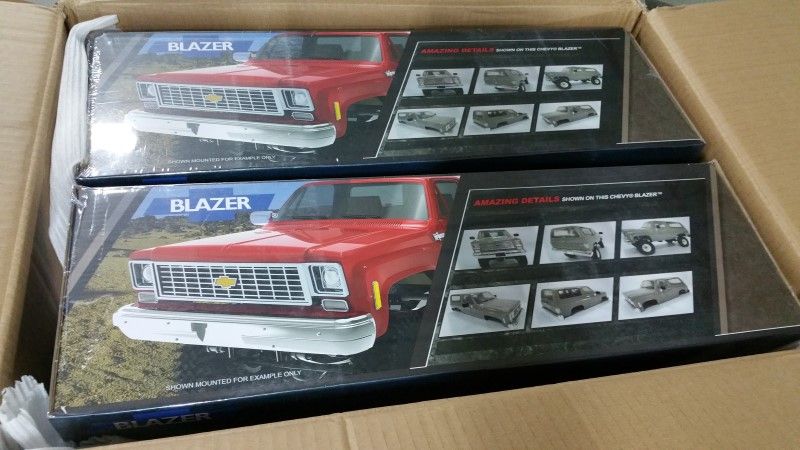 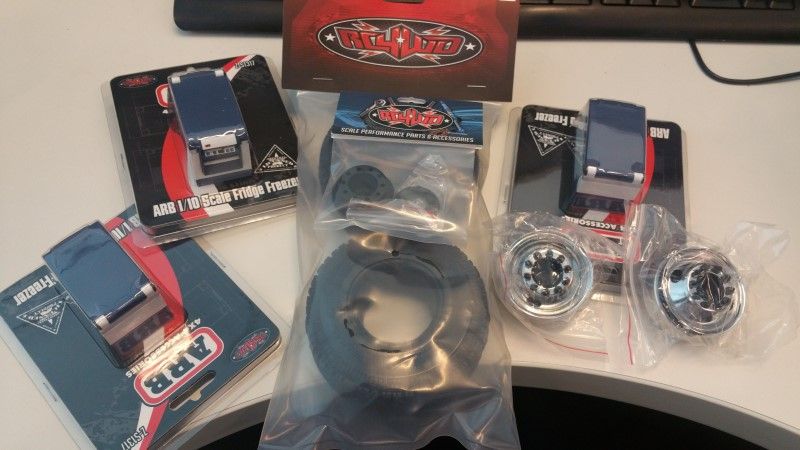 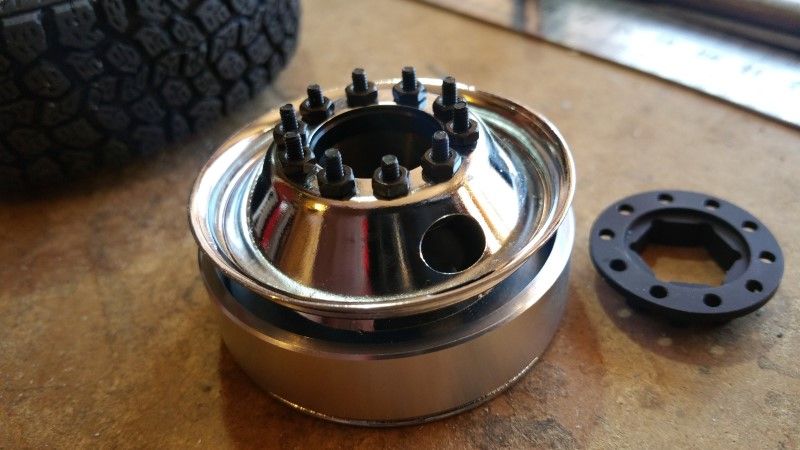 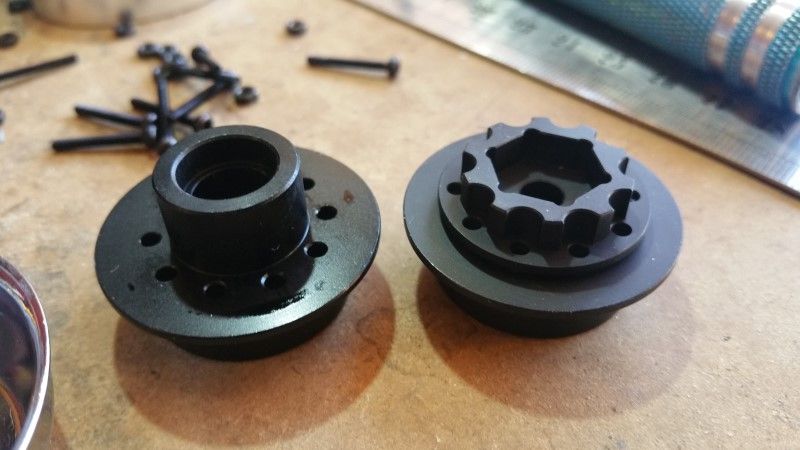 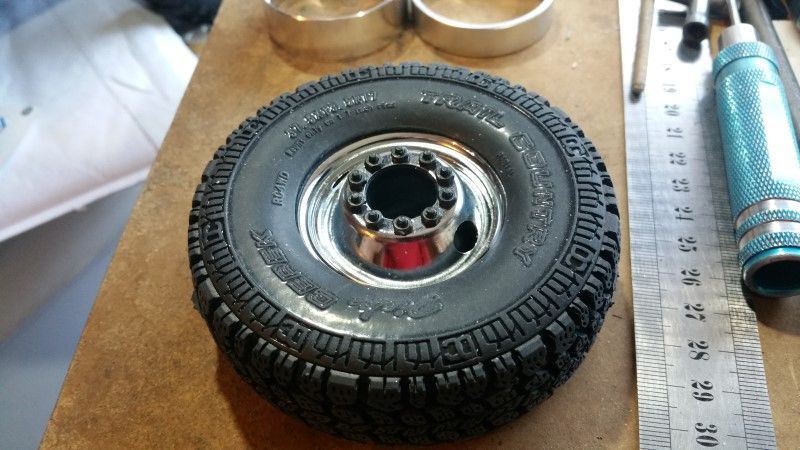 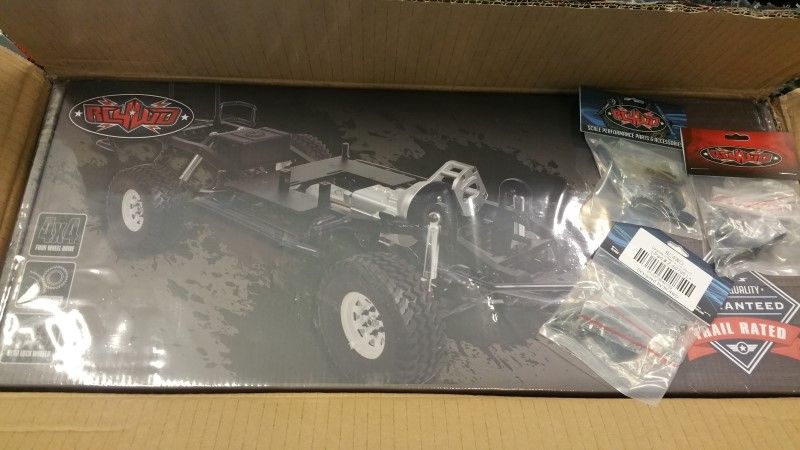 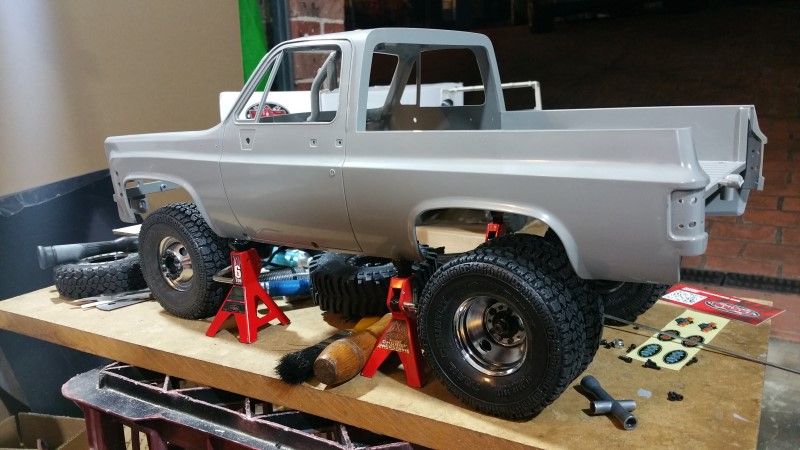 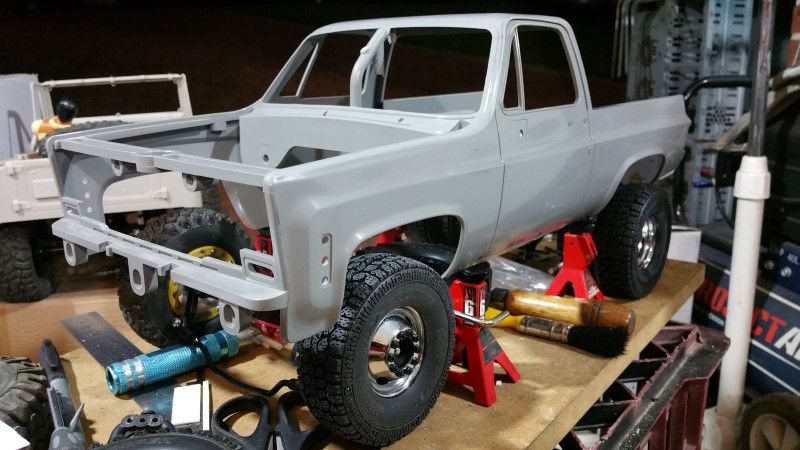 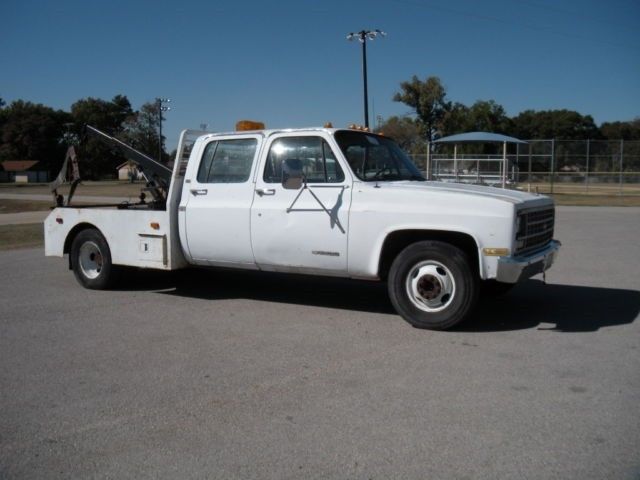 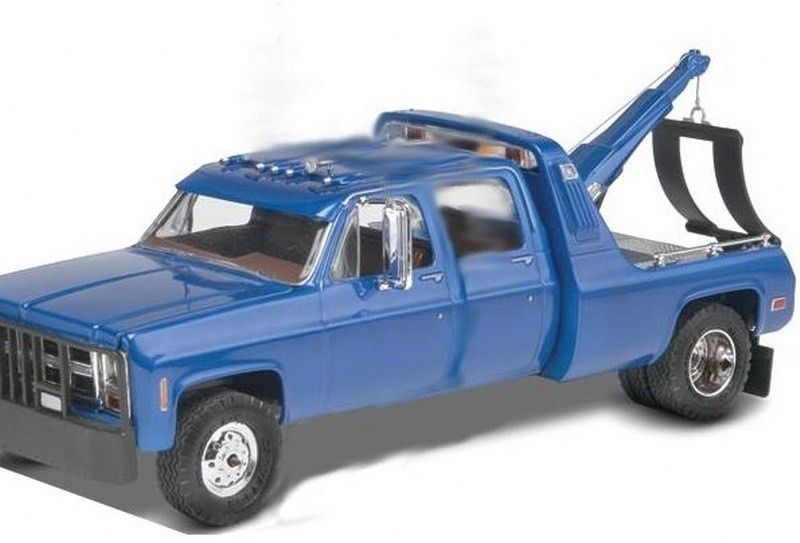 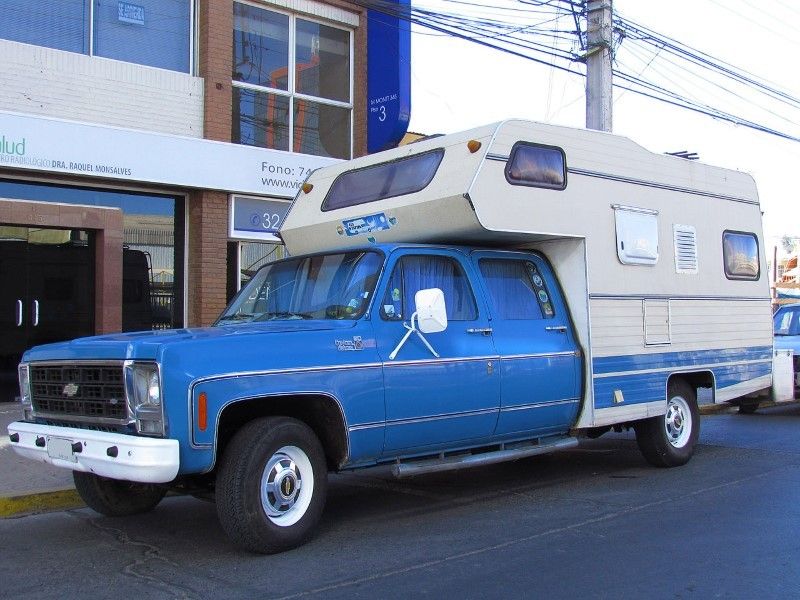 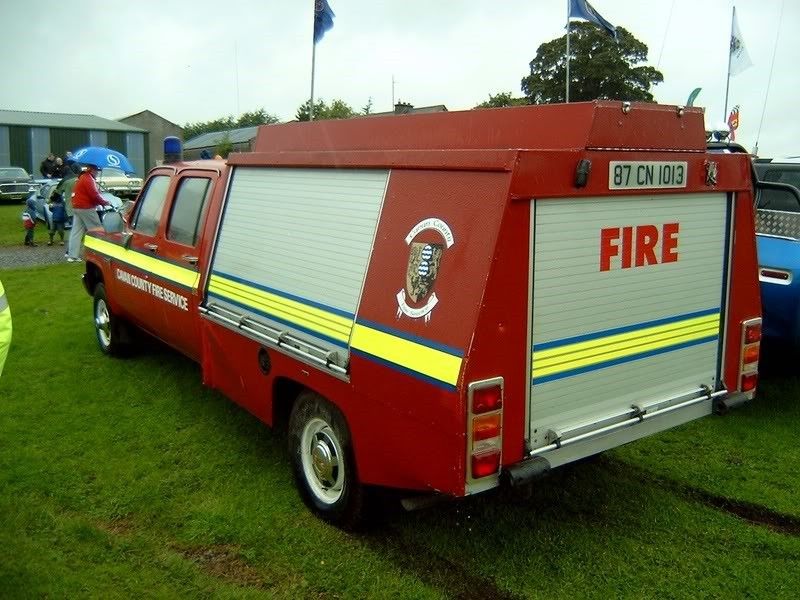 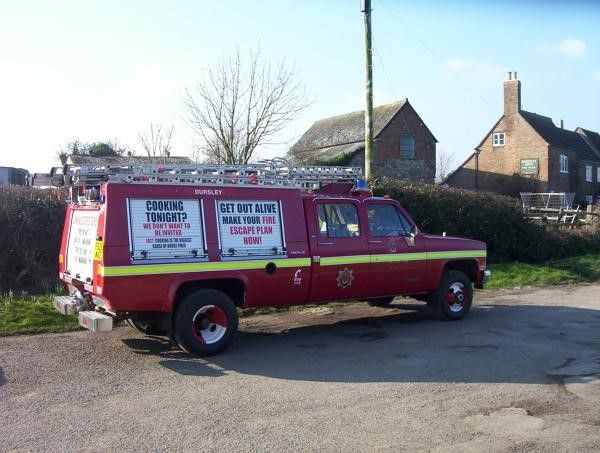 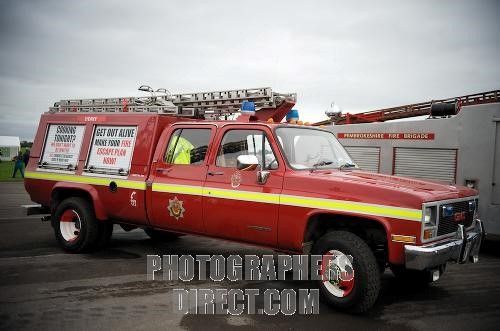 I want to model this build after the last couple of pics in terms of body style and service bed design. In the long run I would like a wrecker bed and a camper bed as options to go on the back. Cheers H2Micr0 |
| |  |
| Sponsored Links | |
| | #2 |
| Rock Crawler Join Date: Jan 2013 Location: Australia
Posts: 541
|
I decided it was time to build my first ever TF2 Kit. I have not owned one before so found this interesting. New Roller Kit. 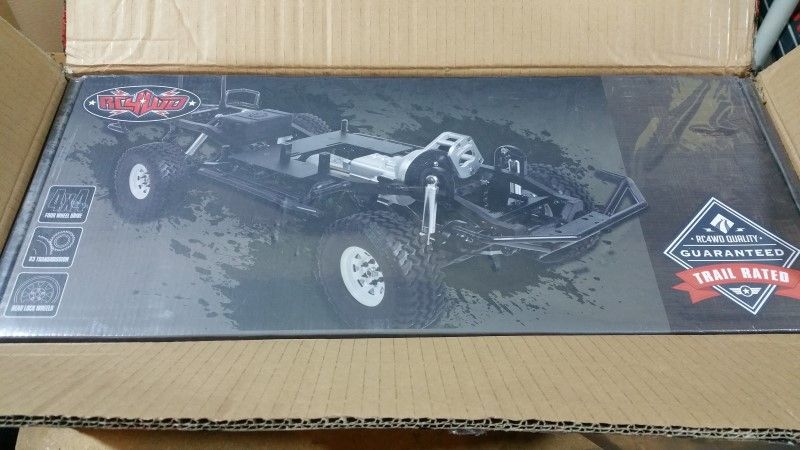 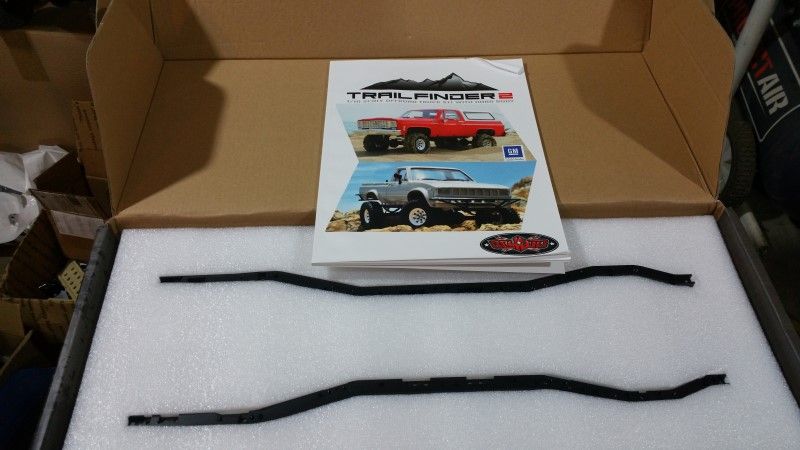 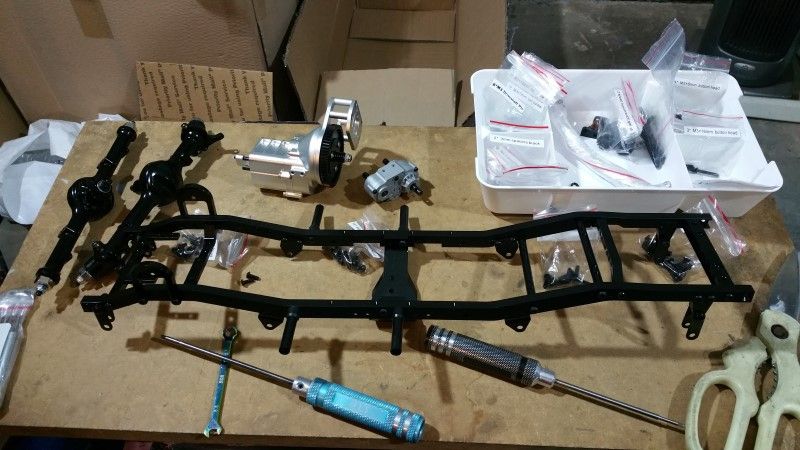 And assembled. 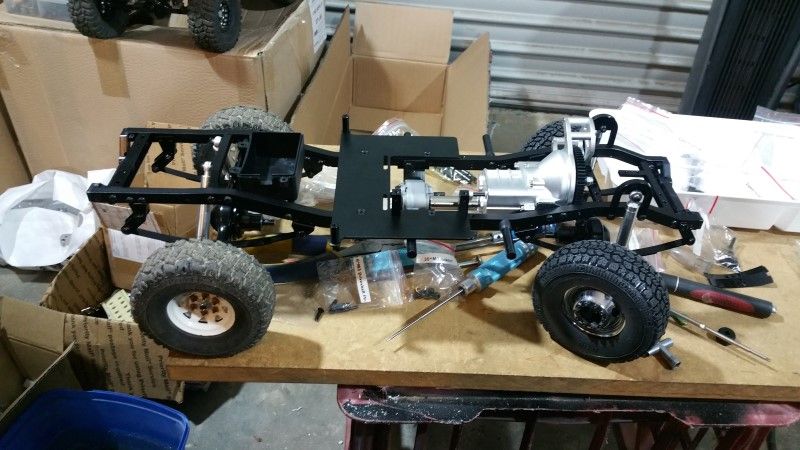 Now despite this being my first TF2, I have used Leaf Springs for a couple of years now. I found the set up on the TF2 to be perplexing and interesting at the same time. In my mind the leaf springs should carry the weight of the truck and the shocks are there to help control the bounce and rebound of the spring. In the TF2 the shackles are shorter than others I have used and the spring at full compression locks the up when the shackle reaches a position parallel with the ground. 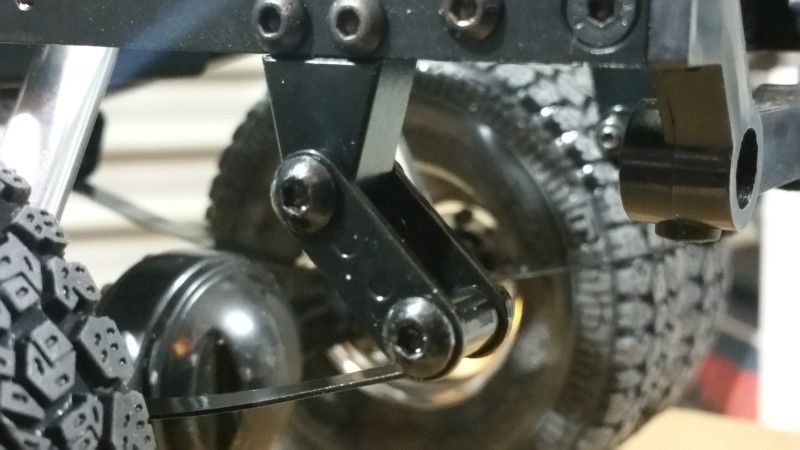 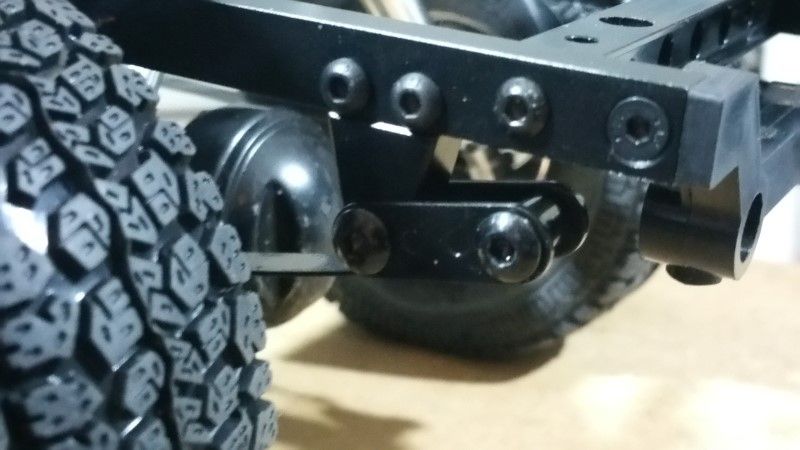 It appears to me the shocks have internal springs in them to push the leaf back down unlocking it from that position, and helps carry a bit of the load of the truck. I will be messing around with the leaf and shock setup for this rig. Front needs taller shock mounts etc. In the last pic you may note the rear wheels are not the duallys. That is because I discovered the Yota 1 bearing housing is quite a bit larger than the G5 and Yota 2 versions and the dually inner wheel bound up on the housing. This is also due the mods I have made to the dually wheel which I will explain later. In stock configuration this wouldn't be an issue. Here is a comparison pic of the Yota 1 (right) and Yota 2 (left) axles. 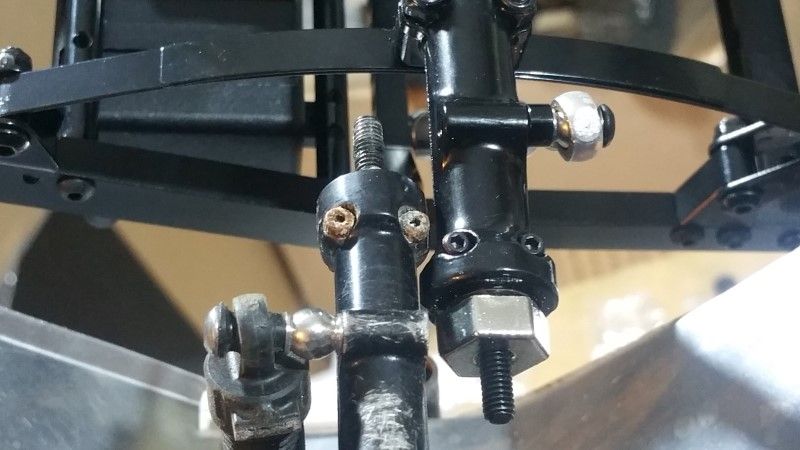 Here is the dually wheel on the Yota 2 diff. It clears the wheel and bolts. 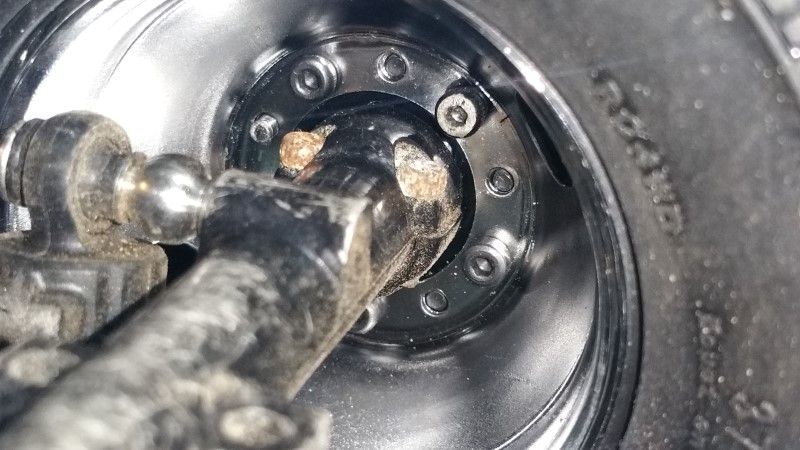 Luckily for me I had a Yota 2 axle on the back of the HJ47, so I decided to swap them over. The Yota 2 diff has quite a few trails under it so I pulled it down, installed some new bearings where needed and some new grease. With the wheels now bolted on to the chassis it is like these were made to go together. 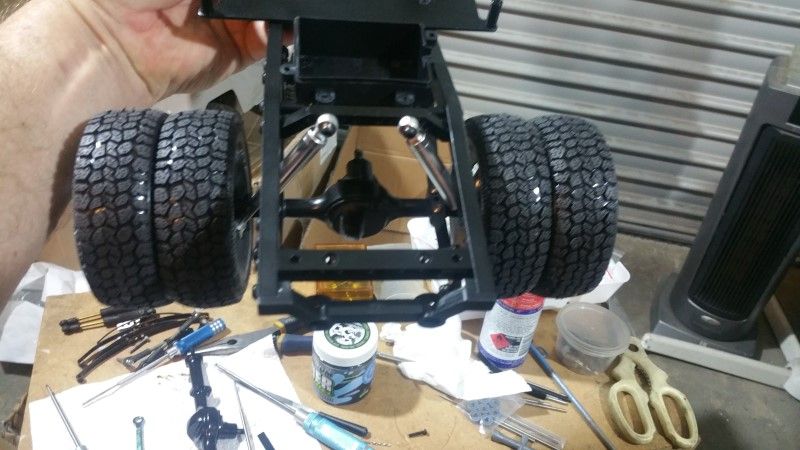 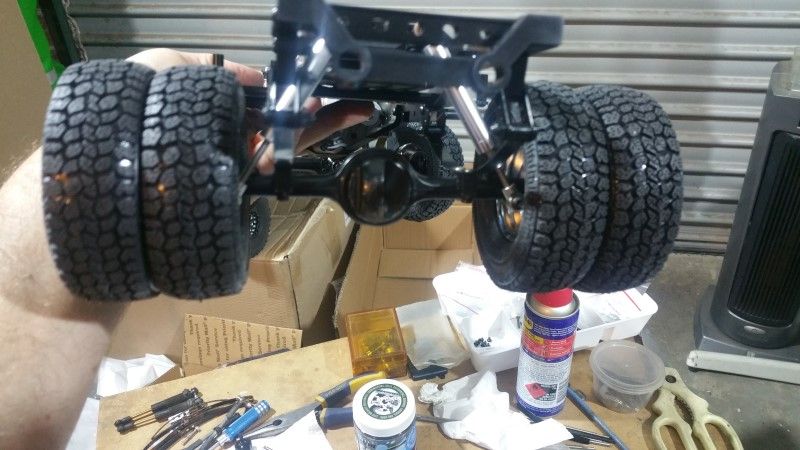 I of course couldn't resist sitting the Blazer body on the chassis to get a feel for how this will look. 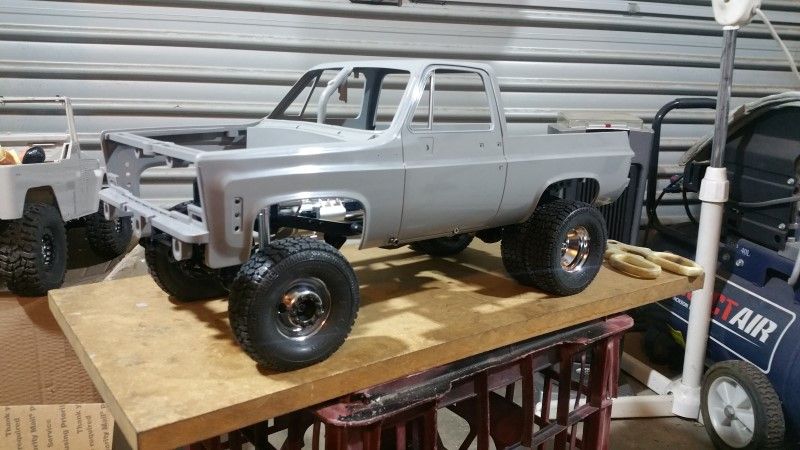 Rear tyre coverage should be easy to get with and SDI rubber flare. 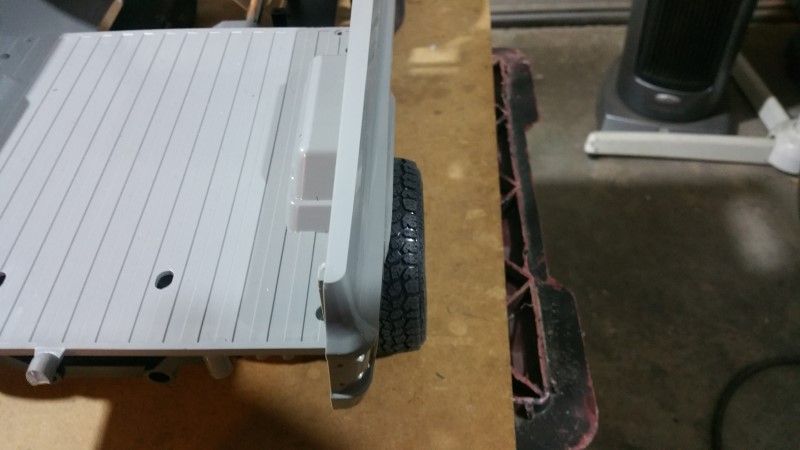 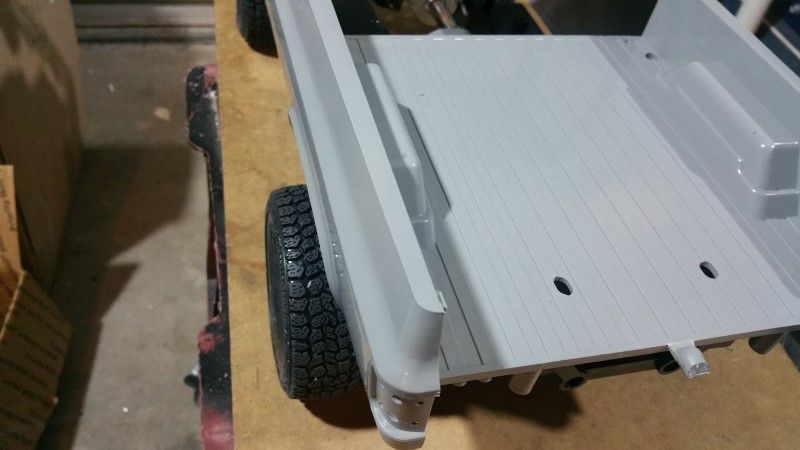 And then I spied a piece of a Croc Hunter body I have been waiting to use on just the right project. 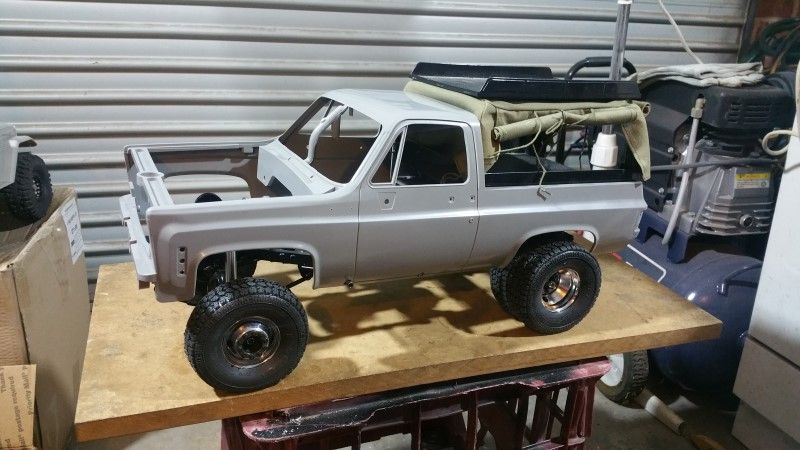 Hmmmmm, plenty of ideas here. Cheers H2Micr0 Trailworx Garage |
| |  |
| | #3 |
| Rock Crawler Join Date: Jan 2013 Location: Australia
Posts: 541
|
So just how do you make a Crew Cab from a Blazer? Good question. Guess I will either find out, or fail trying LOL. My attempt requires me to hack up 3 blazer body shells. So I started with 2 body shells I bought as individual items, and a picture to work off to start figuring this all out. 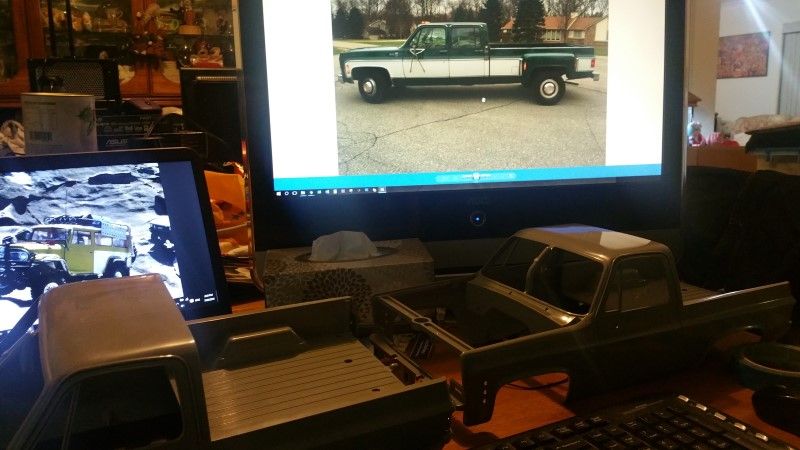 My theory from the beginning was to use the rear of the cab to create the front half of the rear door and window frame. Using my trusty dremel I went to work. 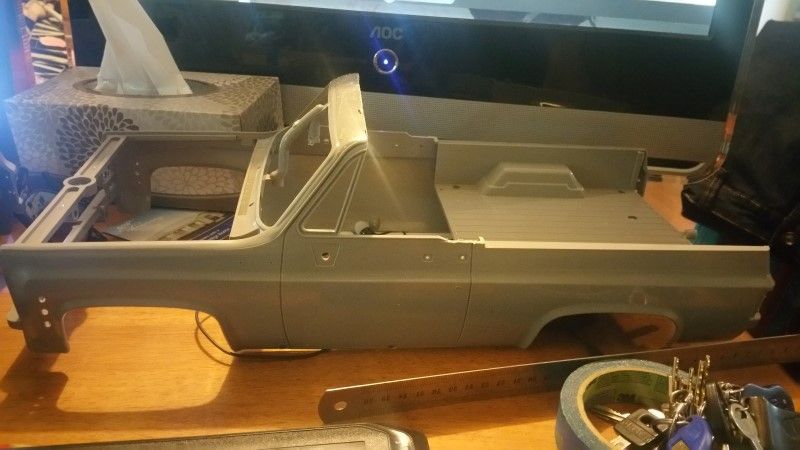 I think my theory may have some merit. 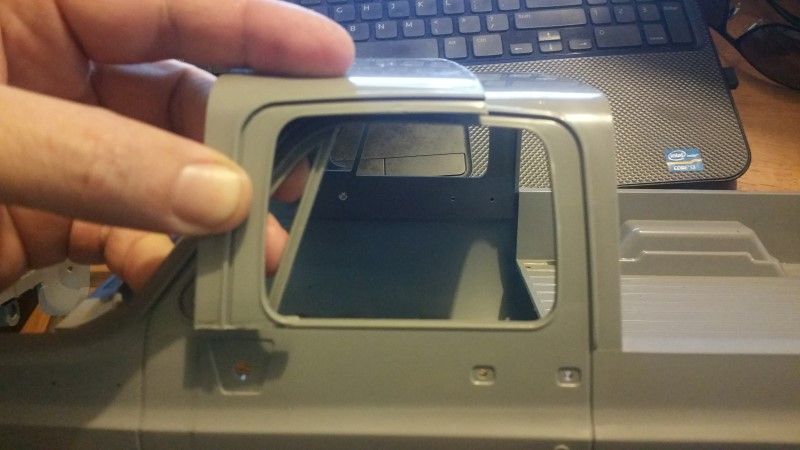 Then I marked out cut lines for the rear bed. My research found there is the Blazer bed, short bed and long bed. The Blazer bed was just going to be too short, so I decided to go for a longer bed but retain the shorter rear overhang. This is a custom built rig after all. 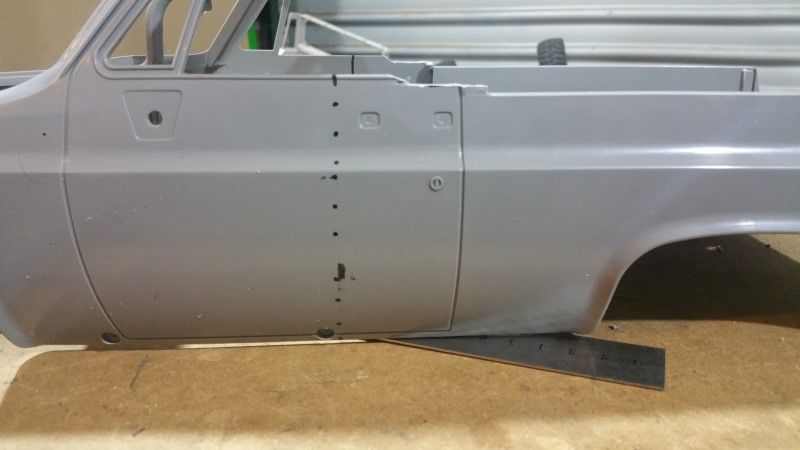 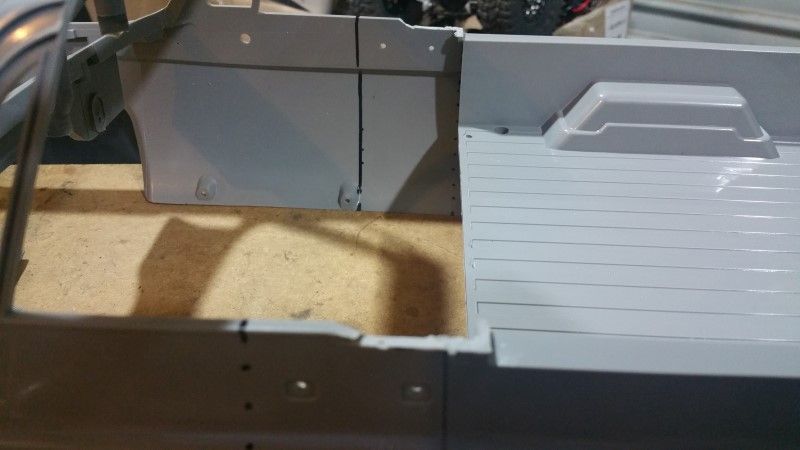 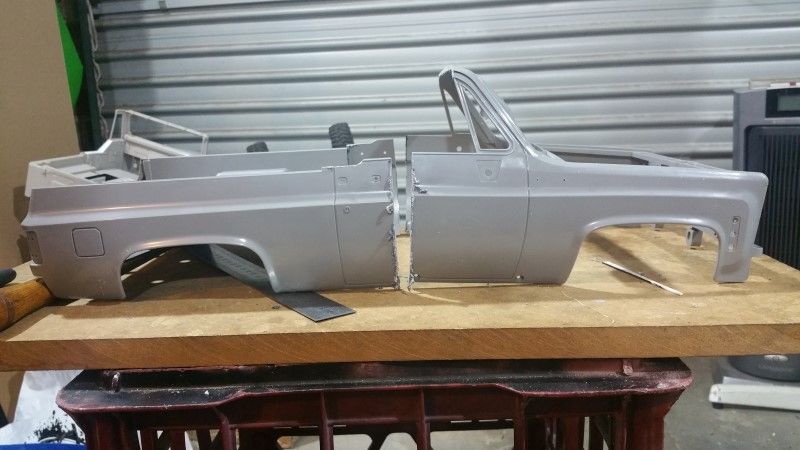 After a bit of cleaning up and a bit more trimming I have this. 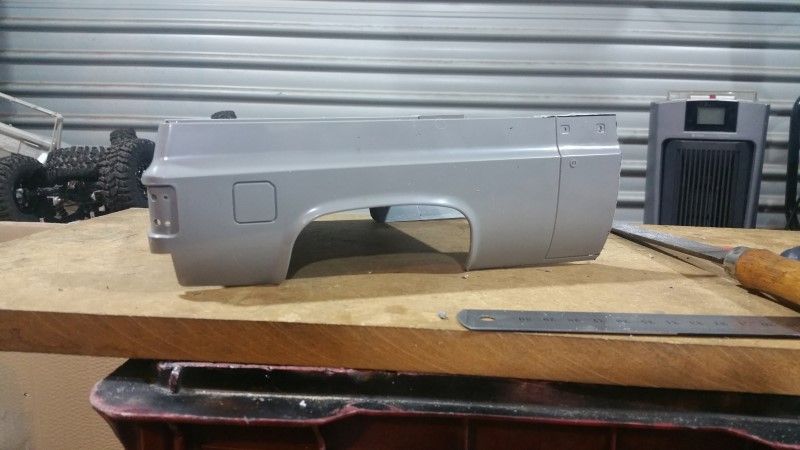 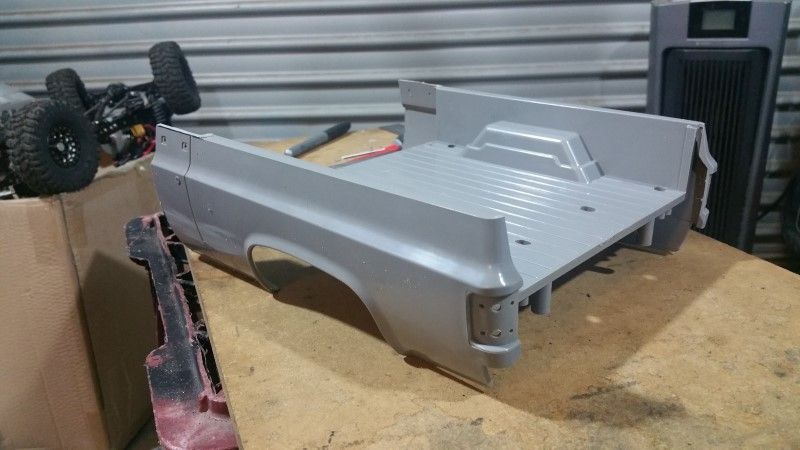 Next up was to make a start of the rear door and window section of the crew cab. Again some highly precised marking was applied before attacking it with the cutting wheel. 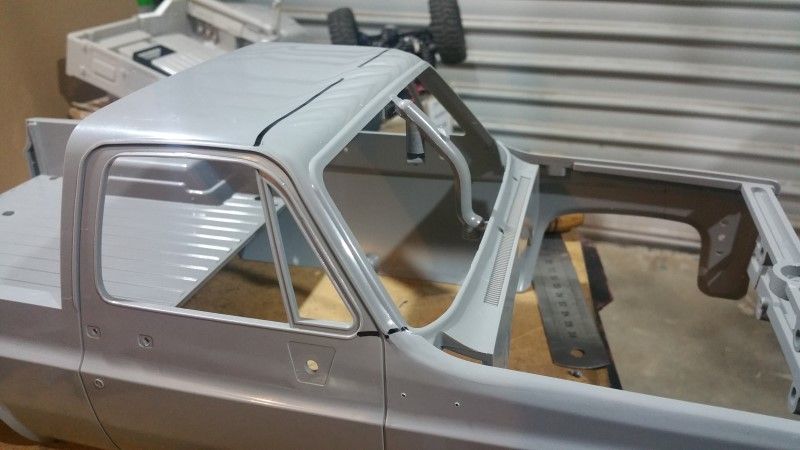 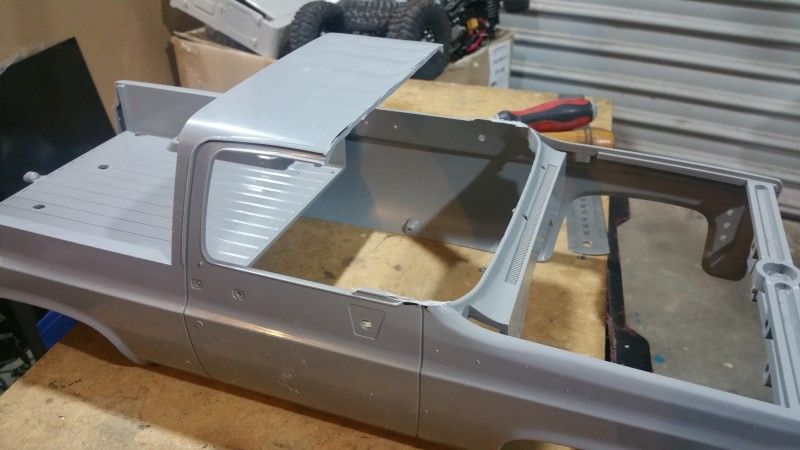 Yes, this does look promising. 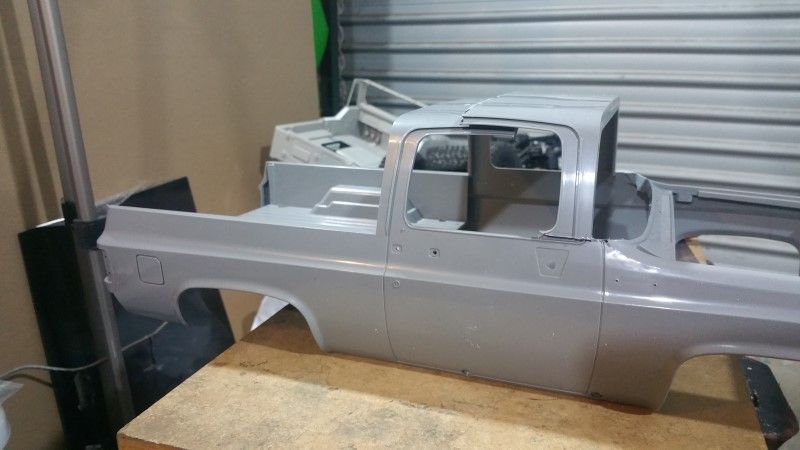 There is obviously a lot more use of the dremel required yet. I want to glue in the window frame to as close the correct size as I can before cutting off the bed and front clip to retain some structural rigidity. The cab back will also be fabricated and installed before the front is cut off. The third body is part of a full Blazer Body kit and will form the front half of the rig. I should end up with a rear tray left over to build a trailer from. So far this project is proving to be fun and interesting. Oh, the estimated wheelbase for this will be around 425mm. Cheers H2Micr0 Trailworx Garage |
| |  |
| | #4 |
| Rock Crawler Join Date: Jan 2013 Location: Australia
Posts: 541
|
Now that I had successfully cut the two body shells into bits, I had to break open one of the full Blazer body sets so I could introduce a third body shell to my dremel. Nice Box!!! 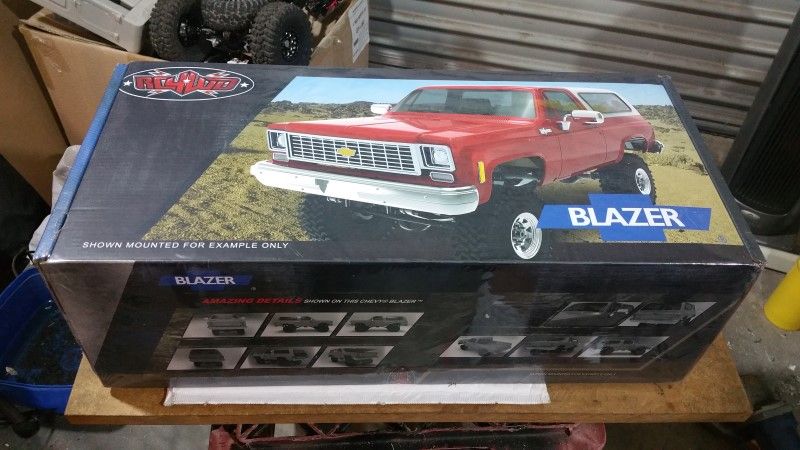 Comes with a fancy colour instruction manual. Oddly there were no dremels listed in the tools section? 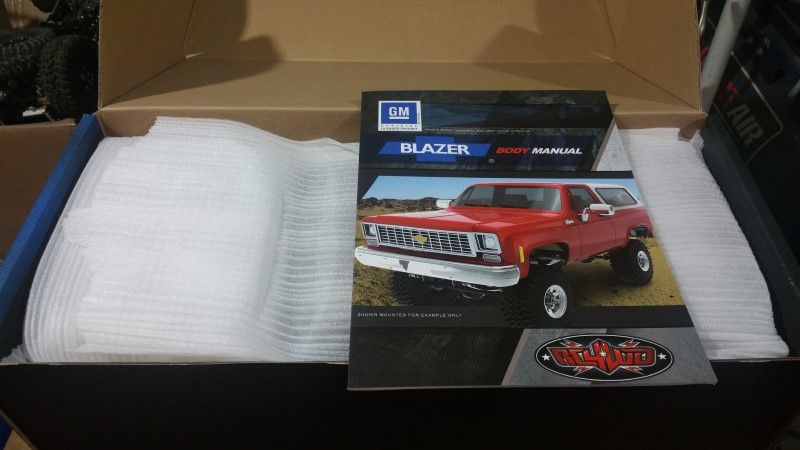 Liberated from the box. 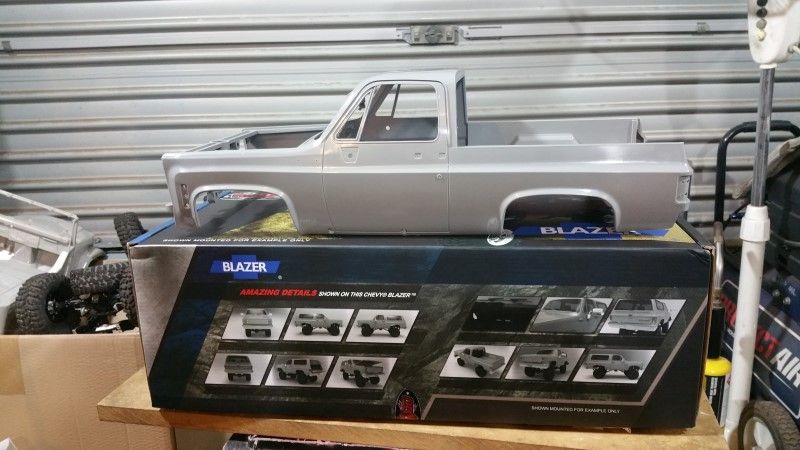 Carefully marked up. 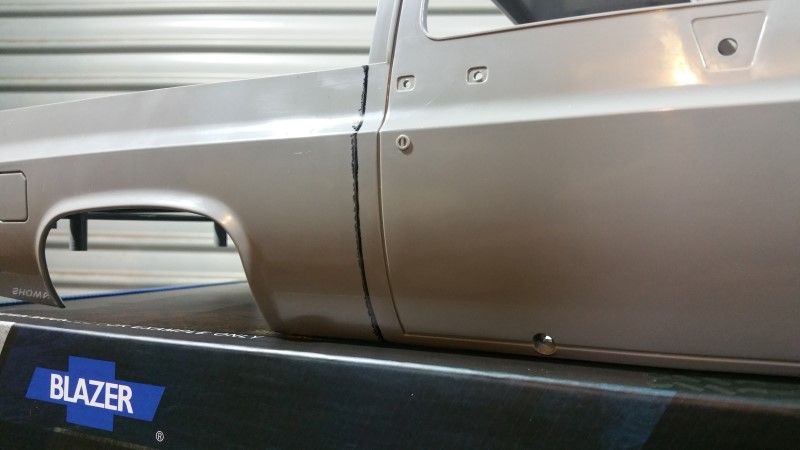 Sadly the meeting with the dremel didn't go so well. The Blazer body is all cut up about it. (GROAN) 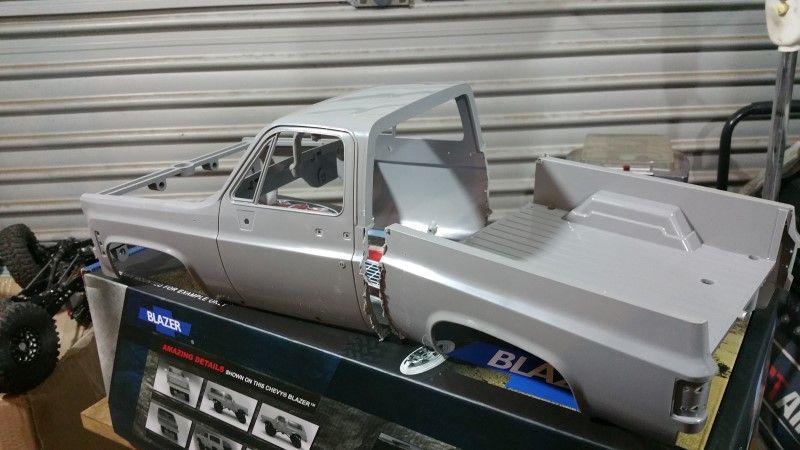 With that done I focused on sorting the rear door windows of the crew cab. After MUCH thought and deliberation, I marked up the the areas to be cut. 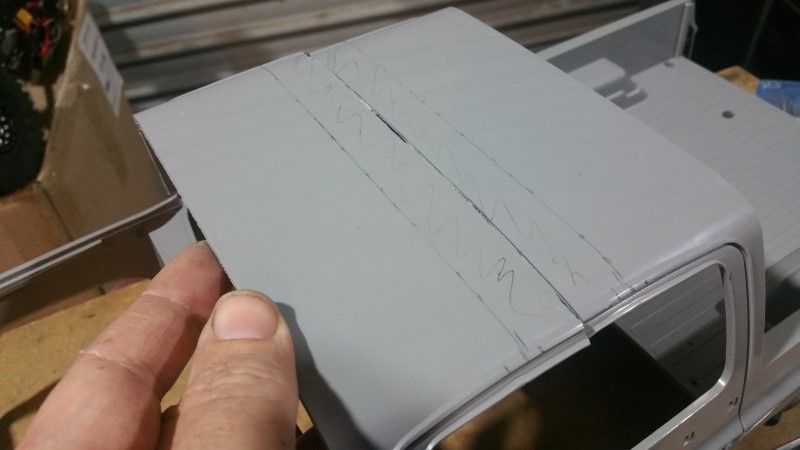 Things do look promising. 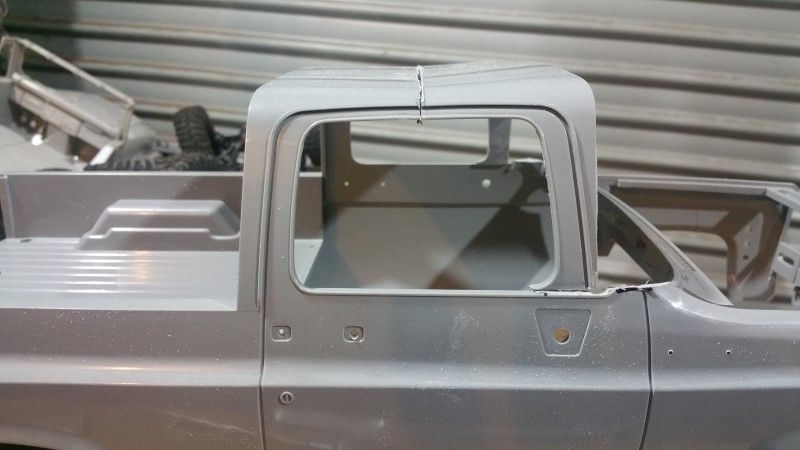 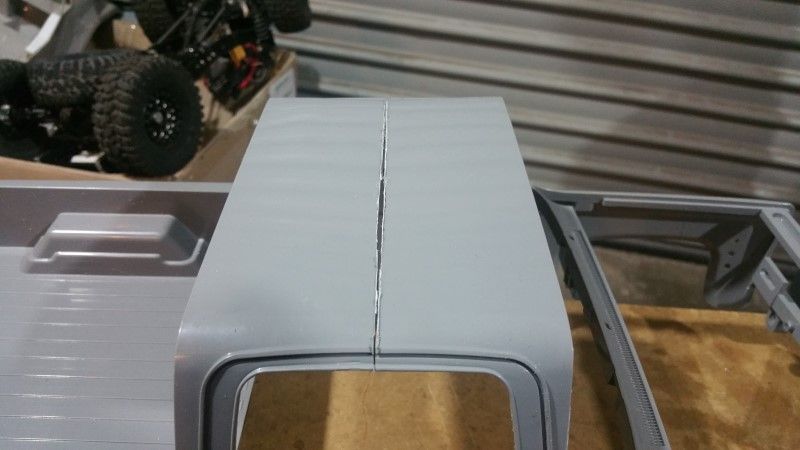 I went to work with the files and cleaned up all the dags and bumps etc to bring the to parts closer together. Now, to integrate the new roof section where the pillar base meets the lower window frame, I had a plan. The general idea is to cut a step and inset the pillar flush with window. 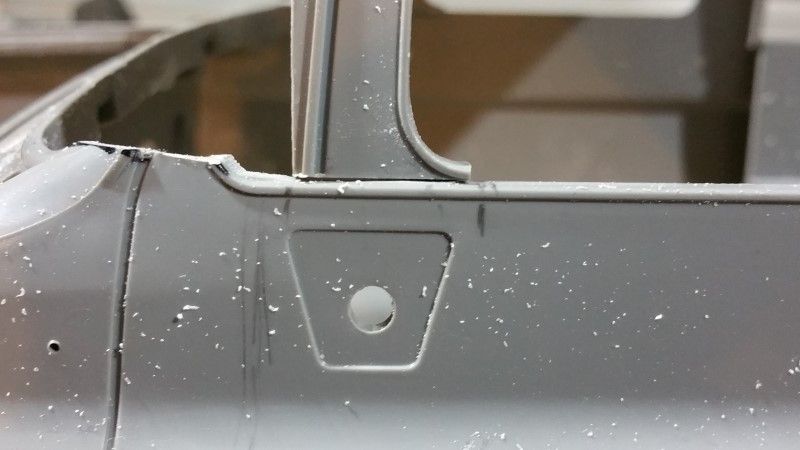 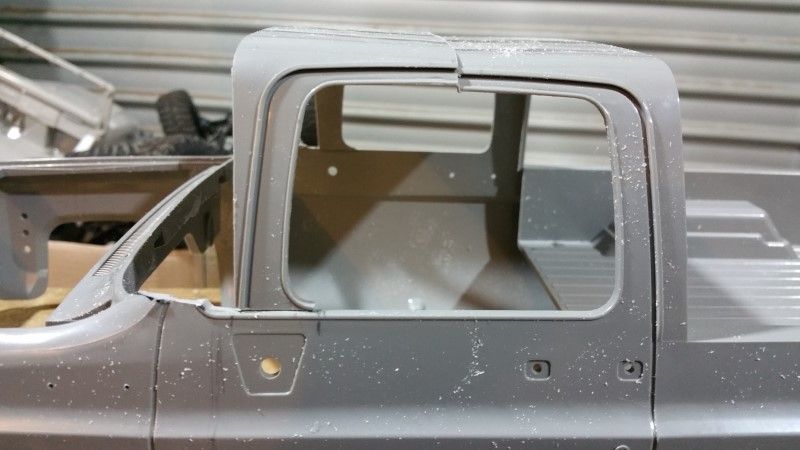 After some delicate dremel action. 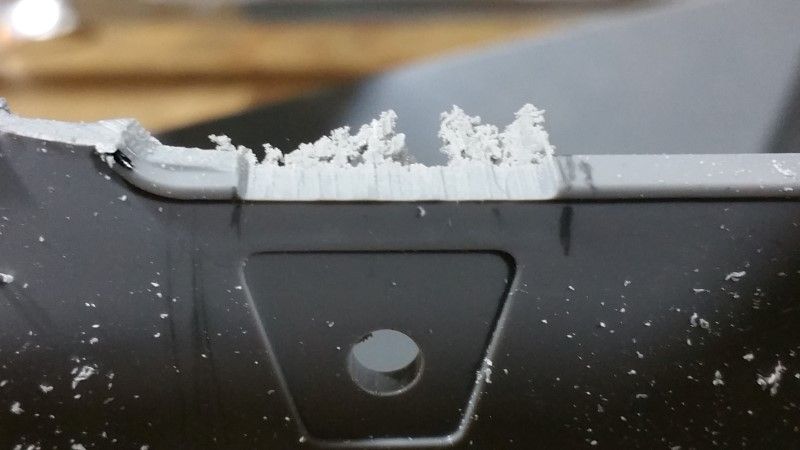 What I discovered is that the body is wider at the windscreen and firewall, than at the back of the cab, so it was time to lose the front clip. 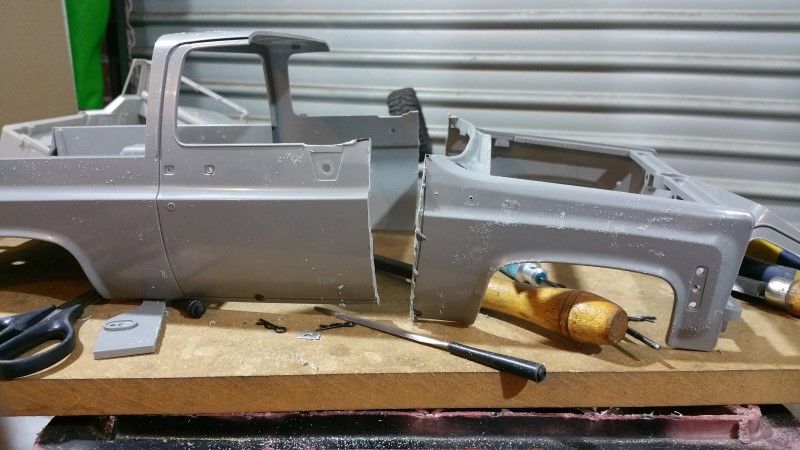 After much filing, and trial fitting, more filing etc, I have this. 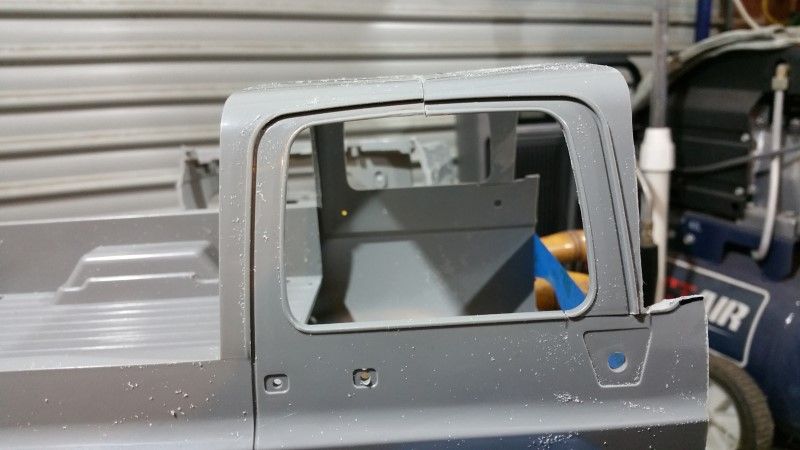 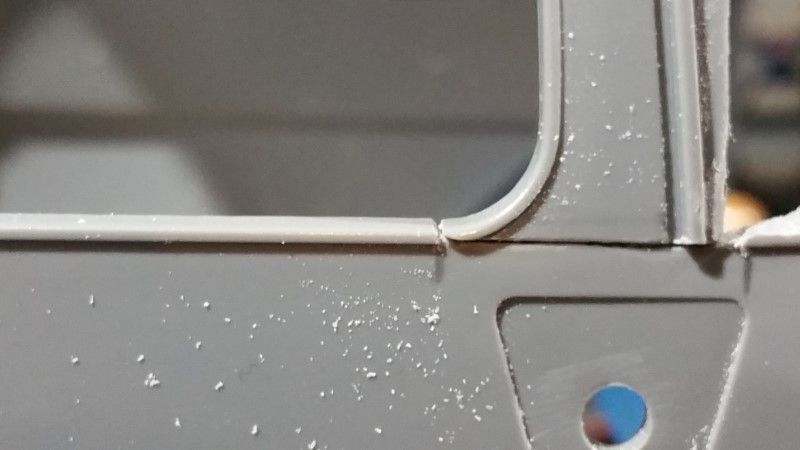 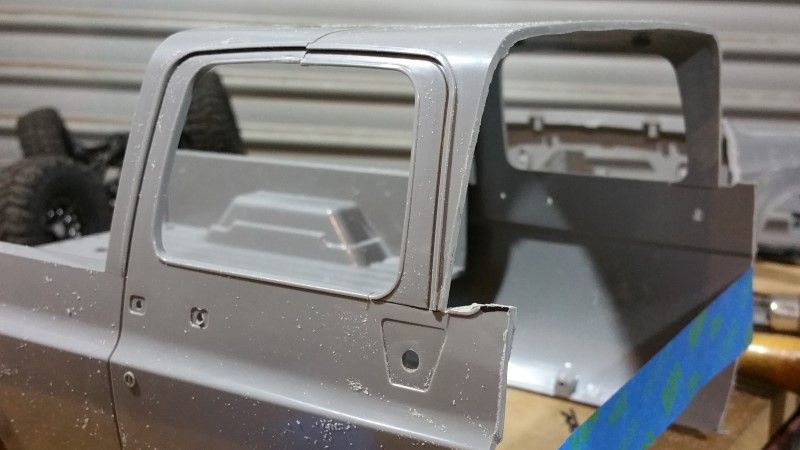 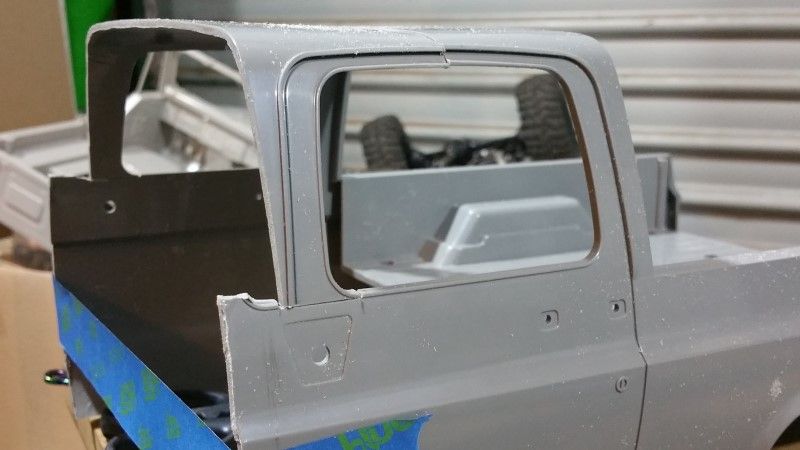 Very happy with how this is looking. Now the next challenge is this. 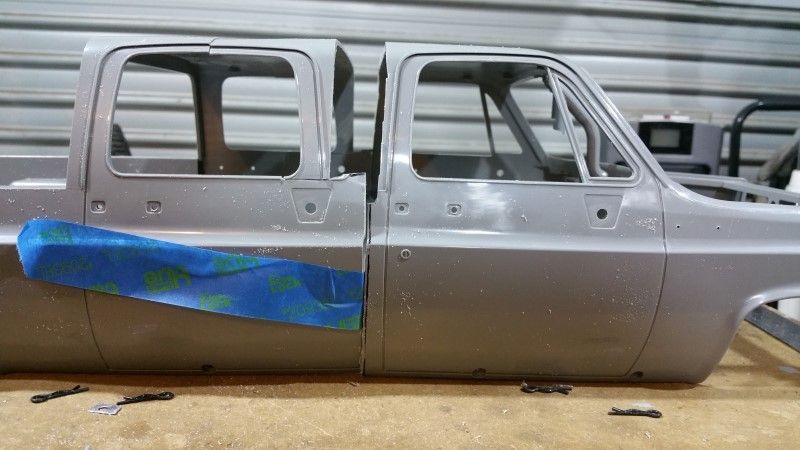 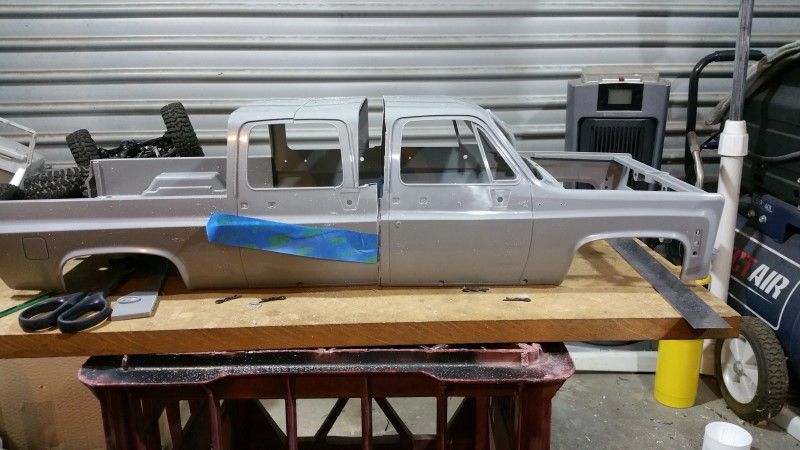 Long isn't it. And that short bed is yet to be cut off and the longer bed will go behind it!!!!! Next step will be to glue the front of the rear cab into place. Cheers H2Micr0 Trailworx Garage |
| |  |
| | #5 |
| Rock Crawler Join Date: Jan 2013 Location: Australia
Posts: 541
|
Now that I had successfully cut the two body shells into bits, I had to break open one of the full Blazer body sets so I could introduce a third body shell to my dremel. Nice Box!!!  Comes with a fancy colour instruction manual. Oddly there were no dremels listed in the tools section?  Liberated from the box.  Carefully marked up.  Sadly the meeting with the dremel didn't go so well. The Blazer body is all cut up about it. (GROAN)  With that done I focused on sorting the rear door windows of the crew cab. After MUCH thought and deliberation, I marked up the the areas to be cut.  Things do look promising.   I went to work with the files and cleaned up all the dags and bumps etc to bring the to parts closer together. Now, to integrate the new roof section where the pillar base meets the lower window frame, I had a plan. The general idea is to cut a step and inset the pillar flush with window.   After some delicate dremel action.  What I discovered is that the body is wider at the windscreen and firewall, than at the back of the cab, so it was time to lose the front clip.  After much filing, and trial fitting, more filing etc, I have this.     Very happy with how this is looking. Now the next challenge is this.   Long isn't it. And that short bed is yet to be cut off and the longer bed will go behind it!!!!! Next step will be to glue the front of the rear cab into place. Cheers H2Micr0 Trailworx Garage |
| |  |
| | #6 |
| Rock Crawler Join Date: Jan 2013 Location: Australia
Posts: 541
|
More Jigsawness. I glued the front part of the rear doors into place. Using a strip of 2mm styrene sheet under the roof to begin with I glued half of this to the smaller piece then to the mains structure This should provide enough structural support. Then small tabs of thinner styrene support the lower pillars against the body. 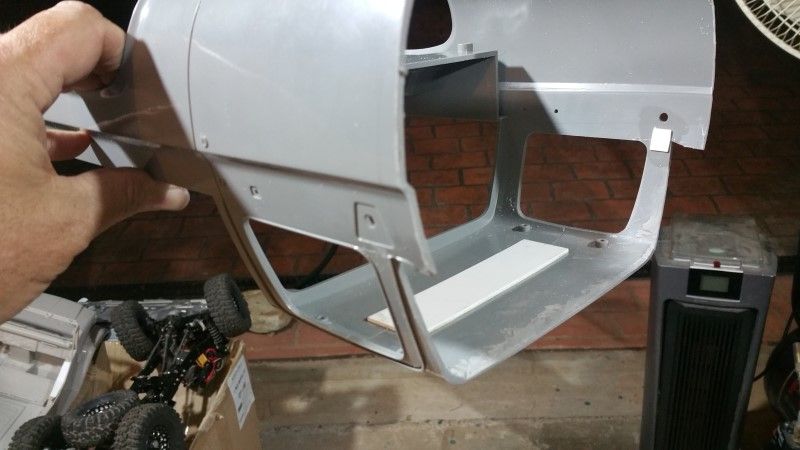 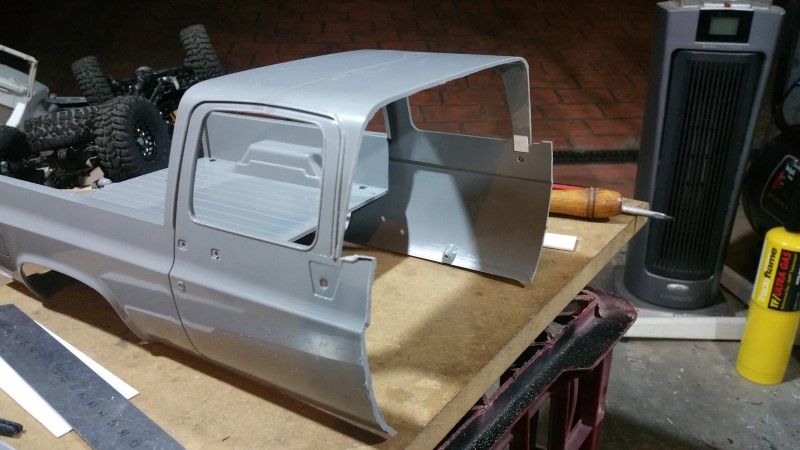 And some close ups of the joins. 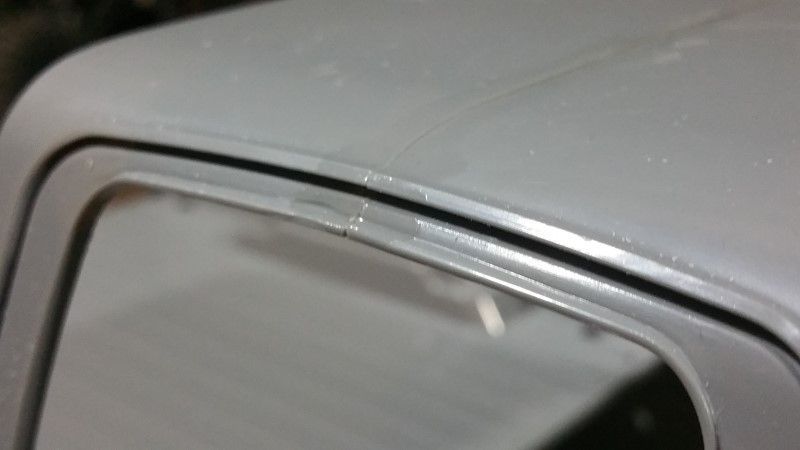 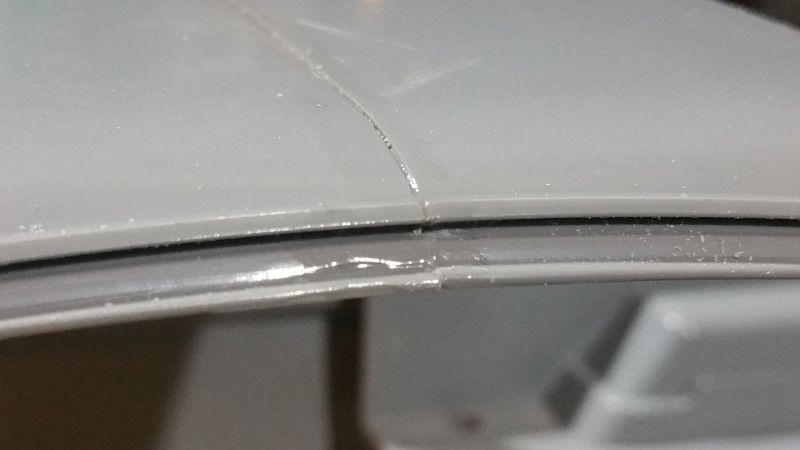 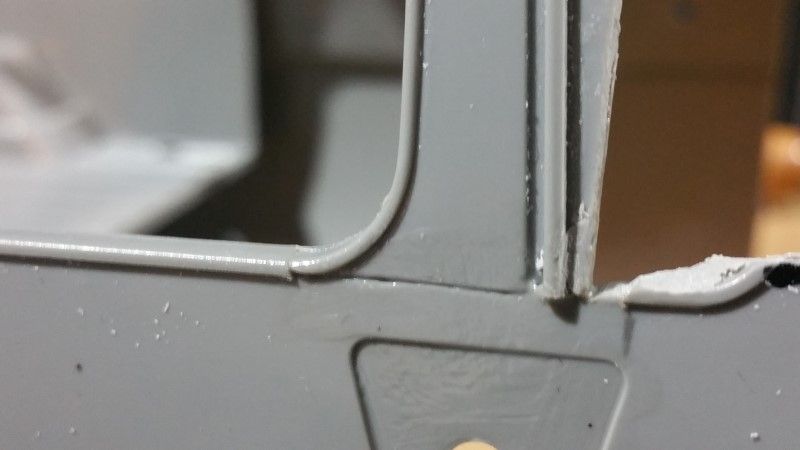 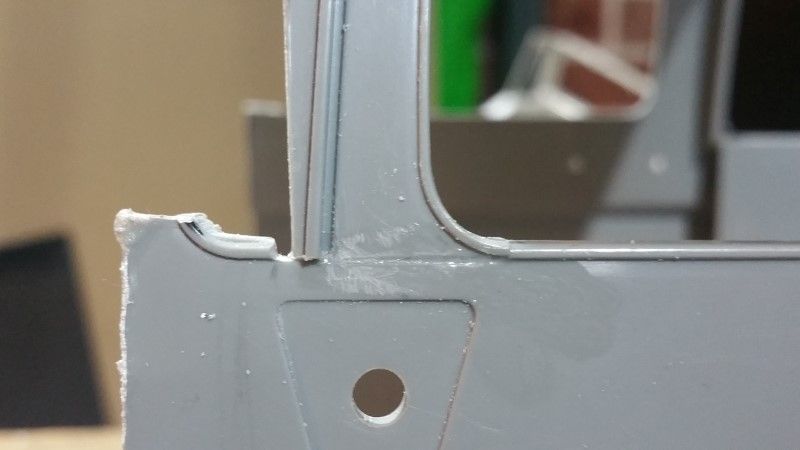 A bit of attention with the needle files followed by some filler later and it should clean up nicely. Now for the tougher part. Either I get this right, or I have wasted a whole Blazer Shell. And being in Australia, it is not a simple or cost efficient exercise to get another one. One of these lines is the right one, surely???? 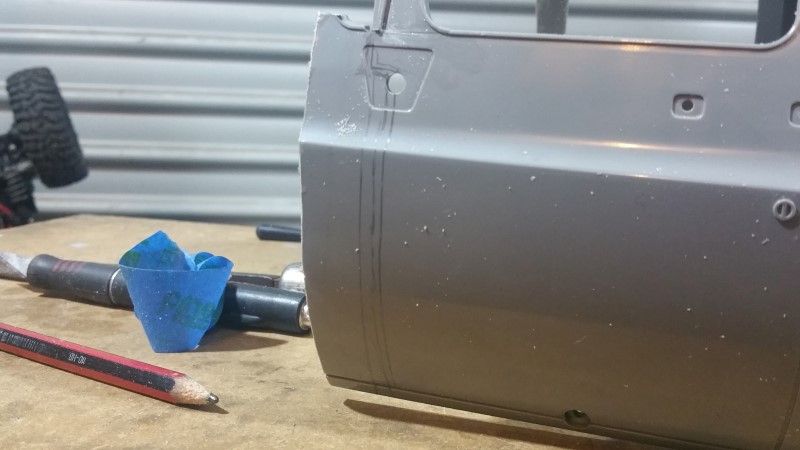 Yes!!!! 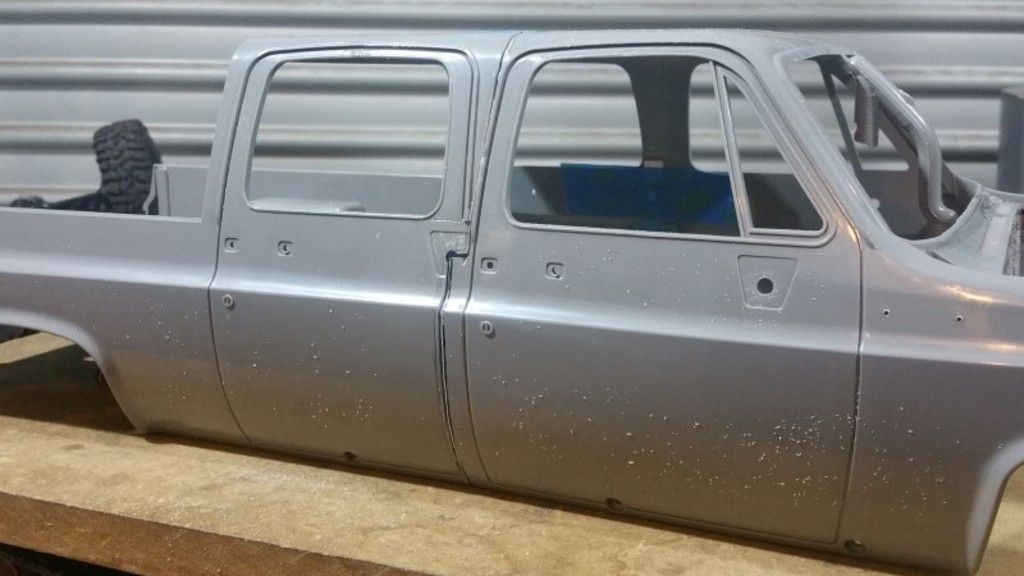 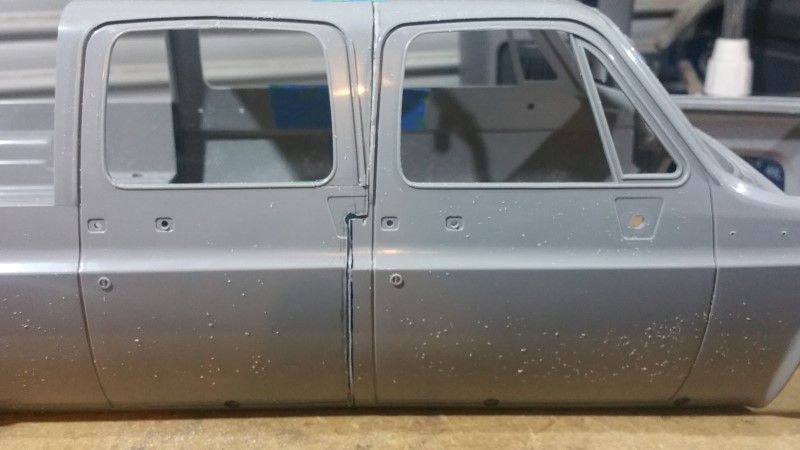 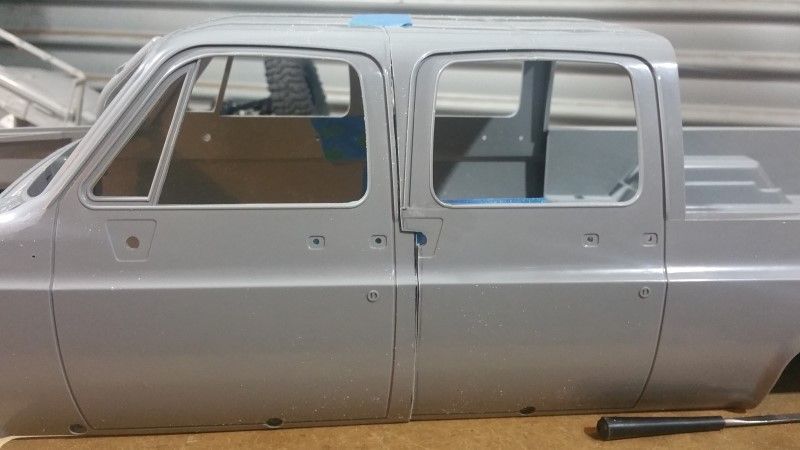 Even the roof looks pretty flat!! 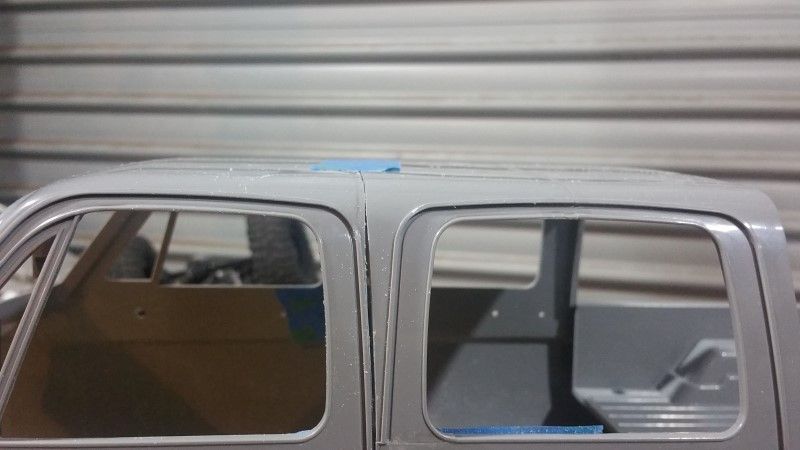 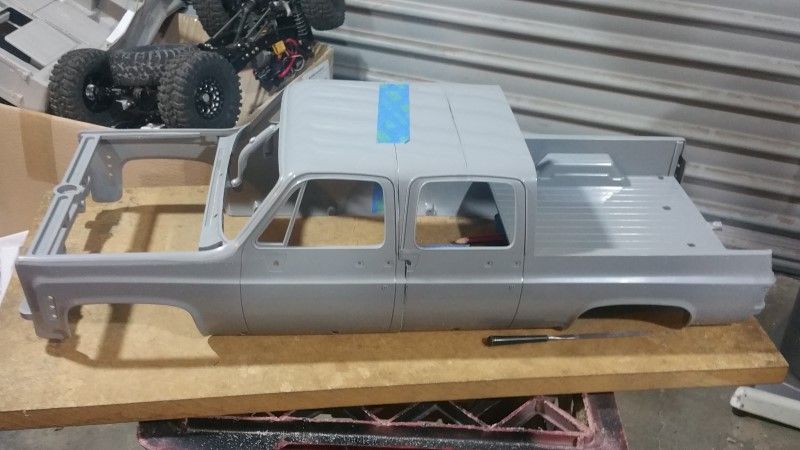 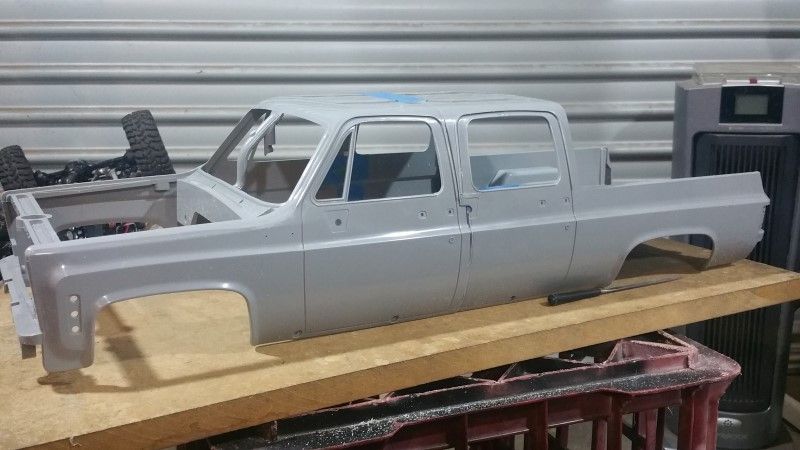 A bit more careful work with the files to get a bit better fit to go. Obviously, this is only close to a 1:1 and is about the best I think can be achieved, but it isn't finished yet. Cheers H2Micr0 Trailworx Garage |
| |  |
| | #7 |
| Rock Crawler Join Date: Jan 2013 Location: Australia
Posts: 541
|
I spent a fair bit of time gently filing and shaping the edges to achieve a better join. Then it was time to actually bond the two halves into one piece. 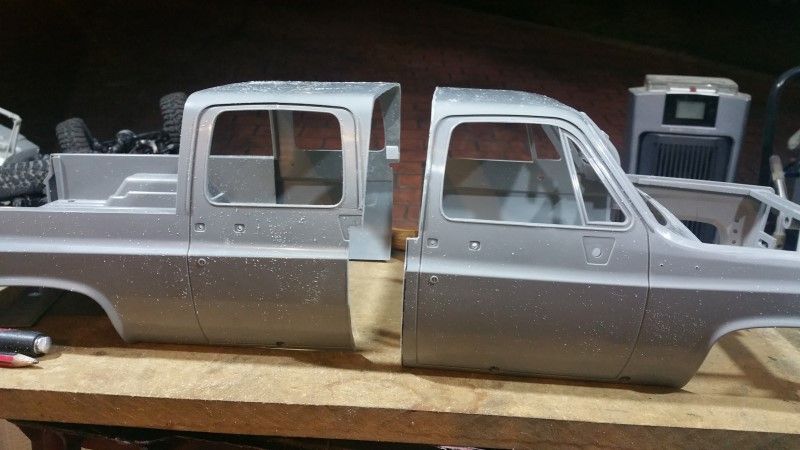 This time around I used 1mm sheet styrene as I needed more of a bend in the tabs. I also allowed for a greater surface area to create a strong bond. Here are the three main tabs glued to the back half of the body. 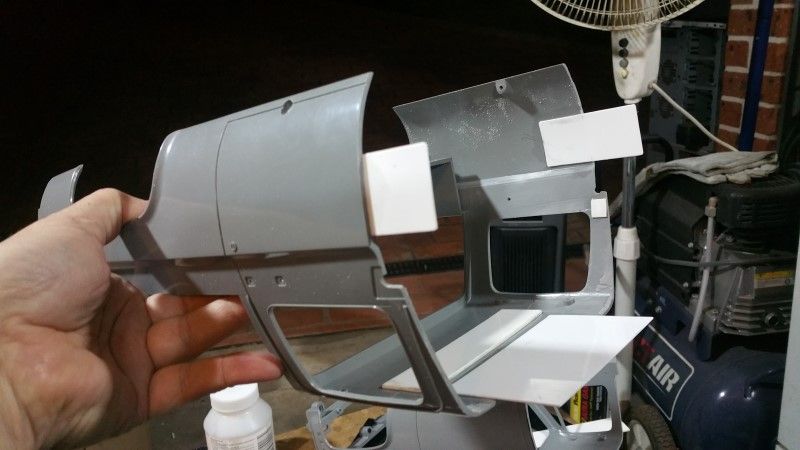 Once those first 3 were successfully bonded, I added in additional tabs across the join area. 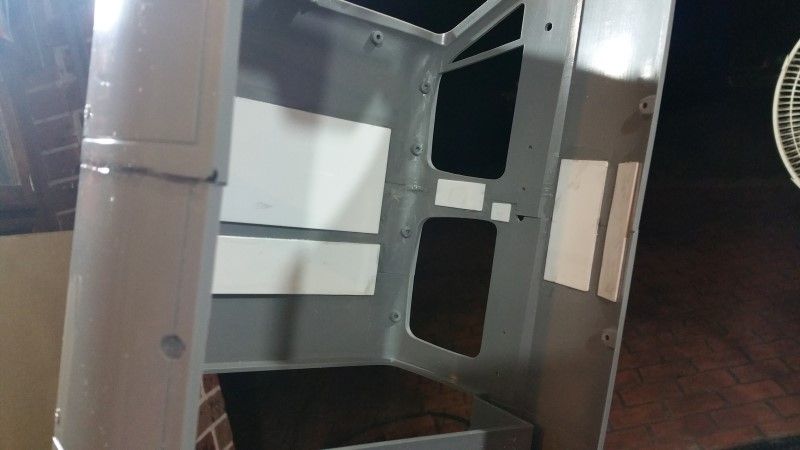 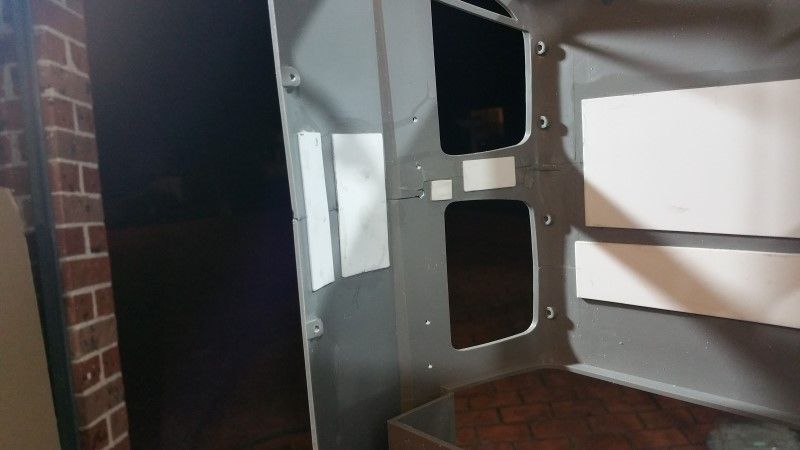 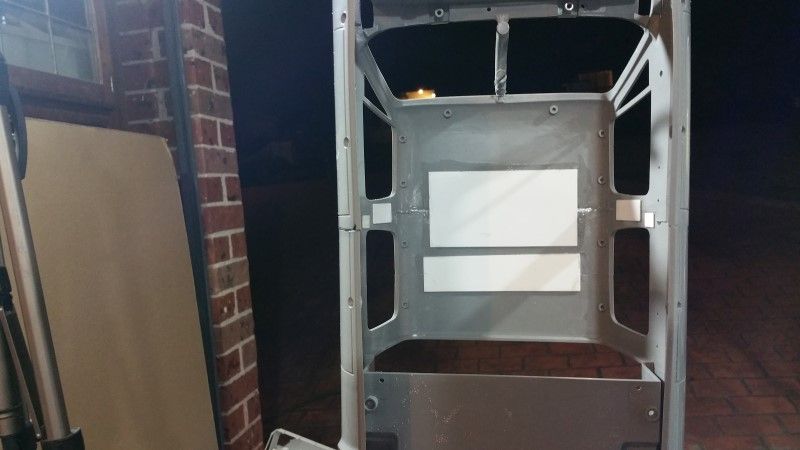 The roof will need very little work to get it flat. 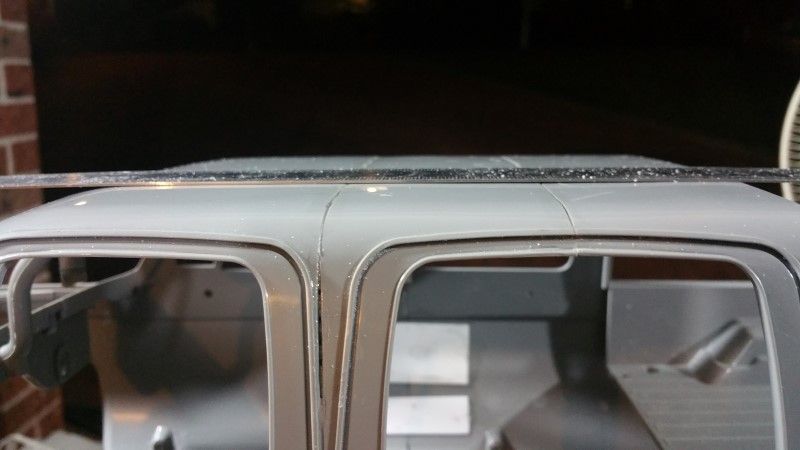 And here it is as one body. 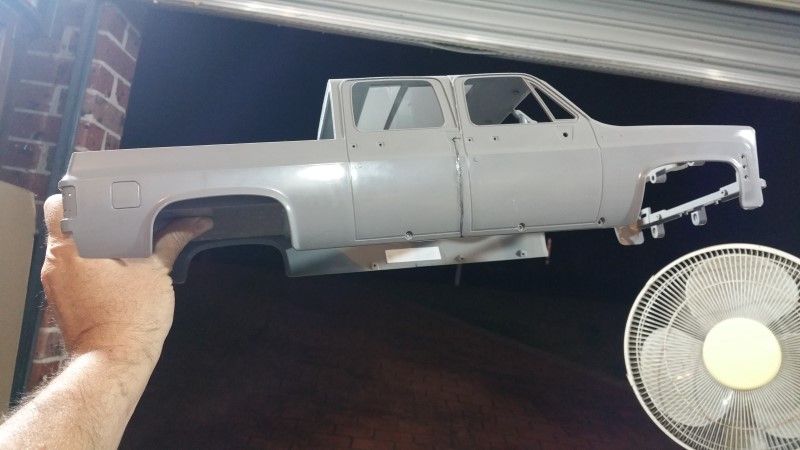 Now that it is one whole single thing, I get to cut it up!!! The rear bed will be removed and a cab back fabricated. Cheers H2Micr0 |
| |  |
| | #8 |
| Rock Crawler Join Date: Jan 2013 Location: Australia
Posts: 541
|
After all that hard work to make all those bits into one piece, I of course now have to chop it up again. Marked where the cut will be. 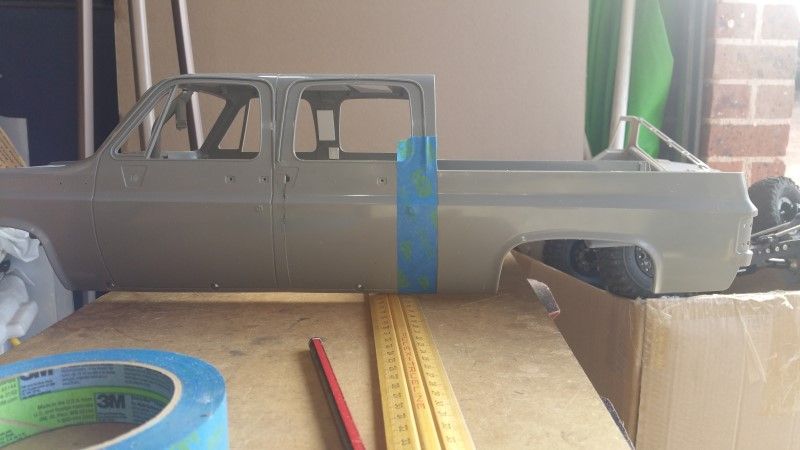 A few minutes later after feeding the dremel. 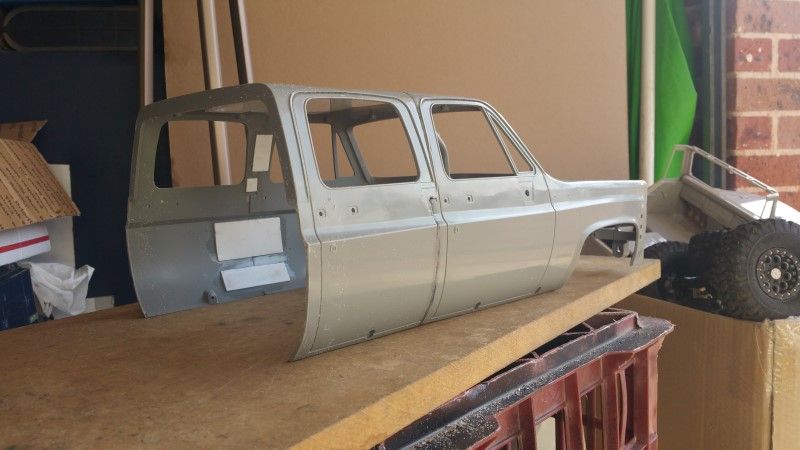 And finally I, and you, get to see just how long this will be with the longer bed. 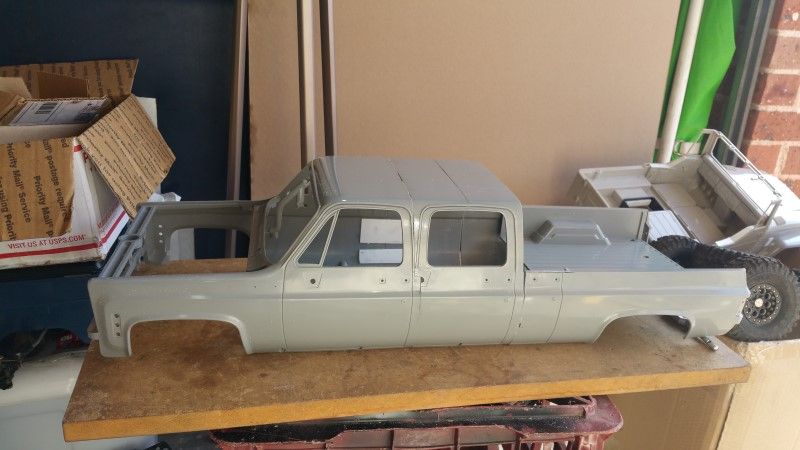 I then got to work making a cab back. 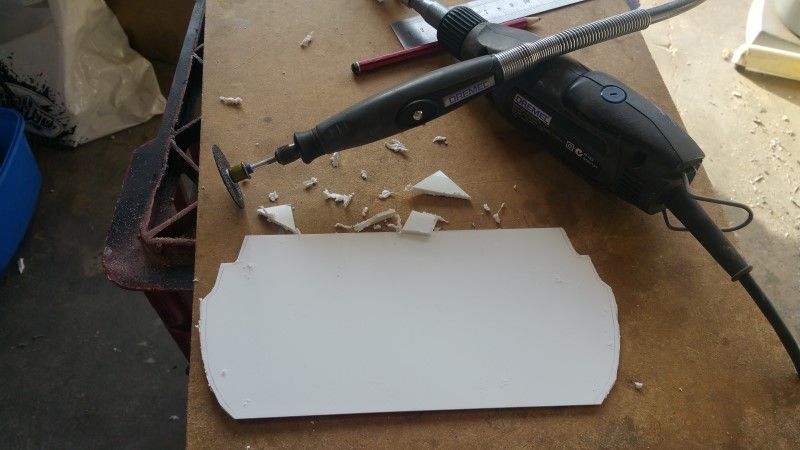 Test fit. 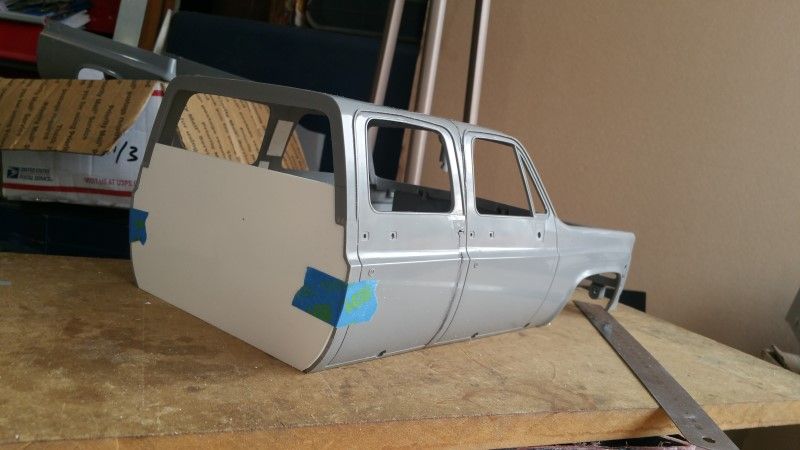 Rear window opening is a little bit shallow, and the lower cut out to clear the chassis is yet to be done. 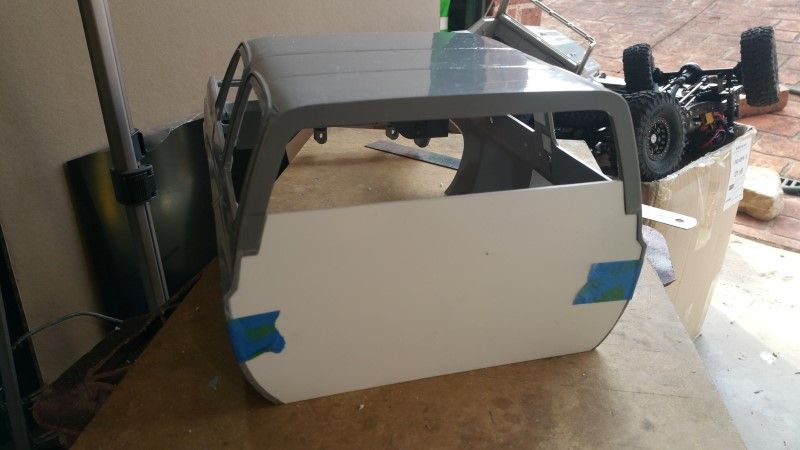 I have decided to build the bed in a similar design to this.  But my version won't have the wrecker boom. Some storage boxes will be installed along both sides, and a rear winch will find a home there somewhere. I made a start on the bed by cutting up the blazer bed topper. 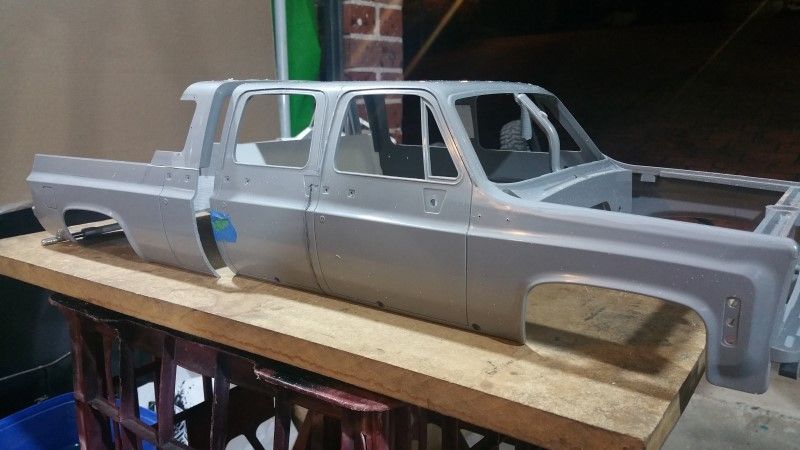 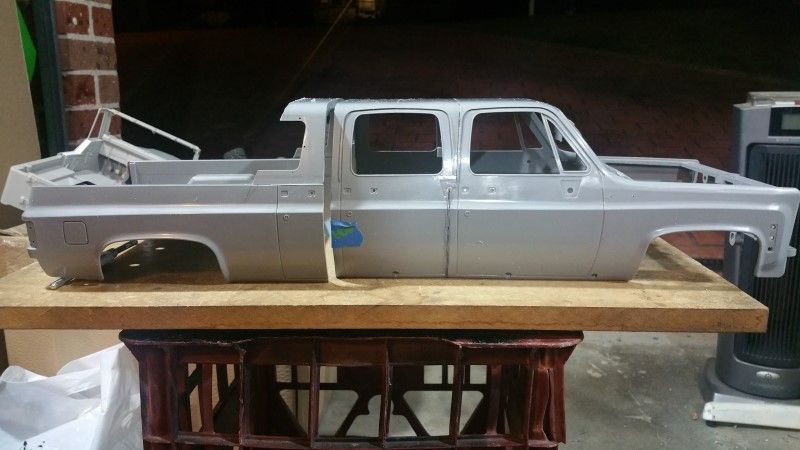 The bed needs to be widened by around 25mm to cover the duallys. Cheers H2Micr0 |
| |  |
| | #9 |
| Rock Crawler Join Date: Jan 2013 Location: Australia
Posts: 541
|
I was hoping to get out on the trails today (Sunday here in Australia) but, the weather isn't playing nice and it is raining. But that means, more Garage time!!!!!! I decided to get started on the bed modifications. Yes, more hacking and cutting to come!!! But, instead of just hacking away, I spent a few minutes looking at the structure of the bed. If you look carefully at the below photo you will see the cut lines marked along the side. 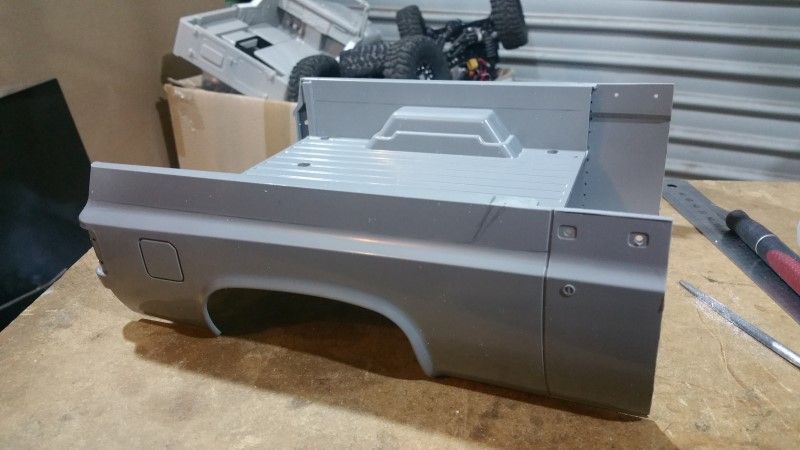 The area marked to be cut is the same material that joins the sides and inner bed together. So I decided to glue in some support tabs first to help keep the alignment correct. 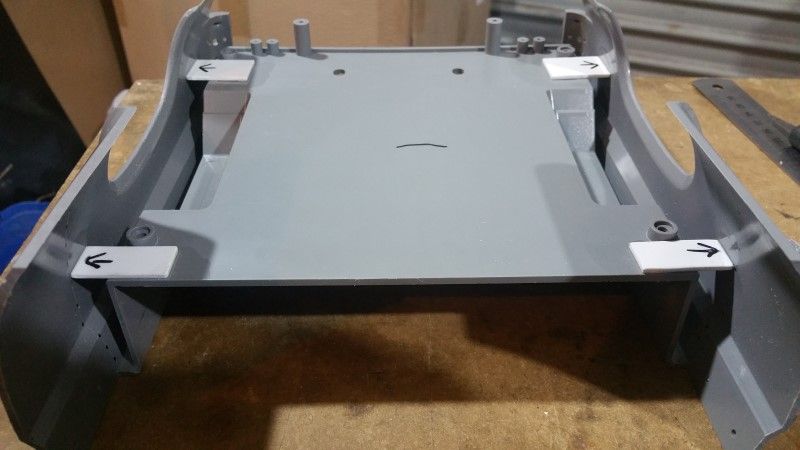 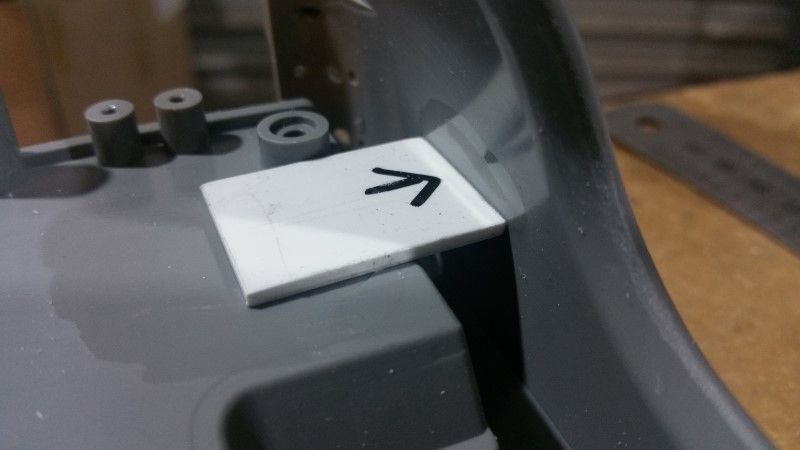 I also decided to make the cut in sections and glue in the cap piece in that section to keep everything in its place. The following pictures will explain it all. 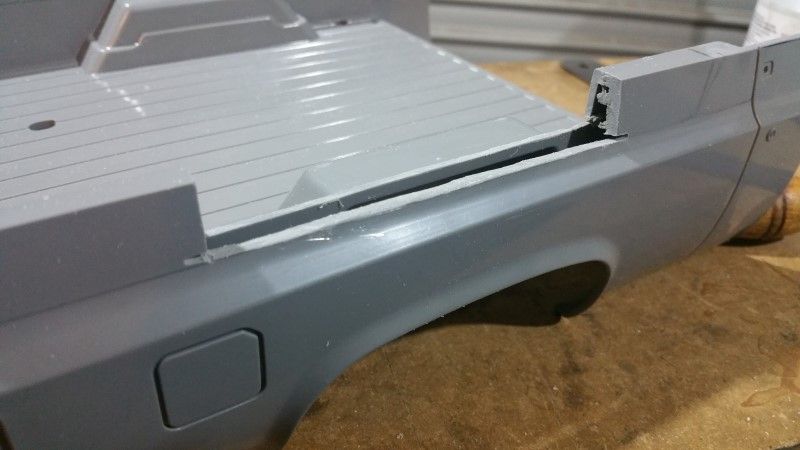 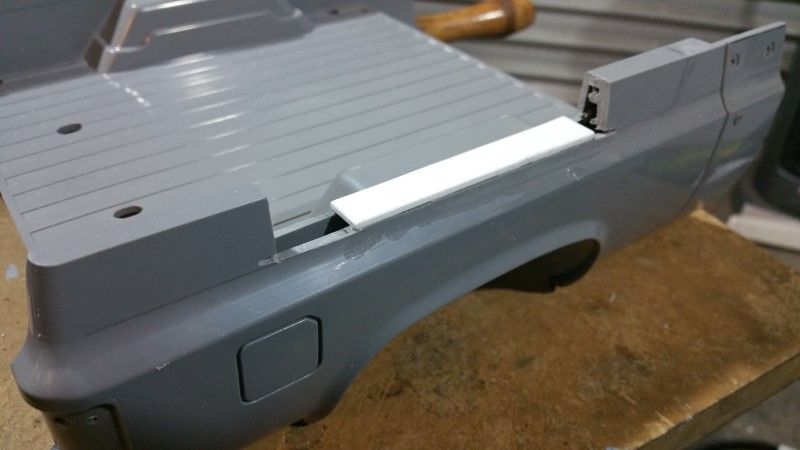 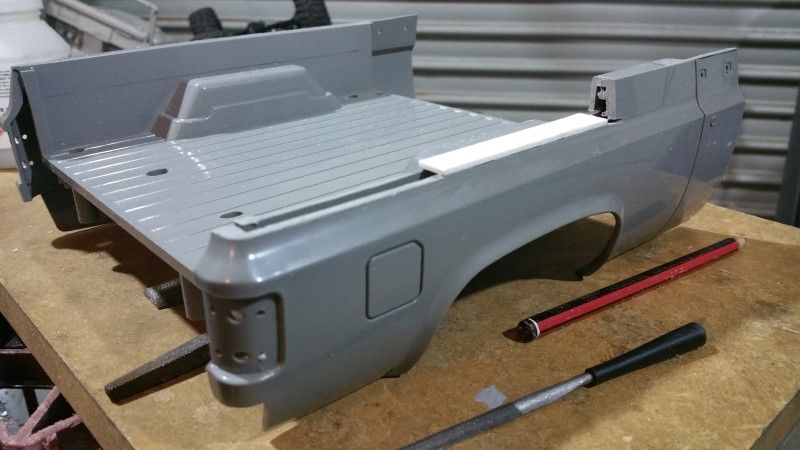 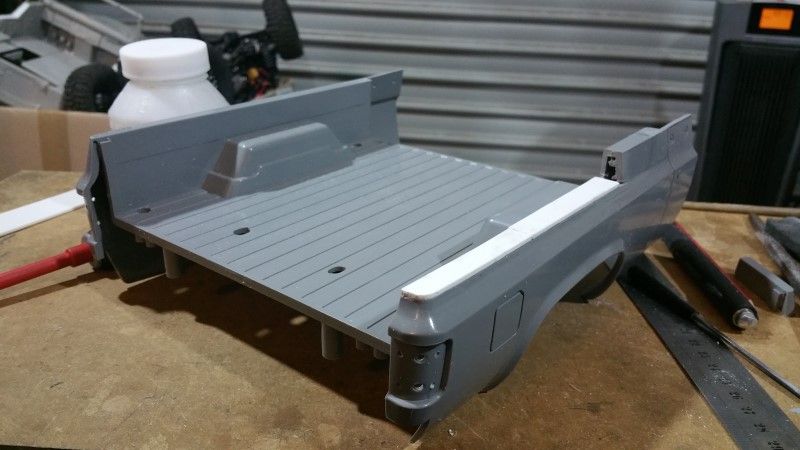 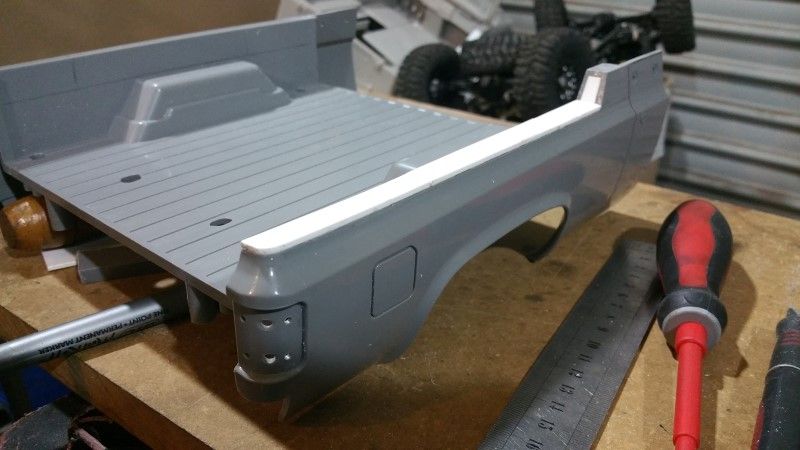 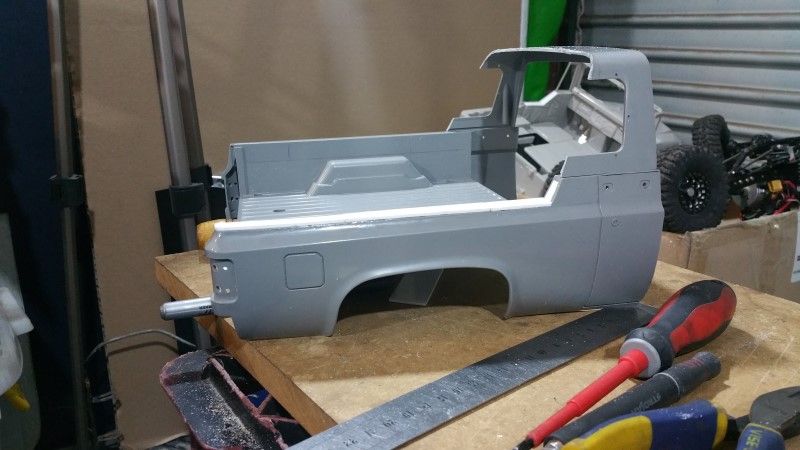 I then went ahead and completed the same work to the other side. Had to line it up behind the cab to see how it looks. 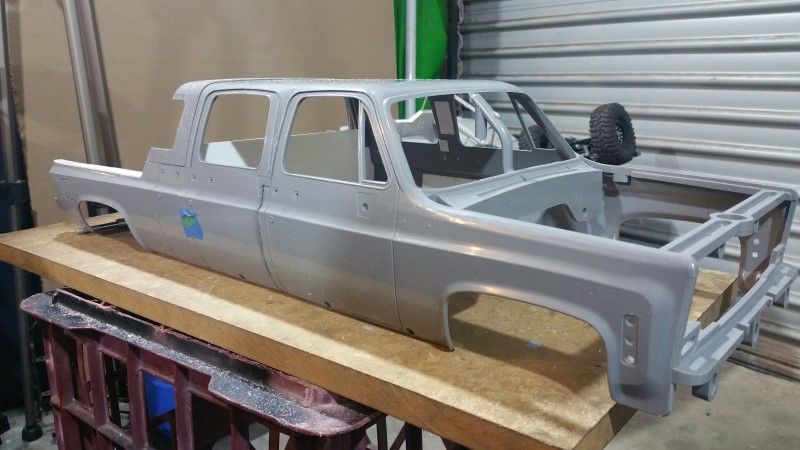 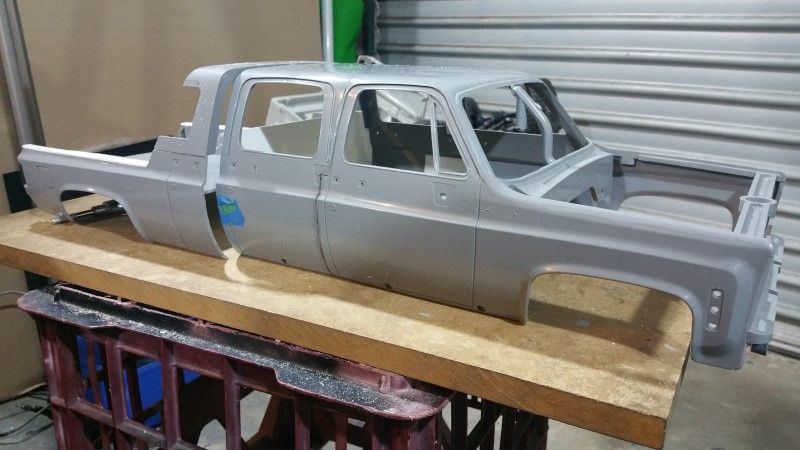 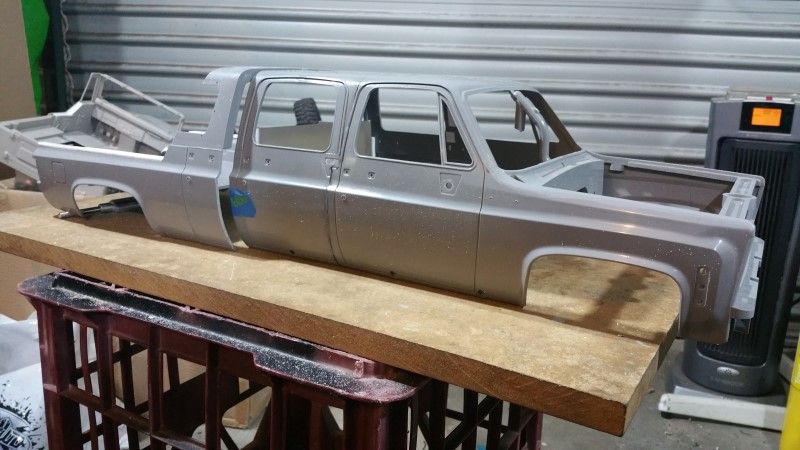 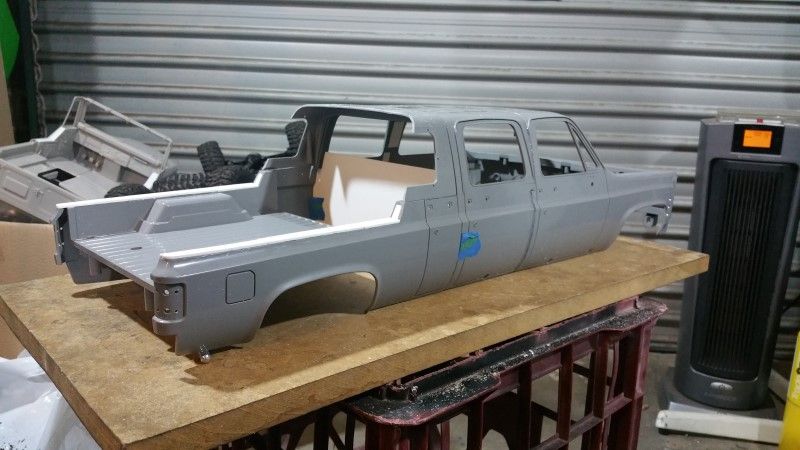 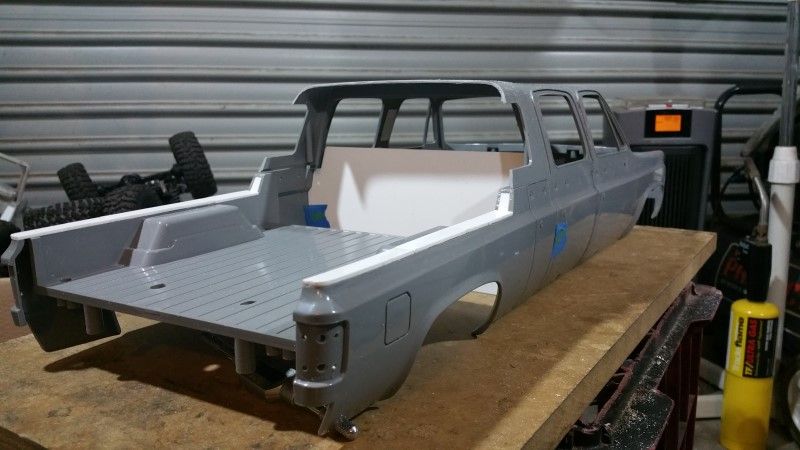 Still undecided about wide or standard bed width. So now I have the body parts in the right configuration, it was time to see about mocking it all up on the chassis. Stock TF2 Chassis. 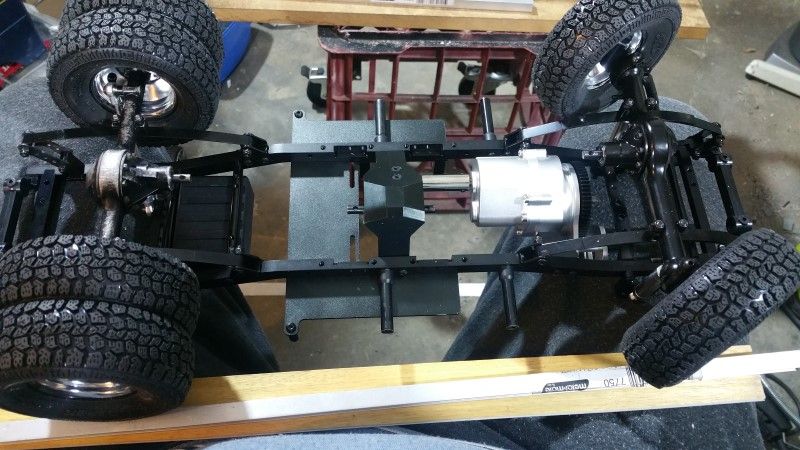 TF1 + TF1 configuration =? 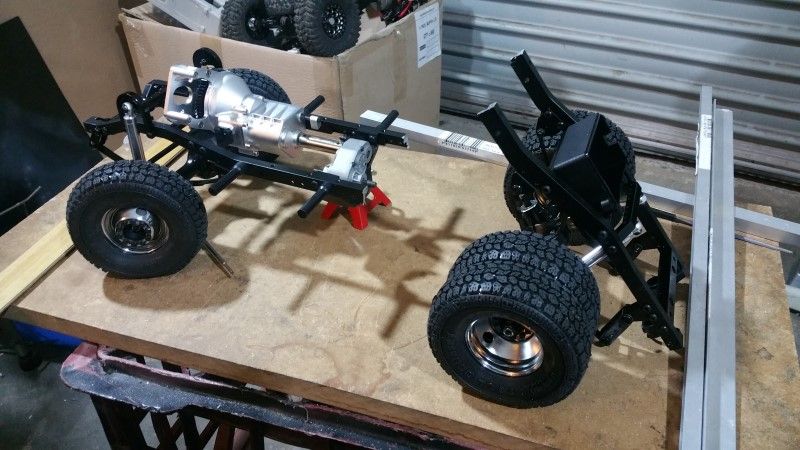 I need to add in around 140mm and after a bit of scrounging through my metal box found some U Channel Alloy that proved to be a nice snug fit over the rails. 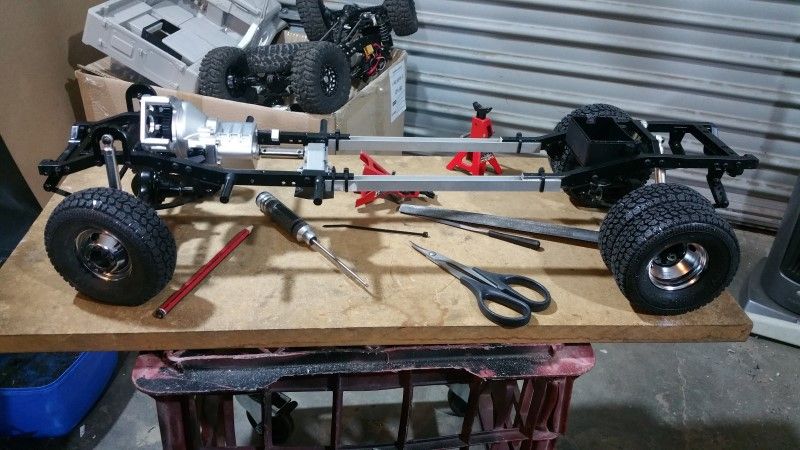 Now we get a glimpse of how awesome this rig is going to look. 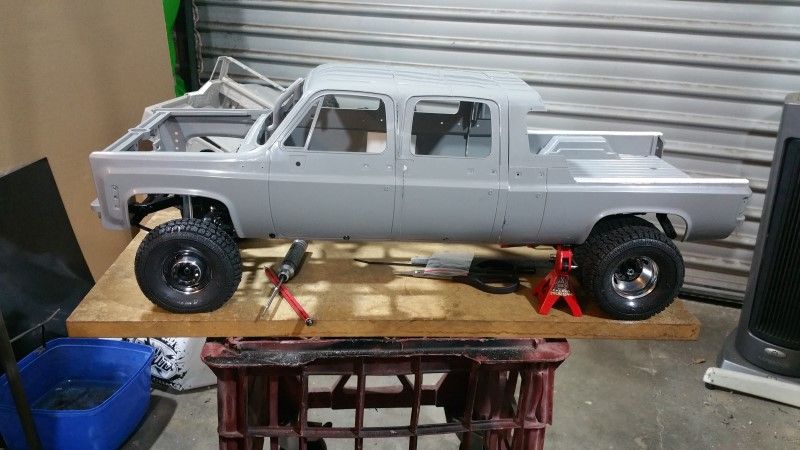 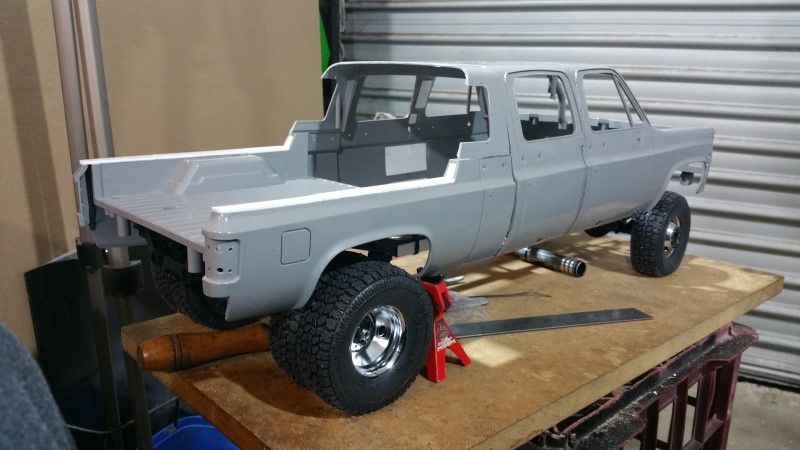 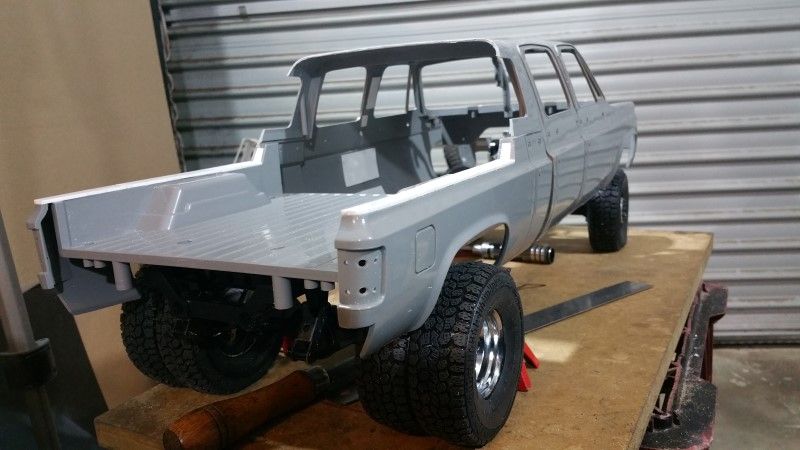 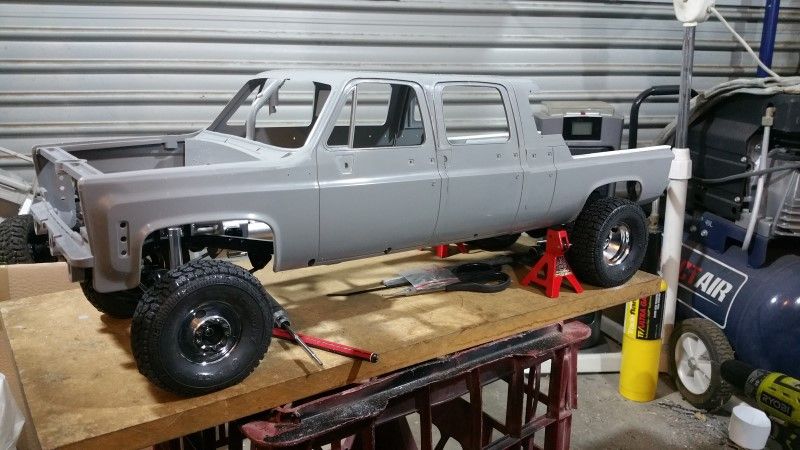 This last pic is the one that helped me decide about the bed width. 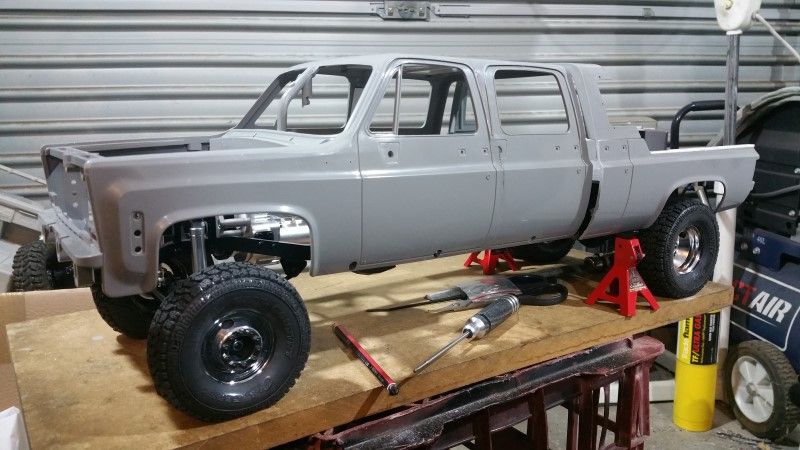 Cheers H2Micr0 |
| |  |
| | #10 |
| Rock Crawler Join Date: Jan 2013 Location: Australia
Posts: 541
|
I was hoping to get out on the trails today (Sunday here in Australia) but, the weather isn't playing nice and it is raining. But that means, more Garage time!!!!!! I decided to get started on the bed modifications. Yes, more hacking and cutting to come!!! But, instead of just hacking away, I spent a few minutes looking at the structure of the bed. If you look carefully at the below photo you will see the cut lines marked along the side.  The area marked to be cut is the same material that joins the sides and inner bed together. So I decided to glue in some support tabs first to help keep the alignment correct.   I also decided to make the cut in sections and glue in the cap piece in that section to keep everything in its place. The following pictures will explain it all.       I then went ahead and completed the same work to the other side. Had to line it up behind the cab to see how it looks.      Still undecided about wide or standard bed width. So now I have the body parts in the right configuration, it was time to see about mocking it all up on the chassis. Stock TF2 Chassis.  TF1 + TF1 configuration =?  I need to add in around 140mm and after a bit of scrounging through my metal box found some U Channel Alloy that proved to be a nice snug fit over the rails.  Now we get a glimpse of how awesome this rig is going to look.     This last pic is the one that helped me decide about the bed width.  Cheers H2Micr0 |
| |  |
| | #11 |
| Rock Crawler Join Date: Jan 2013 Location: Australia
Posts: 541
|
I wasn't happy with the rear of the bed so the dremel got fed again. 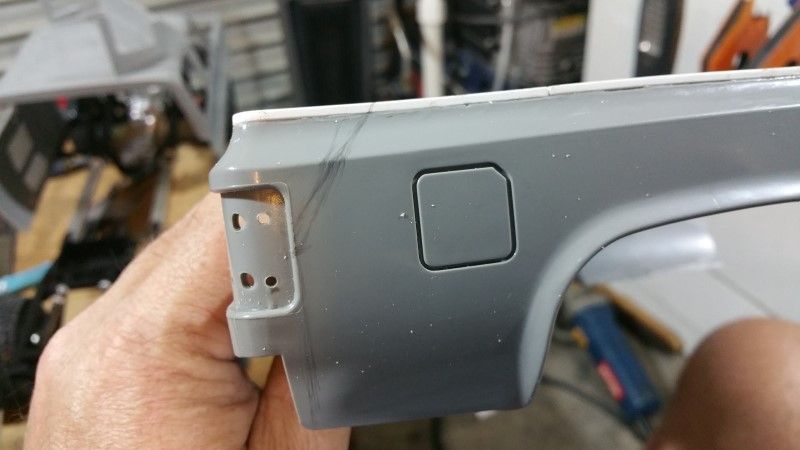 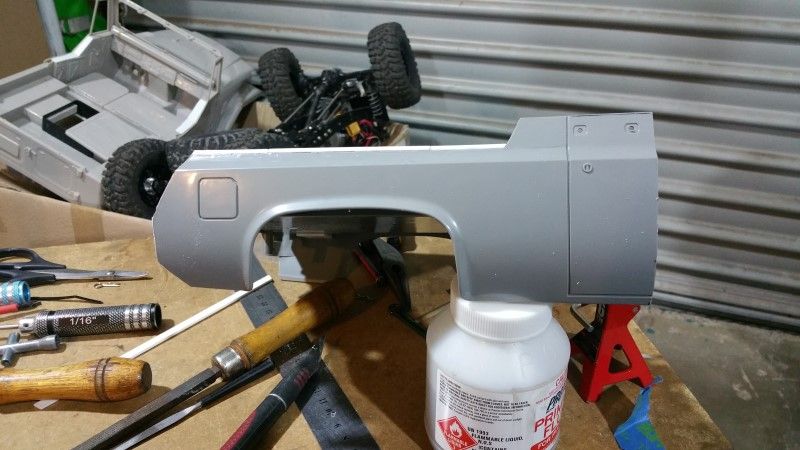 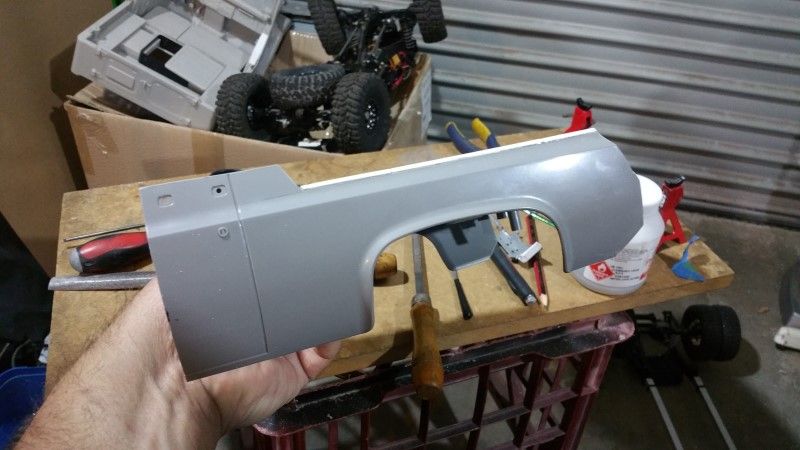 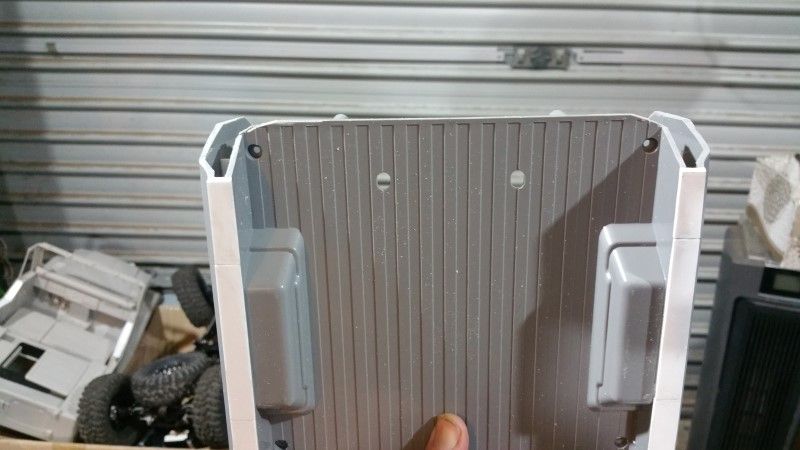 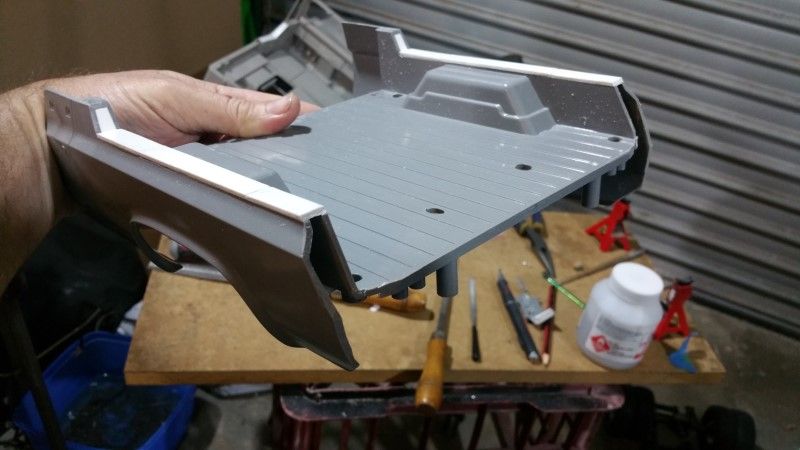 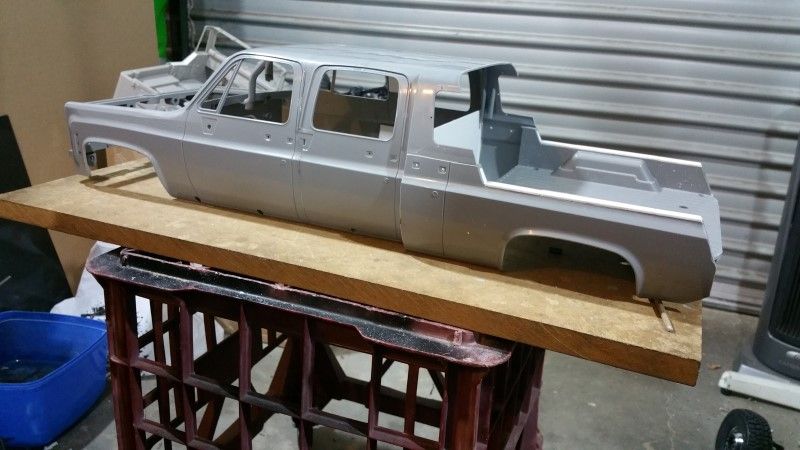 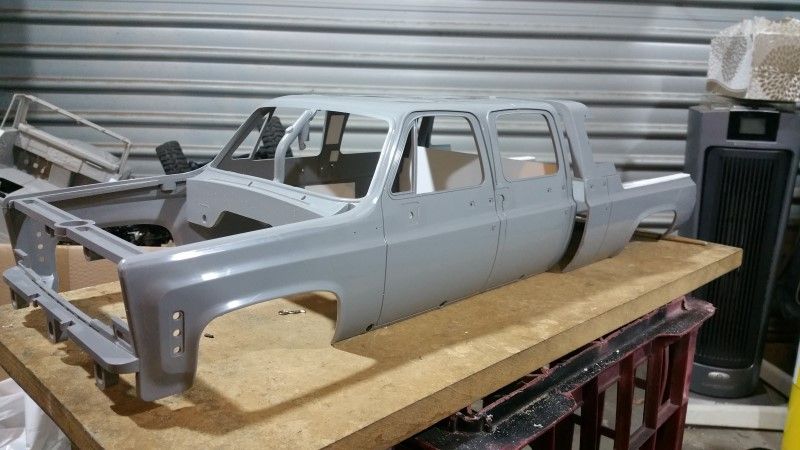 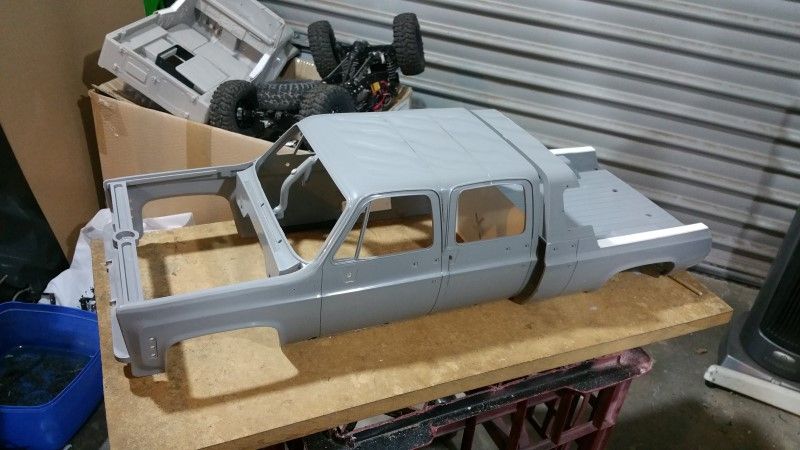 Then I installed some caps over the ends. A full metal rear bumper will be built later. 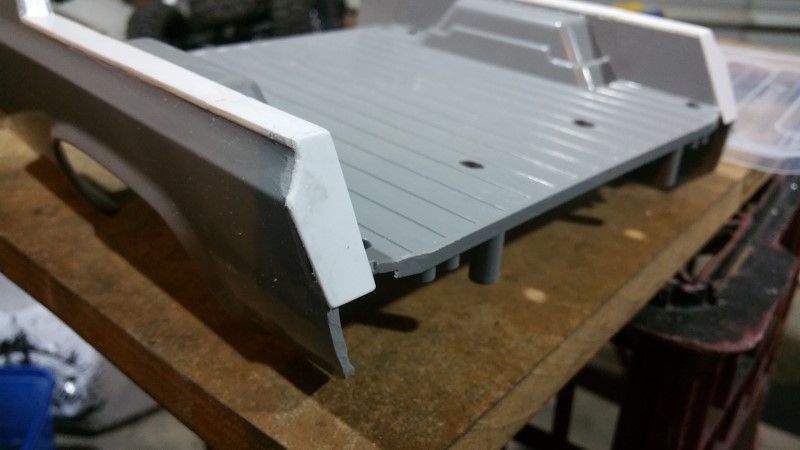 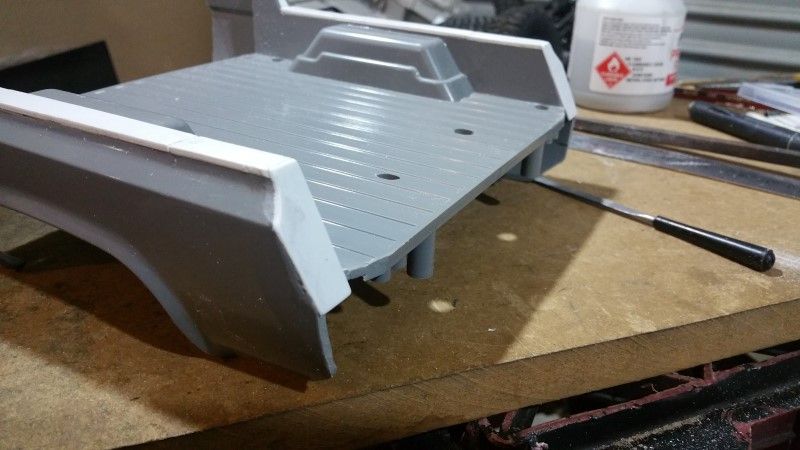 One complete custom rear bed. 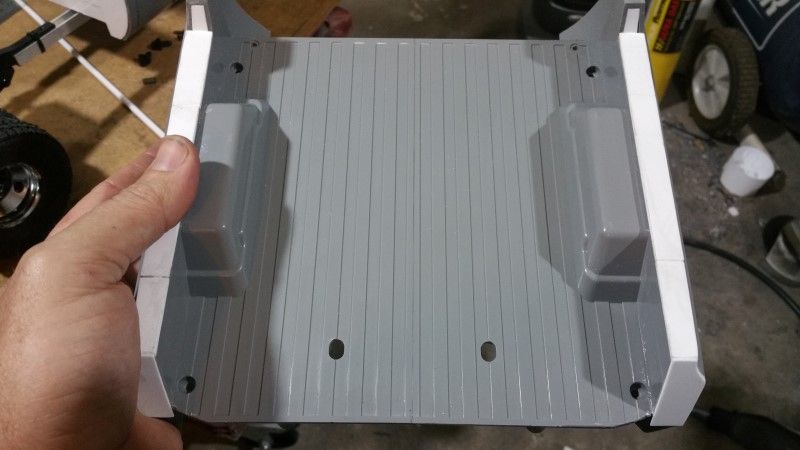 Oh dear. 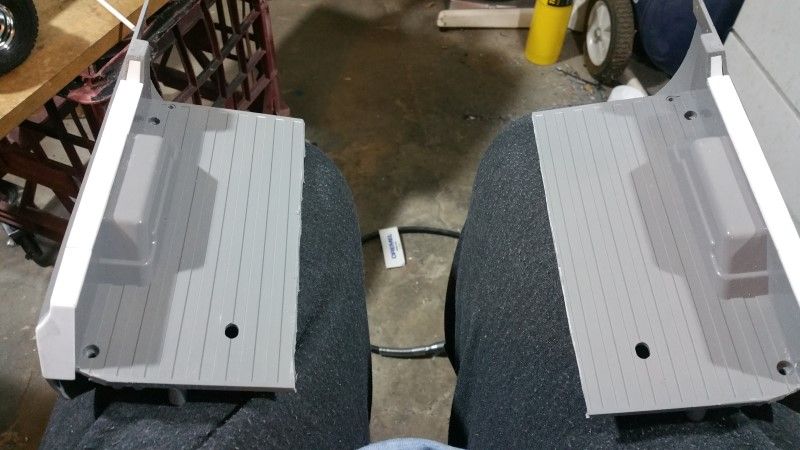 Very fitting I think. 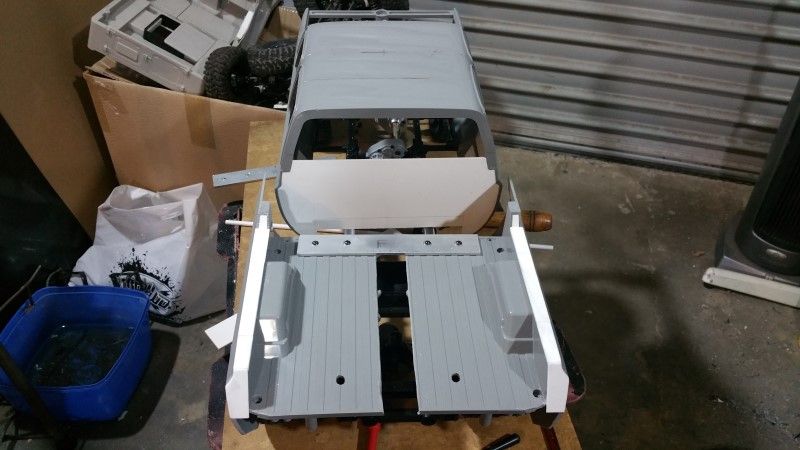 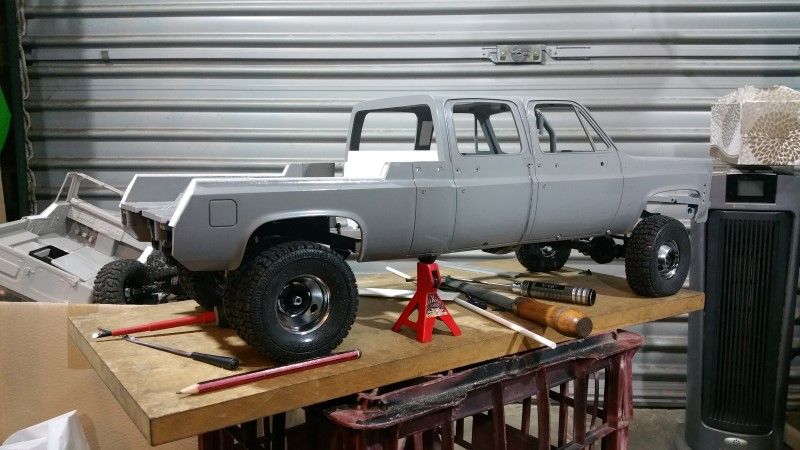 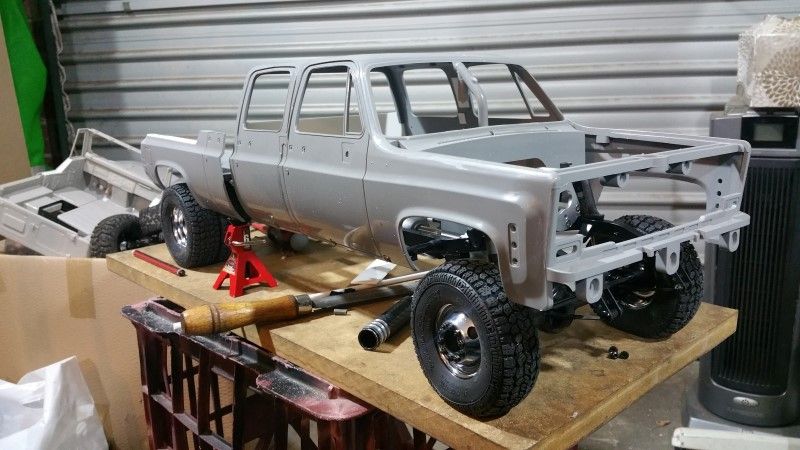 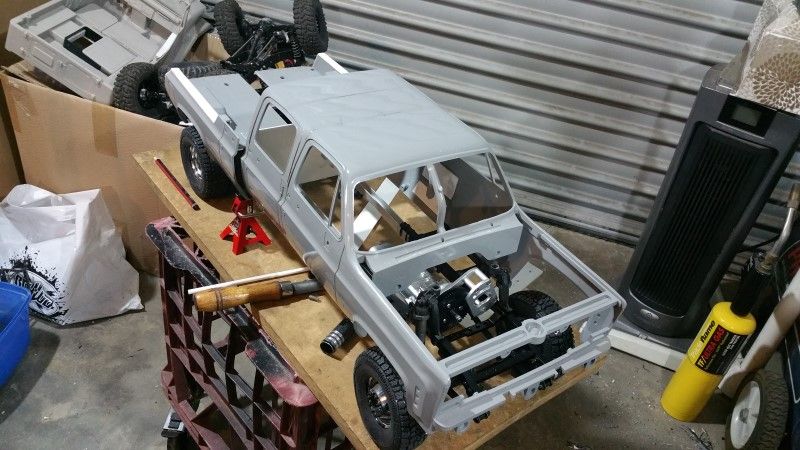 Tyre coverage is about right. 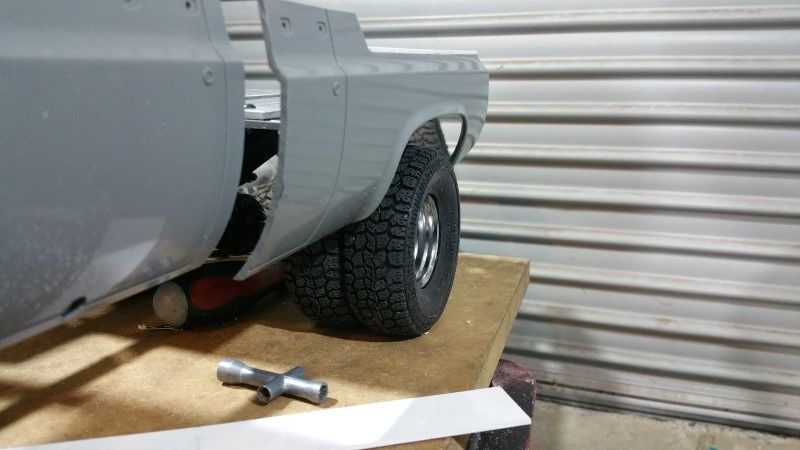 I also glued in the rear cab wall. 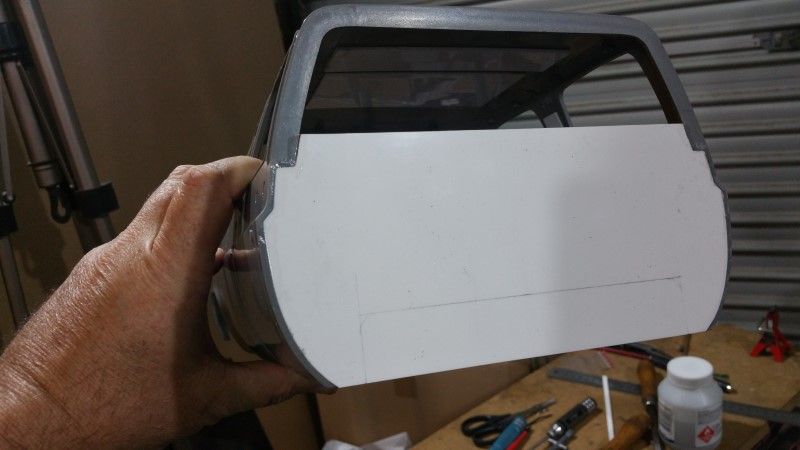 And the TF2 Front suspension was fixed. SCX10 Shocks and Shock hoops, and longer leaf spring shackles. Now the suspension can actually articulate. I installed some wider hexes on the front to push the track out a touch. 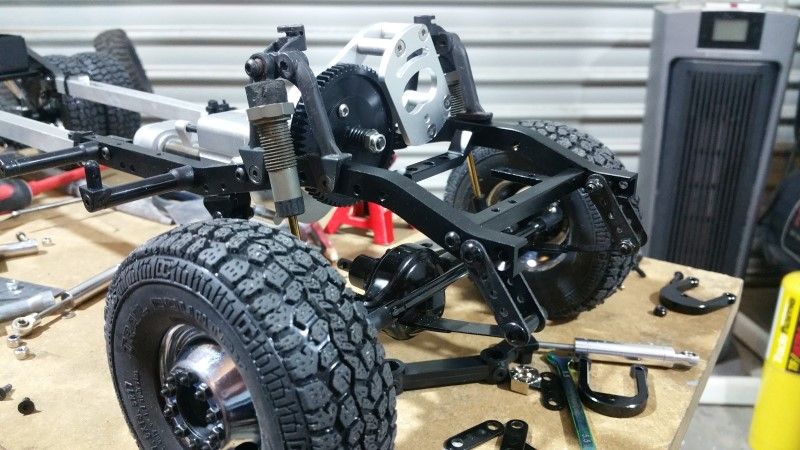 Cheers H2Micr0 Trailworx Garage |
| |  |
| | #12 |
| Rock Crawler Join Date: Jan 2013 Location: Australia
Posts: 541
|
I wasn't happy with the rear of the bed so the dremel got fed again.         Then I installed some caps over the ends. A full metal rear bumper will be built later.   One complete custom rear bed.  Oh dear.  Very fitting I think.     Tyre coverage is about right.  I also glued in the rear cab wall.  And the TF2 Front suspension was fixed. SCX10 Shocks and Shock hoops, and longer leaf spring shackles. Now the suspension can actually articulate. I installed some wider hexes on the front to push the track out a touch.  Cheers H2Micr0 Trailworx Garage |
| |  |
| | #13 |
| Rock Crawler Join Date: Jan 2013 Location: Australia
Posts: 541
|
With the bed width sorted I turned my focus to the topper, which was now too narrow to fit on the bed. It is also too short as it needs to be taller than the cab roof to give it the right proportions. The topper piece was cut off the front of the Blazer rear roof section. So I cut off some more bits to use them as the angles and curves in theory should be a close match. This piece would normally be under the rear side window. I used the dremel to remove and flatten a section of the inside area and then did the same for the same location of the topper. 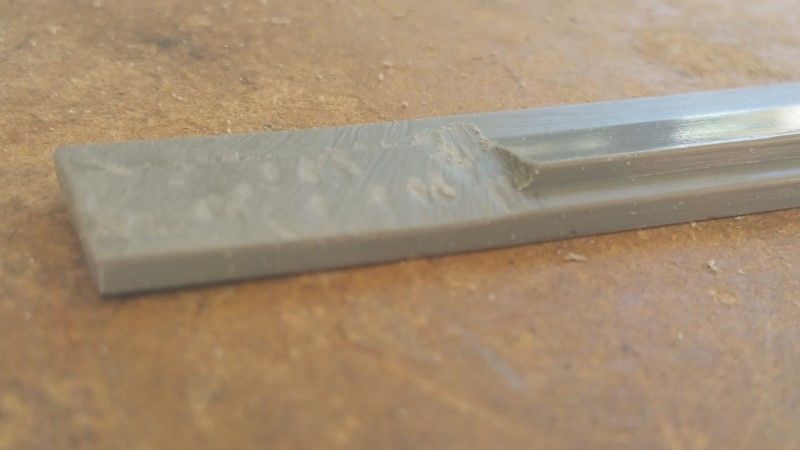 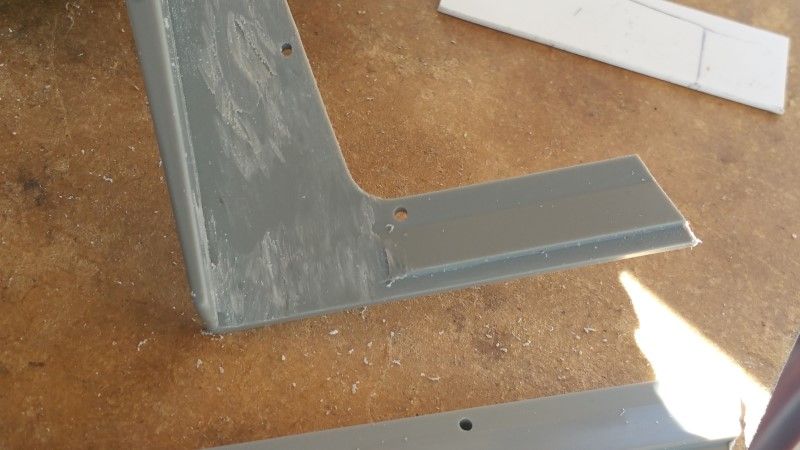 This is how they will go together, adding around 12mm to the total height. 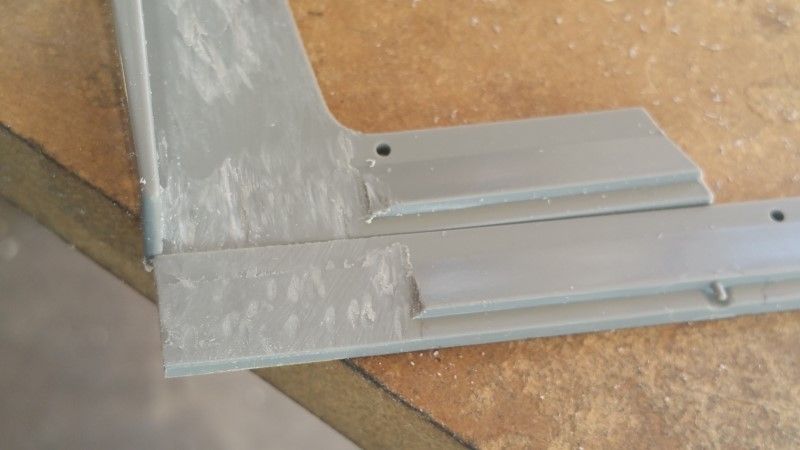 You can see how I joined these parts on the other side. 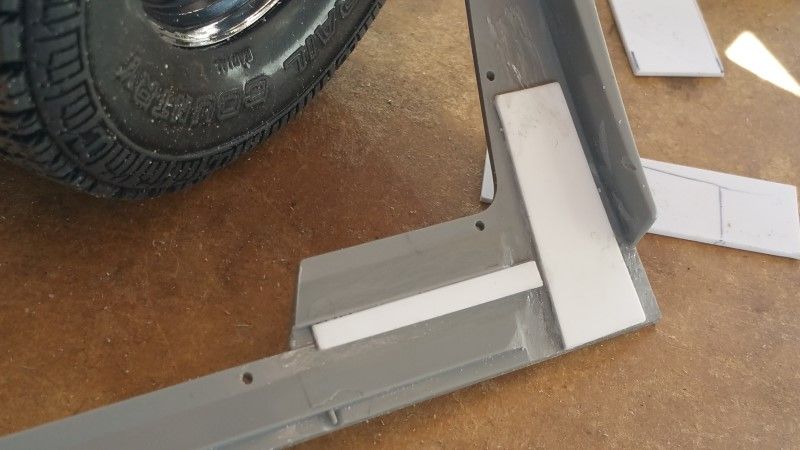 That seems to be doing the trick. 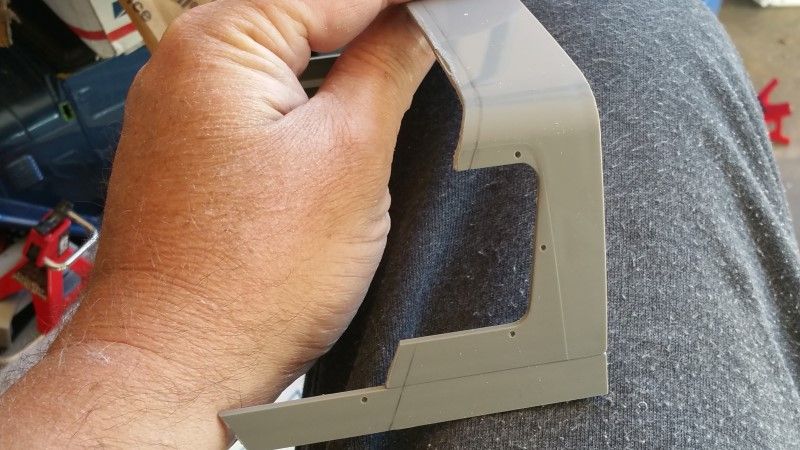 You can see in the above pic where I have marked a cut line. By inserting extra material to raise the height, the angle to match the bed is now out. This was trimmed until it was close. Then I took a perfectly good piece of custom topper and cut it in half. It is really the only way to make the whole wider by around 24mm. 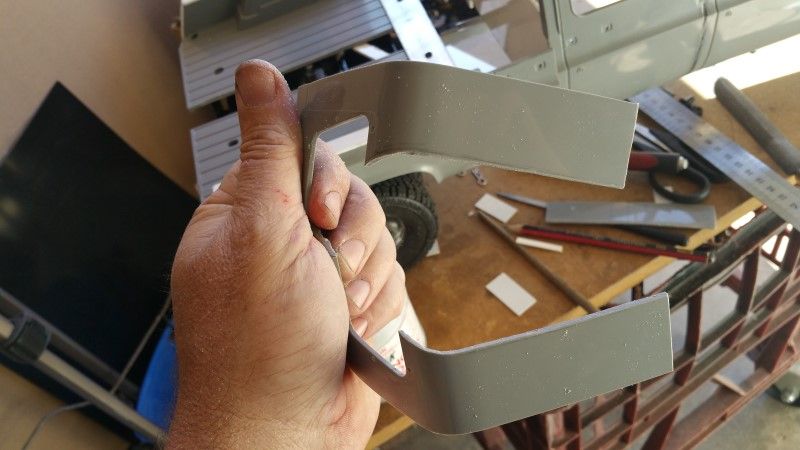 Then using a piece from the matching roof from the Blazer rear roof I joined them back together. Here you can see it being test fitted. 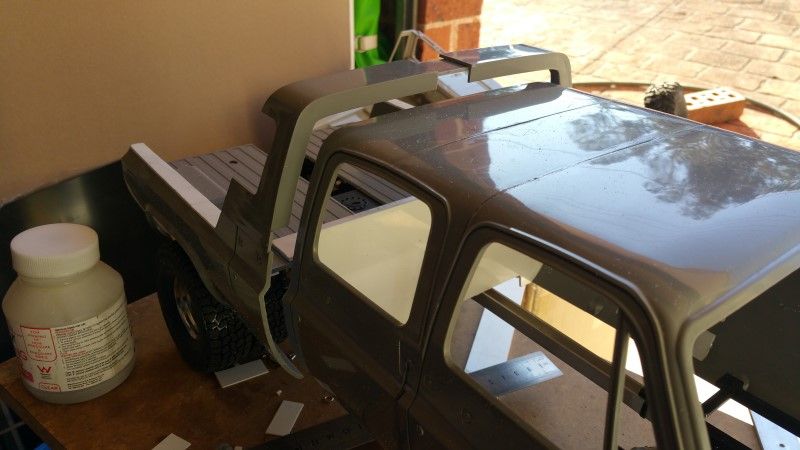 Of course it looks a bit unsightly, so I carefully filled in the gaps. 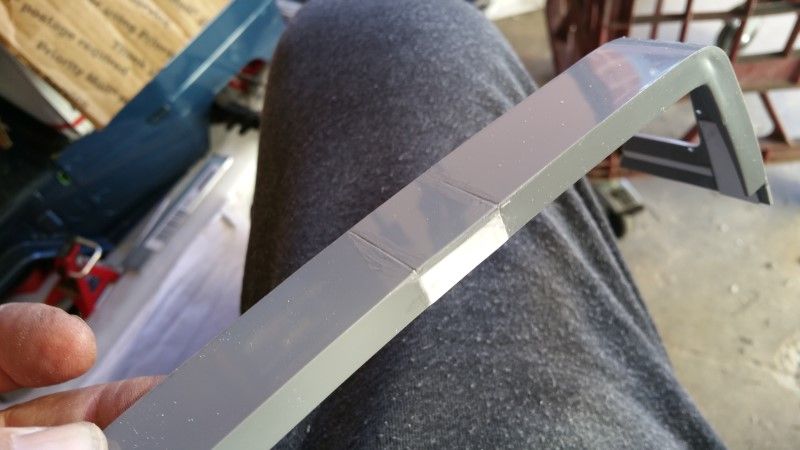 And some pics of it quickly dummied up on the truck. 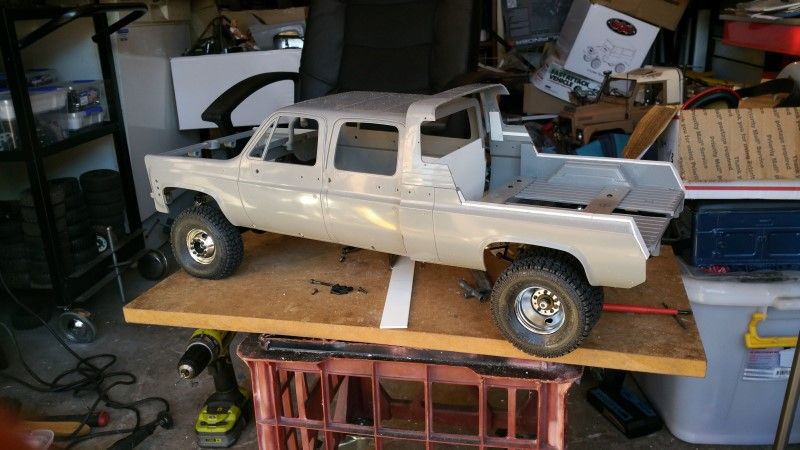 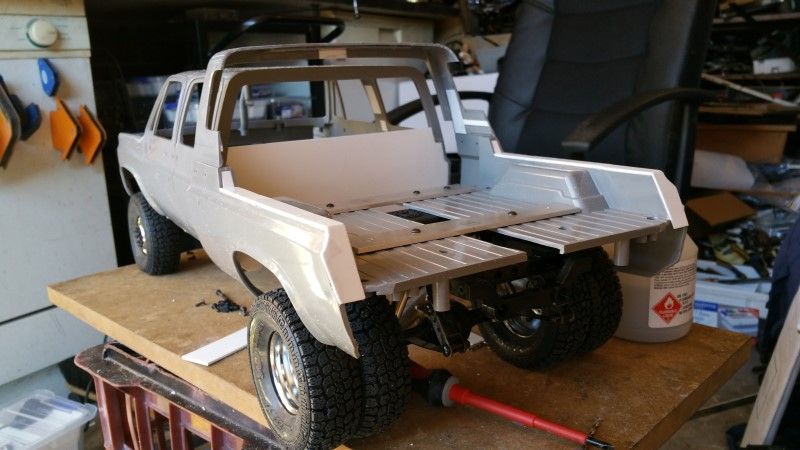 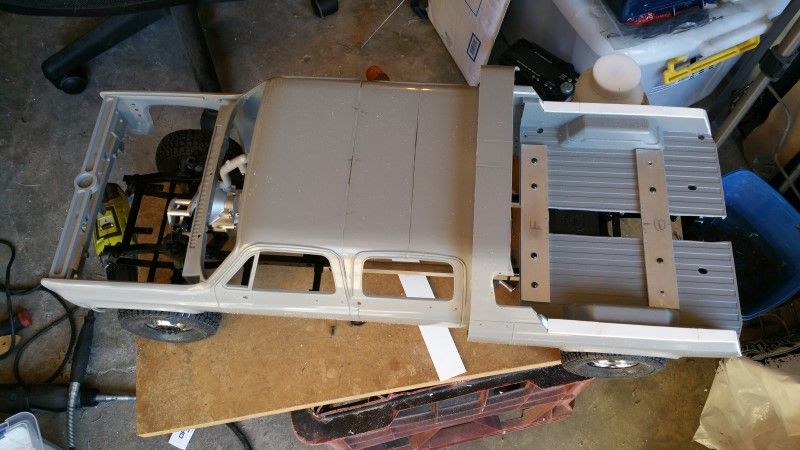 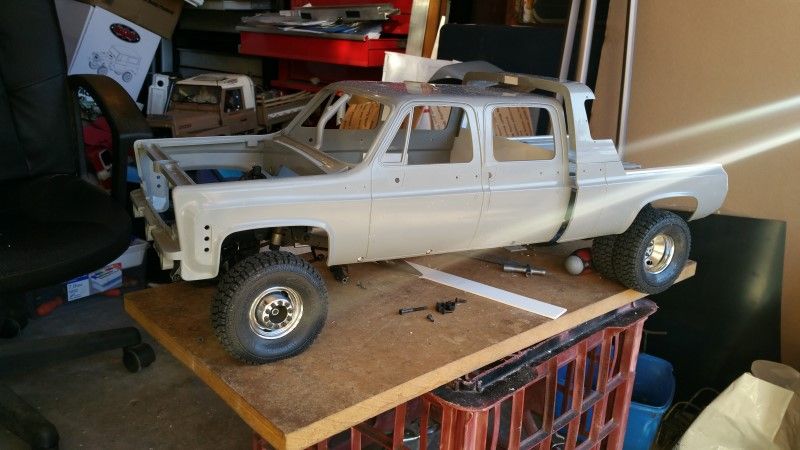 When I started this morning I wasn't really sure I could make this work. Very pleased with how it has turned out. Oh, and I ordered some number plates for the Chevy. 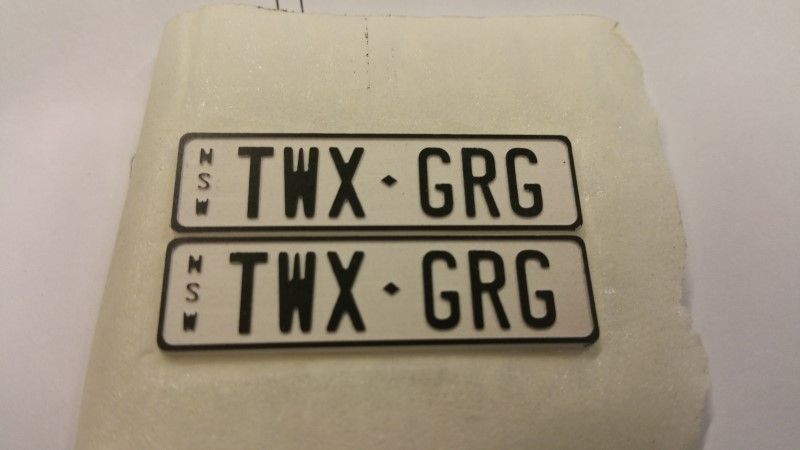 Cheers H2Micr0 |
| |  |
| | #14 |
| Rock Crawler Join Date: Jan 2013 Location: Australia
Posts: 541
|
Hi All. I have been working on other projects but did get some work done on the chassis and drivetrain. I ordered in a carrier bearing. 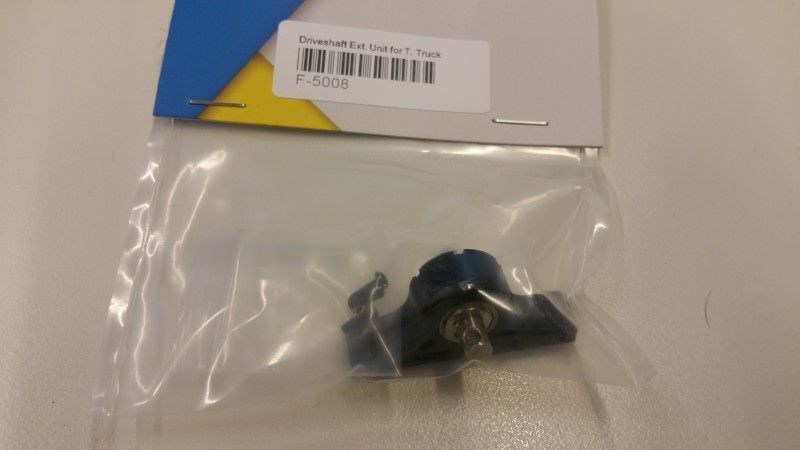 There was no way I could run a single long drive shaft to the rear axle, so this will allow me to run two instead. First job was to actually bolt the frame extension pieces to the TF2 Chassis. 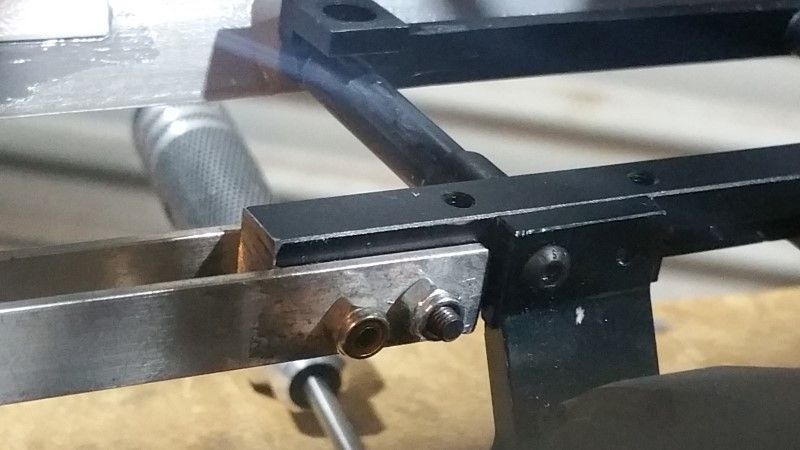 Then I used a piece of right angle alloy to mount the bearing, and to also provide a rear body mount. 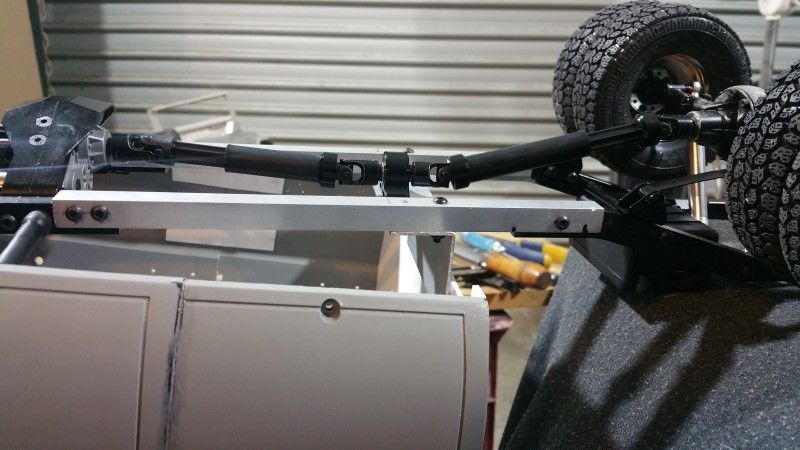 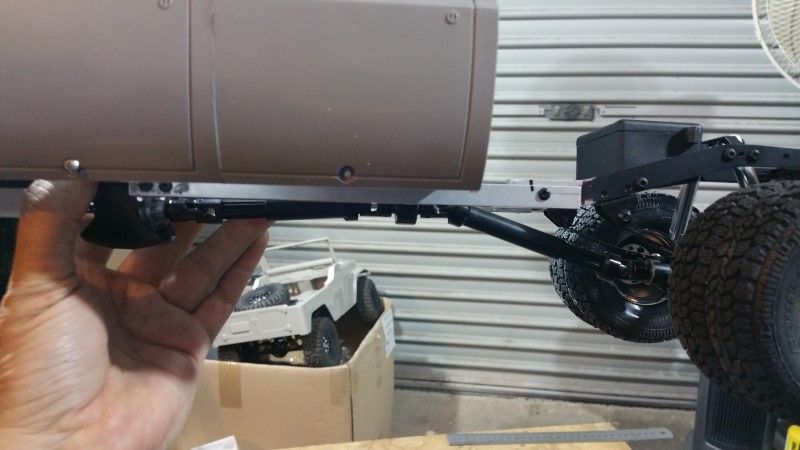 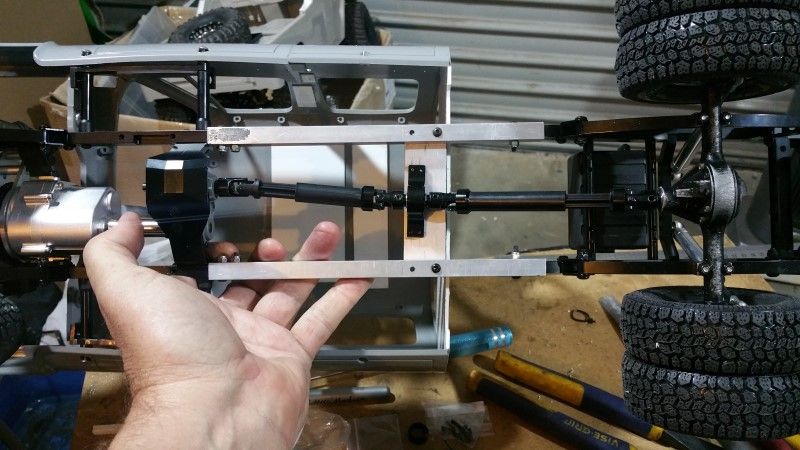 While this will only ever be a trail rig, or possibly an ST4 Challenge rig, I still am keeping in mind clearance underneath, especially given how long it is. I will be getting back to this build soon. Cheers H2Micr0 |
| |  |
| | #15 |
| Rock Crawler Join Date: Jan 2013 Location: Australia
Posts: 541
|
While put aside for a bit, I did make some progress on filling in the front wall of the bed. A mate used this new material he found at Bunnings (local hardware chain) called Handi-Art, which appears to be the same thing as Sintra or Komacell, so I grabbed a sheet. 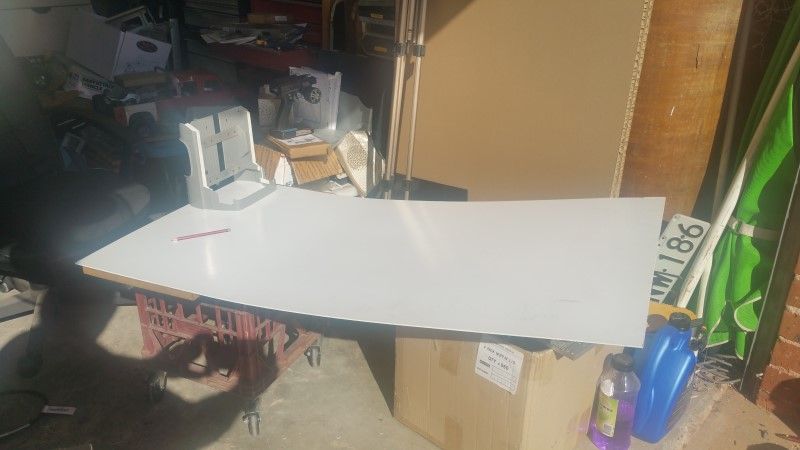 At $20 for a 1200 x 600 x 3mm sheet it is cheap. In the above pic you can see I traced around the outside of the bed to get the shape I needed. Using a hobby knife I cut out a piece slightly larger than the outline. 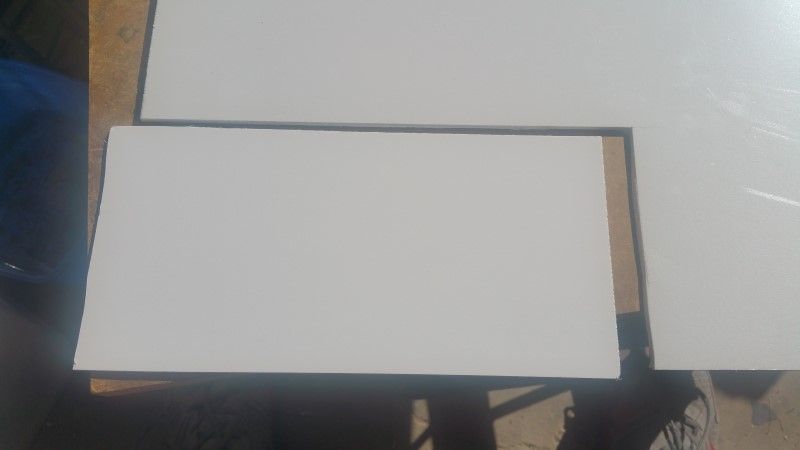 I fired up the dremel and was able to cut out the shape close to the line. 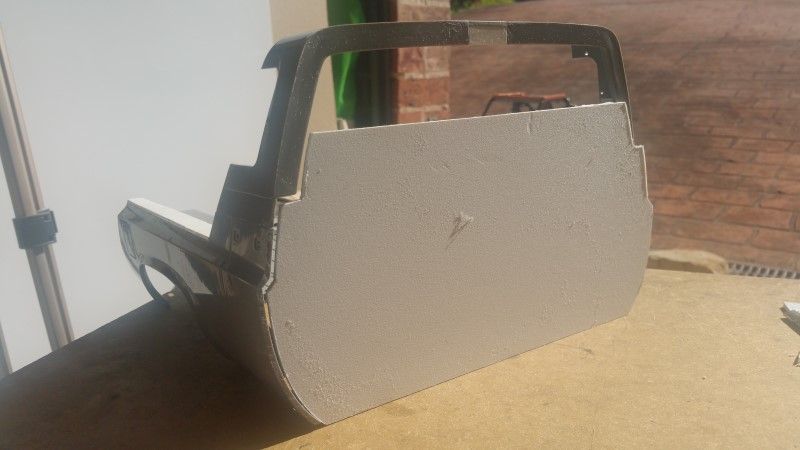 This product cuts nicely with the dremel and doesn't end up with melted dags and balls of plastic behind like styrene does. After a few minutes of file work and a touch more gentle dremel action, I had it pretty close. 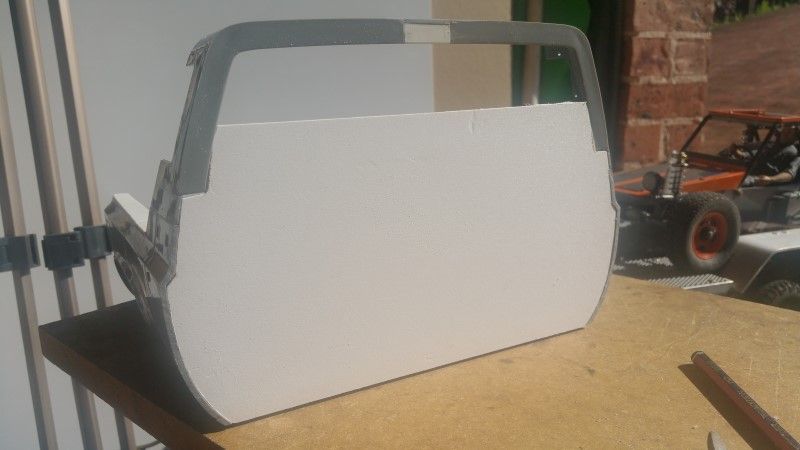 The top was left high deliberately so I could cut it to the correct height to match the cab window opening. I also marked and cut the lower section to clear the chassis before gluing into position. 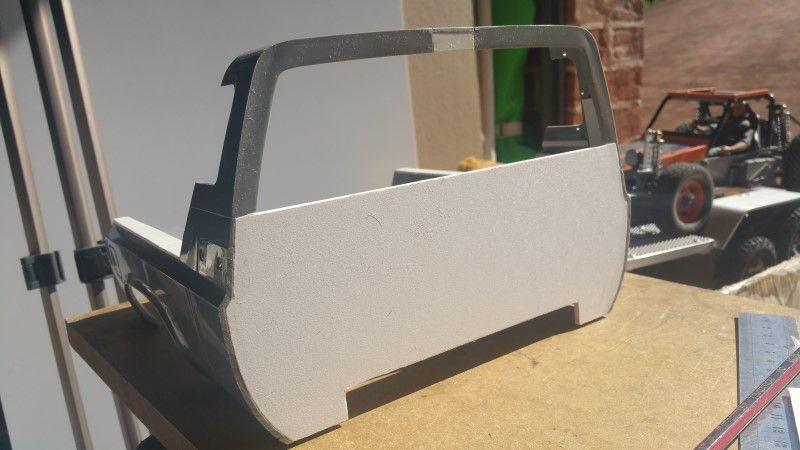 This material glues in just like styrene using the same MEK based solution. Looks much better with the wall in place. 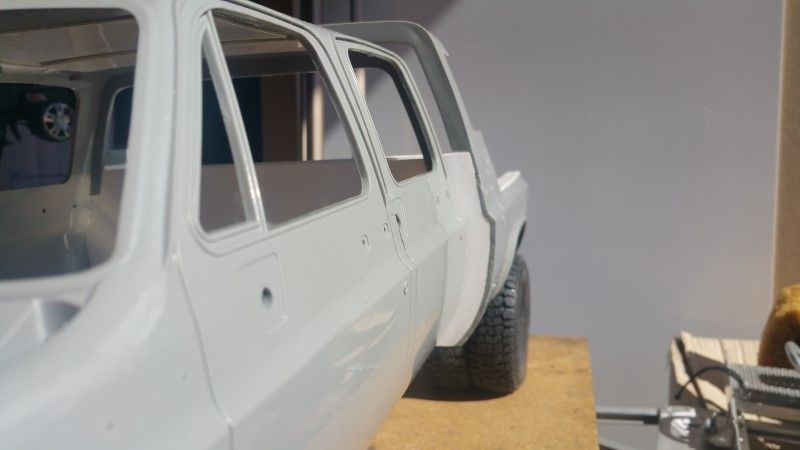 Next step I think will be mounting the bed and cab together to the chassis. Cheers H2Micr0 Trailworx Garage |
| |  |
| | #16 |
| Rock Crawler Join Date: Jan 2013 Location: Australia
Posts: 541
|
I actually had to dust this off, literally. 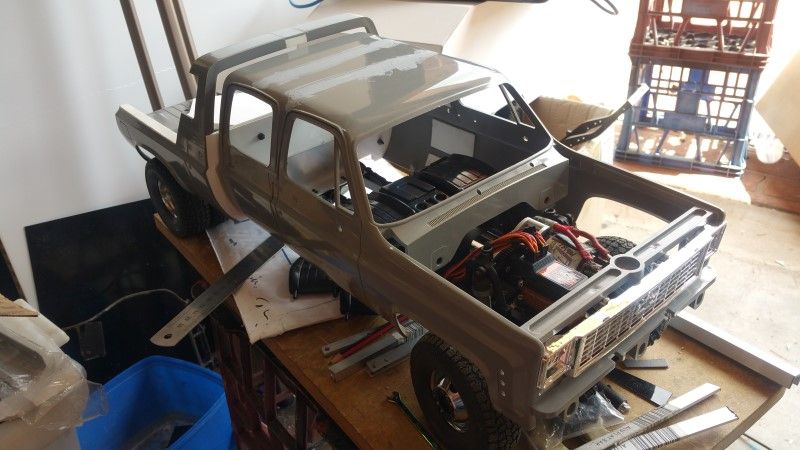 Sad state of affairs I know. Having started and finished the HJ47 Crew Cab, and the WJ Grand Cherokee, a few minor upgrades on D110 and FJ40 Shorty, I figured that now I have gained some confidence with the Komacel/Handiart material, I got to work on the interior. 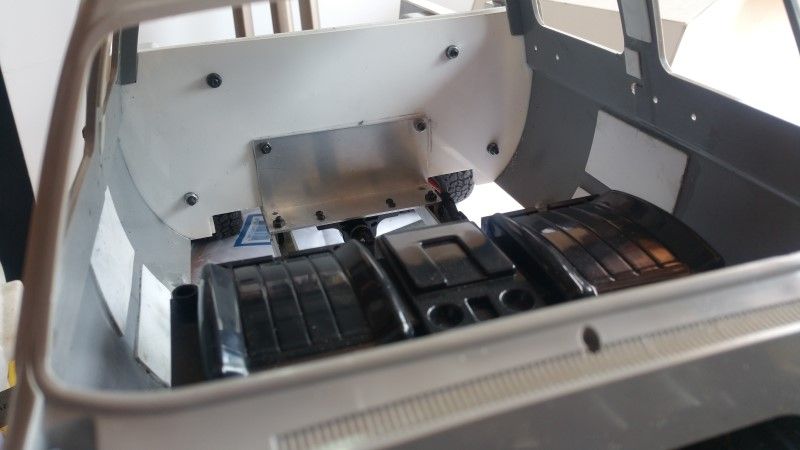 While sitting and pondering on just how this was going to be achieved I applied some filler to the gaps in the body joins. Knowing this will dry and shrink several times, I thought I would get a head start on it. 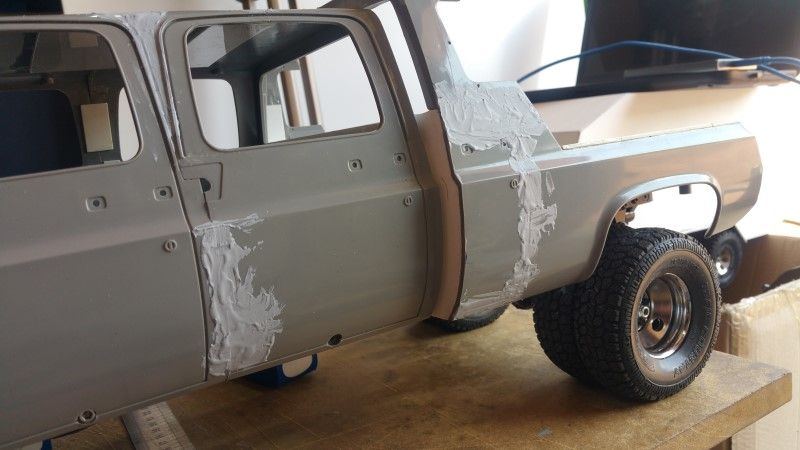 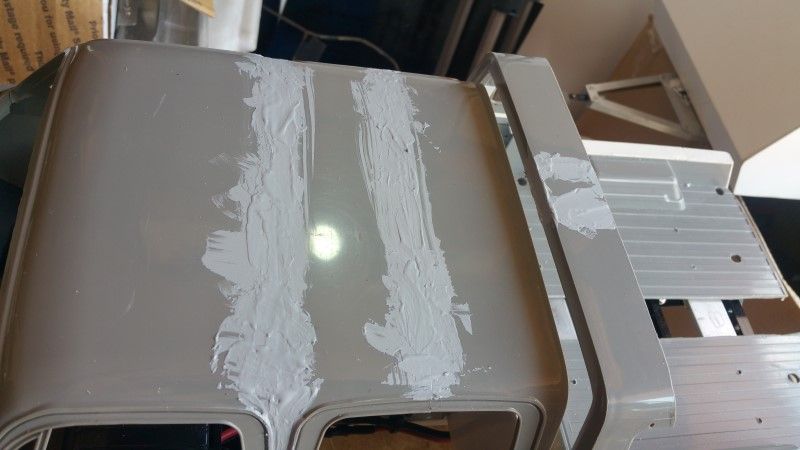 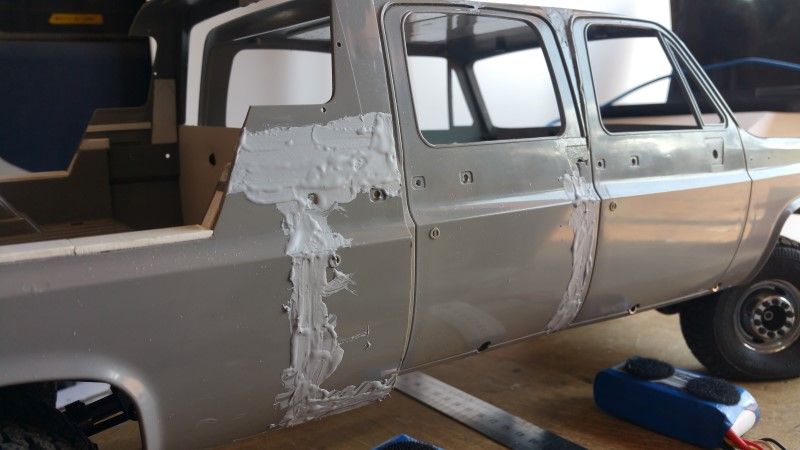 I did make a rear floor section that bolts to the chassis, but don't appear to have a photo of it. There is more to do in that area so will get one next time. With the floor height established it was time to make a rear seat. The bench seat in the back of these Crew Cab Chevys appears to be pretty much just a simple bench, so I set about emulating that notion. I started by making the base shapes, laminating pieces of the Komacel together. 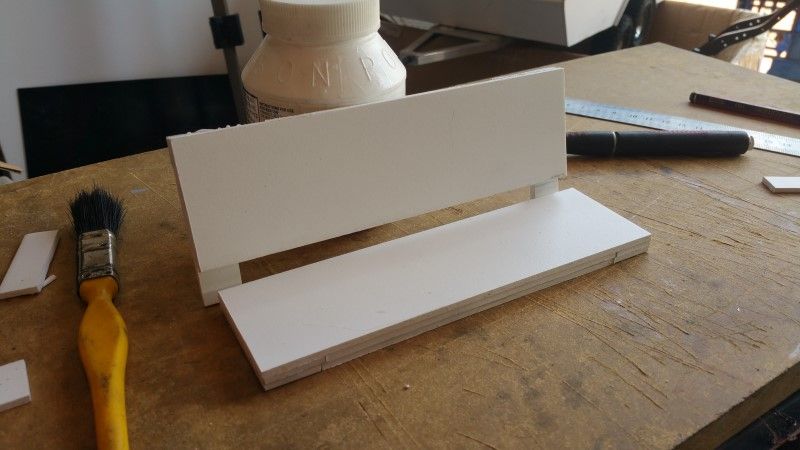 Using a grinding stone in my dremel, I shaped the seats and made the pattern similar to a factory vinyl I found on the internet. 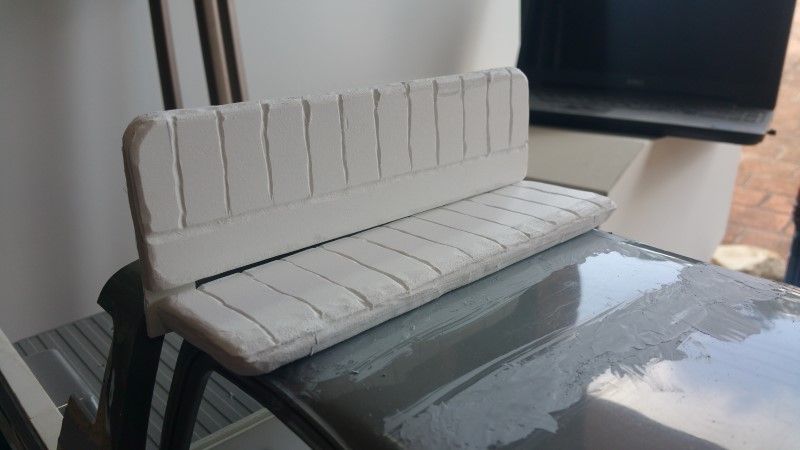 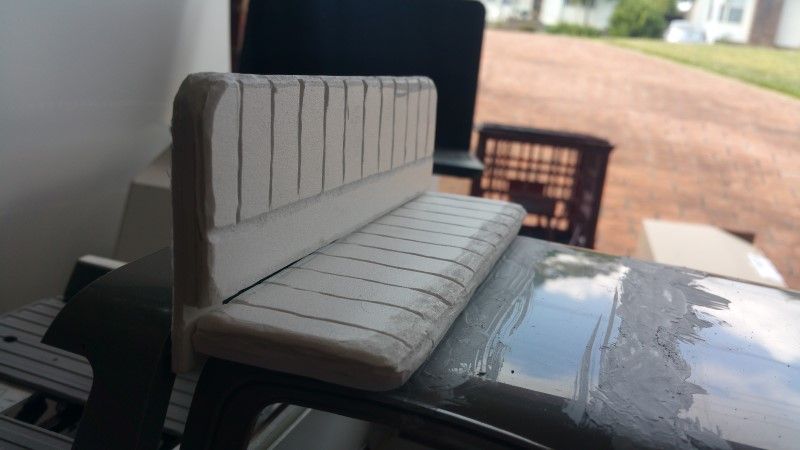 I then made a riser for the base and seat back, and glued it all together so the rear seat is now one piece, and sat it quickly in place to get a feel for the fit and overall look. I LIKE IT!!!!! 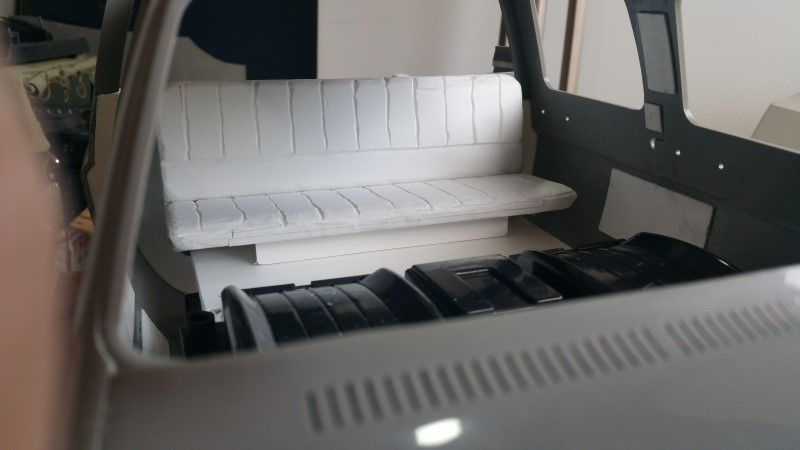 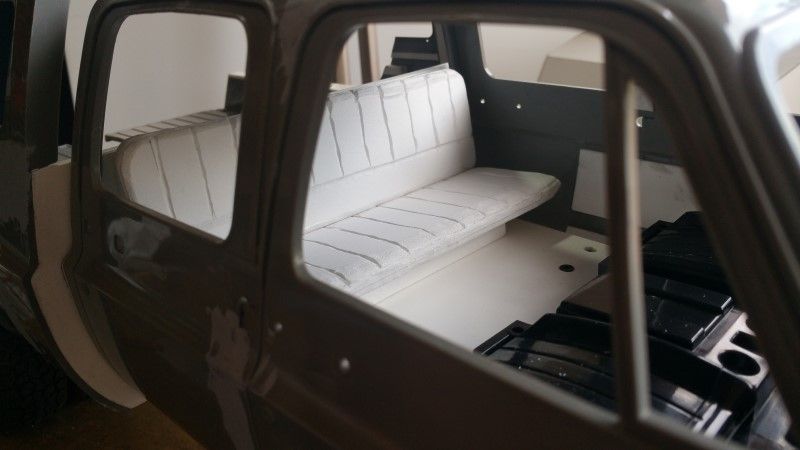 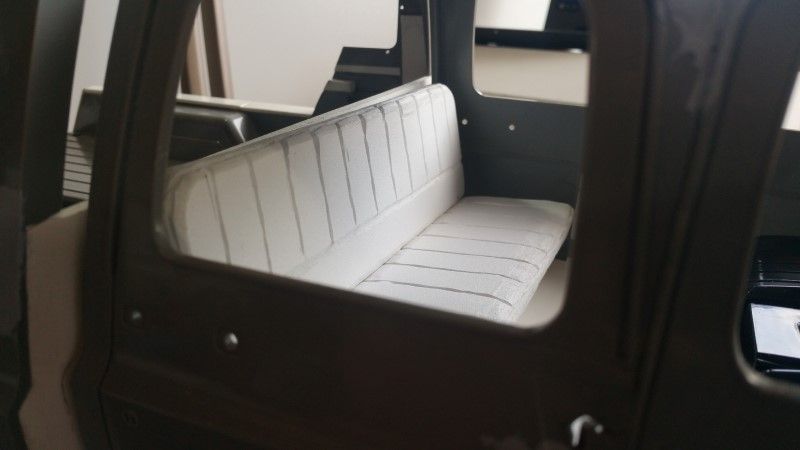 It is good to make some progress on this rig. ############################################# OH, I forgot, the K30 is now a driver. I actually did this weeks ago, then a Jeep distracted me. I gathered a collection of parts to use. The ESC is an AE2, with a CC BEC so I can run 3s Batteries. The motor is a 35t Integy Lathe that I installed new brushes in. I used a new spare 13kg cheap servo for the 2 speed shift. Here is the shift setup, it works great. 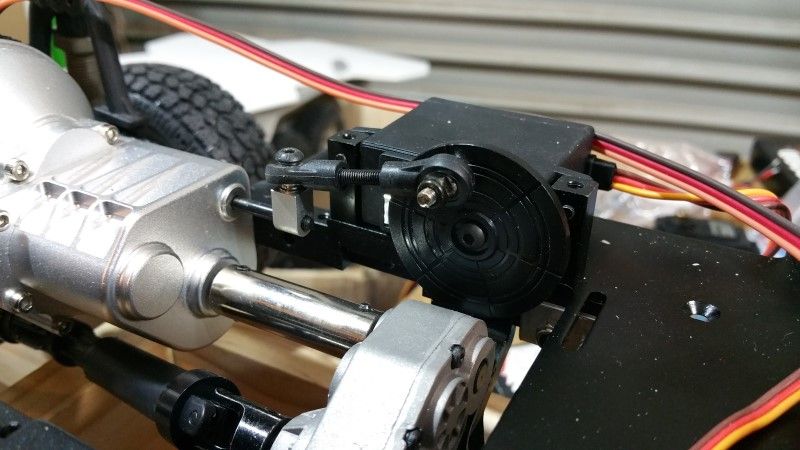 Working out the general layout and testing it all functions as intended. 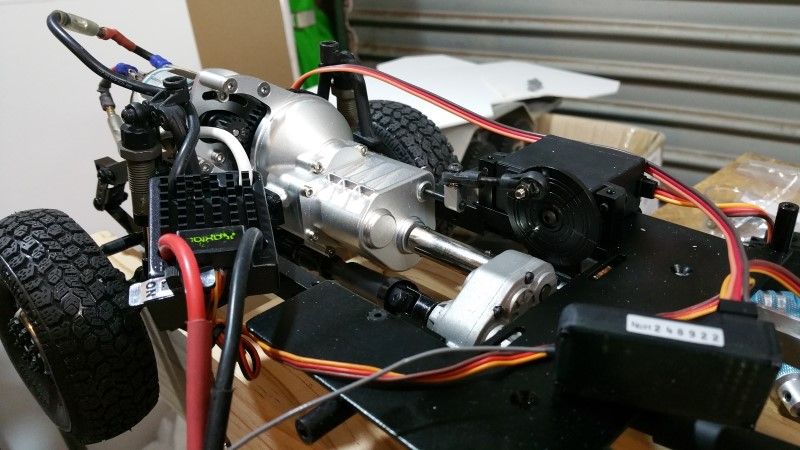 And everything in place with the wiring neatly routed. 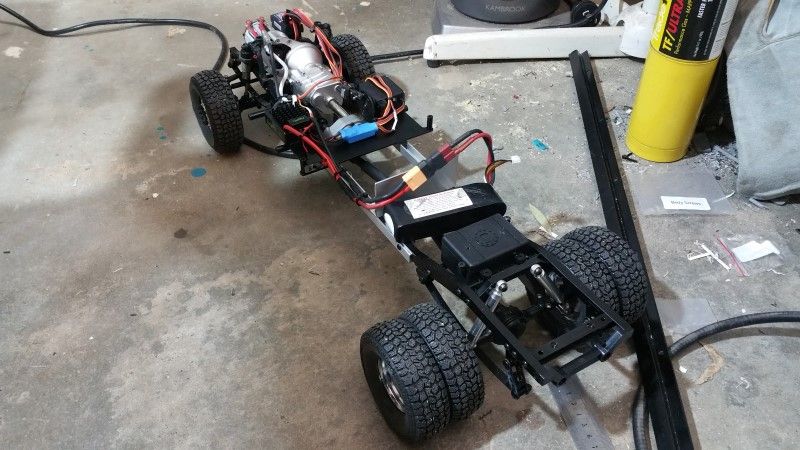 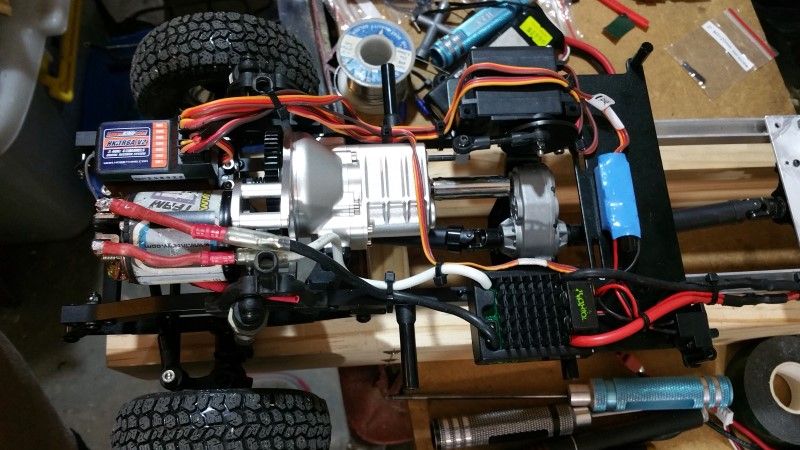 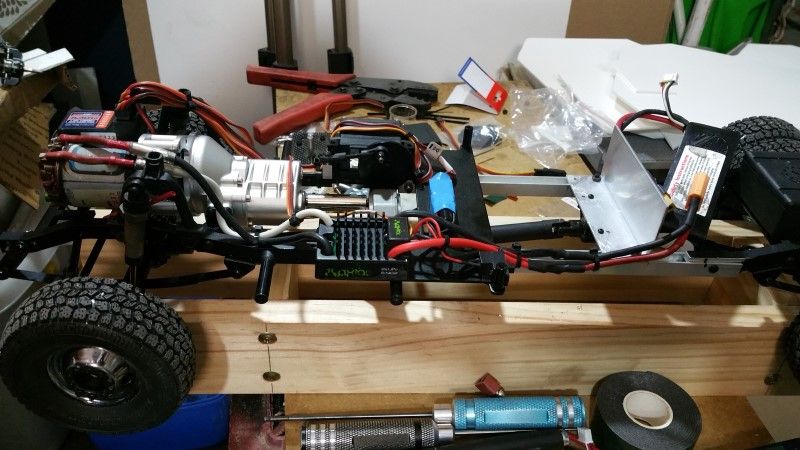 The battery is in it's approximate location. More details on that another time. It drives great, shifts gears nicely, and turns far better than ever hoped for. Cheers H2Micr0 |
| |  |
| | #17 |
| Rock Crawler Join Date: Jan 2013 Location: Australia
Posts: 541
|
With the back seat done I turned my attention to the front driver seat, and it was empty. Now that just aint right!! so I grabbed the driver and shoved him in. He fit ok with his head against the roof. Then I tried to put the body and interior on the chassis and there was no way I could align the body and chassis with a driver in place. I substituted a couple of other 7" figures but it just wasn't going to work. After rubbing my head and a Pepsi Max, some chocolate, and chips, I picked up my Dremel. You can fix most things with a cutting implement of some type right? 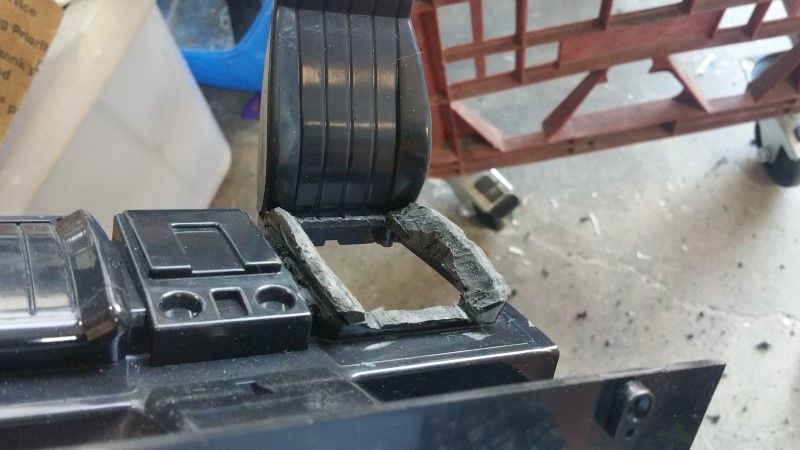 As you can see I decided to lower the driver into the seat. This gave him suitable head room. 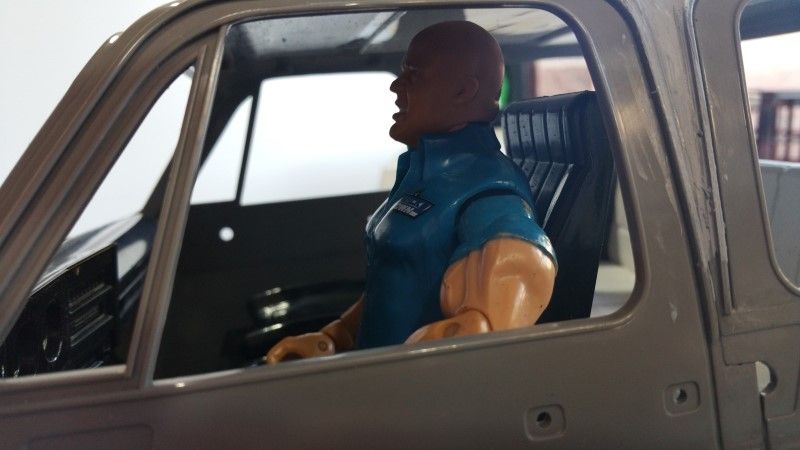 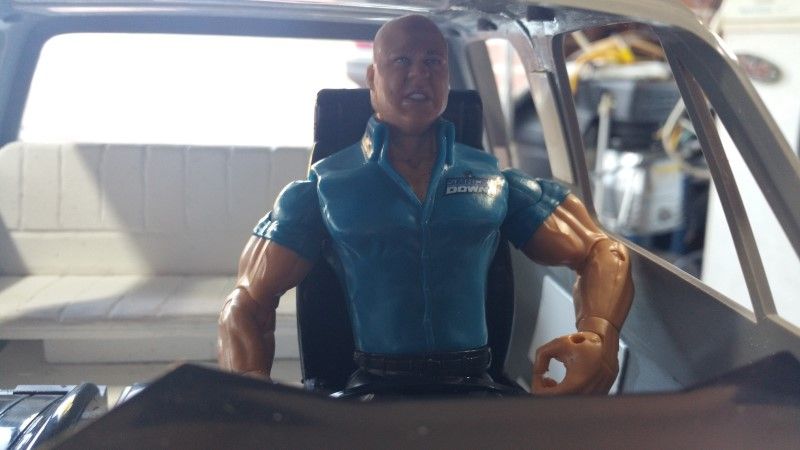 I installed the dash in the higher position like most have been doing and still needed to trim the lower return underneath the instrument cluster. 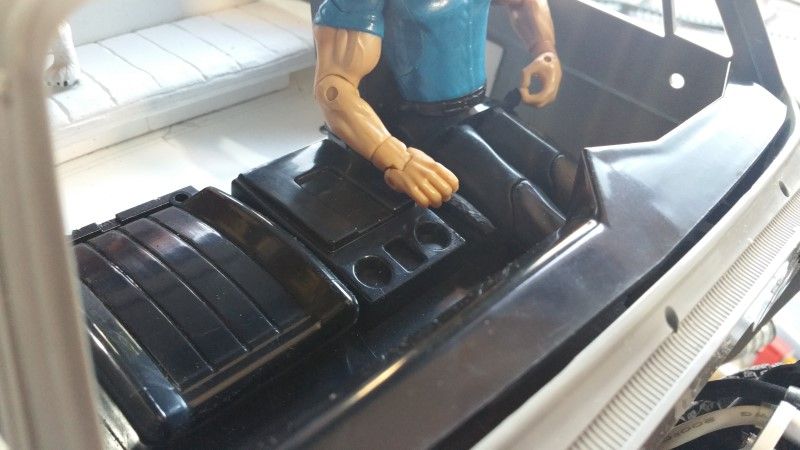 This gives you a good idea of how far down the driver now sits. 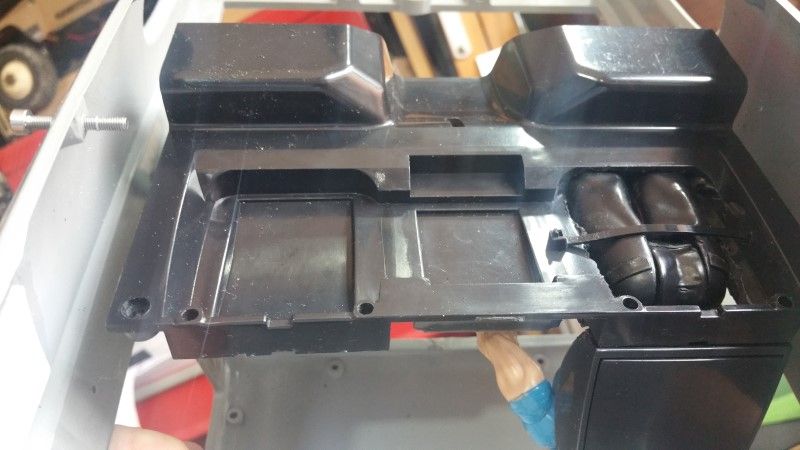 I also found a trail buddy to go in the rig. 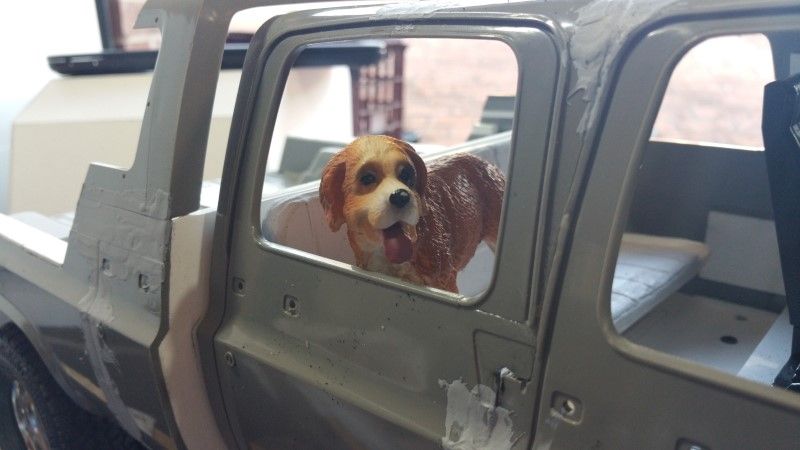 Cheers H2Micr0 |
| |  |
| | #18 |
| Rock Crawler Join Date: Jan 2013 Location: Australia
Posts: 541
|
With the back seat done I turned my attention to the front driver seat, and it was empty. Now that just aint right!! so I grabbed the driver and shoved him in. He fit ok with his head against the roof. Then I tried to put the body and interior on the chassis and there was no way I could align the body and chassis with a driver in place. I substituted a couple of other 7" figures but it just wasn't going to work. After rubbing my head and a Pepsi Max, some chocolate, and chips, I picked up my Dremel. You can fix most things with a cutting implement of some type right?  As you can see I decided to lower the driver into the seat. This gave him suitable head room.   I installed the dash in the higher position like most have been doing and still needed to trim the lower return underneath the instrument cluster.  This gives you a good idea of how far down the driver now sits.  I also found a trail buddy to go in the rig.  Cheers H2Micr0 |
| |  |
| | #19 |
| Rock Crawler Join Date: Nov 2012 Location: Charlotte
Posts: 931
|
Is it done yet?
|
| |  |
| | #20 |
| I wanna be Dave Join Date: Jan 2004 Location: Austin Texas
Posts: 3,866
|
Damn this is awesome! That body is long!
|
| |  |
 |
 K30 Chevy Crew Cab Dually Wrecker by Trailworx Garage - Similar Threads
 | ||||
| Thread | Thread Starter | Forum | Replies | Last Post |
| chevy crew cab dually | S10XtremeSR | Micro Scale Rigs | 4 | 03-22-2015 05:18 PM |
| Chevy Crew Cab Dually | makaveliks | 1.9 Scale Rigs | 222 | 11-17-2014 08:32 AM |
| |