| |
 11-04-2008, 01:12 PM
| #21 |
| RCC Addict Join Date: Jun 2008 Location: Monroe, NC
Posts: 1,547
|
Lookin good man, great craftsmanship.  |

|  |
| Sponsored Links | |
| | |
|
11-16-2008, 10:50 AM
| #22 |
| Quarry Creeper Join Date: Sep 2008 Location: Petaluma
Posts: 282
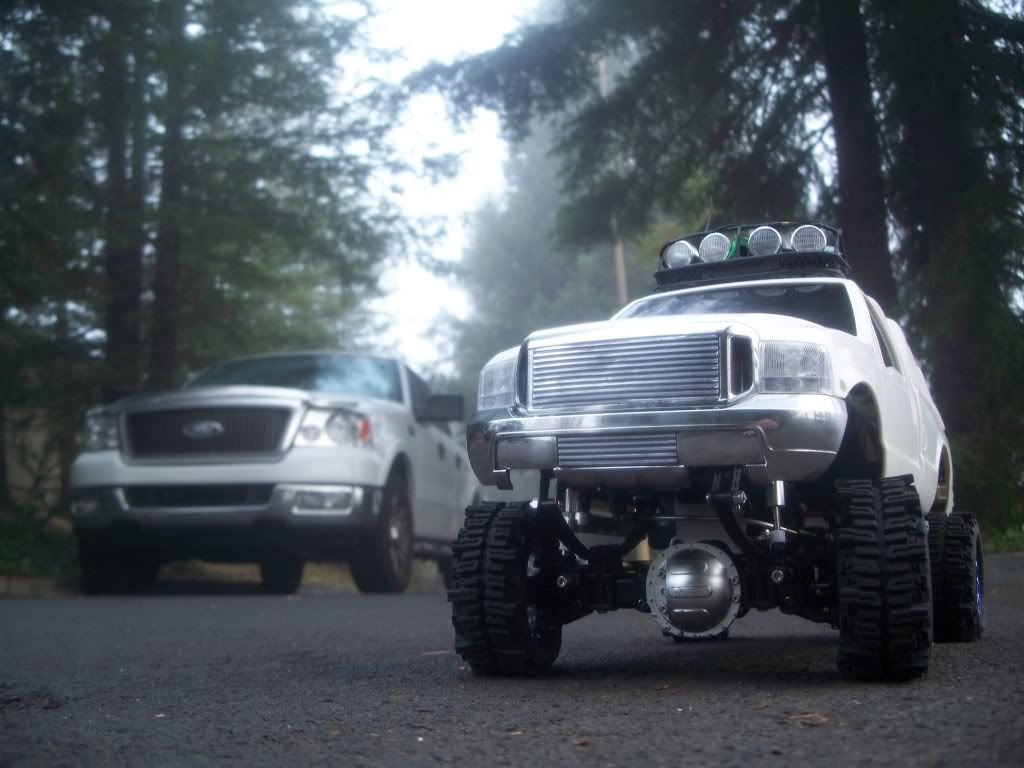
|   I was a bit distracted on the Halloween Gig this year which delayed some work on the F350. But here's the update. I needed to attach a lower bed rail plate to the f350 soft top cage in order to attach it securly to the bed. Now - all thats needed is a few holes drilled and a couple screws to the bed. 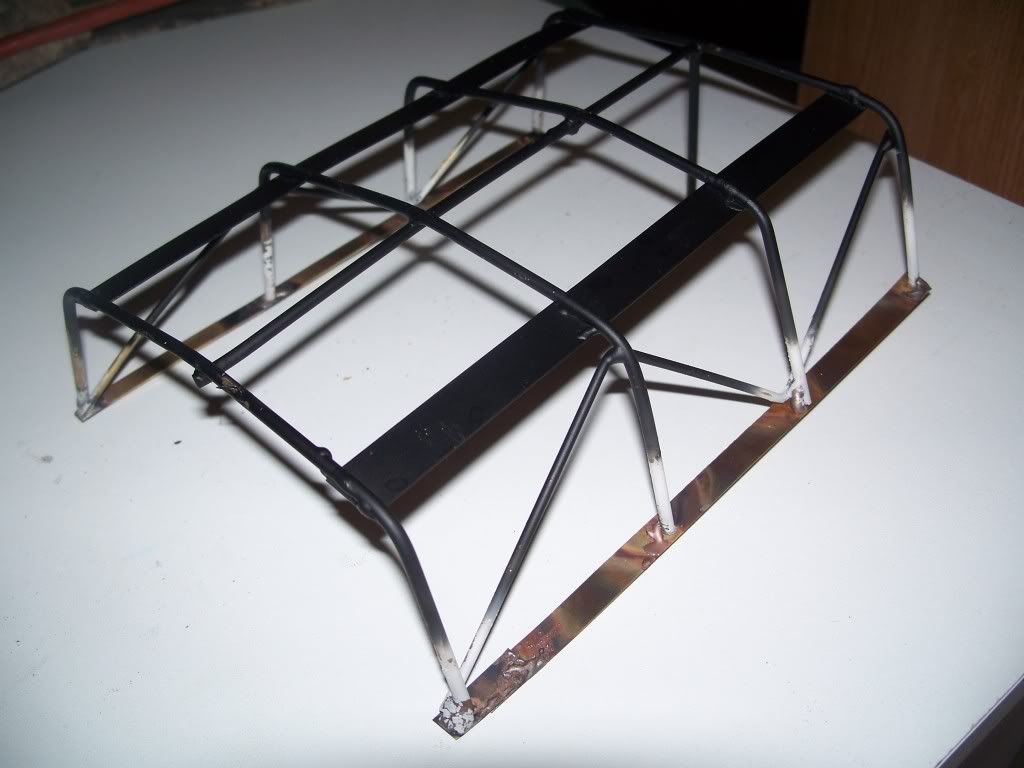  The billet grill got a paint job but theres a few touch up spots that need tending - however - you get the idea. 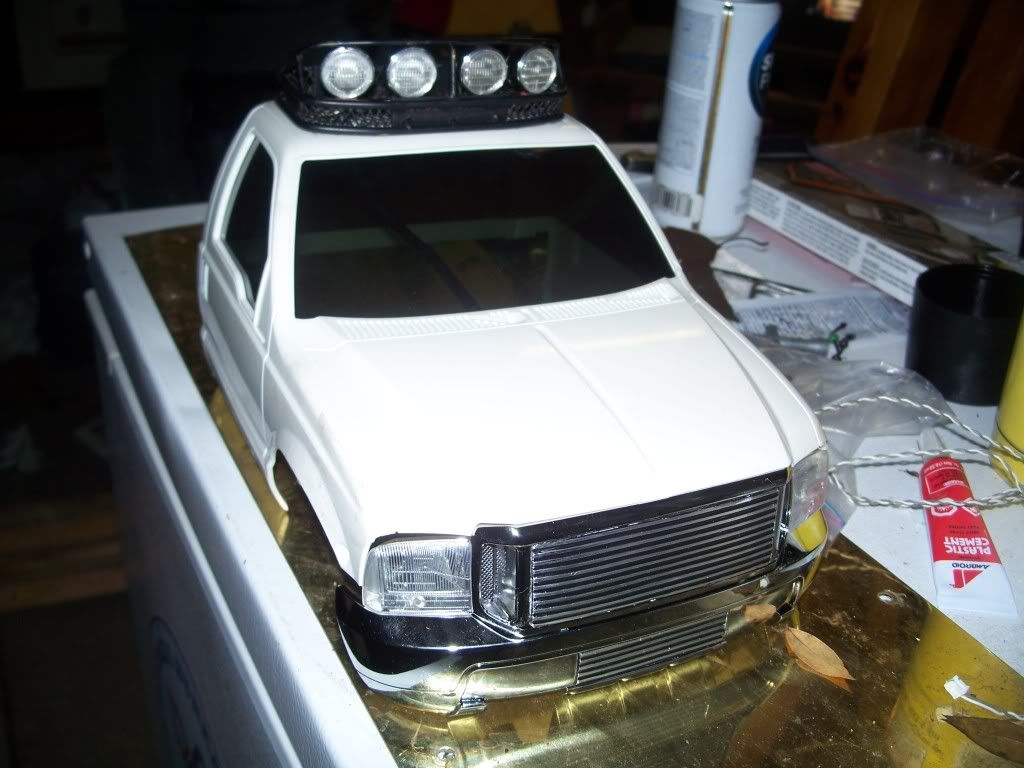 RC4WD Tires and rims came in - the weights didn't fit right in so they they needed to be a little tweaked. 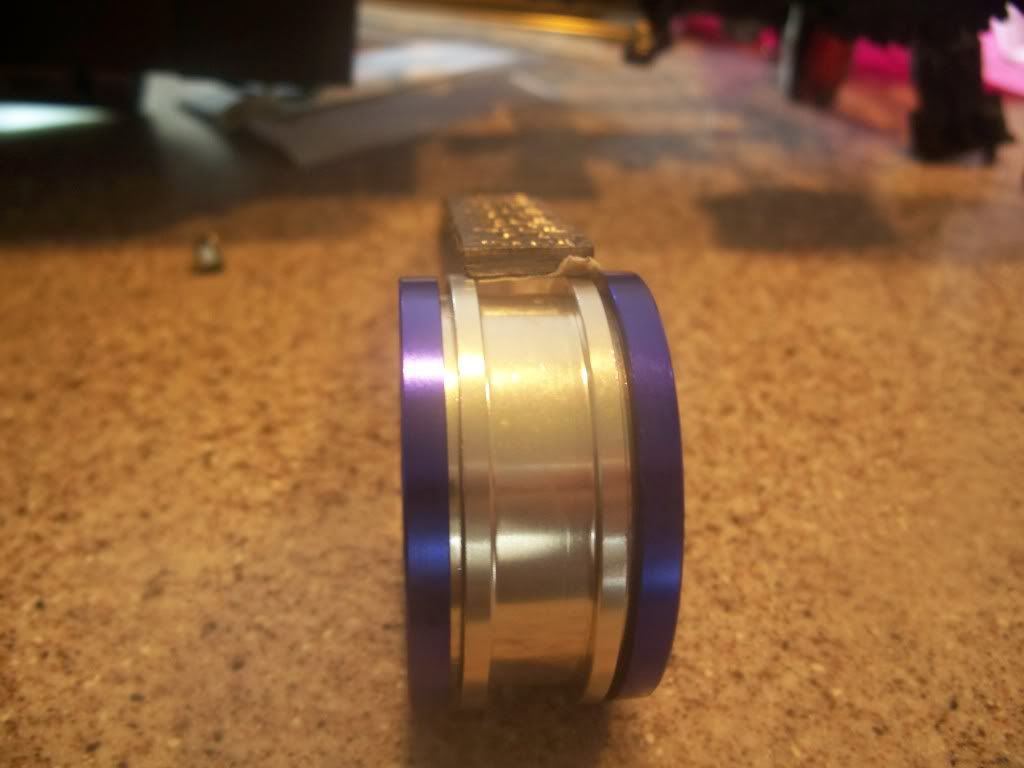 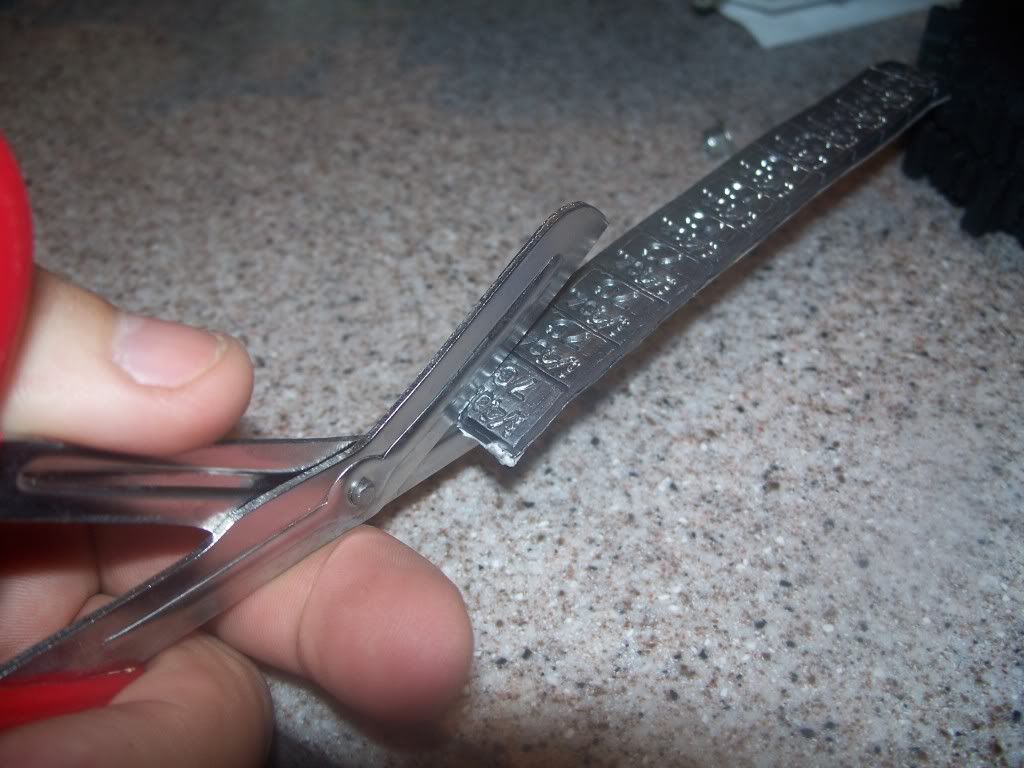 After running the weights around - there was a gap left over. 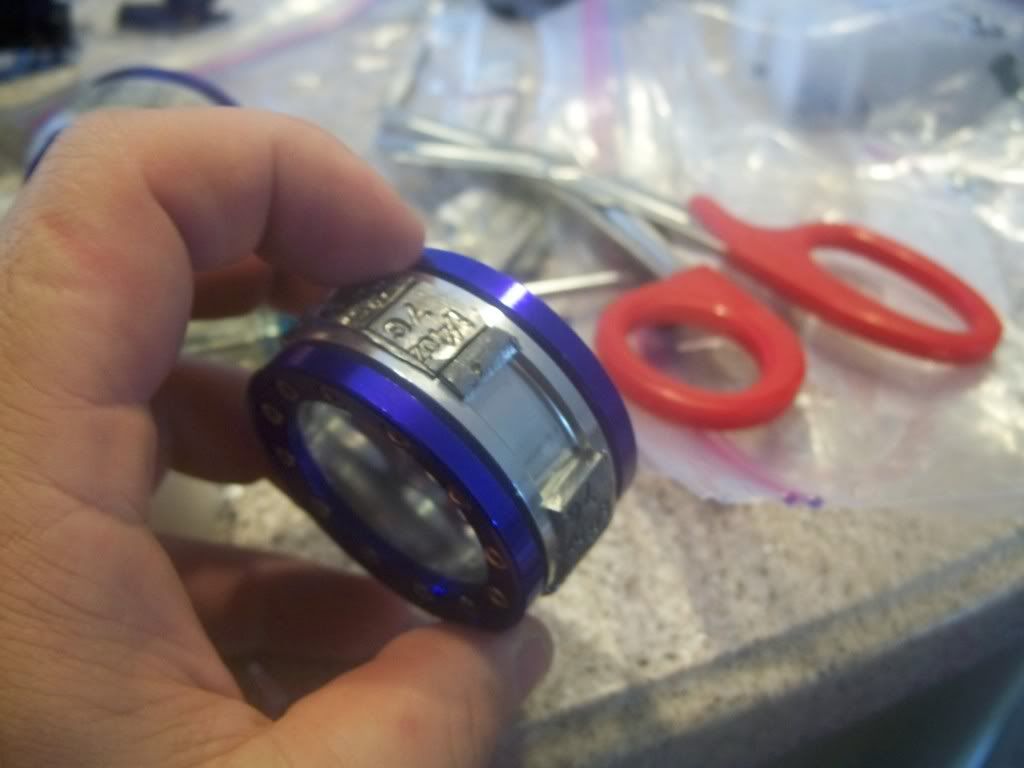 The part I cut off the weight stick was a perfect fill-in fit. 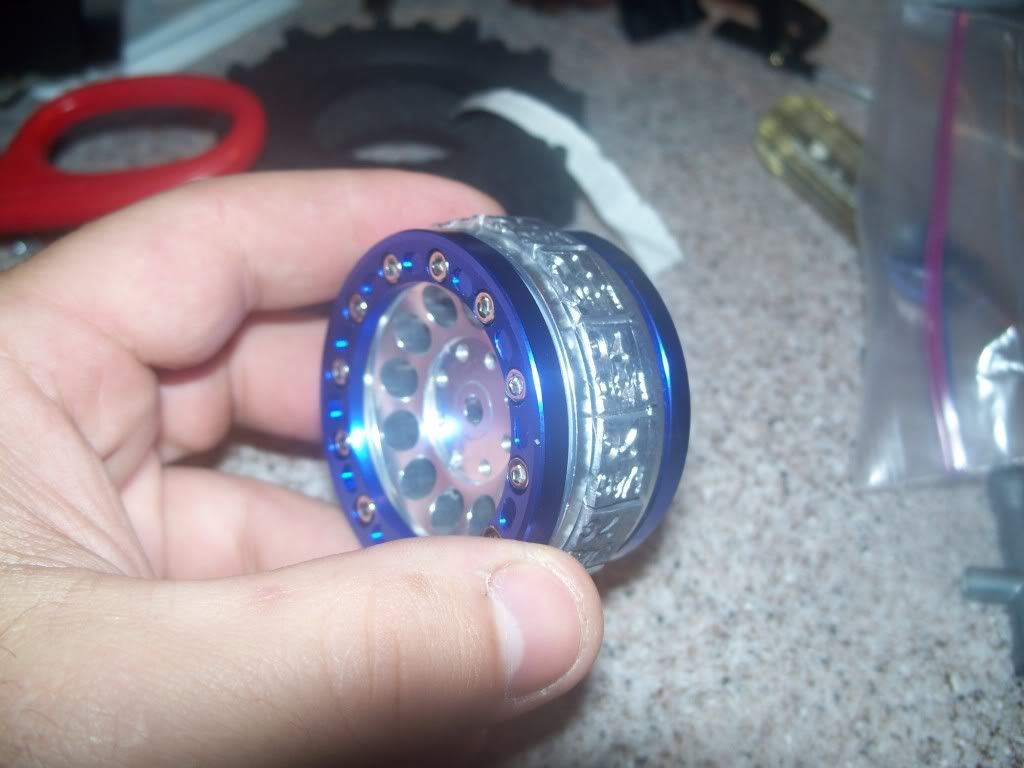 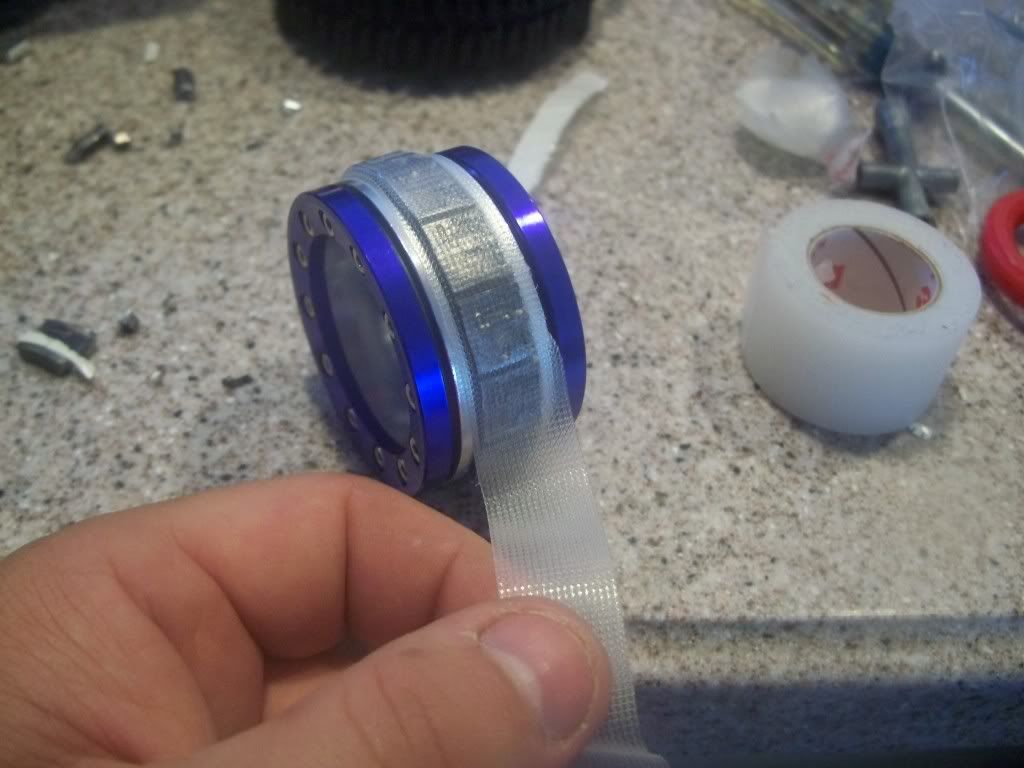 The Rear Shocks got an overhaul too. Took some finagling - but looks cool. I needed to cut a notch in the frame to allow for the shock more free play. I could have lowered the bracket - but didn't want to raise the rear end. 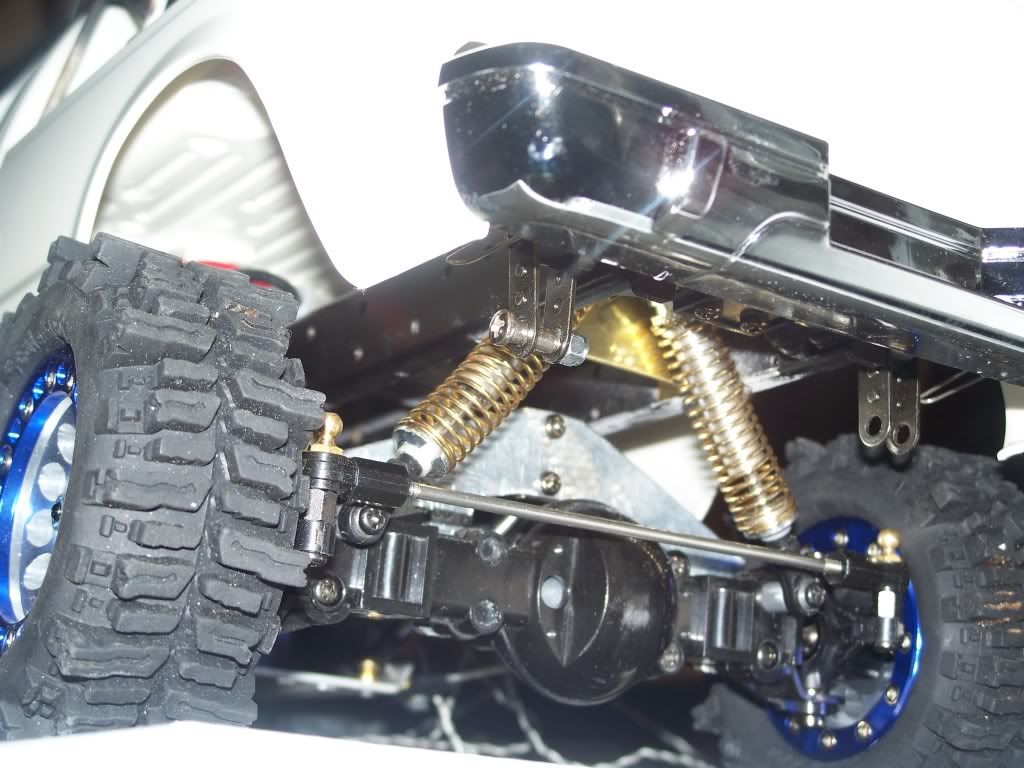 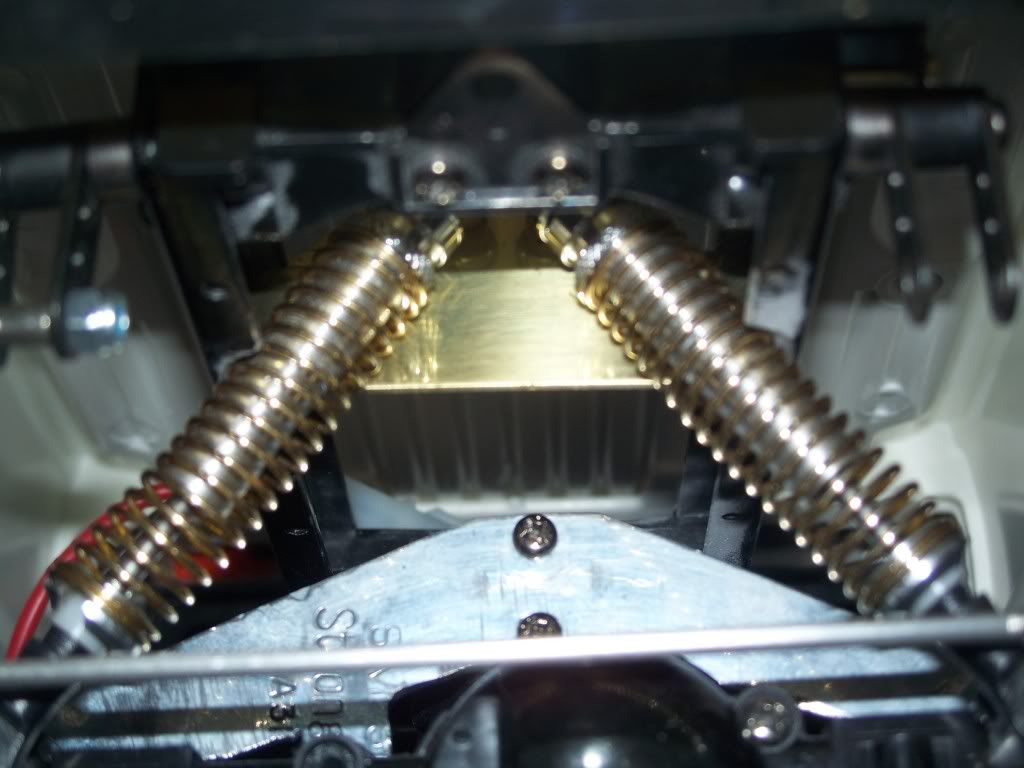  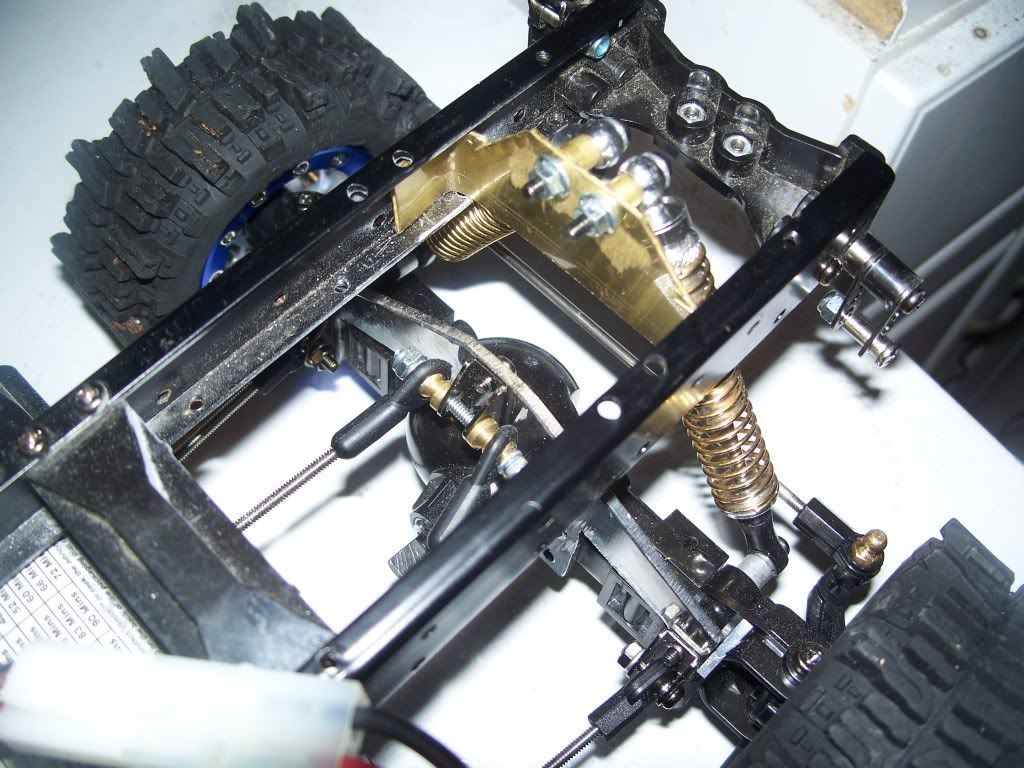 The 4 link suspension will get beafed up later and I'll start on the front bumper shortly. I also need to figure out how to lock the rear steering. I'm still debating on having rear steering (or not). Both ways will take some work seeing I moved the shocks and built the 4 link. On a side note: I just picked up the "light changing" pearl blue paint for the truck - can't wait for that one but with the holidays a coming - might be Jan till it gets painted. This is a slow build. Here's where I'm at now - I did install the lights on the roof rack and set the wires with some shrink tubing. 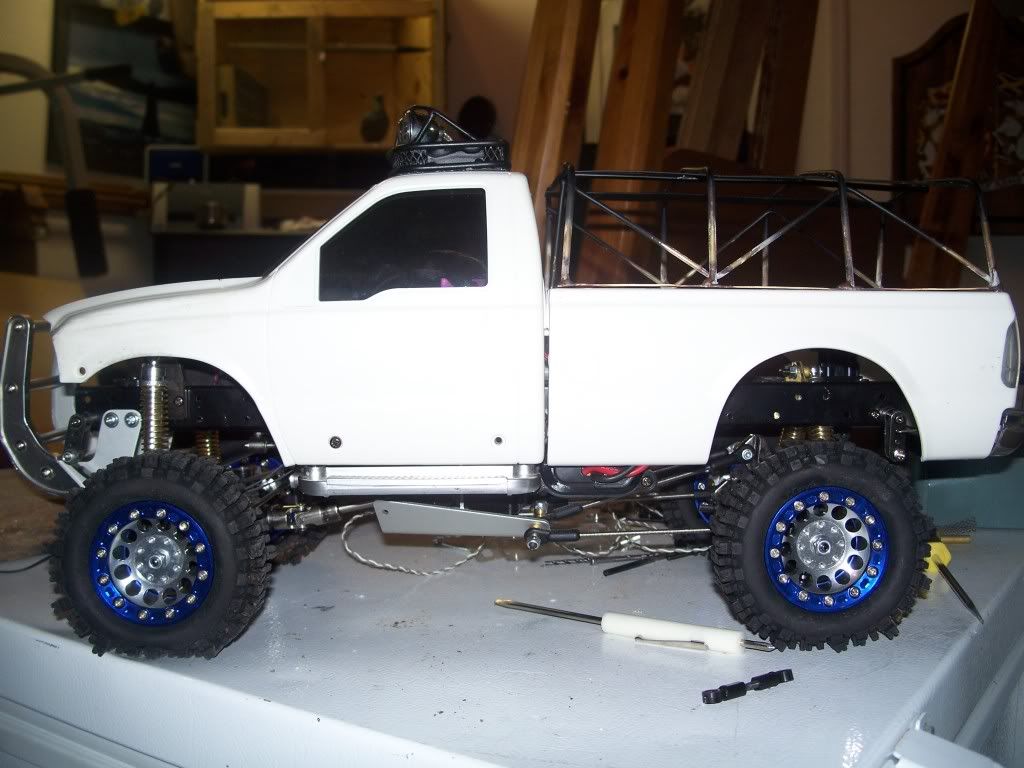 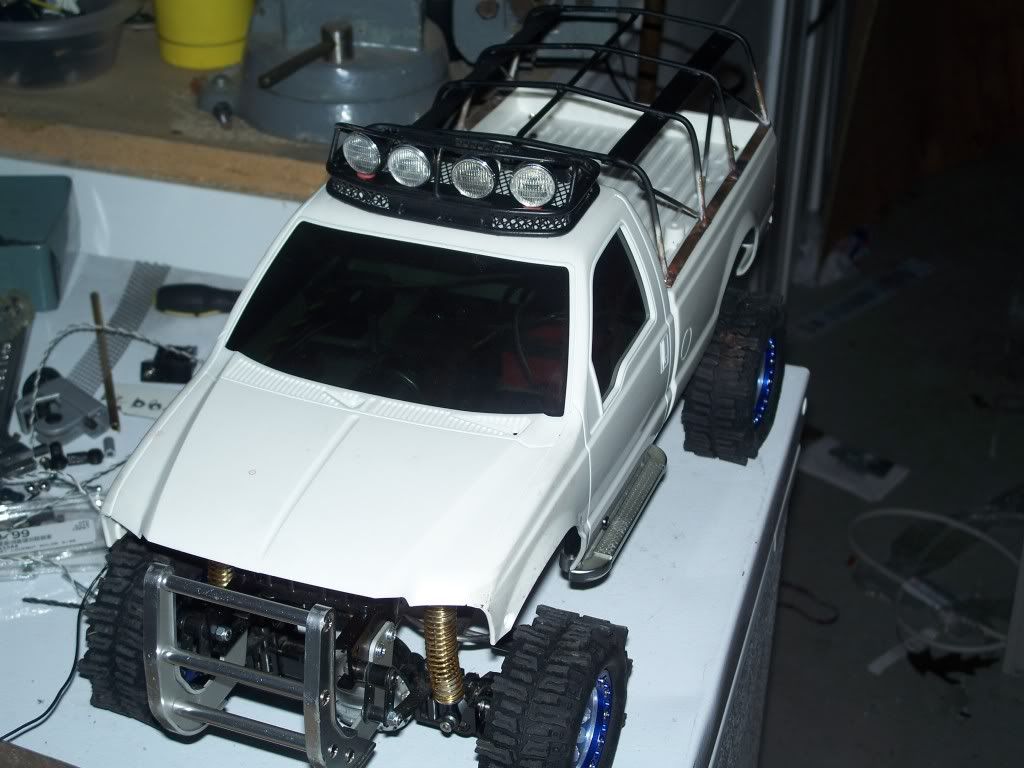 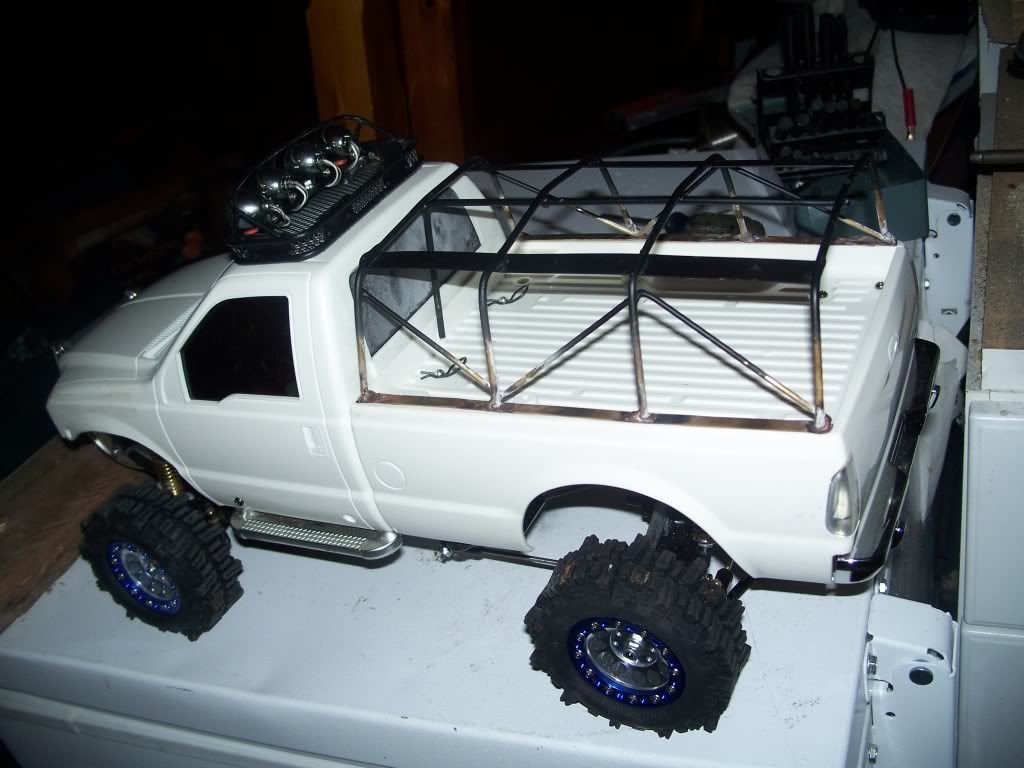 Last edited by FodigoDave; 11-16-2008 at 11:08 AM. Reason: pics added |
|
| |
|
11-21-2008, 08:52 PM
| #23 |
| Quarry Creeper Join Date: Sep 2008 Location: Petaluma
Posts: 282
|
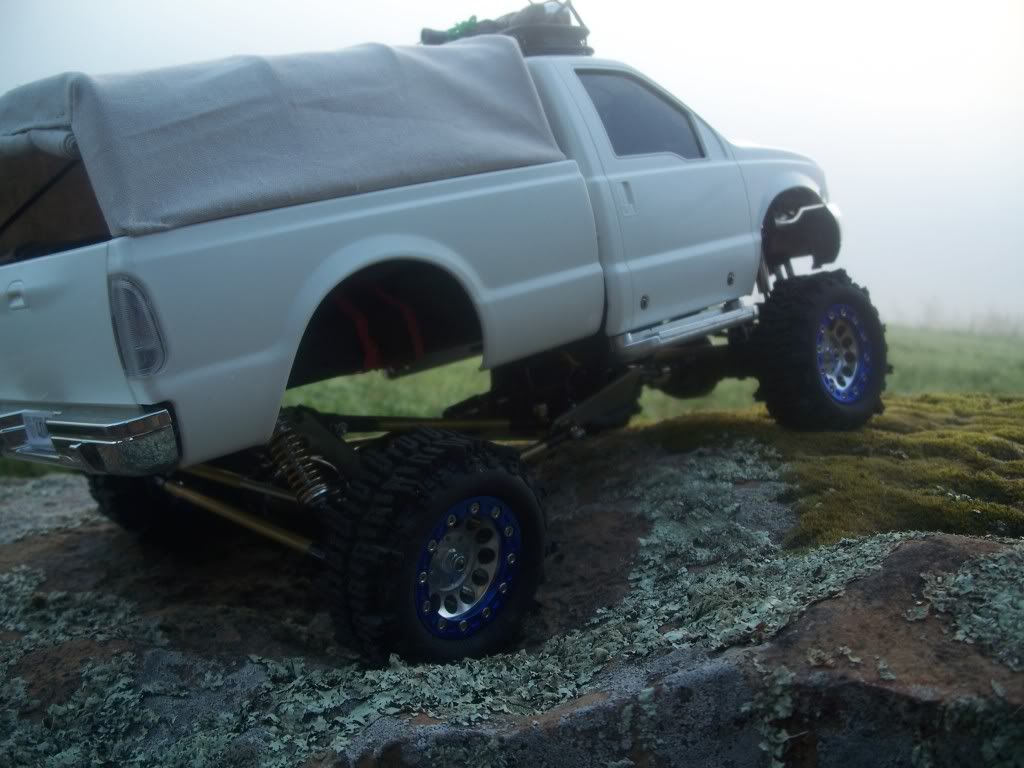
GREAT OBS on Hospital issue. Yup - the ER Things are starting to come along. It's about 75% done at this point. Wait till ya see the bed - complete with "bed rug" and soft top. Have a few more minor little tweaks to do to it before installing and there's a few tweaks throughout the truck that still need to be done. Now things seem to be coming together quicker so I might make that December deadline as previously scheduled. Still have the MFC to install as well. It will hide well under the soft top. In the mean time - here's a couple pics I took today. I tried switching out the rear shocks with a more streamlined set but it just didn't work out so I'm sticking with the updated mod shocks on it. The later plan is to put 4 shocks in the rear but I really really want to see some rocks and dirt so I'll drop that idea till later. I saw a cool thread that listed a little "trick" with the side mirrors to keep them from getting torn off on the first rock - I'll be working on that shortly. The front bumper will get replaced with a custom made one. I built on but now I'm thinking of a new idea- so the first one got scratched. 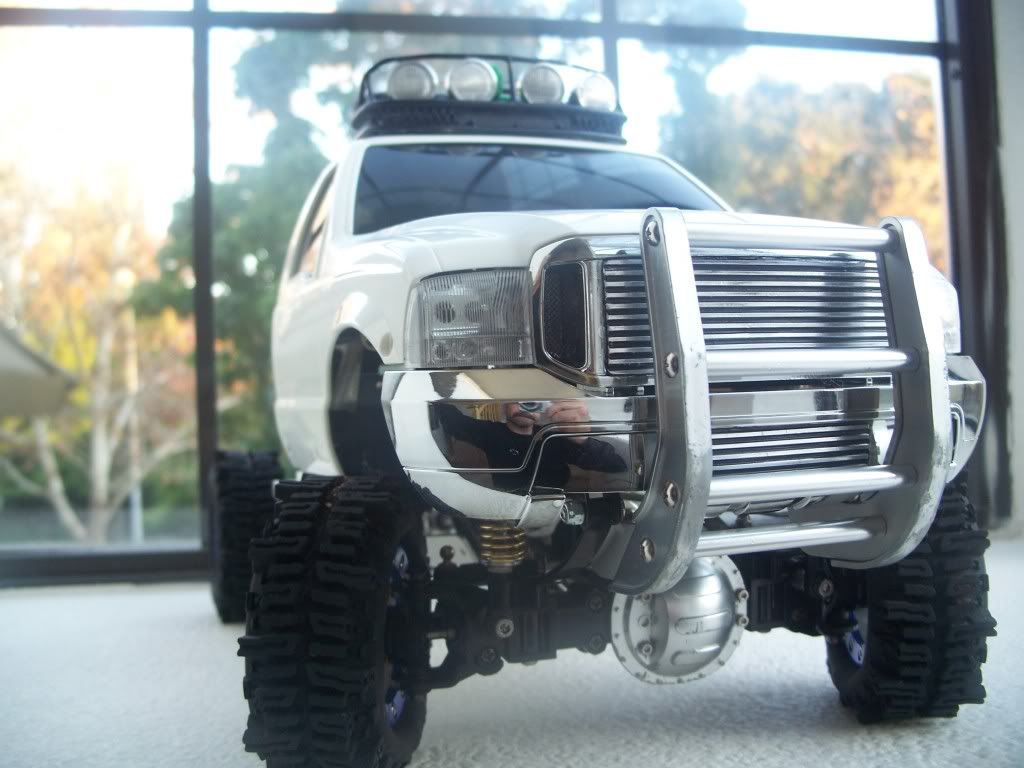 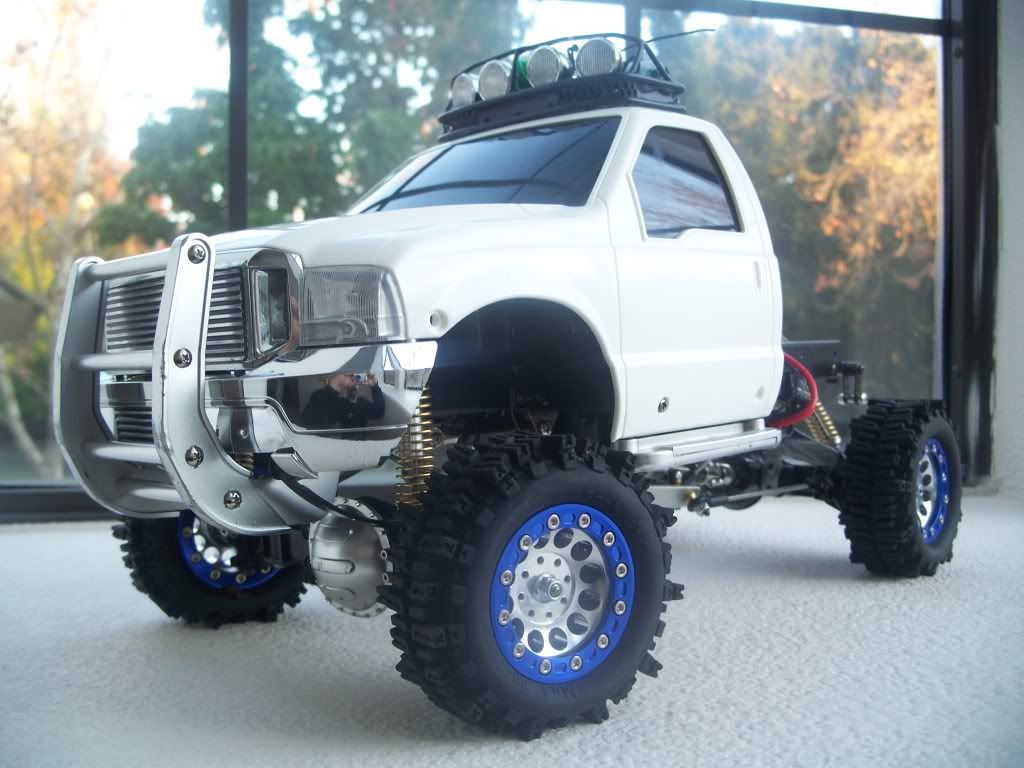 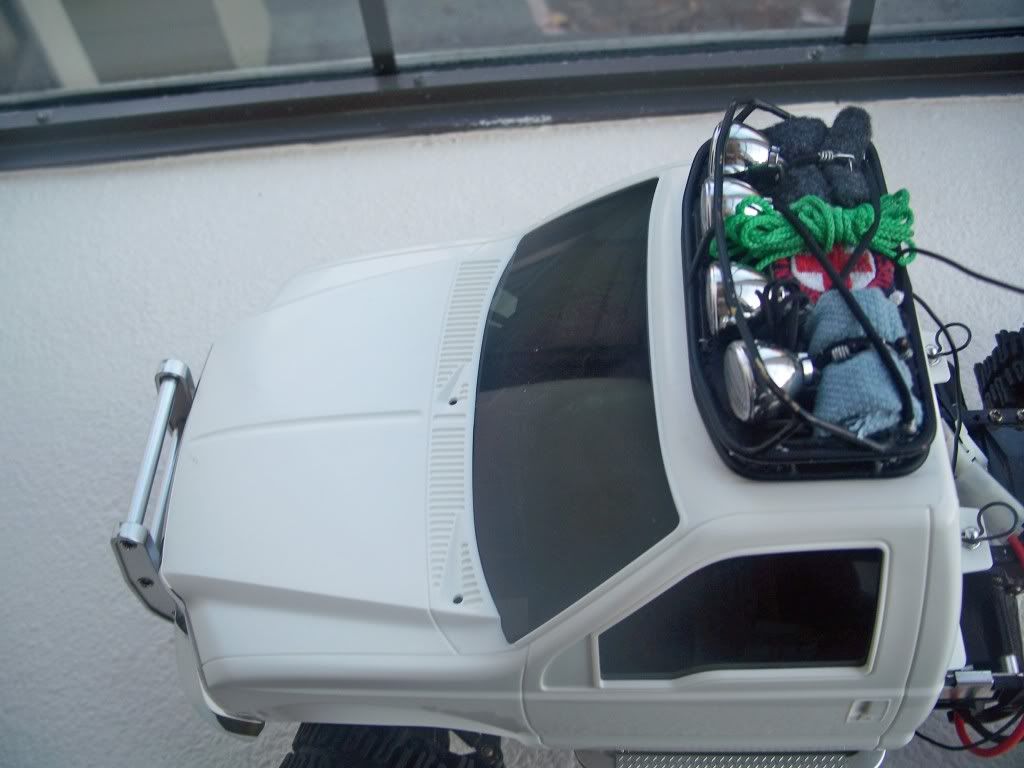 Last edited by FodigoDave; 11-25-2008 at 06:56 AM. |
|
| |
|
11-21-2008, 08:57 PM
| #24 |
| I wanna be Dave Join Date: Sep 2005 Location: Houston, TX
Posts: 16,952
|
Looks good! You must work at a hospital....I recognize those scissors and tape! |
|
| |
|
11-27-2008, 01:20 PM
| #25 |
| Quarry Creeper Join Date: Sep 2008 Location: Petaluma
Posts: 282
|
Hospital is where I end up getting a lot of detail work done (LOL) working nights - you don't always have patients. Here's the update - got a lot done this week. The roof rack got mounted firmly, the bed rug was installed (felt from the fabric store), and the largest thinking problem resolved, how to get the soft top rack to attach and be easily removed. Soft top resolved. A key lock. Two servo screws worked best as the locking part attached to the bed. You can see it better in the next pic. Narrow screw shaft with a wider phillips head locks to the top of the bed cover frame. I did notch out the thinner runner on the footing of the soft top rack and added a thicker brass piece. The top now locks into place very well. Almost snaps in - don't know how that happened or why - but once it's in the right position, it feels like it locks into place. Got lucky. 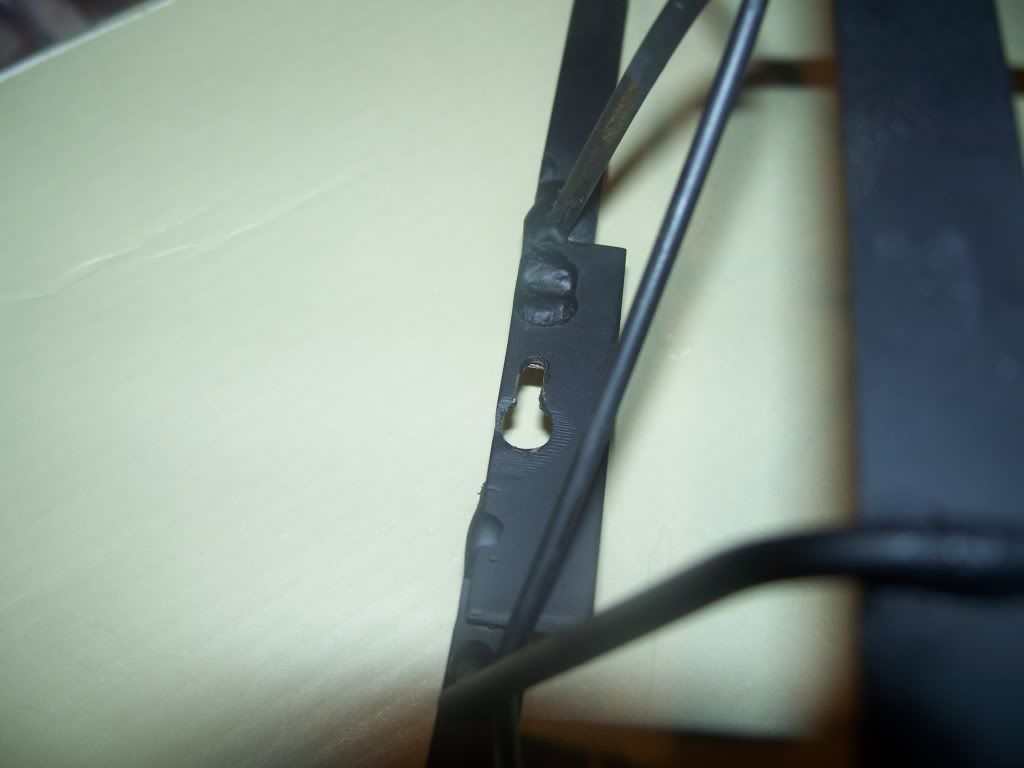 BED RUG [found a totally scale piece of felt - same color and texture as the bed rug on my real F150. 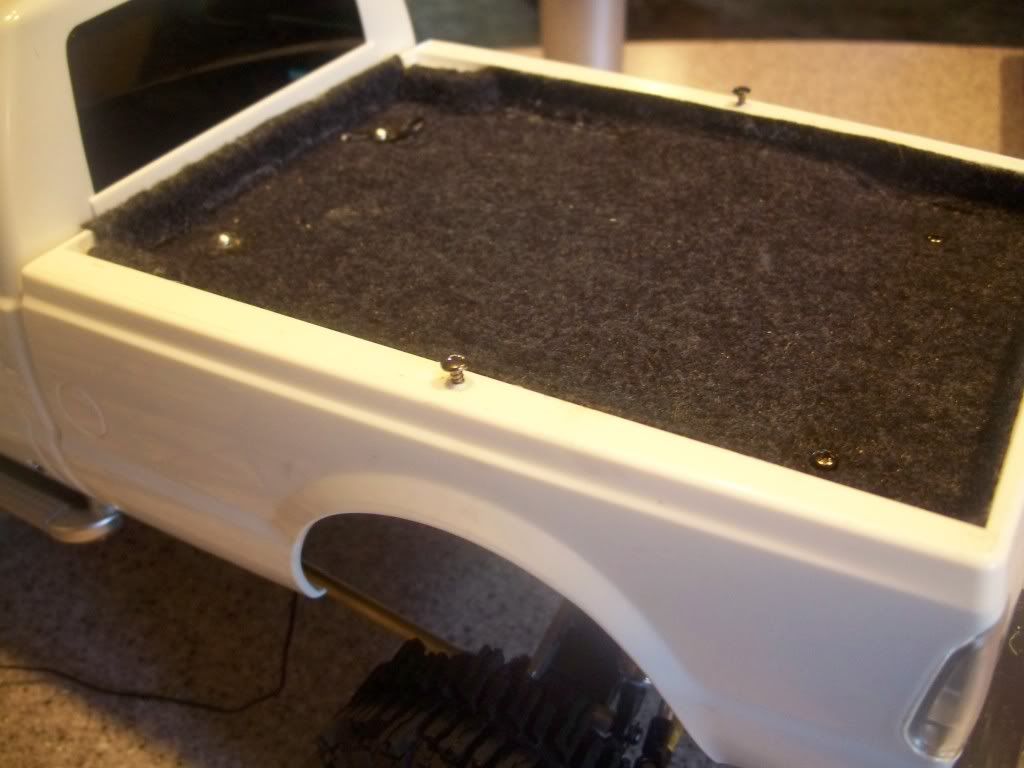 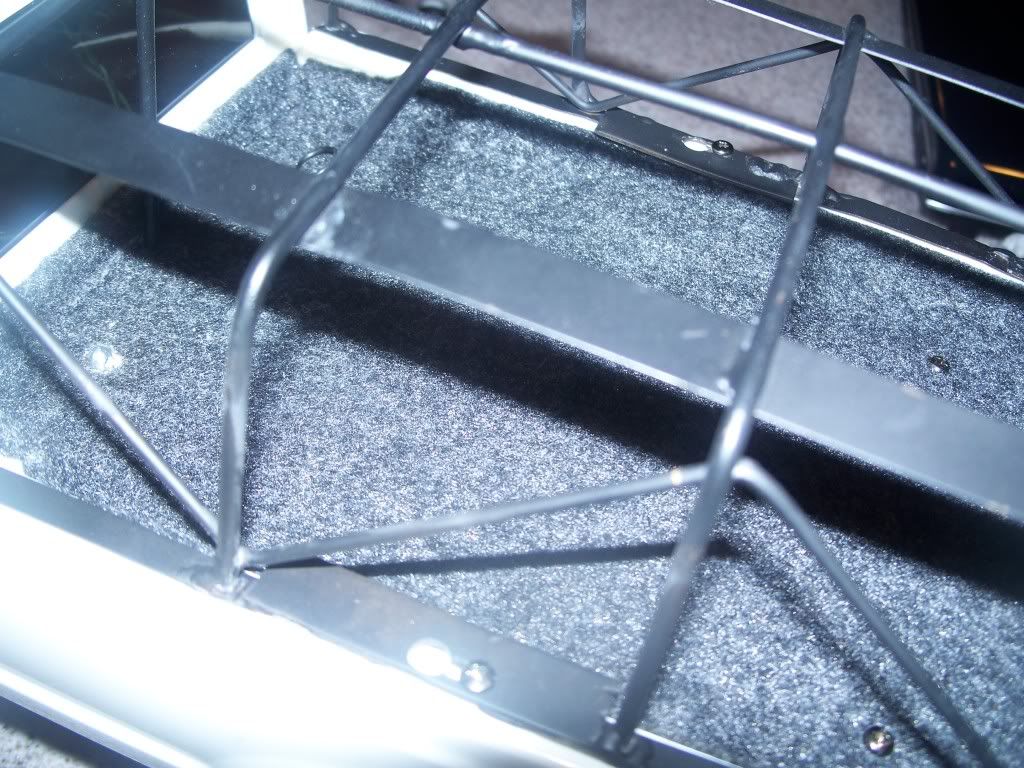 Once that was done - it was a matter or stretching some material around the frame and hand stitching the ends. By just doing the ends - I'm able to take it on and off easy (wash - replace - or if it's hot - just run with the frame). Heres the update today - I still have a lot of detail work to do - more to follow. 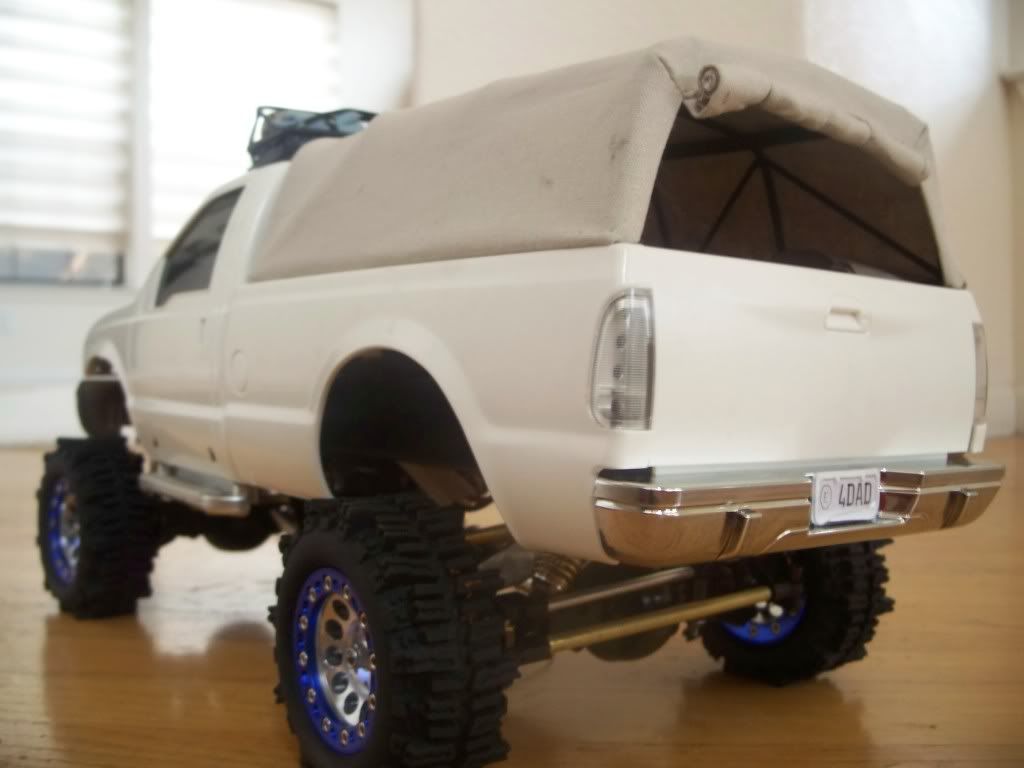 License plate - I used the acme picense plate maker - which was cool but then just googled license plate and found a half dozen other similar sites. One had "exempt" plates so used that one. I then googled license plate frames which gave me another dozen good sites - some where you could customize your plate online and see what it looks like. I printed it - reduced it on a copy machine - and that was my template for some thin plastic and an exacto knife. 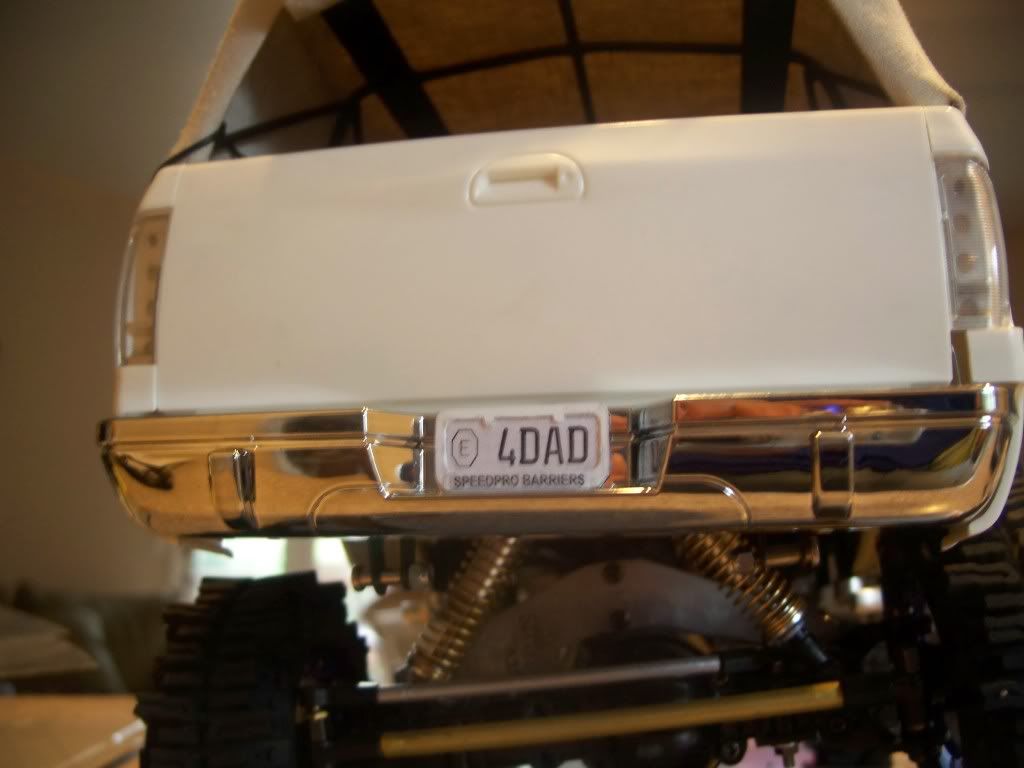 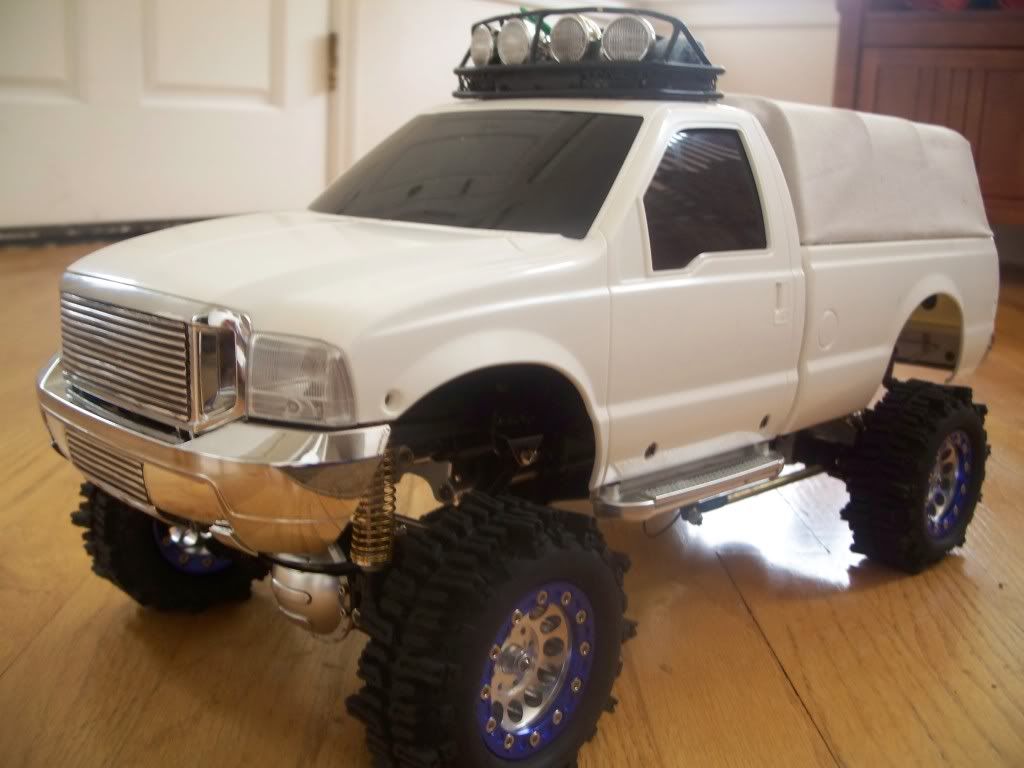 I relocated the battery (darn - after taking a good hour building the battery carriage - only to take it off and run the battery in the bed rail. You'll have to remove the stock position of the bed rail support beam to the bottom of the rail - but - there's holes in the frame so it's was a 5 minute fix. 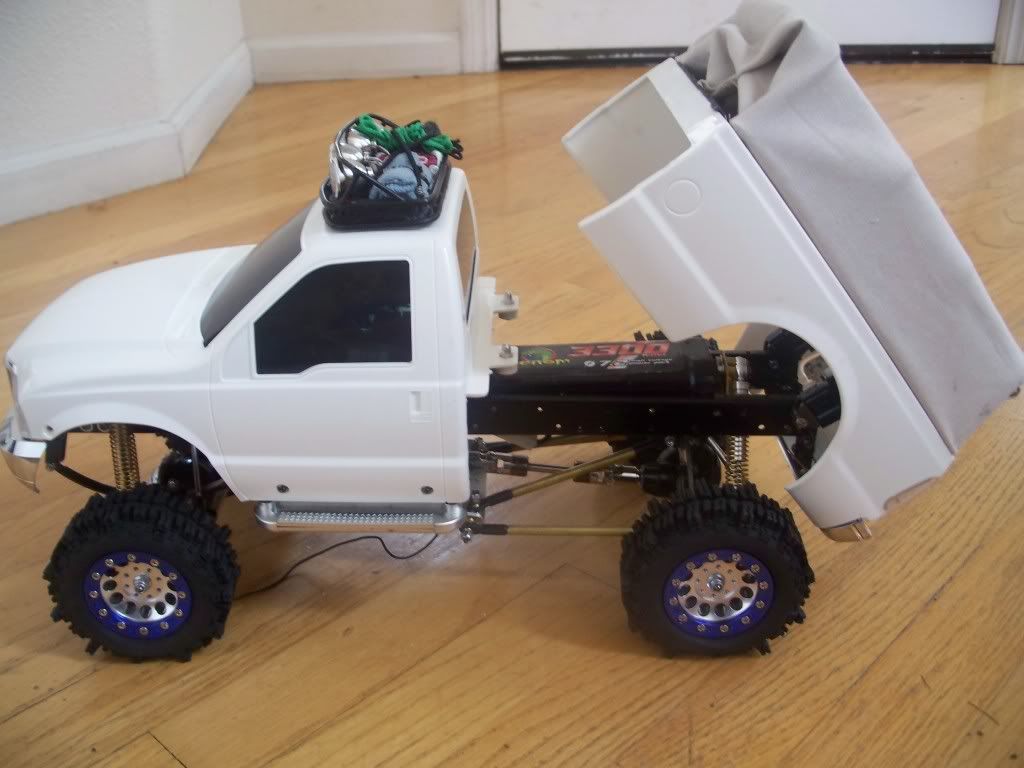 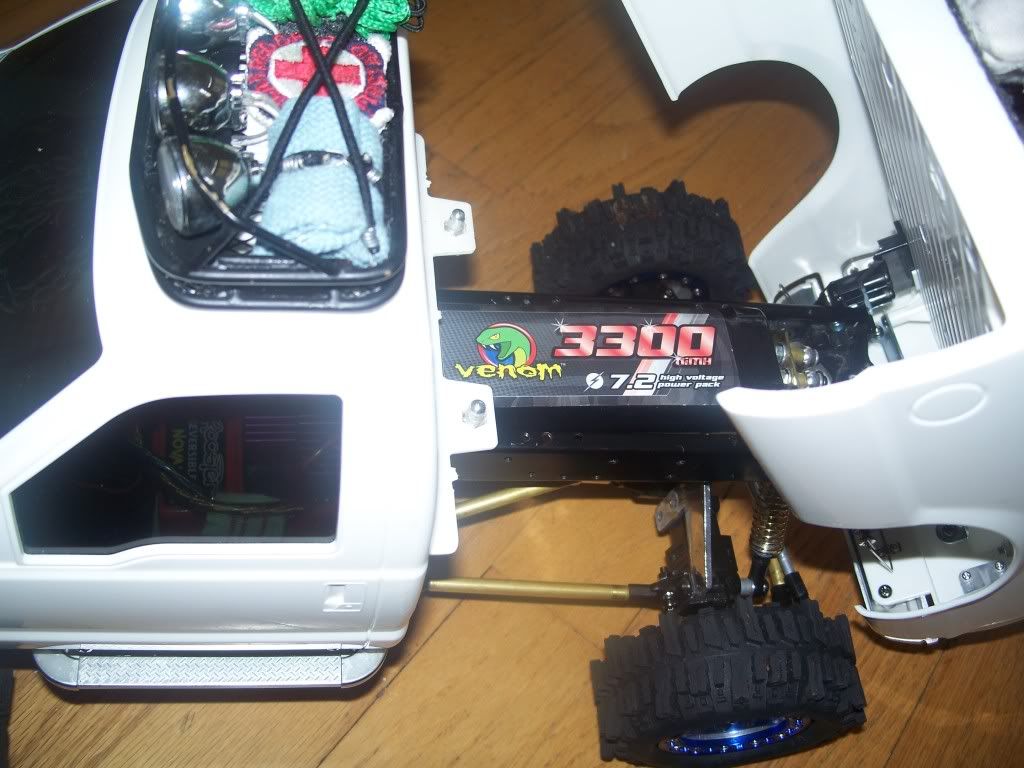  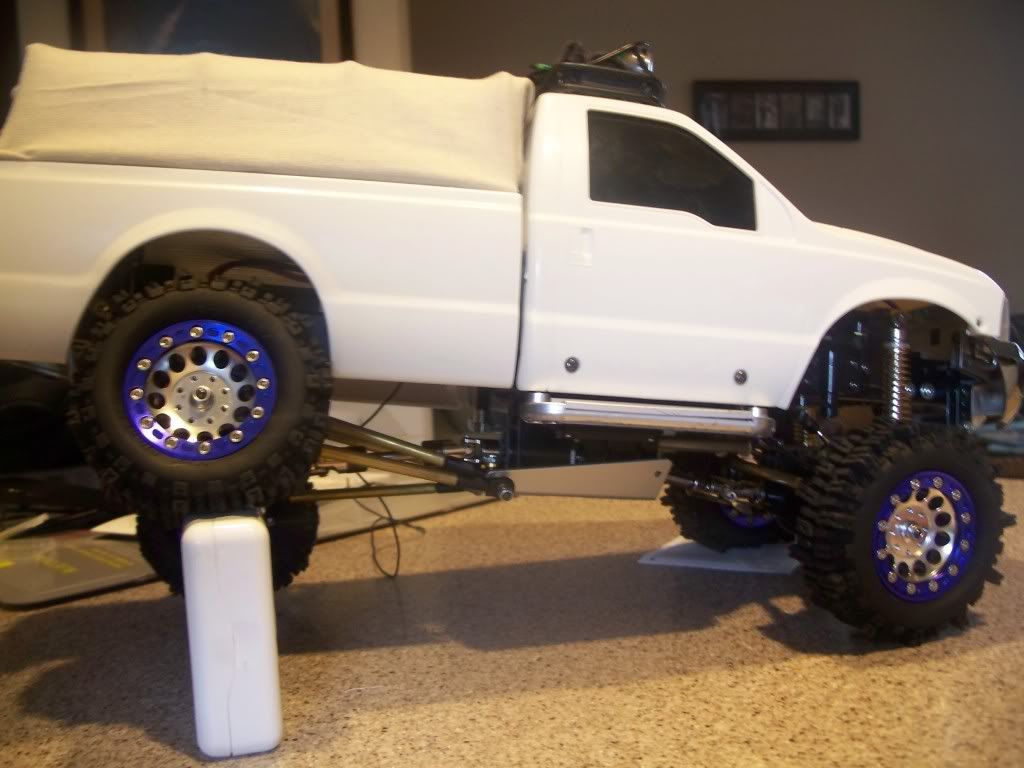 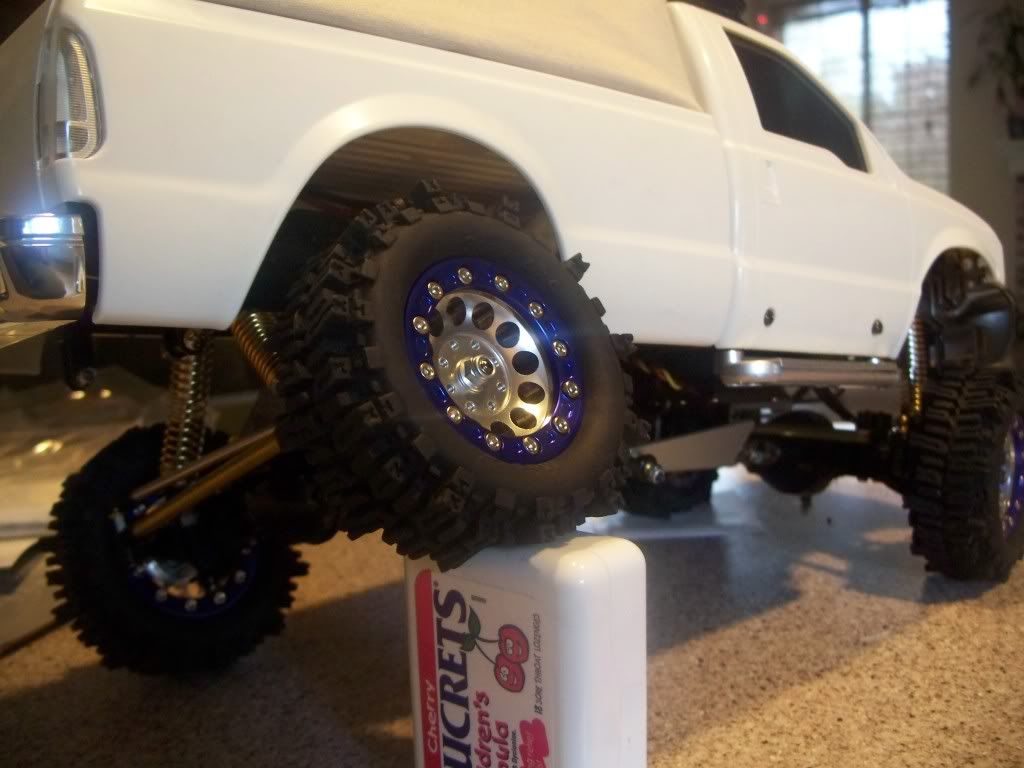 Last edited by FodigoDave; 11-27-2008 at 01:55 PM. Reason: photos added |
|
| |
|
11-27-2008, 02:58 PM
| #26 |
| Quarry Creeper Join Date: Sep 2008 Location: Petaluma
Posts: 282
|
Added a shock-like extra tube to the rear locking steering shaft. Looks like a rear stabilizer now. All I needed was a little extra tube to surround the existing one. 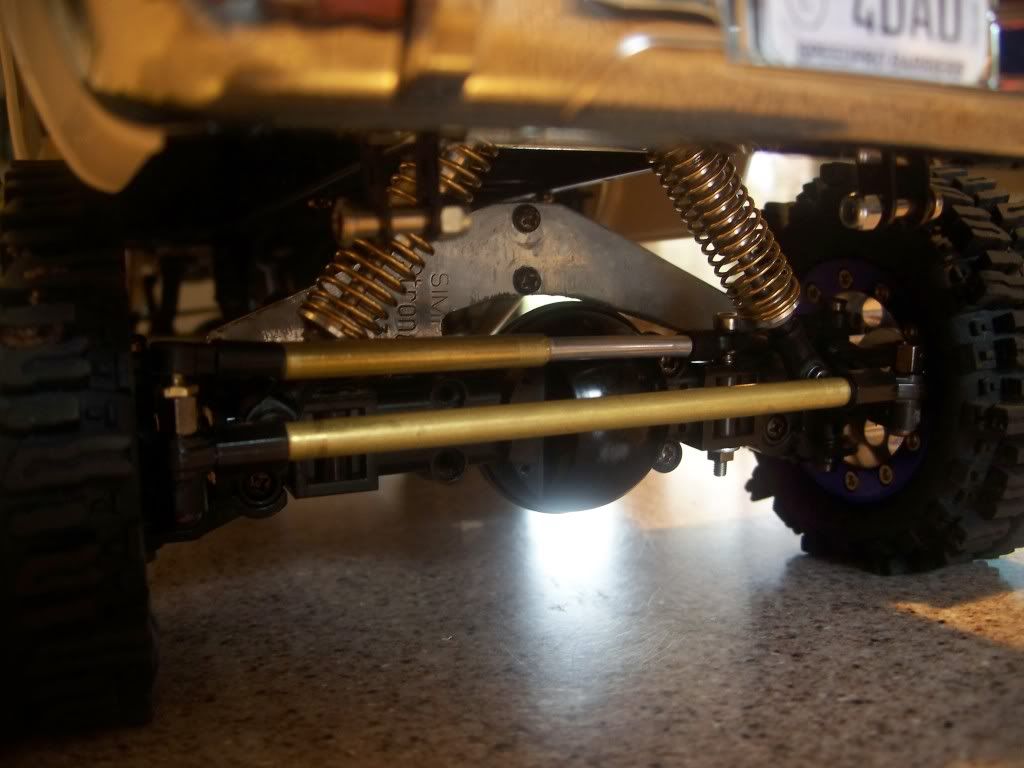 |
|
| |
|
11-28-2008, 11:36 AM
| #27 |
| Rock Crawler Join Date: Feb 2007 Location: Bridgeport
Posts: 589
|
Nice Super Duty! That's one of the best executions of a soft top i"ve seen yet. That's definately one truck to be proud of. |
|
| |
|
11-28-2008, 02:48 PM
| #28 | |
| RCC Addict Join Date: Jun 2008 Location: Monroe, NC
Posts: 1,547
| Quote:
Justin | |
|
| |
|
11-29-2008, 03:51 PM
| #29 |
| Quarry Creeper Join Date: Sep 2008 Location: Petaluma
Posts: 282
|
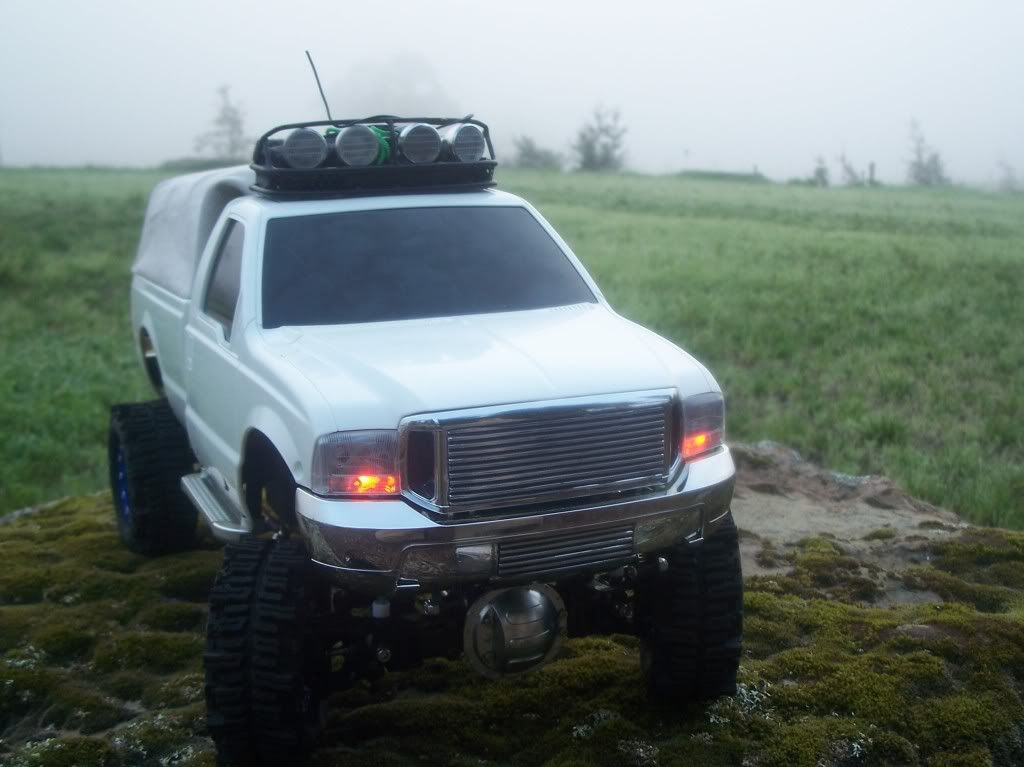
Thanks for the good words guys - just make me want to super-size it even more. The multi-function unit went on board today. Don't be fooled by the look of simplicity here - it was a pain to install. Of course - The idea was to hide the control unit under the soft top in the bed of the truck - but after seeing how many miles of wires would be left hanging - I went for installing it inside the truck. The Unit itself was butted against the rear window with heavy duty velcro. The speaker was mounted under the hood. The vibration unit was mounted just behind the cab on the outside of the frame. I went to youtube to get the idea of how to use it after it was installed. The instructions were very slim pickens so it was about right for a guy to install, throw the instructions away and start from "what looks right". The kit looked simple enough out of the box - but after you open things up and really get started - whoa! It quickly turned into an electrical nightmare. 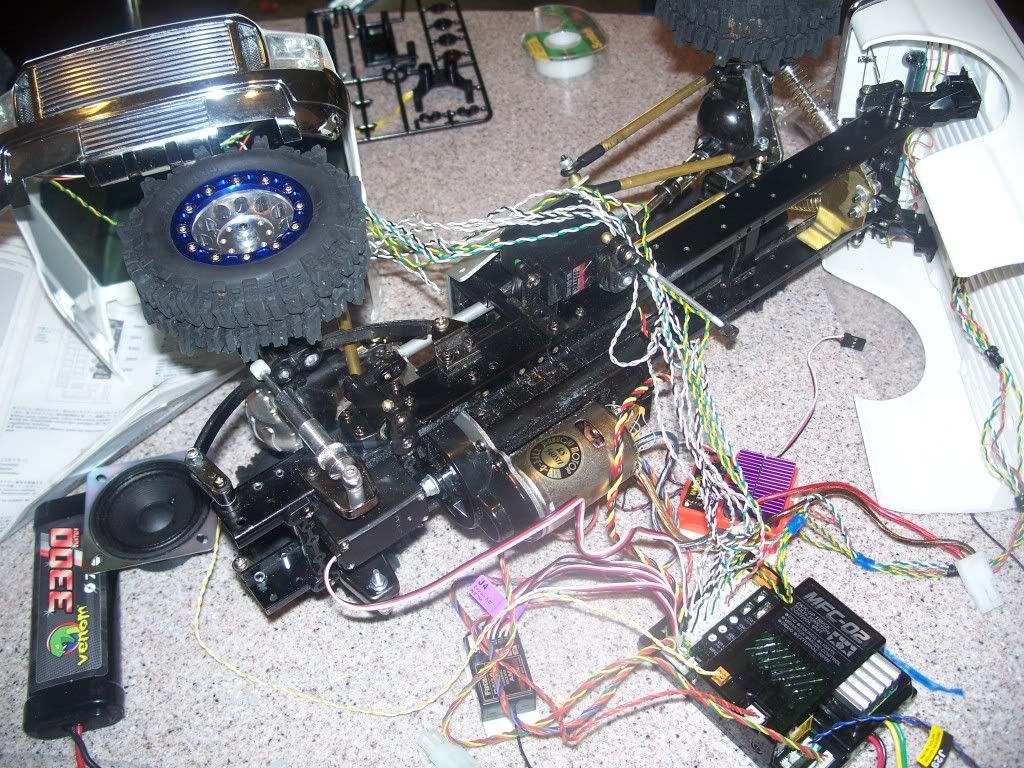 Wanting to run the battery between the frame rail - I had to sink the wires on the inside of the rail to keep it neat and out of the way. You can also see the frame strut support lowered so the battery can fit in between the rails. 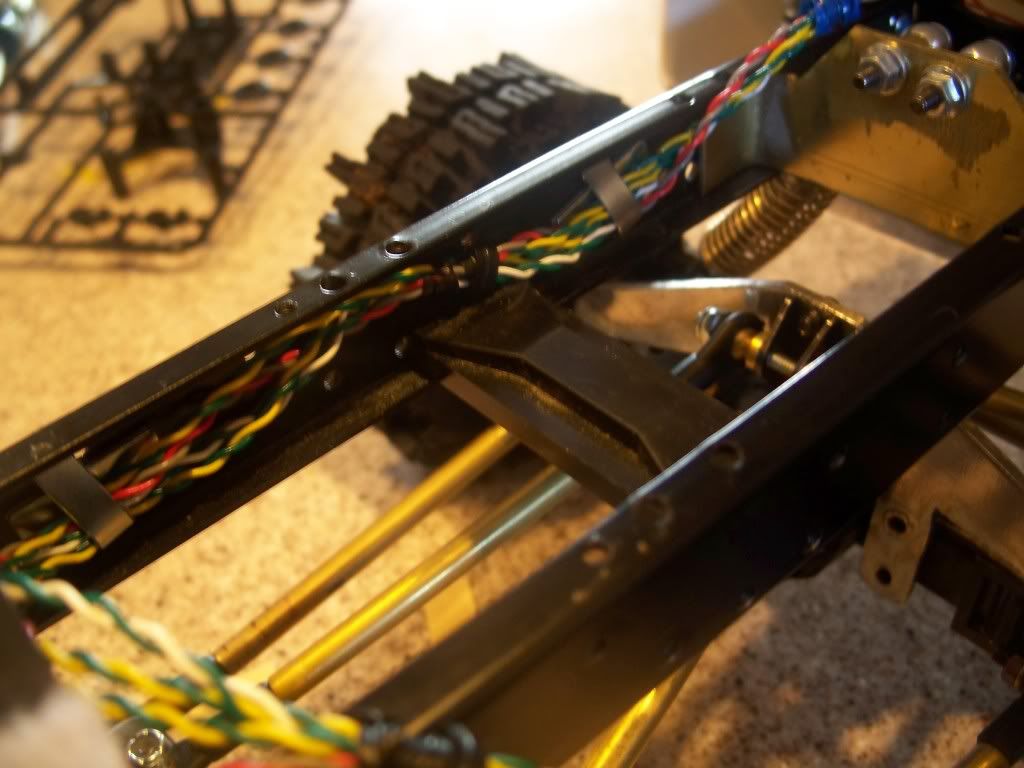 I was able to hook everything up - but found the MFC-02 unit is also the speed ESC (speed controller) [that I didn't know but I'm a rookie so its allowed] so I had to scrap my bitchen novak. Heck - I just pulled the ESC and engine combo and installed a stock motor. I guess I'll have a better use for the novak on project #2, F350. 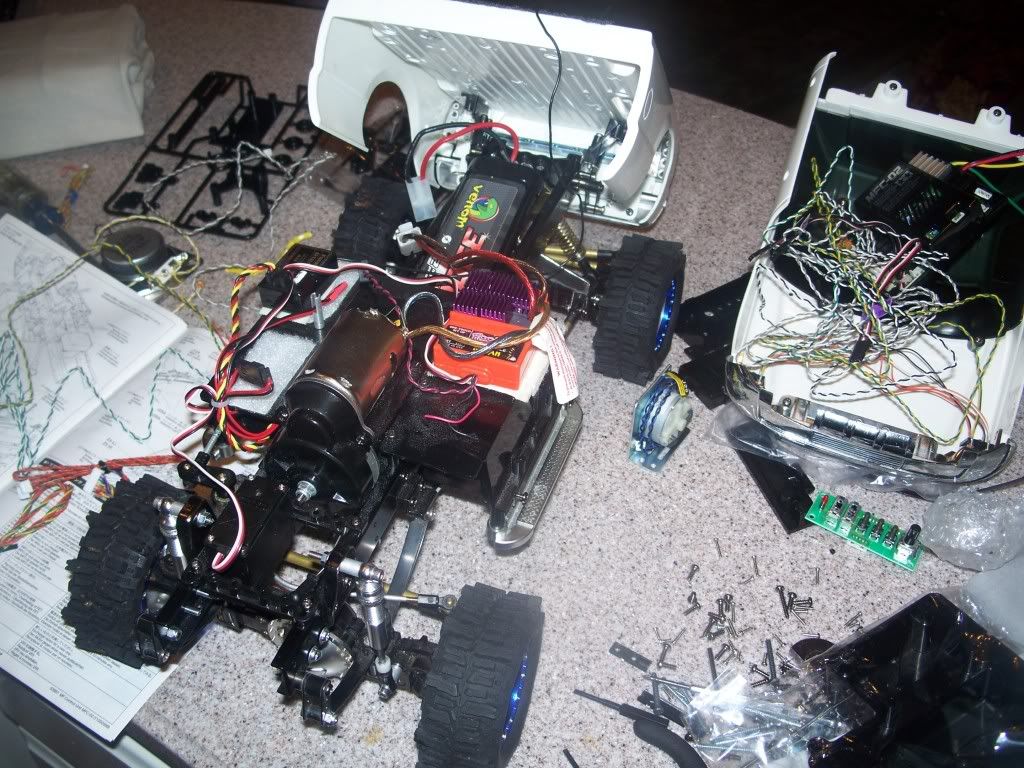 The lights tested good (blinding bright!) and I decided to leave the lenses clear for the european look. The lights inside (turn sigs are yellow) (brake is red) illuminate their proper color so there was no need to sticker the outer lense. I was actually planning on painting the inside of the lense but again, no need now. 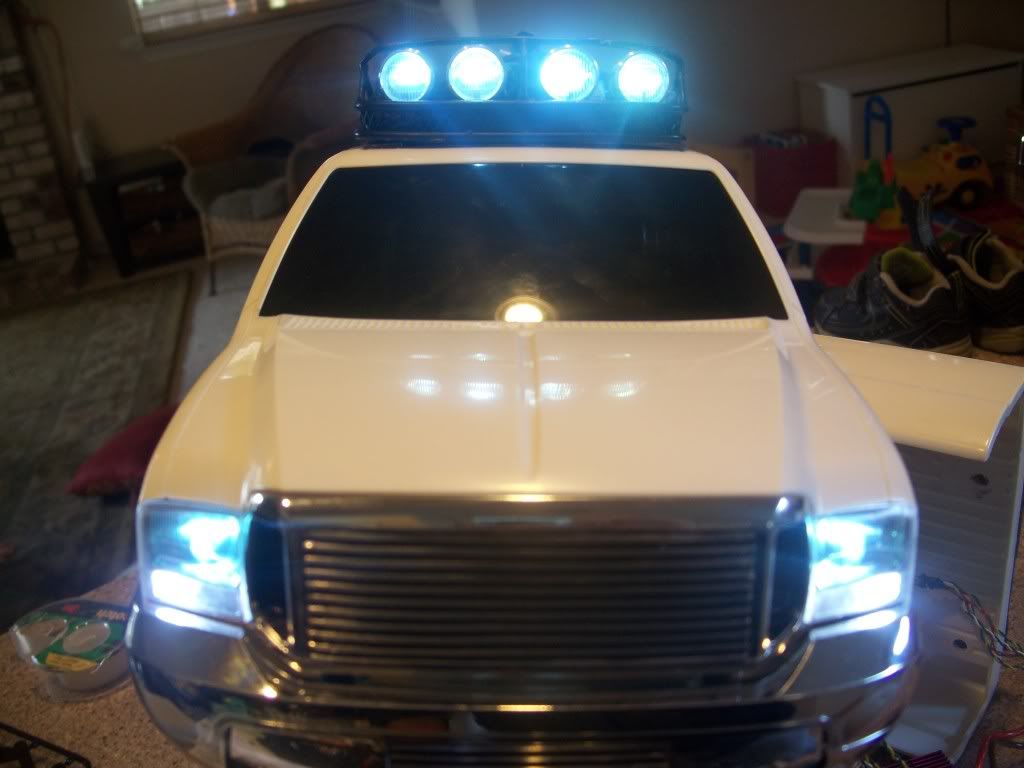 After hearing the V8 engine roar for the first time and after seeing the truck wiggle upon start up- it was just too cool and too tempting to let sit for the evening so it was charged and a quick run (30 minutes) outside. It didn't take long before I rolled it - but the good news - nothing broke and it handled the roll over just fine. 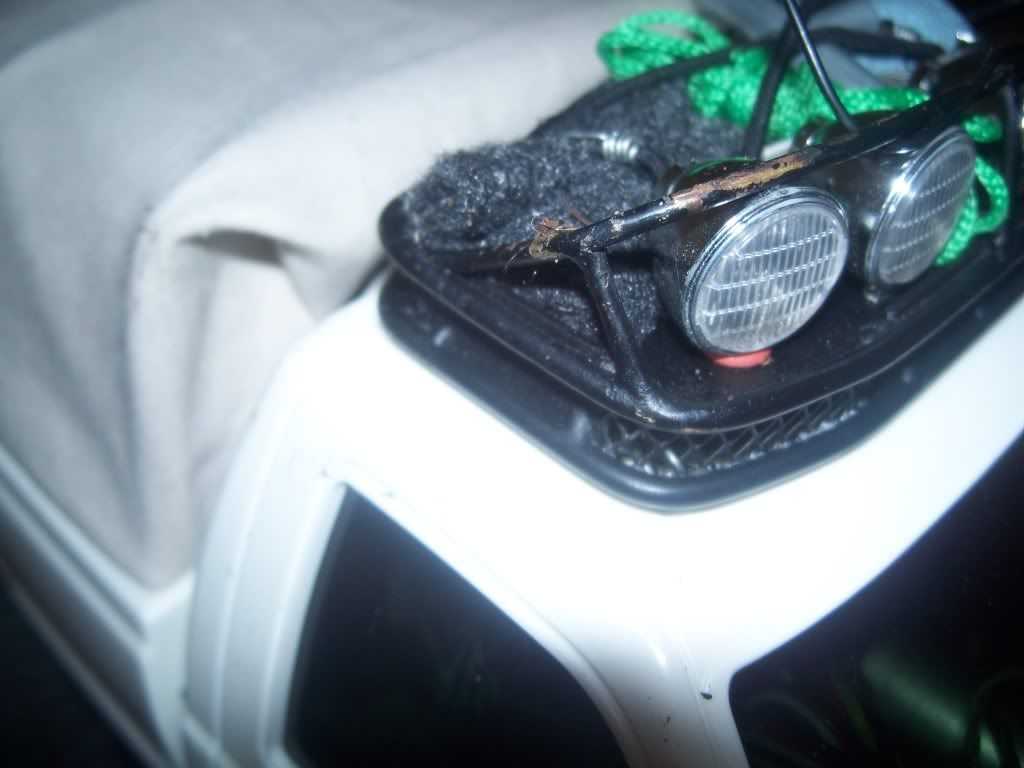 Just a bit of dirt and some paint fluffed off the roof rack. The bed soft top frame held out too - no damage - just a little dirt. The roof rack protected the lights which was only hoped and prayed for. Hurray! Last edited by FodigoDave; 11-29-2008 at 04:36 PM. Reason: typo |
|
| |
|
11-30-2008, 12:11 PM
| #30 |
| Rock Crawler Join Date: Oct 2007 Location: Miami
Posts: 652
|
Awesome build. I love the roof rack. |
|
| |
|
11-30-2008, 04:07 PM
| #31 |
| Quarry Creeper Join Date: Sep 2008 Location: Petaluma
Posts: 282
|
Thanks! More to follow.... |
|
| |
|
12-02-2008, 04:12 PM
| #32 |
| Quarry Creeper Join Date: Sep 2008 Location: Petaluma
Posts: 282
|    |
|
| |
|
12-03-2008, 05:06 PM
| #33 |
| Quarry Creeper Join Date: Sep 2008 Location: Petaluma
Posts: 282
|
Didn't take long after the first run - it was pulled apart again. The good news - it's getting easier to thread a screw in the body. I'm wanting to get more done by starting with a fresh coat of paint. But - It was killing me not to see any rocks so I was happy to get some outside time and dirt on the tires. So now... off to the detail shop it goes. I'll have more later when I finish the painting. Should look cool - it's that changing color paint.  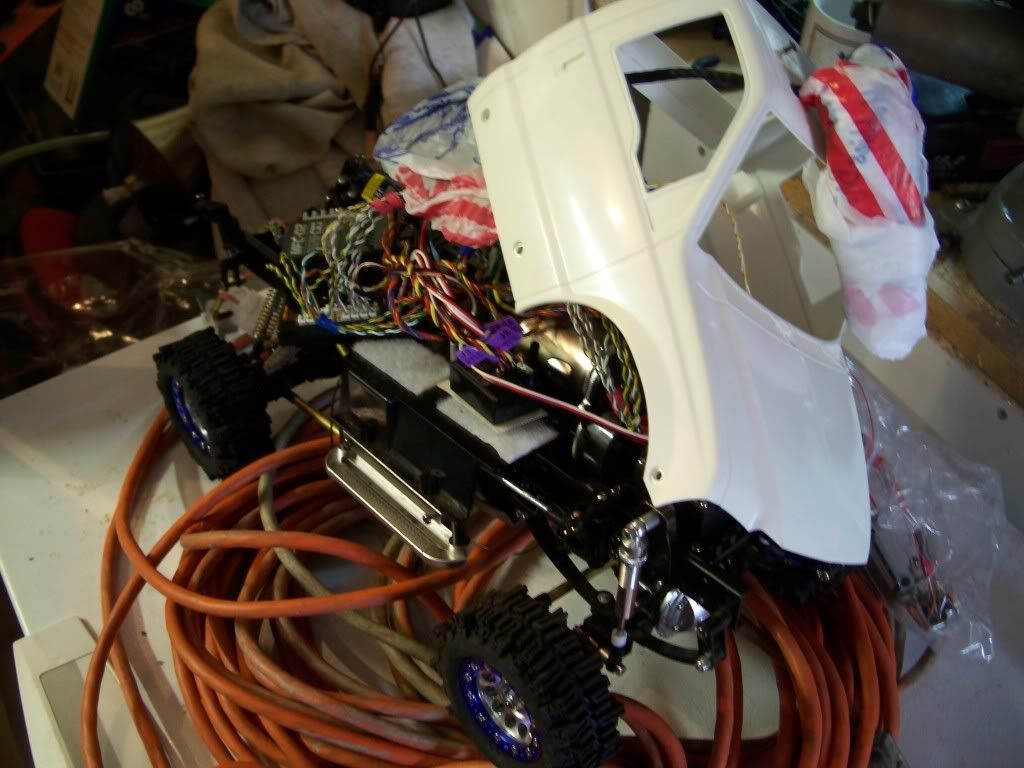 While thats drying - I'll also be working on the front brush guard and going to the store for milk and bread (per wife). Last edited by FodigoDave; 12-03-2008 at 09:53 PM. |
|
| |
|
12-04-2008, 01:40 PM
| #34 |
| Quarry Creeper Join Date: Sep 2008 Location: Petaluma
Posts: 282
|
Build thread here: Scale Fire Extinguisher How To: alatta Pics decided to list it there for those scale accessory builders. I pulled out the air brush from storage in prepping for painting the body and noticed I'm missing a minor little part so in the mean time, I was messing around today and built this. 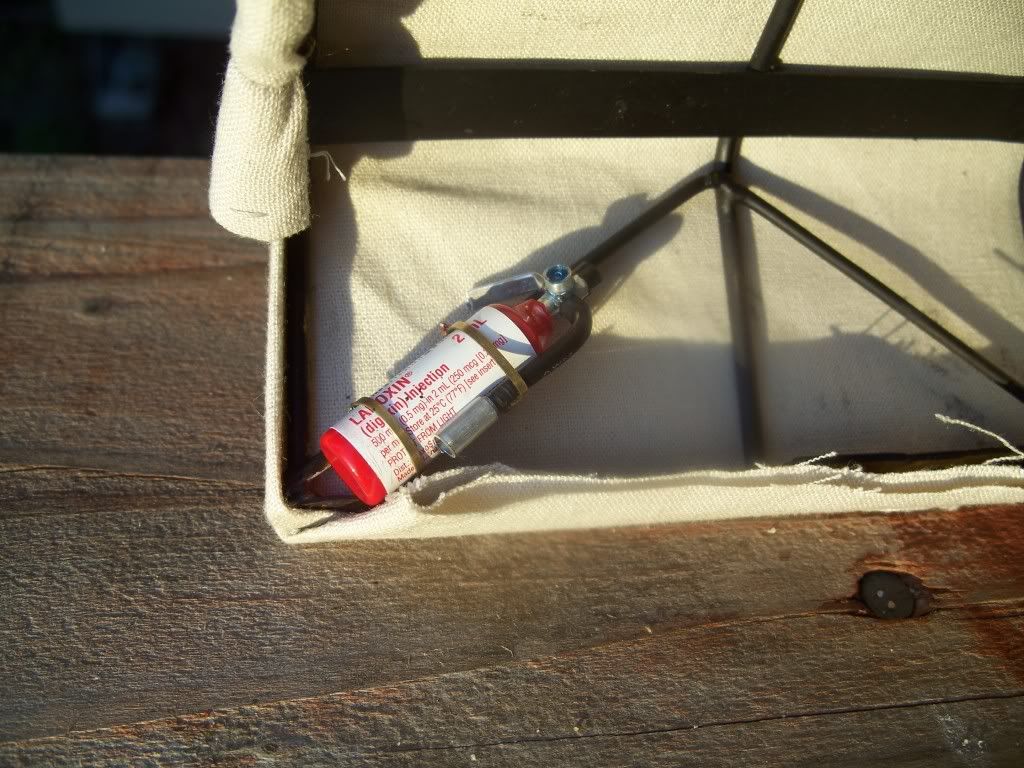 Last edited by FodigoDave; 12-04-2008 at 05:27 PM. |
|
| |
|
12-04-2008, 01:58 PM
| #35 |
| Rock Stacker Join Date: Oct 2007 Location: Vancouver, BC
Posts: 52
|
nice rig. What color are you planning painting it. Also where did you purchase the tire weights? |
|
| |
|
12-04-2008, 02:54 PM
| #36 |
| Quarry Creeper Join Date: Sep 2008 Location: Petaluma
Posts: 282
|
The color is fast changing blue - looks white but when it drive's - depending on the angle - it'll turn blue. Pretty cool color - will go good with the blue accents on the truck. I've never painted this color before so I'm not sure what to expect. You can see it slightly changing colors at the top of the bottle where the sun is hitting it. The weights - I got at the hobby shop (Hobby Town USA). They come in a stick. Took one stick per rim is required. I bet any hobby shop carries them. 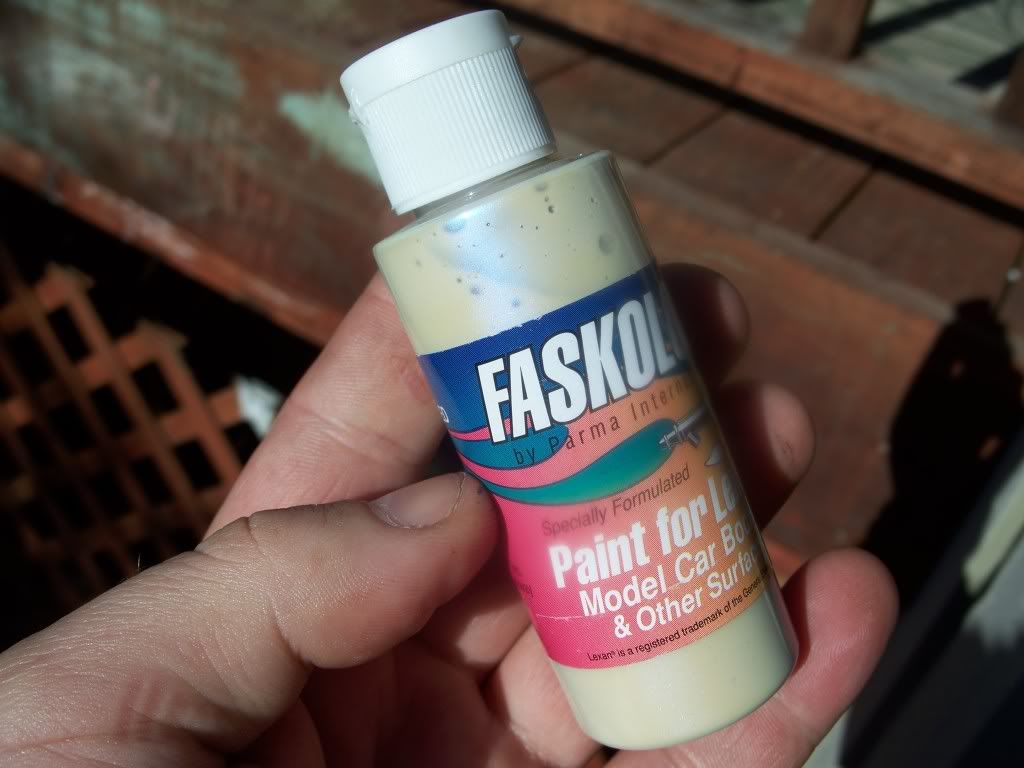 Last edited by FodigoDave; 12-04-2008 at 05:37 PM. |
|
| |
|
12-08-2008, 11:08 AM
| #37 |
| RCC Addict Join Date: Jun 2008 Location: Monroe, NC
Posts: 1,547
|
Cool color choice, I've never seen that before. Done painting yet? Justin |
|
| |
|
12-09-2008, 02:32 PM
| #38 | |
| Quarry Creeper Join Date: Sep 2008 Location: Petaluma
Posts: 282
| Quote:
I'm taking my time so I don't screw it up. I let it sit for about a week between coats. Although the blue is shining through - the fixer is like an eggshell color I didn't expect. Still looks OK because the soft top is a desert sand color. I'm planning on using that "sand" color for more accents throughout the suspension. I'm debating between "sand" and flat black for the fender flares. I got a great idea from anther "paint" thread about putting it in the microwave after painting to prevent dust build up while drying. Seems to take a bit longer to dry that way - but this is my "garage use" microwave so it's not like it gets used often. Although it's eather the cab or the bed that gets painted so it's taking a bit longer. Just hope no one decides to hit START on the microwave while I'm drying a piece. That would be bad. I will continue to update - suscribe so you'll be notified of new posts that get put up. You'll get to see the final job. Last edited by FodigoDave; 12-09-2008 at 02:36 PM. | |
|
| |
|
12-09-2008, 02:40 PM
| #39 | |
| RCC Addict Join Date: Jun 2008 Location: Monroe, NC
Posts: 1,547
| Quote:
Justin | |
|
| |
|
12-12-2008, 03:47 PM
| #40 |
| Quarry Creeper Join Date: Sep 2008 Location: Petaluma
Posts: 282
|
Mirrors finished today - Decided to do a two tone finish. Flat black and the color changing blue on the outer rim. Looks "interesting" to say the least. Will have to wait till it all gets assembeled to really get an idea if that was a good thing to do or not. The mirrors will have a folding type mechanism in case it rolls. That's another process step for later. Cab: I put on a third "heavier" coat of paint today. I debated doing it in the first place because it looked good as it was . but... Ugg - I think I might have messed it up I finished the bumpers today - those look hella cool. Currently accenting the undercarriage. All is looking good in that department. I'll keep you posted on more details. I'm working on new scale fire extinguishers too. I'm hoping to a few more vials to make more this week. I have an idea to make a scale NOS system for the bed too. |
|
| |
 |
| |


 Linear Mode


