| |
 01-08-2009, 07:59 AM
| #61 |
| RCC Addict Join Date: Jun 2008 Location: Monroe, NC
Posts: 1,547
|
Great work on the mirrors. It would suck to keep breaking them, Nice use of the lady's products. Justin |

|  |
| Sponsored Links | |
| | |
|
01-09-2009, 12:16 AM
| #62 |
| Quarry Creeper Join Date: Sep 2008 Location: Petaluma
Posts: 282
|
Had the frame and a few other items bling bling'ed. Amazing what a little chrome will do. 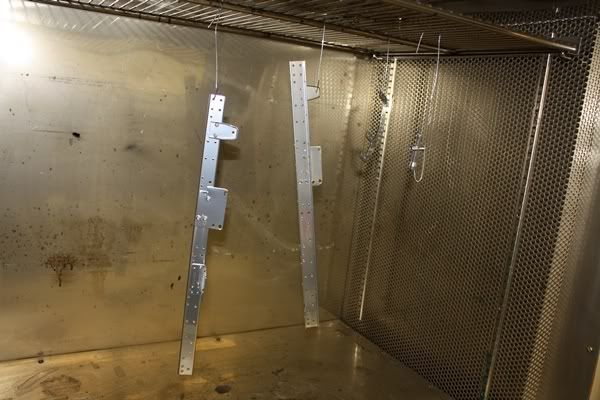 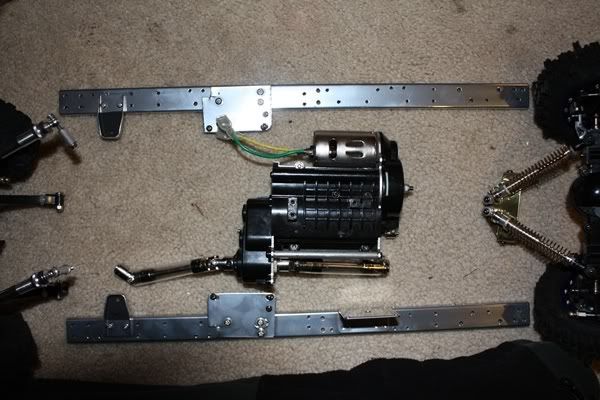 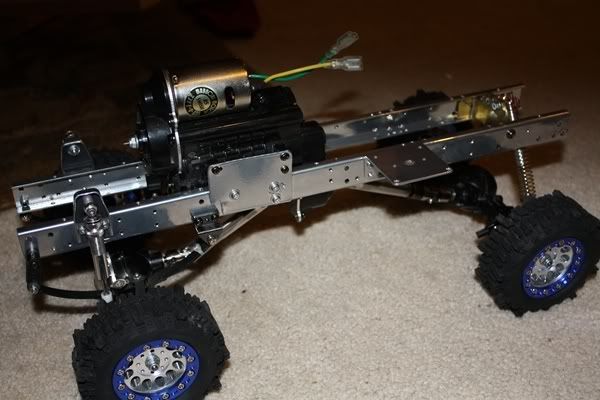 |
|
| |
|
01-09-2009, 07:04 AM
| #63 |
| RCC Addict Join Date: Jun 2008 Location: Monroe, NC
Posts: 1,547
|
Oh no, not chrome!! JK... Looks good Dave.  Justin |
|
| |
|
01-10-2009, 04:18 PM
| #64 |
| Rock Stacker Join Date: Jun 2008 Location: Wyoming
Posts: 58
|
I love the folding mirrors. I've been thinking I needed to do that to my chevy.
|
|
| |
|
01-10-2009, 09:22 PM
| #65 | |
| Quarry Creeper Join Date: Sep 2008 Location: Petaluma
Posts: 282
| Quote:
Thanks - it was really an easy fix and took about 10 minutes once I found the right drill bit. And works great. I've since put the cab on the frame and roll it around with the mirrors on while I work on it or the bottom, they just flop right back into place. No Damage! Lemme know if you need more details or pics. | |
|
| |
|
01-23-2009, 05:00 PM
| #66 |
| Quarry Creeper Join Date: Sep 2008 Location: Petaluma
Posts: 282
|
Taking apart the roof rack was a bit challenging but after picking at it for a while, I found a blow torch made quick work of the epoxy glue. 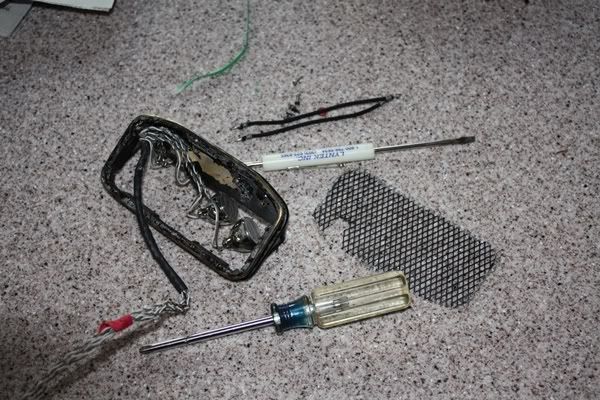 Finished the powdercoating of the ft brush guard, rear bed rack, roof rack and other things. 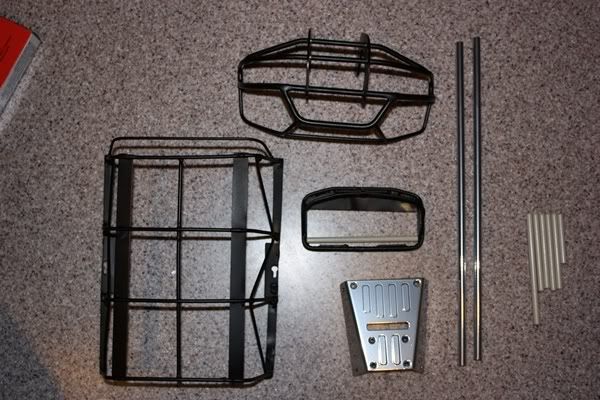 The rear 4 point suspension and controlling rods was powdercoated with Saraha Tan. 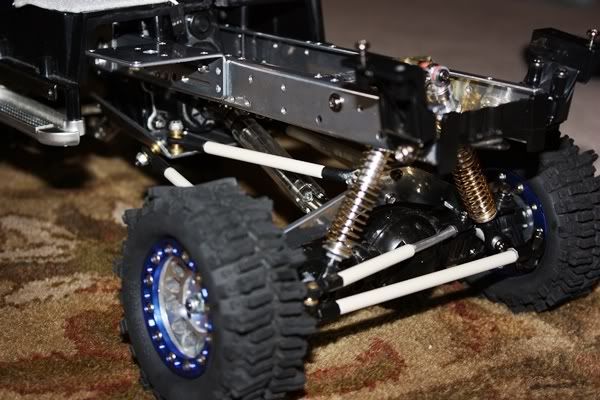 The front steering that Tamiya placed mid frame was moved to the front of the frame for more direct steering.  |
|
| |
|
01-23-2009, 07:28 PM
| #67 |
| Pebble Pounder Join Date: Jan 2009 Location: upstate
Posts: 111
|
Nice use of the wheel weights. Great idea the shell looks nice too. I have been thinking about doing it for my clod build.
|
|
| |
|
01-24-2009, 09:02 AM
| #68 |
| I wanna be Dave  Join Date: May 2006 Location: HONDURAS...ROCK HEAVEN
Posts: 5,076
|
Nice work, your h/l keeps getting better and better , i just did the tranny lift on mine, moved the steering servo and 4 linked the rear, it goes over obstacles much better, although i feel it's a liitle top heavier, i still have to inboard the shocks, what did you use for the shock mount and maybe a better pic if you could please, thanks.I went back and saw the shock mount pics, never mind my request. Last edited by cartronicshn; 01-24-2009 at 09:04 AM. Reason: Found the pics on the previous page. |
|
| |
|
01-24-2009, 11:10 AM
| #69 | ||
| Quarry Creeper Join Date: Sep 2008 Location: Petaluma
Posts: 282
| Quote:
To keep the shocks from binding - I used the stock f350 H/L parts 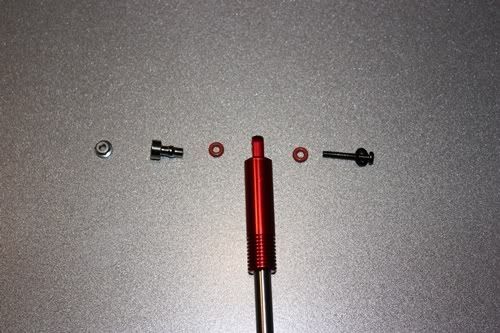 I used a thick gauge piece of brass (it was an old kickplate from a door [never throw anything away theory 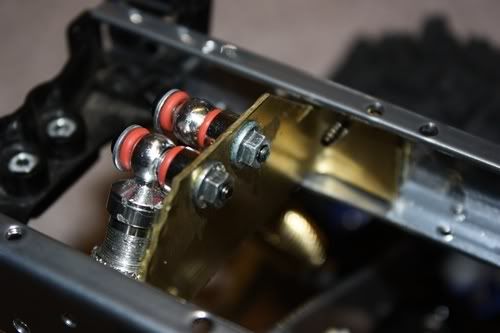 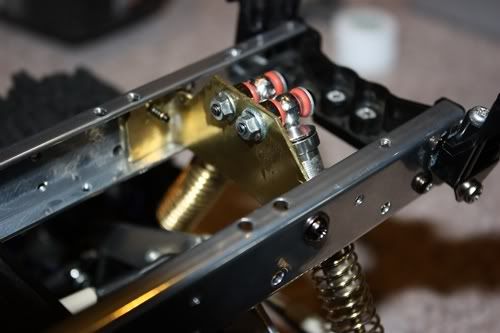 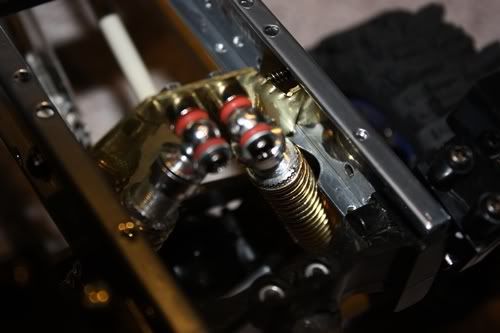 I notched the frame rail to accept the springs during max flex. The rails are really hard to grind with a dremmel. They are super strong. Although it clears the springs, I think I'll need to do more later. Seems the springs get hung up from time to time on the rail. I'm thinking that redesigning the springs will get rid of that problem. I'm still not sure of the beneift of having the shocks setup like this other than it looks really trick! and gives a clean look from the outside (no shocks seen under the bed fender wells) 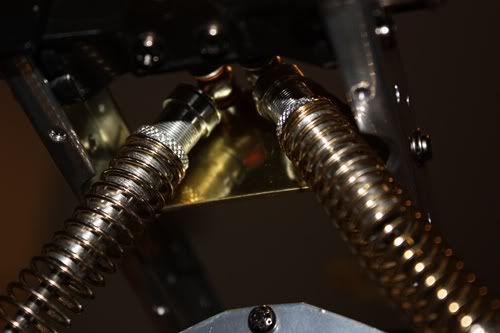 Quote:
Last edited by FodigoDave; 01-24-2009 at 12:13 PM. Reason: typo | ||
|
| |
|
01-24-2009, 05:09 PM
| #70 |
| Quarry Creeper Join Date: Sep 2008 Location: Petaluma
Posts: 282
|
- TRUSS - After powder coating the truss, I then came up with the idea of making a few holes in it after seeing a few others that look similar. Ugg - Another trip to the shop I guess. Here's the idea - before. I kinda made a psudo template to give a rough estimate of hole location and sizes. I didn't want three same size holes, I wanted them all different (just to make it a bit more difficult (and custom). 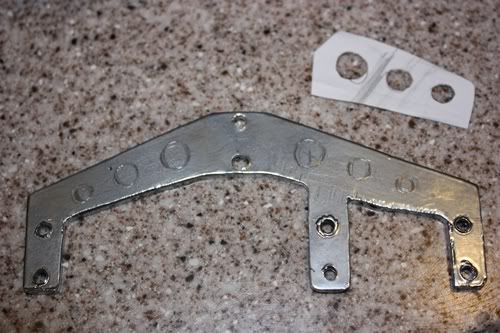 The markers looked good - but they just didn't line up exactly when it was drilled. Looks a bit messy! 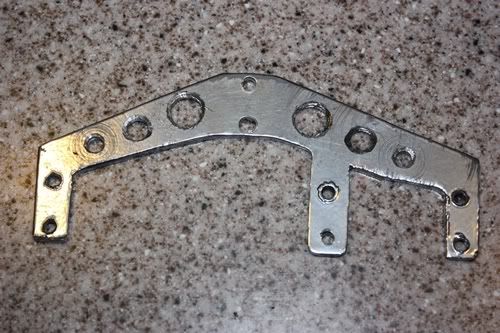 How about painting it flat black and hone out the radius'. That should accent the holes nicely. 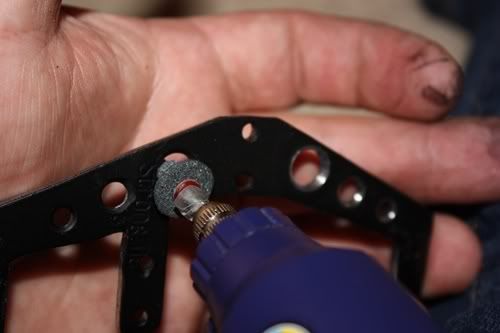 Humm - Looks better than I thought, cool! 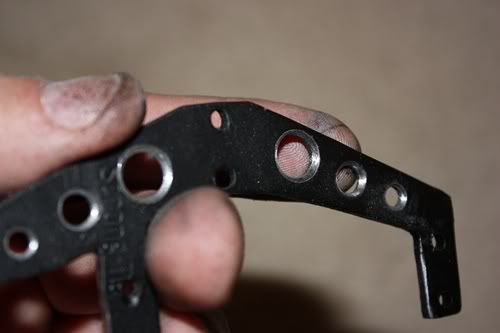 Putting it back on the axle, now it's a matter of just bolting it back on the rig. A half day job done in 5 pics. 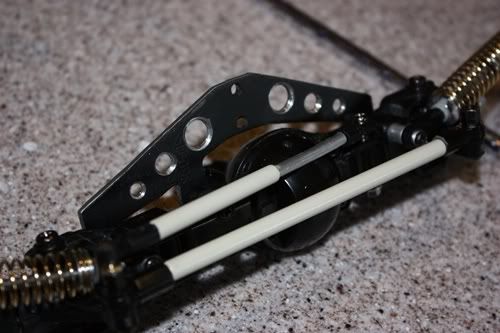 Last edited by FodigoDave; 01-24-2009 at 05:12 PM. |
|
| |
|
02-01-2009, 05:33 PM
| #71 |
| Quarry Creeper Join Date: Sep 2008 Location: Petaluma
Posts: 282
|
Looking more like a truck.. well. kinda.. Did work on affixing the MFU-02 unit to the back end of the trannie yesterday and today. Used a solder gun to heat and melt the MFU plastic to mate with the trannie. A little CA goes a long way. I had to go that route because I moved the transmission back about a quarter inch to help reduce the amount of trannie that will protrude out the front windshield (I raised it earlier for better ground clearance) and still want to mount the MFU upright in the cab. After the wiring nightmare gets more organized, I'll cut up the tinted windshield and start working on the interior. 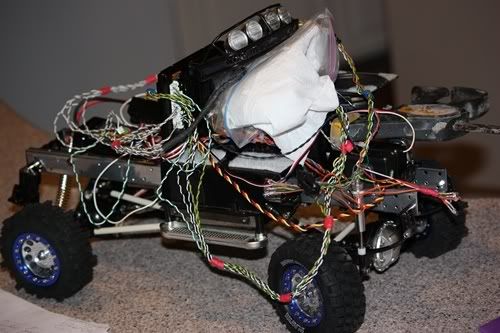 |
|
| |
|
02-01-2009, 07:35 PM
| #72 | |
| Quarry Creeper Join Date: Jan 2007 Location: Osaka, Japan
Posts: 425
| Quote:
Seriously though, I'm sure you'll get it tidied up great, I love this build! | |
|
| |
|
02-01-2009, 07:39 PM
| #73 |
| Pebble Pounder Join Date: Jan 2005 Location: canada
Posts: 135
|
That pic is my new background..lol..Great work...James
|
|
| |
|
02-02-2009, 04:05 AM
| #74 |
| Quarry Creeper Join Date: Sep 2008 Location: Petaluma
Posts: 282
|
What? You guys saying its a mess (LOL) My friend looked at it - says it looks like a crash-landed moon rover. Like I keep telling my wife about my other home projects, "it'll look good when it's finished" thanks for the funny comments - cracked me up! |
|
| |
|
02-02-2009, 06:41 AM
| #75 |
| RCC Addict Join Date: Jun 2008 Location: Monroe, NC
Posts: 1,547
|
Great job on that axle truss Dave. That picture looks like a computer exploded on your truck. Justin |
|
| |
|
02-02-2009, 06:45 PM
| #76 | |
| Quarry Creeper Join Date: Sep 2008 Location: Petaluma
Posts: 282
|  Ka-blewie! Good one Justin... Quote:
| |
|
| |
|
02-04-2009, 09:55 AM
| #77 |
| Quarry Creeper Join Date: Sep 2008 Location: Petaluma
Posts: 282
|
After seeing all those totally bitchen scalers where guys are building full-blown interiors, I just have to try. The F350 (as you know) comes with a FULL WINDOW TINT set of glass. Front, sides and rear are totally tinted. I want to up that by clear glassing (clear lexan) the front and rolling down the drivers side window. I have a LOT of electronics and wire to hide inside the cab so I'll leave the passenger window up for now... First thing - Draw out and pre cut the front winshield. I used a dremmel with a saw cutting blade. Just scratching the surface took time and protective eyewear. 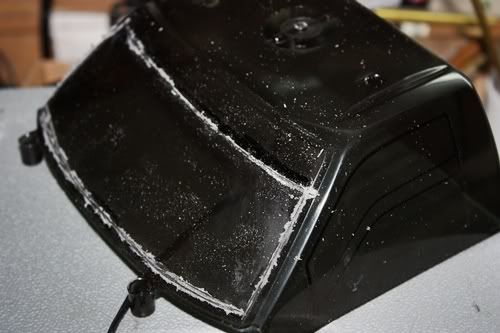 With diligence and more time, I finally cut through the darn thing... I left some at the top for a bolder-tint look and to also support the added lexan I plan on placing up there. 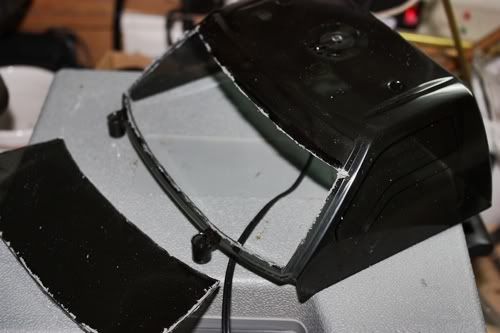 Next came working the side window. I made a paper template of the upper window and just transferred that image to about where I was expecting the window to look rolled down. 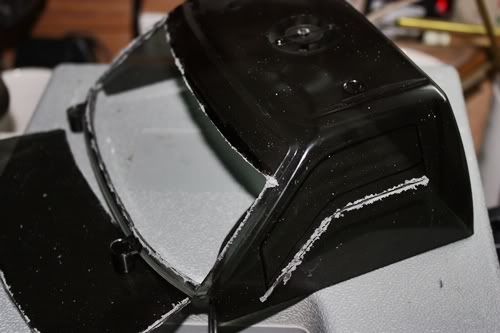 I punched out the side window - filed down all the edges and stuck it in the cab. 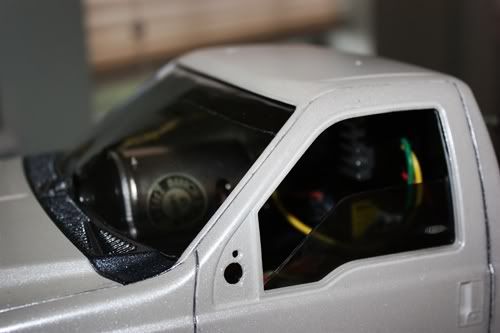 With the trannie buldging into the front windshield a bit - I made a mock-up front window so I could get an idea where to cut. After a while of thinking - I used the wife's hair drier (man, that things hot!) and form-fit the window around the transmission case. Not bad for a starter - next - I'll make a good window to go in there. I don't think I'll need to cut anything. 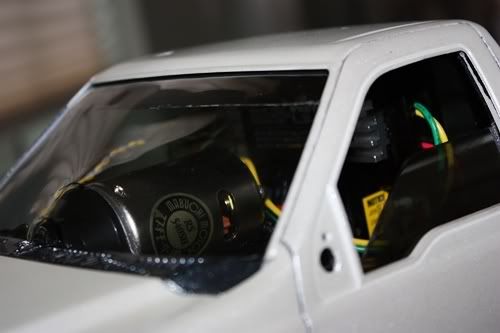 The idea for the interior is a horse-shoe shaped cockpit for the driver and rig componenets being hid on the passenger side. Last edited by FodigoDave; 02-04-2009 at 10:03 AM. |
|
| |
|
02-04-2009, 10:29 AM
| #78 |
| Quarry Creeper Join Date: Jan 2007 Location: Osaka, Japan
Posts: 425
|
How close is that motor to being a scale keg? |
|
| |
|
02-04-2009, 10:45 AM
| #79 |
| RCC Addict Join Date: Jun 2008 Location: Monroe, NC
Posts: 1,547
|
will you be able to do an interior with what you have in the cab already? Or are you going to move the electronics? Justin |
|
| |
|
02-06-2009, 05:21 PM
| #80 | |
| Quarry Creeper Join Date: Sep 2008 Location: Petaluma
Posts: 282
| Quote:
However, I have high hopes to get that darn interior put in! Speaking of which - I started working on the interior today with a few mock-ups. Still haven't come to any conclusions on how to do it. didn't take any pics yet but will soon. IF ANYONES FABBED AN F350 DASH - LET ME KNOW! Here's some of what I did earlier with other parts of the truck. Fender Flares! 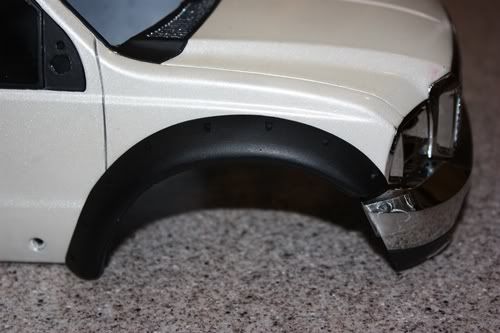 And did some chrome (aluminum) work using a thin aluminum adhesive film (like gold leaf). You can just see the door handles here and the gas cap on the other pic. I also redid the grill, had a few brushes with the front brush guard that needed repair. It was easier to just lay another layer of film on the grill, paint it, and call it a day. 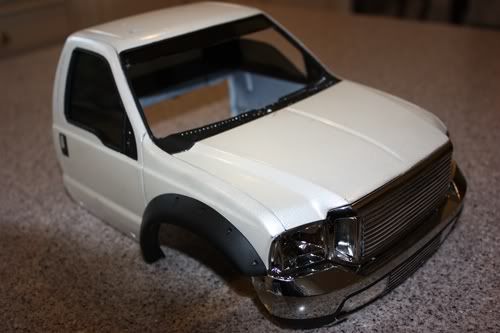 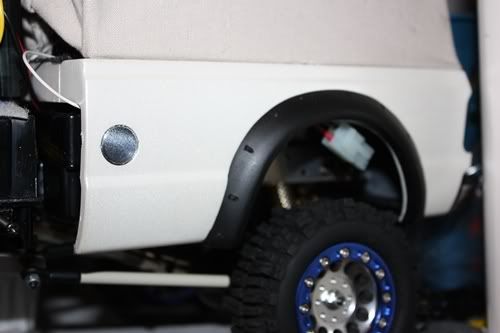 I moved the receiver forward just a bit and now have room to tuck a roll of wires in that spot - but now I'm thinking of running the wires out - house it in a frame rail box, and then bring the wires back in. Still not sure yet - working on several options. 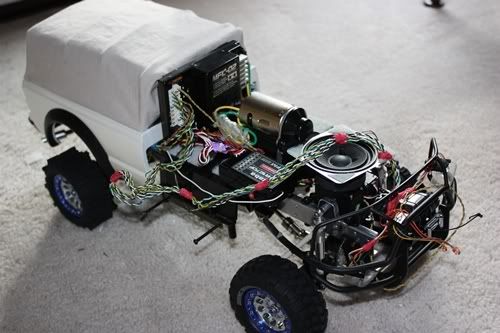 Oh yea - and I TOO got a winch! 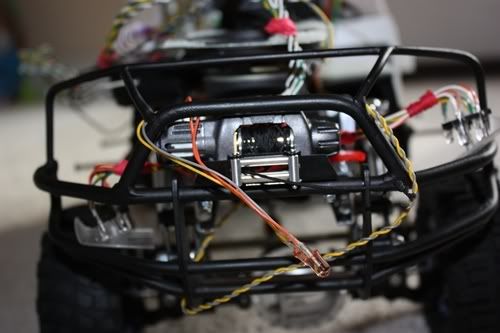 DARN IT - It took the place of my aux. lights. Will have to relocate those too - but worth the effort for the winch. Last edited by FodigoDave; 02-06-2009 at 09:44 PM. | |
|
| |
 |
| |


 Linear Mode


