| |
 05-02-2009, 12:33 PM
| #41 |
| Quarry Creeper Join Date: Sep 2008 Location: Petaluma
Posts: 282
| |

|  |
| Sponsored Links | |
| | |
|
05-07-2009, 10:39 AM
| #42 |
| Rock Crawler Join Date: Jun 2006 Location: Wisconsin
Posts: 570
|
Thanks El Barto. Dave, your welcome. Happy to help. Whew! So the last couple of weeks I've been struggling again with the cowl hood. I thought I was mostly done with the body work and then I got some nice weather and decided to hit the cab up with some primer. Finally, it's warming up enough to paint outside. Well, nothing shows flaws better then a nice white coat of Tamiya fine primer! I ended up going back and smoothing out the flaws. Low spots, high spots, little pin holes, ect. I didn't think I was ever going to get things perfect. At one point, I thought I was better off starting all over again, but then some how with some sanding things started looking great. They still aren't quite perfect, (I'm a perfectionist) but it's really, really close. I am happy enough that I can scratch that hood off my list. It's hard to capture the lines when the object is all white and brightly lit under the sun, but here are the pictures from today's work..... 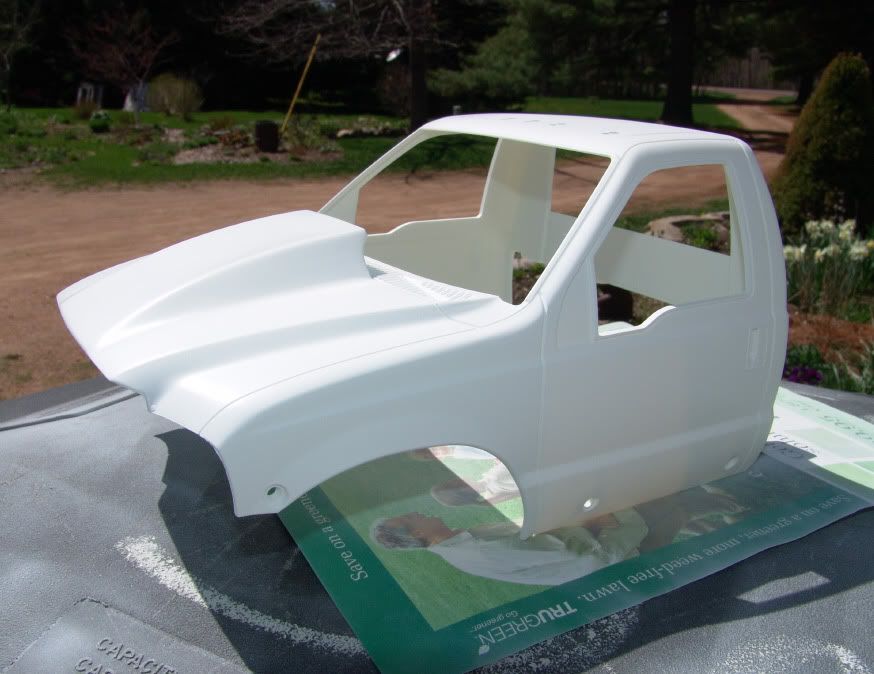 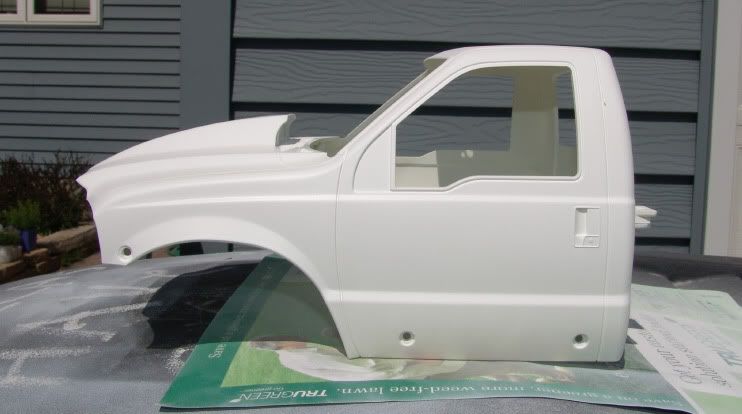 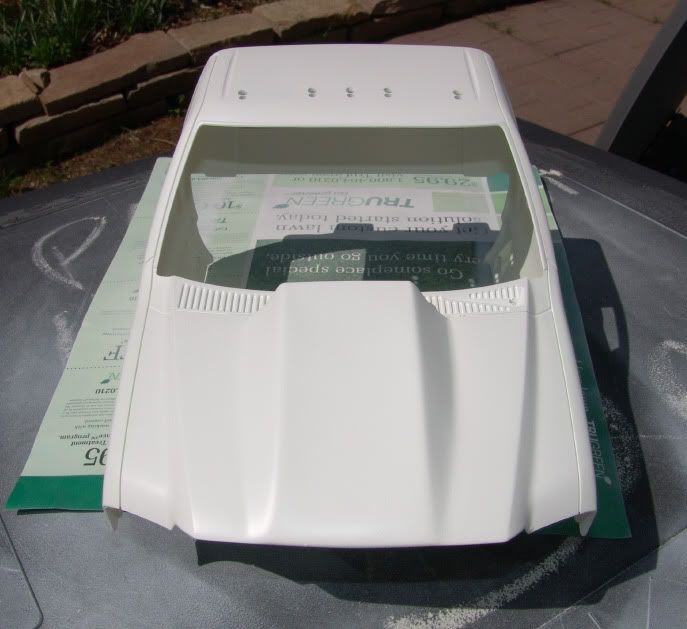 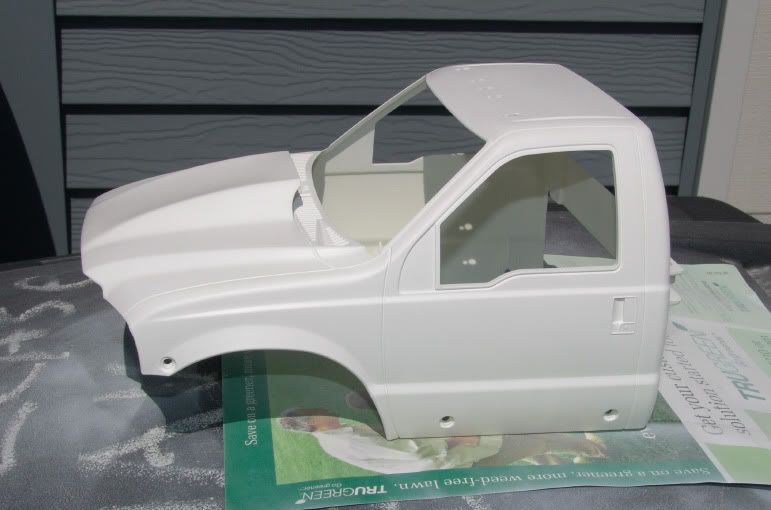 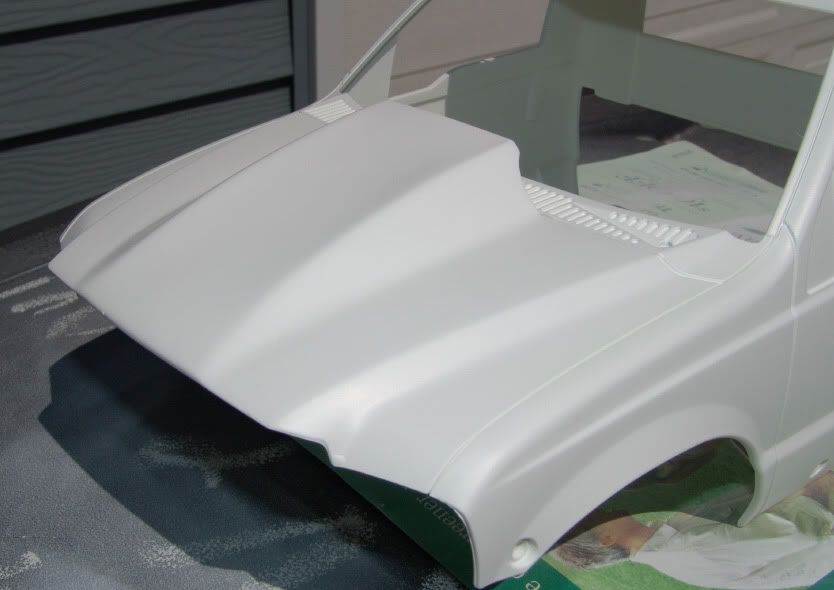 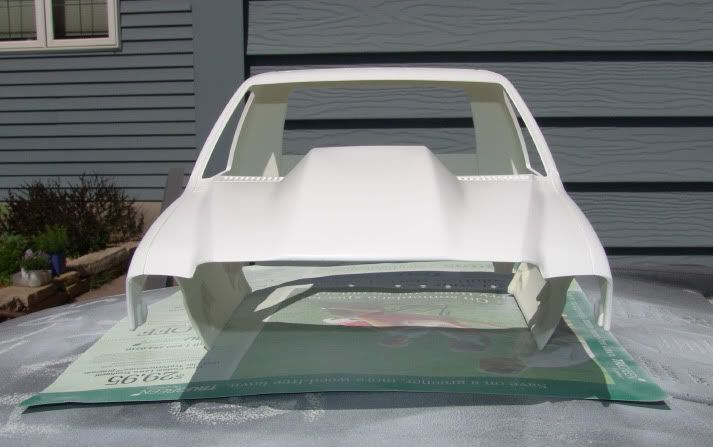 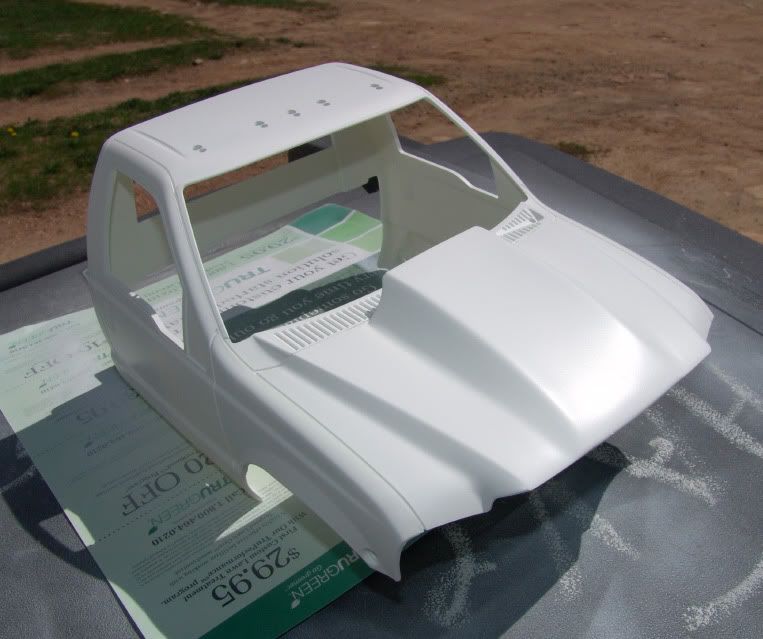 Now, to just prime everything else and then I get to make a final decision on the paint scheme of the truck. Hopefully I don't have any mistakes or problems. I've got to much time into the body to mess things up now! I am going to try doing a billet grill for the truck as well, and that will be the last of custom touches. Dave's F-350 inspired me. I've got a good idea. I hope I can make it work. |
|
| |
|
05-07-2009, 07:17 PM
| #43 |
| RCC Addict Join Date: Jun 2008 Location: Monroe, NC
Posts: 1,547
| |
|
| |
|
05-07-2009, 10:32 PM
| #44 |
| Rock Stacker Join Date: May 2009 Location: San Francisco
Posts: 90
|
that is pretty cool, how did you do it?? cut, some how weld it together and then bondo???
|
|
| |
|
04-24-2010, 12:09 PM
| #45 |
| Rock Crawler Join Date: Jun 2006 Location: Wisconsin
Posts: 570
|
Thanks guys! Happy Trucker, I made the cowl hood using sheet styrene and Tenax 7R glue, which does weld styrene and other plastics. I don't think you can buy Tenax 7R anymore. Most places list as discontinued. Not sure why. There are other brands out there that do the same thing though. Now I use Plastruct Bondene. It's every bit as good. There is no bondo or body filler anywhere. I hate using it because when the styrene flexes the putty or bondo doesn't. That makes cracks. Looks horrible. The better the styrene work, the better the result. I am still learning myself. This cowl hood was one of three attempts! I was still not happy with it, even after priming it, which brings me to an update, FINALLY! I am a perfectionist. I admit it. I hated the above cowl hood. It was close to perfect, but it wasn't. Not 100% symetrical. So, the old hood was removed and I started over again. 4th time is the charm! Here are some new photos. Notice the real update here is the front bumper I am working on. I have decided to ditch the stock F-350 bumper, and the brush guard. The cowl hood is also new and redesigned. 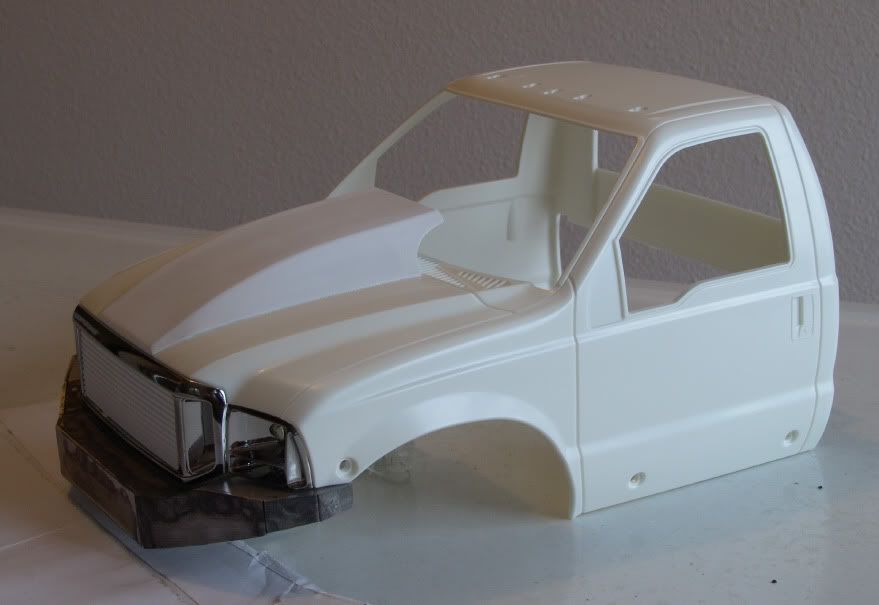 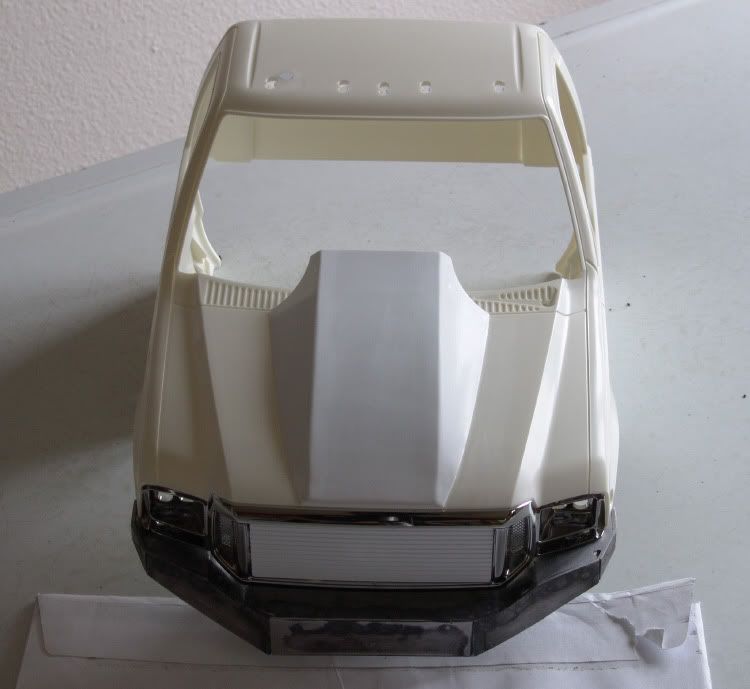 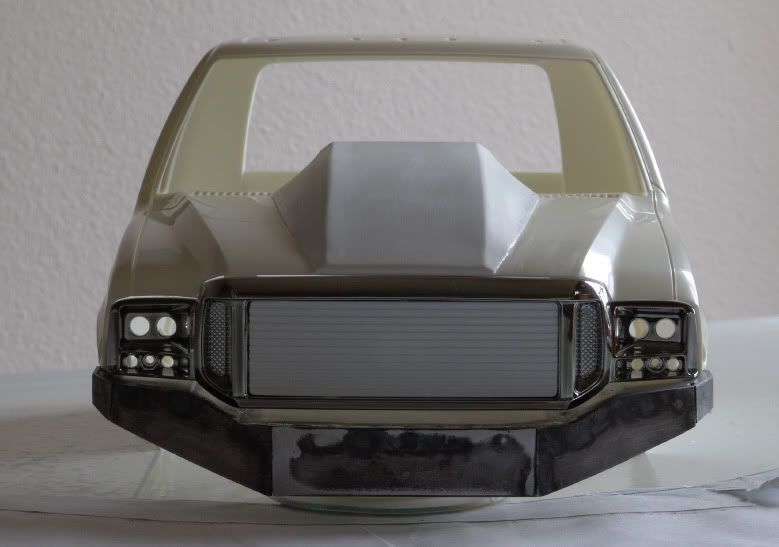 I am also playing around the with the idea of a billet grill insert. I just want something a little different. So far I am not sure if I will go with the styrene insert I have cut. I did mill out the original cross members of the stock grill, so there is no going back now. In this shot, you can see it actually looks half-way decent. 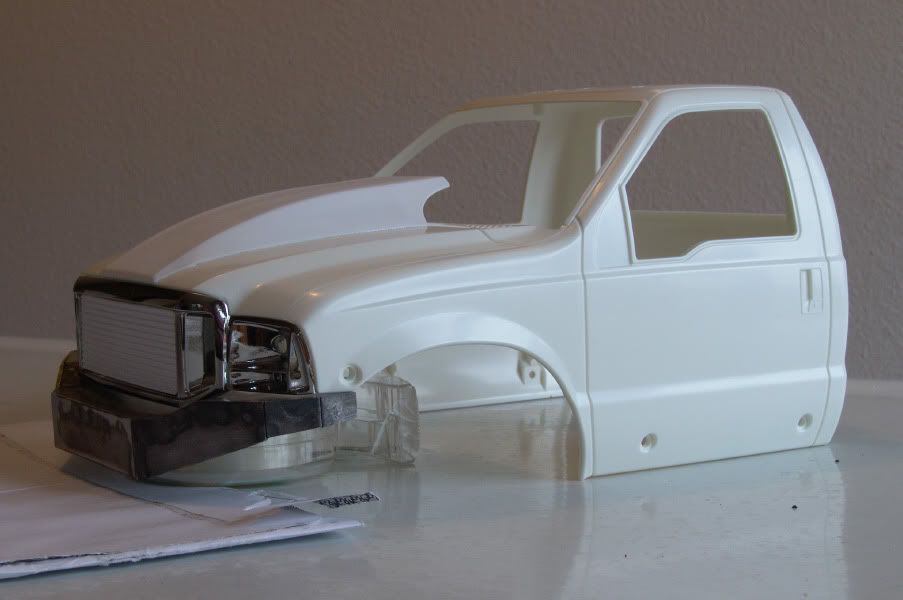 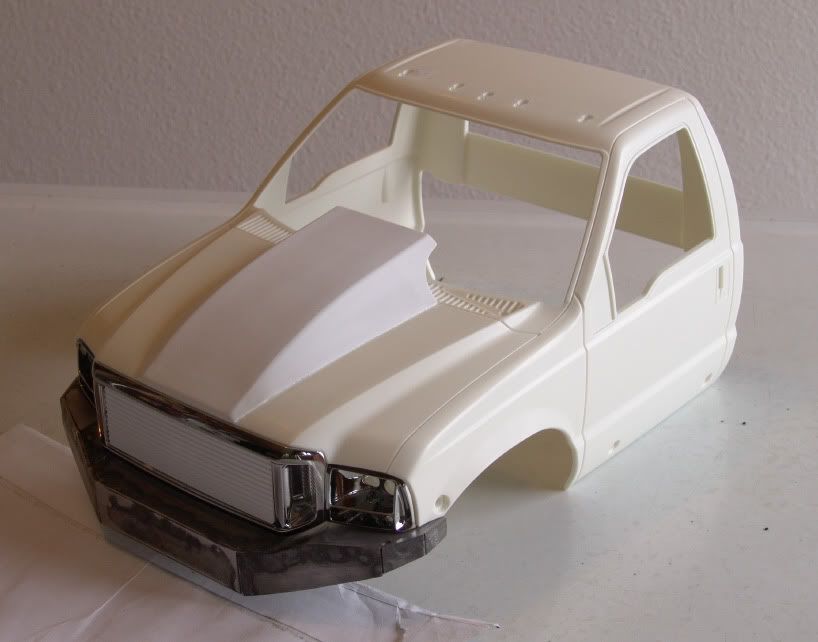 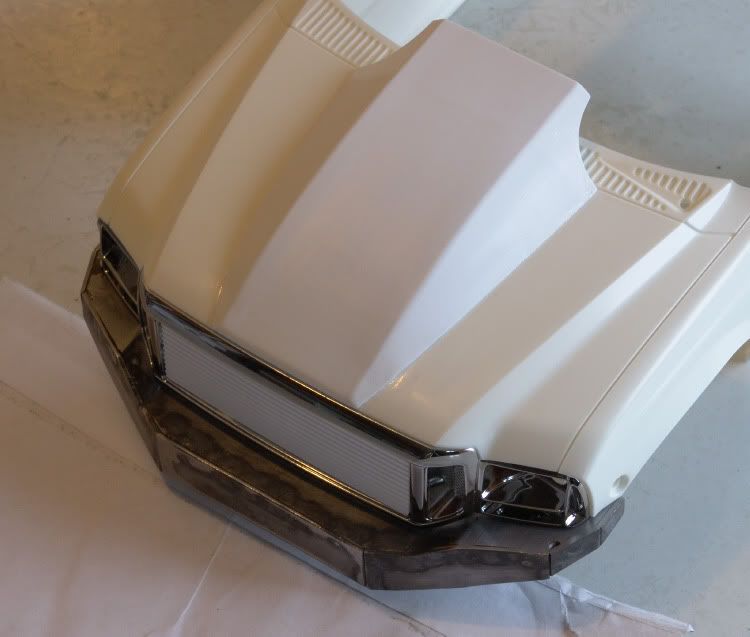 Good look at the re-designed cowl. It's better in everyway, but not necessarily taller. I am very happy with this one. It is 99% flawless. No body filler at all. Not even primed with paint, and it looks good. 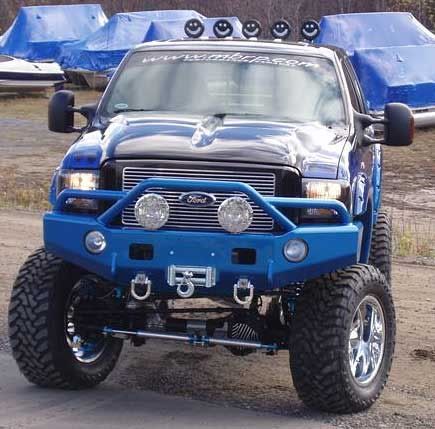 And the inspiration for the bumper. 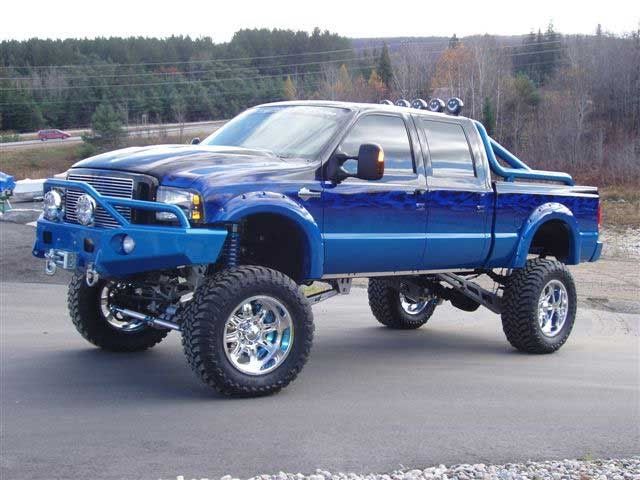 After buying my 3R winch, I really wanted to use it, but had no place to fit into the original Tamiya bumper. I started digging for photos of 1:1 winch bumpers and found one I liked and figured I could fab up. I am still working on the winch bumper. It needs the angled plates underneath yet, all the weld and seams cleaned up really good, and the tabs closest to the fenders trimmed to match the profile. Then there is the need to figure out how to mount my winch inside the bumper. Rollers on the outside. I also want to make some d-rings. I have an idea for that also. Then I need to figure out how to mount the sucker to the Highlift chassis! I hope it all comes together. I will be adding quad lights, recessed in my bumper too. Lots to do, but it will slowly get there. Last edited by Espeefan; 04-24-2010 at 12:13 PM. |
|
| |
|
04-24-2010, 05:41 PM
| #46 |
| Newbie Join Date: Mar 2010 Location: Provo, Utah
Posts: 47
|
Man your truck looks sweet! this is a great build. The way you have kept the wiring to all the electronics so clean is amazing. I will be keeping up with this build for sure. Keep it up man.
|
|
| |
|
04-28-2010, 11:31 PM
| #47 |
| Newbie Join Date: Apr 2010 Location: Libville
Posts: 16
|
you are making me want a highlift more and more. I will be watching. Great Job man!!!!
|
|
| |
|
04-29-2010, 06:34 AM
| #48 |
| Rock Crawler Join Date: Jun 2006 Location: Wisconsin
Posts: 570
|
Thanks Little Rockcrawler and Rocket Ranger 88. Glad you guys like things so far. I know this build isn't as elaborate as what some guys are doing, but the Highlift is still a fun truck, and I you can only change things so much before it's not a Highlift anymore. More like customize it. Anyway, the latest update is that I have decided to machine a front bumper, similar to the steel one I welded up, out of derlin instead, to help cut some wreight down. Have to see how that goes. It will probably be a pretty ambitious machining project for me, as I am not a machinist, but I'll give it a shot! I will change the dimensions slightly. Beef it up just a little, but it fits great on the chassis (my mock-up). Here are a few pics. 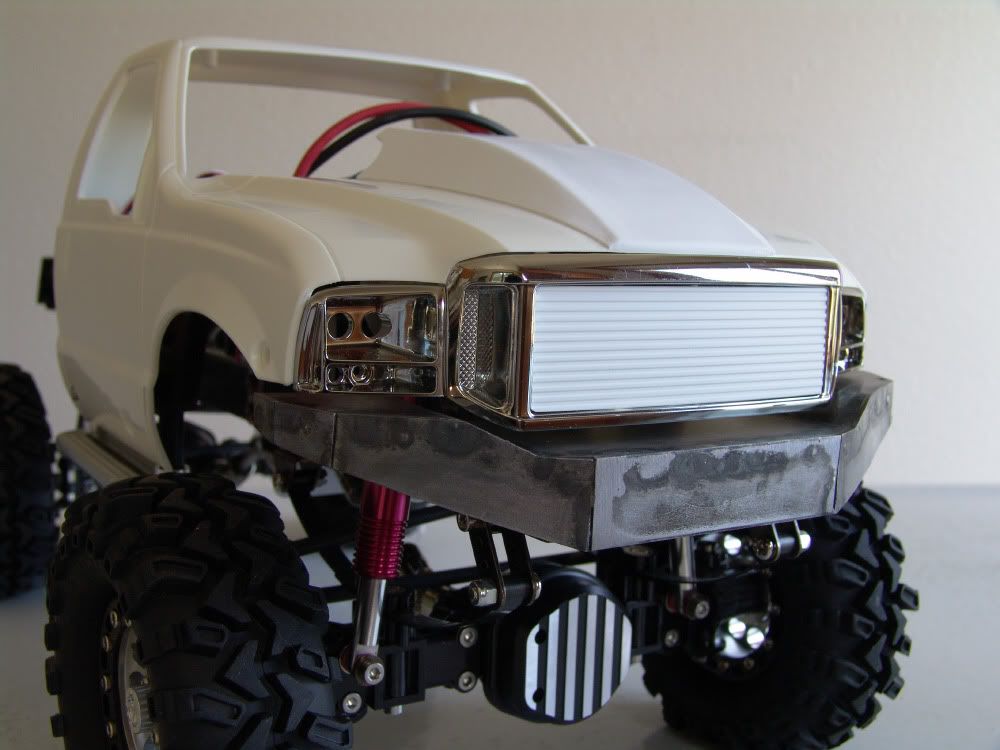 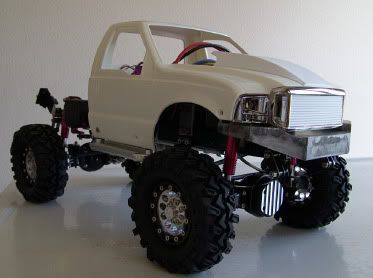 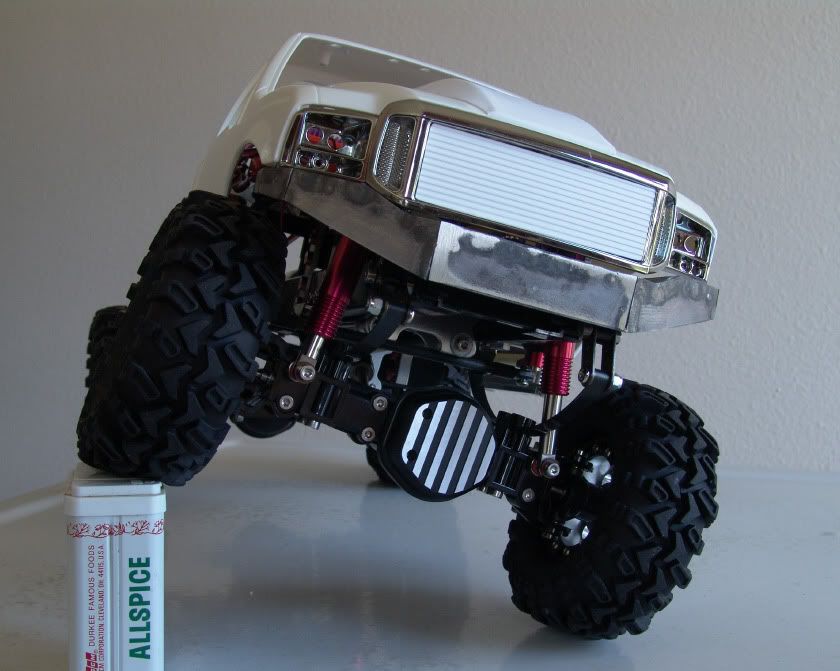 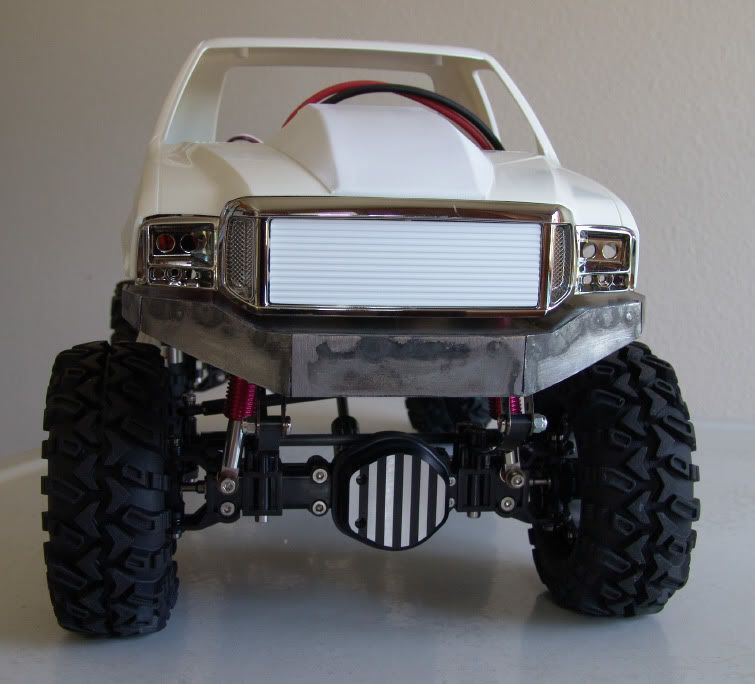 It's going to be a bugger fitting the 3R winch in. There is still not enough room to put it behind the bumper, like I wanted to, and the spring shackles also will limit me from adding much more depth to the underside of the bumper, unless I notch it out, like the stock F-350 bumper. I think it looks pretty cool, just as it sits, so the derlin bumper will be very similar to what you see here. |
|
| |
|
05-10-2010, 09:37 AM
| #49 |
| Rock Crawler Join Date: Jun 2006 Location: Wisconsin
Posts: 570
|
I got a little more work done on my Highlift this weekend, and the last. Time for an update! First of all, I got some derlin in so I was able to machine up a new heavy duty bumper for the F-350. It's not 100% complete yet, but the basic shape is there. I'm am still looking at ideas for mounting it to the chassis, plus there is more detail work to do to it, but here it is in a raw state. 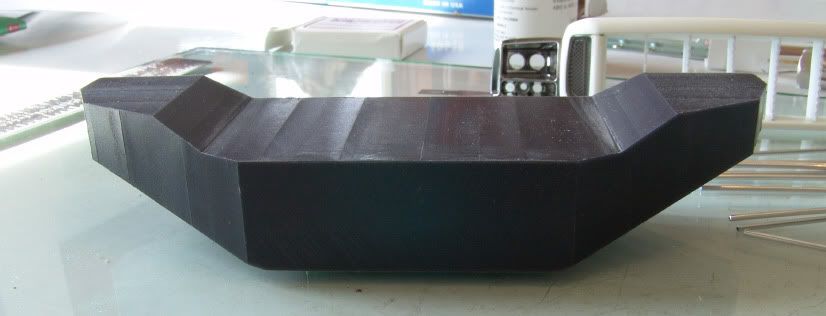 Need to mill some recessed openings for off road lights yet, make some d-rings, and maybe, just maybe I'll build a small and simple grill guard type tube. I still don't know if I'll be able to fit the winch in. My guess is not very easily, but this truck has turned into more of a tow truck, and I would really like to set it up for a 5th wheel gooseneck, but that will come afterward. So maybe it doesn't really need a winch after all. Fittment with the grill.  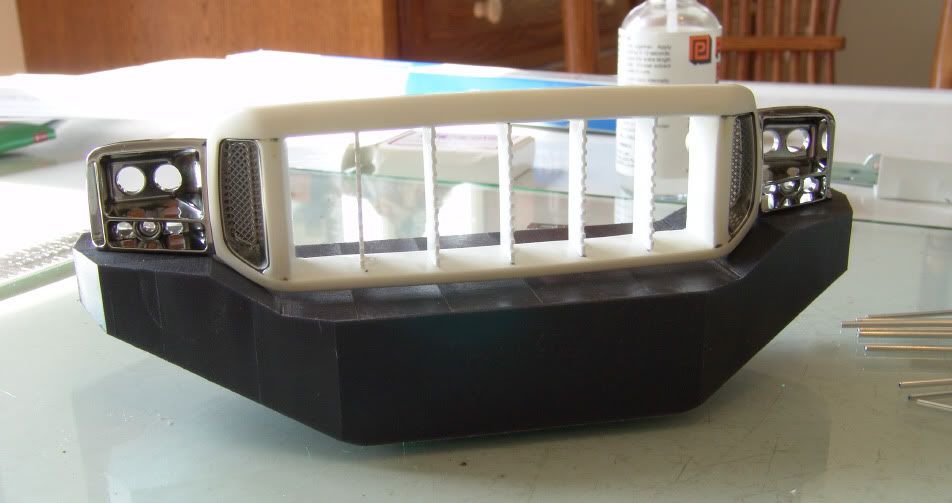 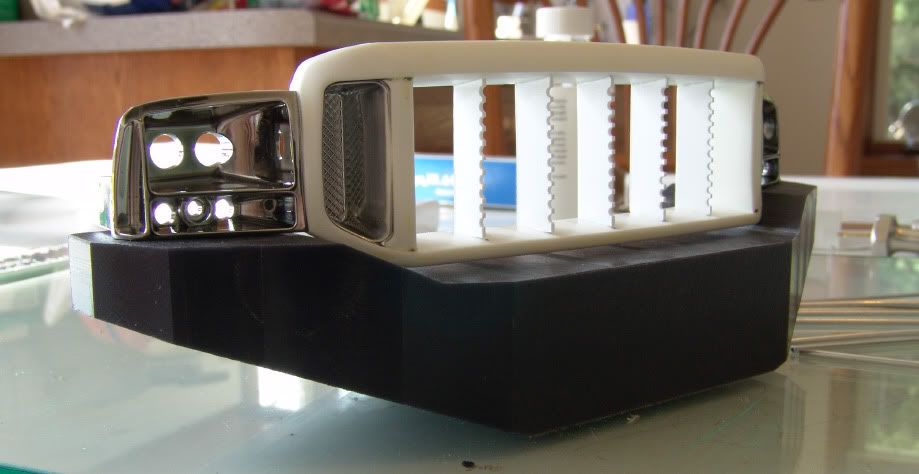 And, I think I figured out how to build the billet grill I was wanting for this truck. 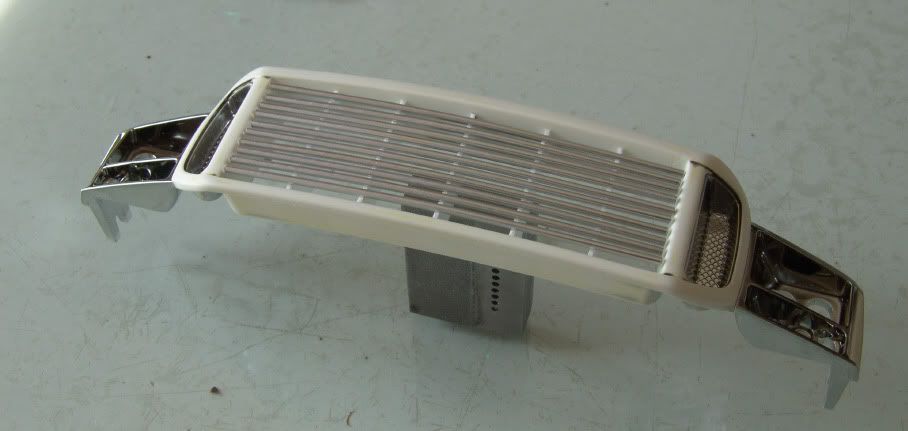 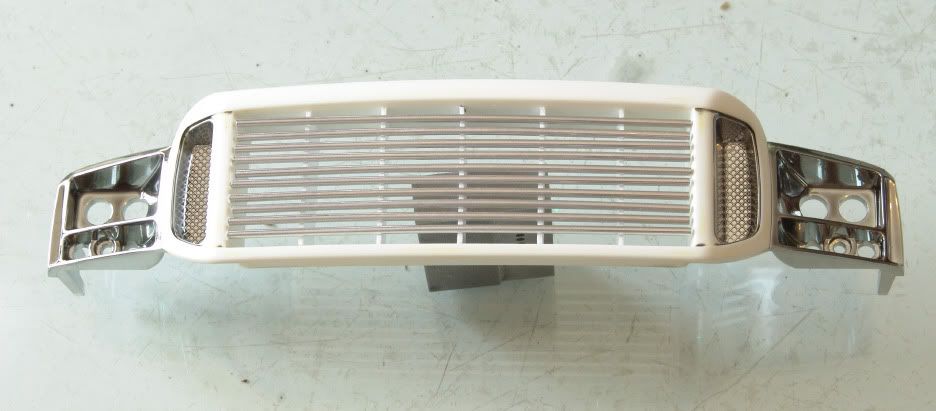 Let's just say I had to sacrafice a F-350 grill to figure this out, but the end results are pretty good! The billet inserts will not be glued into place until the grill is color matched (painted) to the body, which I think the color is going to be black. I still have a lot on the list of things to do, but it's getting closer! So is summer. The goal is to get done by June sometime. The weather still has not been the best for outdoor painting. It's pretty cold here and we just got snow last Friday. Probably 2 or 3 inches worth! What do you guys think? |
|
| |
|
05-17-2010, 09:41 AM
| #50 |
| Rock Crawler Join Date: Jun 2006 Location: Wisconsin
Posts: 570
|
I have started working on the bed of the truck. I didn't think I was going to do a drop bed at all, but the more I looked at the bed, the less I cared for the shallow relief. So, I have started a bed drop now. Mine will not be as deep as many I have seen. I can't afford to loose the space for my battery packs, which I relocated to the underside the bed. Also, I have my rear wheel steering servo under the bed and the shock towers. I could easily take off the rear servo, and I guess I could lower the shock towers, or relocate them, but I don't really want to go all through that. I can, however, at least double the depth of the box with a bed drop and still have room for all the stuff underneath. Right now, it looks like I will be going about 1 and 3/8 of an inch deep. It should look a lot better then stock. I think 1 and 1/2 to 1 and 5/8" deep would be perfect, so I am close to an ideal depth.  Chop, chop! 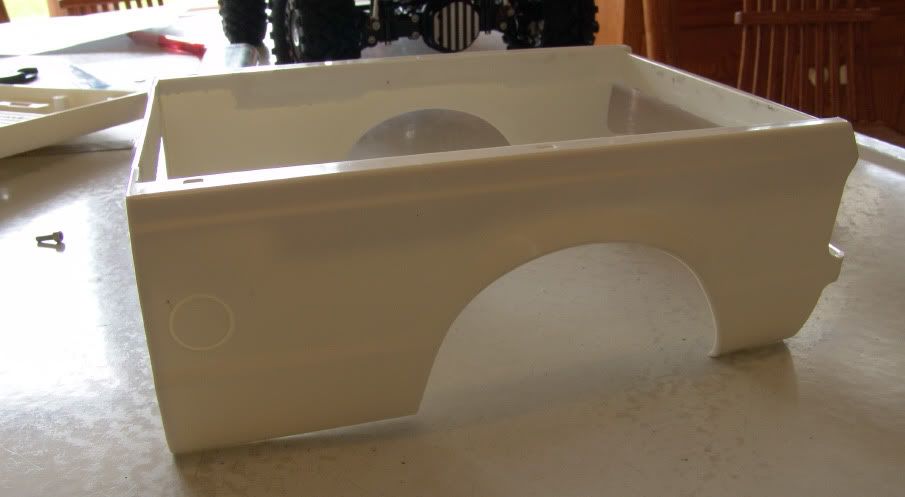 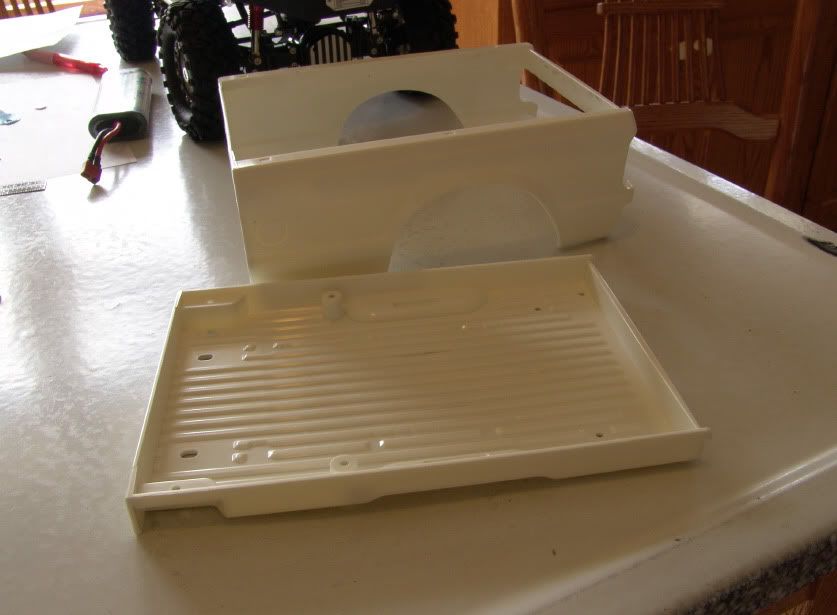 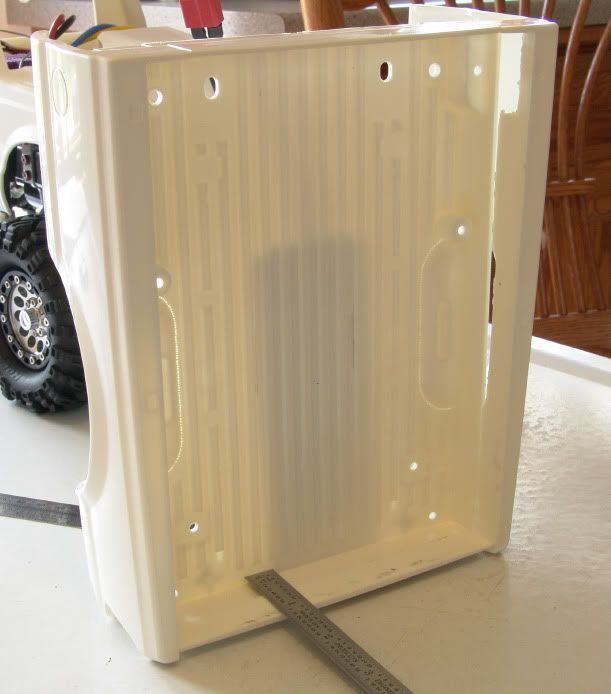 I've just got the box pieces cut apart at the moment, but they will be joined together when I get the chance. It's a good start though! If wasn't for me wanting to install a 5th wheel hitch in the truck, I probably would not have bothered dropping the bed, but with the hitch in place, it will draw more attention to the box, and this will help things look a little better! |
|
| |
|
05-23-2010, 11:41 AM
| #51 |
| Rock Crawler Join Date: Jun 2006 Location: Wisconsin
Posts: 570
|
Hello guy. I am making slow, but steady progress on the Highlift. Sometimes one thing leads to another, and then another, but here is what's new. Got a little done on the drop bed. It's not going to be 100% correct, with some of the detail I have seen some guys do. I opted to make a simple box within a box design. So there isn't going to be a channel look at the top edge of the box. I do plan to add some ribbing to the floor, and some embossing to the sides to at least suggest that the box is not all smooth. My wanting to install a 5th wheel hitch started the whole drop bed idea! 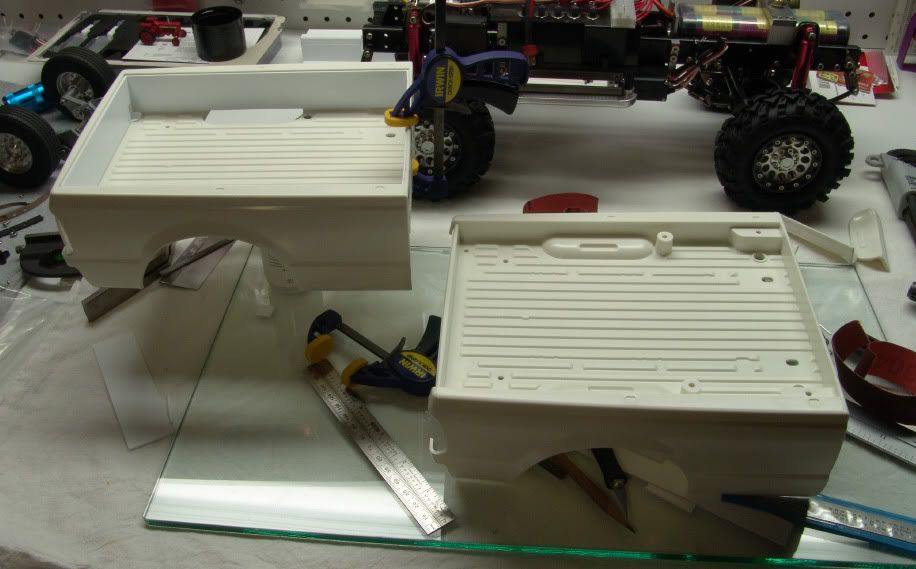 Though my drop is only about 1 and 1/4 inches deep, it's pretty much double what the stocker would look like. 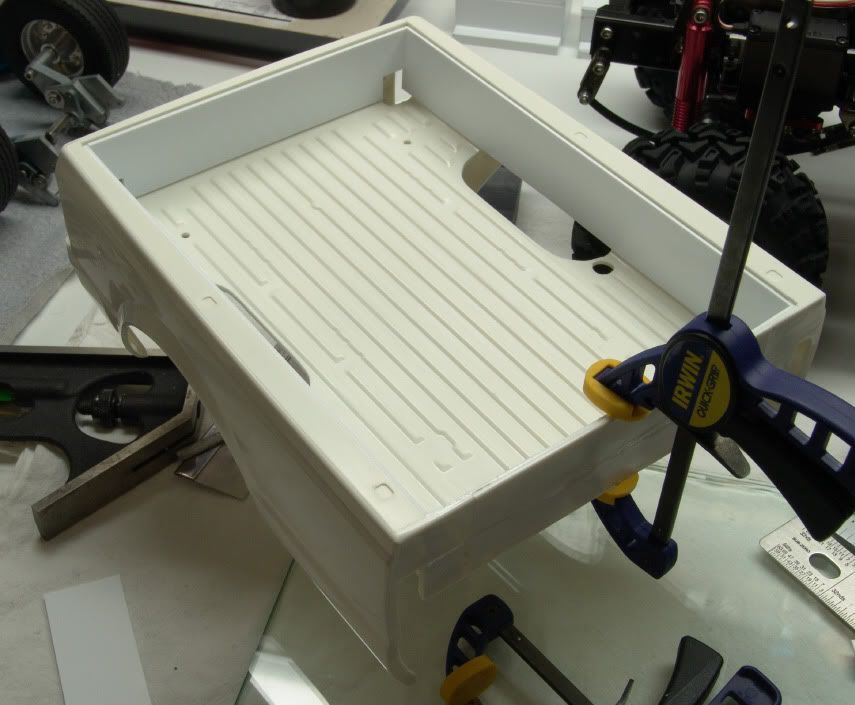 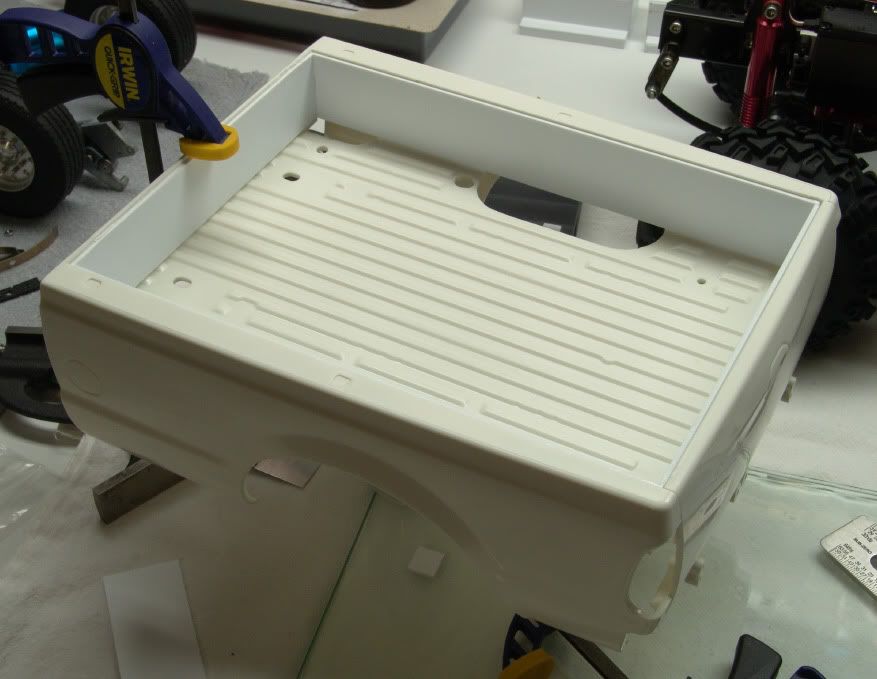 Speaking of the 5th wheel hitch..... 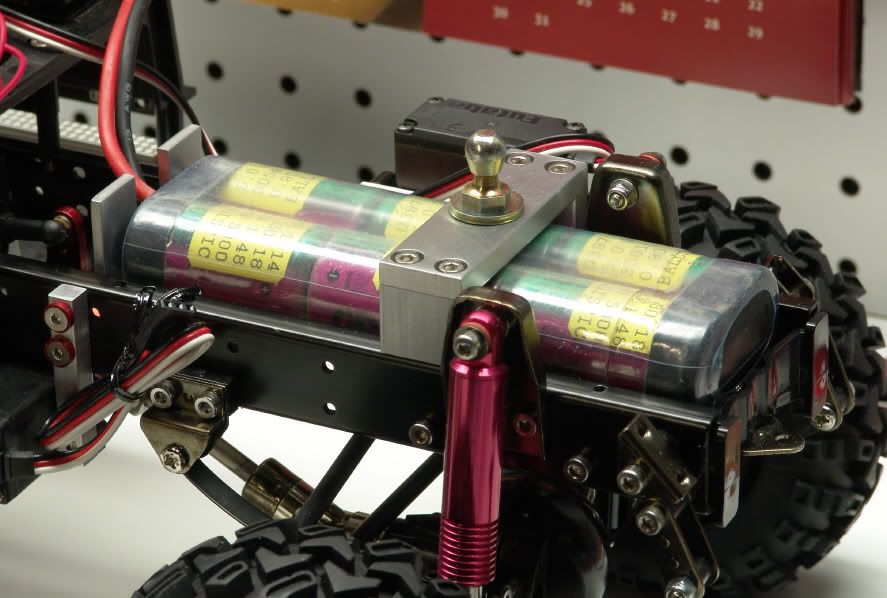 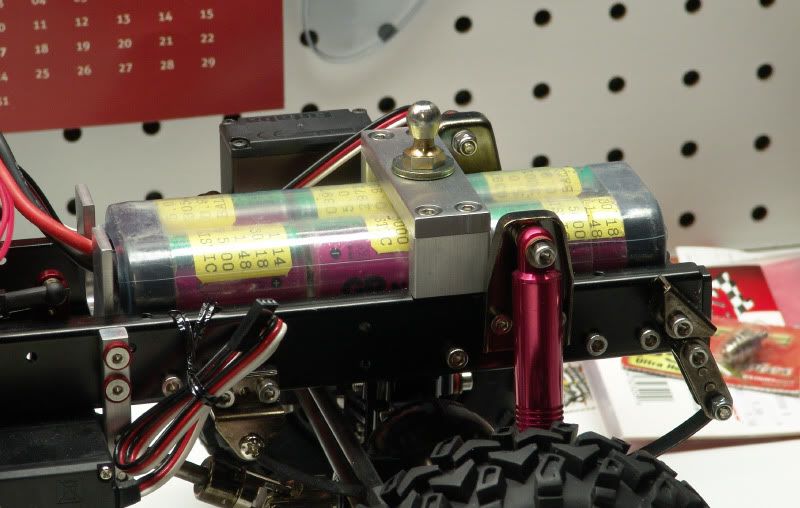 I machined the hitch up out of some aluminum. It will be completely hidden under the box, and only the ball with show through. Much like the 1:1 hitches you can buy for a truck. We had one on our old '93 Dodge. It was nice. Along with that, I also machined a cross member and a battery tray/plate. I needed a way to support and secure the battery in between the frame rails anyway. The rear chassis cross member holds the pack well, but up front, there was nothing. Hard to see in this photo, but it's there. The 5th wheel hitch acts as a hold down as well. Both of these keep the battery from moving around. 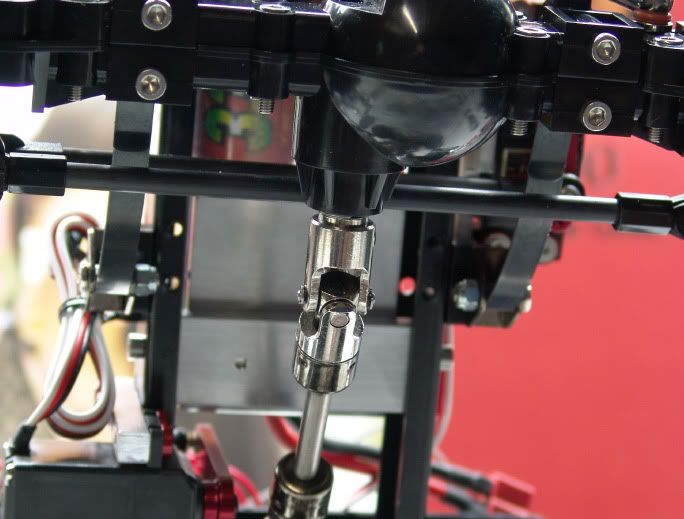 The last couple pics are of something I am still working on. A mystery part. Can anyone guess what it is? 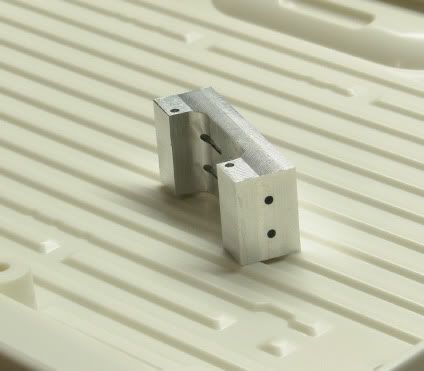 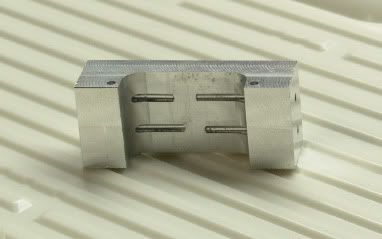 It's not done yet, but hopefully it will be soon. I just hope I don't mess it up, when I clamp it onto the milling machine to finish it. Last edited by Espeefan; 05-23-2010 at 11:47 AM. |
|
| |
|
05-23-2010, 11:08 PM
| #52 |
| Rock Crawler Join Date: Sep 2009 Location: Bushnell FL
Posts: 648
|
A reese hitch?
|
|
| |
|
05-26-2010, 10:50 AM
| #53 | |
| Rock Crawler Join Date: Jun 2006 Location: Wisconsin
Posts: 570
| Quote:
Here's an update on the part. I was able to do a little more machining on it yesterday, so maybe this will help give a better hint as to what it is. 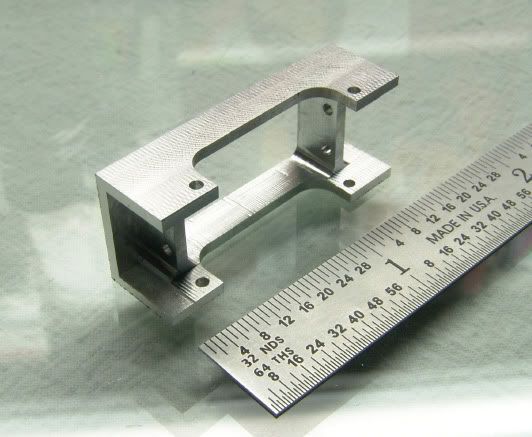 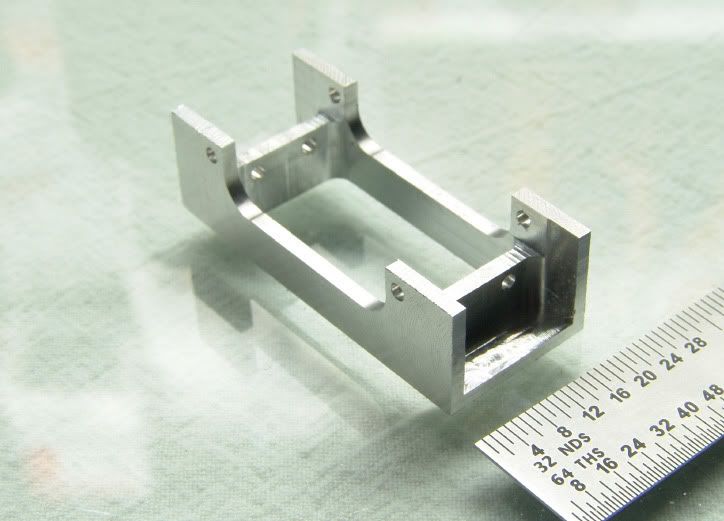 Just a few little things to do and it will be done. | |
|
| |
|
05-27-2010, 08:36 AM
| #54 | |
| Newbie Join Date: Jun 2009 Location: reykjavík,iceland
Posts: 36
| Quote:
| |
|
| |
|
05-27-2010, 11:50 AM
| #55 |
| Rock Crawler Join Date: Jun 2006 Location: Wisconsin
Posts: 570
|
Powered by Ford, good guess! Pretty much spot on! A winch roller mount is what I've been working on. What gave it away? Snapped some photos of the latest progress and updates. Here they are. The bed drop is pretty much finished, but I have to plug a couple holes yet, and there are some spots that could use a little smoothing over, and maybe some putty. This thing took me forever to do. I did what I could to keep it looking like a half-way accurate Ford F-350 bed, based off of photos I found on the net. (I'm really a Dodge guy, but like the Superduty too). I ended up layering in some details with the styrene. It's not 100% accurate, but a heck of a lot better then what Tamiya gave me to start with! The openings at the tailgate corners are access holes, so I can install the tail light buckets, lenses, and LEDs later. I will fab up a cover for that, so the box will be seamless, later. 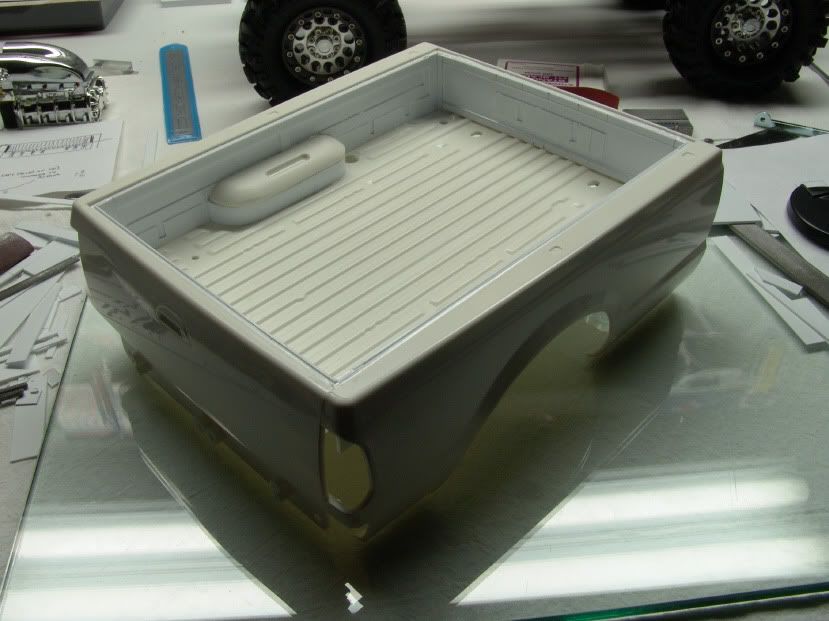 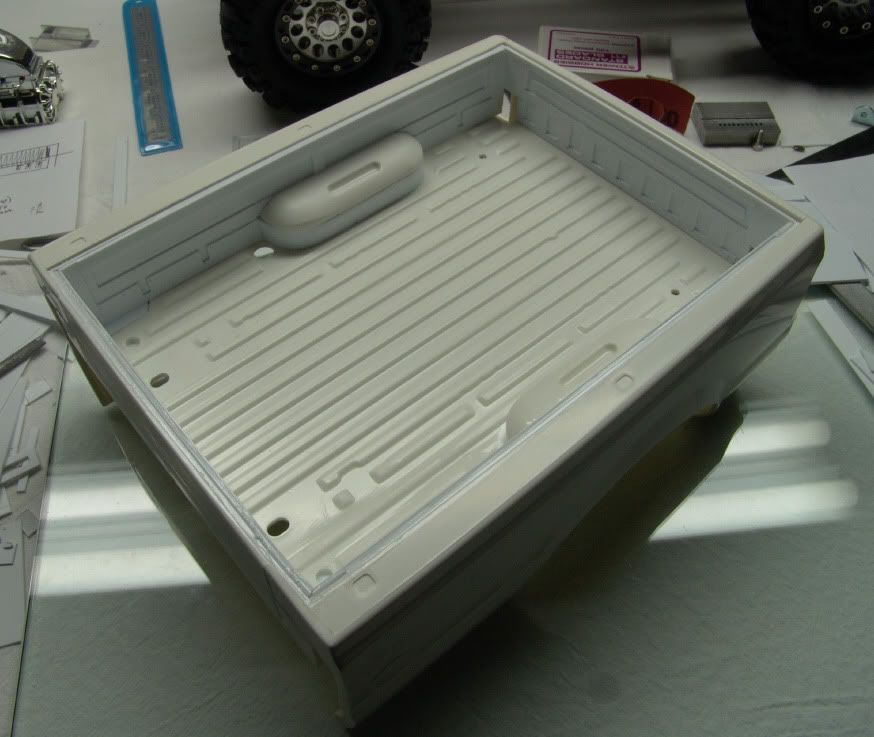 Also, some finish work on the HD bumper and winch roller mounts. Still need to make the rollers, and figure out if I should run the winch cable through a guide tube, or just bore the hole behind the winch roller frame the rest of the way through the bumper. I milled the center out as deep as I could go, but my end mill couldn't make it all the way through. It's not a long enough end mill to come out the back side. Minor. I'll figure something out. 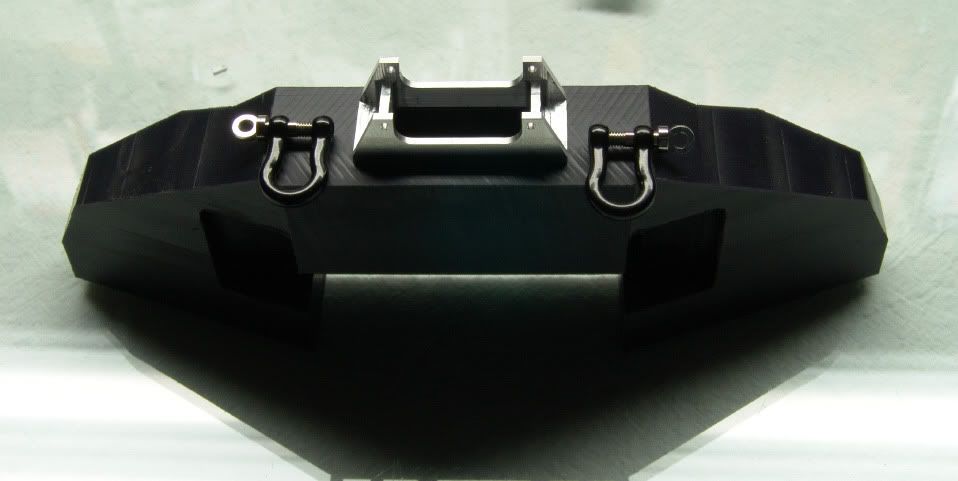 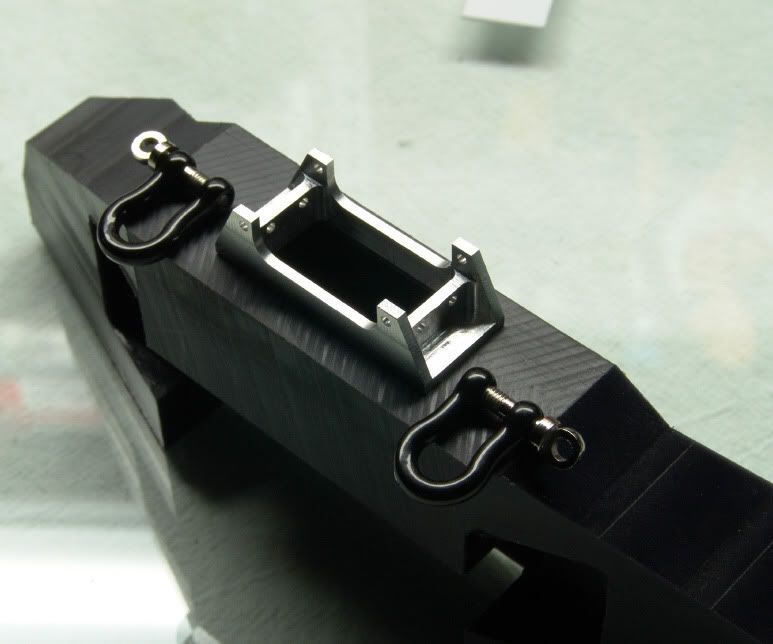 Oh, and I got my RC4WD D-rings, from RPP! Thanks Corey. Super fast shipping. I didn't expect them to arrive to quick. I didn't like the BIG mounting plates that came with the d-rings, so I will be making something else for them, probably smaller and out of aluminum block. But that is generally how the layout will look. Still need to bore some holes in the bumper for the off road lights. I bought a set of the Axial light buckets, that are so popular now. Those are here too. Just a matter of figuring out where they will go, and getting the chance to do the work. |
|
| |
|
06-03-2010, 12:48 AM
| #56 |
| Rock Crawler Join Date: Jun 2006 Location: Wisconsin
Posts: 570
|
No comments?  Tough crowd! I did some more work on the front bumper tonight. I decided the mounts for the RC4WD d-rings were to large and would take up to much room on my front bumper, so I machined some new ones. Tough crowd! I did some more work on the front bumper tonight. I decided the mounts for the RC4WD d-rings were to large and would take up to much room on my front bumper, so I machined some new ones.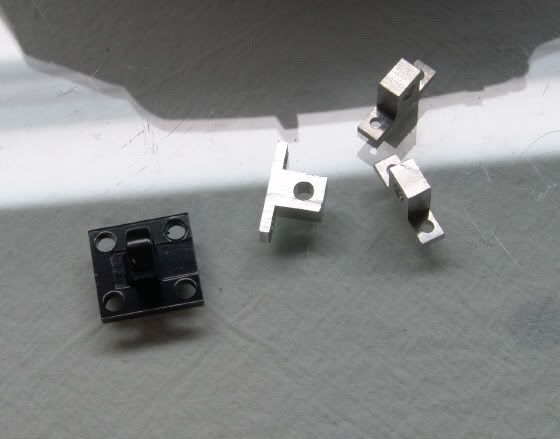 I also was able to complete the winch rollers and get them installed.  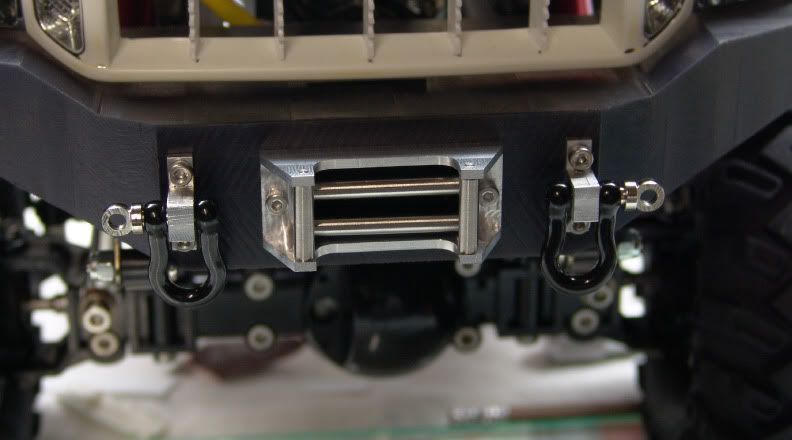 Not bad eh? Starting to look a little more complete! There is still more that I need to do yet. The 3R winch will need a custom mount, so it can be hidden behind the grill. The idea is to run the cable down, make a 90 degree turn on a roller, and then run out the front of the bumper. Then I need to get some pockets milled into the bumper for the off road and fog lights. More pictures when that is done! |
|
| |
|
06-03-2010, 02:35 AM
| #57 |
| Newbie Join Date: Dec 2009 Location: Saint Louis
Posts: 30
|
Wow man. this rig is lookin better then most trucks on the road. Ive been lookin at HLs for a while now and i knew i would end up with one as soon as i started looking them up. but after this thread i HAVE to have one, only thing is, youve set the bar so high with this rig im gonna end up throwin mine in the trash cause itll looks so puny next to this thing. keep up the work man. great job. p.s. I saw that you're a Dodge guy..... I'm sorry to hear that. lol |
|
| |
|
06-03-2010, 08:06 AM
| #58 | |
| Rock Crawler Join Date: Jun 2006 Location: Wisconsin
Posts: 570
| Quote:
Yeah, I'm a Dodge boy, but hey, we can't all be perfect now, can we? | |
|
| |
|
06-03-2010, 09:26 AM
| #59 |
| Newbie Join Date: May 2010 Location: raleigh
Posts: 15
|
this thing is awesome, very custom.  what did you build the bumper out of? and how did you cut out the aluminum for the winch line rollers? i cant wait to see this thing done |
|
| |
|
06-03-2010, 10:02 AM
| #60 |
| Rock Crawler Join Date: Jun 2006 Location: Wisconsin
Posts: 570
|
Thank you! The front bumper is machined from a solid block of derlin, which is a type of dense plastic and pretty wear resistant. It's pretty common for guys to make skid plates out of derlin, as well as lower 4 links on crawlers. It's a little softer then aluminum and a bit cheaper as well, but the parts still come out durable and strong. I plan to sand the bumper down and then paint it black, when it's finished. The frame that holds the winch guide rollers started out as a solid block of aluminum. I machined it myself on a milling machine. I had to do a lot of planning and design work to figure out how to make it. Each step in the process of machining it removed more and more material. I started by truing up the block to make it sqaure. Then I drilled the holes for the roller pins. Then I started removing material step by step. Some of the earlier photos show the different stages of work done. I think it turned out great! For the winch guide rollers, I used some stainless steel tube. I rough cut them using a bandsaw, and then to sqaure them up the end and reduce them to their finish length, I used a belt sander, turning the tube while I lightly ground the ends. I wanted to use a lathe, but the chuck was not able to tighten down on such small diameter material. The tube is .125" diameter and the chuck couldn't go that tight. To hold the rollers in place, I used some .0625" dowl pins, through the center. The rollers actually spin freely, just like you'd expect. I can't wait to get the truck done either! Last edited by Espeefan; 06-03-2010 at 10:13 AM. |
|
| |
 |
| |


 Linear Mode


