| |
| |||||||
 |
| | LinkBack | Thread Tools | Display Modes |
 10-25-2009, 07:05 PM
| #41 |
| Quarry Creeper Join Date: Jun 2008 Location: Hell
Posts: 399
|
Found out what to use for a t case. Traxxas Mini e revo transmission. like $15 shipped. I hacked it up, painted the case and brazed on some complicated mounts(which are hard to see in the pictures and look like crap) I also did the front servo mounts and steering. All the brazing should be done, all the nuts brazed for the skid plates and floor boards have been done too. Forgot other pics 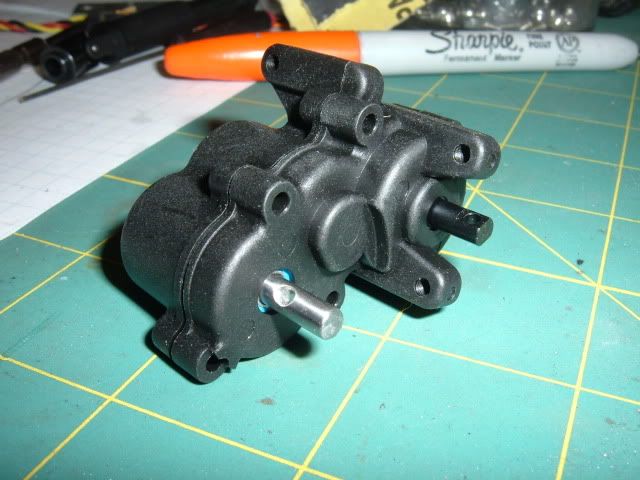 cutting and drilling the input shaft 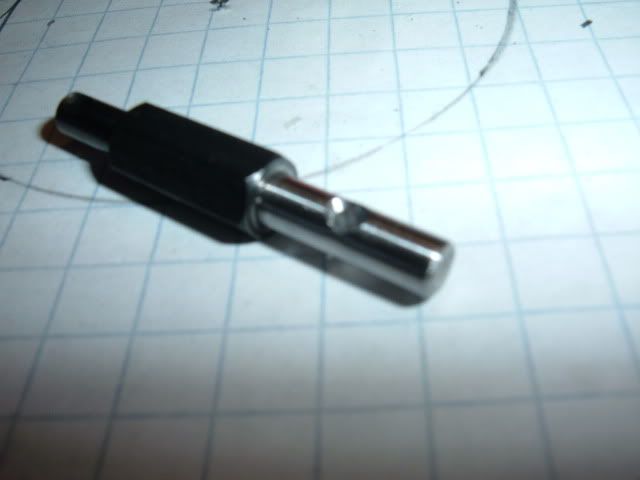 made a shaft to connect- set screw on 1 side and 2mm pin/screw on the other. hopefully the 2mm screw will hold.  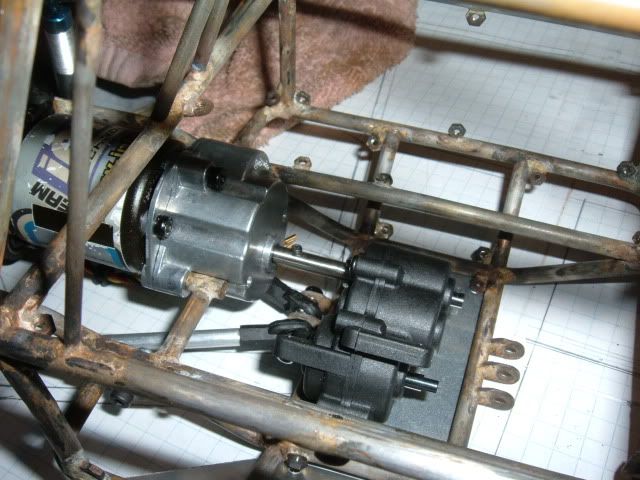 shims for the outdrives so they fit ax10 driveshafts 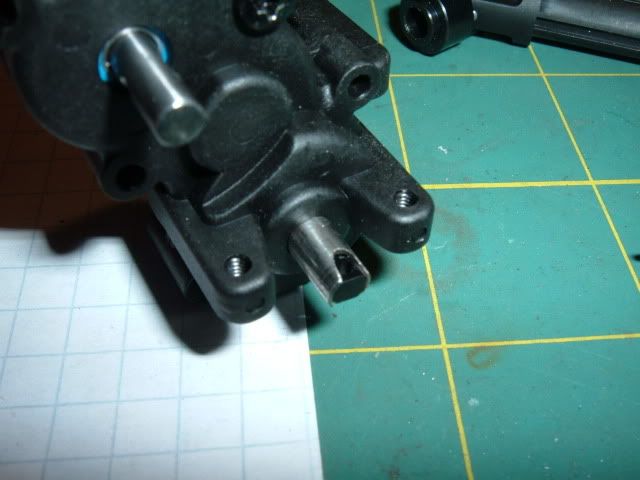 cut up the case and paint 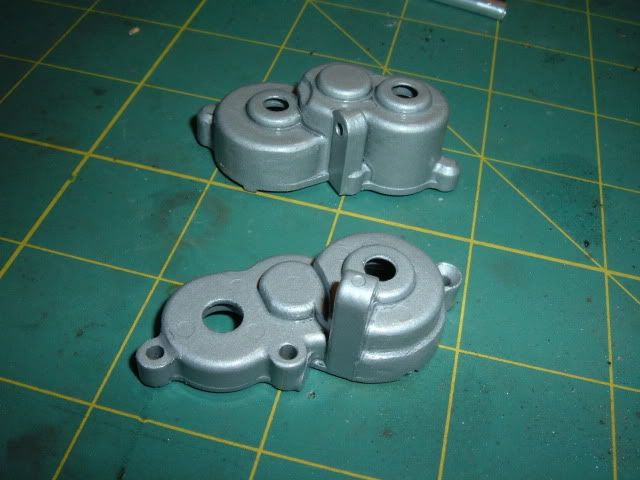 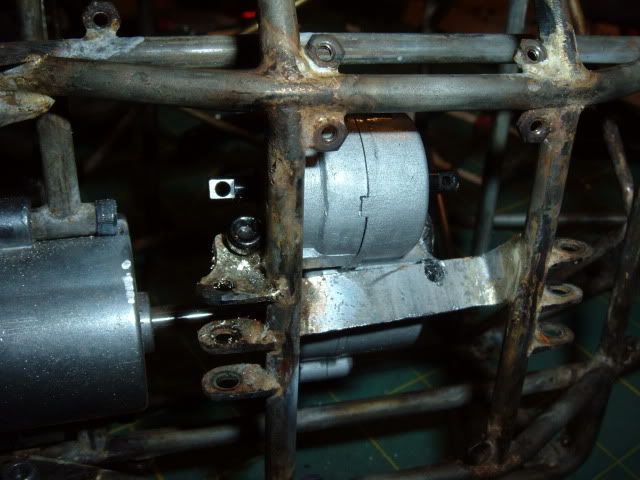 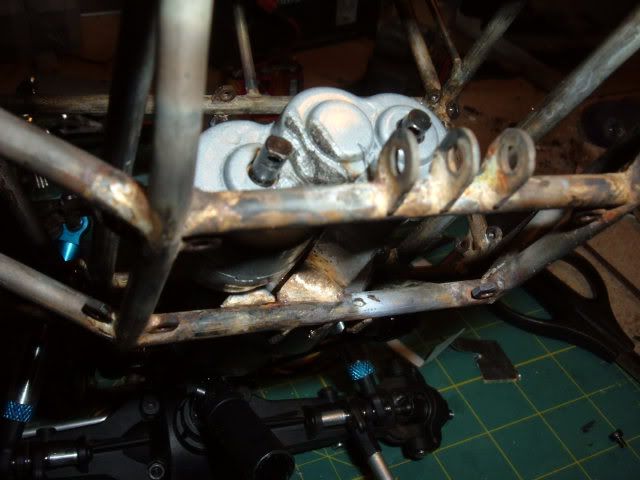 |

|  |
| Sponsored Links | |
| | |
|
10-26-2009, 12:17 AM
| #42 |
| Pebble Pounder Join Date: Jul 2008 Location: modesto
Posts: 149
|
dude that looks sick
|
|
| |
|
11-01-2009, 04:24 PM
| #43 |
| Pebble Pounder Join Date: Sep 2008 Location: bel air
Posts: 149
|
looking good any updates
|
|
| |
|
11-01-2009, 09:00 PM
| #44 |
| Rock Stacker Join Date: Oct 2009 Location: santa cruz,mtns.
Posts: 75
|
I know a little off topic! But are those dans comp stickers on ur work bench? Been ridi 20" for 25 yrs. Id recognize those from a mile away! Sick build by the way! U got some decent brazing skills. |
|
| |
|
11-17-2009, 01:17 PM
| #45 |
| Quarry Creeper Join Date: Jun 2008 Location: Hell
Posts: 399
|
Update. Just about finished the interior. painted seats and put foam on them. Made a shifter/switch to turn on power from the battery to the esc. Made cutting brake levers with the master cylinder. Figured out how to cover the tranny, with styrene glued to the dash which works well and easily. I'm going to leave the t case uncovered though. I also cut off willy's legs so I could re attach them at the right angle cause he sits alot lower now in these racing seats. He is velcroed in to make it easier and I also cut out the 1/8in bars in the roof so I can work on the interior easier and take stuff in and out in whole pieces and not parts. 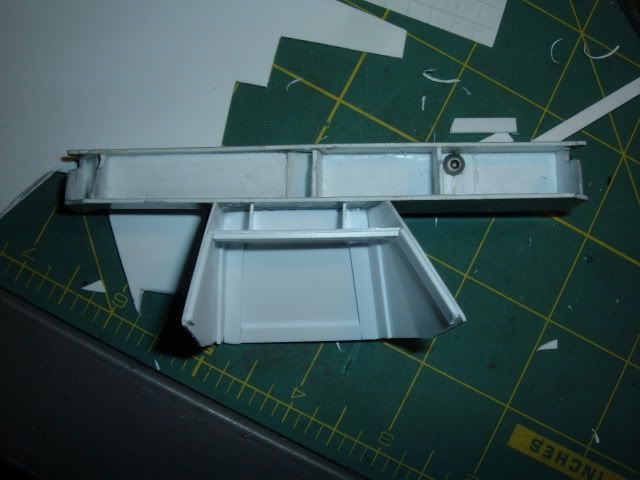 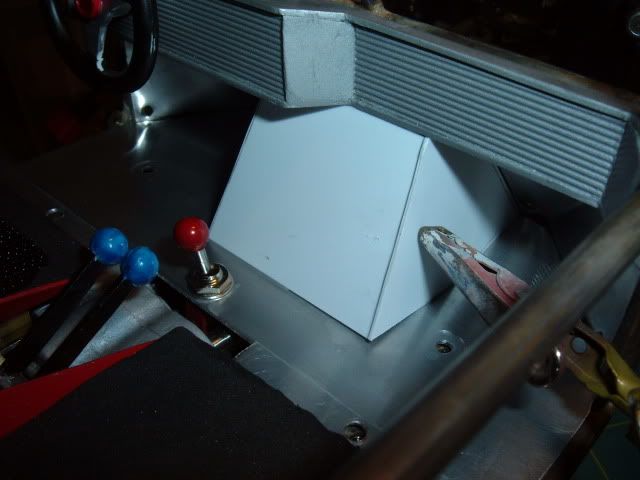 plastic bb's 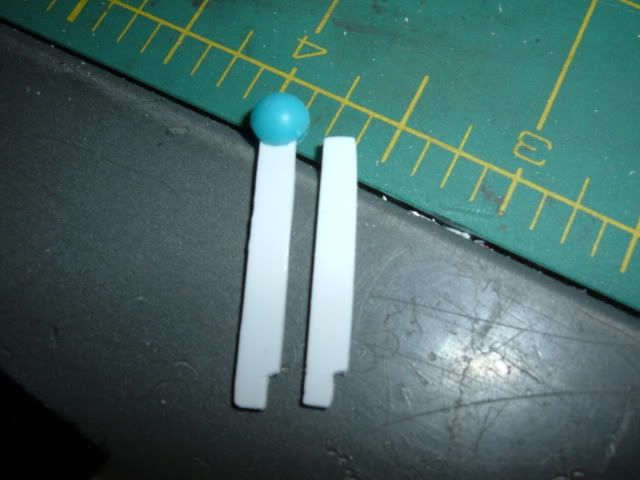 Trying to get close to blue anodized color (same color as shocks) 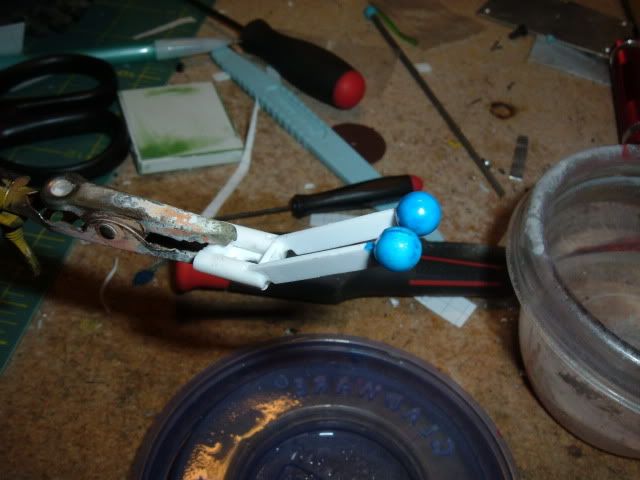 Switch: tight area 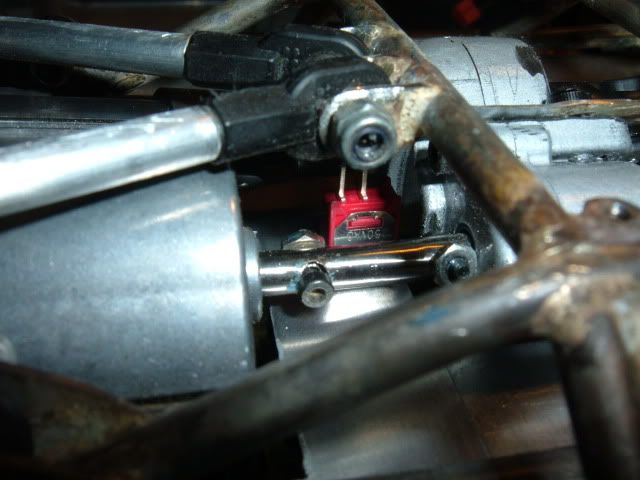 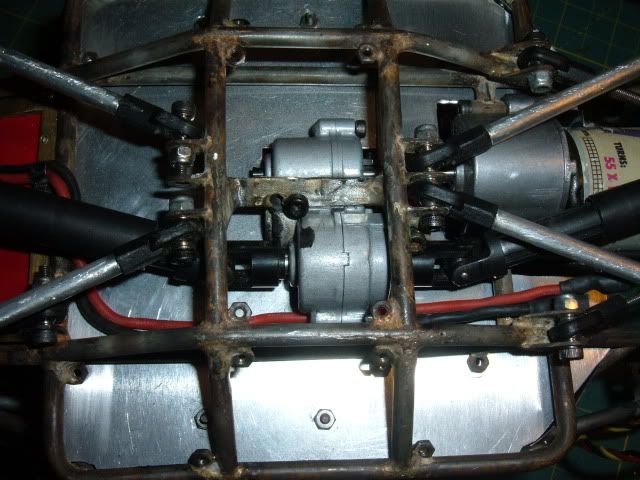 Also I am going to run coilovers instead and use rc18 springs as a spacing spring so the truck can droop to ride height and then at full extension the springs keeps everything in place and dampens similair to when a trophy truck rear end drops out when launching off a jump. 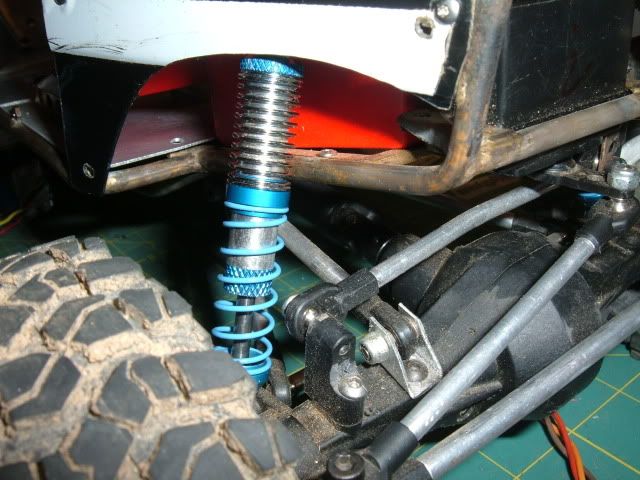 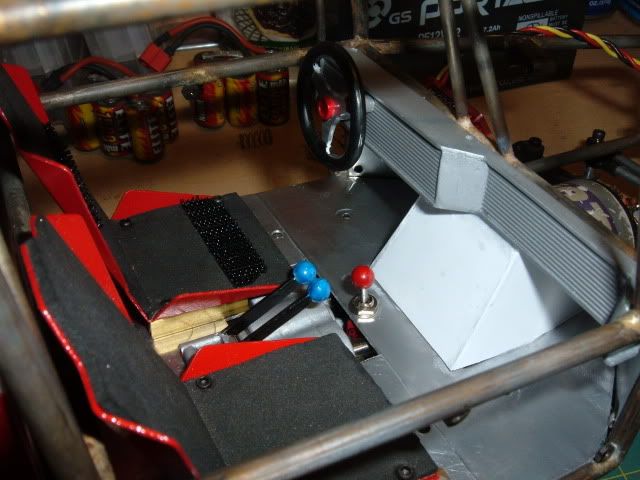 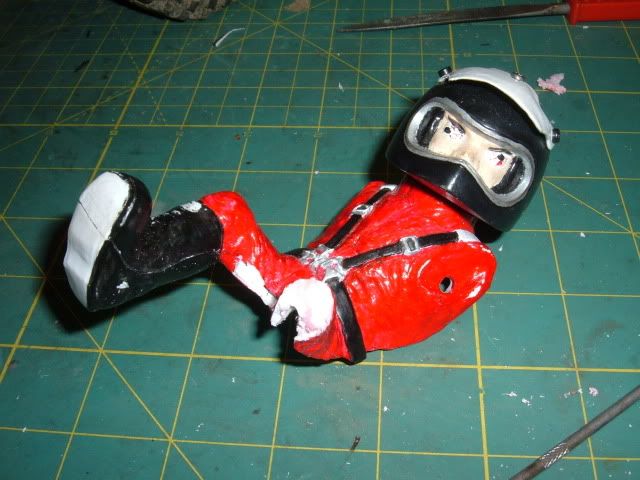 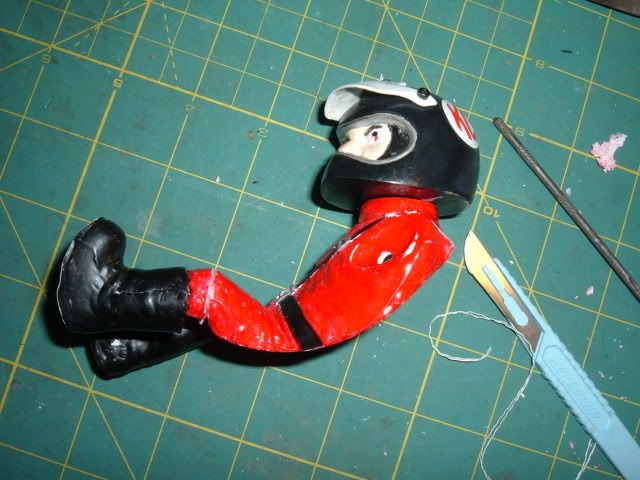  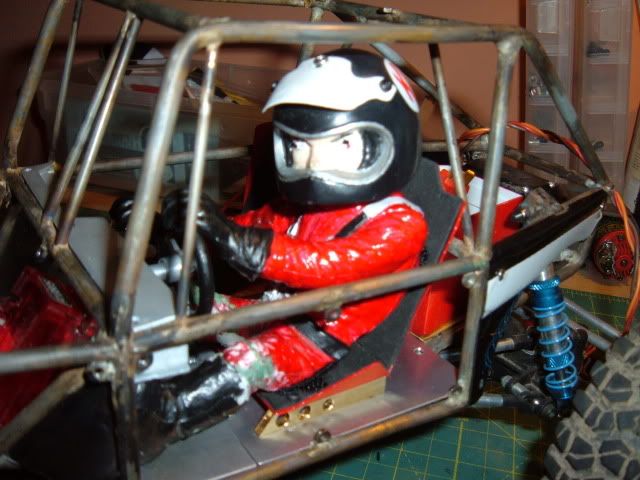 |
|
| |
|
11-17-2009, 01:35 PM
| #46 |
| RCC Addict  Join Date: Feb 2006 Location: UrAnUs
Posts: 1,109
|
nice fan work,love the shock mounts n batt box pretty nifty!
|
|
| |
|
11-18-2009, 03:13 PM
| #47 |
| Pebble Pounder Join Date: Sep 2008 Location: bel air
Posts: 149
|
That looks badass, probably could beat a berg!!!!!!!!!!! |
|
| |
|
11-18-2009, 03:27 PM
| #48 |
| Quarry Creeper Join Date: Jun 2008 Location: Hell
Posts: 399
|
it beat your berg at closest to crawl over the gap between my desk and dresser so I guess so lol |
|
| |
|
11-18-2009, 04:57 PM
| #49 |
| Pebble Pounder Join Date: Sep 2008 Location: bel air
Posts: 149
|
Want to go for pinks???????????
|
|
| |
|
11-27-2009, 07:50 PM
| #50 |
| Pebble Pounder Join Date: Sep 2008 Location: bel air
Posts: 149
|
legit crawling day today
|
|
| |
|
11-27-2009, 10:05 PM
| #51 |
| Rock Crawler Join Date: Apr 2006 Location: Thorp WA, more sheep than men...
Posts: 543
|
Wow...
|
|
| |
|
12-03-2009, 05:32 PM
| #52 |
| Pebble Pounder Join Date: Sep 2008 Location: bel air
Posts: 149
|
any updates??????
|
|
| |
|
12-27-2009, 01:17 AM
| #53 |
| Quarry Creeper Join Date: Jun 2008 Location: Hell
Posts: 399
|
Update since a while. I can't find the USB cord for my camera so I had to take some cell phone pictures. I finished and painted the frame finnaly. I didn't have the frame sand blasted cause I ended up cleaning it with "Delimer" (phosphoric acid) and steel wire brushes which cleaned the metal really good compared to any heavy degreaser actually. Still more details to finish though. And it's been ran a while ago (if I didnt say so already) so I got some older pics of on the trail. Also for christmas I got a couple new toys. 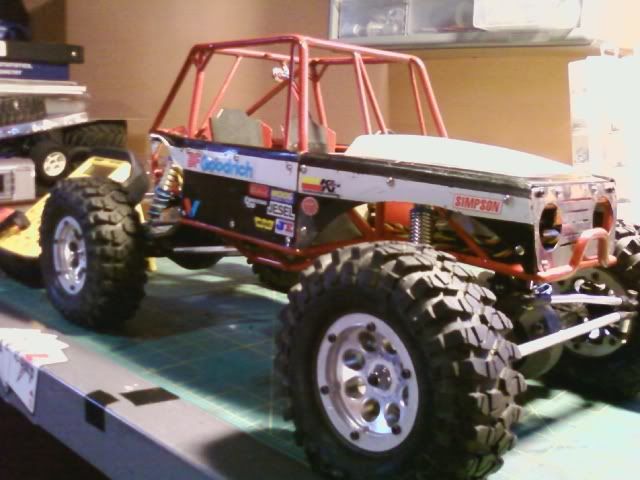  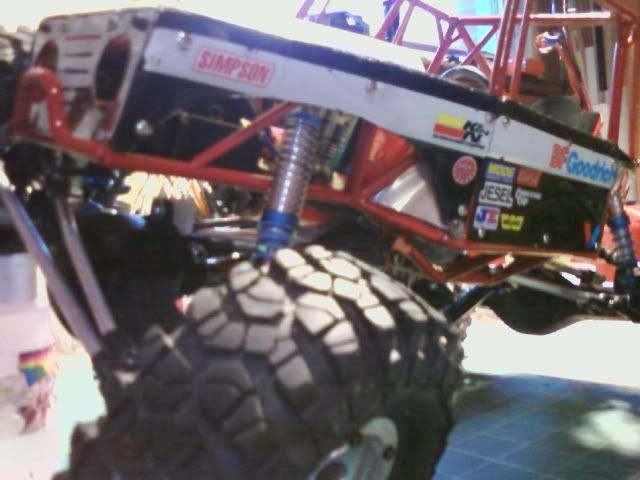 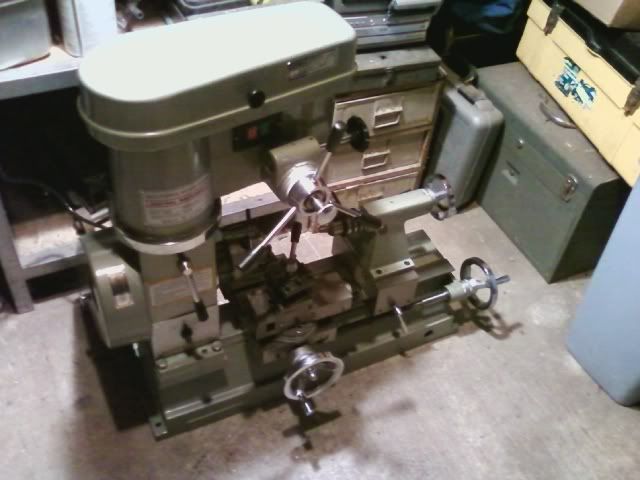  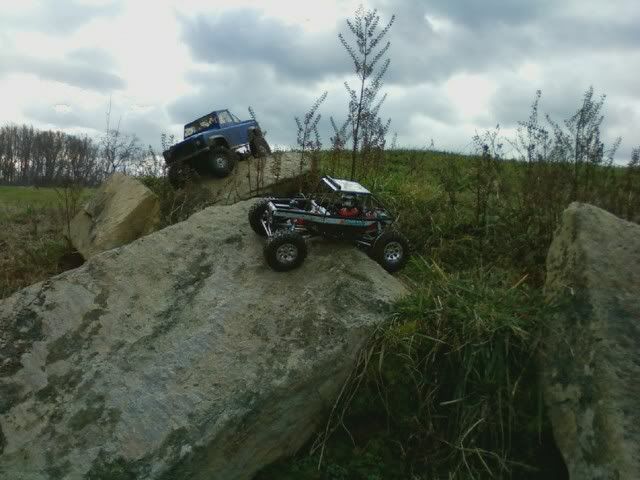 |
|
| |
|
12-27-2009, 09:34 AM
| #54 |
| 0 0  Join Date: Jul 2006 Location: FT. Thomas
Posts: 1,830
|
i dont even know where to start. so many cool things on this build. definitely turned out sweet  |
|
| |
|
12-27-2009, 03:55 PM
| #55 | |
| Quarry Creeper Join Date: Jun 2008 Location: Hell
Posts: 399
| Quote:
| |
|
| |
|
12-31-2009, 11:43 AM
| #56 |
| Quarry Creeper Join Date: Jun 2008 Location: Hell
Posts: 399
|
I found the chord to my camera so heres some pics assembling it back together. Too cold to paint outside. and paint dust just got everywhere. had to mop the whole floor cause it was dusted red.  after paint 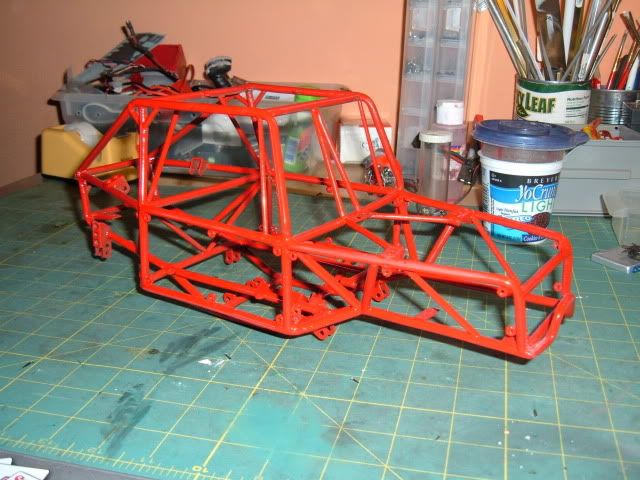 motor tranny and t case in 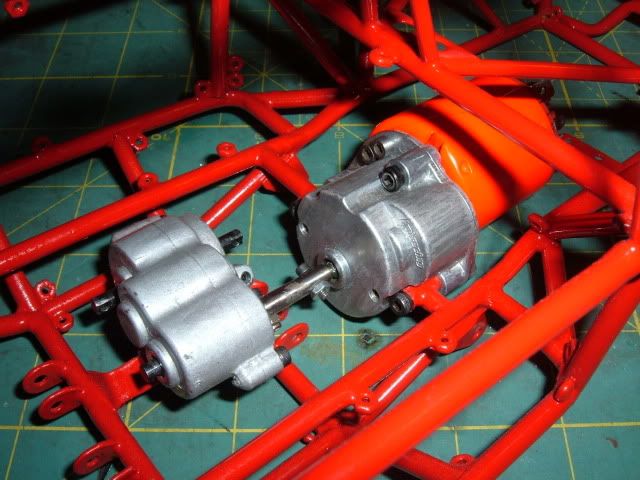 Firewall servos fuel cell in  running wires 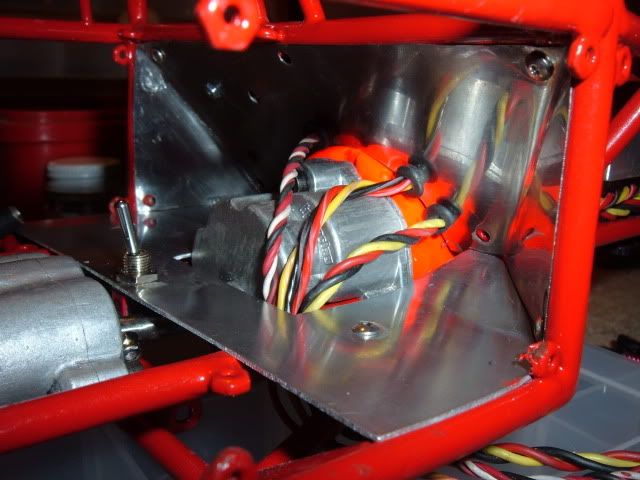 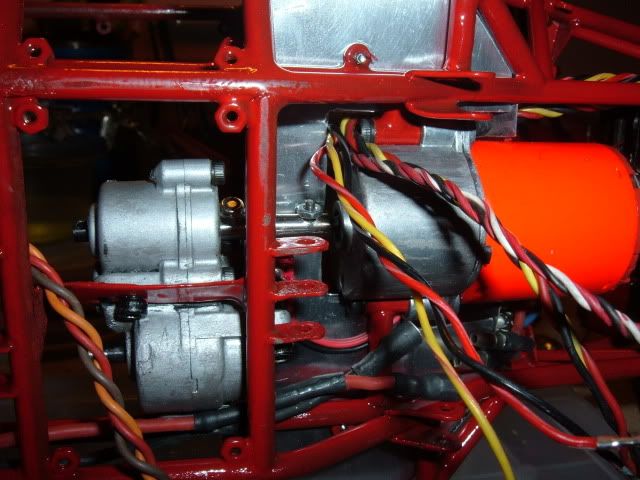 back up through the floor boards where its covered by the passenger seat and tranny cowl 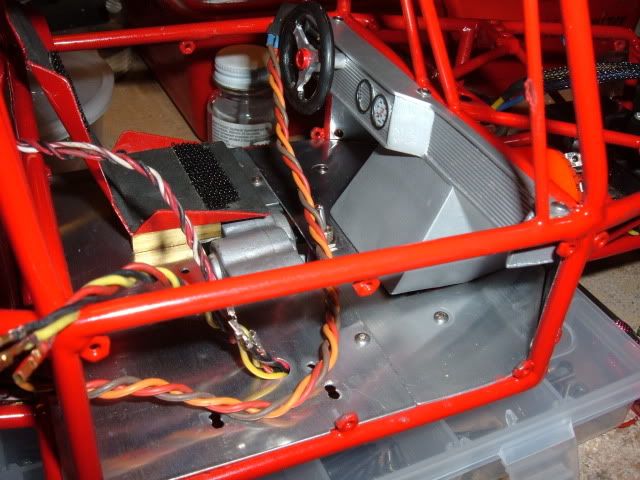   Axles and wheel bolted up- made it look pretty simple yea 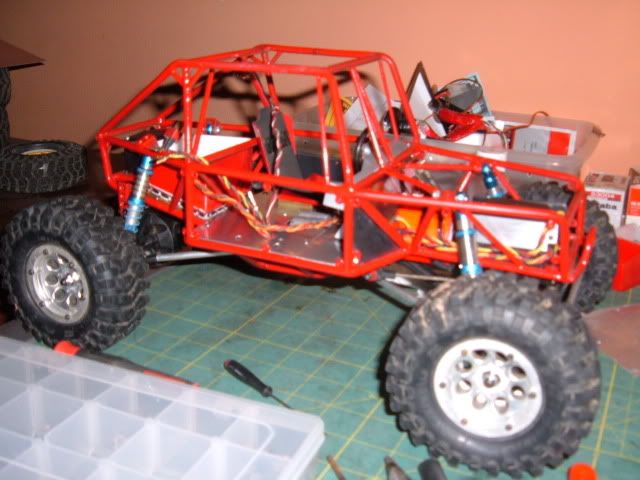 Lots of channels on my dx6- throttle, front st. rear st. suspension winch and lights. 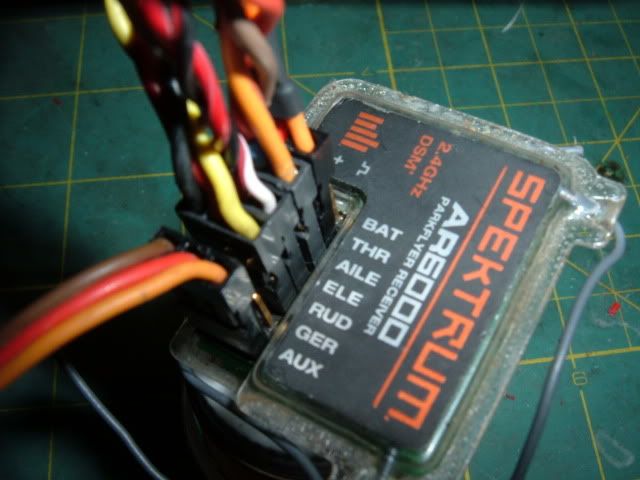 Last edited by super mud; 12-31-2009 at 11:46 AM. |
|
| |
|
02-01-2010, 07:13 PM
| #57 |
| Quarry Creeper Join Date: Jun 2008 Location: Hell
Posts: 399
|
another update. I found a way to mount my electronics under the floor boards so everything is well hidden. I took the ar6000 receiver out of the plastic case and it just barely fits under the skid plate upside down. Fuel cell finished and repainted texture. also mounted transmission cooler and a traxxas elec. fan which a friend broke on his sc10, threw it away at my house and I salvaged it. (had to fix the blades and stuff) 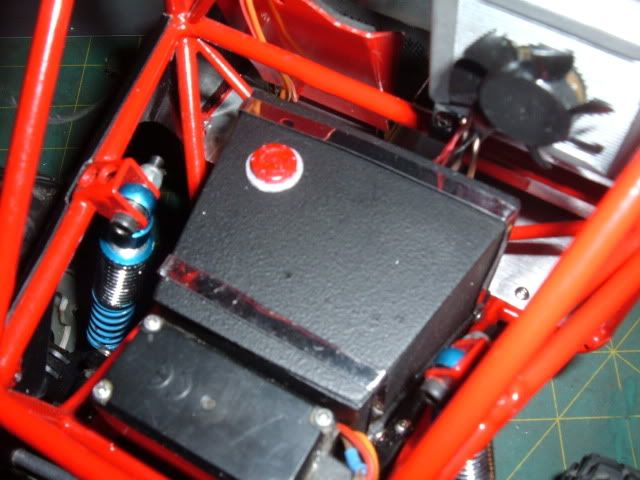 4link bar 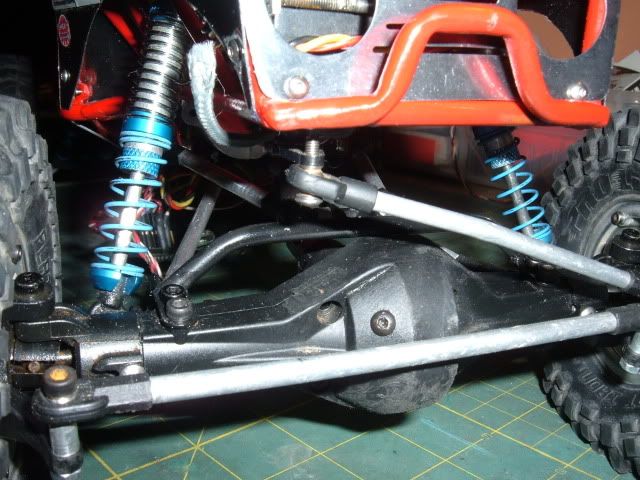 light bar painted, mounted and wires ran through the transmission cooler to look like hoses. 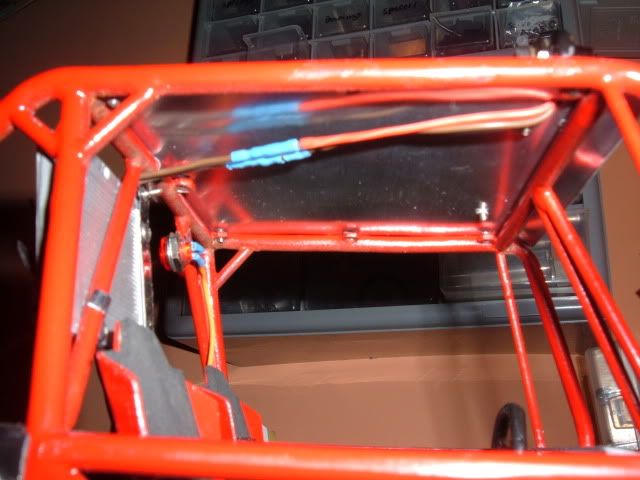 I decided to mount 2 tiny switches in the dash which will turn on and off the taillight and fan incase I don't want them on or whatever. 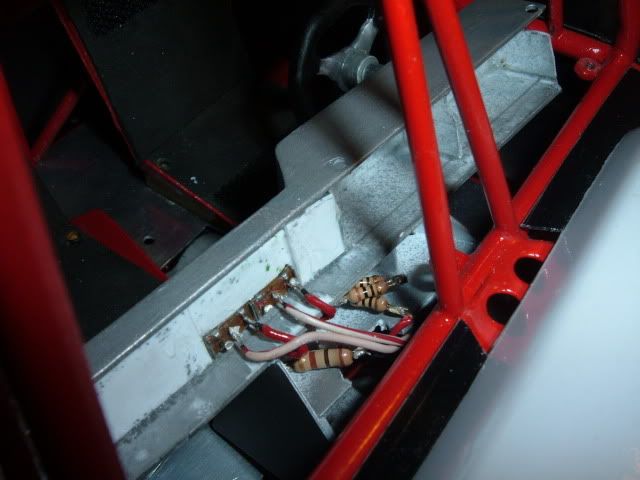  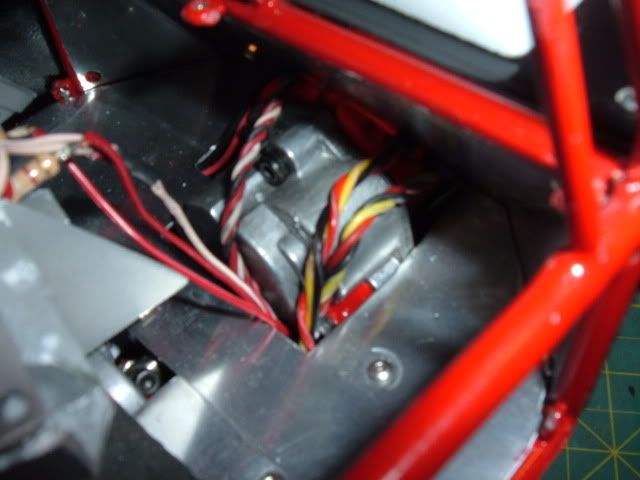 winch servo- still need to run the line through the 4link bar and back up to get a pulley effect. 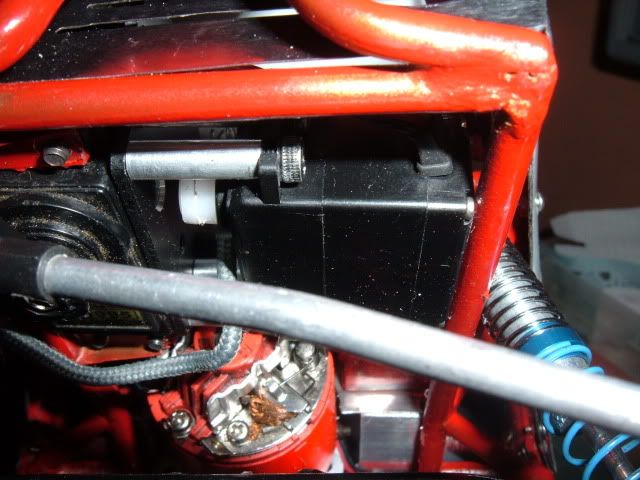 Now theres no wires in the cab behind the seats too 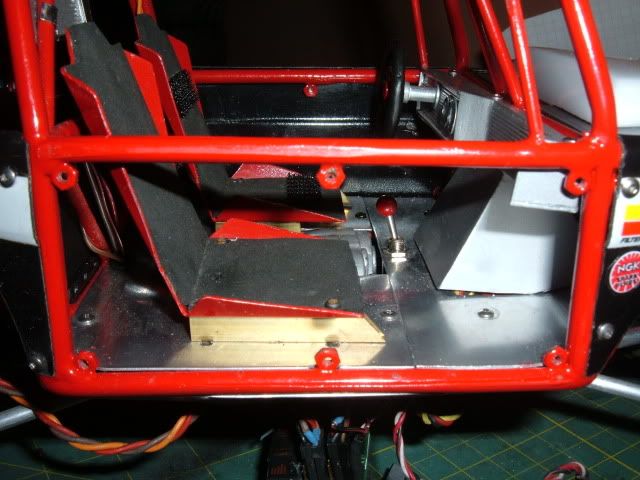 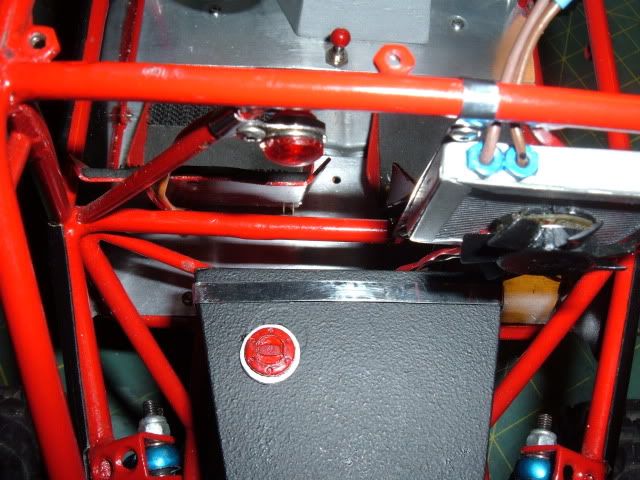 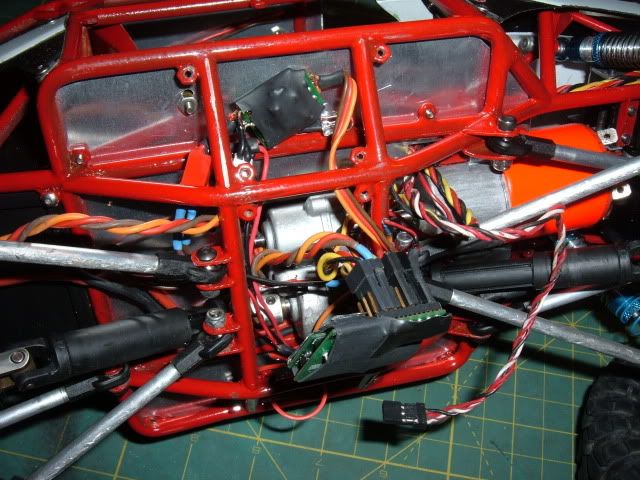 repainted wild willy 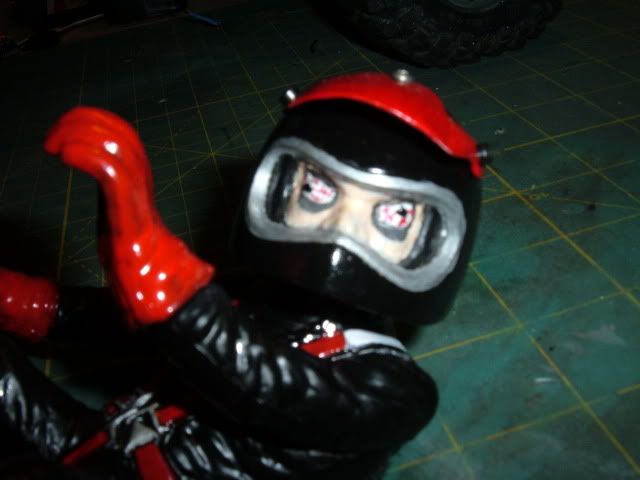 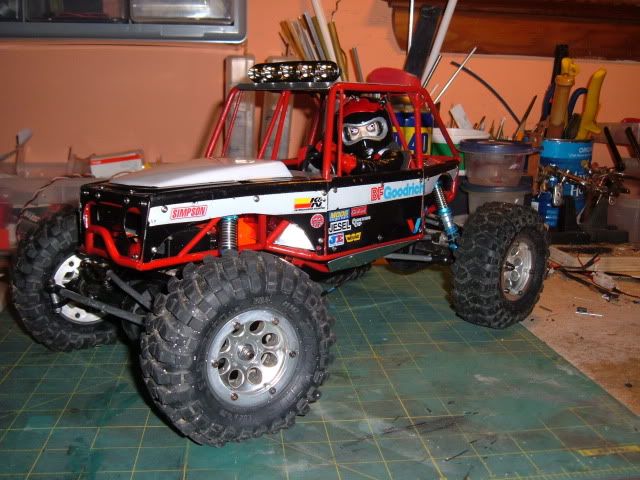 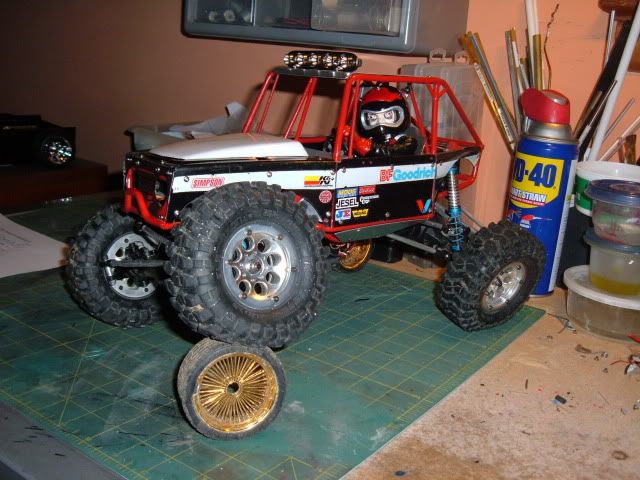 Last edited by super mud; 02-01-2010 at 07:19 PM. |
|
| |
|
02-02-2010, 04:56 PM
| #58 |
| Pebble Pounder Join Date: Feb 2005 Location: Chandler, AZ
Posts: 110
|
Nice work. I love the chassis design and hiding all the wiring is impressive. This make me want to build a tube scaler. |
|
| |
|
02-02-2010, 08:57 PM
| #59 | |
| Quarry Creeper Join Date: Jun 2008 Location: Hell
Posts: 399
| Quote:
Heres the picture I forgot. The rock lights are under the rock sliders on each side.  | |
|
| |
|
02-02-2010, 09:42 PM
| #60 |
| Quarry Creeper Join Date: Jun 2008 Location: Hell
Posts: 399
|
I noticed I never posted any pics of the 1:1s I get my ideas from. Looks the same but it's a jeep. actually it dosn't really make a difference anymore lol. 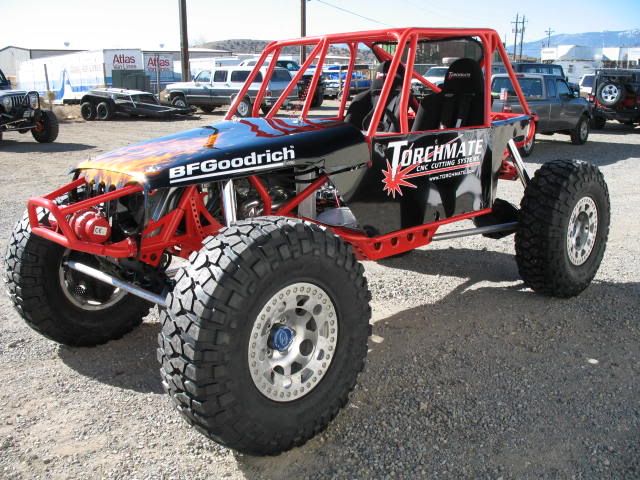 Bronco  another jeep- 2009 KOH winner 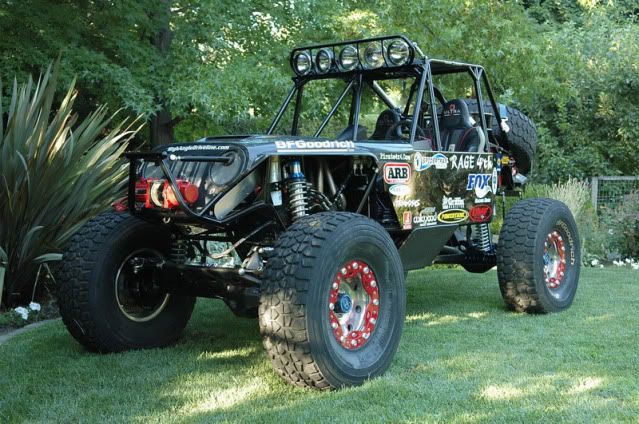 |
|
| |
|
| |


 Linear Mode


