| |
| |||||||
 |
| | LinkBack | Thread Tools | Display Modes |
 05-26-2009, 01:50 PM
| #1 |
| Quarry Creeper Join Date: Oct 2006 Location: Amsterdamned
Posts: 329
|
First off, I'm a slow builder and don't work or have the time to build as fast as some of the guy's on here. Seeing all those awesome O.G. (where does O.G. stands for other than OriGinal ?) Hilux builds here on RCC I decided to buy the kit wich is more than a year ago now. I do have an O.G Bruiser but for now I'll practice with the new one ... The reason I didn't post before is that I'm a bit shy to show my work seeing all those really cool builds by some of the members here. I'm far from building a scaler at the level you'll building. Why I'm posting here after all ? Well, I pm'ed Chris (51WillysJeep) to tell him that I "stole" his rear firewall design and the no doors from Clampy to use it on my HL and asked if that was okay with him. Story short: he said: "it's okay etc. show me some pics" So here it is Specs for now: - RC4WD Bruiser chassis - HL axles - RC4WD Killer T-case - EZ (?) rear axletruss - alu knuckles ( I really don't know where I got 'm atm) - home made links rear - RC4WD white scale shocks rear - turneddown TLT shocks front - FXR-PRO - Integy55T - Rims: they will be 1.9 for sure. I have RC4WD Pythons, 2 sets of CAC's here and RC4WD stamped beadlocks coming in. I decide on wich I'll use later ... I't will have links rear and leafs front with the shackles upfront. Still fighting the drive train, R2 is too slow, AX10 tranny too big. I've ordered the RC4WD 4:1 GRU but waiting to arrive so then I can play with that. Onto some pics. Months ago I did the dropped bed: I also made a dash, midconsole and floor. I made those 3 pieces so that it could be easely bolted togheter, this however was before I got the Killer t-case: The midconsole and floor where designed after the R2 I had installed back than: Since the t-case came in the floor is useless and I've to redo the midconsole. This is in short what i've done sofar. If you like other pics or explanation just ask. With the fresh memory of Mike's Chino-clone and the awesome Clampy build from Chris (there are few others but forgive me, I don't know all the names) I just focus on the cab for now. On one evening I just took my X-acto and start cutting: That wasn't too much of a job, 40 mins or something ... Started the cab thing where the doors close (sorry, don't know how to call that) .... Have to walk the dog now... more in a moment sorry ... Last edited by mir4dor; 01-16-2010 at 02:36 PM. Reason: Added rim info ... |

|  |
| Sponsored Links | |
| | |
|
05-26-2009, 01:54 PM
| #2 |
| RCC Addict Join Date: Jun 2008 Location: Monroe, NC
Posts: 1,547
|
Nice work on that center console and bed.  |
|
| |
|
05-26-2009, 02:06 PM
| #3 |
| RCC Addict Join Date: Dec 2007 Location: Calgary
Posts: 1,575
|
Outstanding start! Very clean work,I look forward to seeing more updates.
|
|
| |
|
05-26-2009, 03:05 PM
| #4 |
| Quarry Creeper Join Date: Oct 2006 Location: Amsterdamned
Posts: 329
|
Thanks Okay, the walk the dog thingy was cheap but oh so true. Here she is back in the day I upgraded the TXT: Okay, inner cab-door thingy glued: First load of filler, I use 2- component polyester repair stuff: Then came to the point where I "stole" Clampy's rear firewall. Remember we don't have real rockcrawlers here in Holland cause we don't even have rocks here. I even don't have 1:1 reference material but the day I saw that firewall I knew I wanted to build such a thing myself. The beginning: Glued to the cab: Closeup: As you can see it's not exactly the same as Clampy and that was not my goal really. It misses the ( I used halfround 100"/ 2.5mm from "StripStyrene) rod on both far sides of the wall. Ofcourse I don't know the exact measurements of the 4 squire holes that are in it but by looking closely I came to this result and I just think it's fine. As you can see there is a close escape on the rear driveshaft and toplinks too, just enough room for it. Right now I'm focusing on the inside of the cab, mainly the floor. My intension was to make 80% of the floor in one piece but that was just to complex. The framerails going up and to the inside inside(?) of the cab made it a bit to difficault. While I was at it I strenghten the inside cab connected to the firewall with some 1.5mm styrene (vertical red line) and cleared the rear driveshaft & T-case ... Then I decided to make a tunnel for the shaft and a box for the T-case so that I could cut the front section off of the floor. Before this the rear section of the floor where two halves actually by looking at the pic (does that make sence :-() Well, those last pics is where I am on this moment. The filler isn't final and so are the inner door openings, it all has to be trimmed later. I just roughly install all components and will finetune thing at a later stage. Link setup is also changed in a better config as you see here, pics later. Added a fuelcell that will hold the spektrum RX: That's it for now. I'm far, far from done but hope to update every now and then. Thanks to all that inspired me on my build |
|
| |
|
05-26-2009, 03:18 PM
| #5 |
| Rock Crawler Join Date: Aug 2007 Location: usa
Posts: 593
|
nice work so far |
|
| |
|
05-26-2009, 04:03 PM
| #6 |
| Rock Crawler Join Date: Jan 2007 Location: Do I look like a freaking people person?
Posts: 874
| |
|
| |
|
05-29-2009, 05:15 PM
| #7 |
| Quarry Creeper Join Date: Oct 2006 Location: Amsterdamned
Posts: 329
|
Thanks. Like I said: slow build but here's a tiny update. Tonight I cut the mounting lips from the bed that normally connects it to the cab just to see how it lines up to the cab ... Sorry for the crappy pics but you can see what I'm trying to show: the front and rear sections doesn't line-up quite right. The cab is how I like it attached to the chassis, so it's the dropped bed that I'll have to redo ... For now I want to stay with the bed cause that's the only place to hide the stickpack, warpig-style is an option but I don't know .... Last edited by mir4dor; 05-29-2009 at 05:35 PM. |
|
| |
|
05-30-2009, 06:05 PM
| #8 |
| RCC Addict Join Date: Nov 2007 Location: Massachusetts
Posts: 1,184
|
Hey Bro - Your off to an Awesome start so far..! I remember being at that EXACT stage with "Clampy" ( MANY moons ago..) Looking forward to more progress..!!!
|
|
| |
|
05-30-2009, 08:09 PM
| #9 |
| I wanna be Dave Join Date: Aug 2007 Location: santa monica
Posts: 3,687
|
looking great for a first try. great for a seasoned expert too-very nicely done. should be something to be very proud of when done! |
|
| |
|
05-30-2009, 08:17 PM
| #10 |
| Rock Crawler Join Date: Jun 2008 Location: Naples
Posts: 609
|
Excellent work, all I can say is "Het is Fijn!"
|
|
| |
|
06-19-2009, 03:08 PM
| #11 | |||
| Quarry Creeper Join Date: Oct 2006 Location: Amsterdamned
Posts: 329
| Quote:
can't get enough of it.Quote:
One question tough: what does "seasoned expert too" means ? Sorry, this must be the language barrier thing :-( Quote:
Okay, did some minor things on this build. Installed the RC4WD 4:1 GRU & a GD-600 3.8:1. Temporary motormount. Did some work on the underside of the floor, just to be shure it stays correct on the chassis: Build it "arround" the chassis rails: Side view: Funny thing is: when I turn the complete rig upside down, the body isn't falling off without installing a bodymount yet, tight fitting here That's it for the body sofar, still struggling with the rest of the floor but I did start a new mid-console. Finally RC4WD come with some XVD's for the HL and I just preordered those, thanks for that ! The problem is: I have more steering ability than the dogbones wil allow me to: More later. Aart. | |||
|
| |
|
06-19-2009, 03:53 PM
| #12 |
| RCC Addict Join Date: Dec 2007 Location: Calgary
Posts: 1,575
| |
|
| |
|
06-19-2009, 04:05 PM
| #13 | |
| I wanna be Dave Join Date: Aug 2007 Location: santa monica
Posts: 3,687
| Quote:
| |
|
| |
|
06-19-2009, 04:13 PM
| #14 |
| RCC Addict Join Date: Jun 2007 Location: San Antonio, Tx
Posts: 1,093
|
This is a great start I'll be watching this build, I just started messing with styreen as well it's alot of fun to work with.
|
|
| |
|
06-19-2009, 10:30 PM
| #15 | |||
| Quarry Creeper Join Date: Oct 2006 Location: Amsterdamned
Posts: 329
| Quote:
Quote:
Quote:
All you have to do is measure, cut, file, sand and then gleu it. Easy isn't it ?Just need some filler at certain points and when it's finally finished, I like to see how it does hold up on the trial ... Brings me to a question for you guy's: I use a two component polyester repair ... uhmm .. thingy. Have to mix it first, gets all messy and dries rather fast. I see that some people here use the green (one component) stuff ? Is that easy to work with ? Does it dry fast ? What is the brand name and where can I get it ? Excuse those questions but I'd like to give it a try, thanks. | |||
|
| |
|
06-19-2009, 11:40 PM
| #16 |
| I wanna be Dave Join Date: Aug 2007 Location: santa monica
Posts: 3,687
|
the two part "thingy" you are using, is it used as filler? if so you are using it the same as many use the one part green putty filler. I have used it and think its okay but I prefer (if you use a separate filler) to use Bondo Gap and Spot filler. its red, dries smooth and hard, easier to work with in my opinion and doesnt shrink or crack as easily as the green stuff. However, my preferred method is to use styrene itself as filler. build it up using the solvent adhesive liberally to melt the styrene together. Build it up higher and sand it down. Solvent I use is Tenax 7R or Plastruct Bondene although unlikely you have access to the same brands. both chemically bond the plastic together, "melting" it together. For example, here I inserted a peice of the body from elsewhere. this applies to styrene as well. 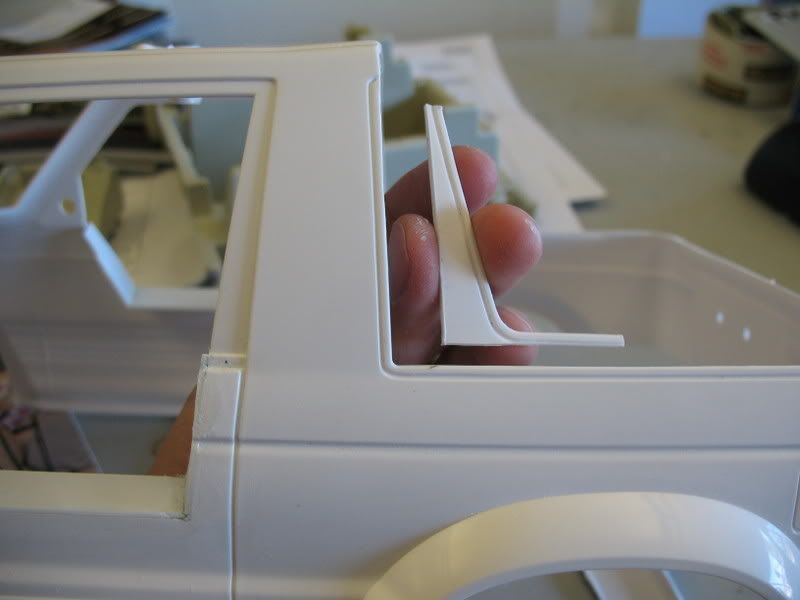 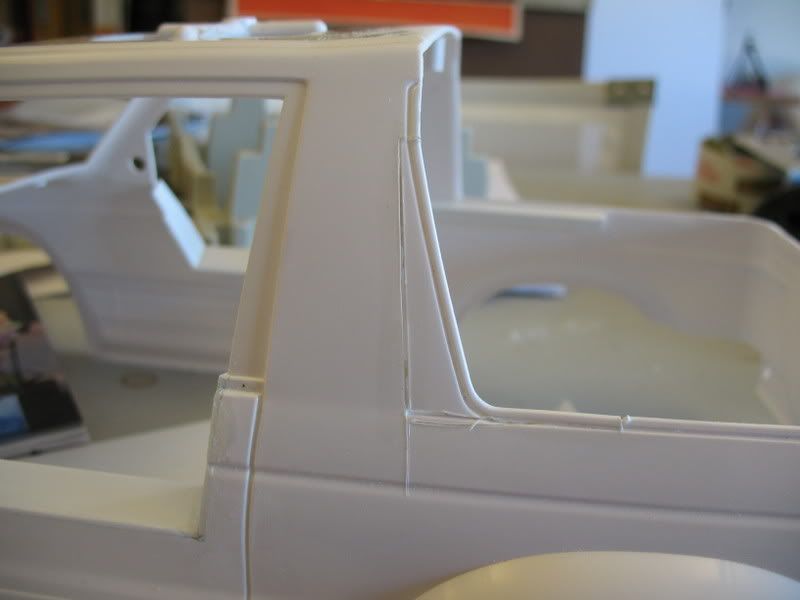 I did as above and was left with this. 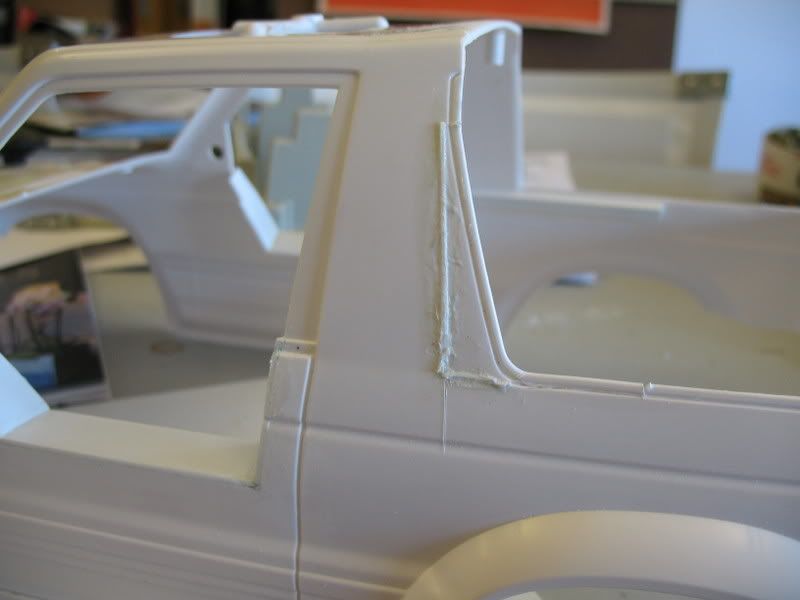 took a file to it quickly to check for low spots that needed more filling. if there are, you can then use the red putty filler or more styrene. I prefer to use the red filler only for the smallest of imperfections  this after final sanding and some red filler 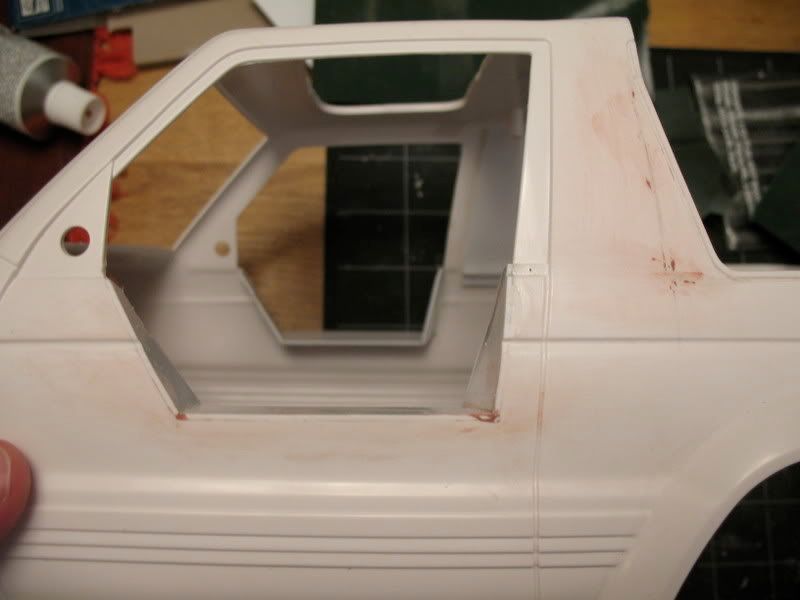 Hope this is helpful. |
|
| |
|
06-20-2009, 01:18 AM
| #17 | ||
| RCC Addict Join Date: Jun 2007 Location: San Antonio, Tx
Posts: 1,093
| Quote:
Quote:
i need to get some of that putty as well , but i got a tip from obijuan to just add more styreen and sand it down like you said and I like working with it this way | ||
|
| |
|
06-20-2009, 01:31 AM
| #18 | |
| RCC Addict Join Date: Dec 2007 Location: Calgary
Posts: 1,575
| Quote:
Sorry my dutch is a bit rusty. I reliezed afterward what i said didnt make sense. What I was trying to say was Good work. Your work is outstanding, keep it up | |
|
| |
|
06-20-2009, 10:12 AM
| #19 |
| Rock Crawler Join Date: Nov 2006 Location: Holland
Posts: 673
|
I like it a lot and hopefully i will get to drive it when it's finished. |
|
| |
|
06-20-2009, 02:04 PM
| #20 |
| Pebble Pounder Join Date: Aug 2008 Location: Living in Paradise
Posts: 193
|
This is a work of are. I will be watching this one close for updates. Keep up the inspiration for the rest of us.
|
|
| |
|
| |


 Linear Mode


