| |
| |||||||
 |
| | LinkBack | Thread Tools | Display Modes |
 11-19-2010, 09:47 PM
| #1 |
| Pebble Pounder Join Date: Aug 2010 Location: Chattanooga
Posts: 112
|
Hello All, My name is Steven and I'm about 3 months into replicating my zebra striped 1999 Land Rover Discovery SD. I have been documenting on Scale4x4RC but had some requests to see more from other threads on this site. So I will do a condensed version of the build til I get current. To start off, let me show some photos of my 1:1 Land Rover that I'm replicating Gratuitous driveways shot:  Flexy Shot with my street tires:  Off Roading at Windrock OHV: 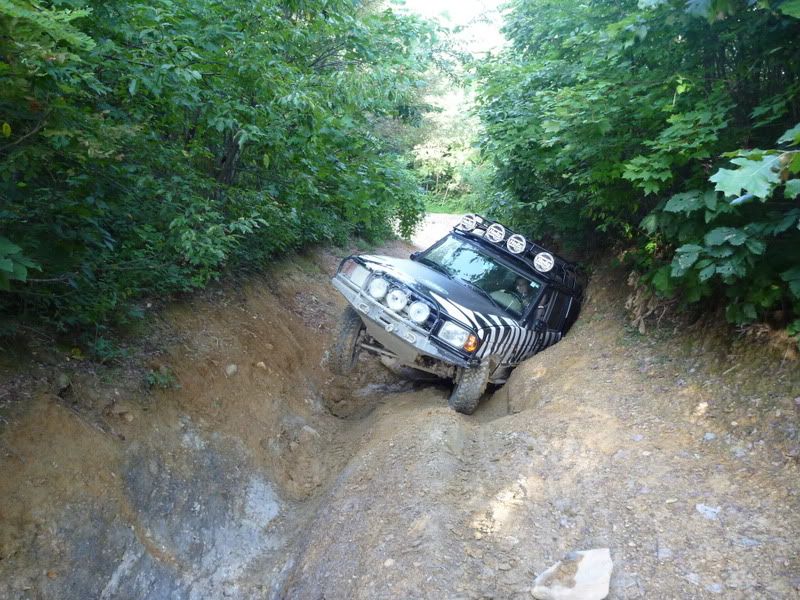 Without the rack on:  Going for a dip:  Recovery effort:  Rack that I will fabricate out of steel tube:  Cheers, -Steven |

|  |
| Sponsored Links | |
| | |
|
11-19-2010, 09:53 PM
| #2 |
| Pebble Pounder Join Date: Aug 2010 Location: Chattanooga
Posts: 112
|
For the body, I am using the Kamtec Discovery-like ABS model from the UK. It definitely resembles the Disco, but lacks the detail like a hard body. Nevertheless, it's a good place to start. For those who have not seen one; here it is: 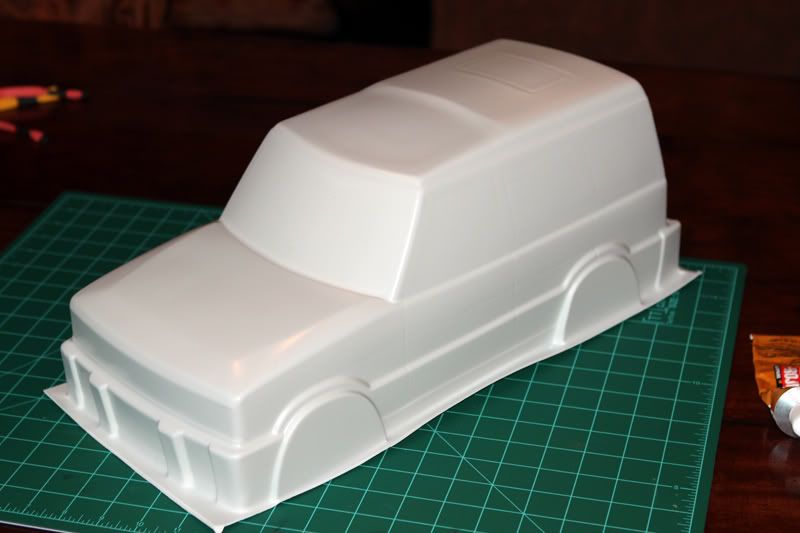 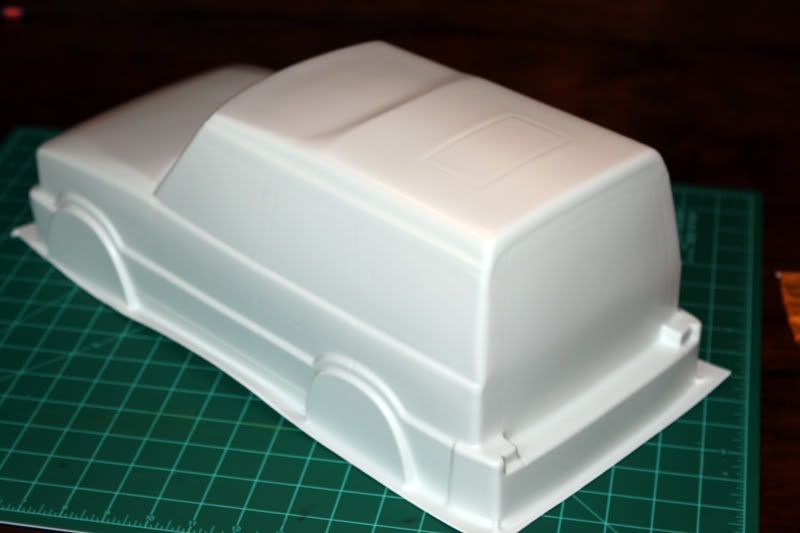   |
|
| |
|
11-19-2010, 10:04 PM
| #3 |
| Pebble Pounder Join Date: Aug 2010 Location: Chattanooga
Posts: 112
|
I started to cut all teh excess ABS away. Before I cut the rear cargo windows though, I knew that I had to add some body filler. The body line that you see running below the windows shown in the photo below does not continue to the rear cargo windows.  Body filler went on:   Now the body looks like it should:   |
|
| |
|
11-19-2010, 10:08 PM
| #4 |
| Pebble Pounder Join Date: Aug 2010 Location: Chattanooga
Posts: 112
|
Now all the windows are cut out, grill, headlights and tail lights as well as body lines sculpted. I also threw a couple spritzes of white primer over my body filler to see the results:   |
|
| |
|
11-19-2010, 10:13 PM
| #5 |
| Pebble Pounder Join Date: Aug 2010 Location: Chattanooga
Posts: 112
|
At this point, I'm ready to start adding bits. I made rain gutters, window and sunroof seals, body molding, door handles, side marker lights and the rear cargo latch/ tag illuminator:    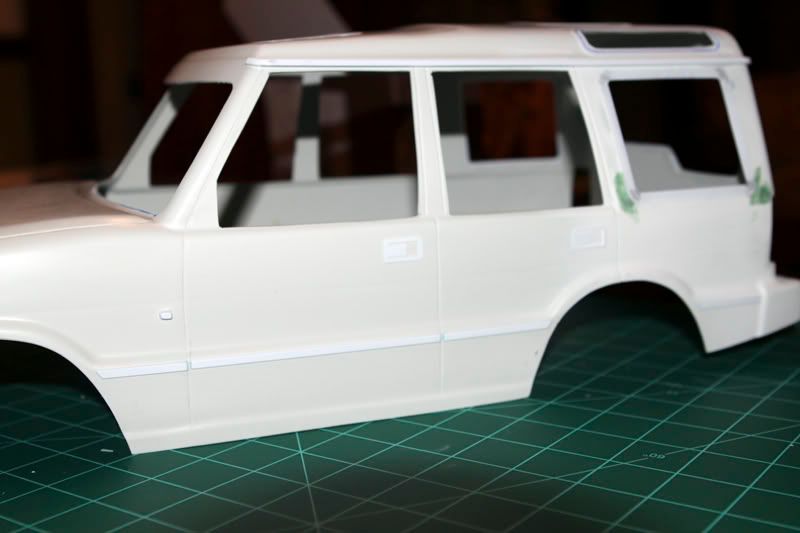 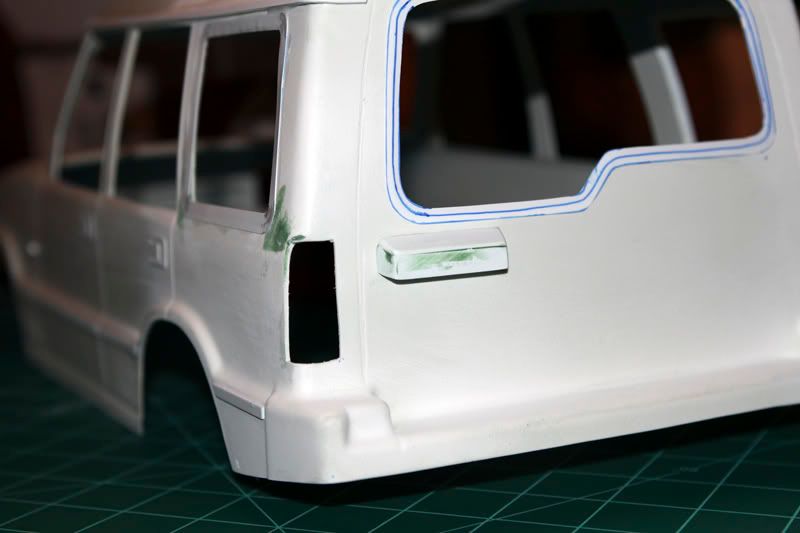  |
|
| |
|
11-19-2010, 10:14 PM
| #6 |
| Gettin back on the horse Join Date: Feb 2006 Location: Hoonsville
Posts: 6,671
|
Nice 1:1, the little one should be cool too. Just food for thought, you should make the roof rack from solid rod. If you do it out of tube the bends won't be as tight without kinking and the diameter of the tube will not look very scale in comparison.
|
|
| |
|
11-19-2010, 10:16 PM
| #7 |
| Pebble Pounder Join Date: Aug 2010 Location: Chattanooga
Posts: 112
|
At this point I took a break from body work and made some accessories. I made a 20' snatch strap, a 30' snatch strap, a 10' tree strap and some various sized bungee cords. I also got a new pooch. I will repaint him to look like my Golden Retriever. He is a little small, but I think he'll be ok:  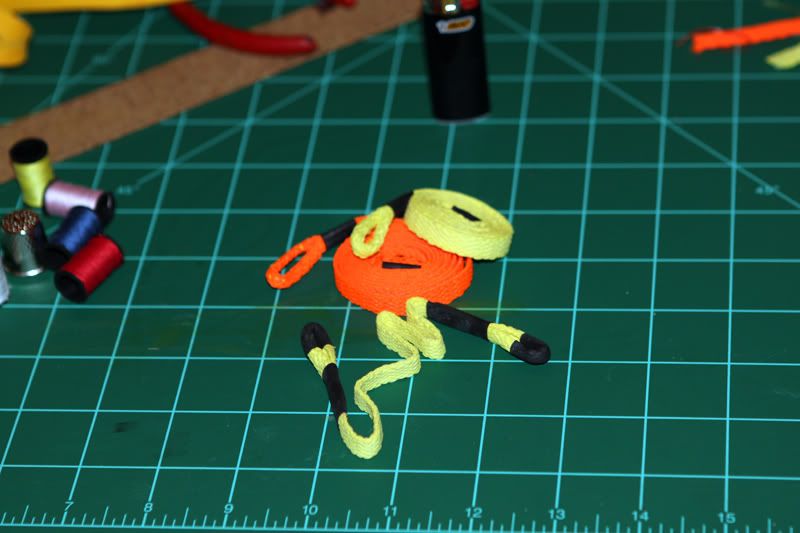     Last edited by nevets; 11-19-2010 at 10:21 PM. |
|
| |
|
11-19-2010, 10:18 PM
| #8 | |
| Pebble Pounder Join Date: Aug 2010 Location: Chattanooga
Posts: 112
| Quote:
I'm still a few posts away from getting the photos of it up. Thanks again, -Steven | |
|
| |
|
11-19-2010, 10:26 PM
| #9 |
| Pebble Pounder Join Date: Aug 2010 Location: Chattanooga
Posts: 112
|
By now, you all are probably wondering what I'm going to put this body on. I chose the Gelande kit from RC4WD. I liked everything about it and since I'm not an experienced RC builder, I went with a kit that I thought would suit me. This is how it arrived: 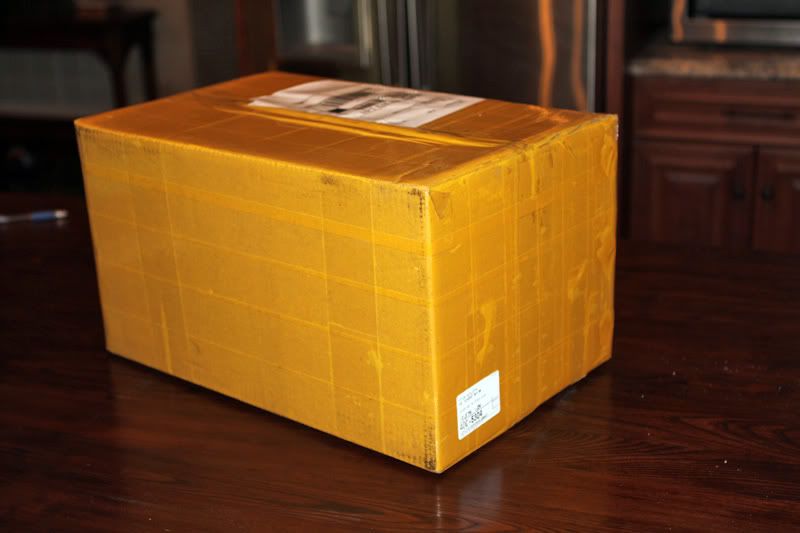 This is how it looked when I took it out of the well packed box. There was nothing to do... It was all set up. I kinda felt like I cheated. However, I found out quickly that everything was "loosely" assembled at the factory. I had to practically take the entire thing apart and locktight each nut and bolt. 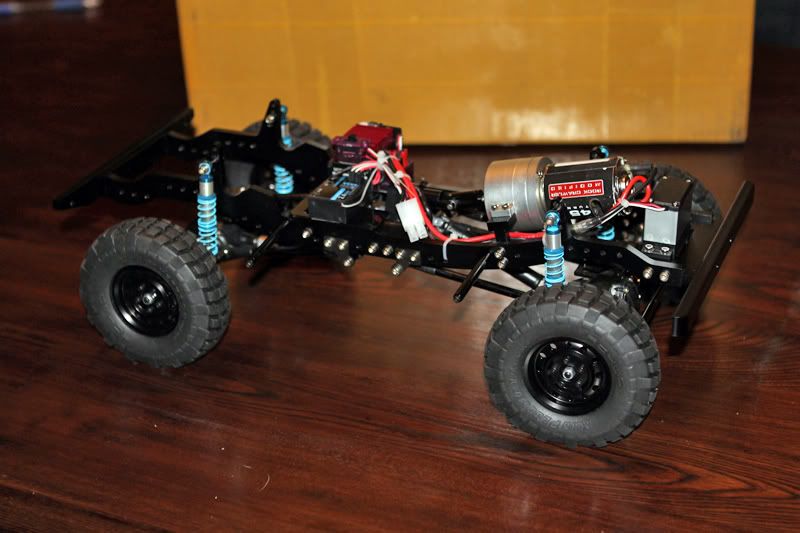 |
|
| |
|
11-19-2010, 10:32 PM
| #10 |
| Pebble Pounder Join Date: Aug 2010 Location: Chattanooga
Posts: 112
|
I set the body on the chassis to see how much adjustment was needed from the stock set up. I needed to shorten the wheelbase about 3/4 of an inch. 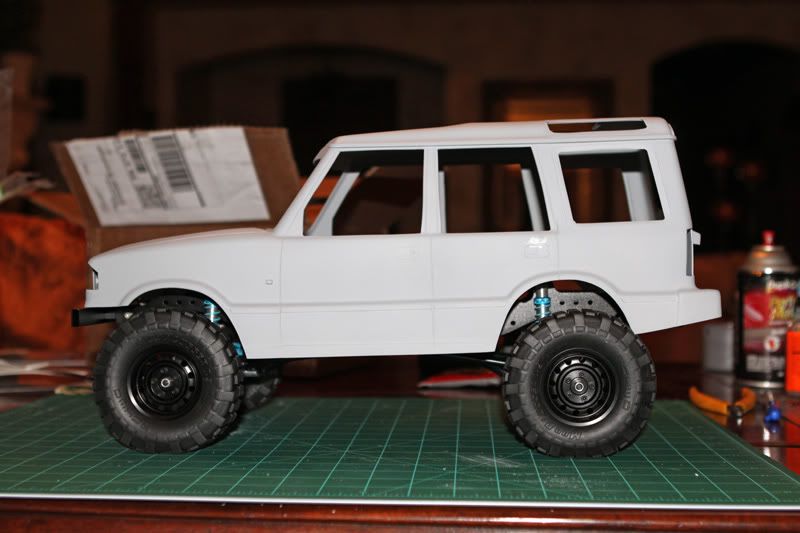 This next photo shows that I've moved teh mounting positions for the links on the chassis. I will fine tune it later. 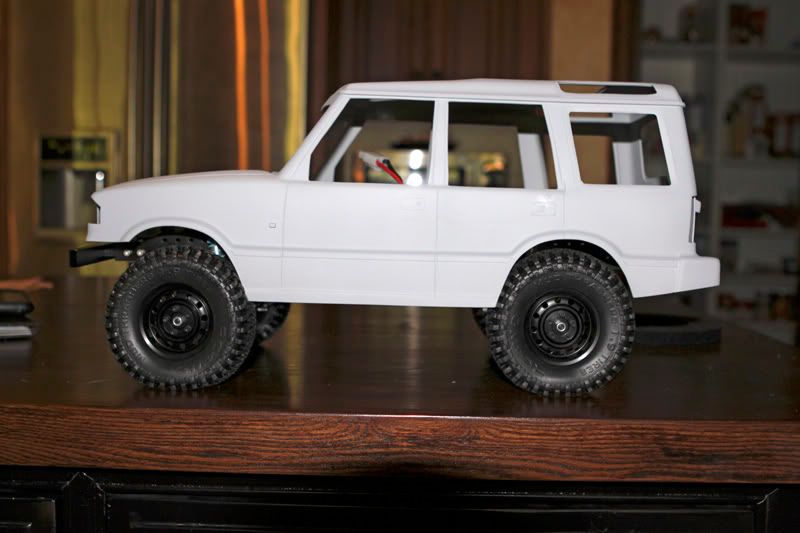 |
|
| |
|
11-19-2010, 10:38 PM
| #11 |
| Pebble Pounder Join Date: Aug 2010 Location: Chattanooga
Posts: 112
|
I made my permanent front body mount. It's made of aluminum stock and uses industrial velcro to secure the body. I have set an additional row of mounting holes in case I decide to do a "body lift" in the future. The rear is still temporary, it's thin gauge aluminum sheet. This was hinging on whether I decided to leave the plastic bumper or make my own. With the body mounted, it looks tall, but I am taking into account that there is virtually no weight on this yet. I am anticipating that once the bumpers are done, roof rack, interior, scale accessories, etc, etc. it will sit where it needs to. I will go the 1.55 route with tire/wheels, but the 1.9's clear the body perfectly. There may be some slight rubbing with front wheels turned at full stuff, but again, very minimal. That will also be moot issue if I go 1.55 anyway.  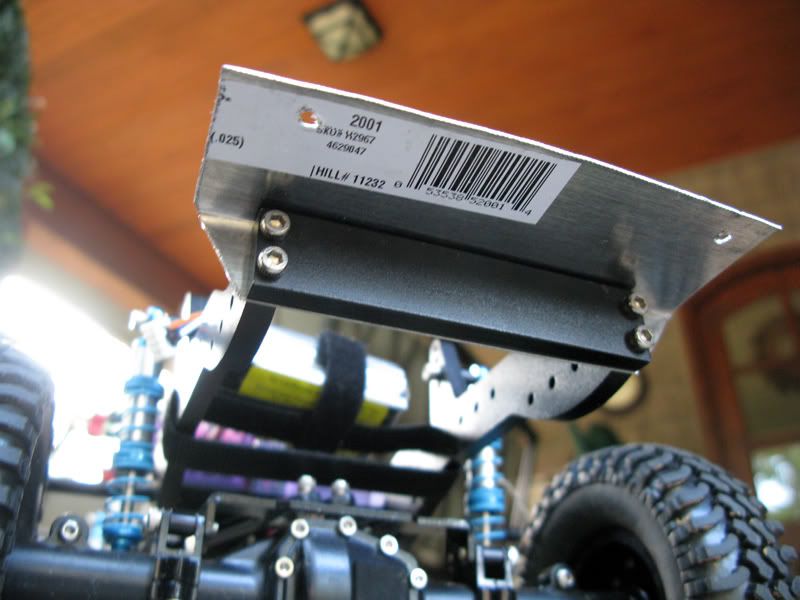     |
|
| |
|
11-19-2010, 10:49 PM
| #12 |
| Pebble Pounder Join Date: Aug 2010 Location: Chattanooga
Posts: 112
|
Now is a good time to start some fabricating. Might as well get the hardest thing out of the way first... the roof rack. I am using solid stock (steel) for it and it came together pretty nicely. I did my best to replicate all the right curves and aesthetics of the rack as I could on such a small scale. I brazed this together with silver wire and an oxy/mapp torch. This is the basic bottom structure for which the rest of the rack gets built off of. The 1:1 is constructed in the same way. It is one single tube, bent, welded in front center. 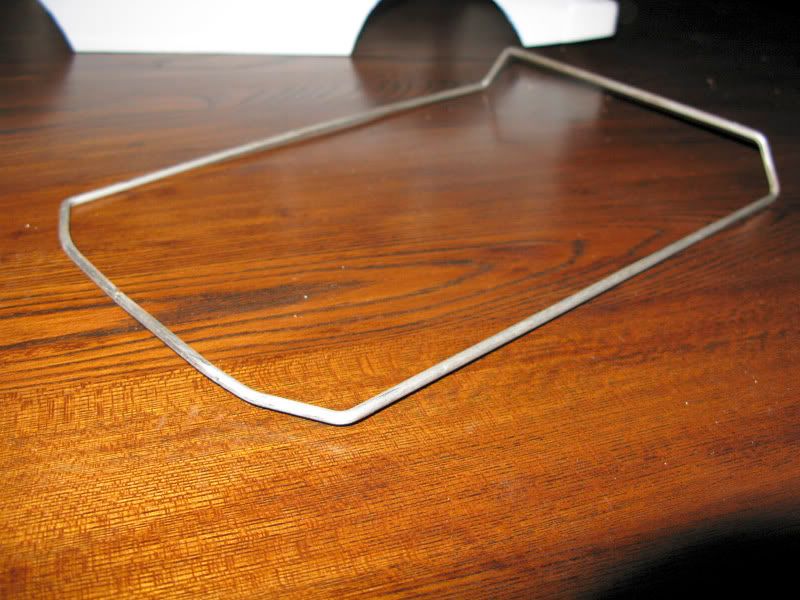 Here, you can see the the bends to the front. This is where I will later weld light tabs.  This is the floor of the basket. It will have legs coming down connecting to the bottom structure. Here you can see the distinct Land Rover roof line.  Nearly complete! I just need to do the light tabs and rack feet.   I have made roof rack flooring out of an Office Max metal mesh letter tray. Works great. I have temporarily zip tied this down to see if I like it attached that way. I use heavy duty zip ties to secure the flooring onto my 1:1 rack, so thought maybe I could do it on the scaler... Not sure about it though. 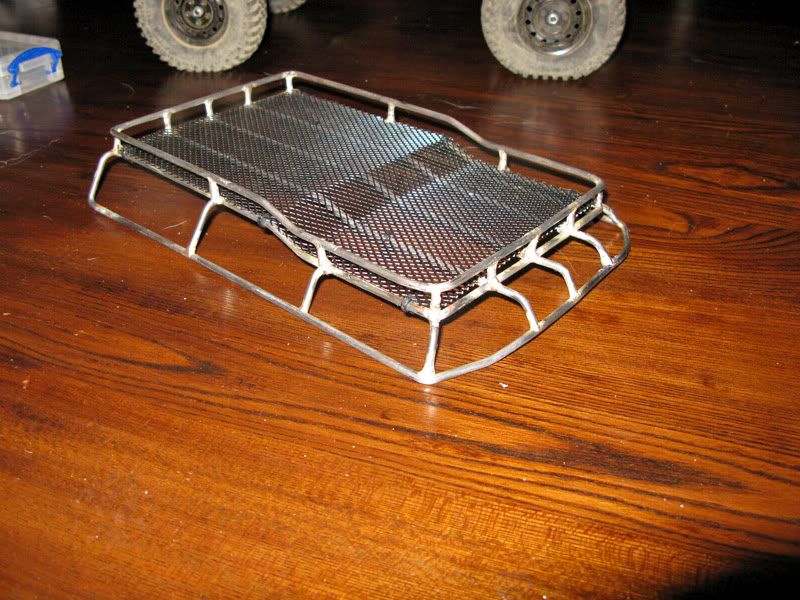 Here is the inspiration again. I am pretty pleased with the outcome of my scale version. A quick mock up on the body.  |
|
| |
|
11-19-2010, 10:54 PM
| #13 |
| Pebble Pounder Join Date: Aug 2010 Location: Chattanooga
Posts: 112
|
I painstakingly added feet and front and rear light tabs. This was not fun and did not go well at all. However, I did manage to get some distorted and crooked feet onto the rack. The light tabs are pretty good, but I have not installed lights yet. That's when I will find out how wonky they are on there. I got the roof rack all cleaned up, ground down, primed then painted. The rack is satin black and the flooring is flat black. I also moved everything to my photo studio at this point. Better photography moving forward.  Oh yea, I decided to go ahead with the zip-ties to secure the flooring to the rack. It is what I have on my 1:1 and it looks fine here too.  Here are some mock up shots  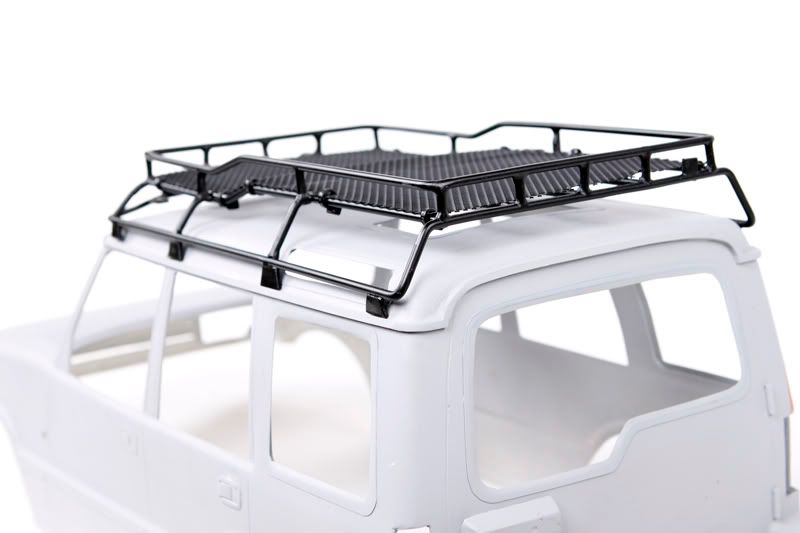 |
|
| |
|
11-19-2010, 10:58 PM
| #14 |
| Pebble Pounder Join Date: Aug 2010 Location: Chattanooga
Posts: 112
|
Next project to fab were the rock sliders. I really thought long and hard on how my rock sliders were going to work. I wanted them to hold the body from moving. I wanted them to look like my real sliders on my truck. I was going to make a "J" channel so that my body would fit in, but decided it was not necessary. Withe the posts coming from the frame rails and connecting to the top of the bottom plate of the slider, I basically still have the same result. I am very happy with how these turned out. At this point I just need to finish grinding them down.    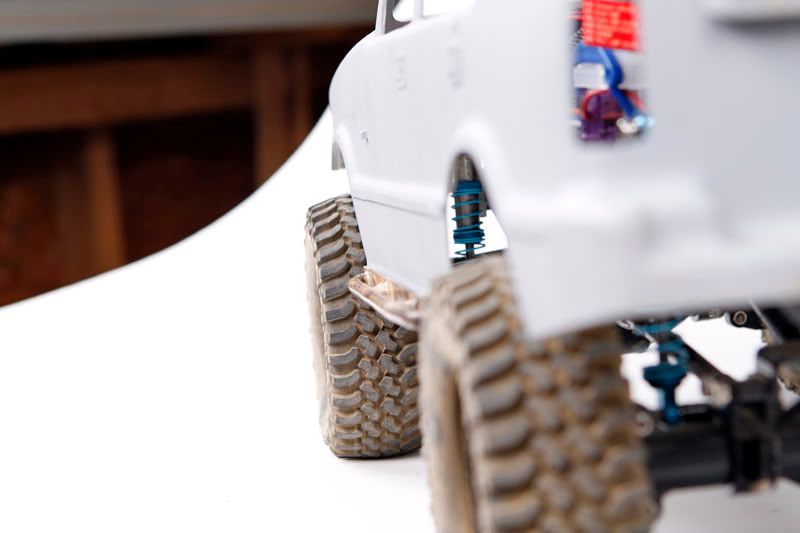  |
|
| |
|
11-19-2010, 11:01 PM
| #15 |
| Pebble Pounder Join Date: Aug 2010 Location: Chattanooga
Posts: 112
|
Here is a repro of the Land Rover Genuine Ladder for Discoveries. Not too bad of a build. After looking at the mocked up shots, I realized I was missing a bend over the cargo handle/license plate light. So this was fixed, but I did not take revised mock up shots on the body. They are still with the ladder "flat".   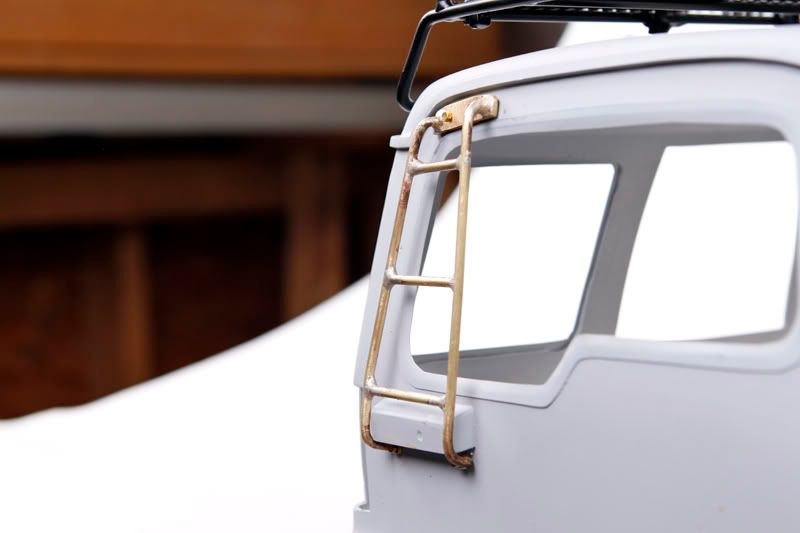 Here you can see the new bend that is not apparent in the mock up shots. Unfortunately, this did change how it sets on the body. It will sit slightly shorter and be lower from the top. I did have to fill in the old mounting holes and drill new ones. It will be fine though. 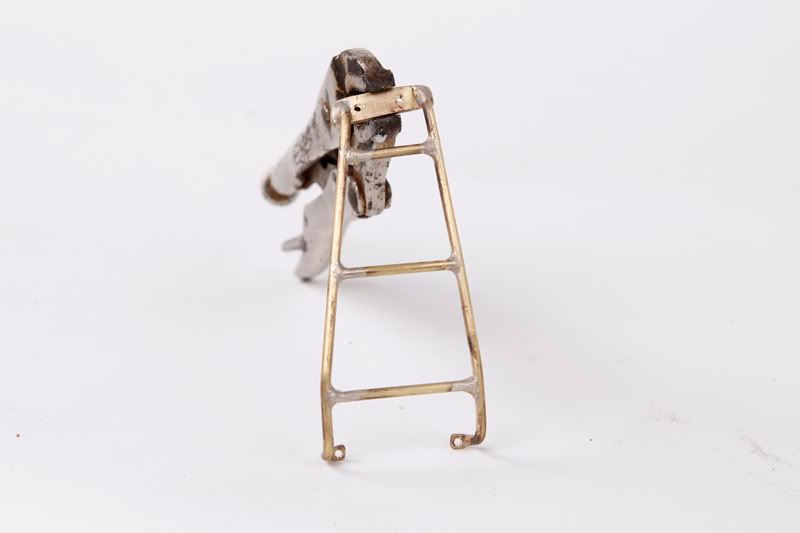 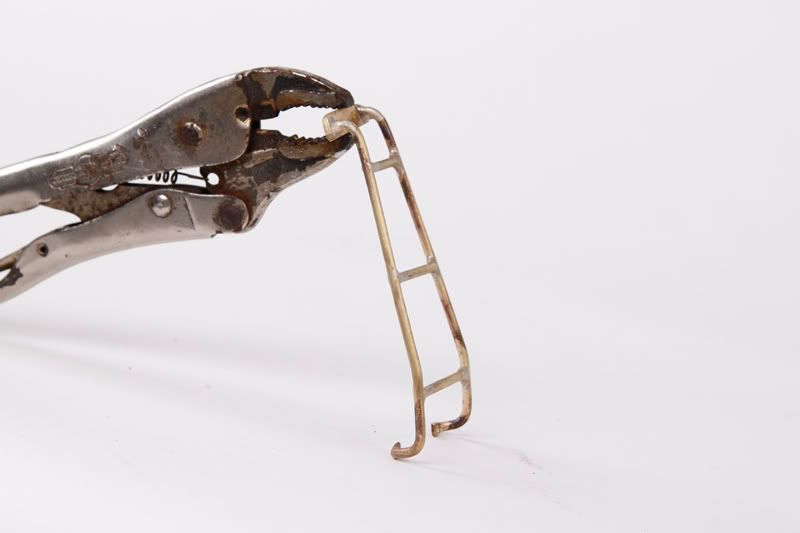  |
|
| |
|
11-19-2010, 11:04 PM
| #16 |
| Pebble Pounder Join Date: Aug 2010 Location: Chattanooga
Posts: 112
|
This is the first phase of the rear tire carrier. This is made out of very lightweight aluminum with the antenna bracket out of steel. The carrier will have 3 studs in it that will go through the spare tire. I will also be making the Safari Gard Hi-Lift holder that will attach to the carrier as well.   The next photos show phase one of the carrier complete with the Firestick whip antenna wrapped in heat shrink and the carrier painted.   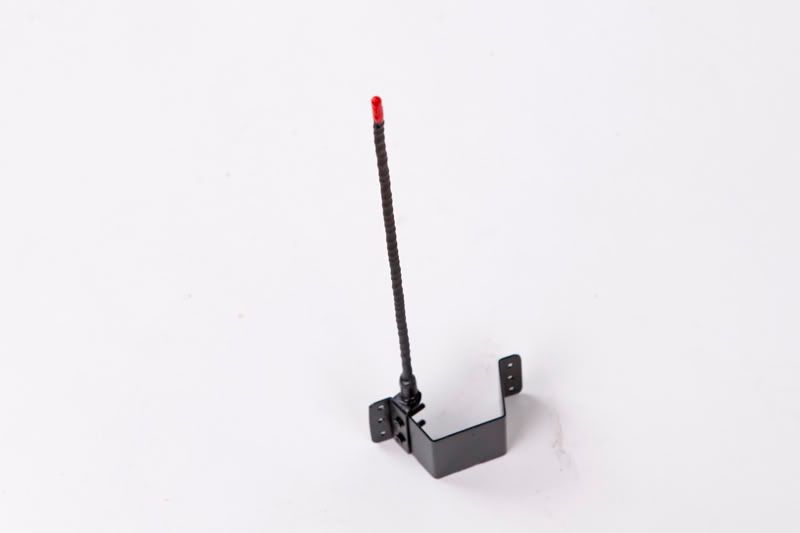 |
|
| |
|
11-19-2010, 11:16 PM
| #17 |
| Pebble Pounder Join Date: Aug 2010 Location: Chattanooga
Posts: 112
|
I decided it was a good time to try my hand at the front bumper. I knew this would prove a difficult job due to the fact that I wanted to use as much of a whole piece of sheet metal as I could and bend and weld as opposed to cut all the bits out and weld individually. This is my template for the sheet metal. I printed on adhesive paper and applied to 26 gauge metal. I just used straight tin snips to cut it. It was not ideal, but it got the job done.  This is Front bumper 1.0. You can see the template getting burned off as I solder. 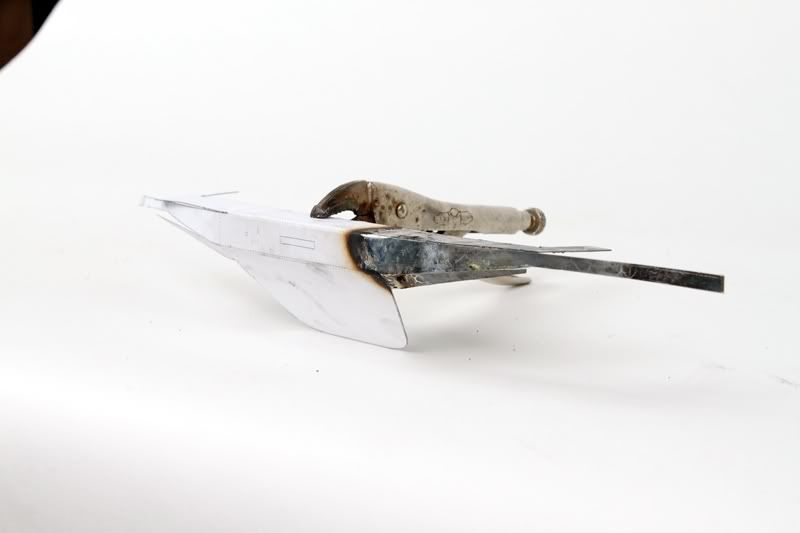 These following photos show all the components of the blade style bumper all welded together including the mounting brackets.  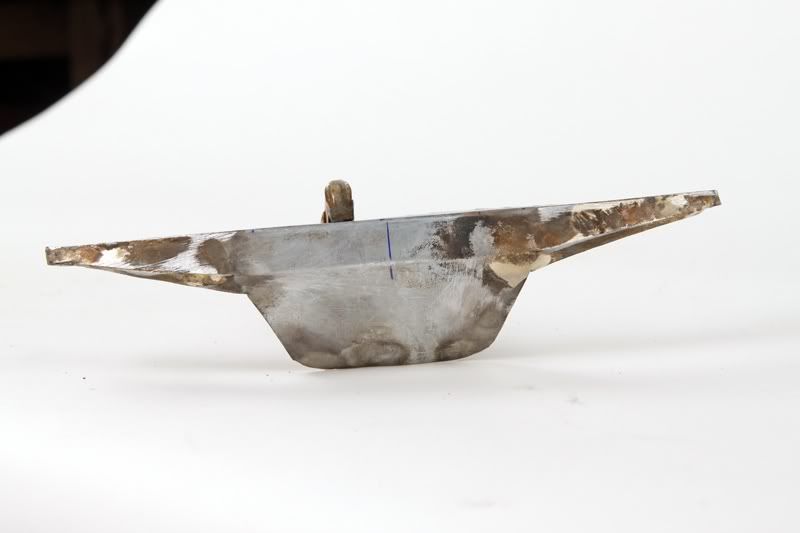   Just in case you've forgotten what the bumper looks like that I'm replicating... Here it is: |
|
| |
|
11-19-2010, 11:21 PM
| #18 |
| Pebble Pounder Join Date: Aug 2010 Location: Chattanooga
Posts: 112
|
So, I scrapped the bumper. I was off on a measurement and when I started adding the tubing, it turned out wrong. So I started on 2.0 it went much better. I'll get back to it later. However, here is nice little package from Stefan at Scale Offroad.  I got 8 large lights to be used as Hella 4000 off road lights, 1 winch hook, 2 shackles to be mounted on the front bumper like the swivel D-rings on my Safari Gard bumper. I also got 8 straps (in real life I strap things onto the roof rack, not bungee) a new winch line (will try to dye it green like my 1:1) and a sweet snatch block. A couple weeks ago I had received my roof rack LED lights from Bill at Bill's Custom RC Lighting. So, since I now have my housings, it was time to make these Hellas shine. The housings are attached to the roof rack light tabs using a 1/8" bit of brass tube as a sleeve with a screw and nut going through. All the wiring travels under the rack to the tote on the back of the rack where it is powered by a 9V battery.   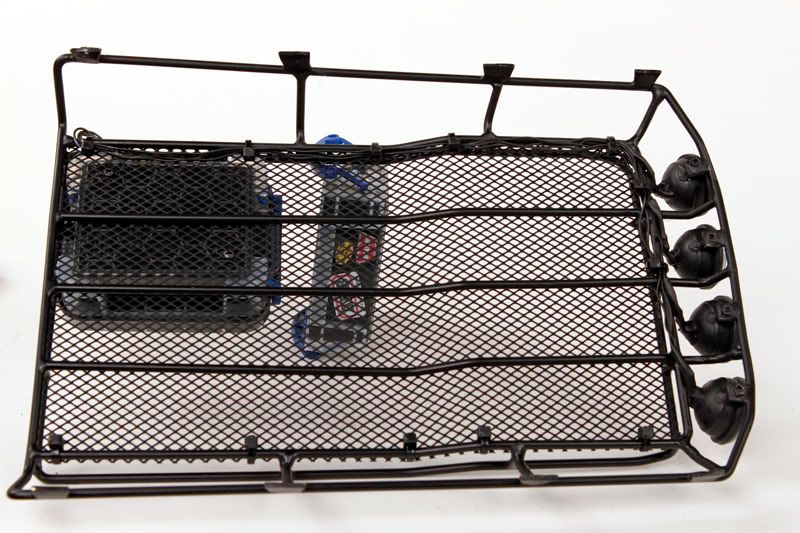 Next you can see the on/off switch for the lights. 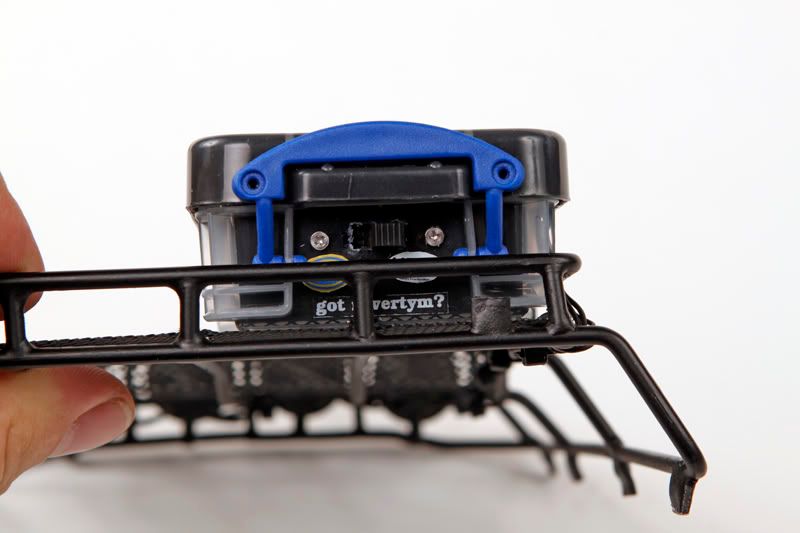 And finally below, how they shine in the dark.  |
|
| |
|
11-19-2010, 11:28 PM
| #19 |
| Pebble Pounder Join Date: Aug 2010 Location: Chattanooga
Posts: 112
|
Well it's 1:25 am East Coast time and I have just packed over 2 months of work into this thread in a single sitting. Must go to bed now. Coming up: finished spare tire carrier, front bumper 2.0, rear bumper, paint and some other bits that I cannot think of right now. Cheers, -Steven |
|
| |
|
11-19-2010, 11:37 PM
| #20 |
| Rock Stacker Join Date: Apr 2008 Location: Australia
Posts: 62
|
Mate that is tops great build love the CB antenna keep up the good work.  |
|
| |
|
| |


 Linear Mode


