| |||||||
Loading
 |
| | LinkBack | Thread Tools | Display Modes |
| |||||||
 |
| | LinkBack | Thread Tools | Display Modes |
| | #1 |
| Newbie Join Date: Jun 2012 Location: Ossendrecht
Posts: 34
|
A while back I had the idea to make a Wild Willy 4x4. I know I am not the first with this idea, and there are some exelent ones here on this forum, but I wanted to share my version anyway. So far I have build and scrapped a aluminium sidepanel chassis that was not working as i wanted it. And now I am building version 3 of my 3d printed chassis based on losi mrc axles. Version 2 was running great, but needed some minor improvements to make it better. here is a video of the unboxing of version 1 here is a video of version 2 here is a video of a strength test of version 1 of the chassis For those of you who want to build one, this will be a step by step "manual" with some explanation, but you will need to figure some stuff out by yourself as well...: Here is what you will need: 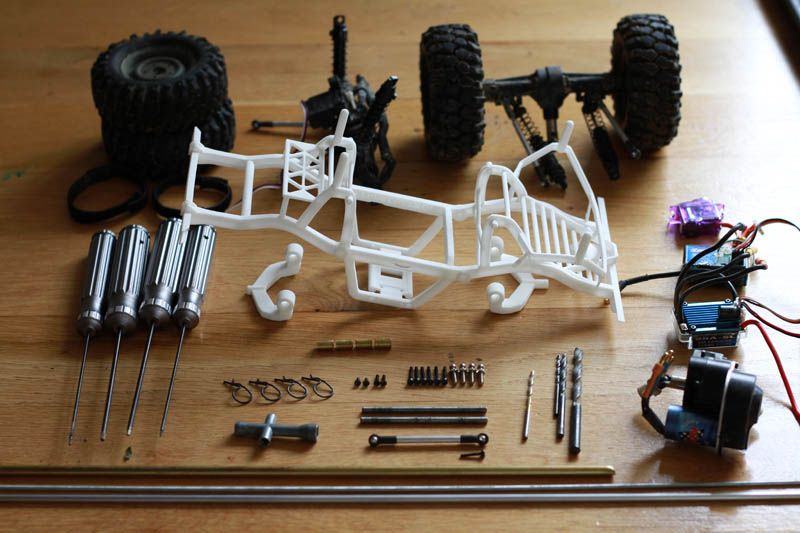 The list of parts: - axles and complete drivetrain of a losi mrc - a micro servo - threaded bar, M3 and M4 - aluminum tube, that just fits over the M3 threaded bar. - brass tube, that just fits over the M4 threaded bar, with an outside diameter of 6mm - a 3d printed chassis, with 3-link arms (Wild Willy chassis for losi mrc by magic2002 on Shapeways) - some tools. - drill bits, 1,5mm 2,5mm 3,5mm and 6mm - a Tamiya Wild Willy body. Of the 3 chassis I had printed so far there were 2 with some "print lines" on them. The 3d printed prints in layers of 0,15mm and depending on how the model is printed sometimes these layers show on sides of the model. So I start with sanding these print lines down. I do not sand them all down, on the motor mount I think they give the chassis some personality. After sanding the holes need to be drilled. All holes are marked or already in the model, but not at the right size because of printing tolerances. Here is a picture of where the different holes need to go and what size they need to be. 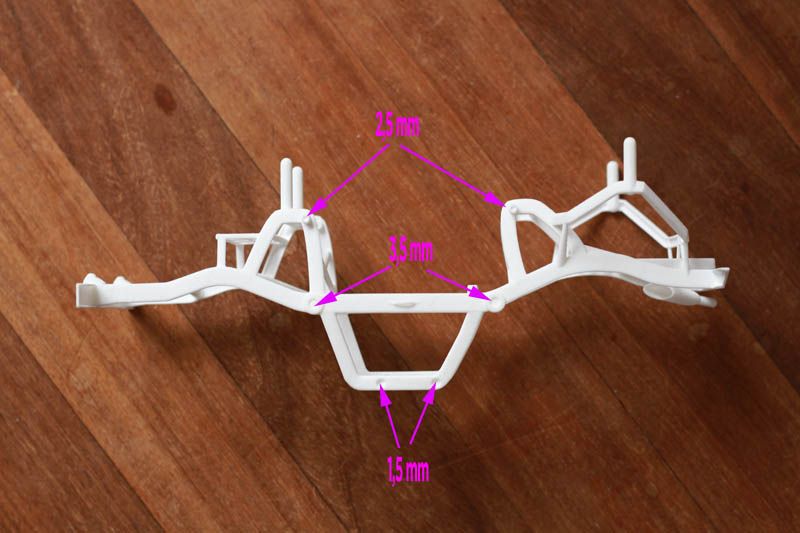 and this is a picture of the rear 3-link arm(it is the longest of the 2), the holes in the front one are the same. 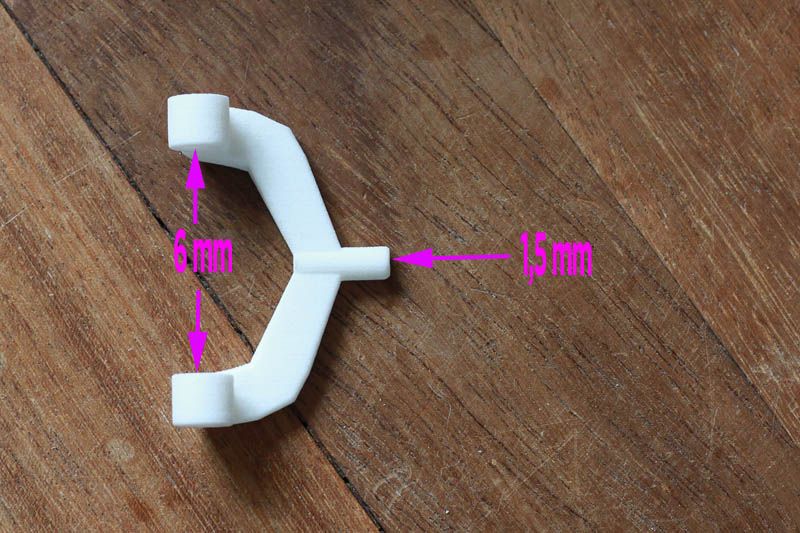 Get your wild Willy body out, place it over the chassis to mark where the holes for the bodyclips should come. There is a little room on the body mounts to place the body somewhat higher, Then you will need to also mark and drill holes underneath the body. On the lowest position no holes underneath are necessary. I use the 1,5 mm drill bit for the holes in the body mounts. 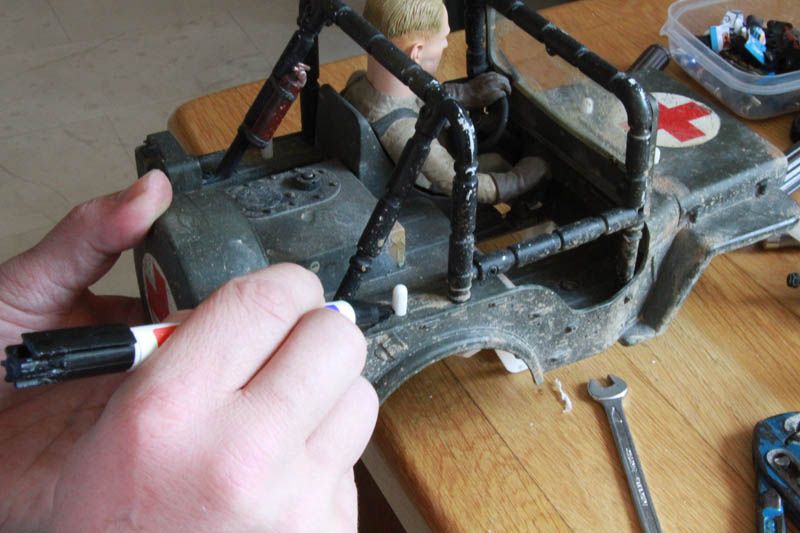 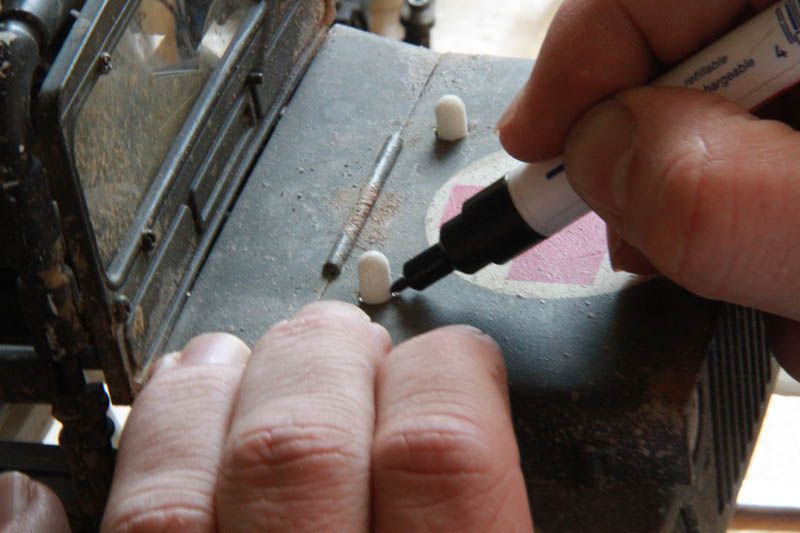 With the chassis in front of you it is easy to spot where the holes should be, and one can drill all holes from the outside of the chassis going in. 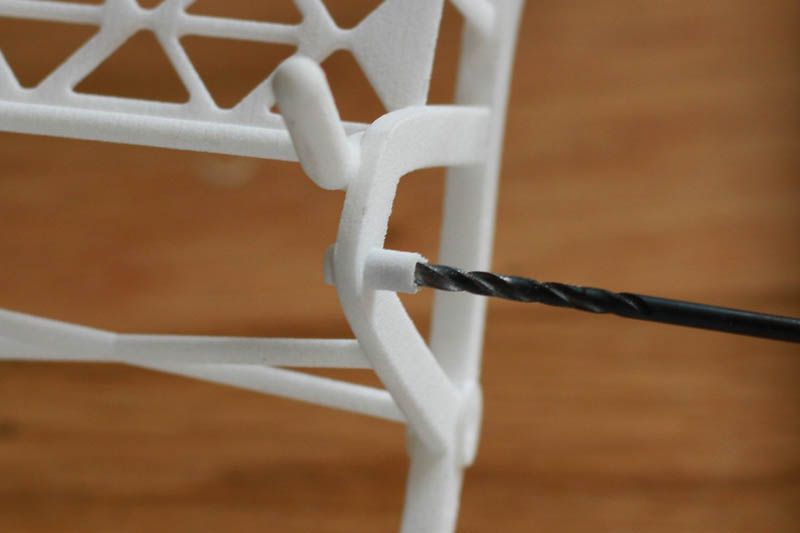 After the holes are drilled 4 pieces of brass tubing need to be cut to a length of 9,5 mm. they will be used as a bushing in the 3-link arms 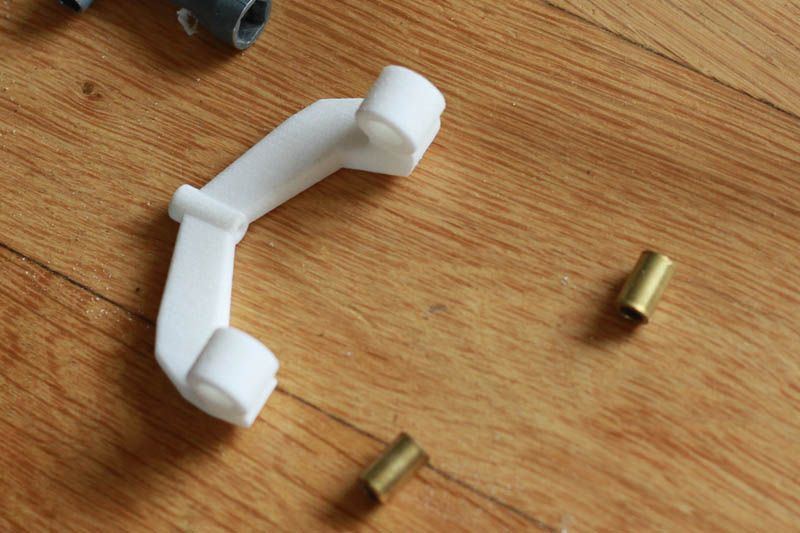 after cutting press them in the arms. 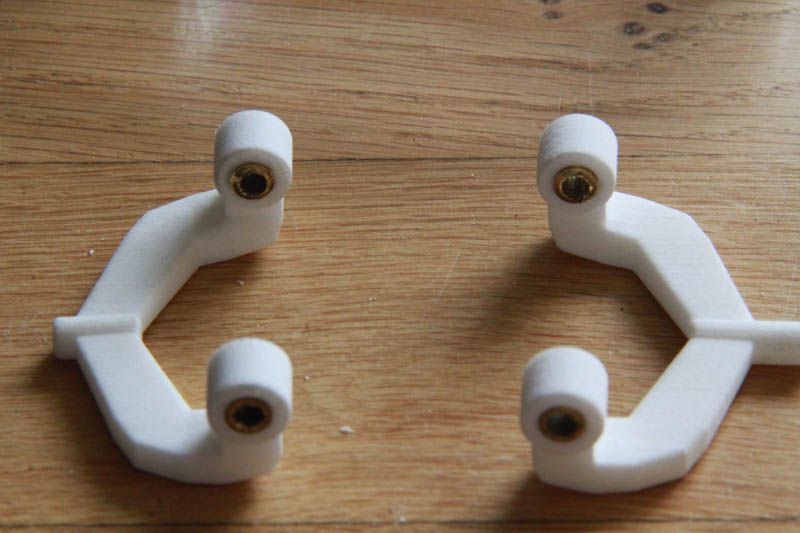 To attach the 3-link arms to the chassis 2 pieces of M4 threaded bar is used, cut down to 73mm. Screw the threaded bar in the 3,5mm hole, and when it just comes out on the inside slip the appropriate arm(front at the front and rear arm on the rear) over the bar before screwing the entire bar from one side to the other. There is no need to use a tap in the chassis, the material is some sort of nylon, and the threaded bar makes the inside thread like on a nylon insert locknut. 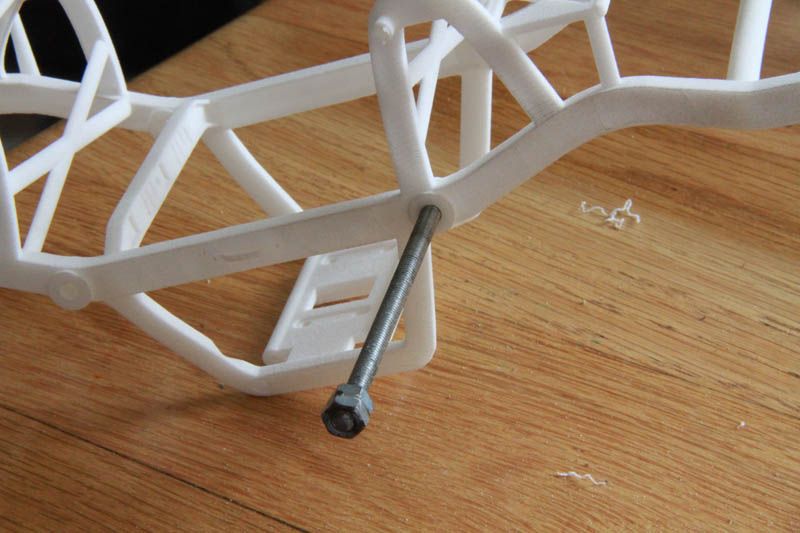 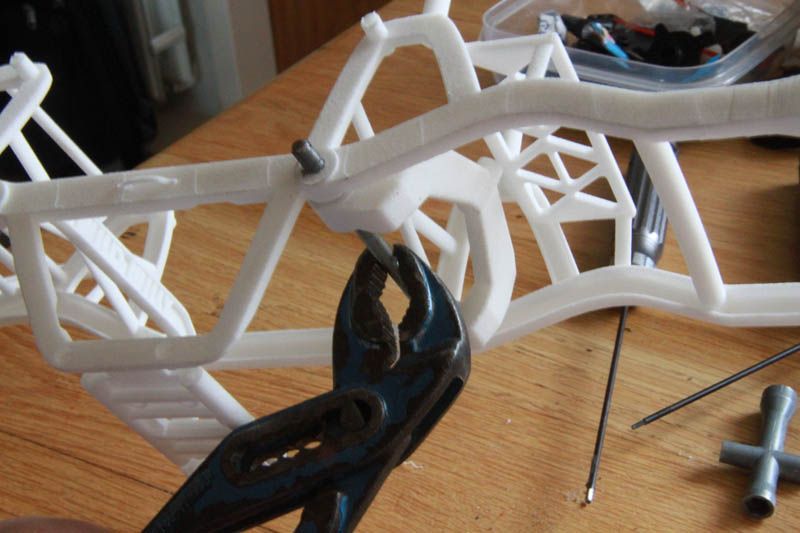 It should look like this when finished : 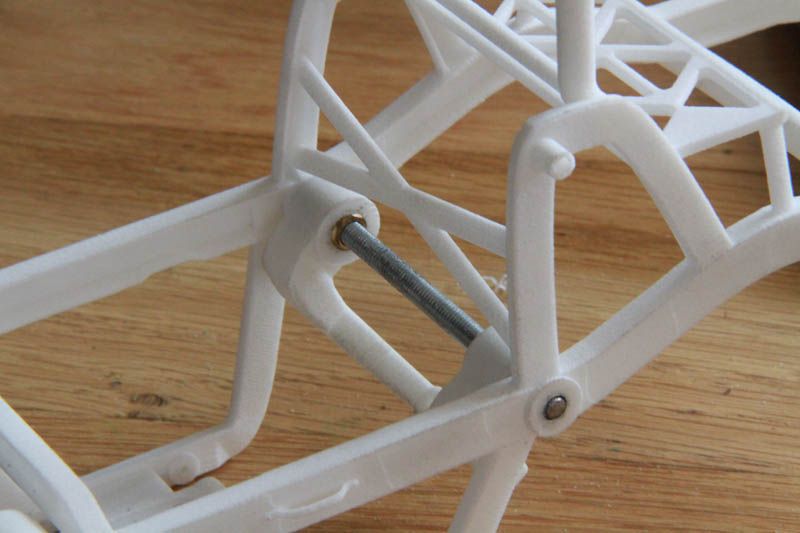 After this step, I paint my chassis. As this is not a painting pictorial, there are no pictures of that. The paint used is Tamiya acrylic paint. It seems to work very well with the 3d printed material, almost soaks it up like a sponge. While paint is drying I start with some preparations to be able to mount everything to the chassis when painting is done. To make room for the support bar at the front of the chassis(this bar is on the real chassis as well) the servo needs to go back a bit. I used the original mrc servo mounting plate and modified it. I cut out a 12mm corner, so that it still mounts to the axle with 2 screws. here is a picture of how it looks... (notice the dirt on my axle... That is from when it was mounted on version 2 of the chassis, I left it on because i like the weathered look... 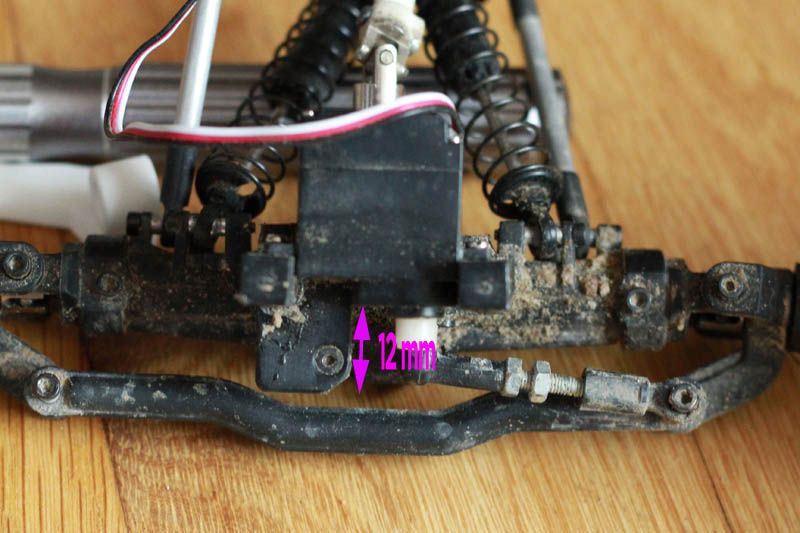 I used M3 threaded bar for the steering arm. That's it for today, stay tuned for more... Last edited by magic2002; 07-22-2013 at 11:11 AM. |
| |  |
| Sponsored Links | |
| | #2 |
| I wanna be Dave  Join Date: Dec 2009 Location: Outside DC
Posts: 2,997
|
Very interesting! 3D printing is going to change the world. Both good, and bad. In this case...very good!  |
| |  |
| | #3 |
| Quarry Creeper Join Date: Dec 2009 Location: Brackenfell, South Africa
Posts: 448
|
Very nice dude...  |
| |  |
| | #4 |
| I wanna be Dave Join Date: May 2007 Location: Fairfield ME
Posts: 3,886
| |
| |  |
| | #5 |
| Newbie Join Date: Apr 2013 Location: United Kingdom
Posts: 37
|
That looks fantastic! May I ask what you spent and where you got it printed? I was posting in another thread recently about how hard it seems to be to source Losi MRC products in the UK :( |
| |  |
| | #6 | |
| Newbie Join Date: Jun 2012 Location: Ossendrecht
Posts: 34
| Quote:
I have a shapeways account and they have printed all 3 versions of the chassis. They also printed the grill in the wild willy body andthe shovle axle combo on the side.. here is my shapeways site : Magic's models by magic2002 on Shapeways There you can also see what 1 chassis costs. I have had them print 3 so far so then you will know what I have spend, if you add up the losi mrc, the micro servo, the motor esc combo(the stock could be used, but i choose not to) and other some bits and bobs like tubes and rods.. all added up probably to much for such a small car but I think it is pretty unique and it rides like a dream... not a rock crawler anymore but great on trail runs..  | |
| |  |
| | #7 |
| Newbie Join Date: Jun 2012 Location: Ossendrecht
Posts: 34
| |
| |  |
| | #8 |
| Quarry Creeper Join Date: Jun 2008 Location: San Antonio
Posts: 409
|
That's awesome! Love those Wild Willy bodies! Cool design on the chassie too! Nice Job!
|
| |  |
| | #9 |
| Newbie Join Date: Jun 2012 Location: Ossendrecht
Posts: 34
|
Ok my friends, let's finish this one... I am going on a trip to Norway and Wild Willy needs to come along so it needs to be done.. After painting the chassis it is time to mount some bits and pieces to it. The only drilled hole I use a tap on is the one that gets the ball-joint where the damper attaches to. I just start the thread so I don't need to much force to screw the piece in. 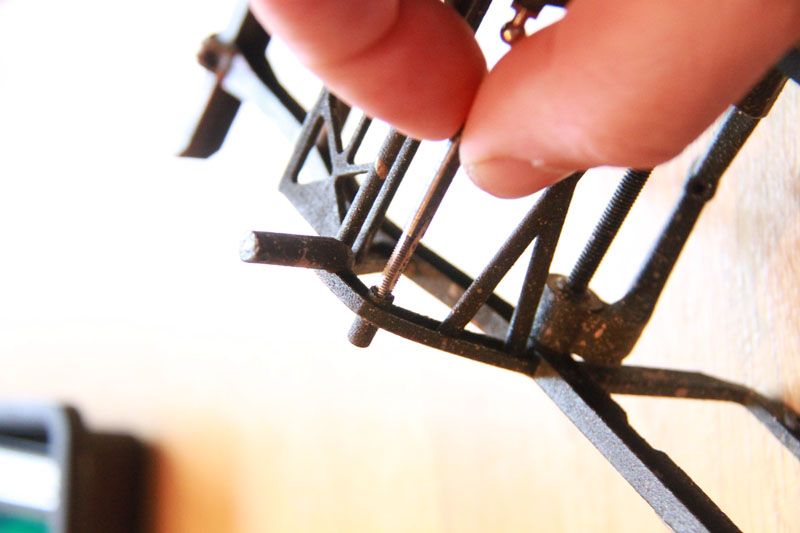 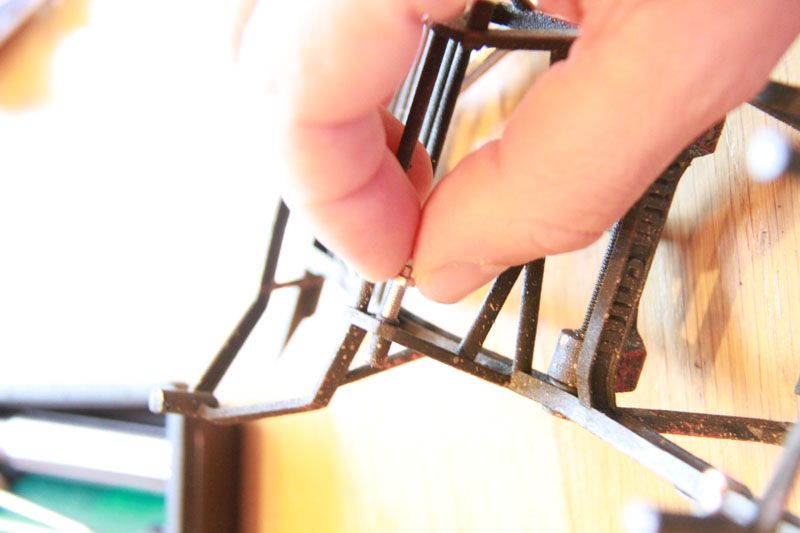 Begin by turning the ball-joint in by hand, to get it in nice and straight. The plastic here is not very thick, so when it is in a couple of threads, make sure it is straight then carefully go further using a socket. When it is completely in it should be flush (is this the correct term?)at the other end of the hole 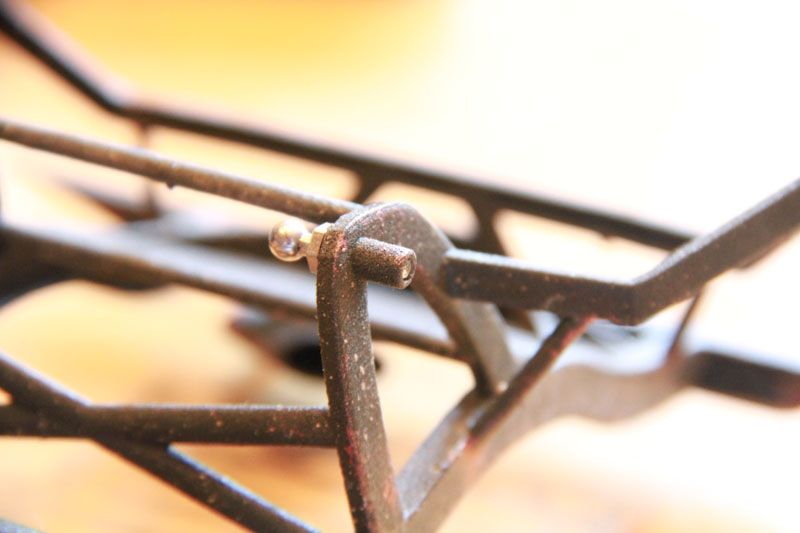 After all 4 ball-joints are in, I mount the motor/transmission case. The 4 holes in the skidplate correspond with the holes in the transmission case, so this is pretty self-explanatory. 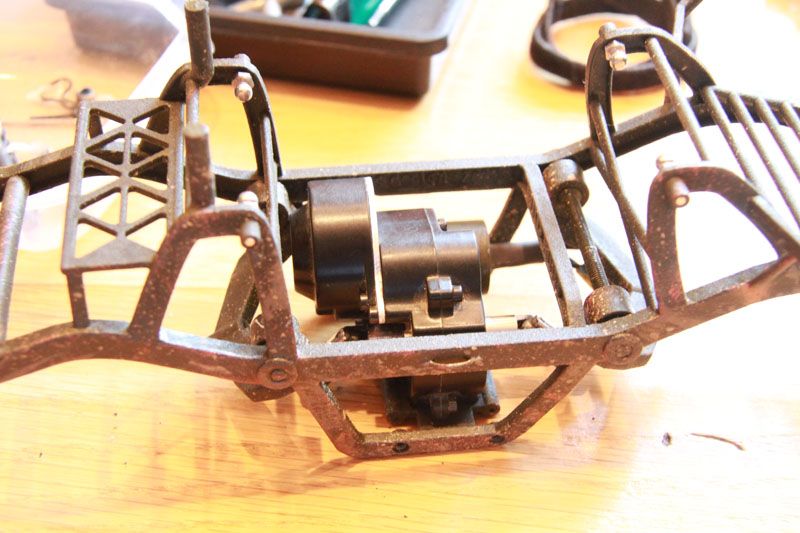 The axles can then be mounted to the 3-link arms using the stock screw from the losi mrc. The dampers can be attached to the ball joints. And this is where the "figuring out for yourself" starts. One can vary the wheelbase a bit by cutting the rear 3-link arm a bit or adding a small ring in between the arm and the axle. The front arm can only be cut a very tine bit, a ring could be added there as well. Of course this also affects the length of the lower arms, and the final length of your drive-shaft. I left the front 3-link arm as it came out of the printer, just bolted that one straight on. The rear arm I cut down by just over 1mm( the idea of the oversize was to accommodate cutting the wheel arches in the back, and thus making more room to move arround) The 1 mm in combination with the right length of lower arm makes the wheel sit nice in the uncut wheel arch. 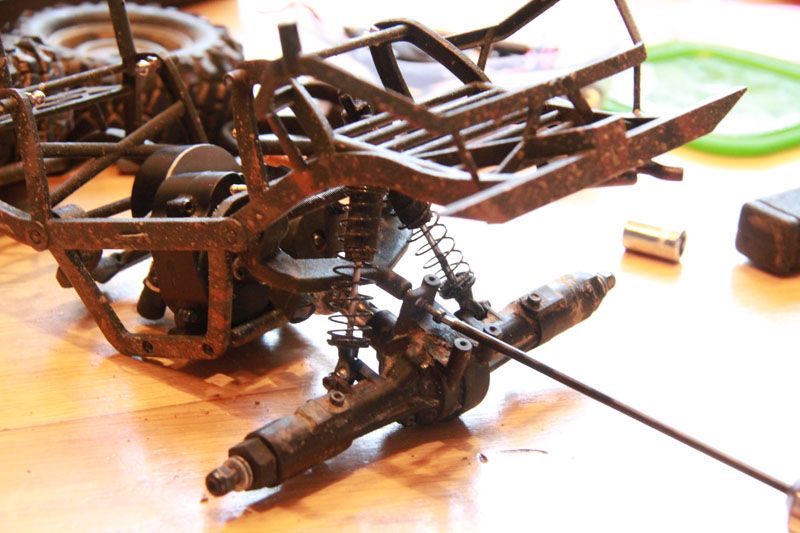 when the axles are mounted to the 3-link, the lower arms can be made to fit. I cut down a m3 threaded bar to 4 pieces of 52 mm. The ball-joints are scavenged of the original mrc lower arms. For the front lower arms I made 2 pieces of aluminum tube of 36.5 mm and for the back I left them 38.2 mm. Screwed these together making pretty short lower arms. 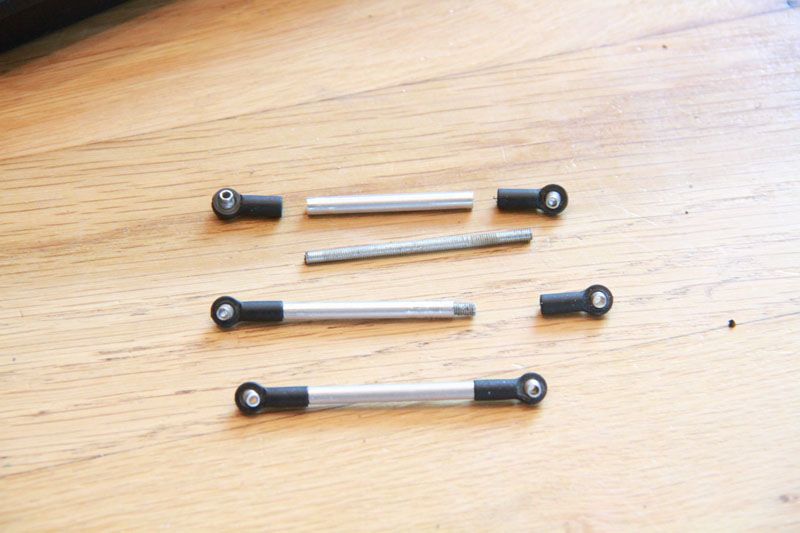 After painting the arms I mounted them to the chassis and axles. 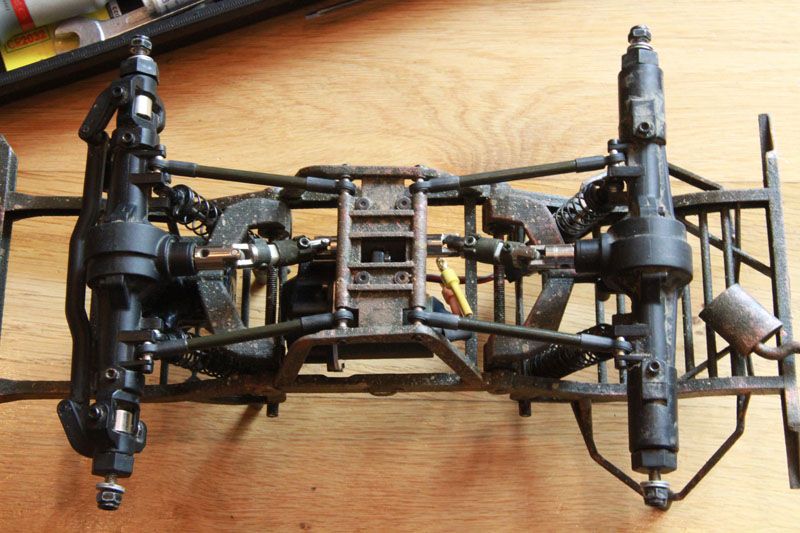 Now it is time to get your electronics in. I use the stock receiver, but a hobbywing esc to go with the brush-less motor. It might sound silly but I love hot glue to mount these to the chassis. It sticks really well and can easily be removed with a small screw driver later on. This part is also a "left up to you" part. All depends on what you use and where you want it. This is how mine looks when all is in there. 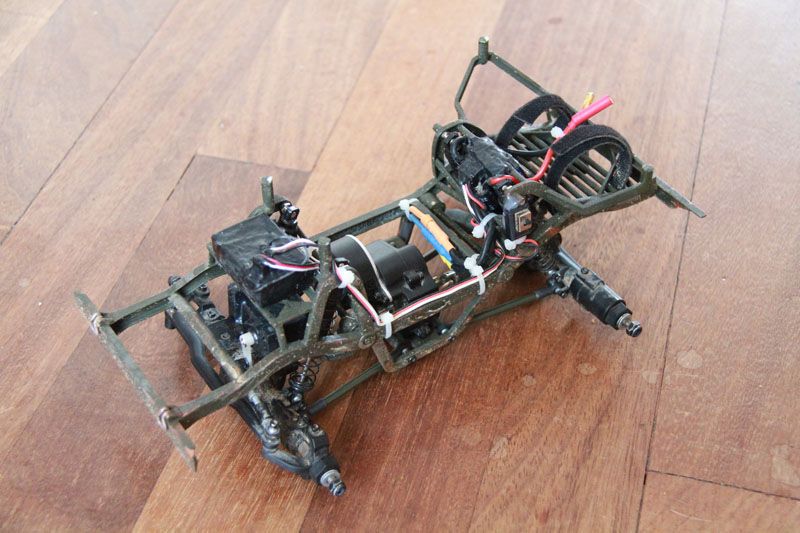 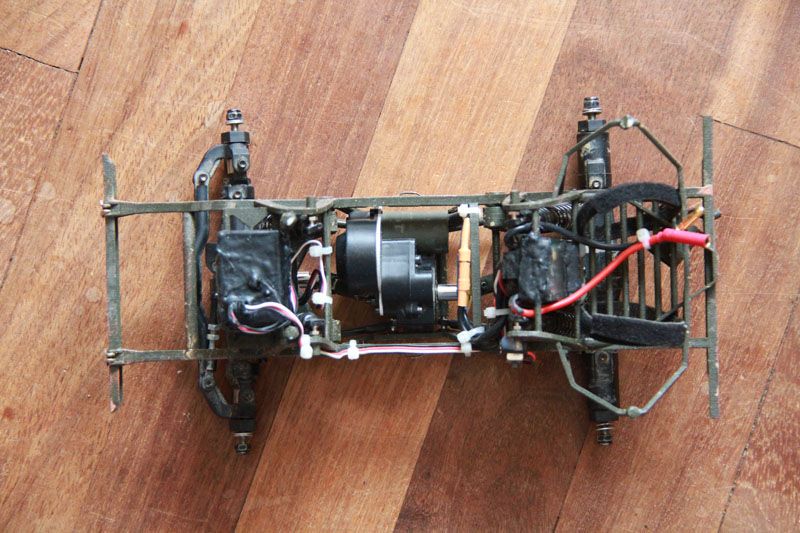 I have used liquid rubber to waterproof the receiver, servo and esc. Here is how it looks with some wheels on: 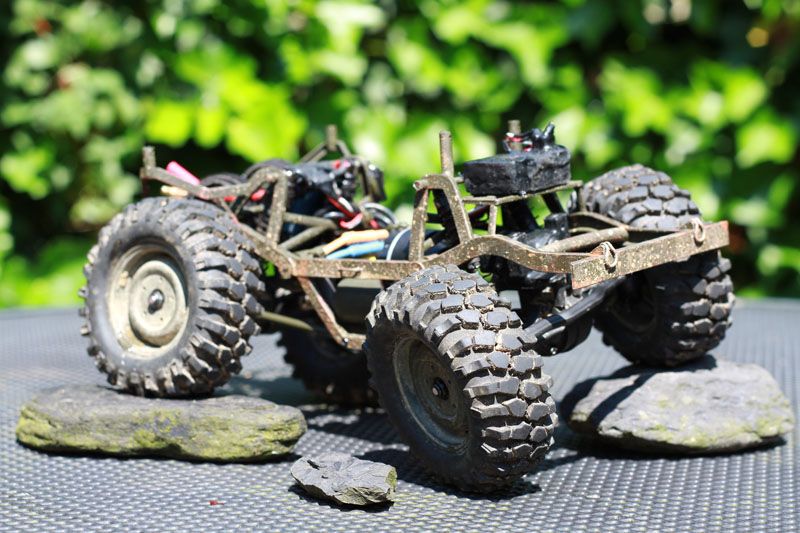 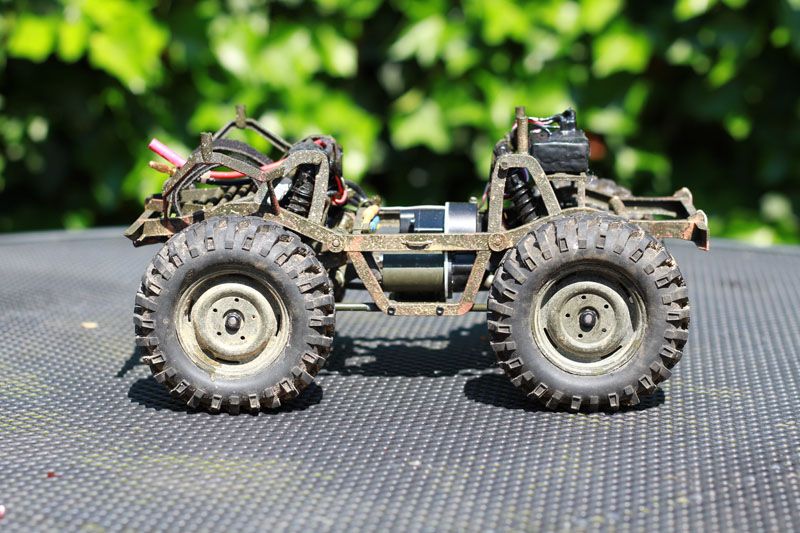 And this is it completely finished and ready to hit some trails : 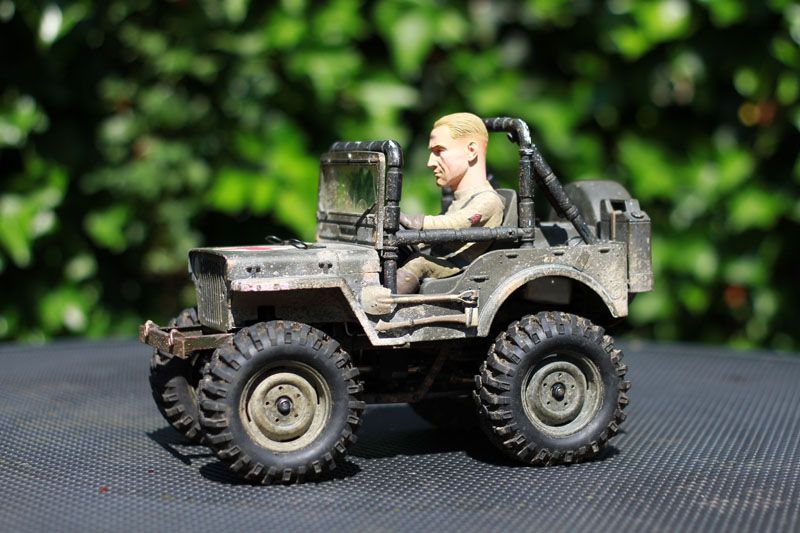 As always when developing stuff, it is not 100% perfect yet, and there will always be room for improvement. But for now I think it is a fun little car that is great to ride trails. It is not the rock-crawler that the mrc was anymore.. Oh and one last thing, I have my battery strapped in the back. I have compensated for that with 33 grams of wheel-weights in the front wheels. Cheers, Martin |
| |  |
| | #10 |
| Newbie Join Date: Jun 2012 Location: Ossendrecht
Posts: 34
|
We went to Norway, and brought the 4x4 wild Willy allong to enjoy some of the nice scenery's... |
| |  |
 |
 3d printed Wild Willy 4x4(photo heavy) - Similar Threads
 | ||||
| Thread | Thread Starter | Forum | Replies | Last Post |
| 4X4 Wild Willy 2 | oldstl1000 | General Crawlers | 5 | 12-28-2012 03:11 PM |
| Wild willy? | S ARR T 8 | General Scale Talk | 0 | 01-03-2010 03:08 PM |
| Wild willy? | S ARR T 8 | 2.2 Scale Rigs | 0 | 01-03-2010 08:54 AM |
| |