| |||||||
Loading
 |
| | LinkBack | Thread Tools | Display Modes |
| |||||||
 |
| | LinkBack | Thread Tools | Display Modes |
| | #41 |
| Quarry Creeper Join Date: Apr 2009 Location: Lynnwood
Posts: 385
|
I always love seeing these metal bodies you do! how do you straighten out the panels after carnage like that? or do you just make new panels?
|
| |  |
| Sponsored Links | |
| | #42 |
| Rock Crawler Join Date: Feb 2011 Location: Williston
Posts: 850
|
he beats em out with a 10# sledge! hahaha L.R. |
| |  |
| | #43 |
| Rock Crawler Join Date: Jul 2012 Location: Grand rapids
Posts: 770
|
I really want body built guy this guy, for the real damage effect and its crazy detailed
|
| |  |
| | #44 |
| Rock Crawler Join Date: Jul 2005 Location: Spartanburg
Posts: 860
|
I am late to this party but these things are awesome!
|
| |  |
| | #45 |
| Rock Crawler Join Date: Feb 2011 Location: Williston
Posts: 850
|
Bump for a few unanswered questions~ L.R. |
| |  |
| | #46 |
| Rock Crawler Join Date: Feb 2011 Location: Williston
Posts: 850
|
BUMP, my only other question would have been are you using some kind of release agent? (but I dont think you are) when you say the 2 gallon kit, do you mean a gallon of part "a" and a gallon of part "b"? That's the one they are selling for 85 bucks or so? need more pics!!! |
| |  |
| | #47 | ||||||||
| RCC Addict  Join Date: Aug 2005 Location: New Oxford PA
Posts: 1,290
| Quote:
Quote:
Quote:
Quote:
Quote:
 Quote:
Quote:
Anyways the only thing i use is a light coat of baby powder. it's more to release the bubbles from the surface when pouring the resin then releasing the cured resin from the body but it does help. Yes you are right about the resin, it' 1 gal of each part. Ok time for more progress Once i got the main hoops done the next step was to make sure the body fits 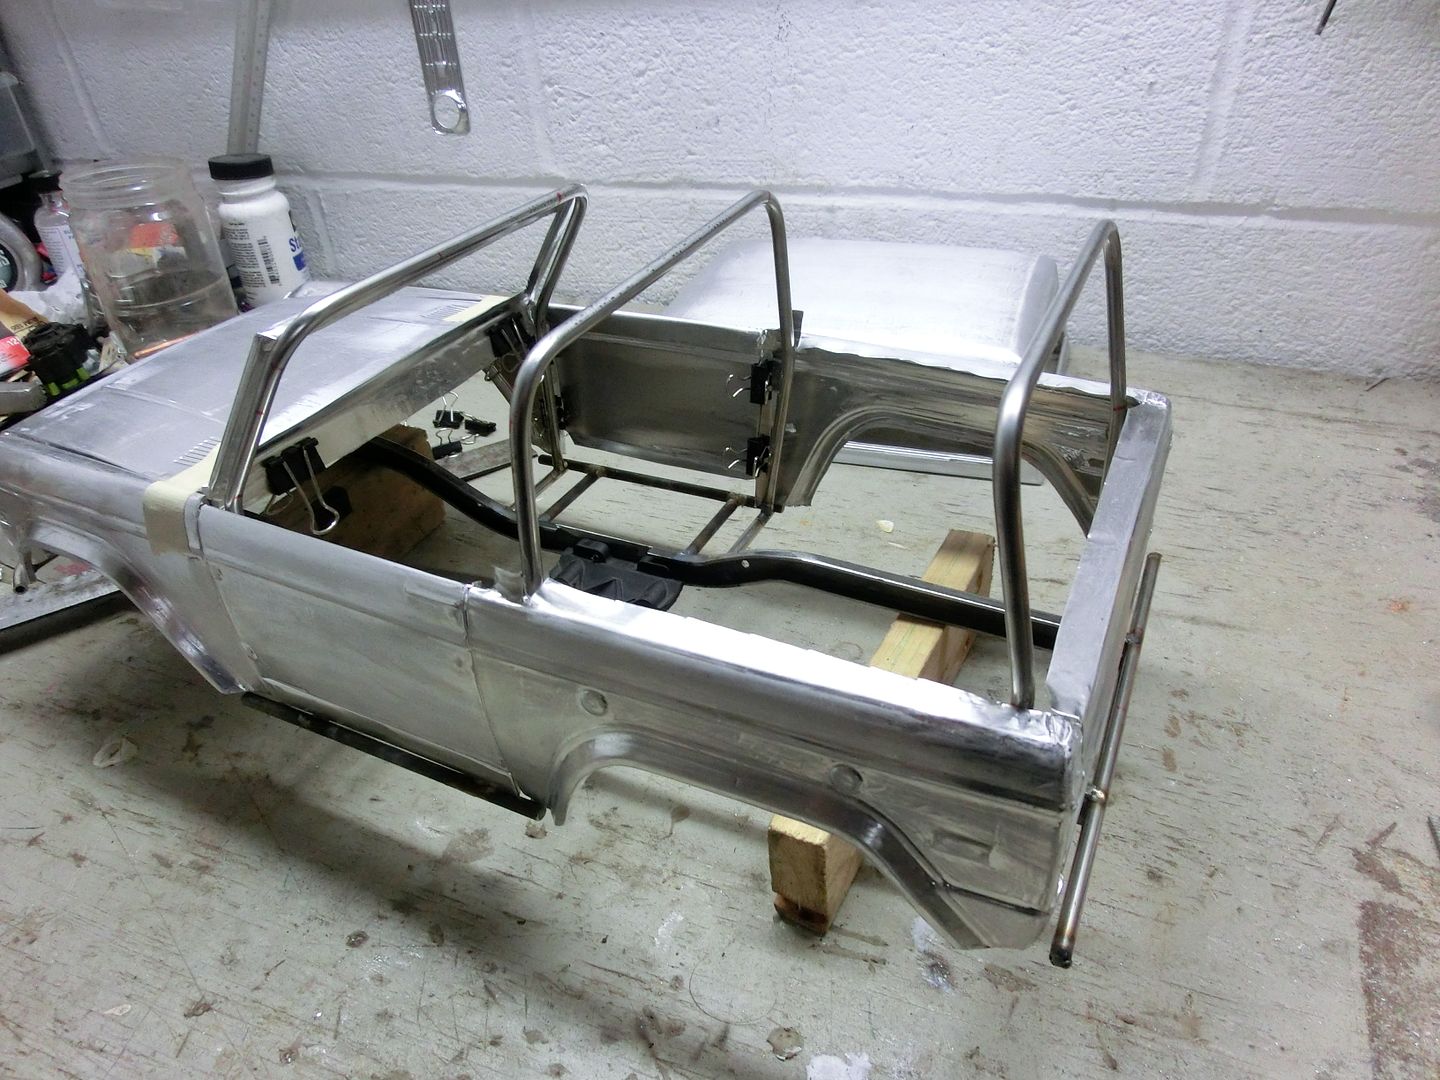 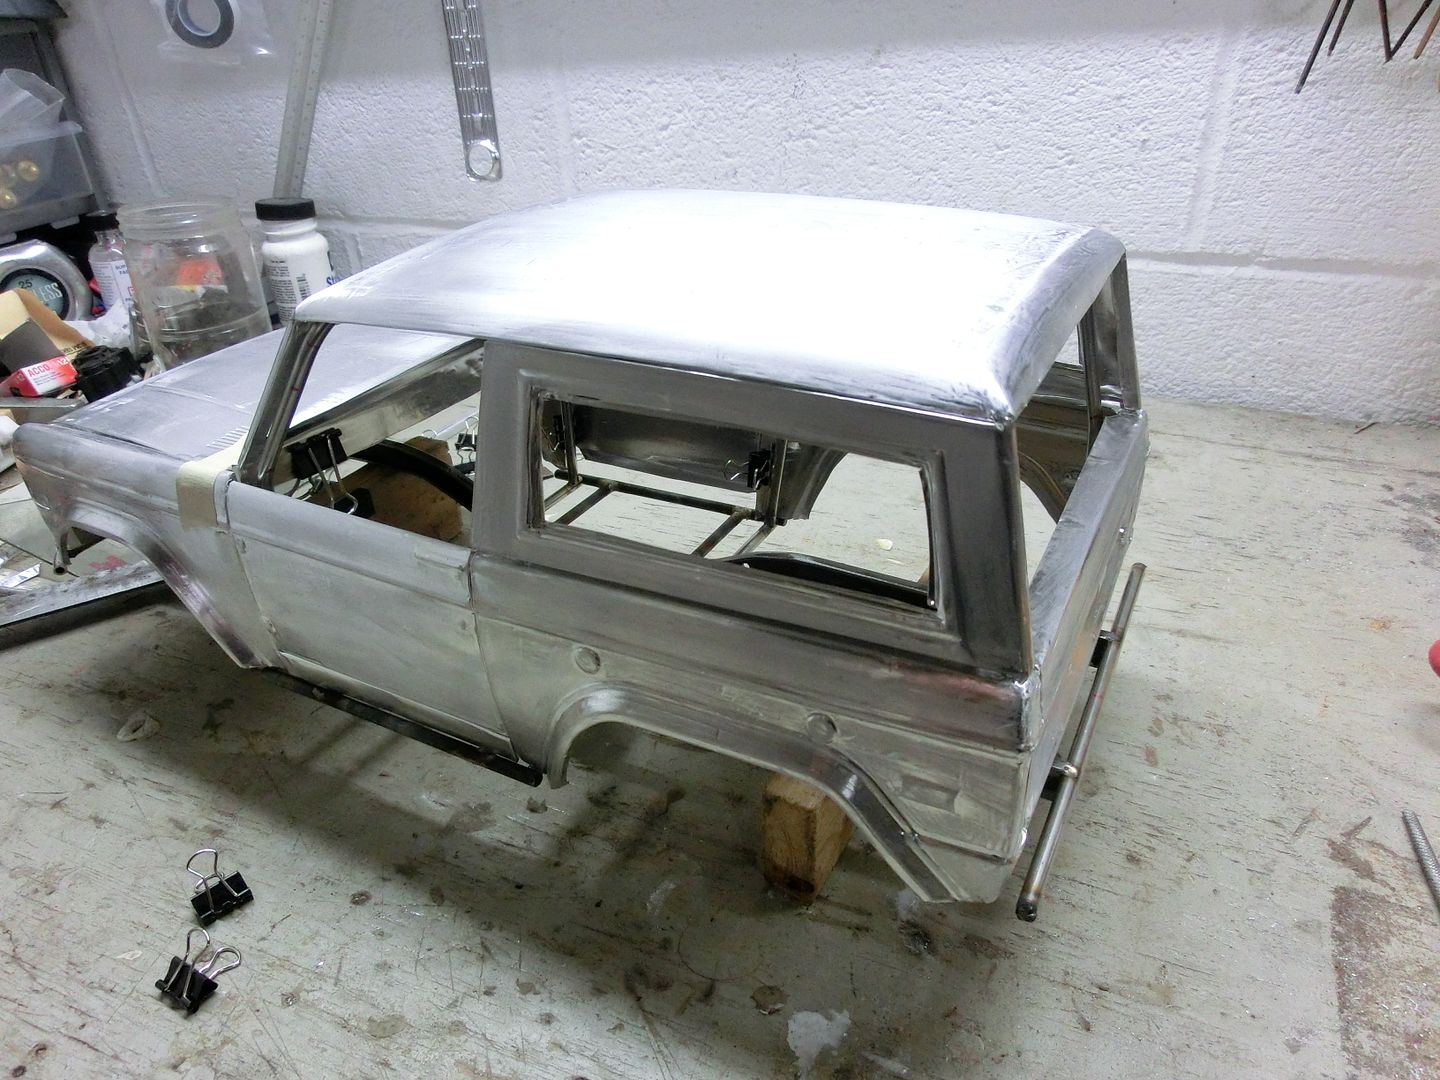 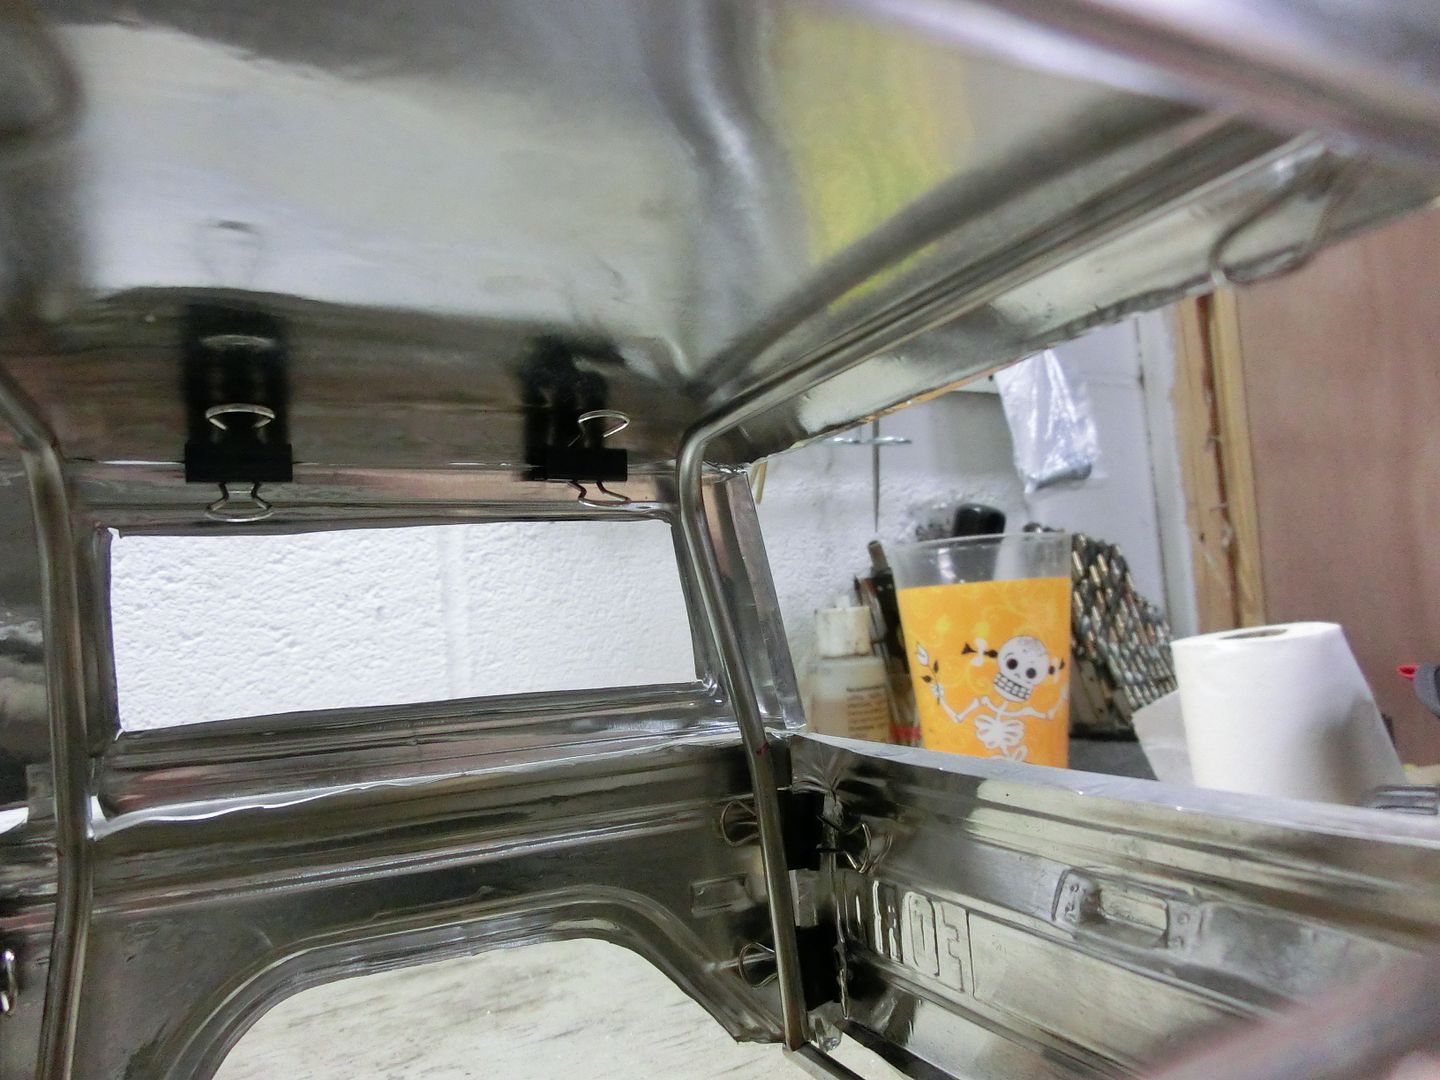 Happy i started adding the stringers 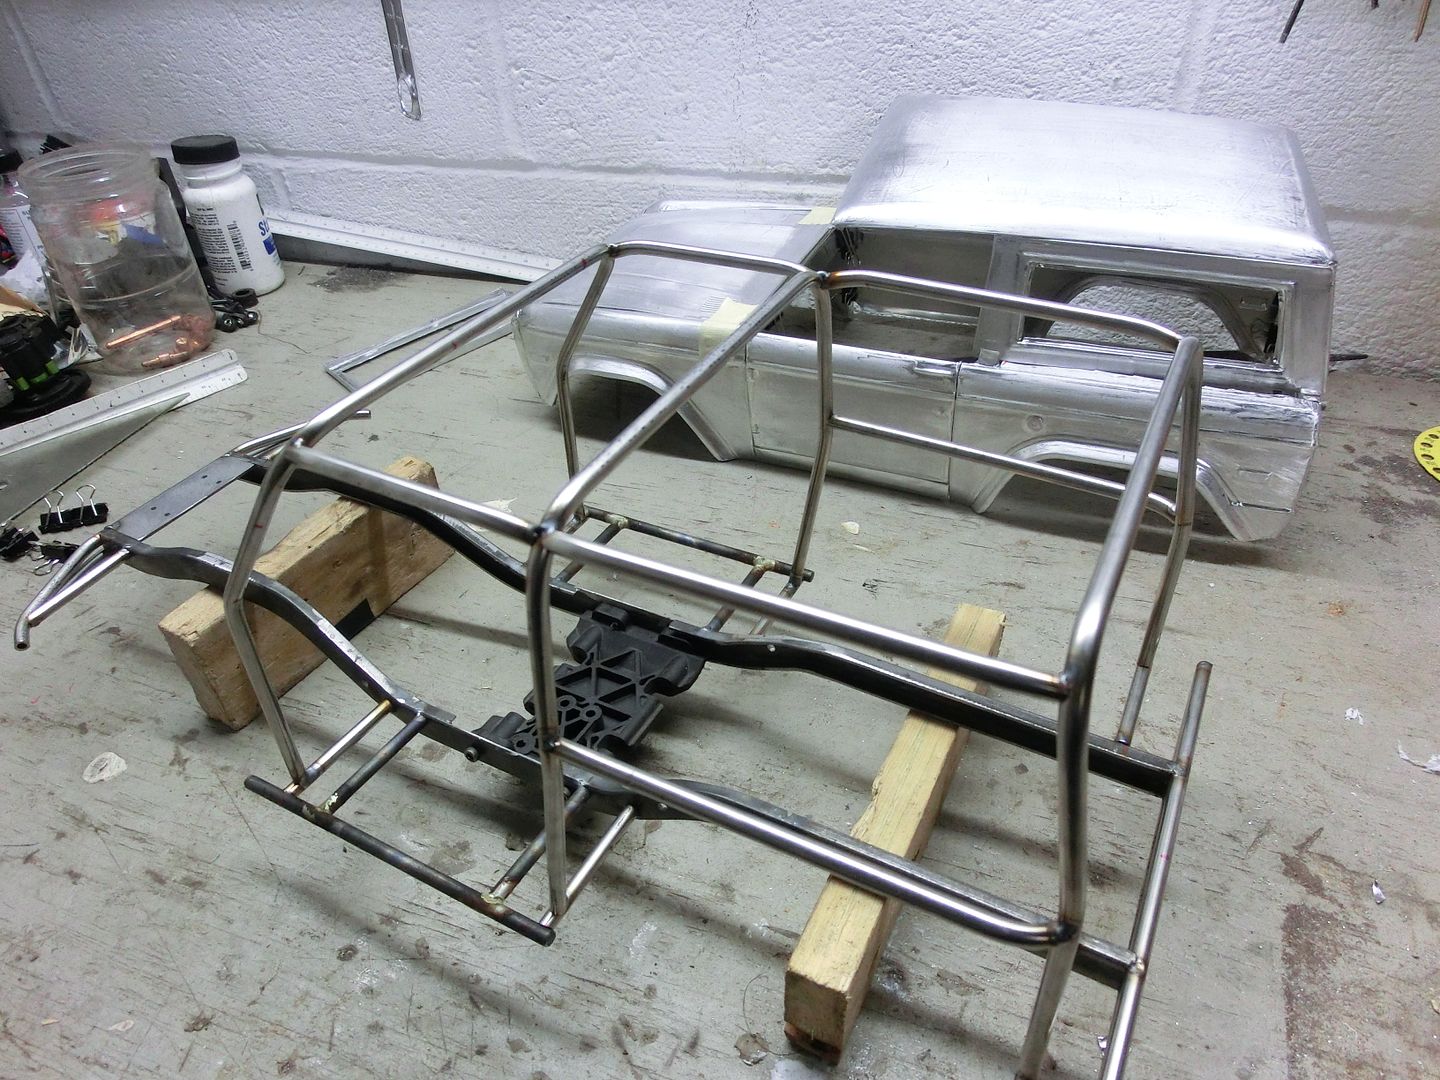 The ones on the sides will support the rear quarters Fits good 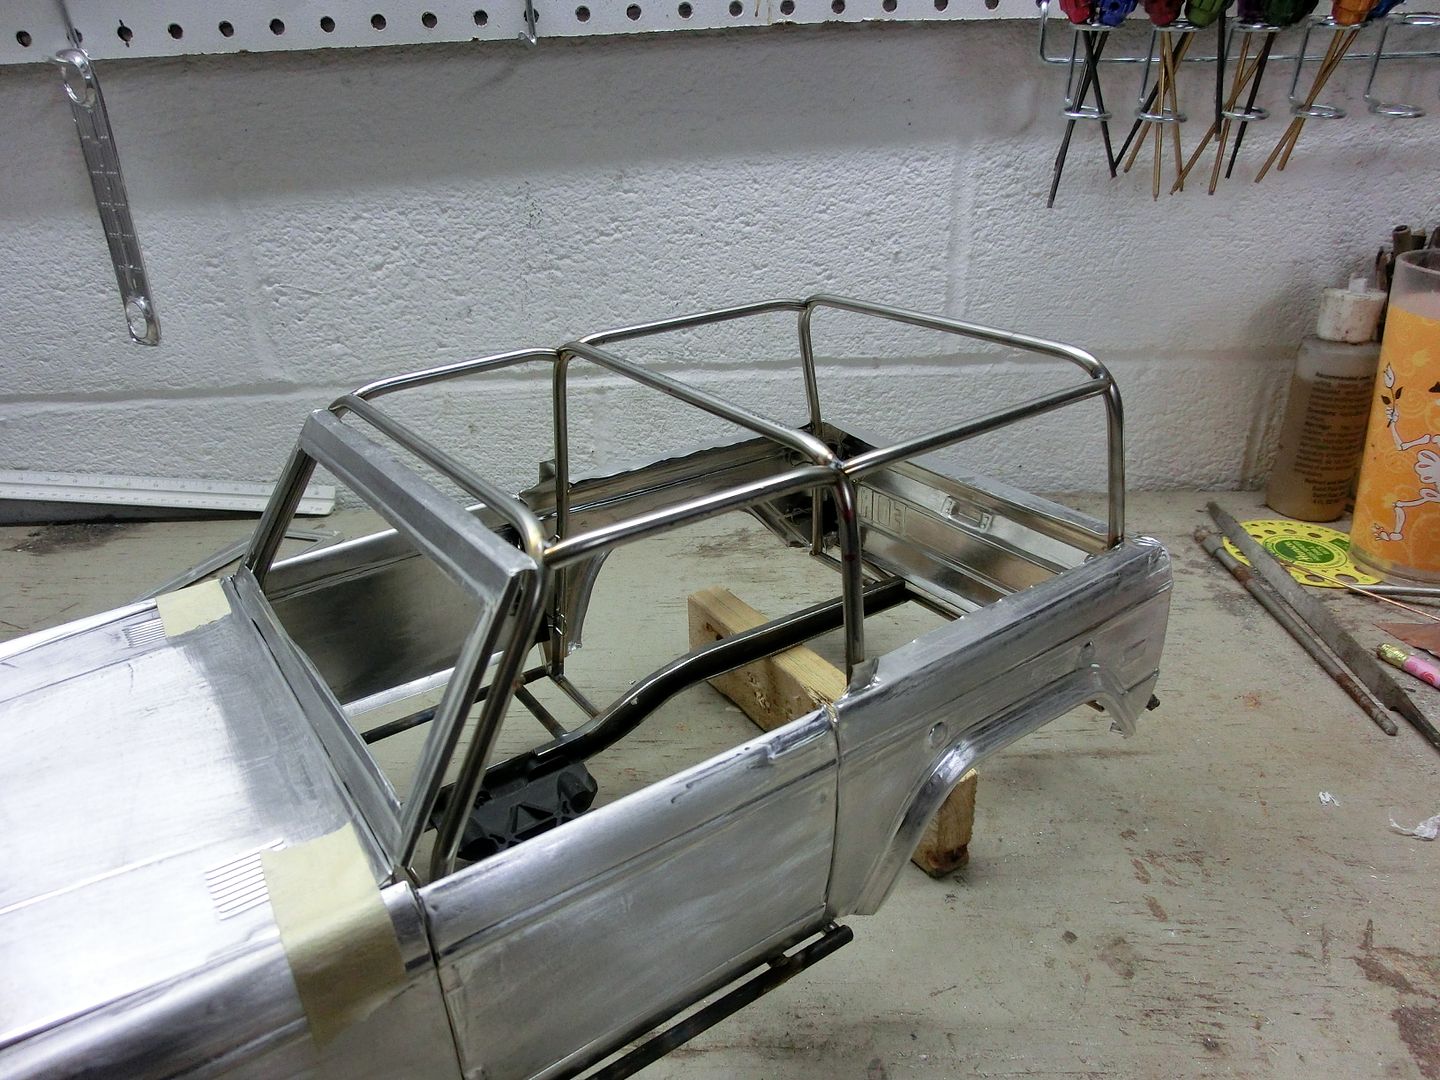 Then i added cross bars to make it legal 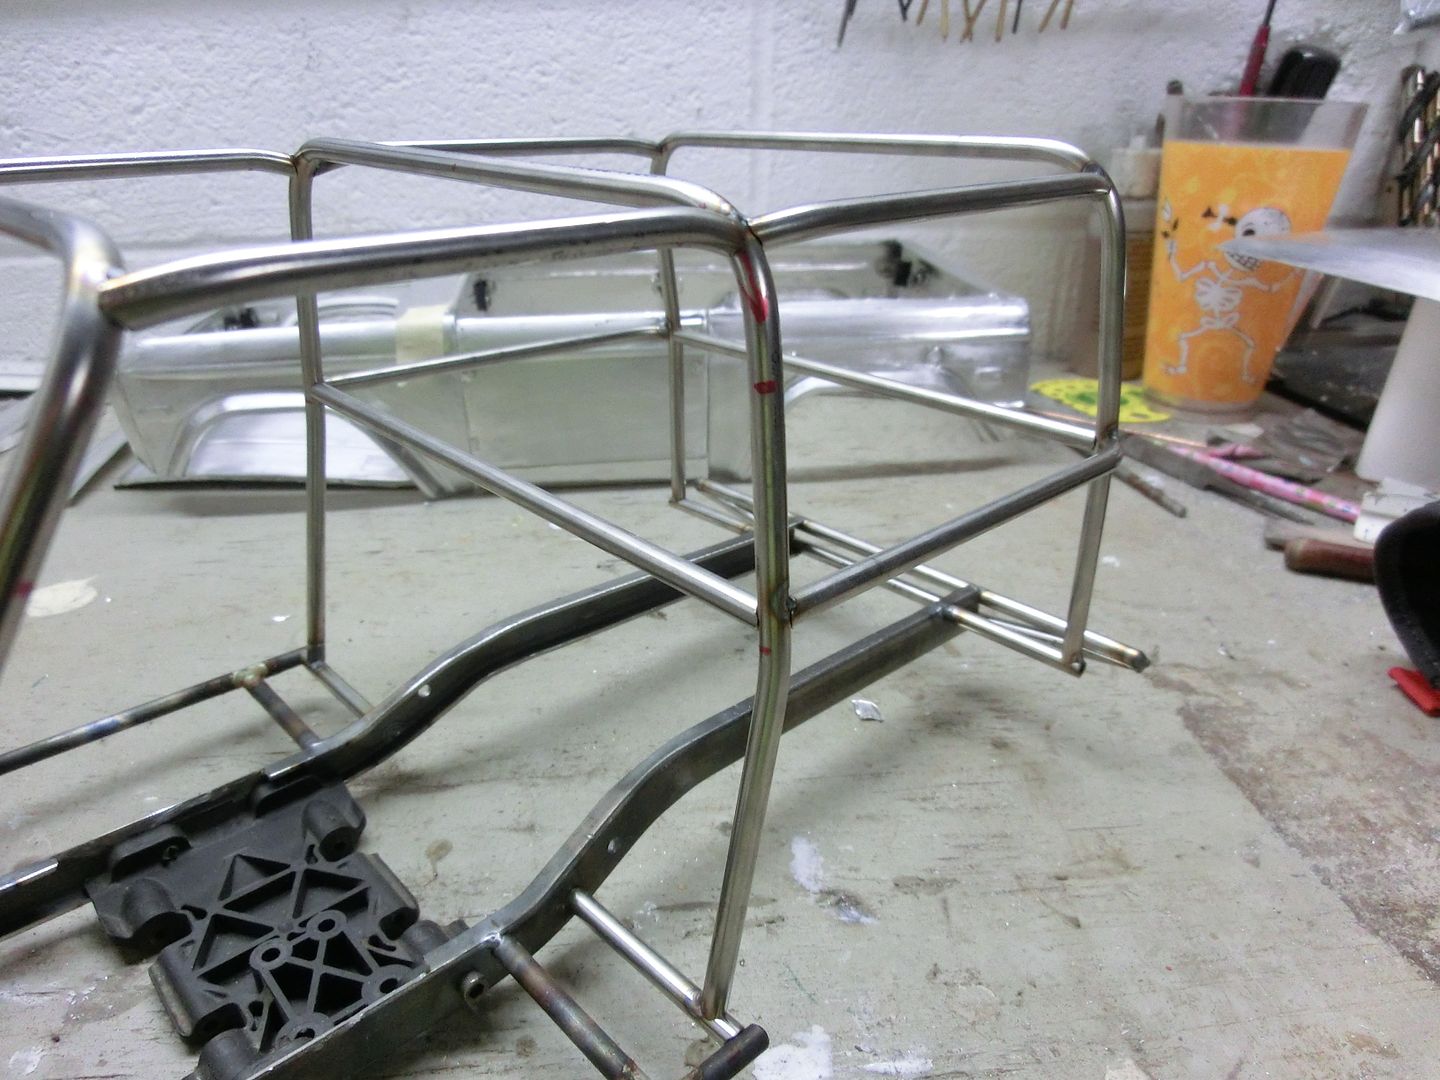 Then came the front fender supports 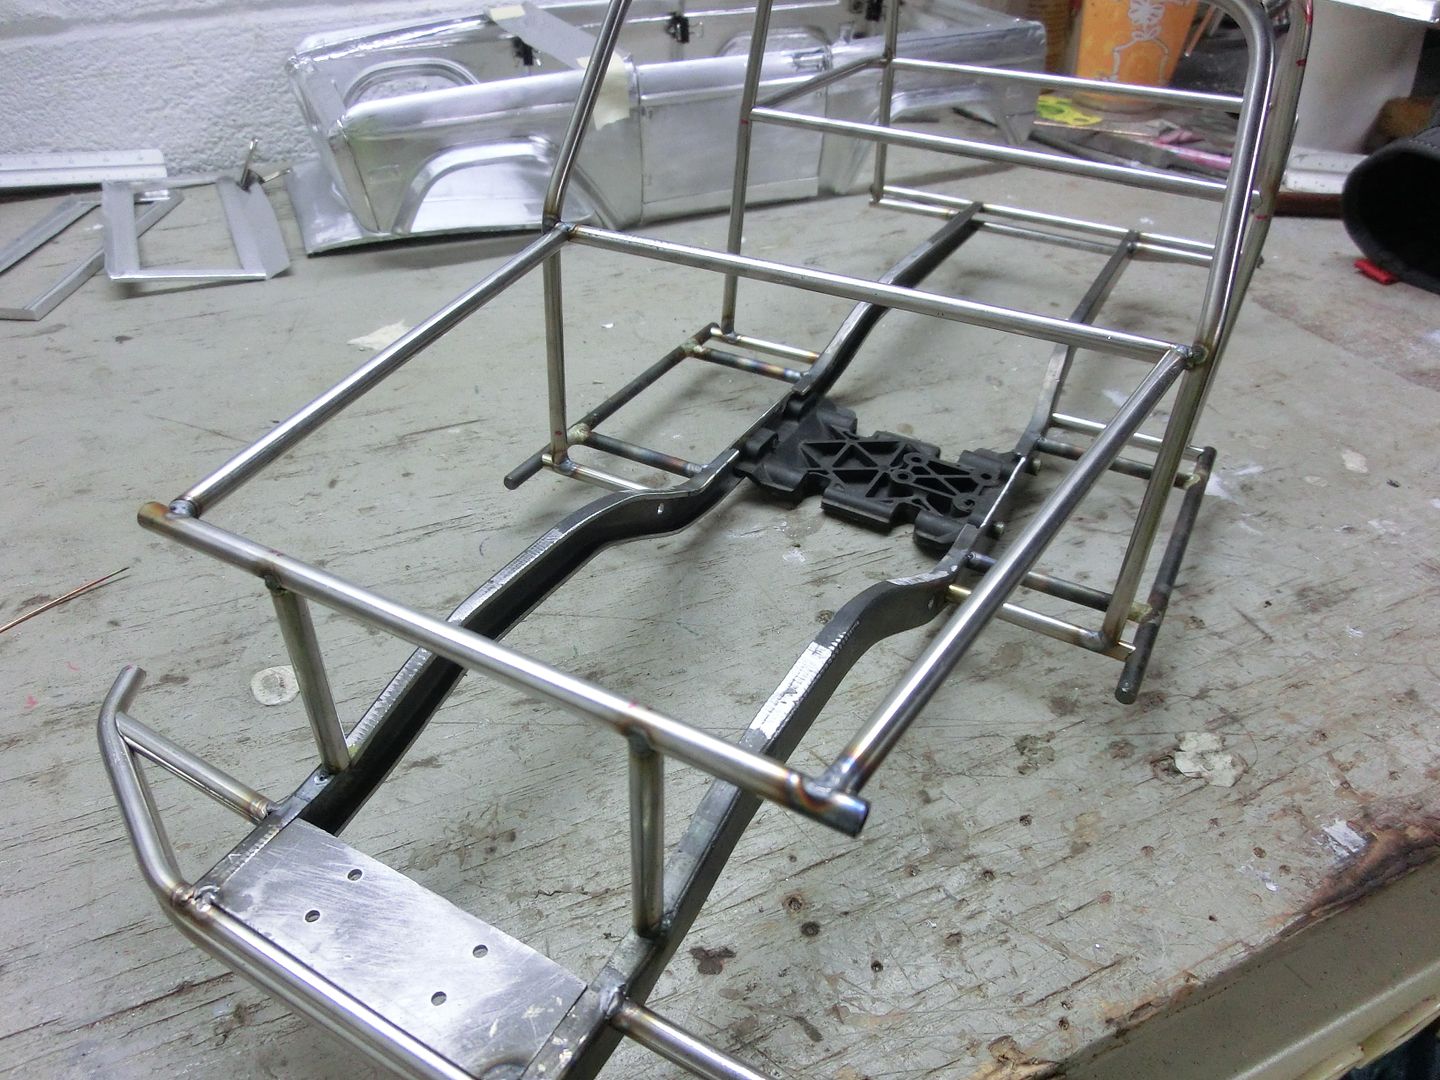 I did this one different then my class 2 Toyota in that the supports are under the hood instead of inside the fenders. I'm hoping to show more damage this way 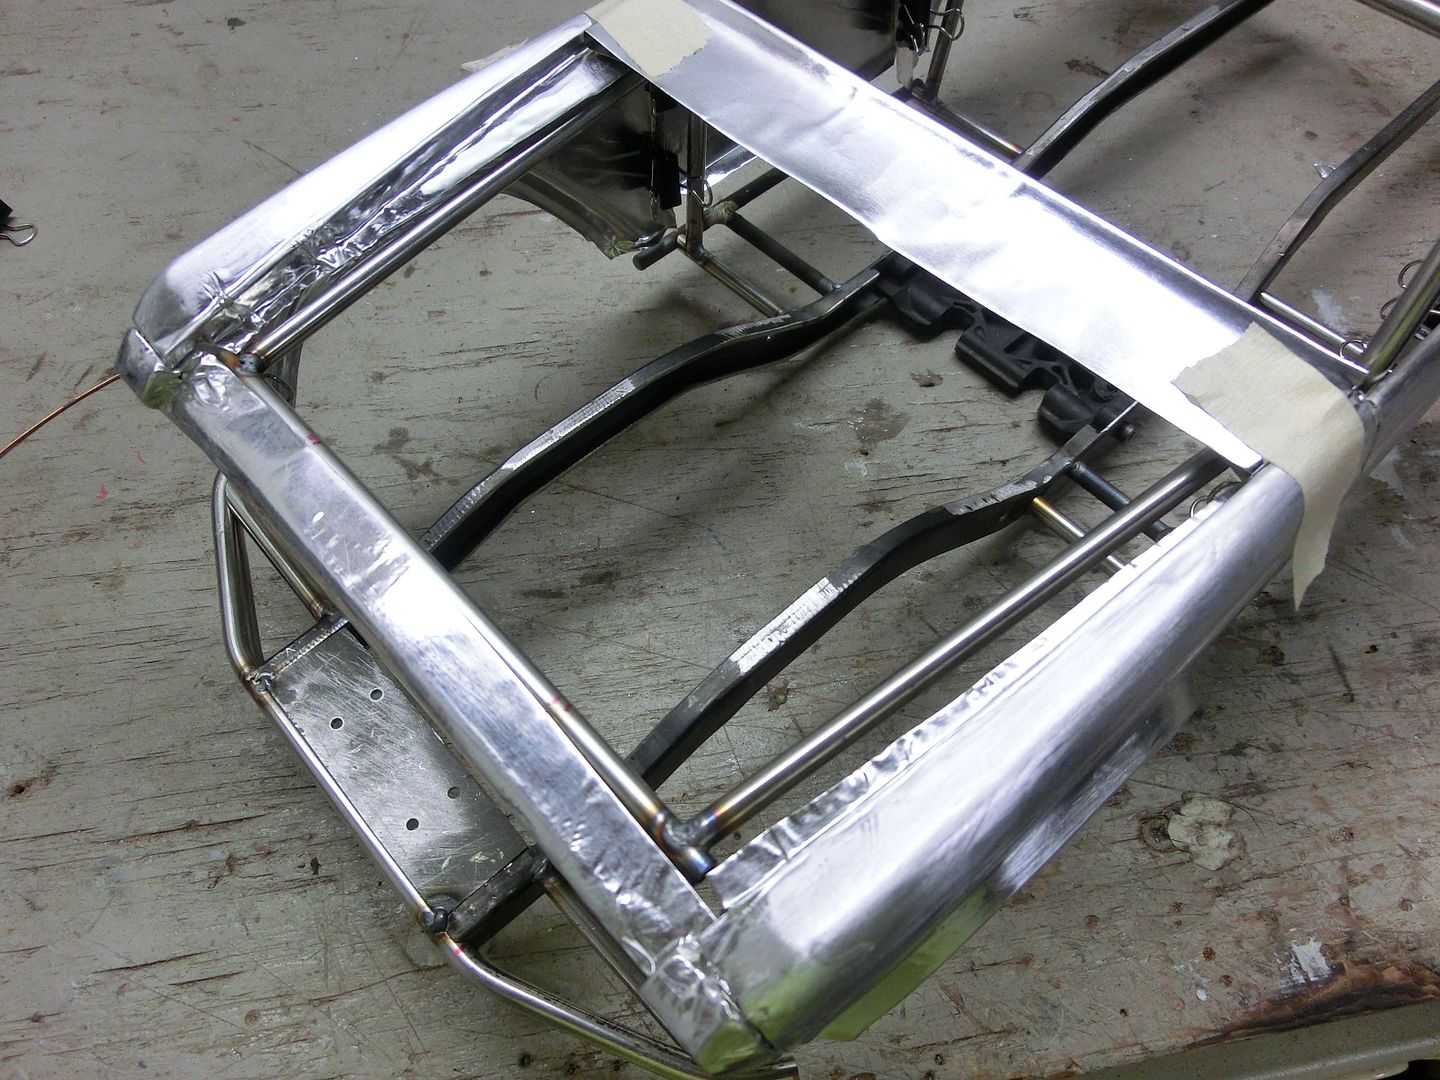 It was now time to glue the body together. you can never have too many clips! 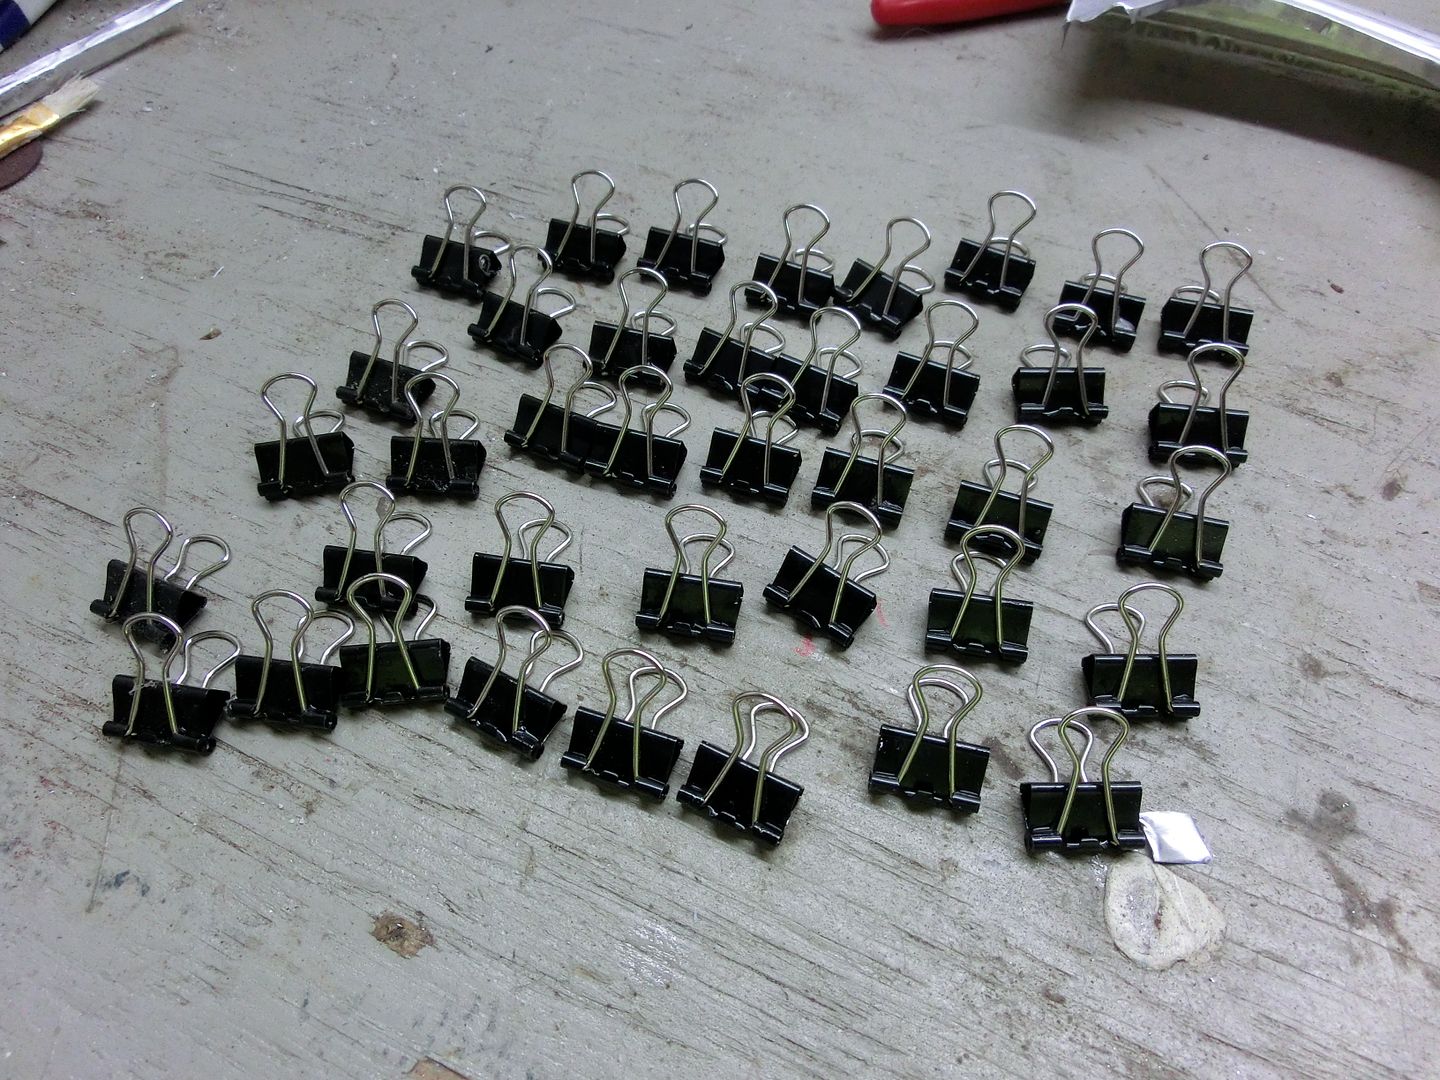 Another deviation from my Toyota was that i completely glued the body together (except for the roof) my Toyota has separate panels that get bolted on. I did it this way to make it faster to fabricate. it required less tabs to add to the chassis 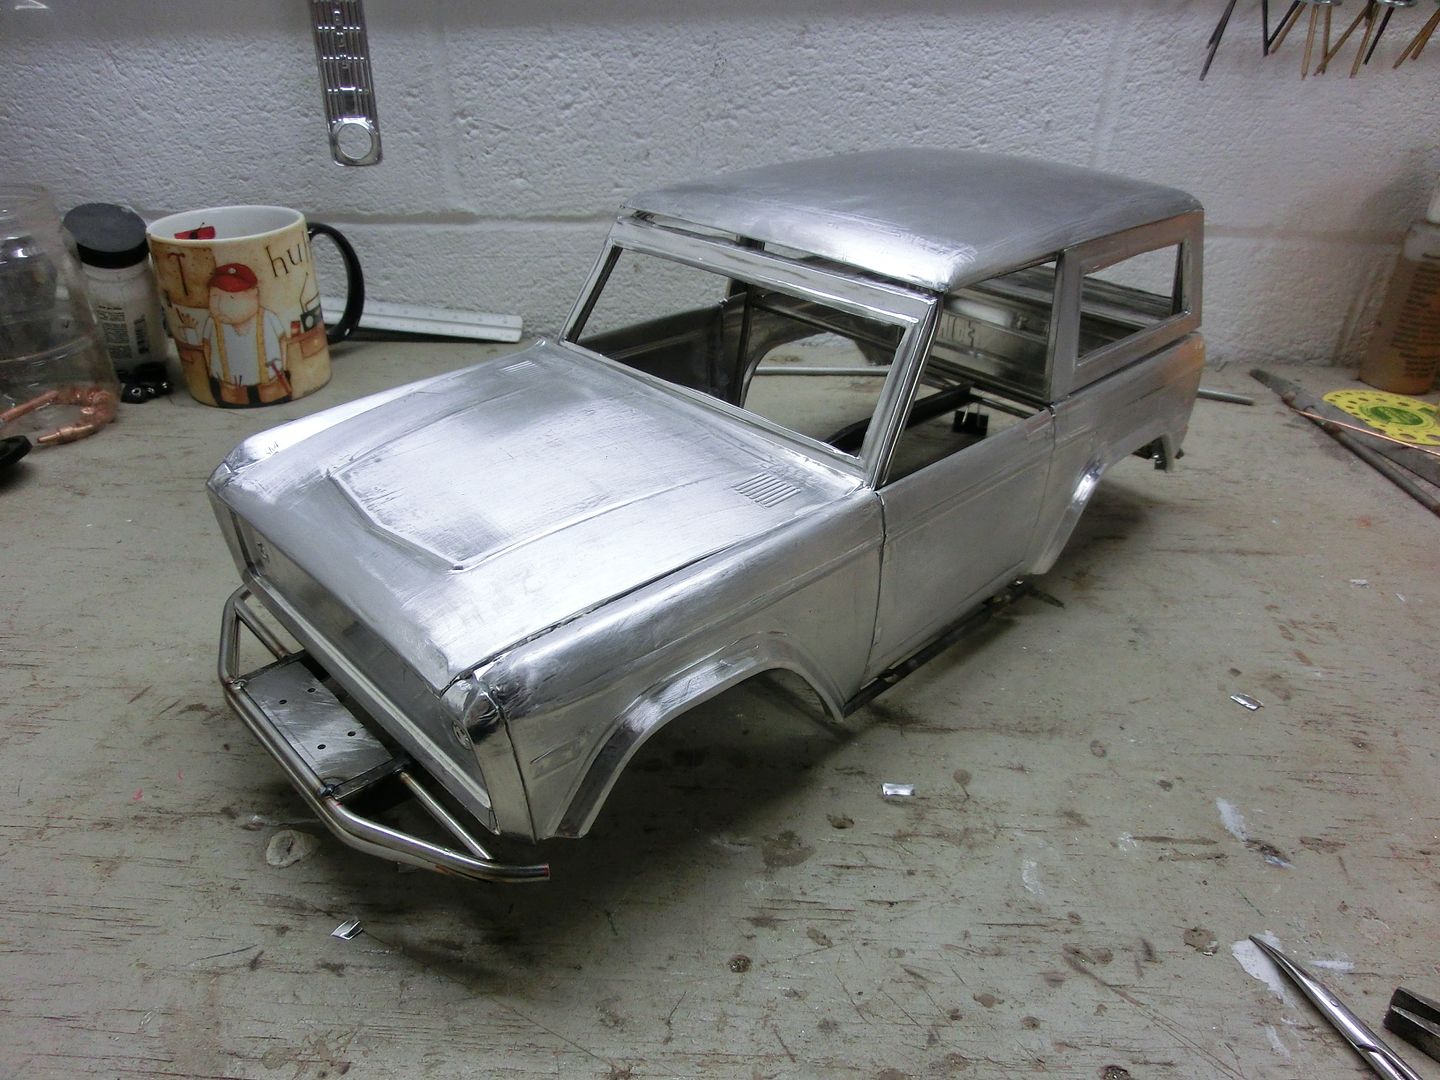 With most of the chassis done it was time to mock up the ride height. I settled on TSL SX swampers and used the set off my Class 2 Toy for mock-up. The looked the best to me. 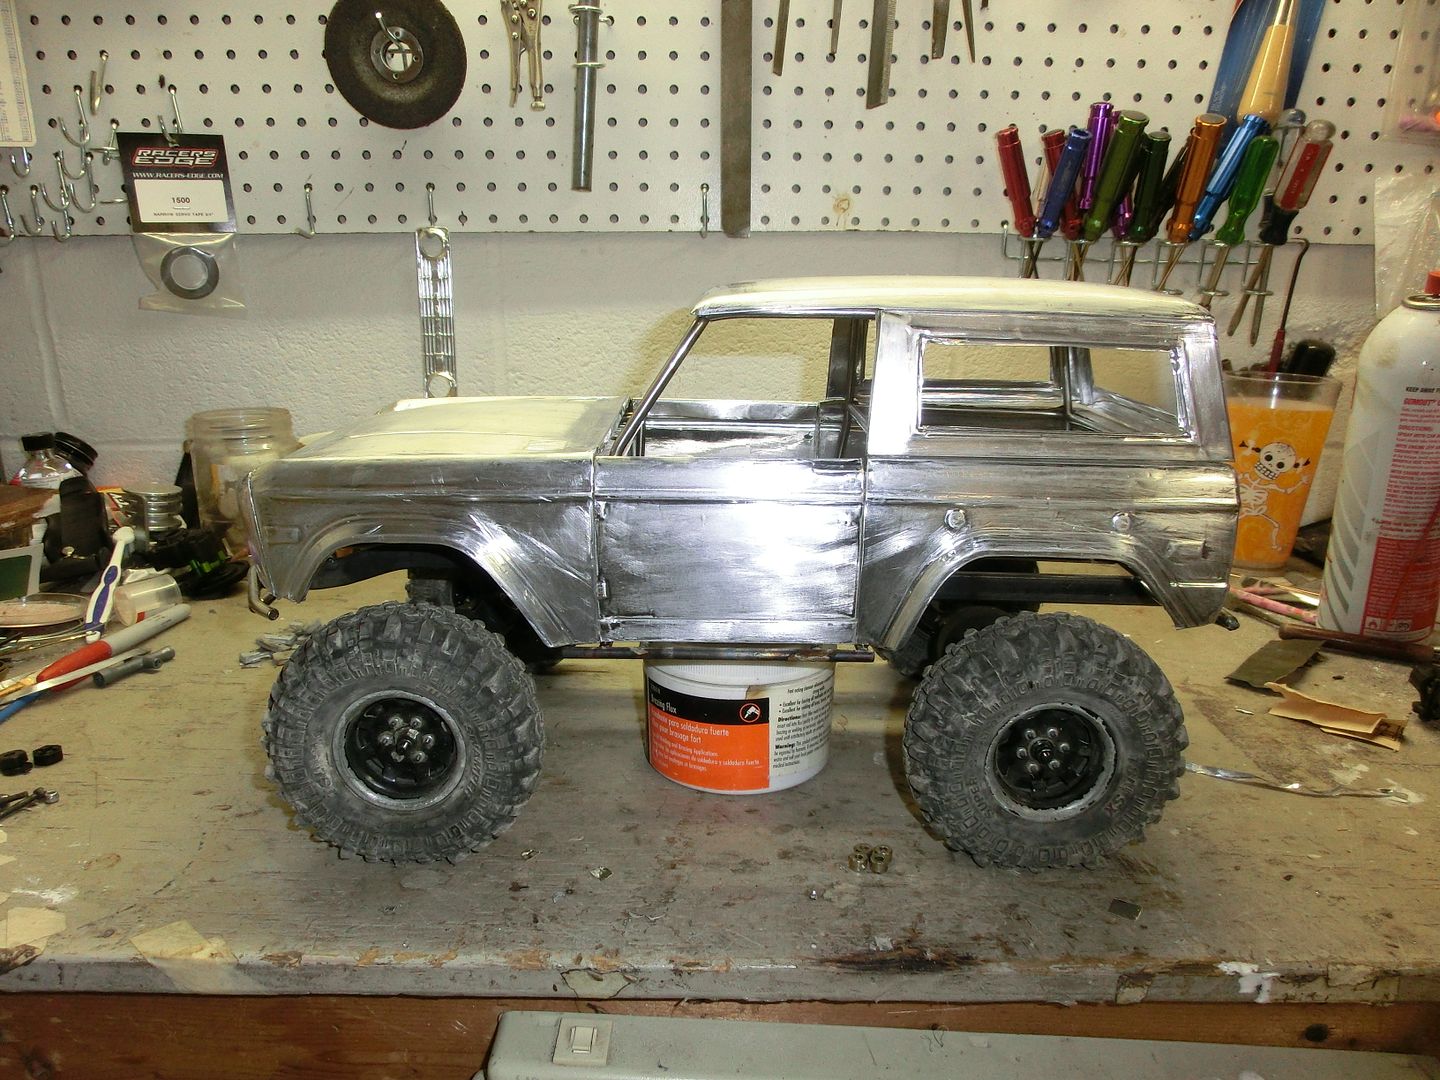 once i was happy i made new lower links 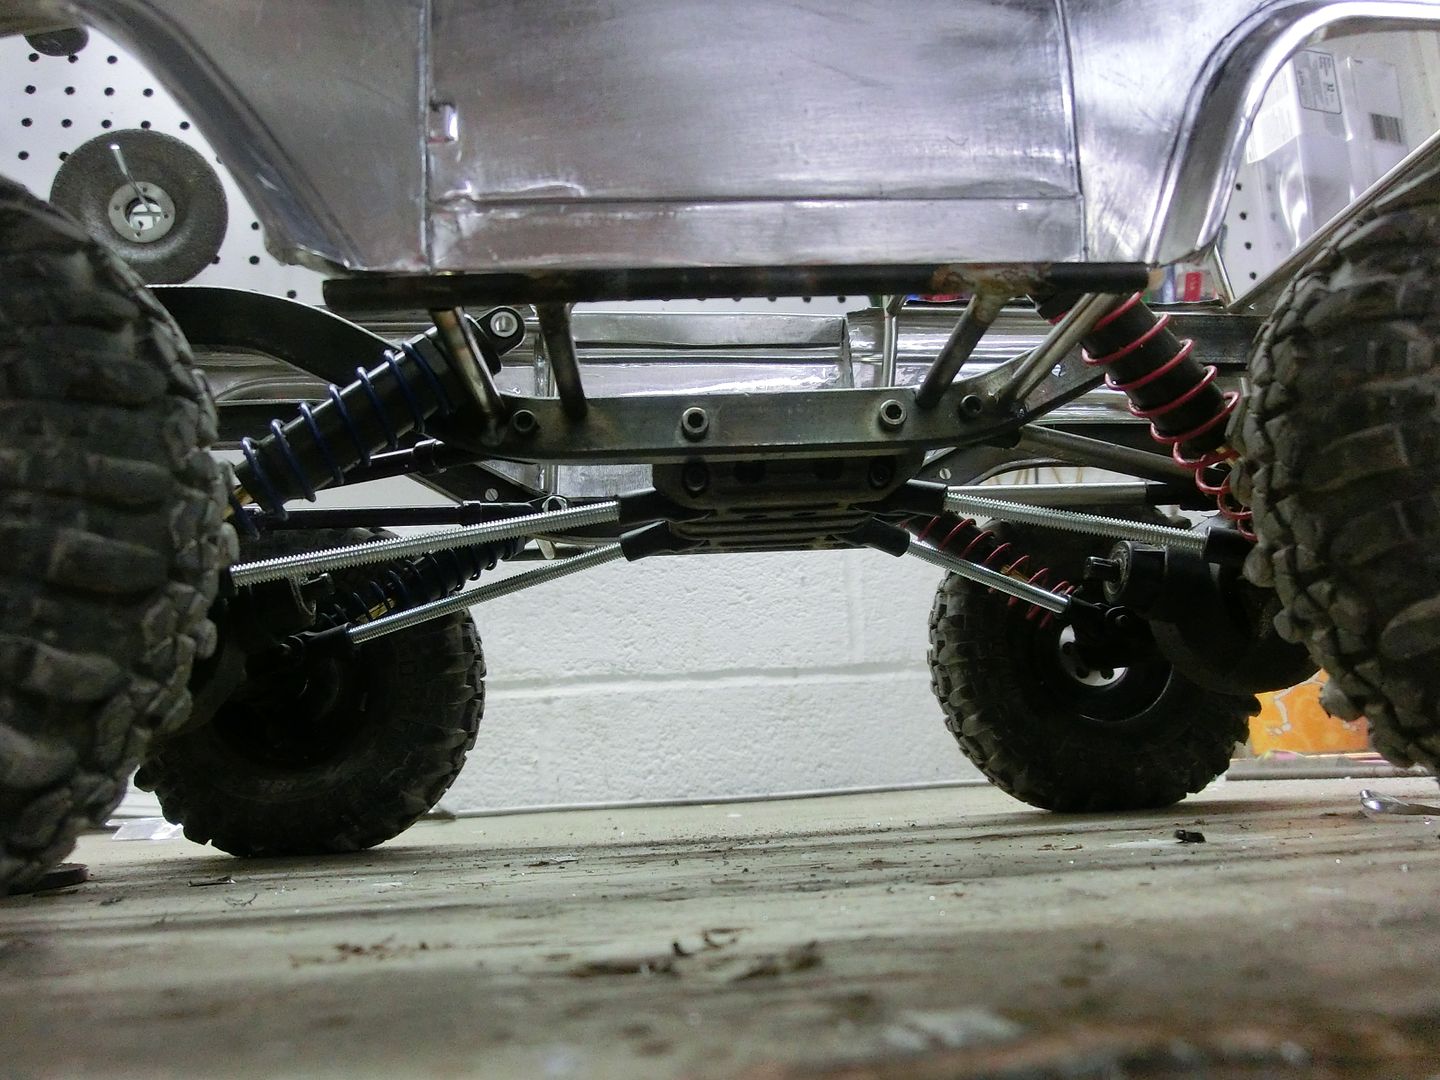 then cobbled together the uppers using spare parts i had lying around 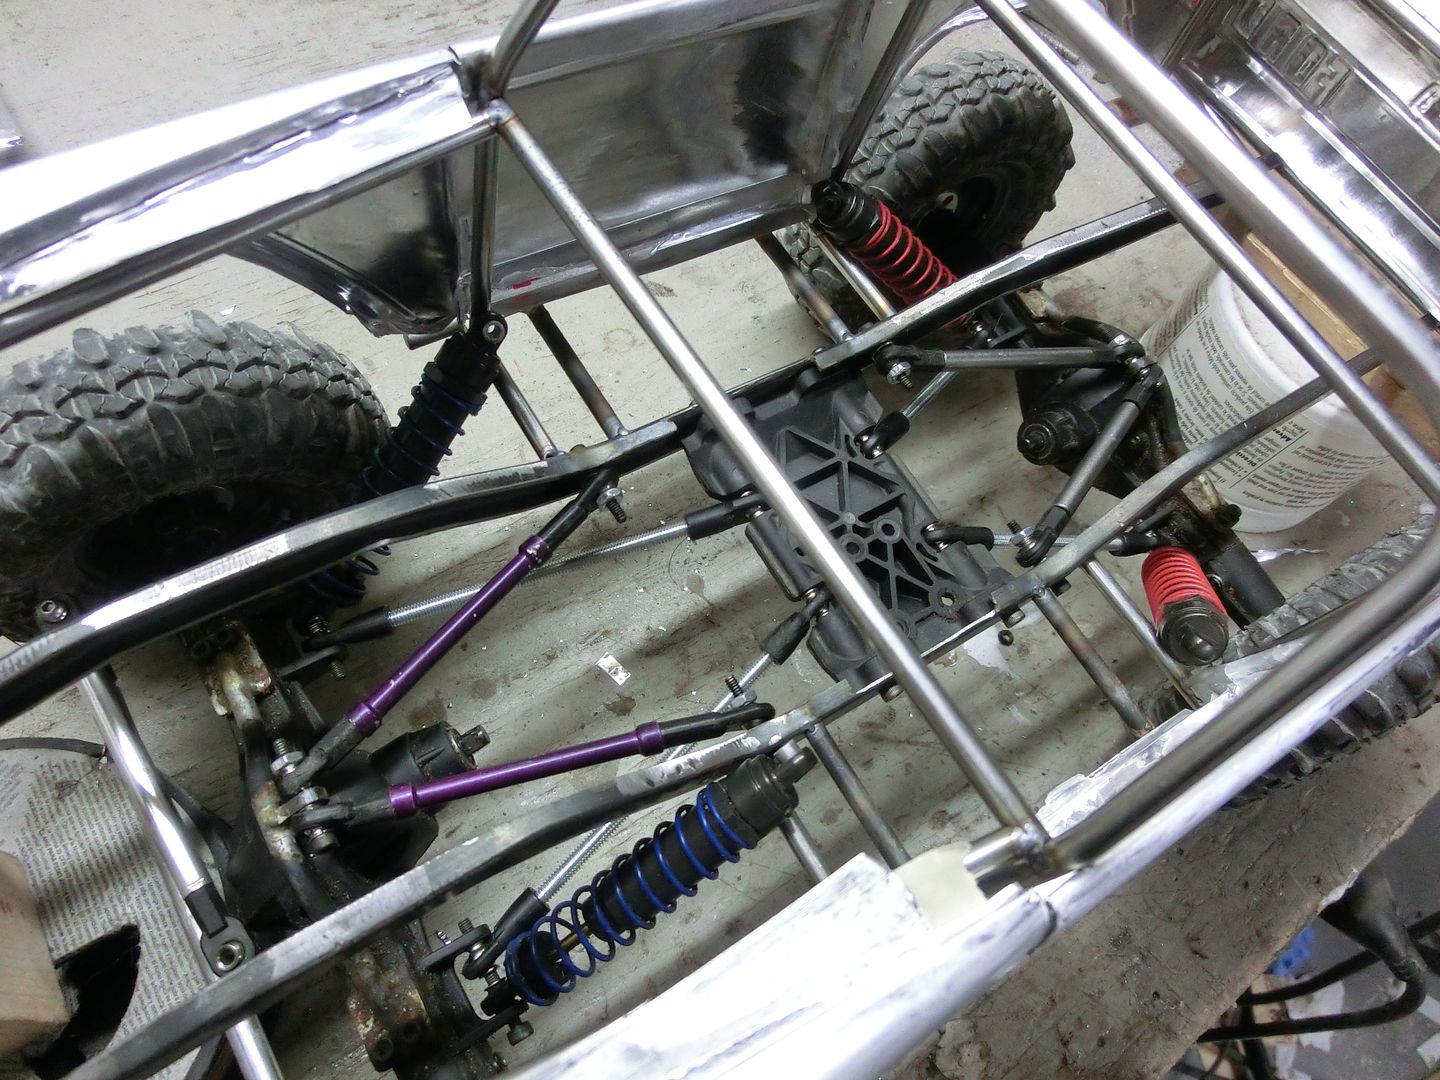 Then it was time for shock hoops 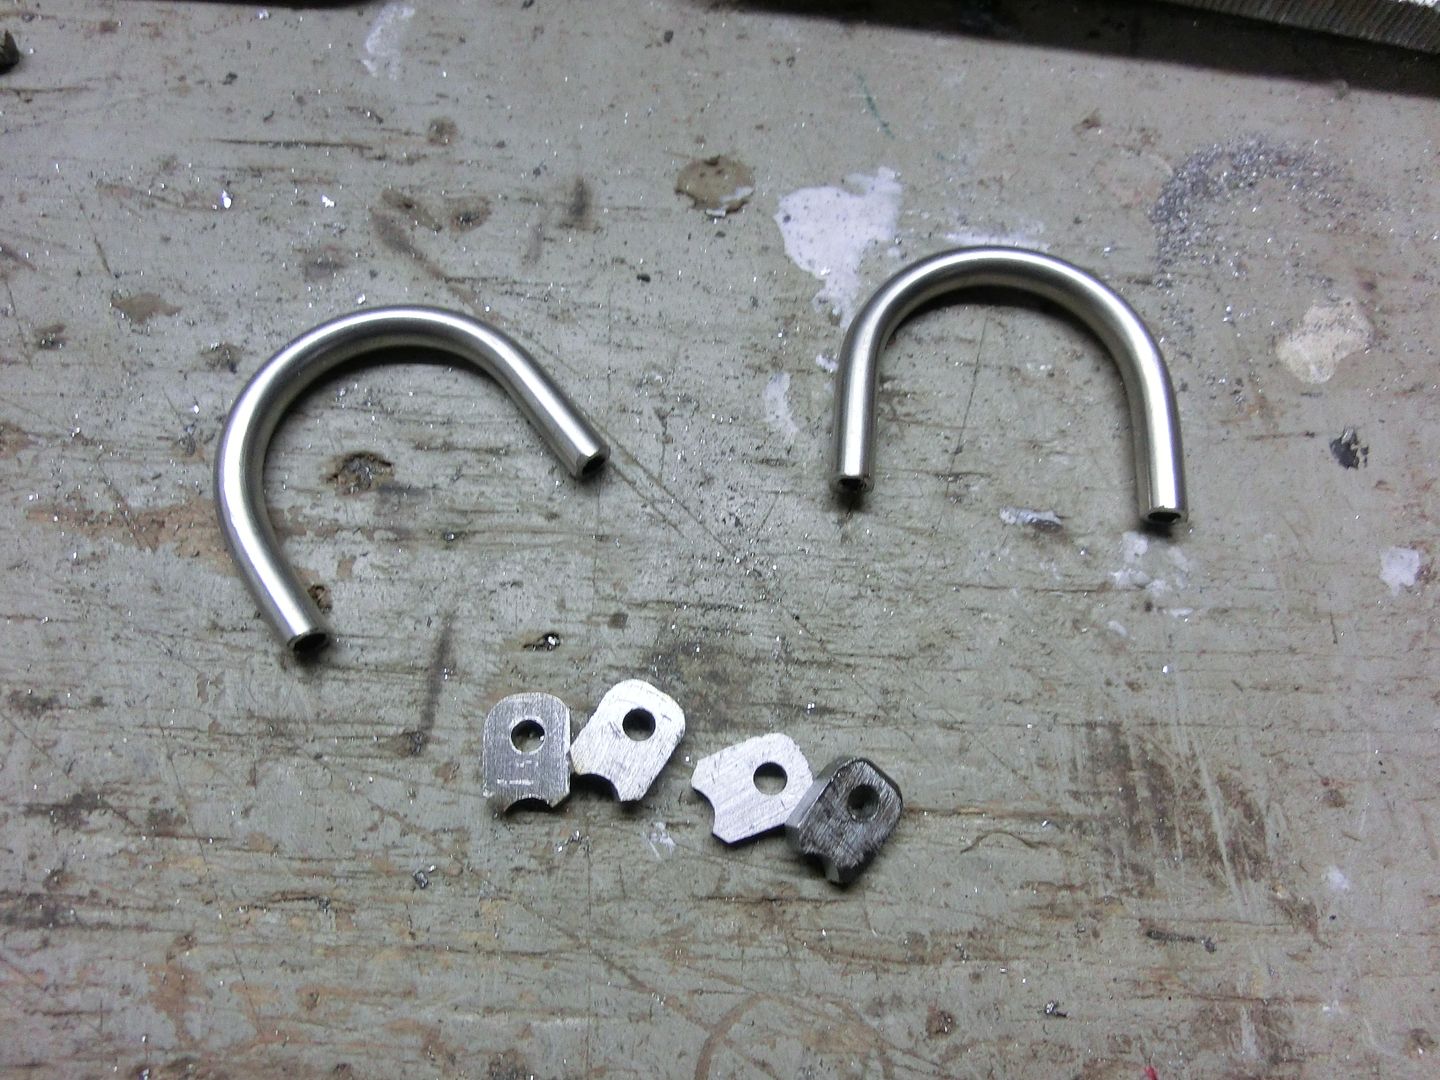 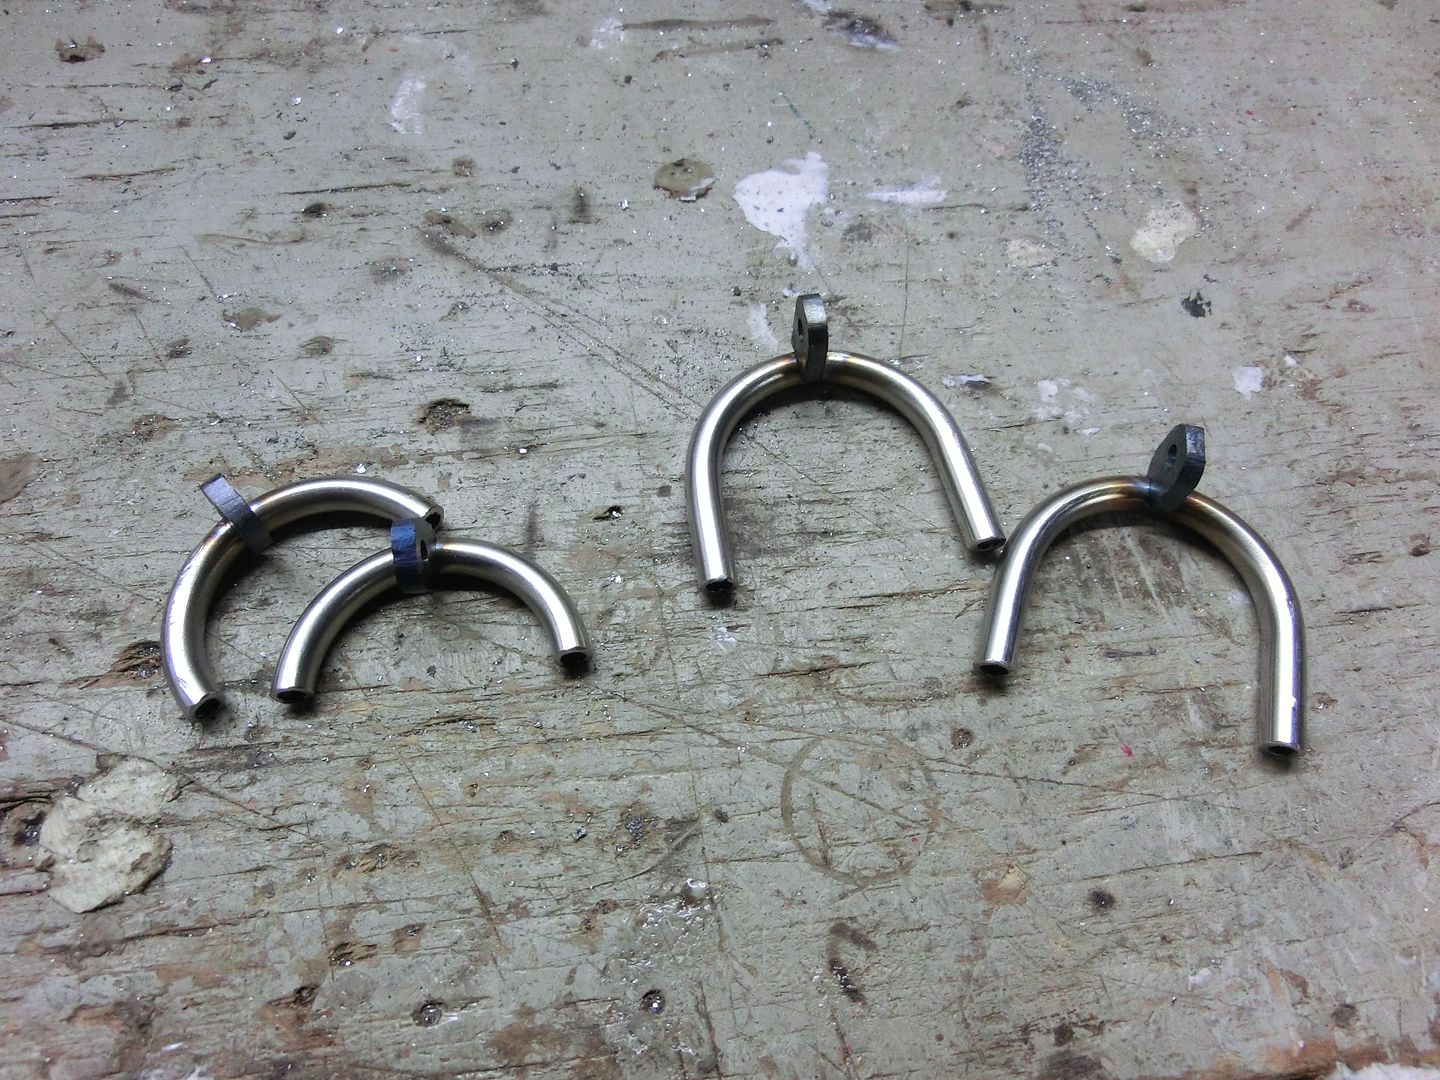 And finally it was standing on it's own 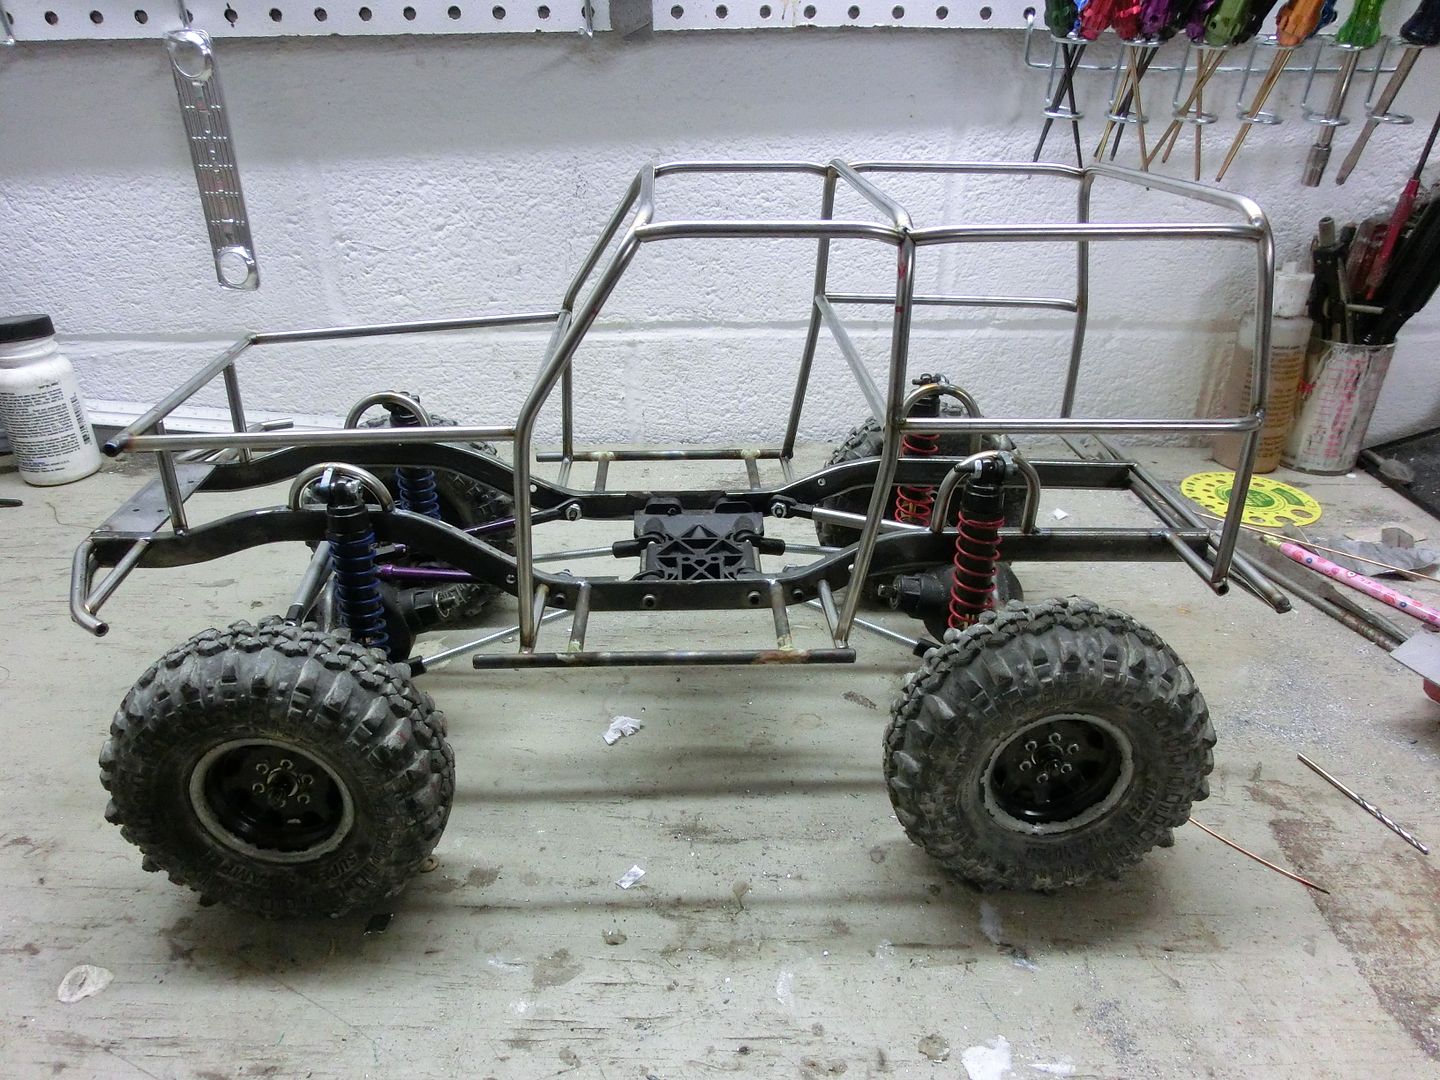 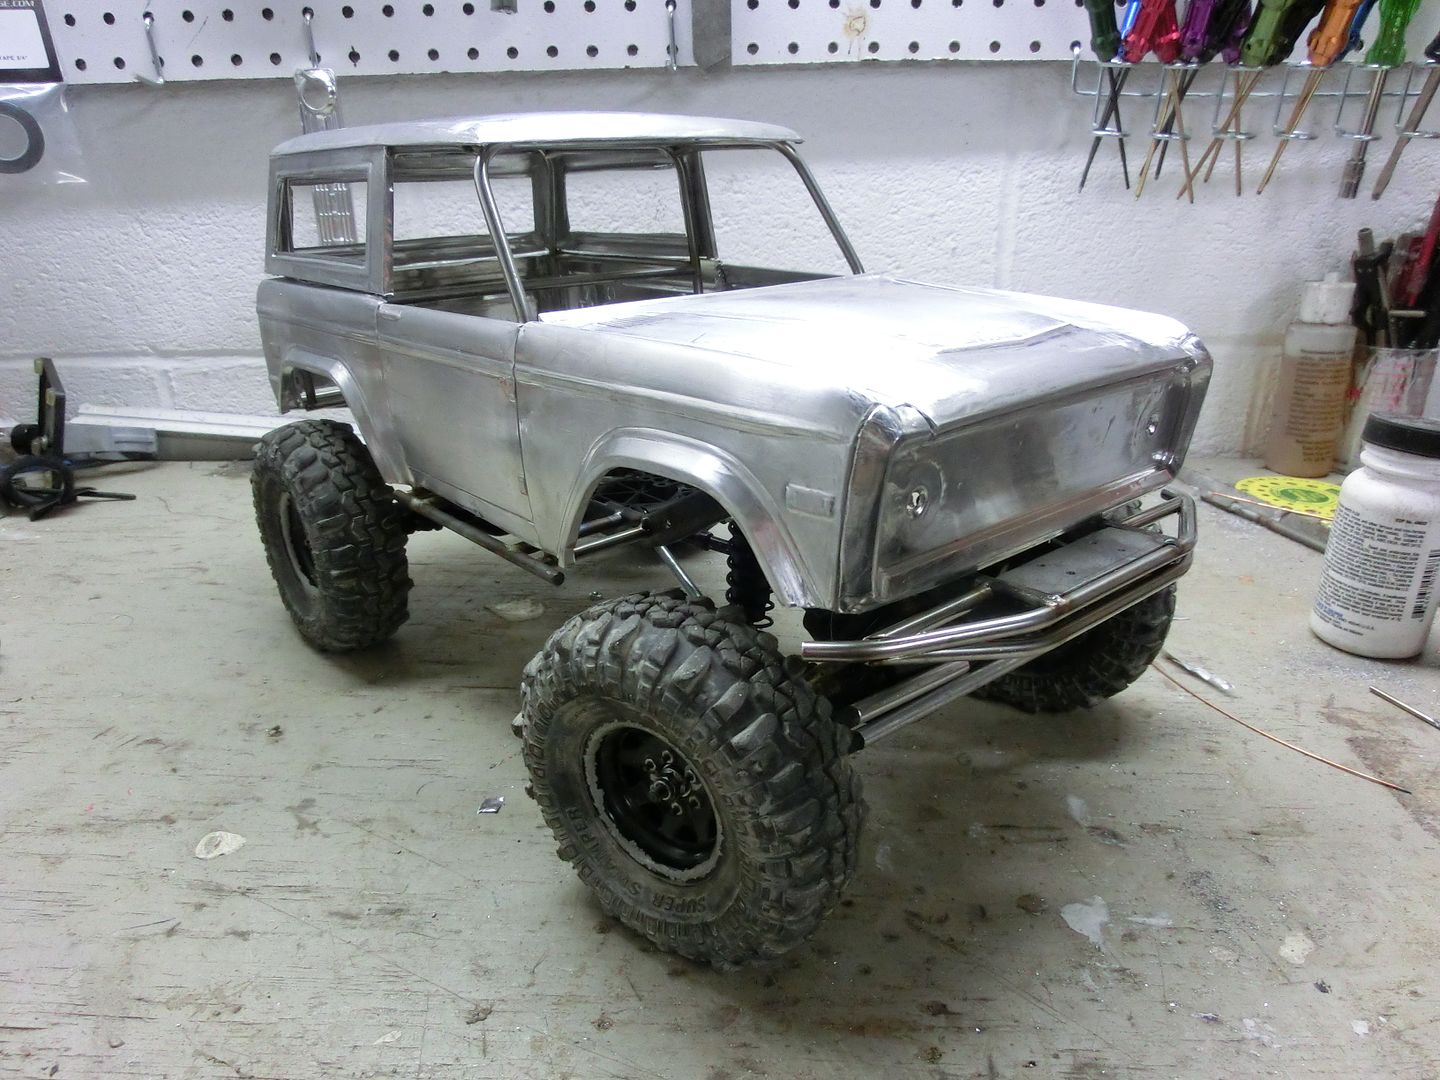 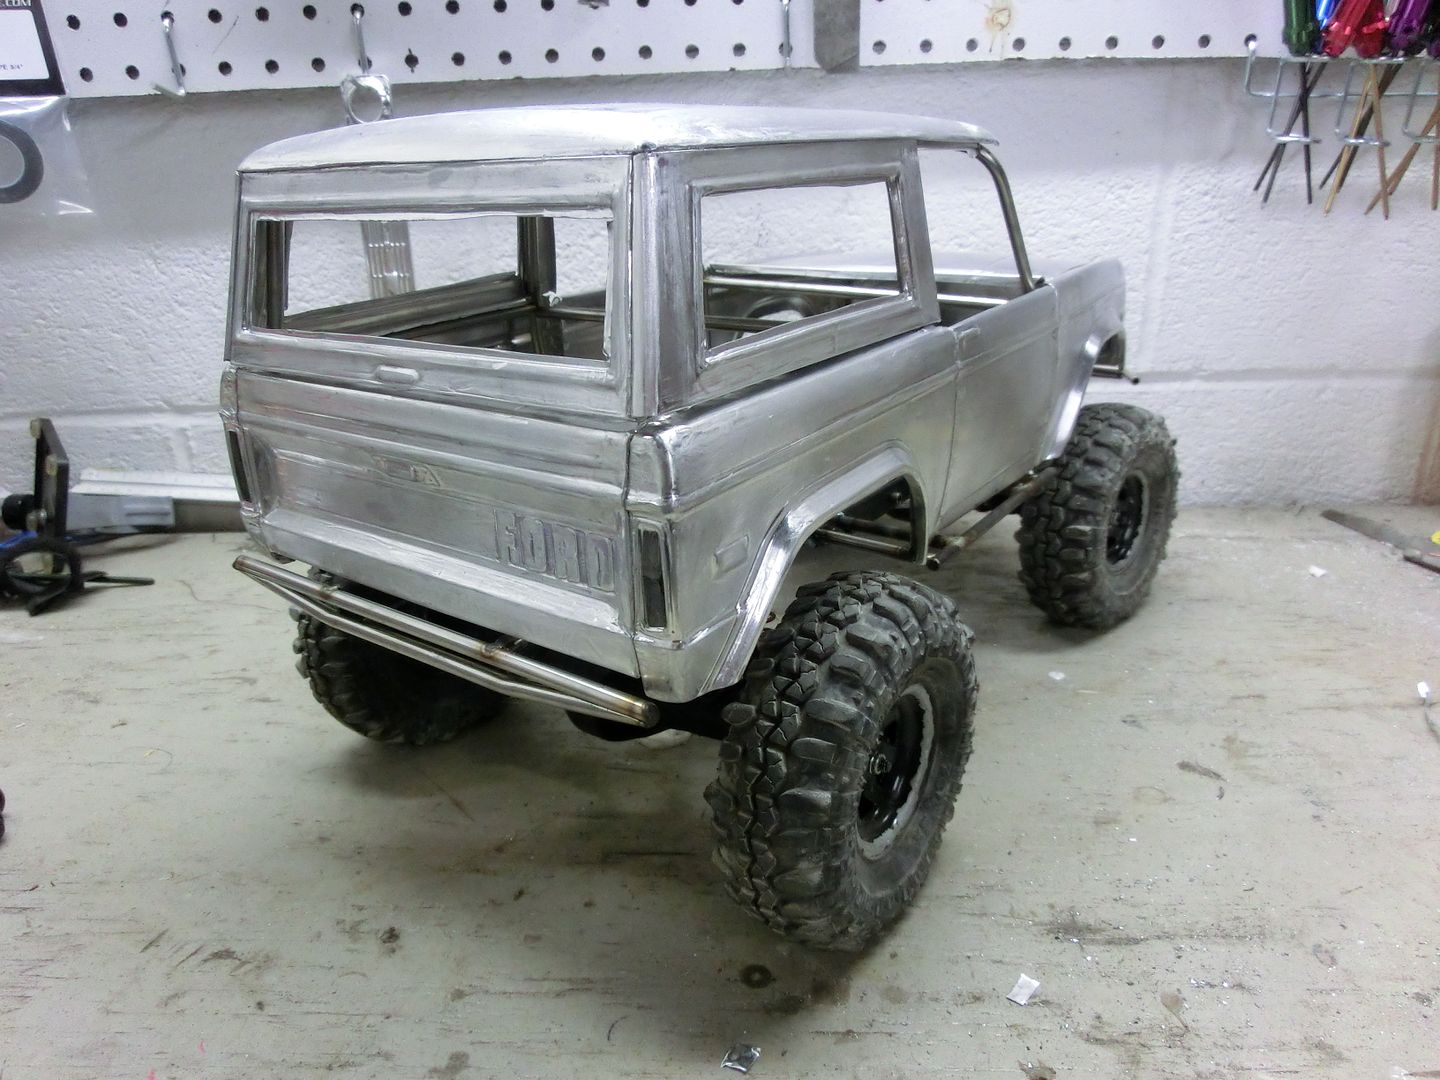 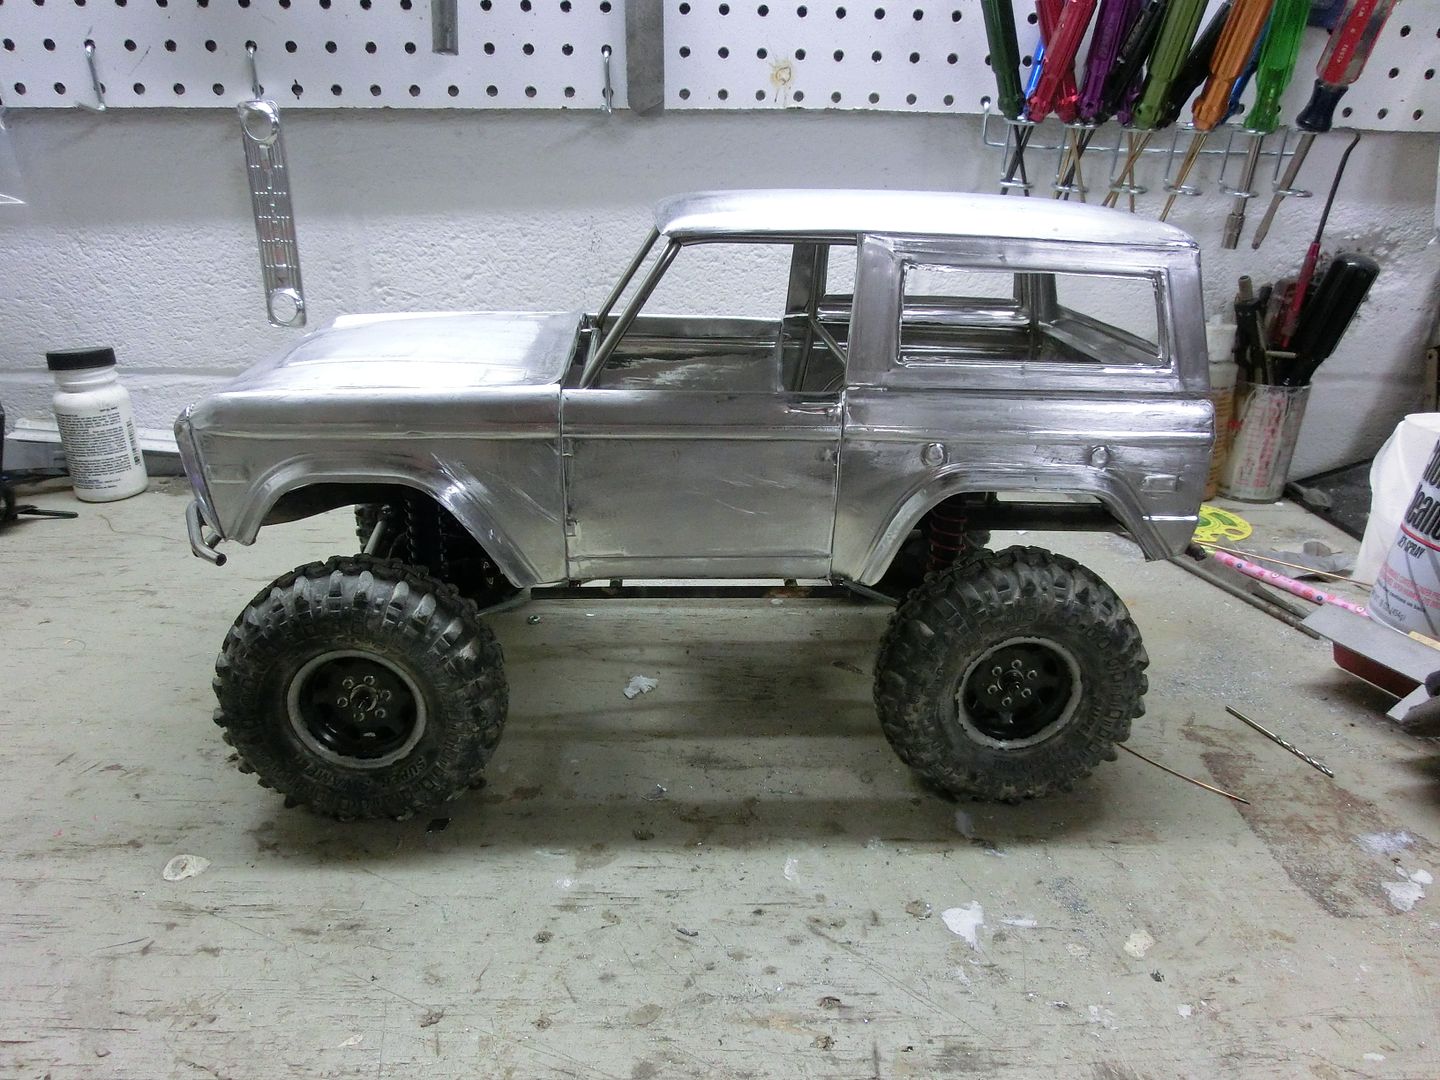 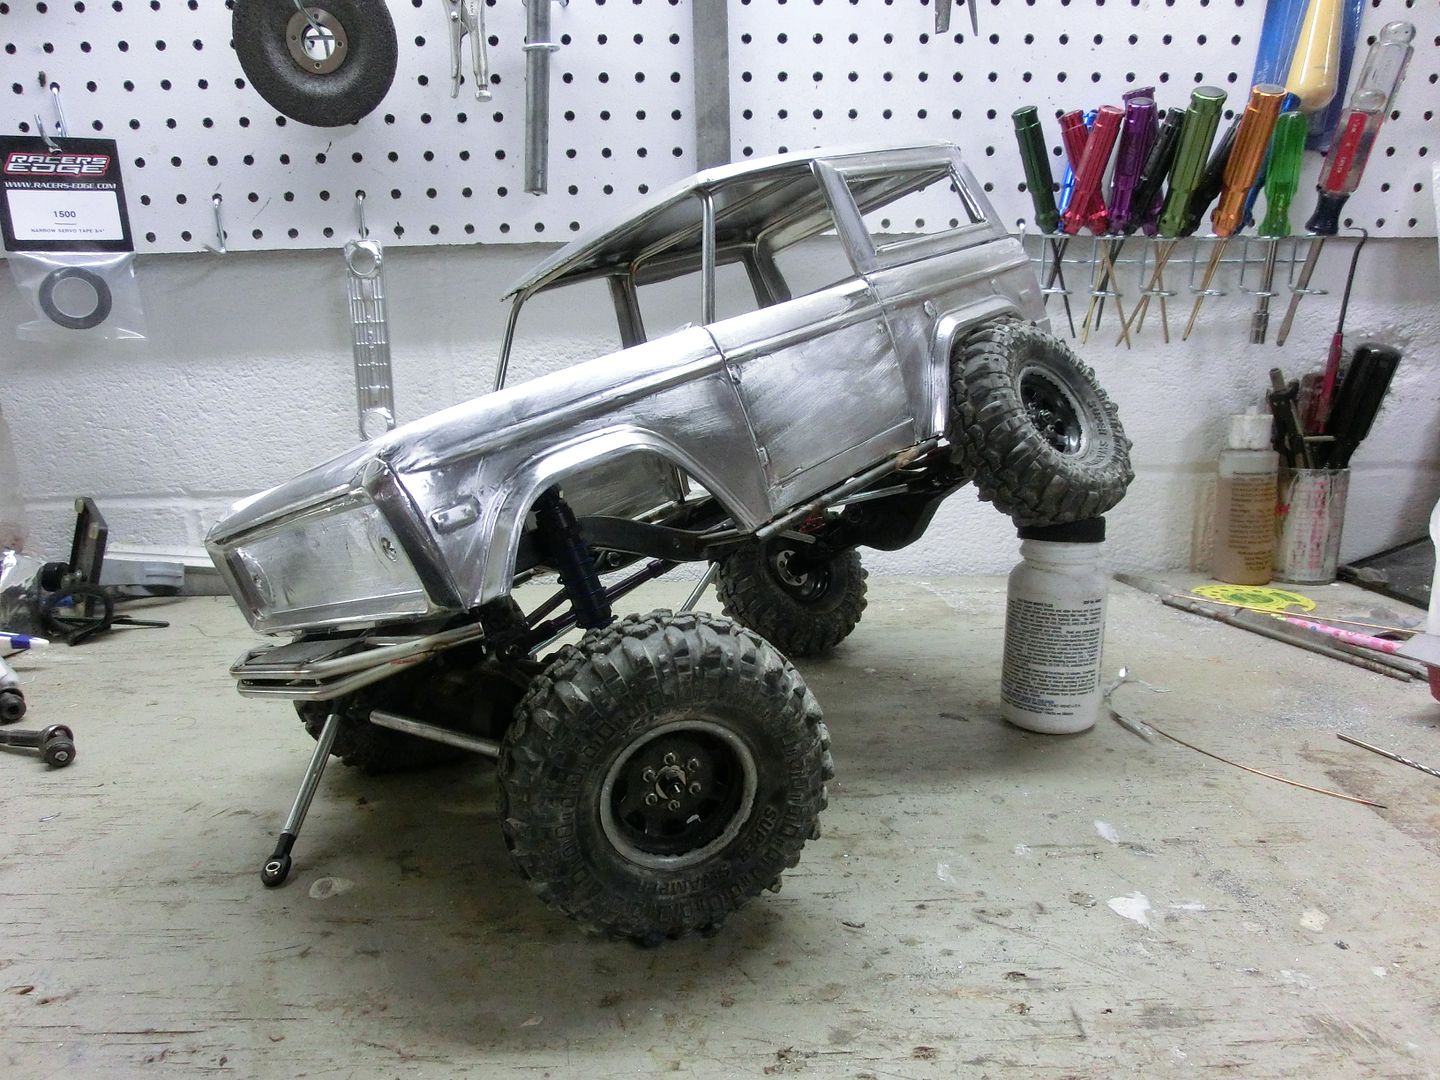 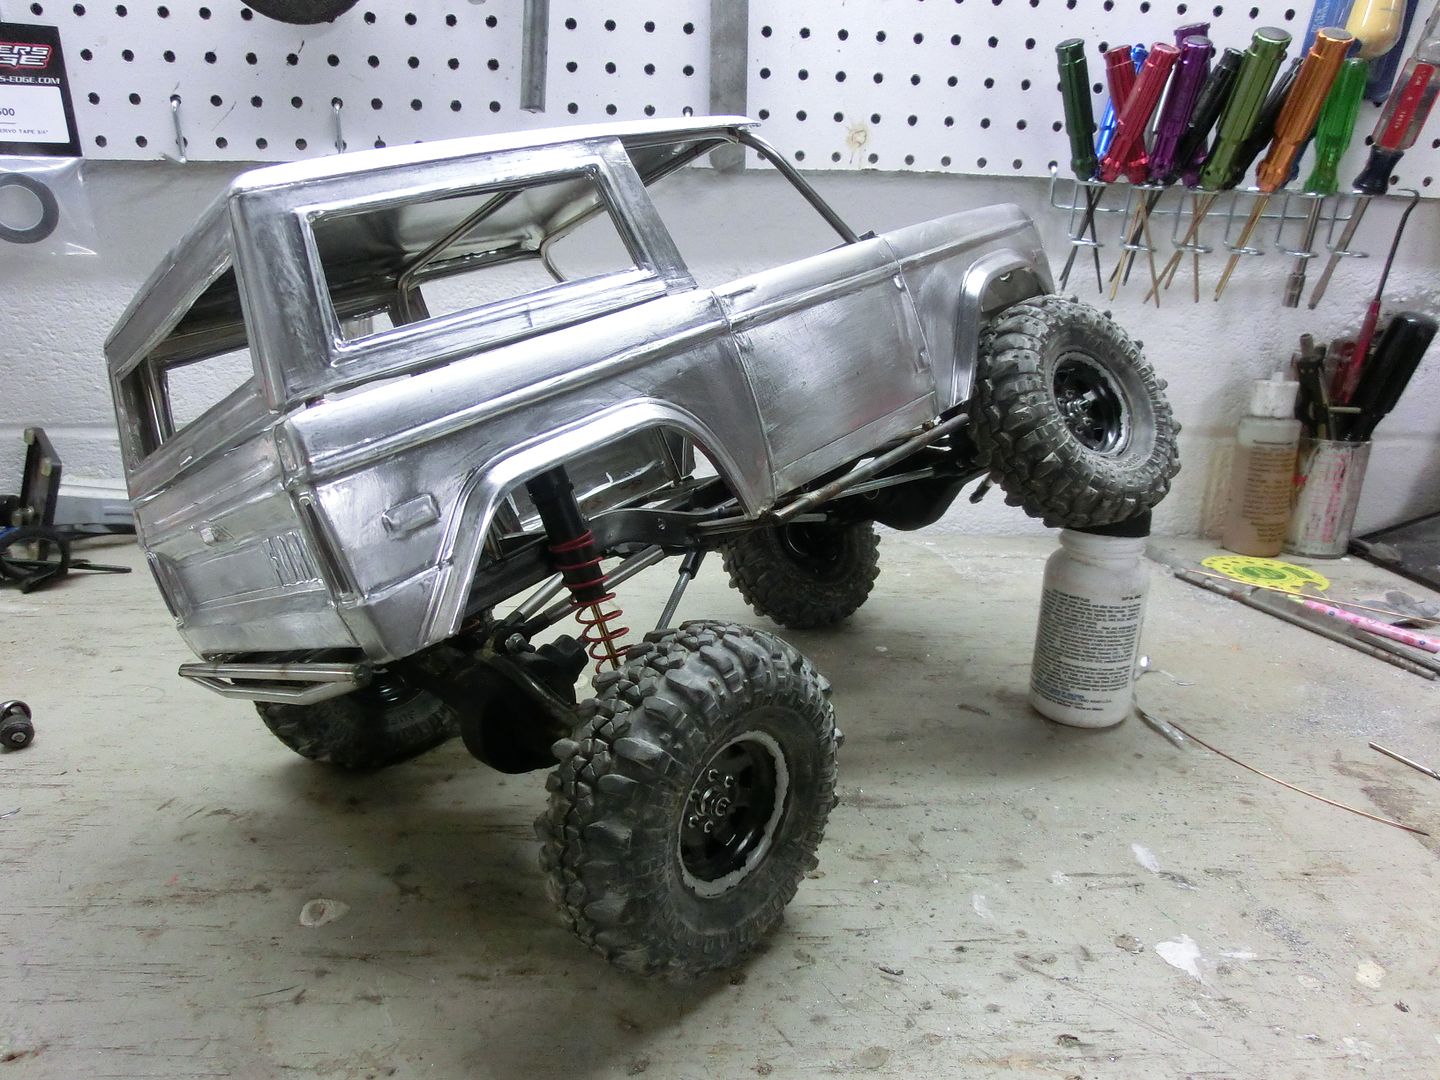 At this point it was still sitting a bit tall but once everything gets added it will settle down a bit Happy with the suspension and tires i threw together a set of spare swampers and wheels i had acquired some time ago 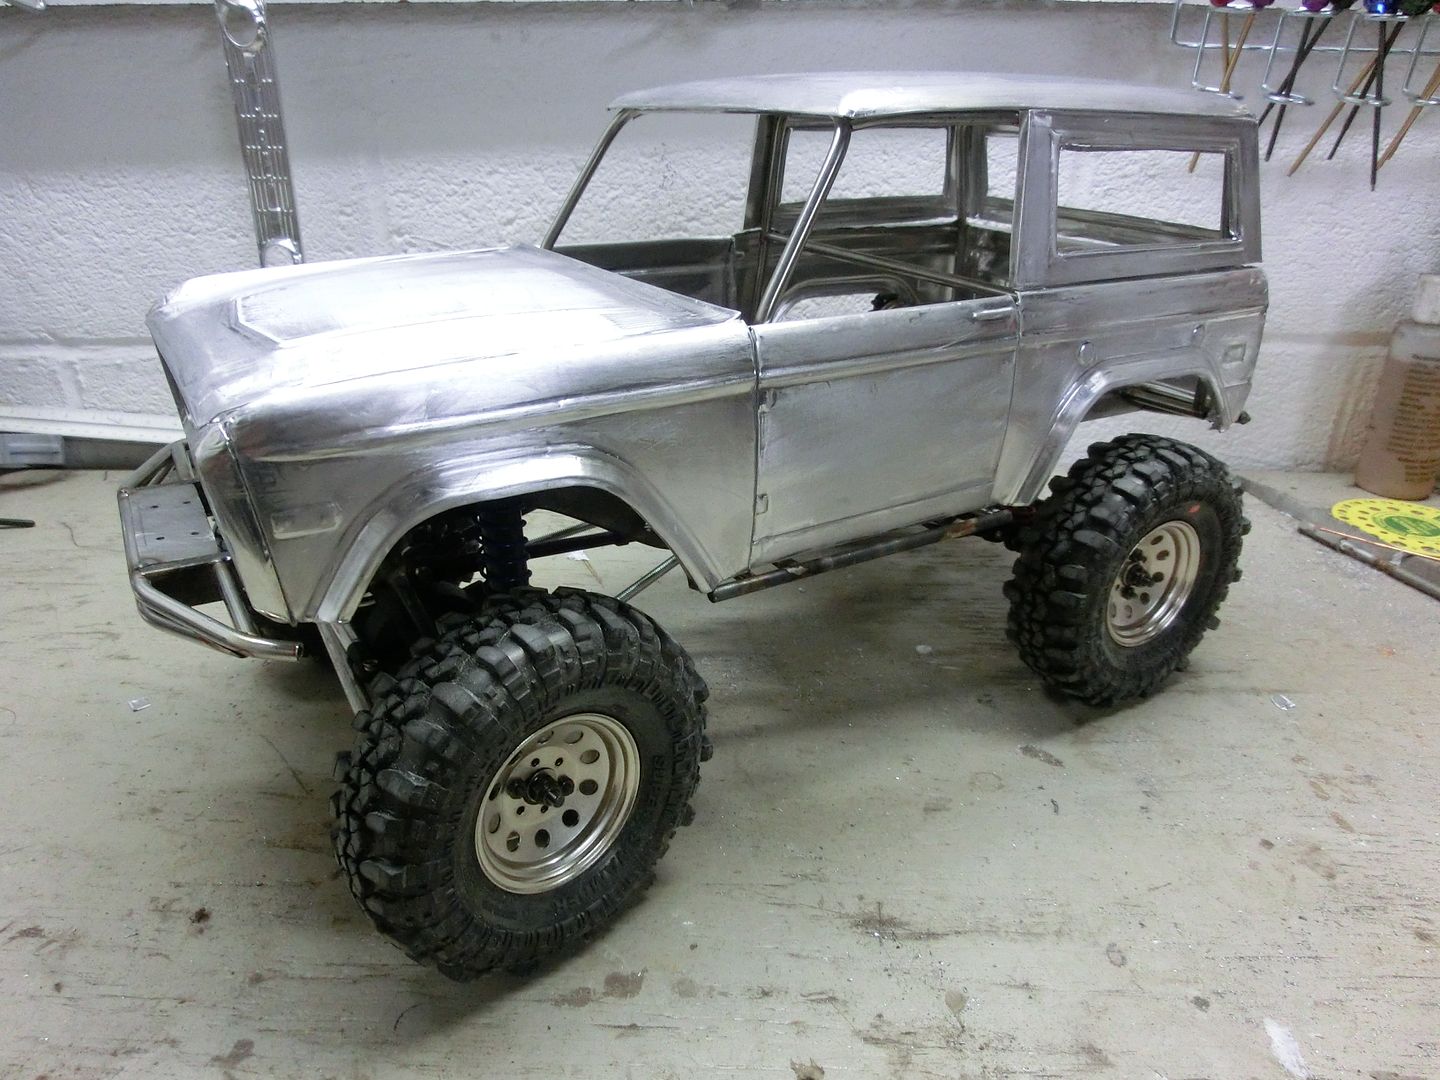 Before i could do the steering i added a set of high steer knuckles 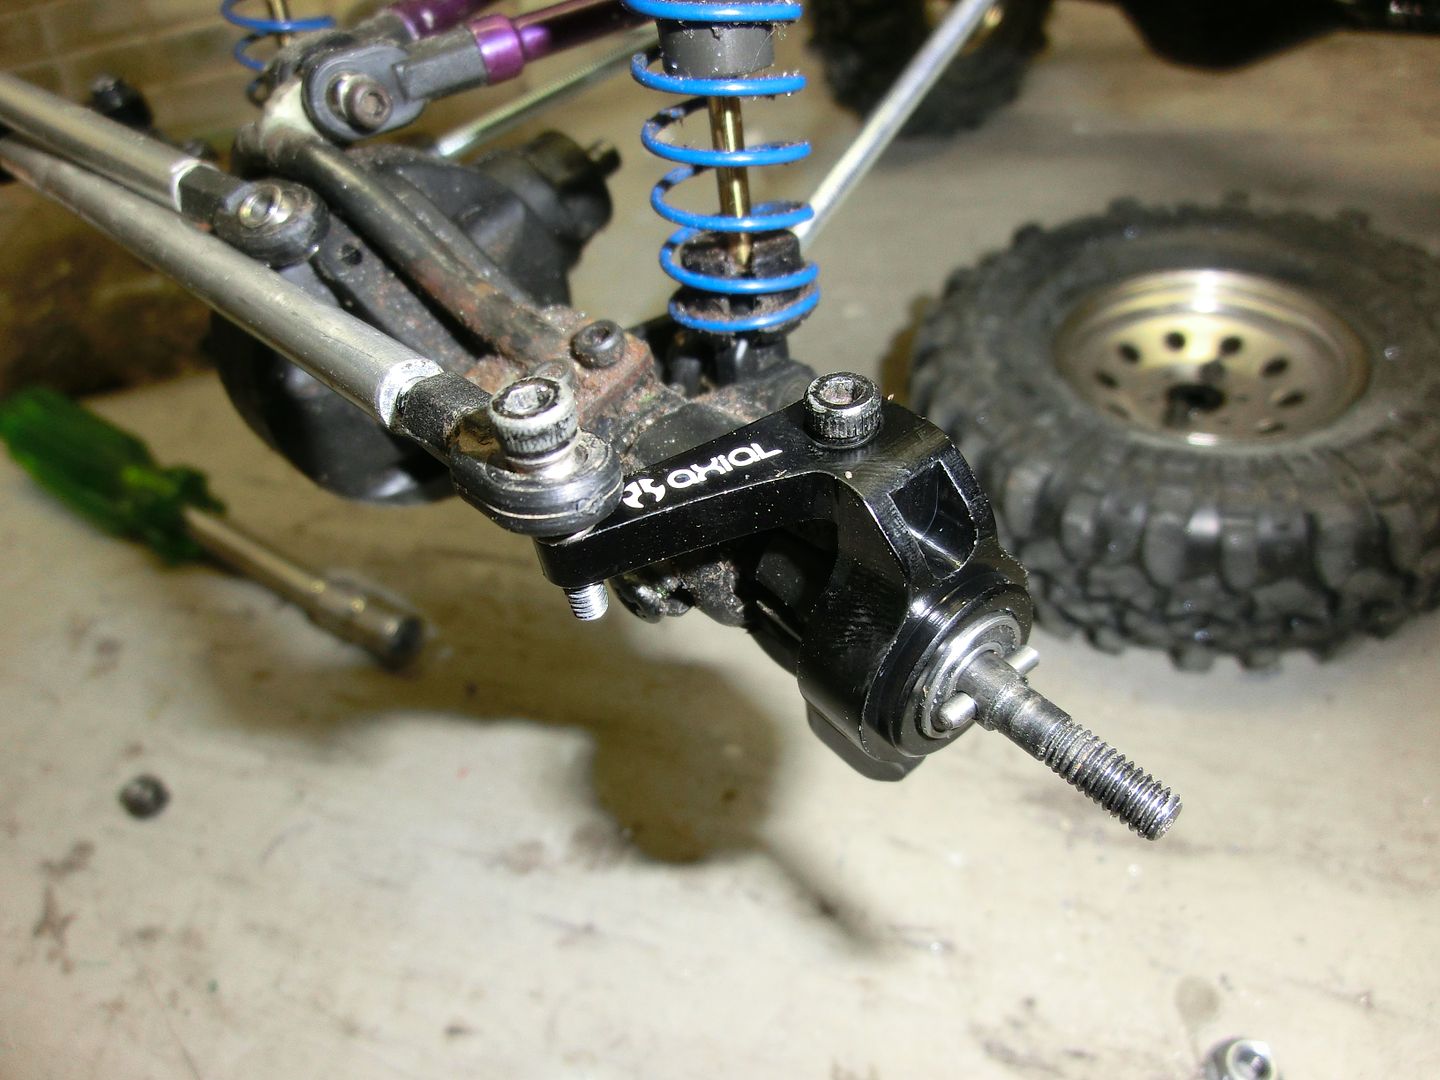 Then to mount the servo i made a mount 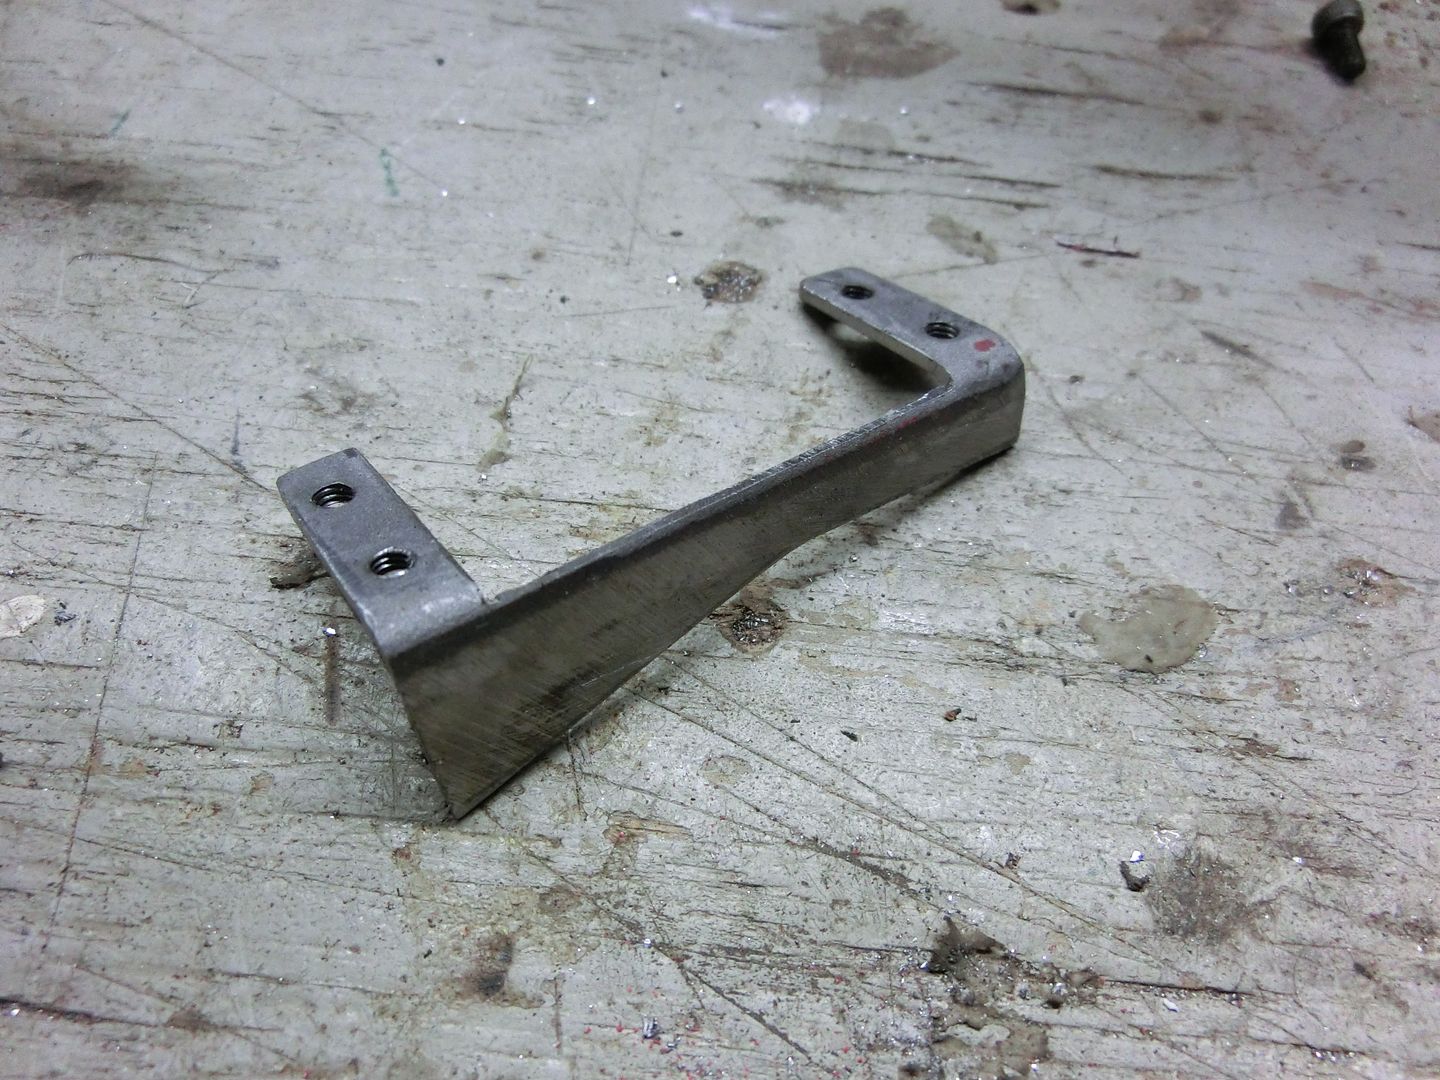 Then welded it to the chassis 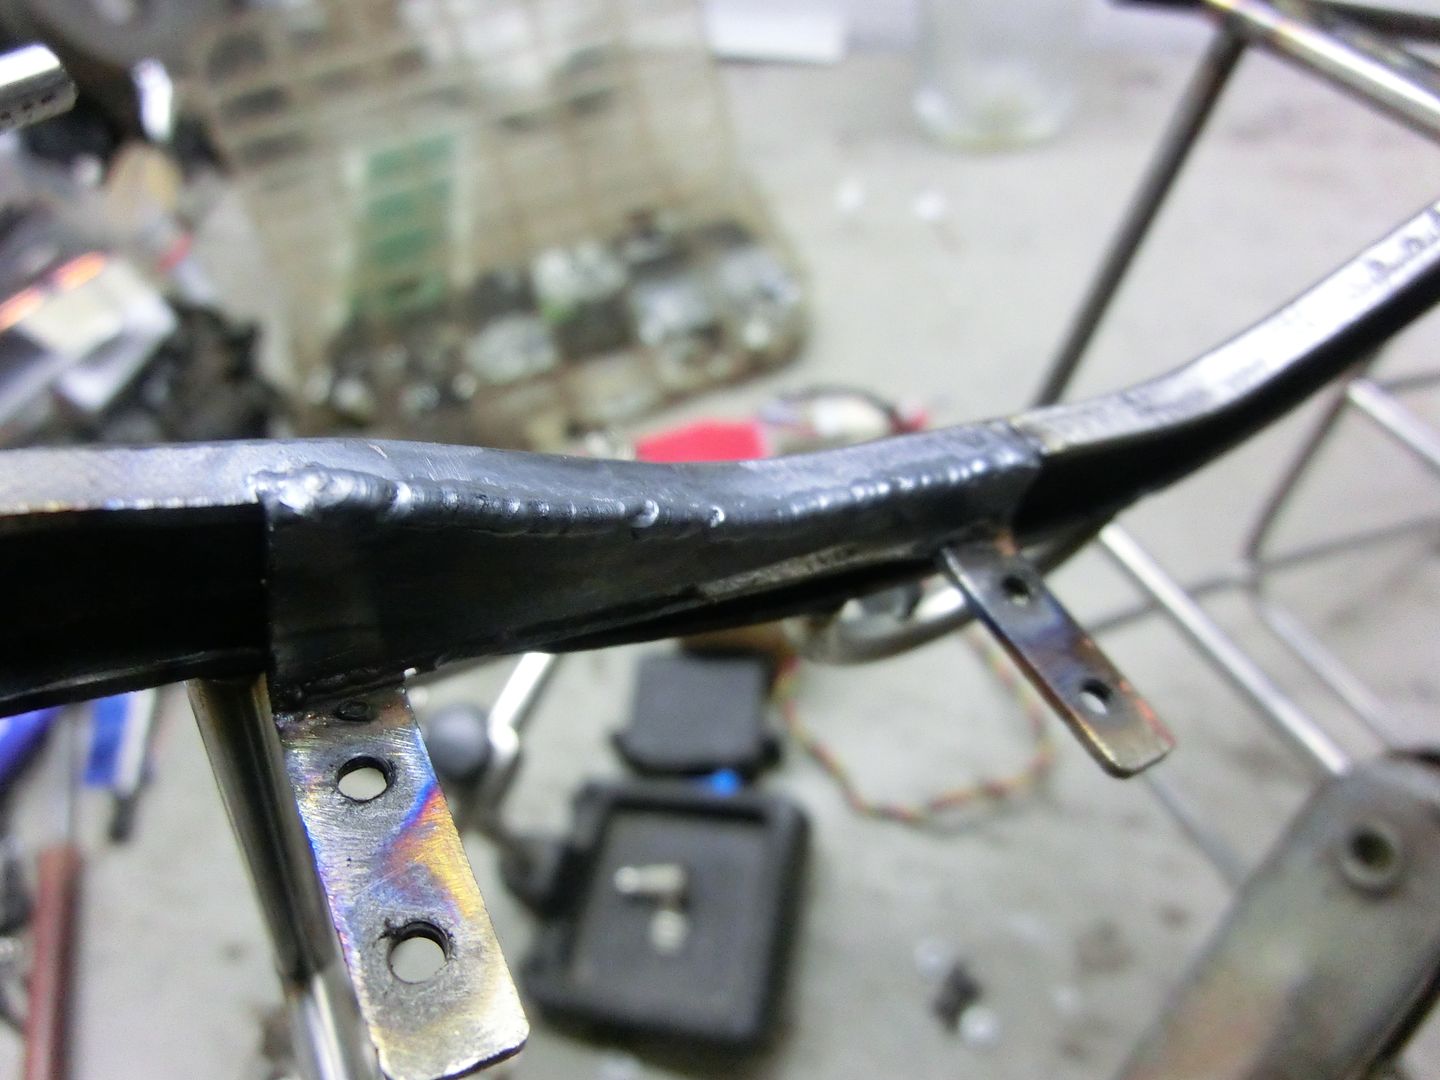 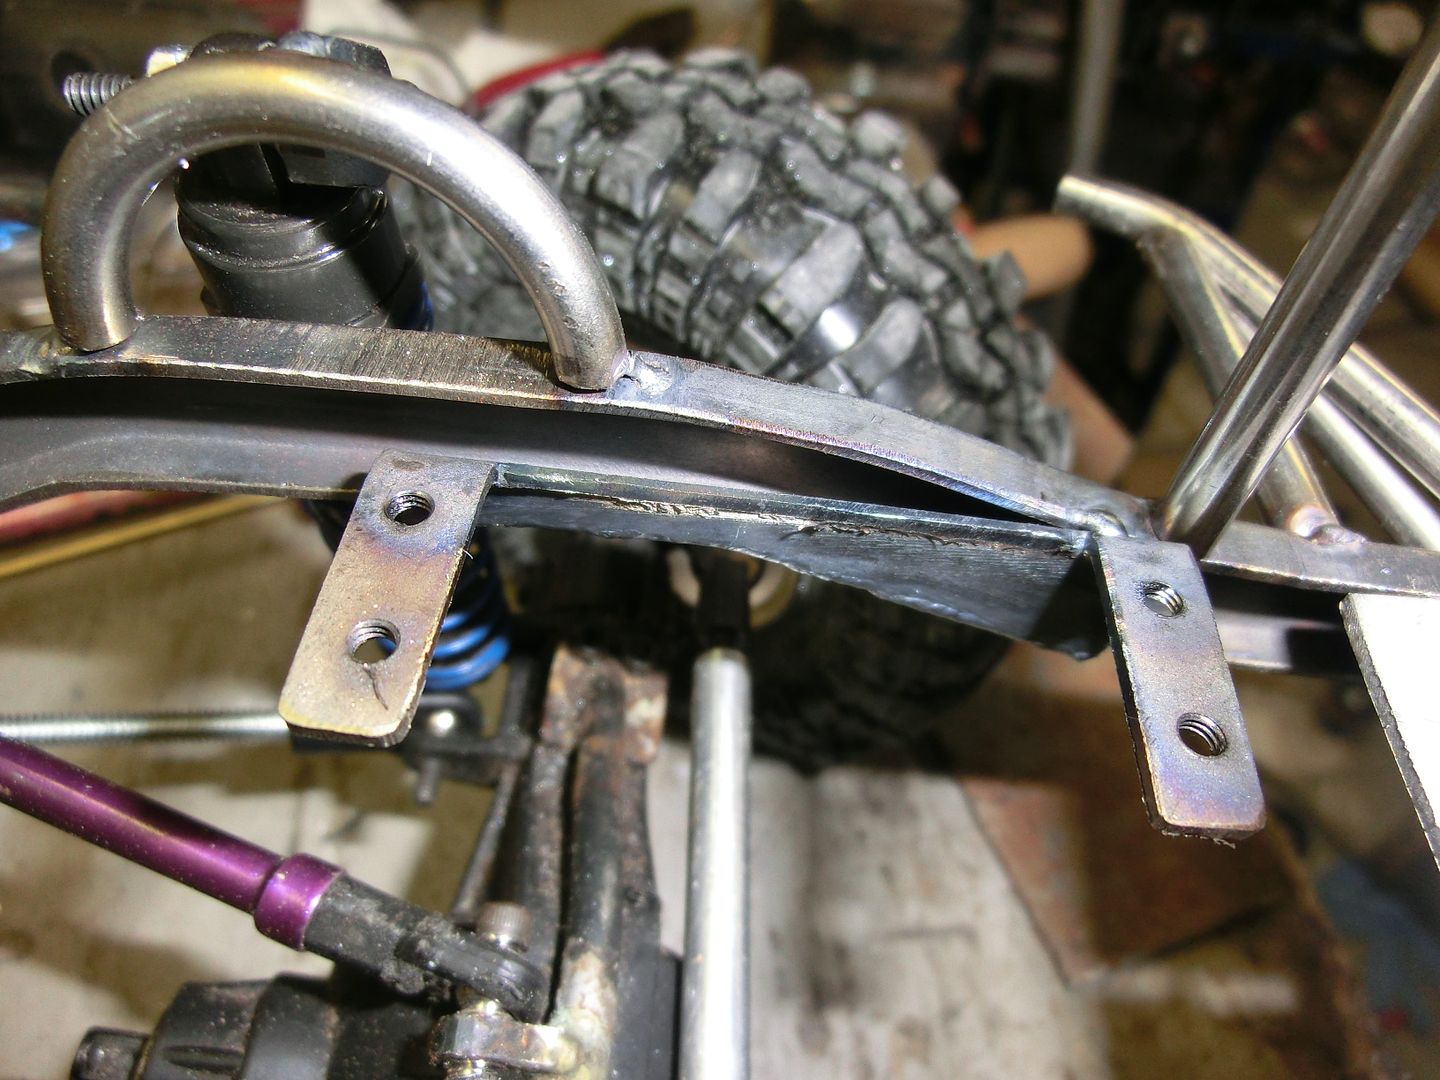 Then mocked up the steering 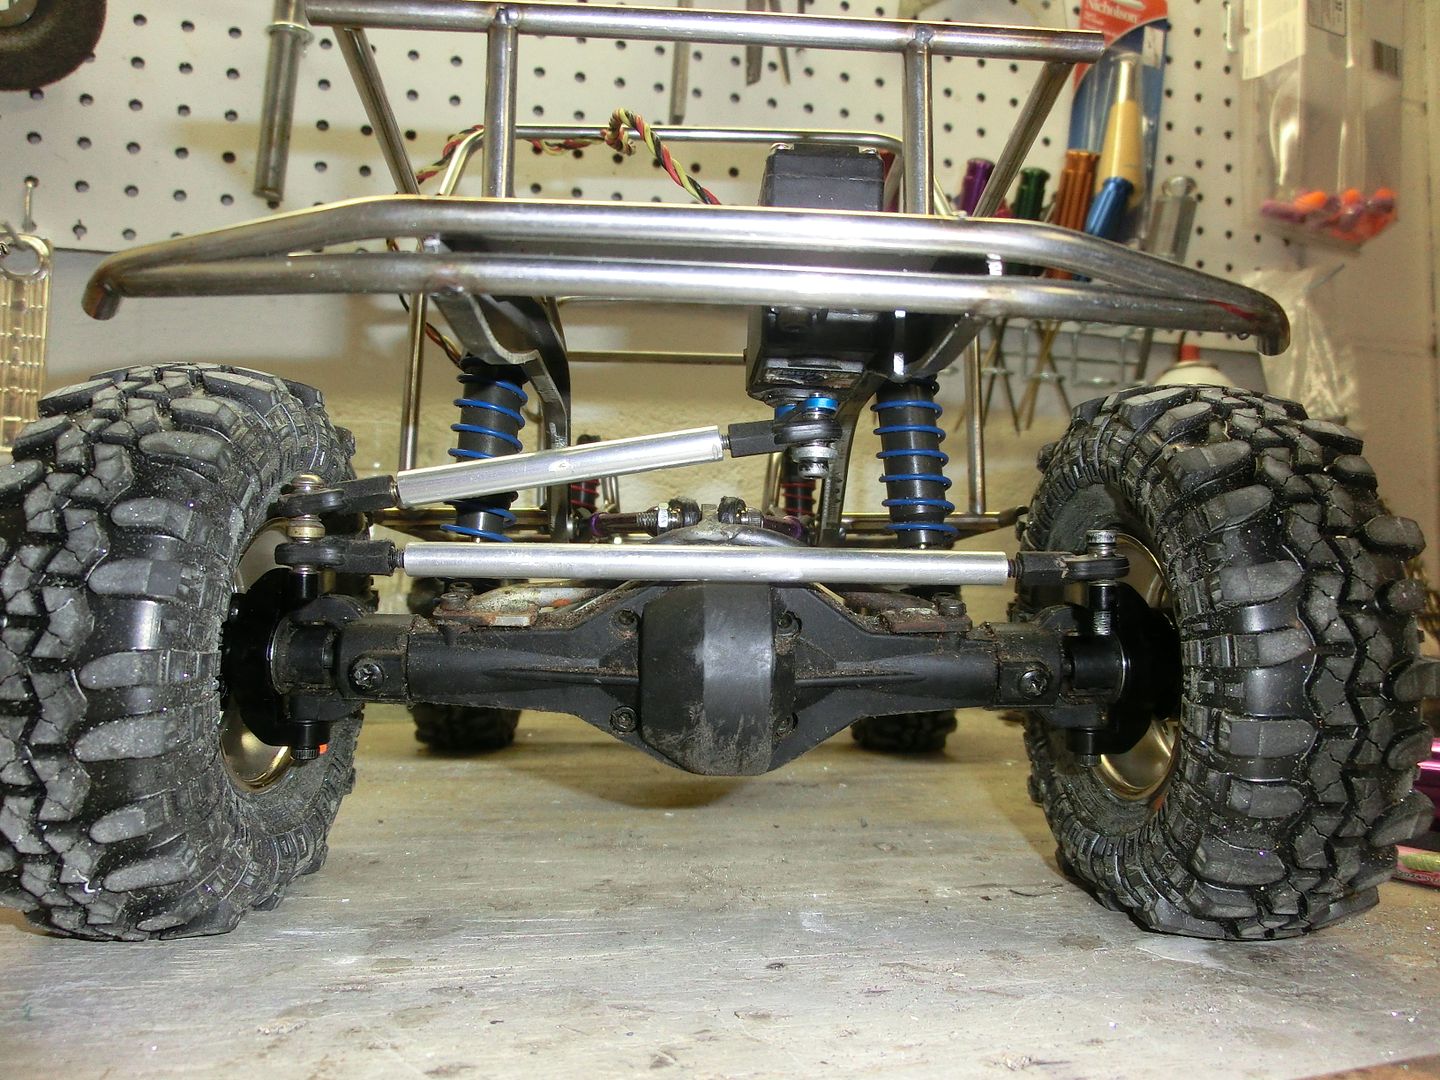 Next i made a mod to the tranny that i had done before but this time i recycled a broken TLT shaft for the mod 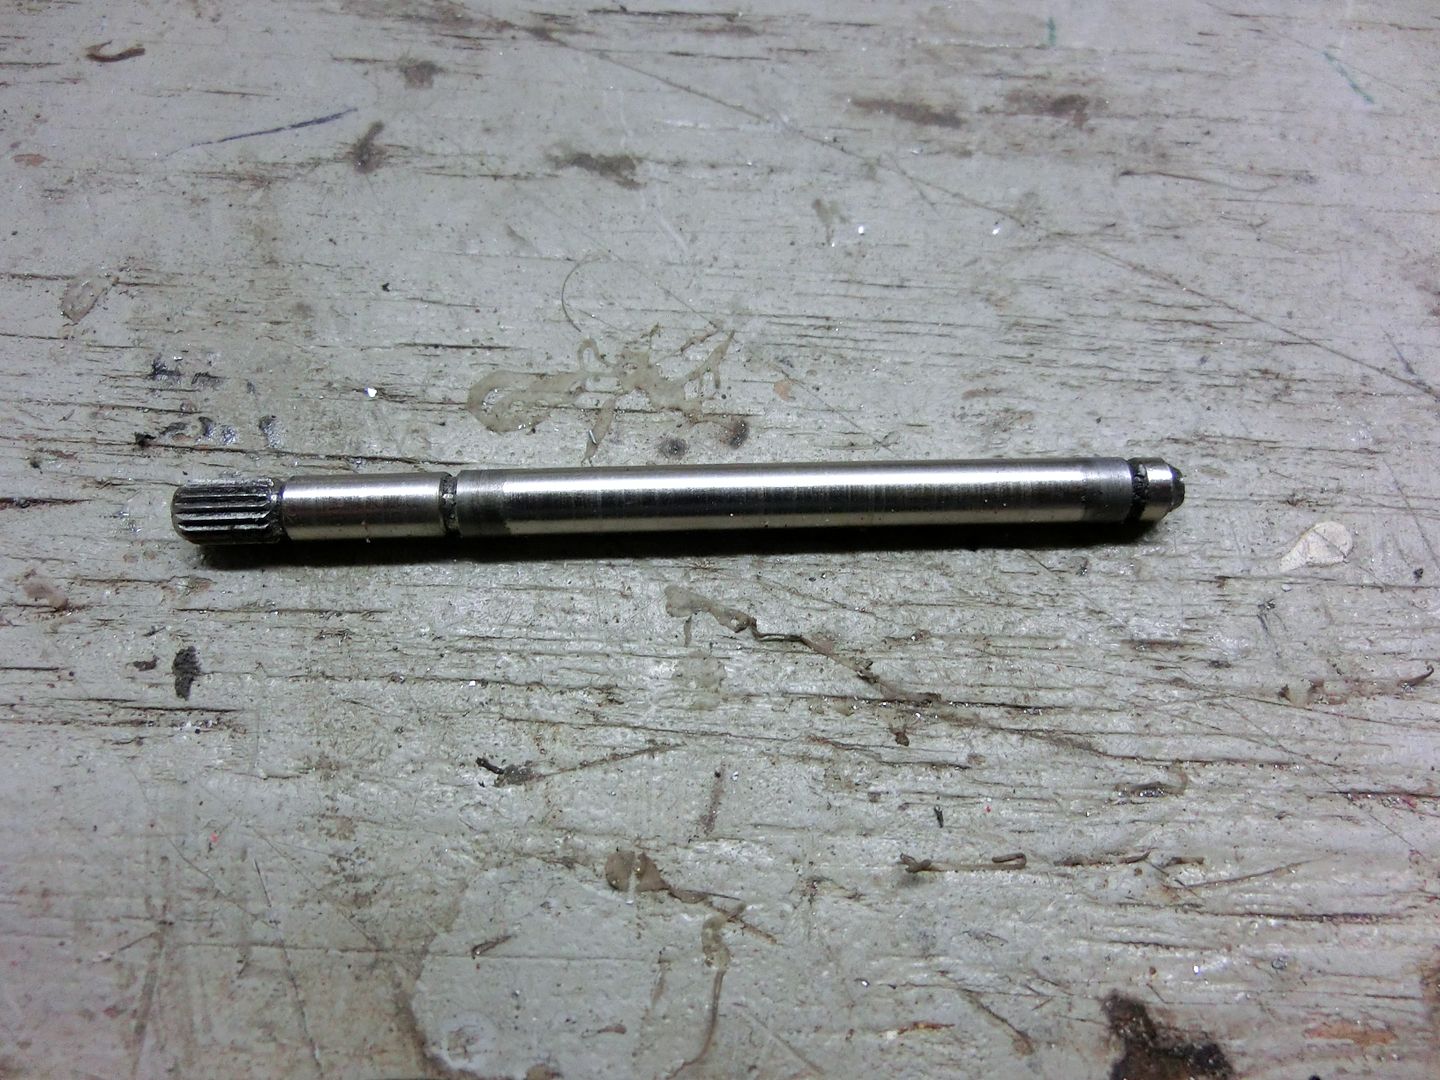 The shaft was cut down to this 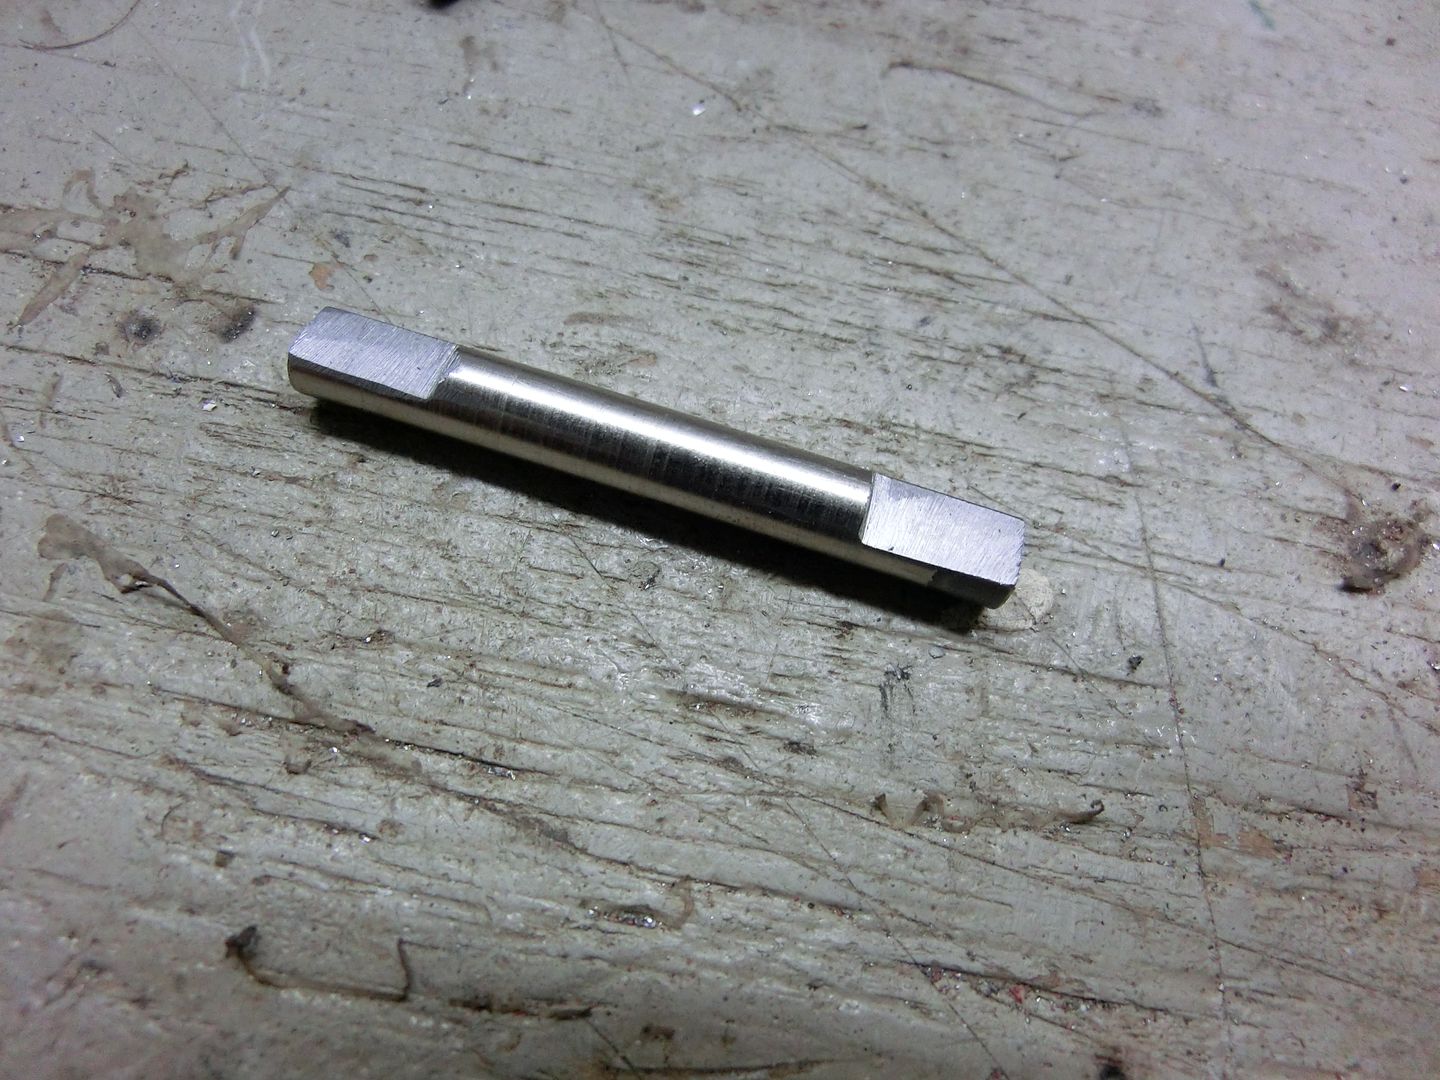 Then the stock diff gear was drilled and the shaft pinned in place 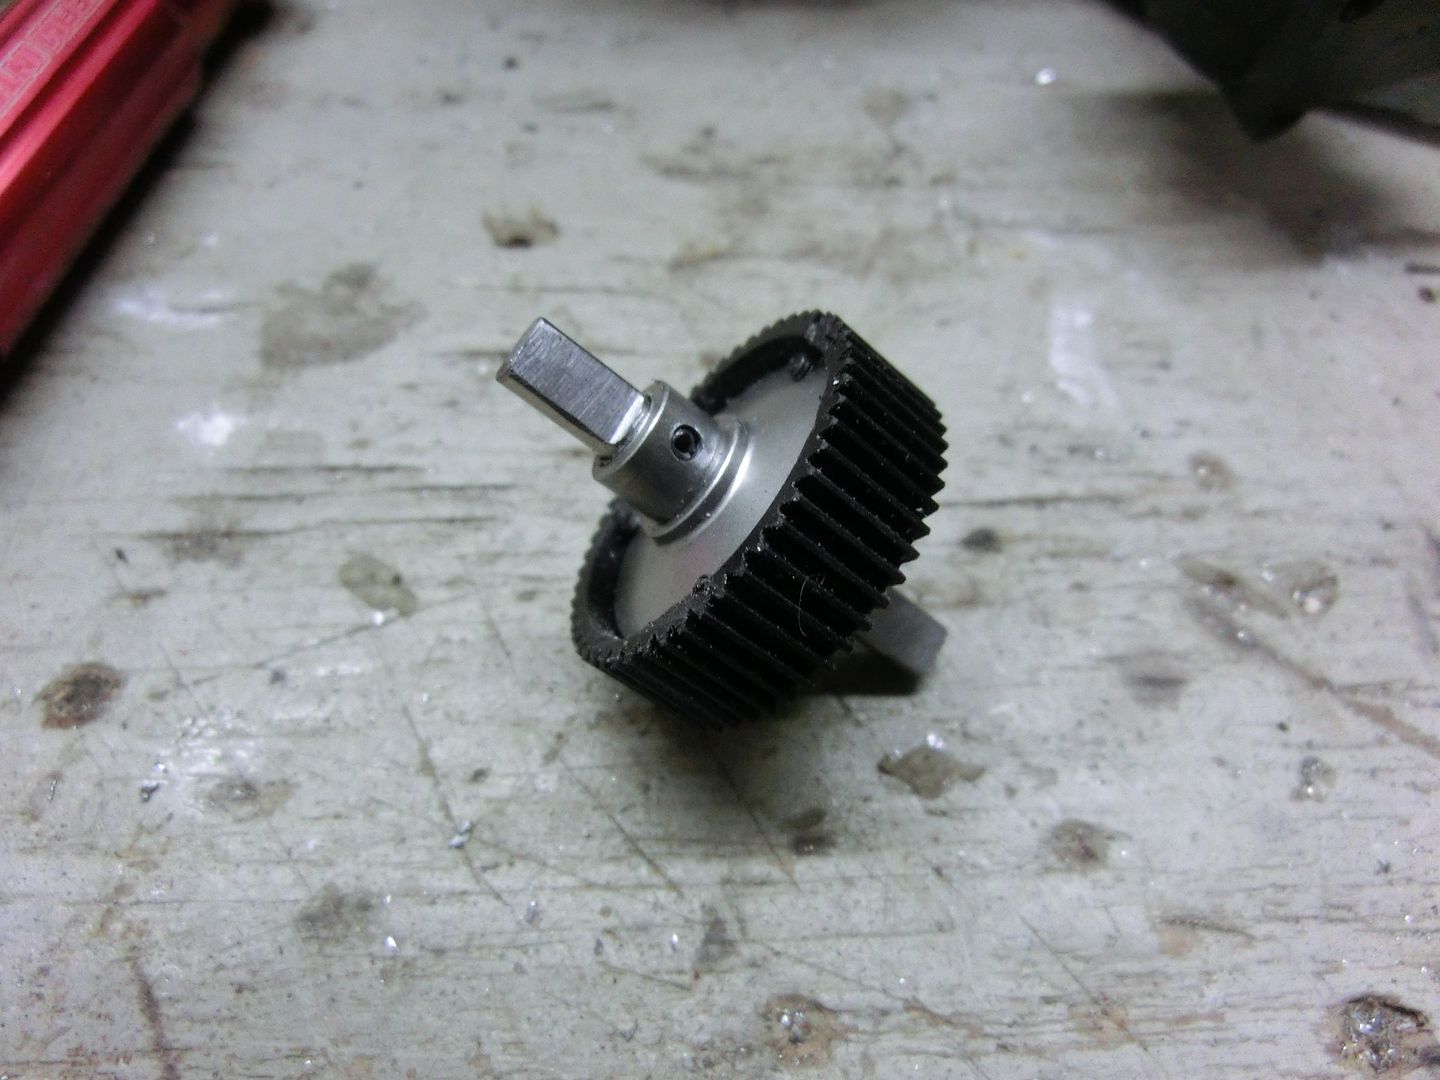 Now i was able to take it for a test run. I used the tired from my Scout as it they were the only ones i had that were assembled and weighted 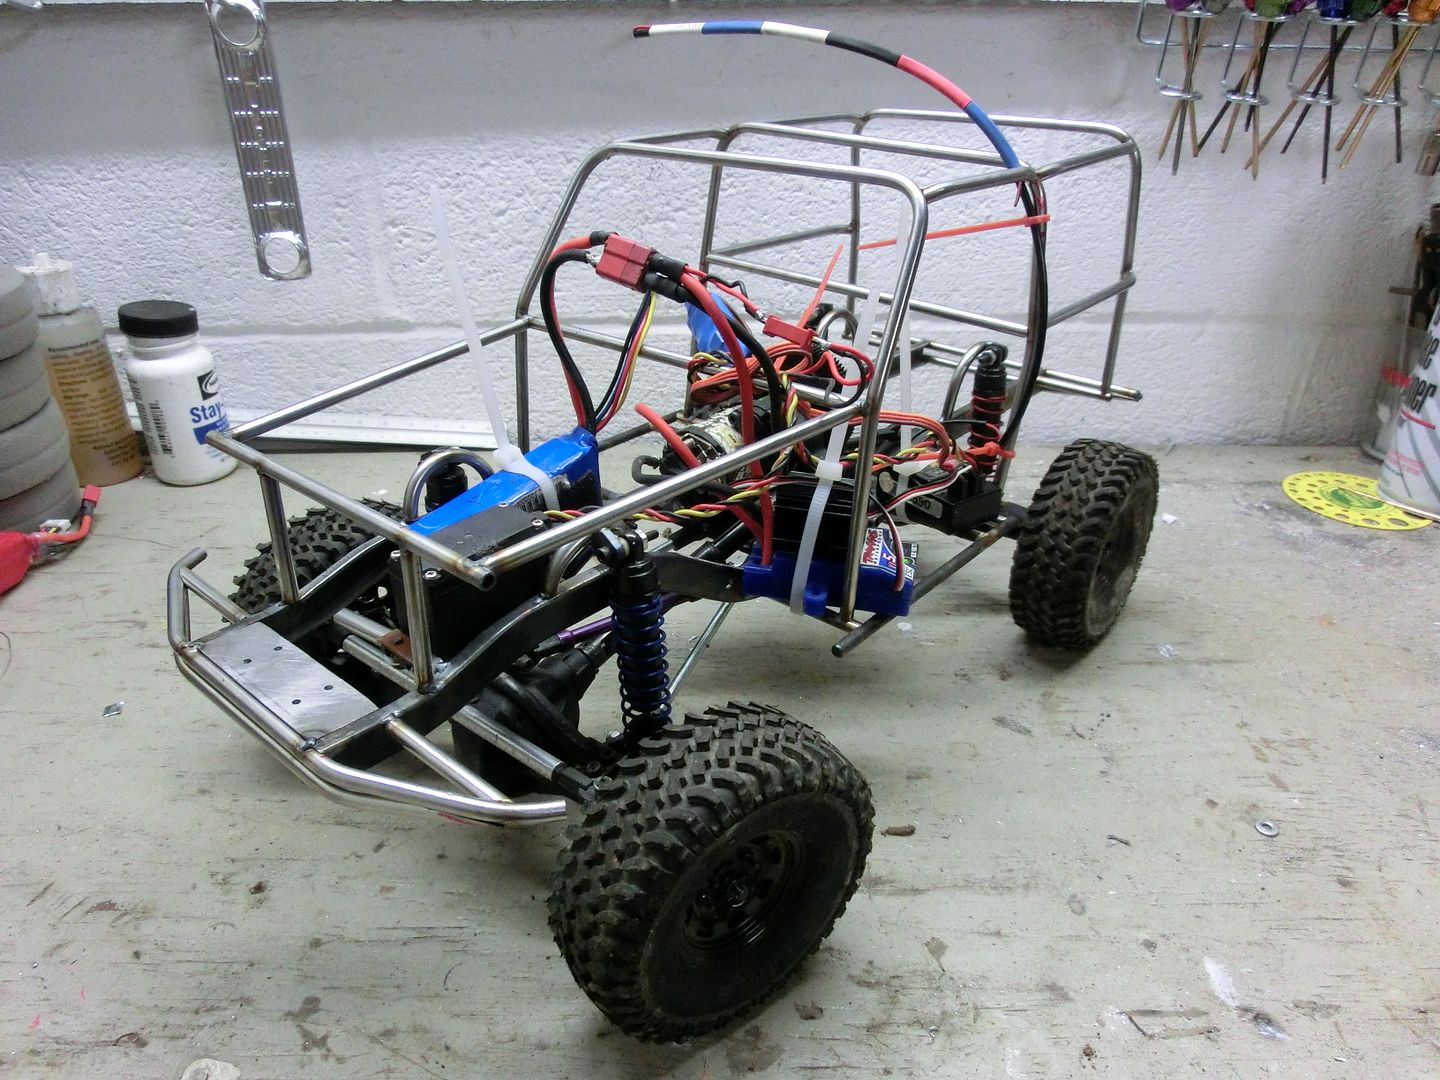 The test went well. I threw the body on to see how it looked with the smaller tires. 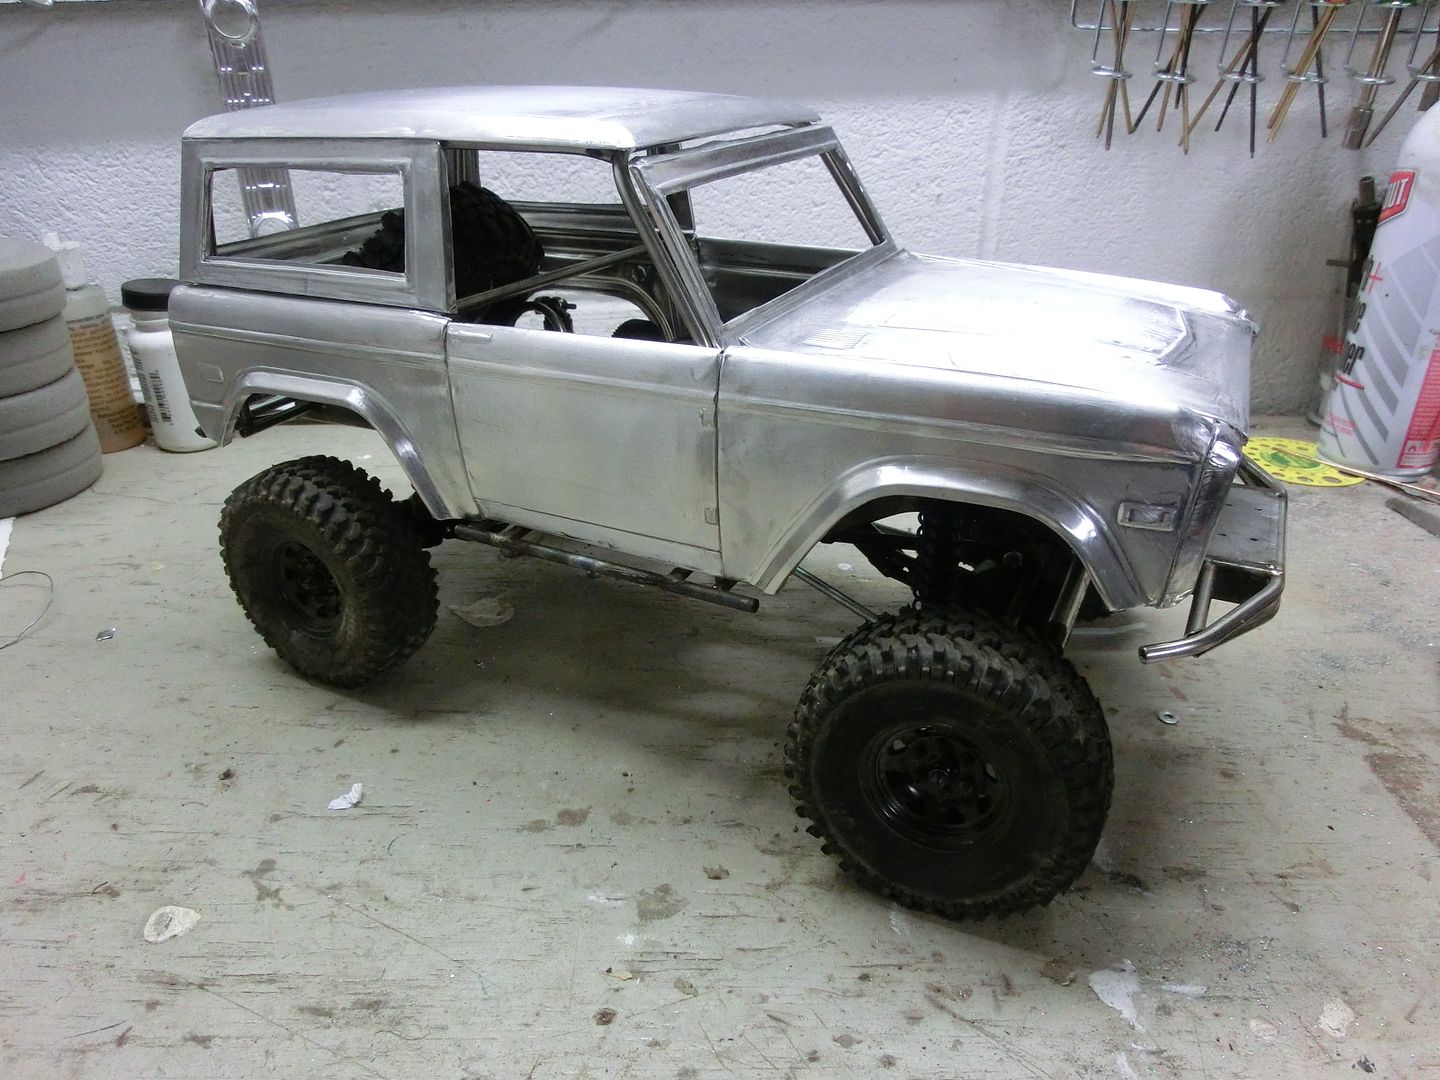 I think it would work good for class 1 if it was lower and had narrower axles. that's it for now | ||||||||
| |  |
| | #48 |
| I wanna be Dave  Join Date: Dec 2009 Location: Outside DC
Posts: 2,997
|
This is scale craftsmanship at its finest. I've followed your builds for years, I"m ashamed to say I haven't posted more. Absolutely amazing work. Loved your interview at the ECSC, it really showed how passionate you are about your builds. The level of detail and determination is absolutely awe inspiring. Keep bringing the talent. Greg    |
| |  |
| | #49 |
| Rock Crawler Join Date: Feb 2011 Location: Williston
Posts: 850
|
I am going to give it a go- I would have never thought to use baby powder as a release agent, but it does make sense. I'll get everything ordered up on Tuesday- When you use the putty to damn up the parts (like the long sides you did) I would like to see a picture of how you actually did that- Thanks! L.R. |
| |  |
| | #50 |
| Rock Crawler Join Date: Feb 2011 Location: Williston
Posts: 850
|
got all my stuff ordered up this am- I would like to see how you mount the body to your frame/ cage work. thanks! L.R. |
| |  |
| | #51 |
| Pebble Pounder Join Date: Nov 2012 Location: Louisville
Posts: 105
|
Amazing work, truly a work of art!
|
| |  |
| | #52 |
| Rock Stacker  Join Date: Apr 2009 Location: Round Lake
Posts: 82
|
Not sure if I like it better before or after the Comp, LOL!!!!! gREAT JOb!!!!!! |
| |  |
| | #53 |
| I wanna be Dave Join Date: Jun 2007 Location: Arlington wa
Posts: 2,100
|
MORE BANDWIDTH!! I cant see the pics :-(
|
| |  |
| | #54 |
| RCC Addict  Join Date: Aug 2005 Location: New Oxford PA
Posts: 1,290
| |
| |  |
| | #55 |
| I wanna be Dave Join Date: Jun 2007 Location: Arlington wa
Posts: 2,100
|
dang , this thing is rad!! I cant wait man... I cant wait |
| |  |
| | #56 | ||||
| RCC Addict  Join Date: Aug 2005 Location: New Oxford PA
Posts: 1,290
| Quote:
Yah, I never hesitate to tell people about my trucks. I've been in to RC's since the 80's but i've never had as much enjoyment as i do building metal bodies. To say i'm passionate it probably an understatement. my wife leans more towards obsessive Quote:
Quote:
Thanks! Quote:
Wait no more! Once i had the chassis sorted out it was time to mount the body. Similar to my class 2 Toyota, i made tabs to mount to the cage 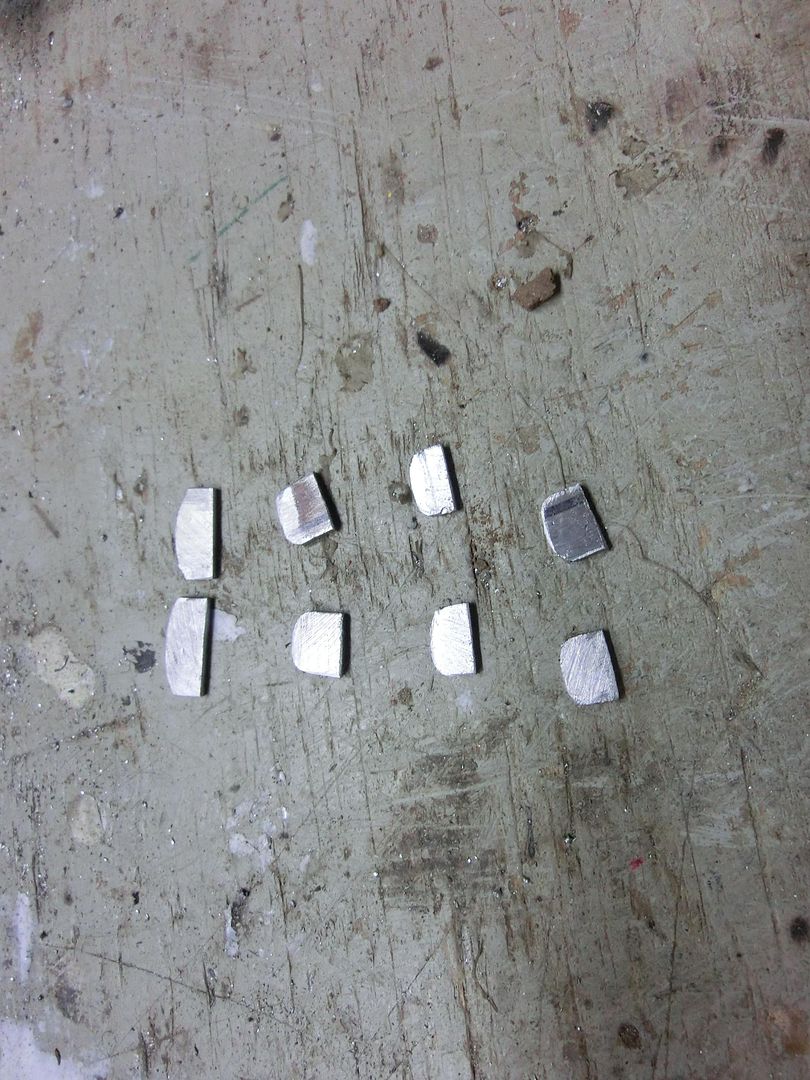 then welded them in place to hold the front fenders 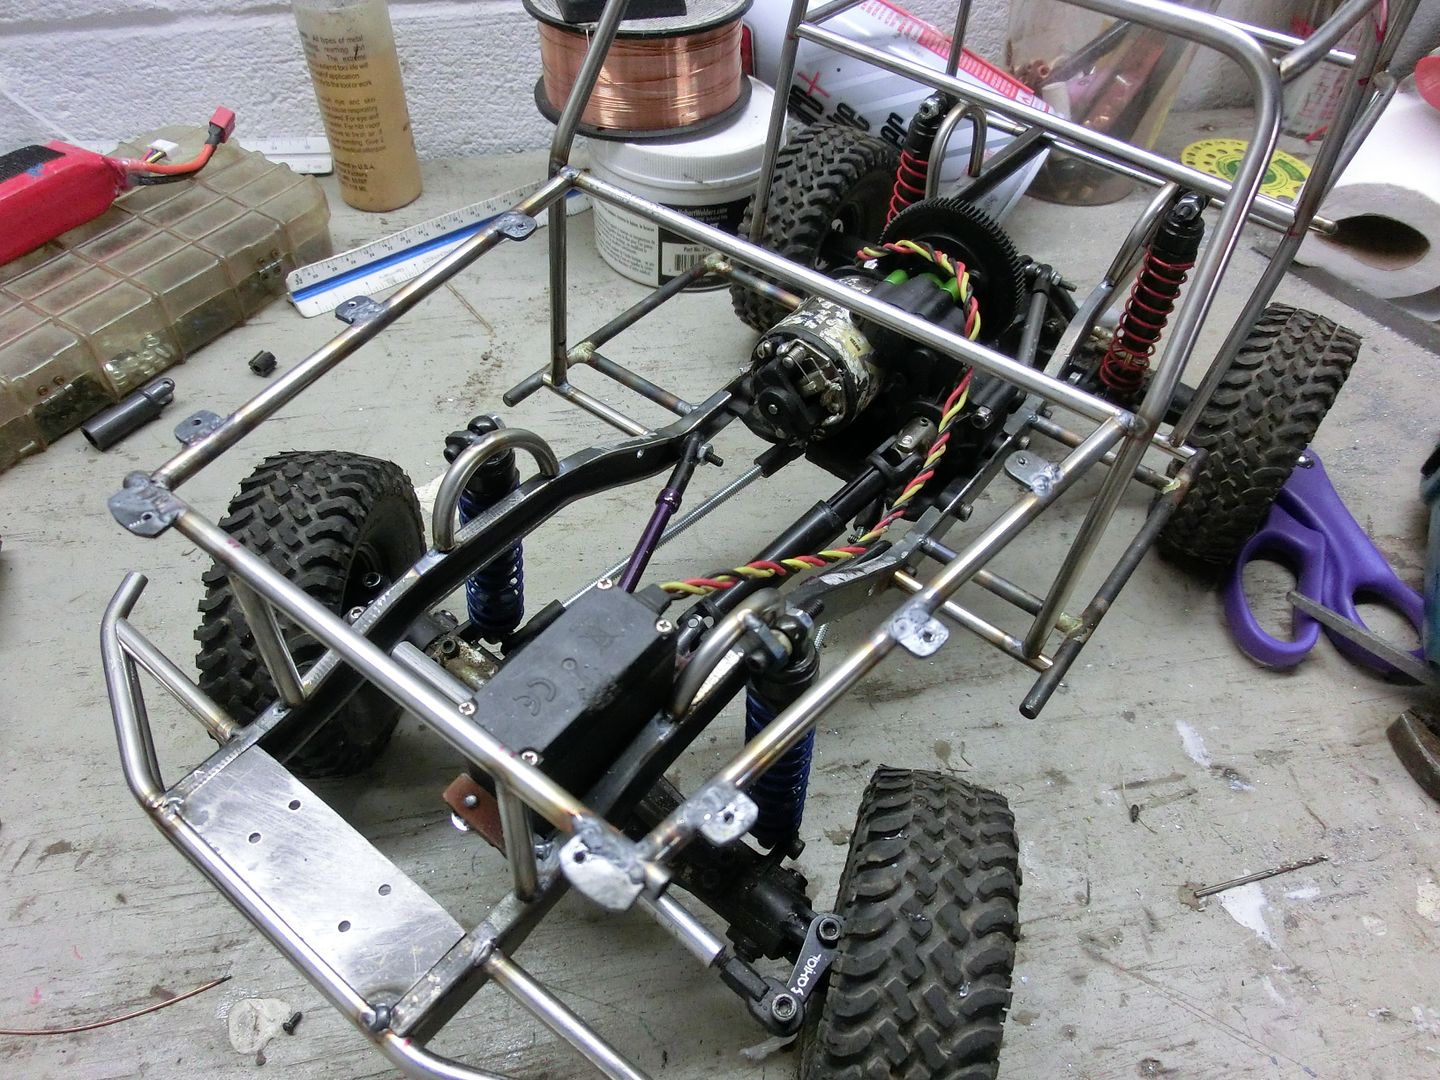 for the rockers, i bent drilled and tapped some tabs 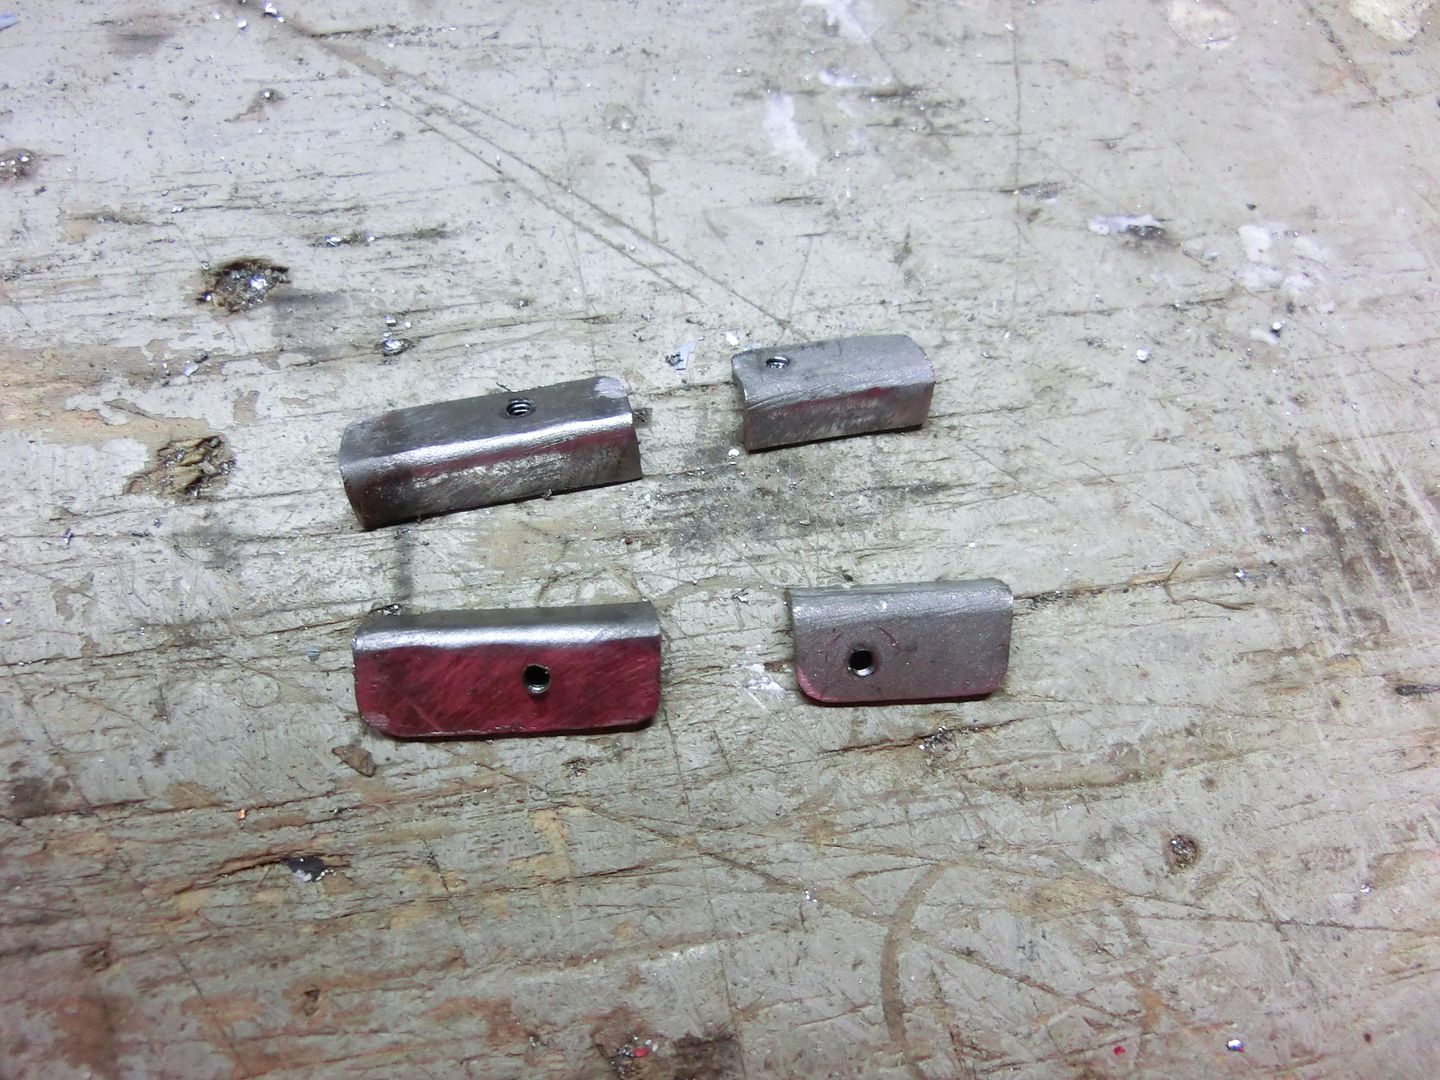 and welded them just above the sliders 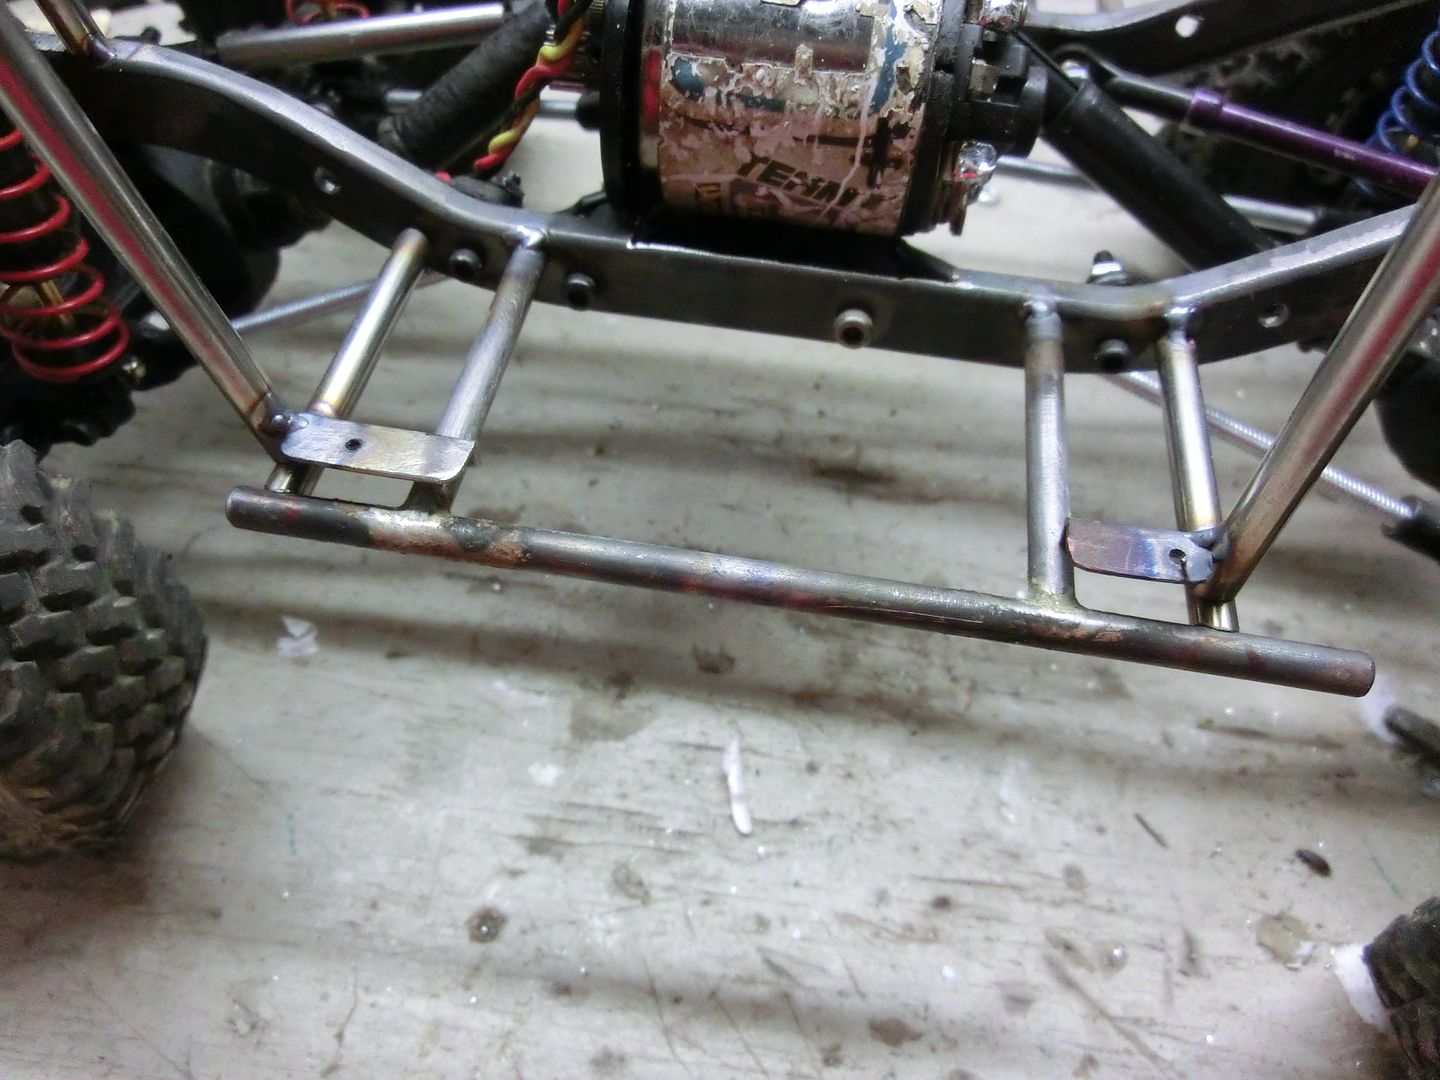 with the body in place you can see how they hold the body from below and are hidden at the same time 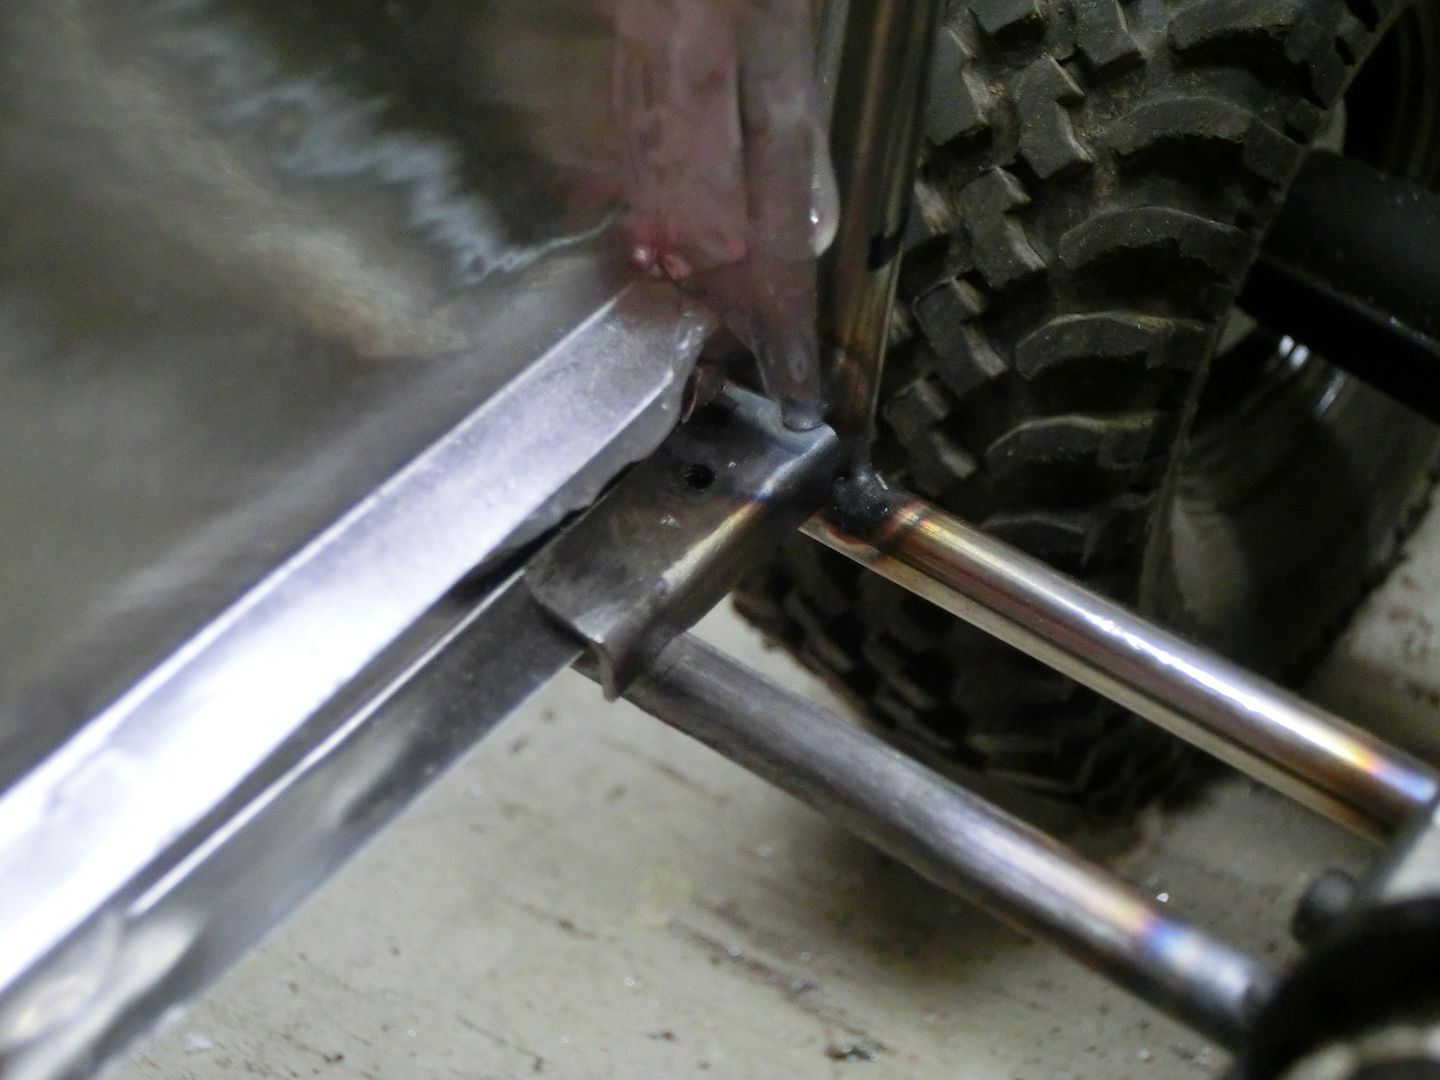 Before i moved to the rear i decided to tackle the seats. I decided to use Axial Buckets and mount them like i would in a 1:1 with tubing I started with the main tubes and some more tabs 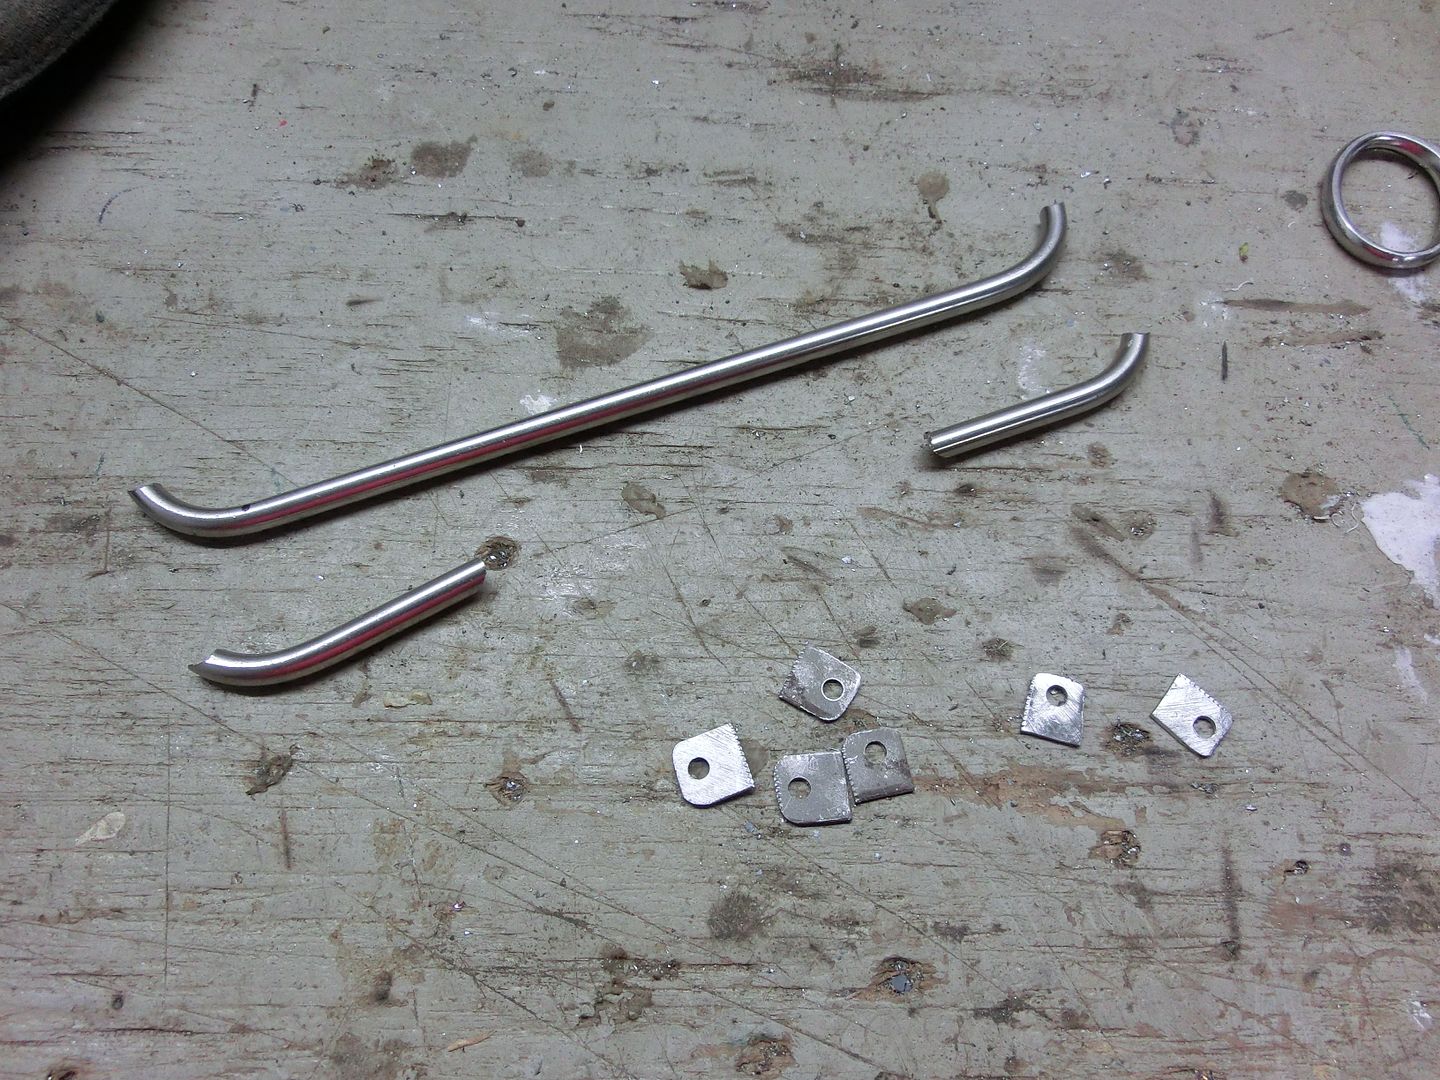 then tacked them in place and fixed them to the seats 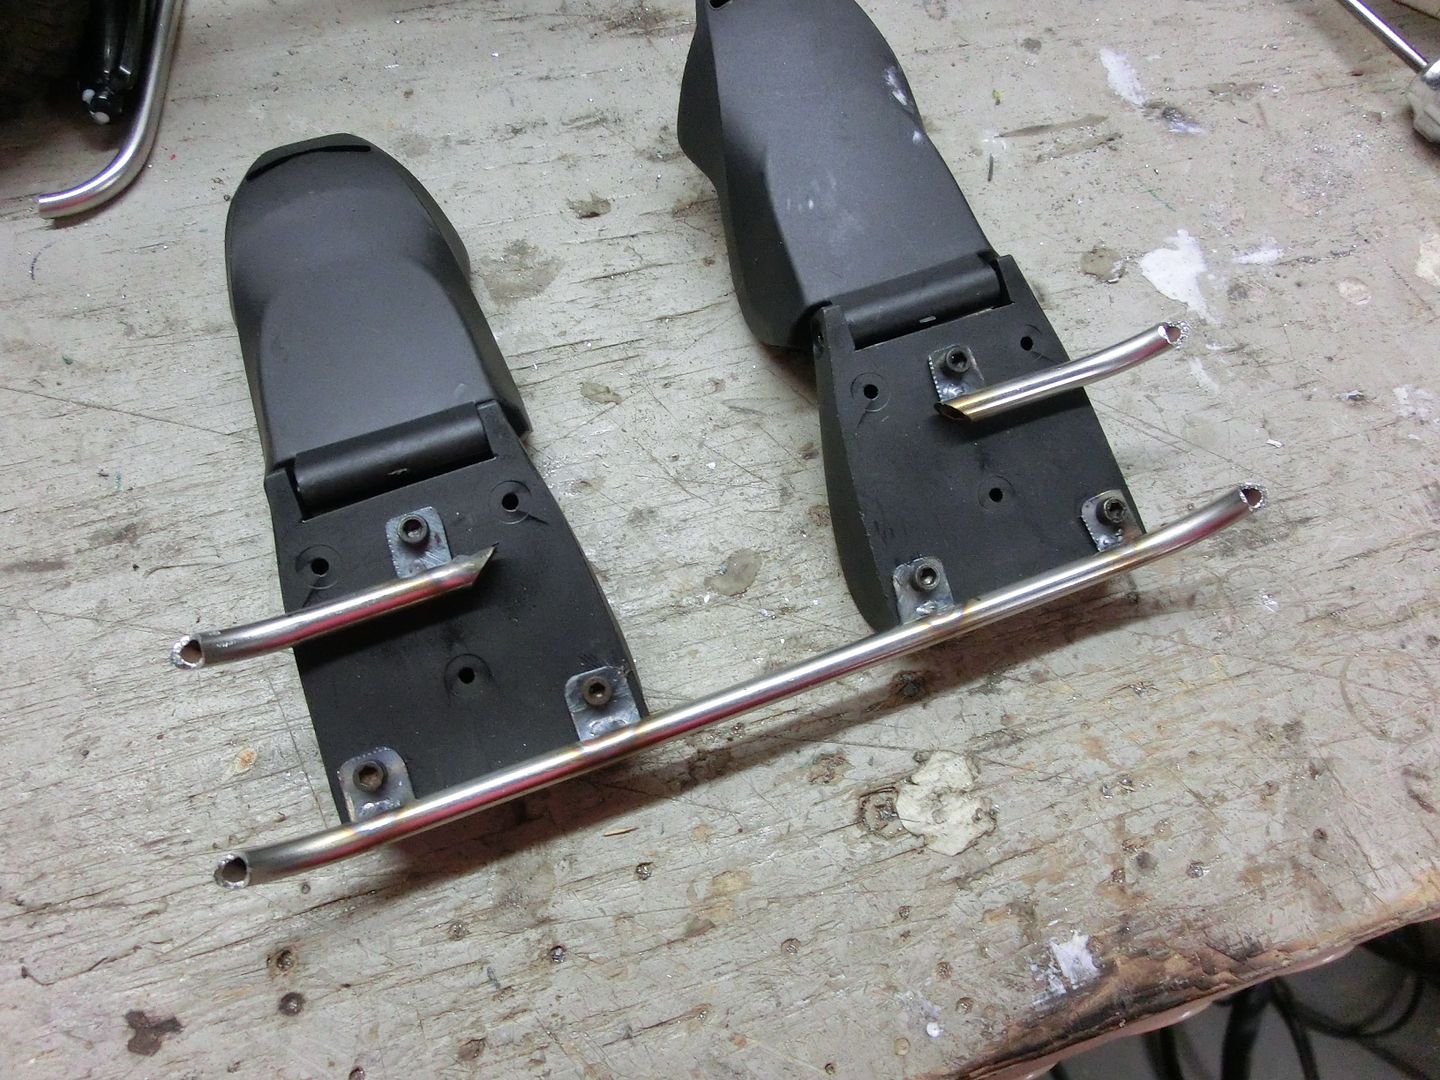 next i added a bar between the hoops to mount them to and tacked them in place 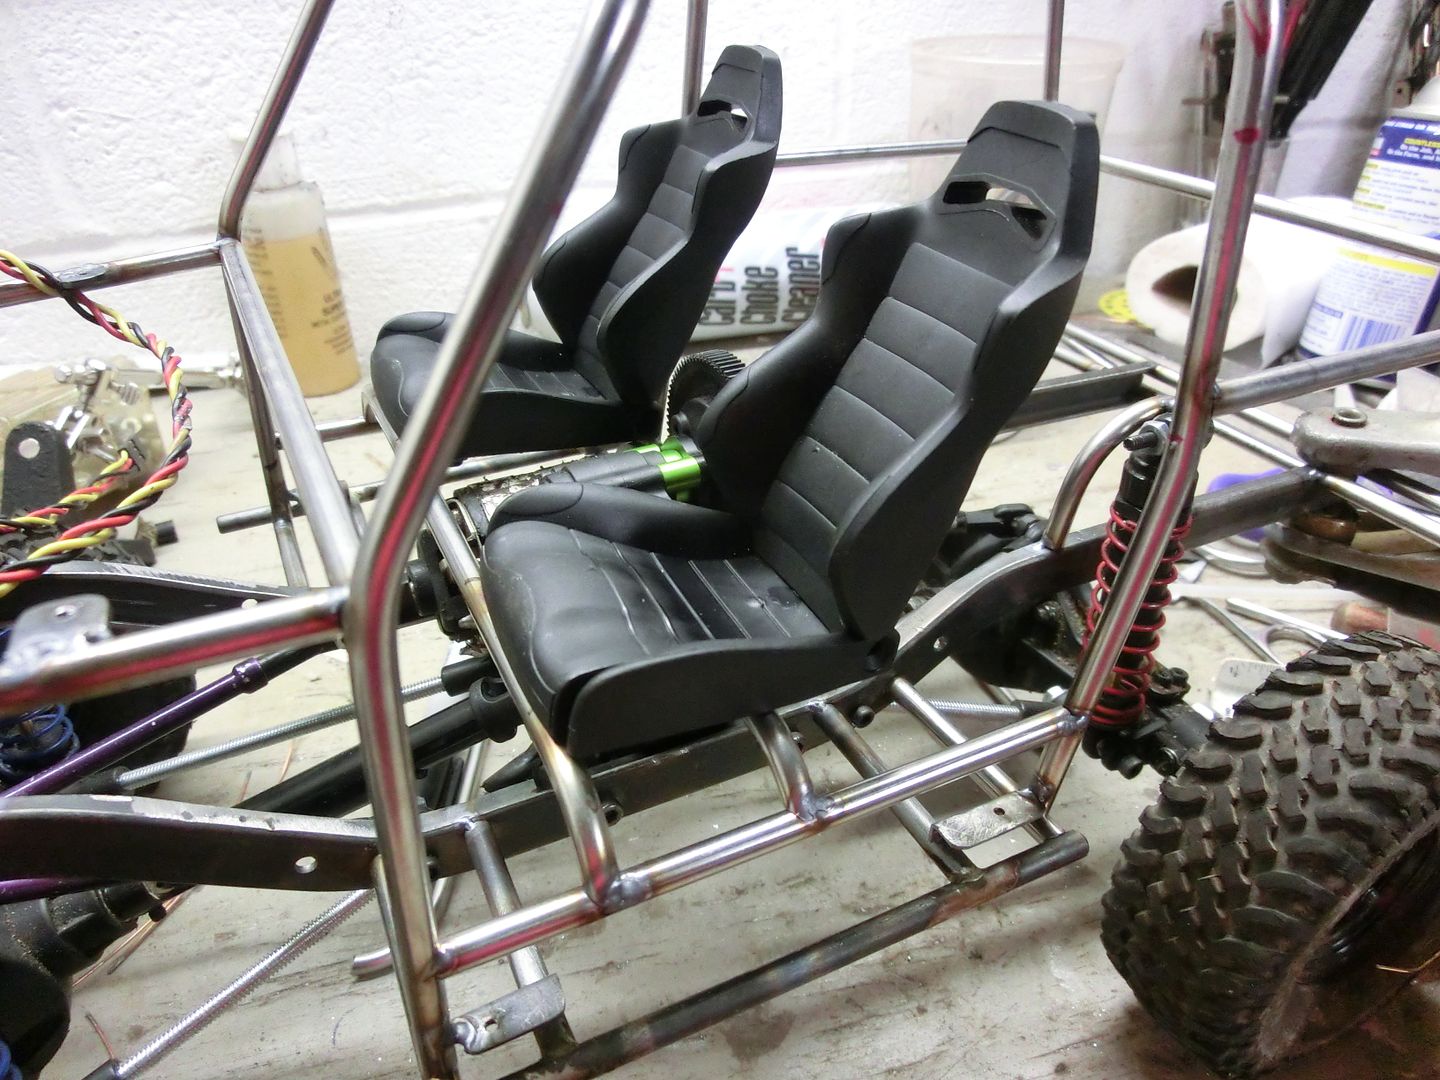 Now i could add the door bar 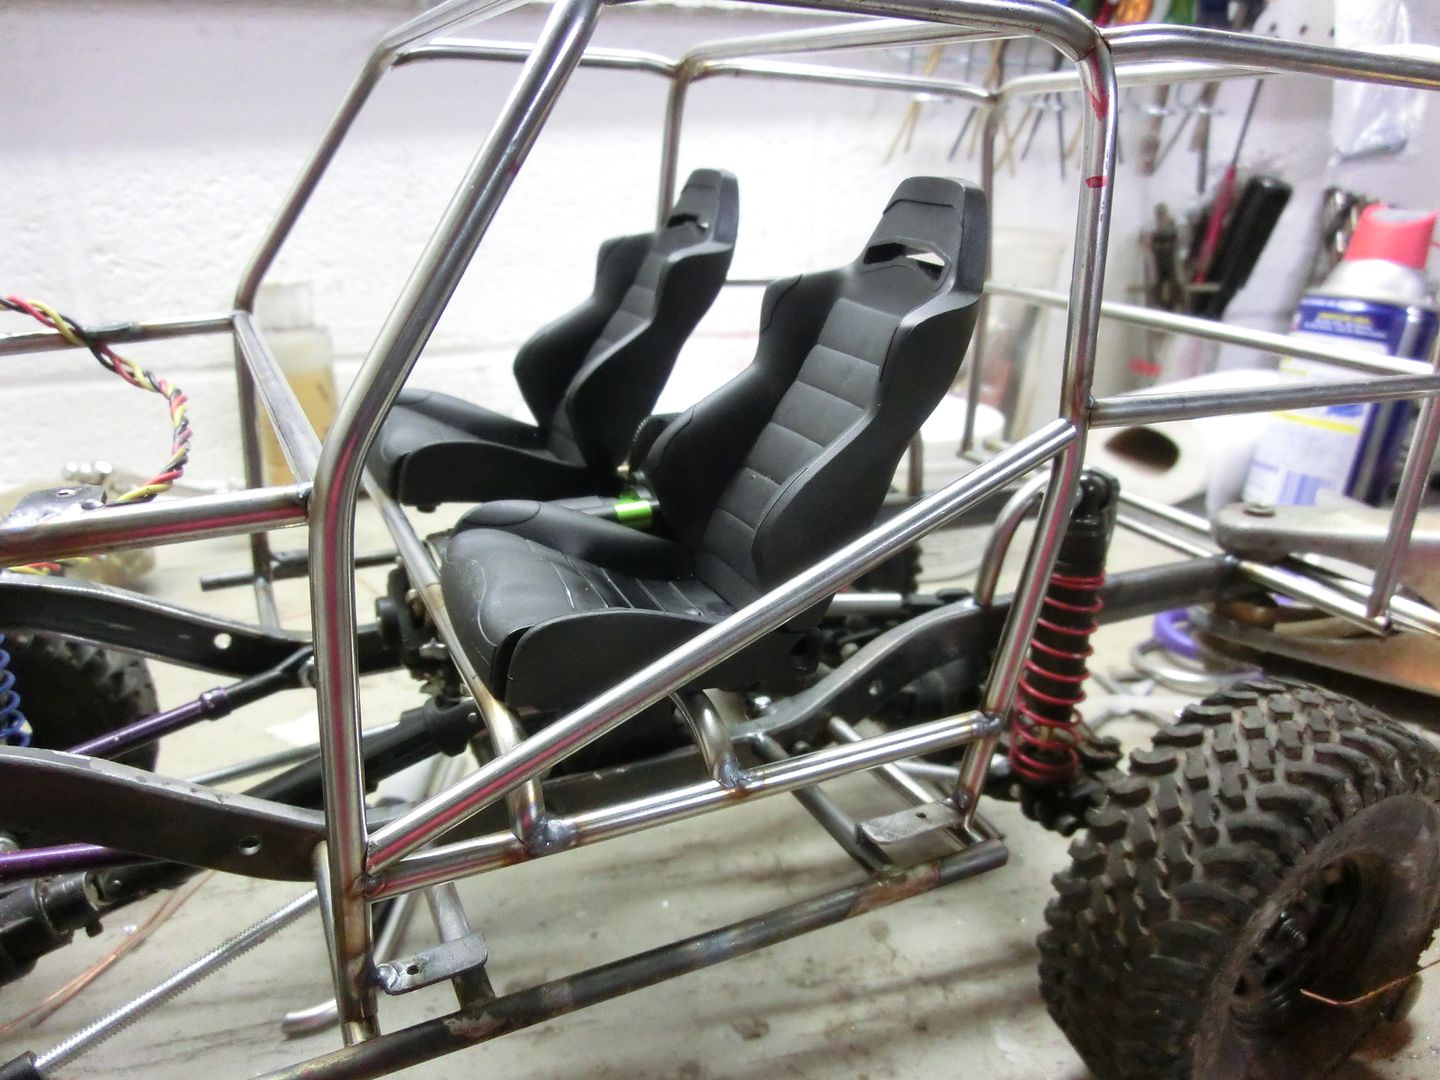 I needed to keep the space in between to clear the tranny so i added some bars to tie everything together 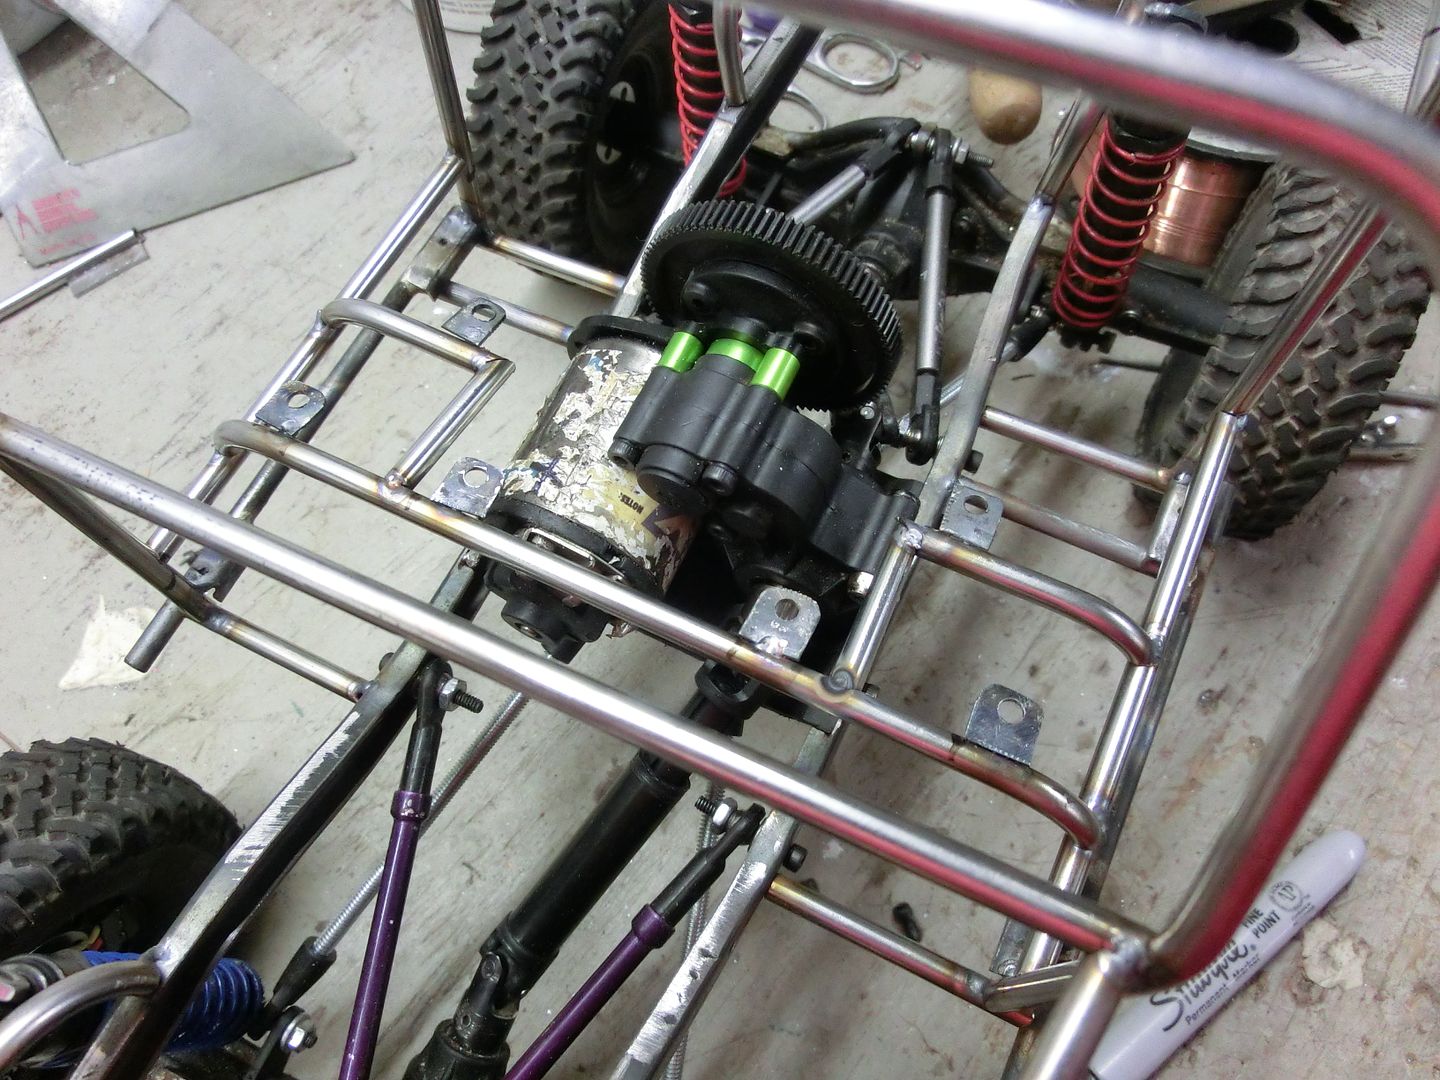 Next i decided i needed a spare tire mount so i added one between the rear hoops while i had the room to get into it 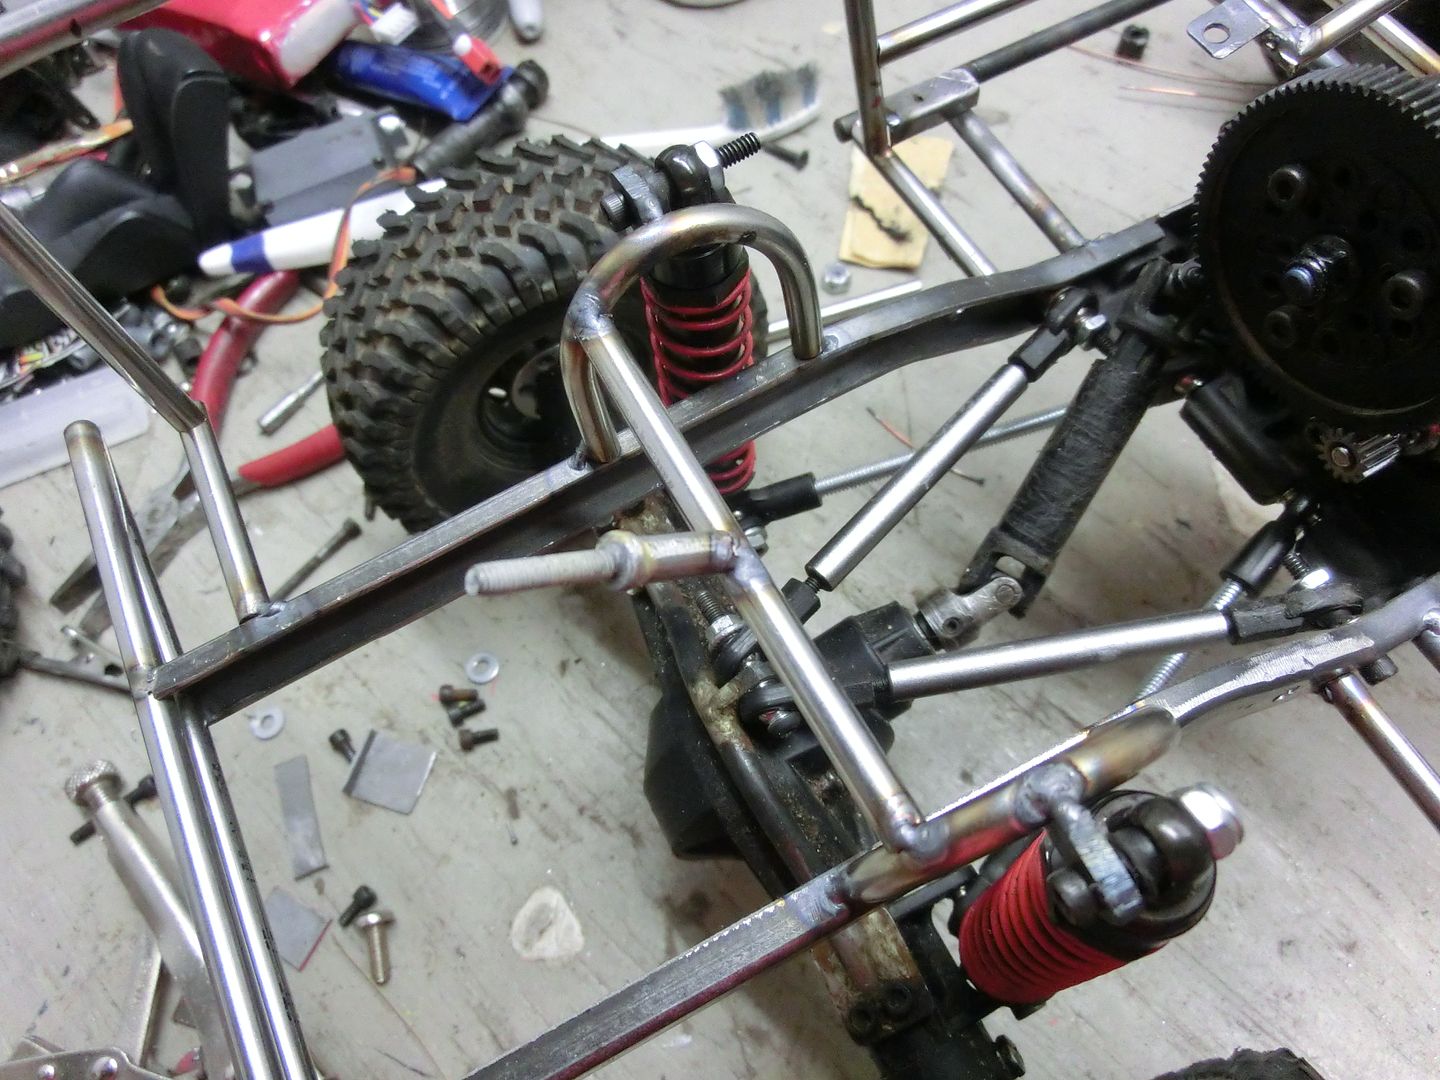 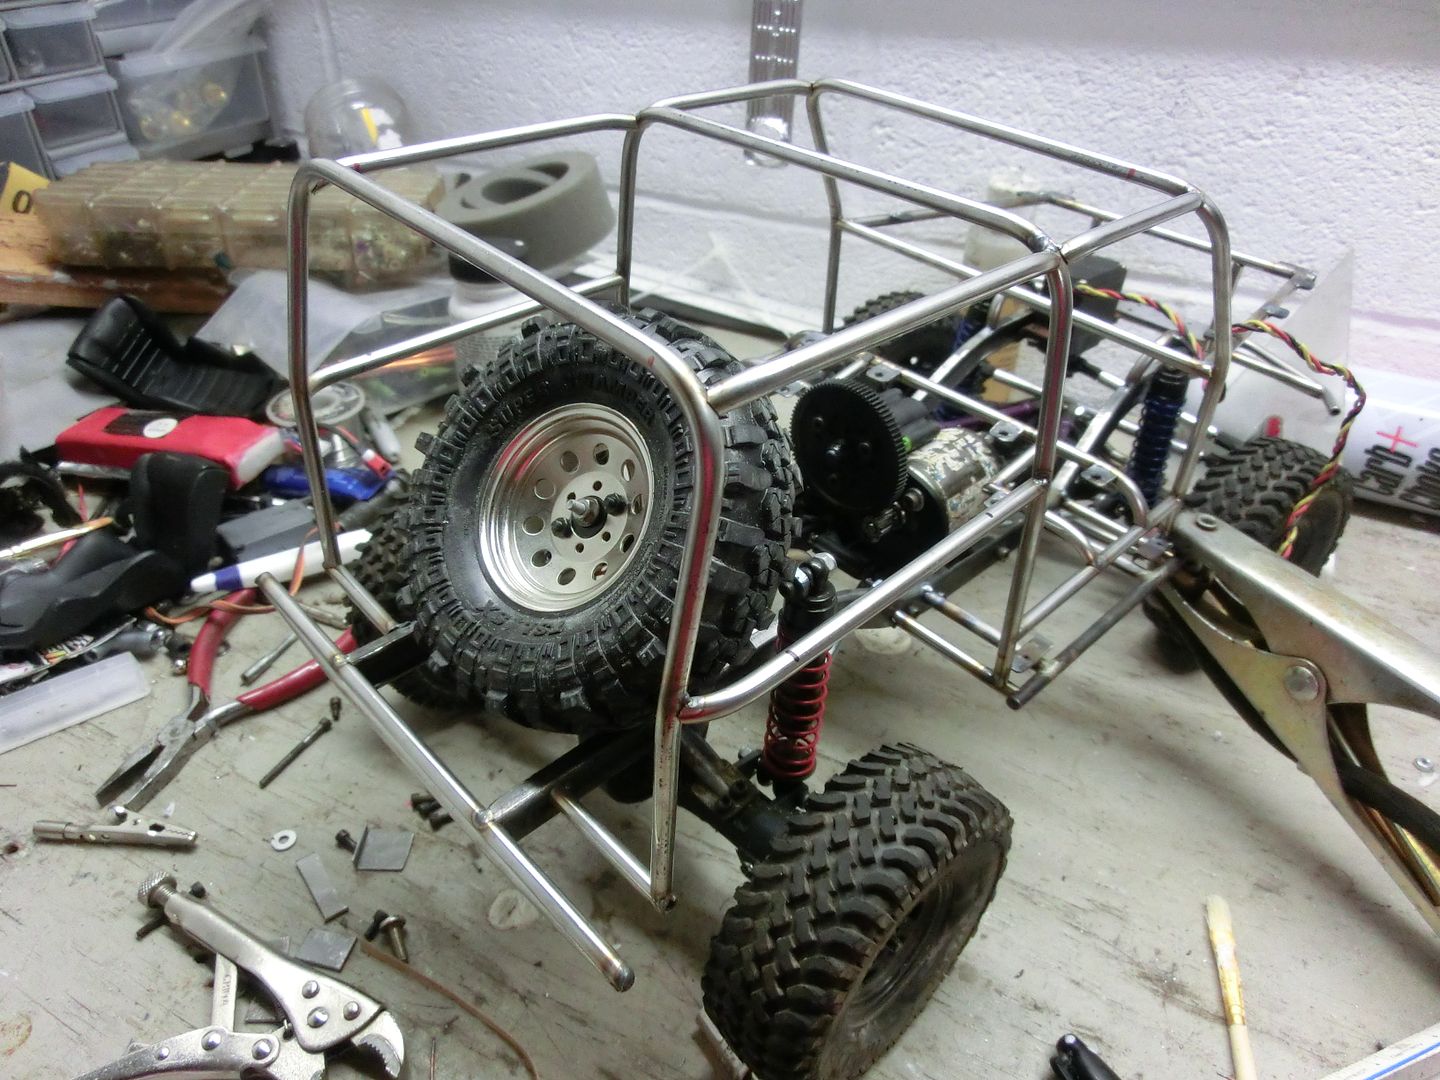 Then i made more tabs an added them to the rear of the chassis 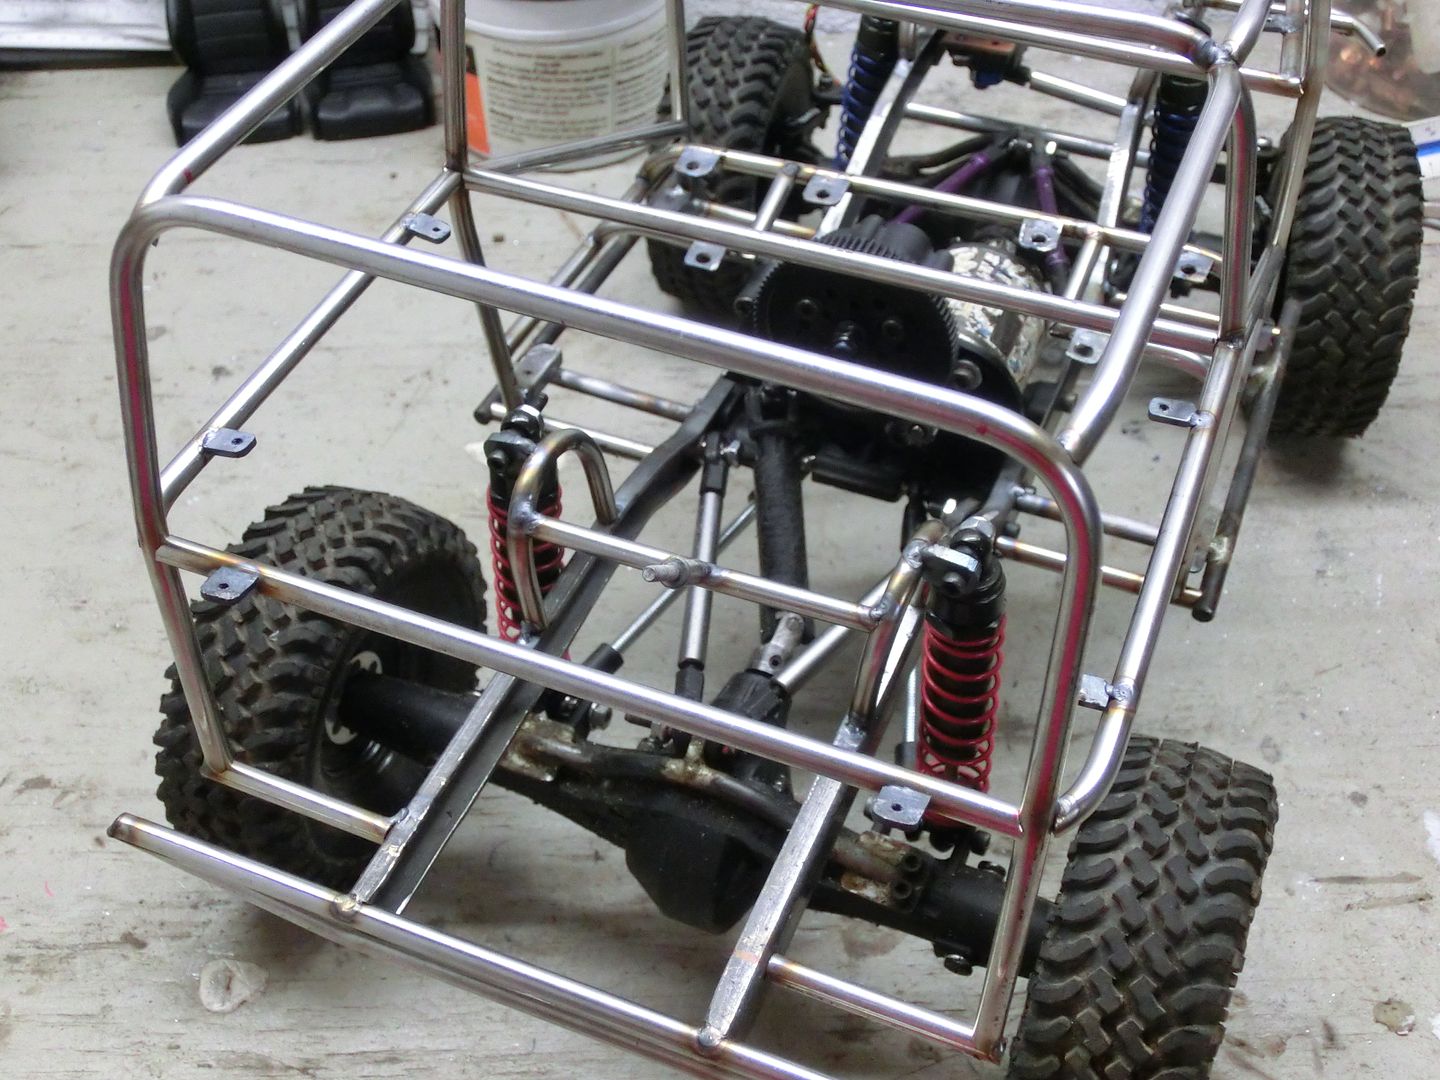 then i test fit the body 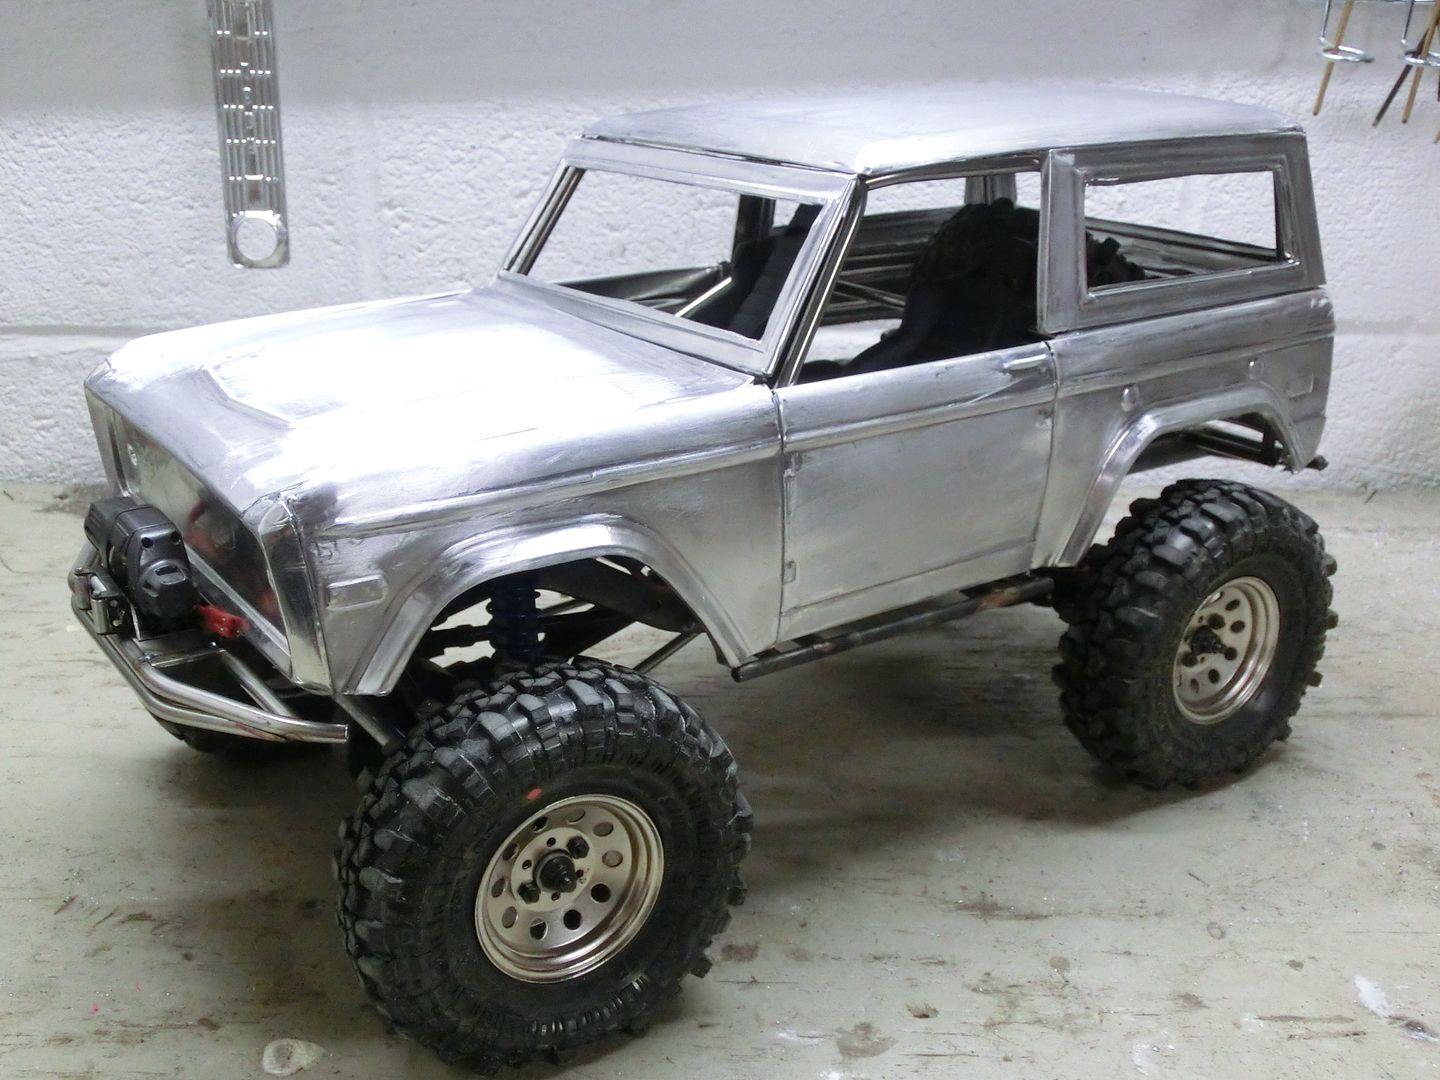 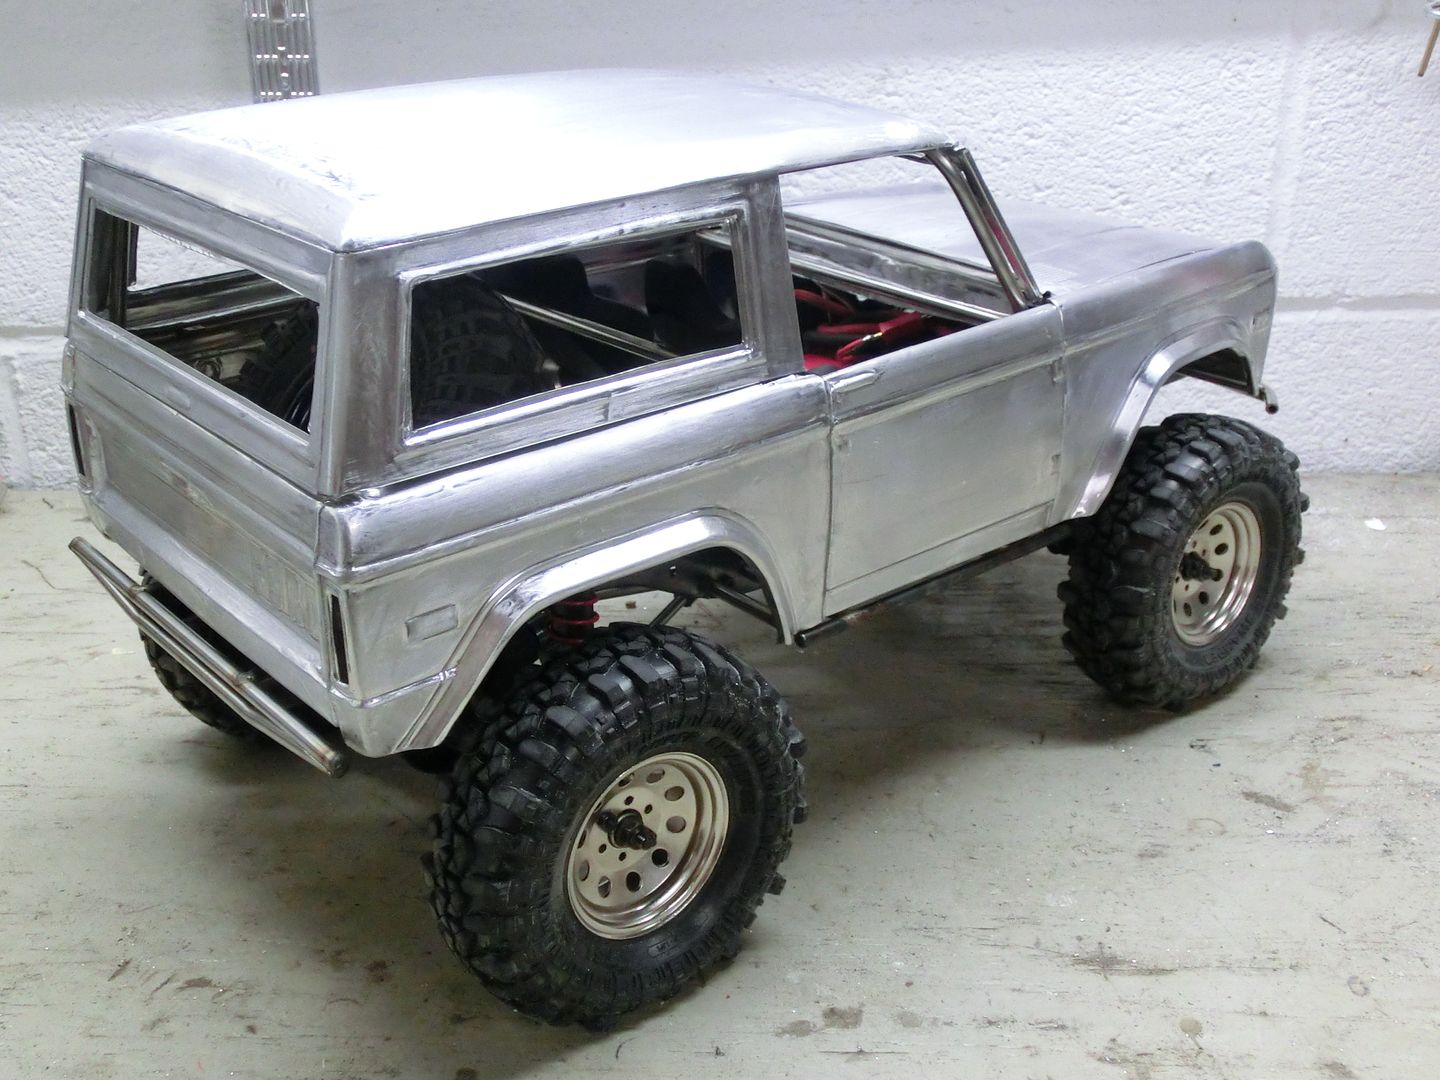 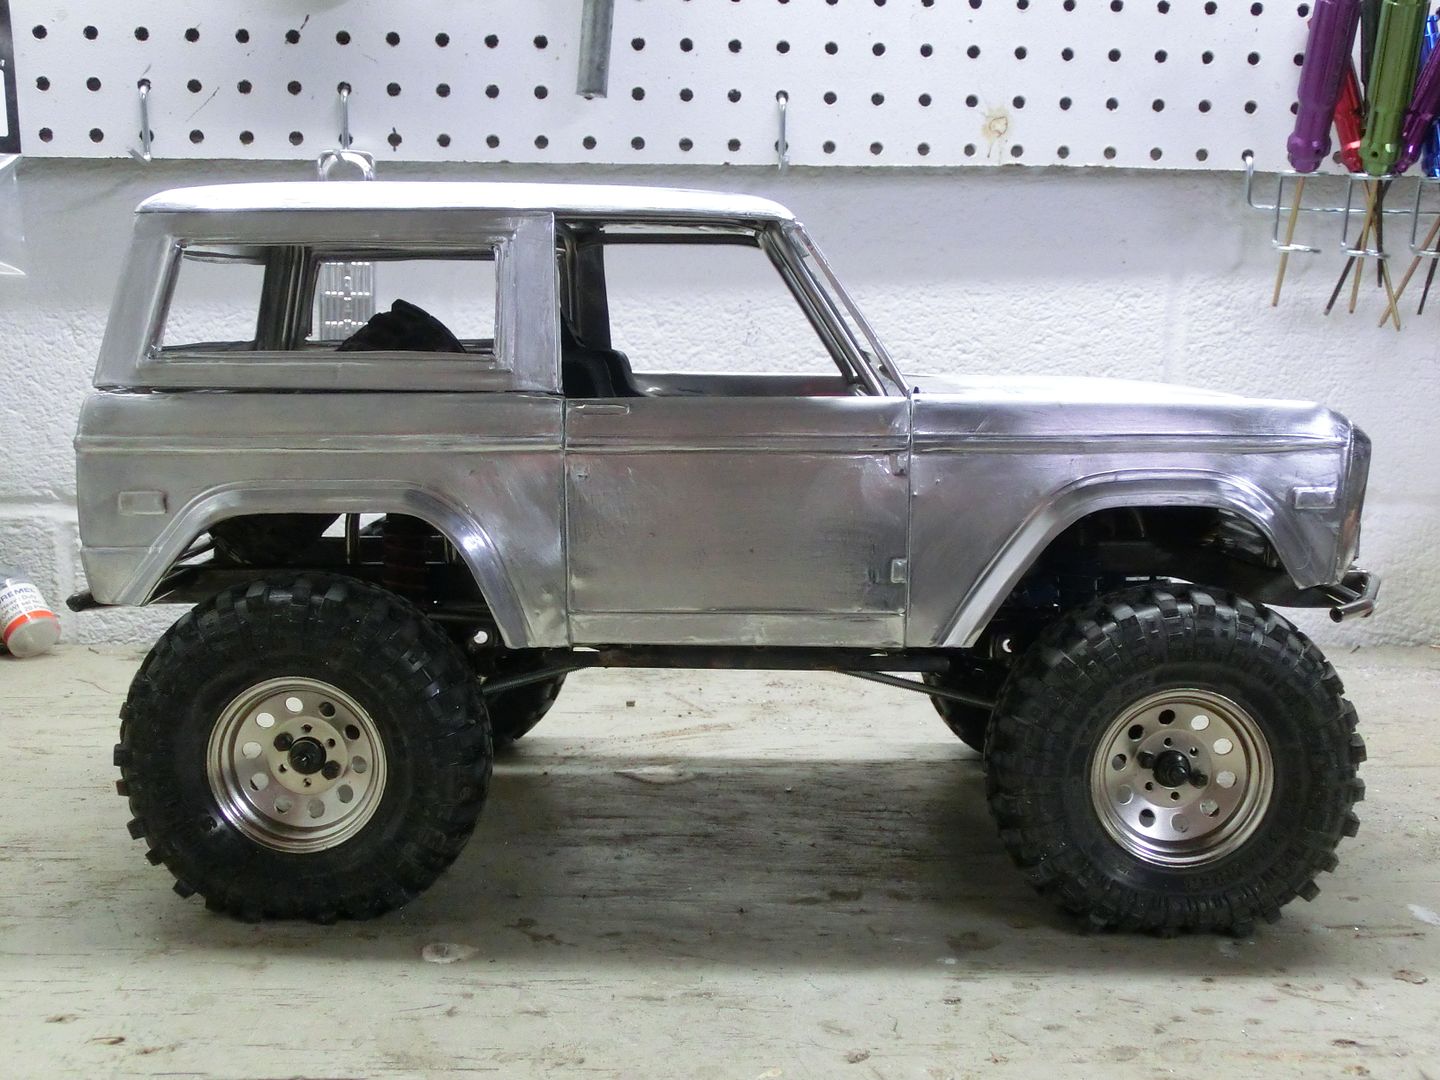 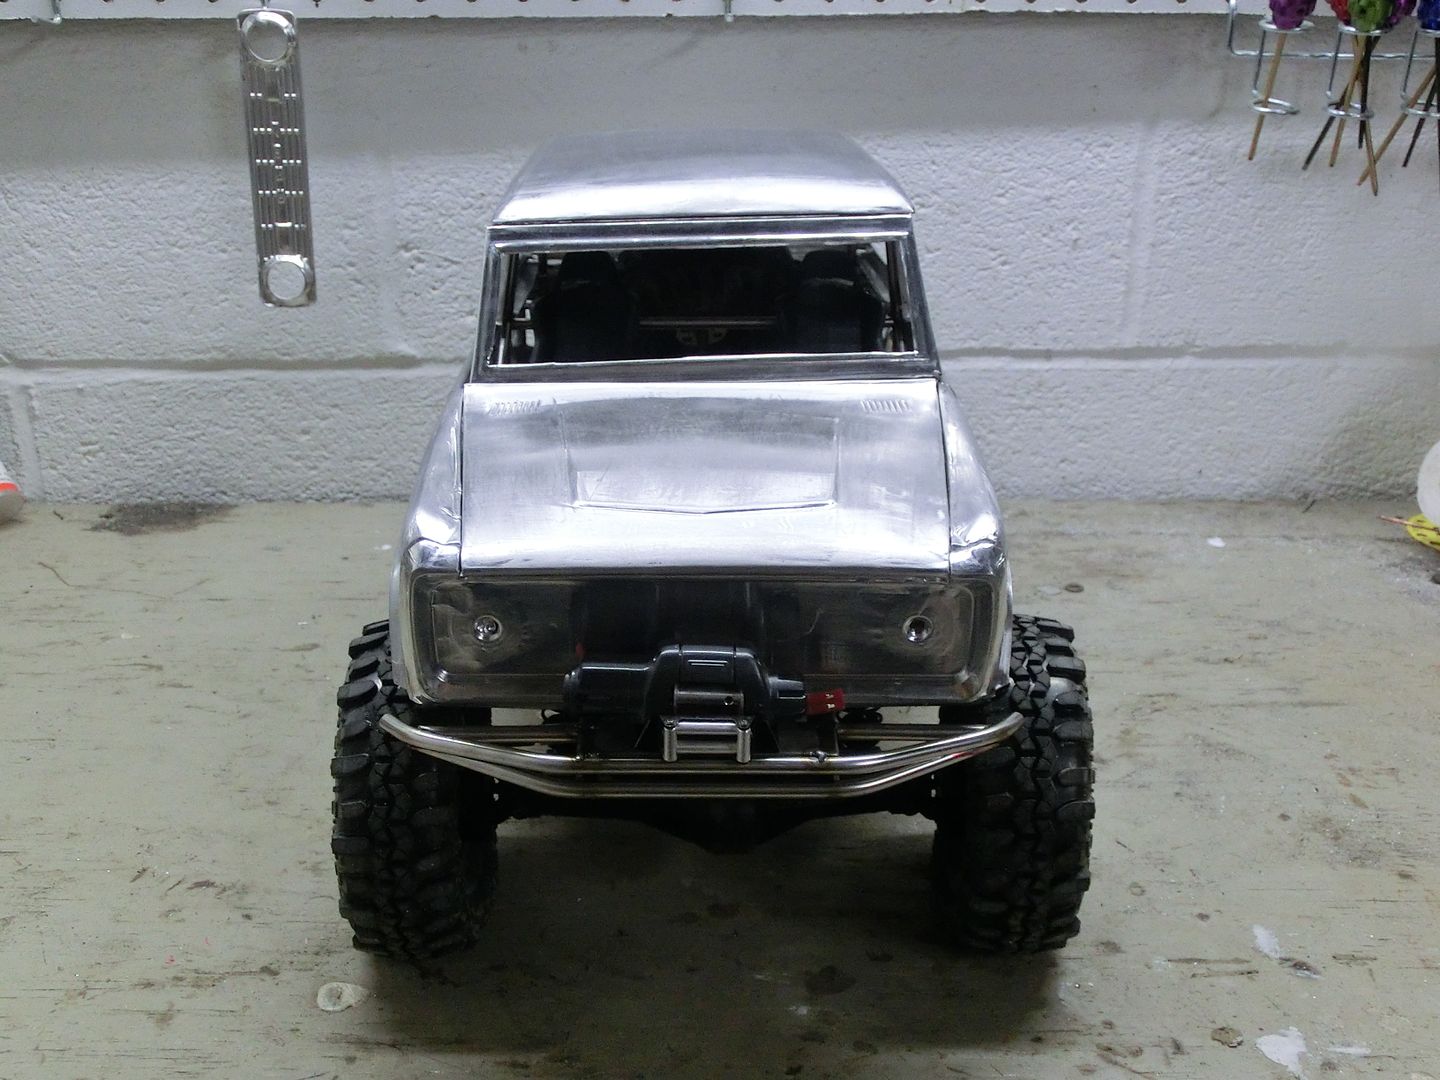 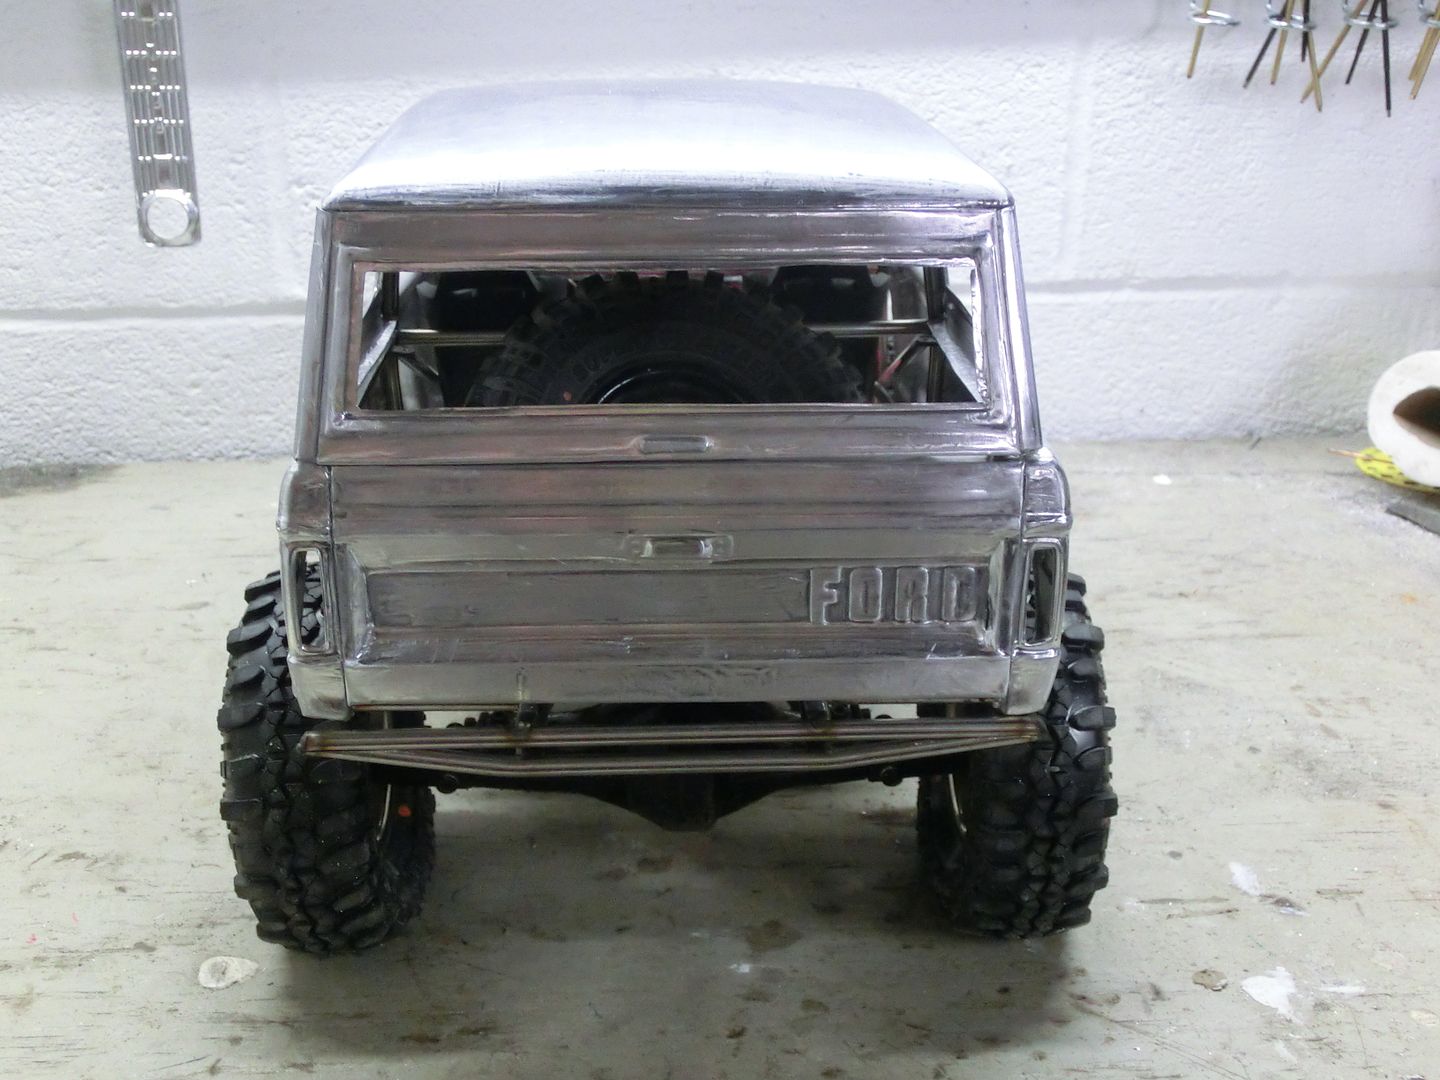 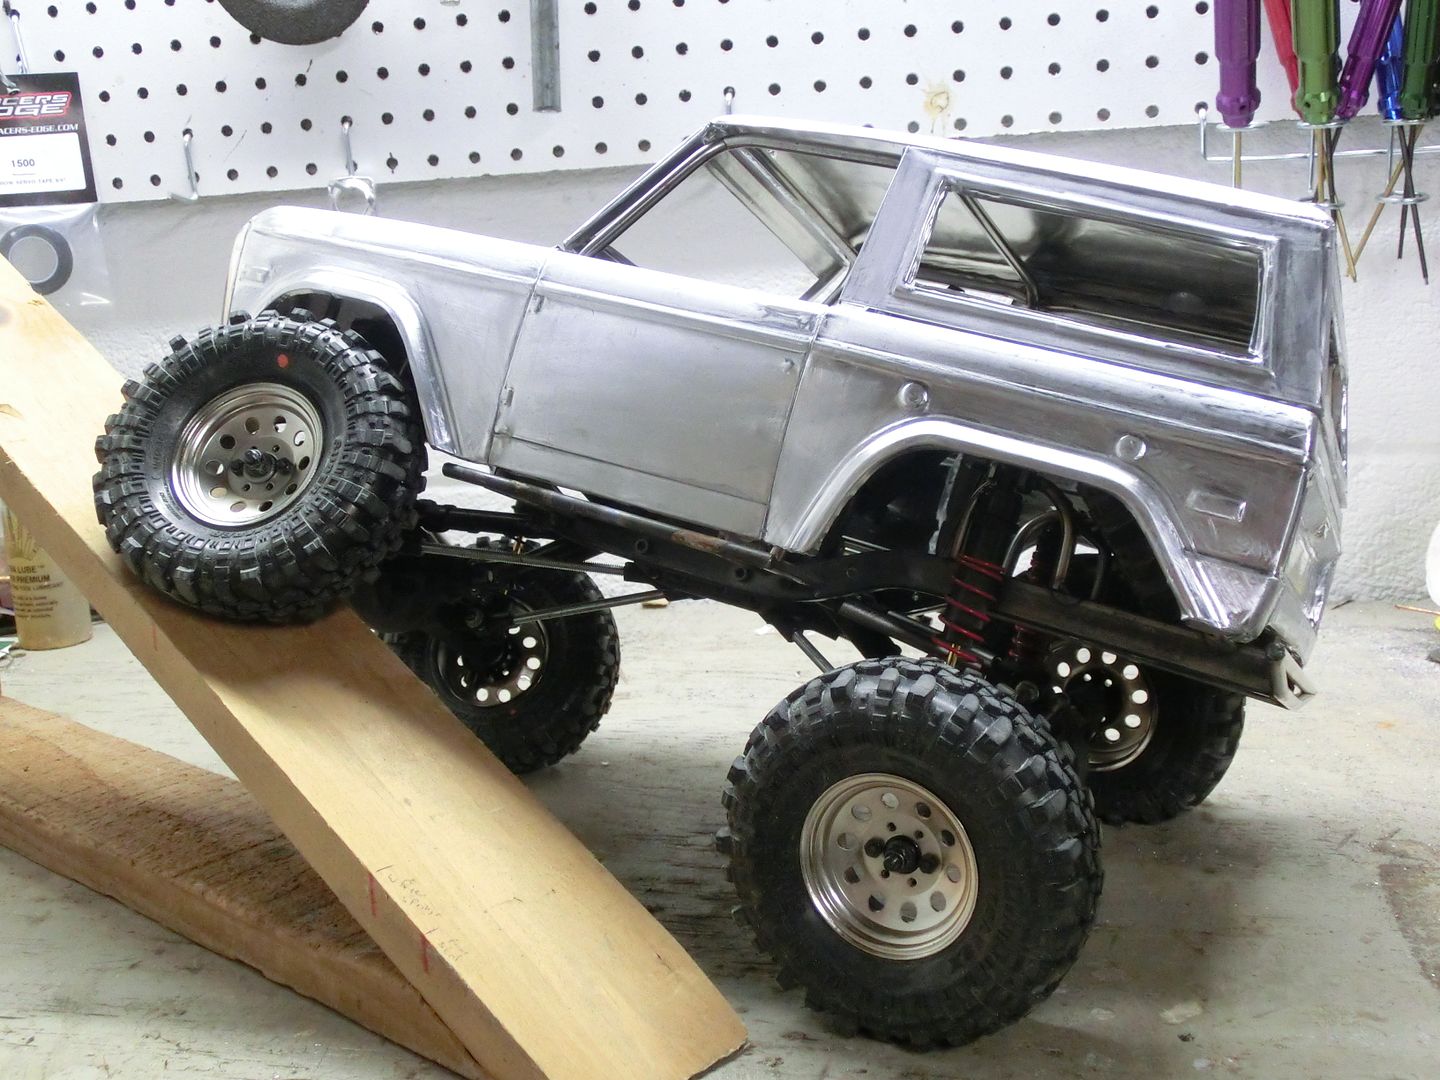 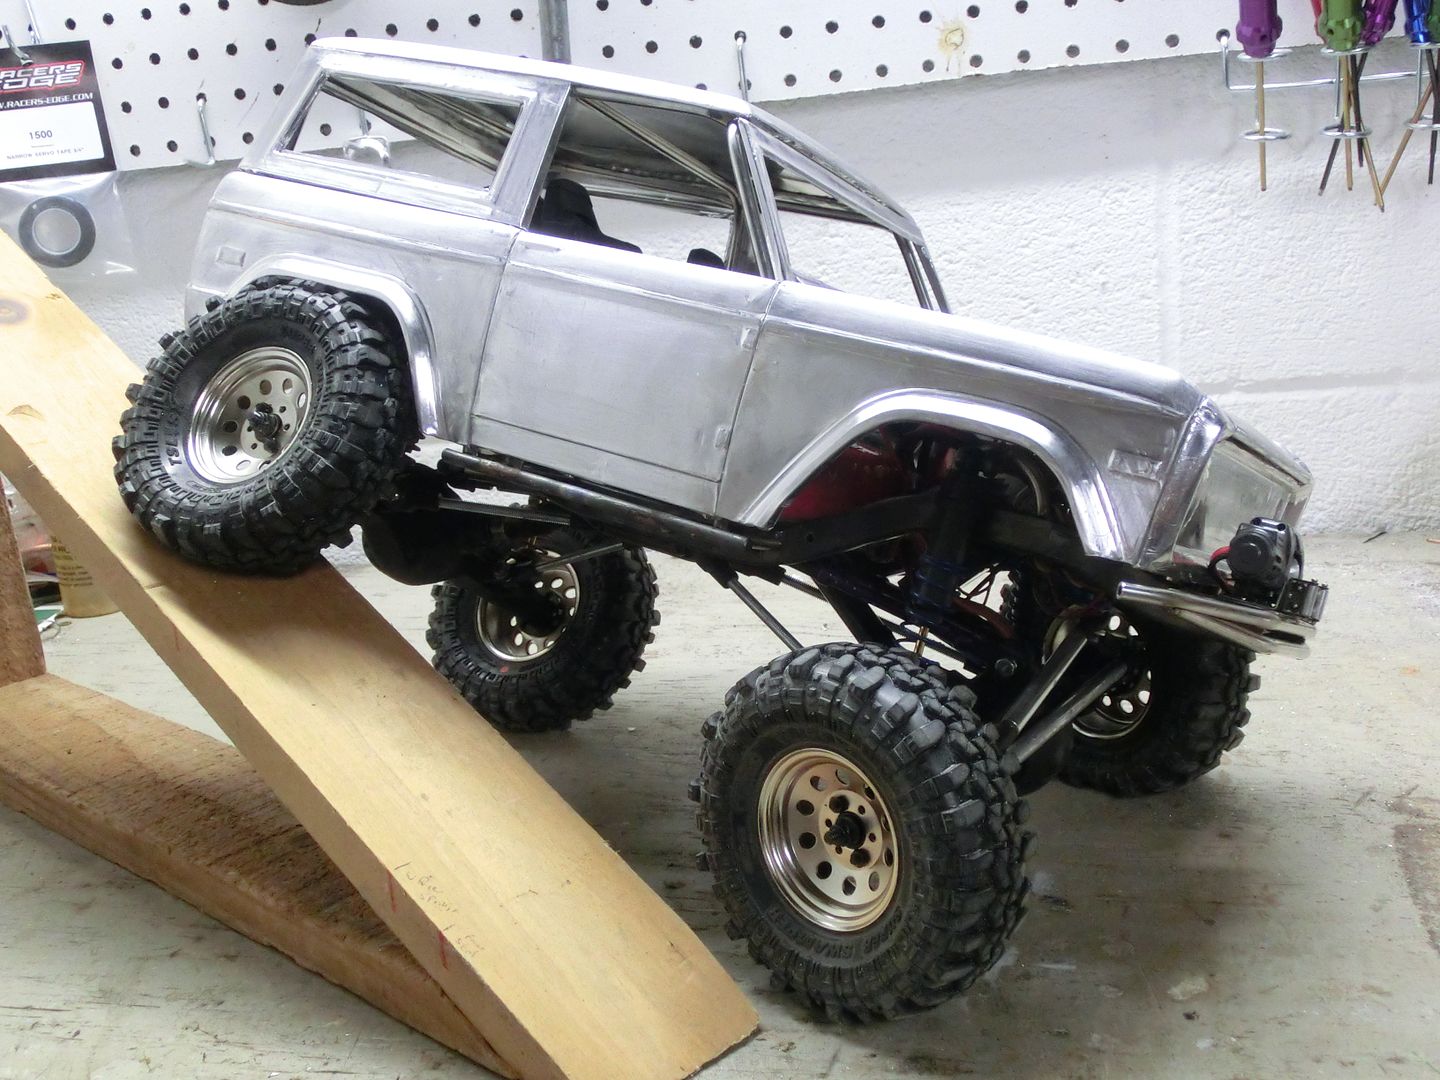 It was looking real good at this point with most of the weight on the suspension. the 1000+ on the RTI was a pretty good indication of how it ended up performing The last item i added before brazing was the D ring mounts I cut them out of heavy stock and notched them to fit the bumpers 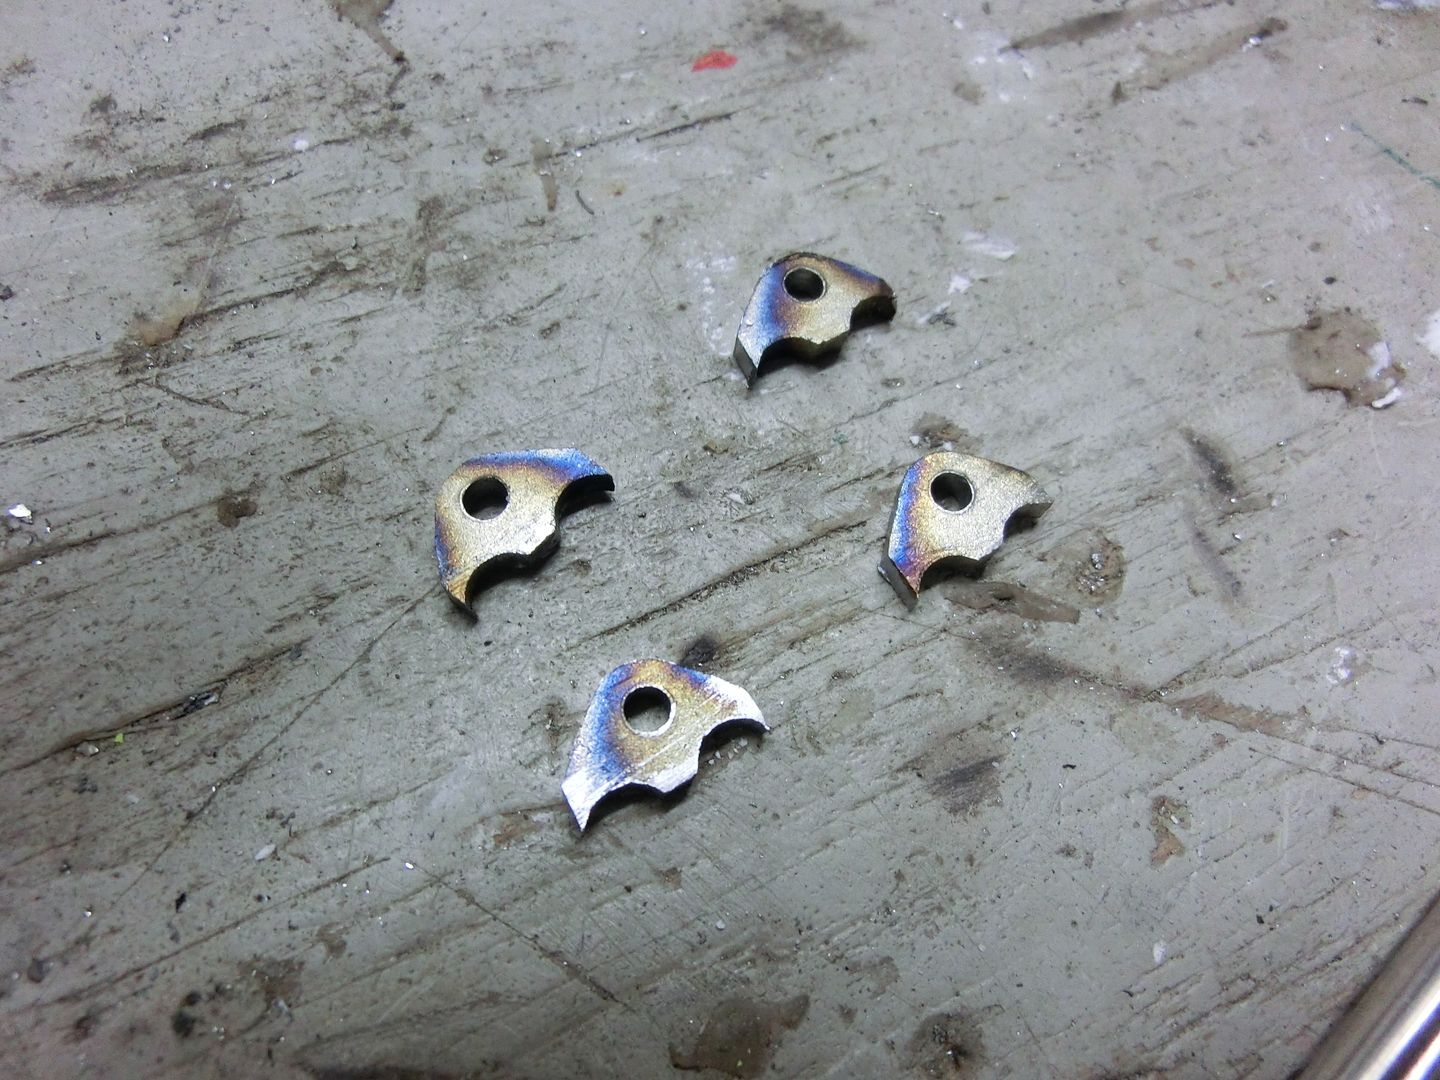 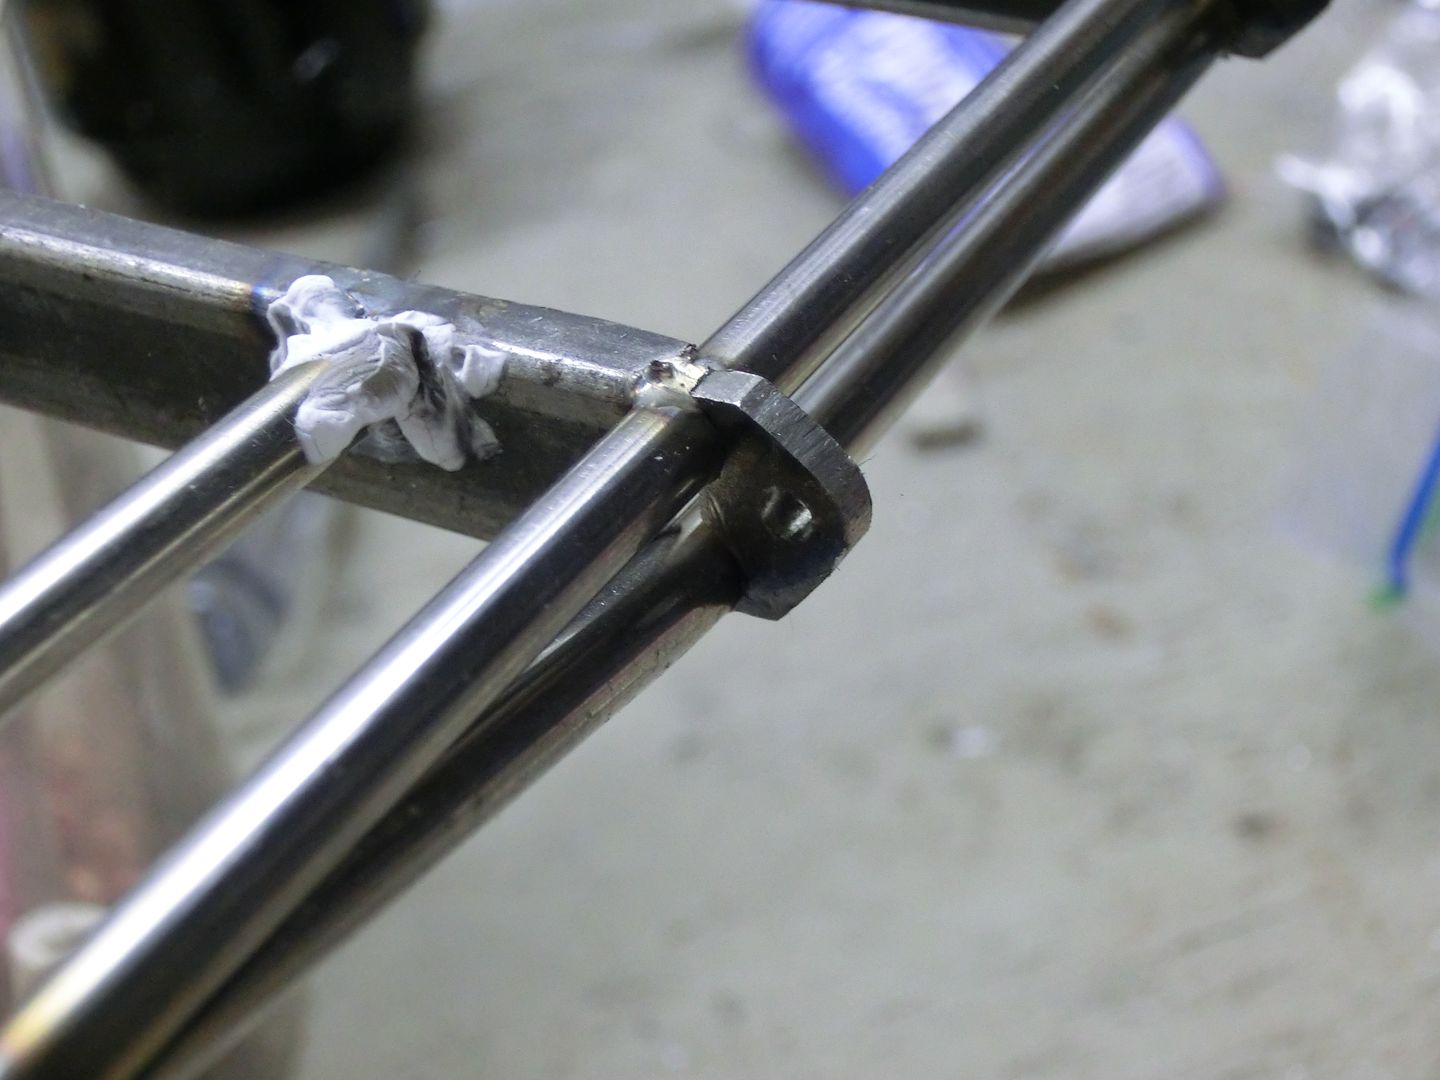 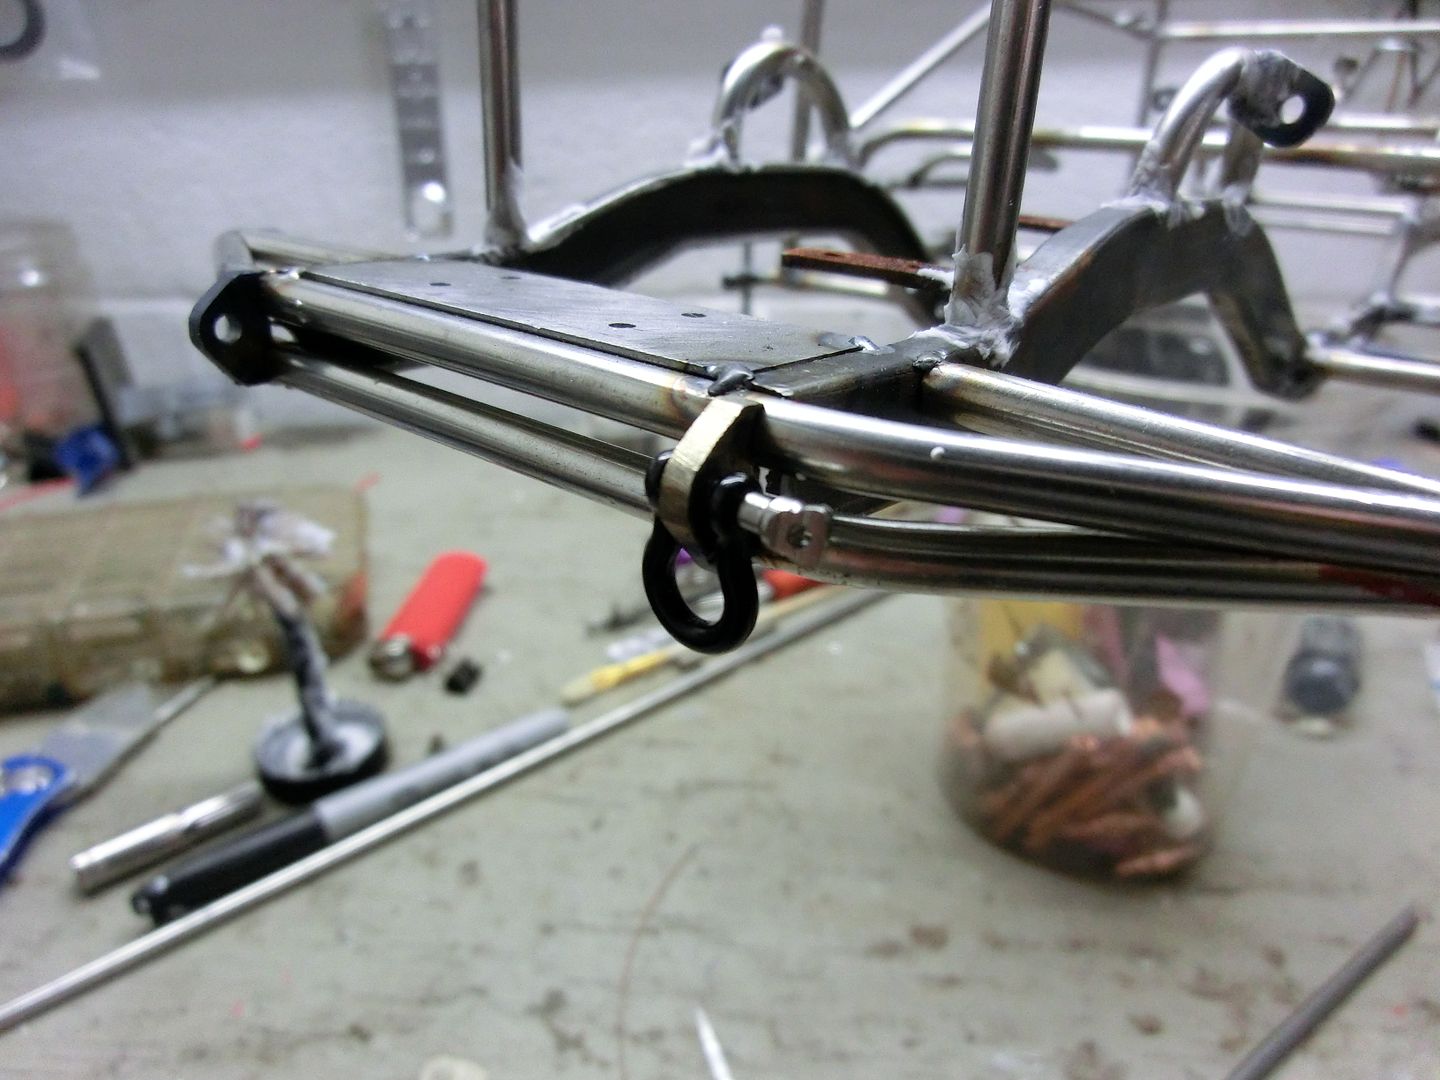 All brazed up 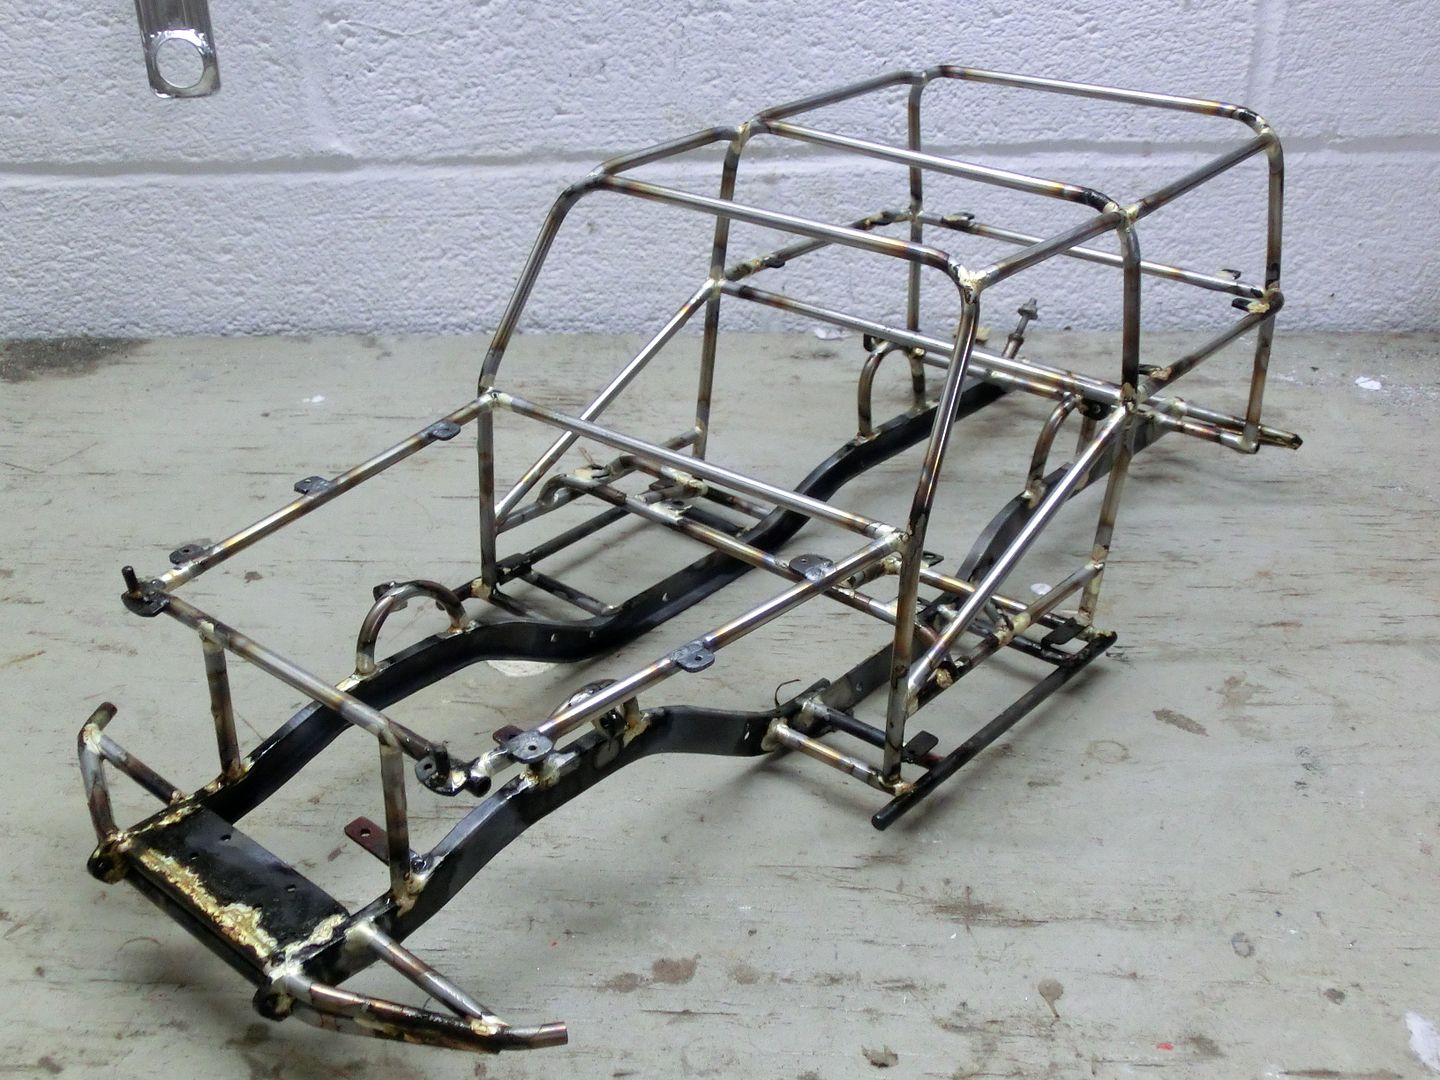 Now here is where i screwed up. I was rushing to get it done for the ECSC and after i had the whole thing blasted and painted up real nice i realized that i forgot to make the mounts for the hood Easily fixed, i cleaned the paint off the dash tube and added some bend and tapped tabs 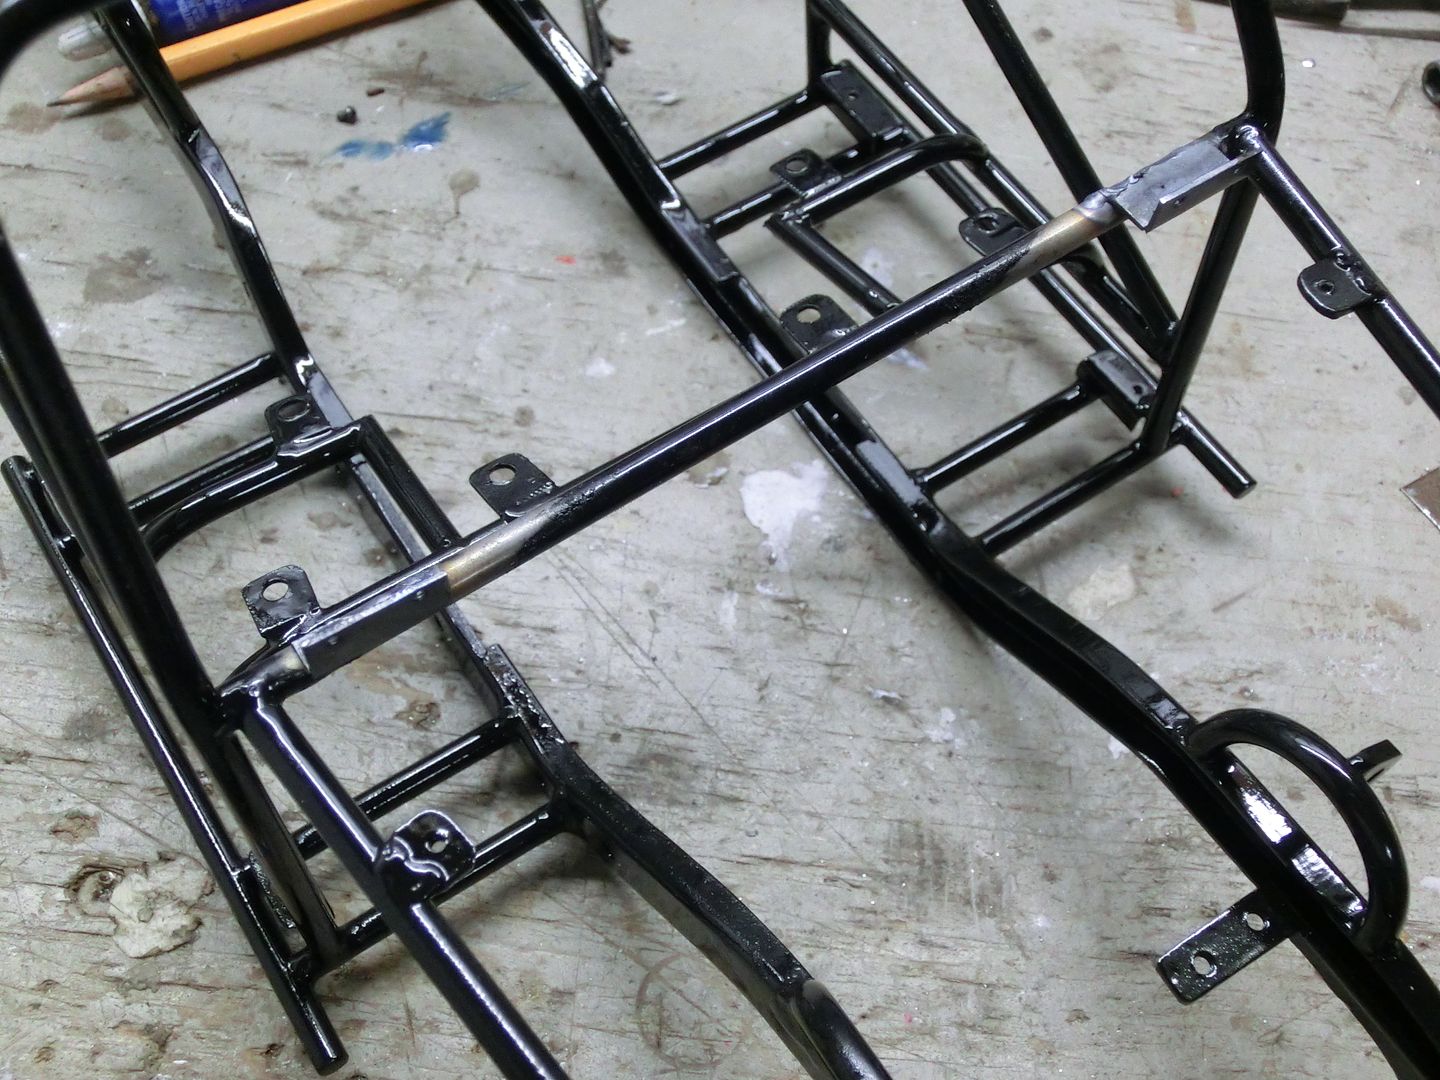 Then i used some model airplane hinges glued to the hood with the windshield frame sandwiched between. 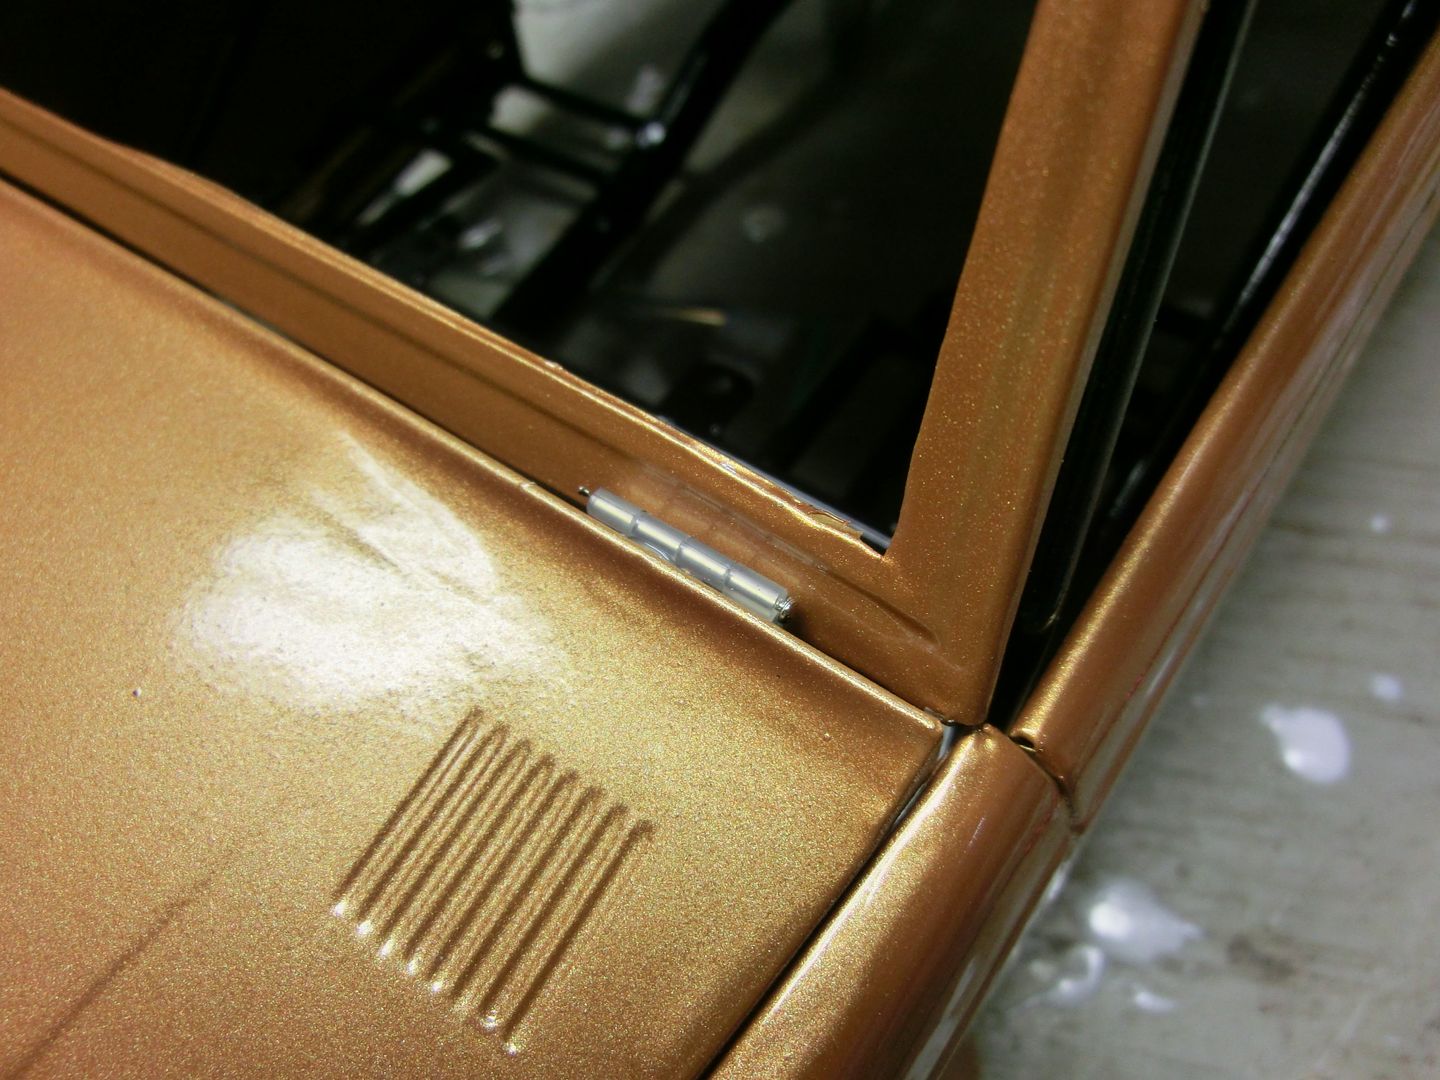 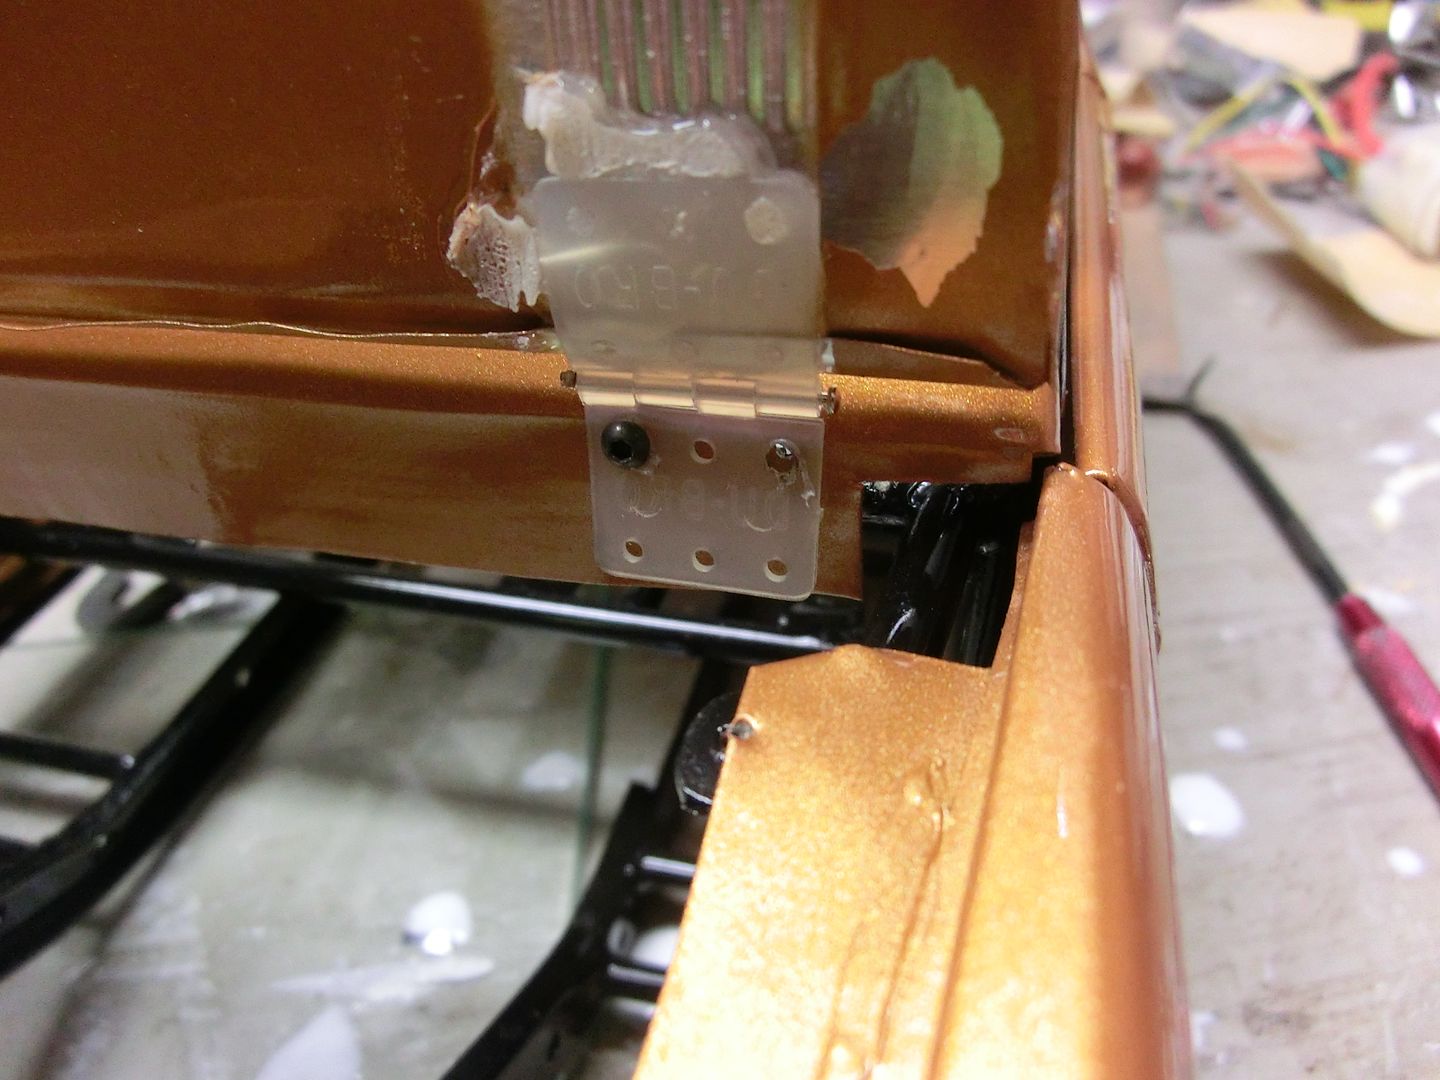 This ends up being the front mount for the whole roof. i opted to glue the windshield to the roof as i could not figure out a practical way to mount the front of the roof to the windshield after it was in place. i figured if i ever wanted to run it with ought the roof i would just make another windshield frame Now for the grill i realized that the Tamiya Bruiser/mountaineer/high-lift headlight lens fits perfectly in the grill. 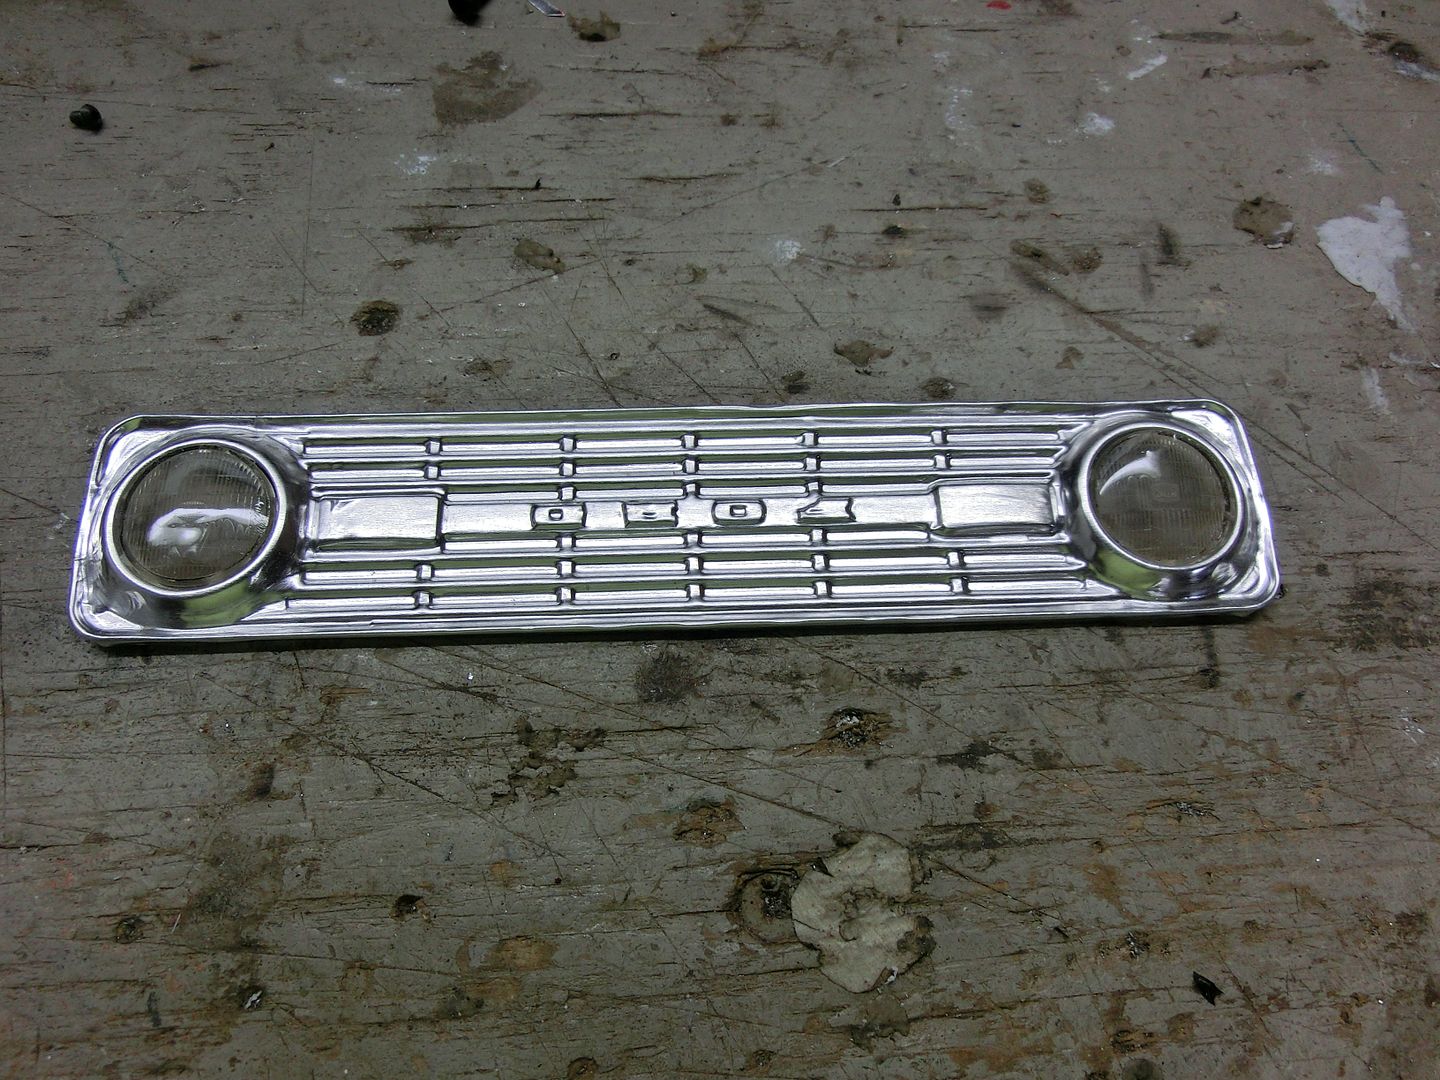 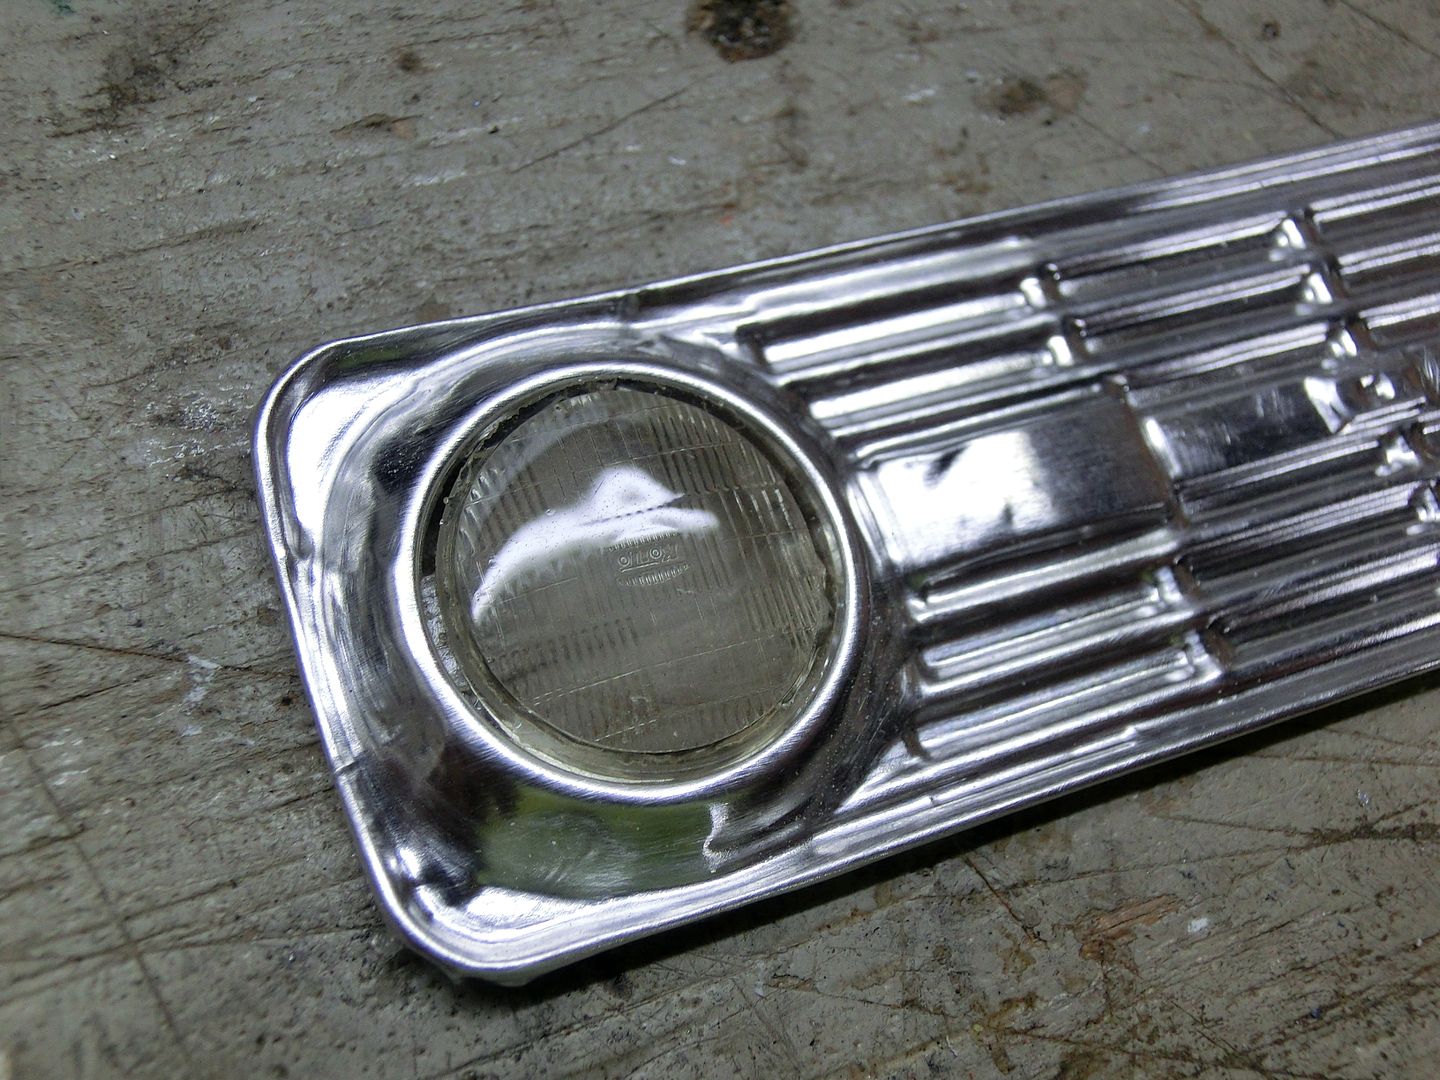 Then i glued it in place 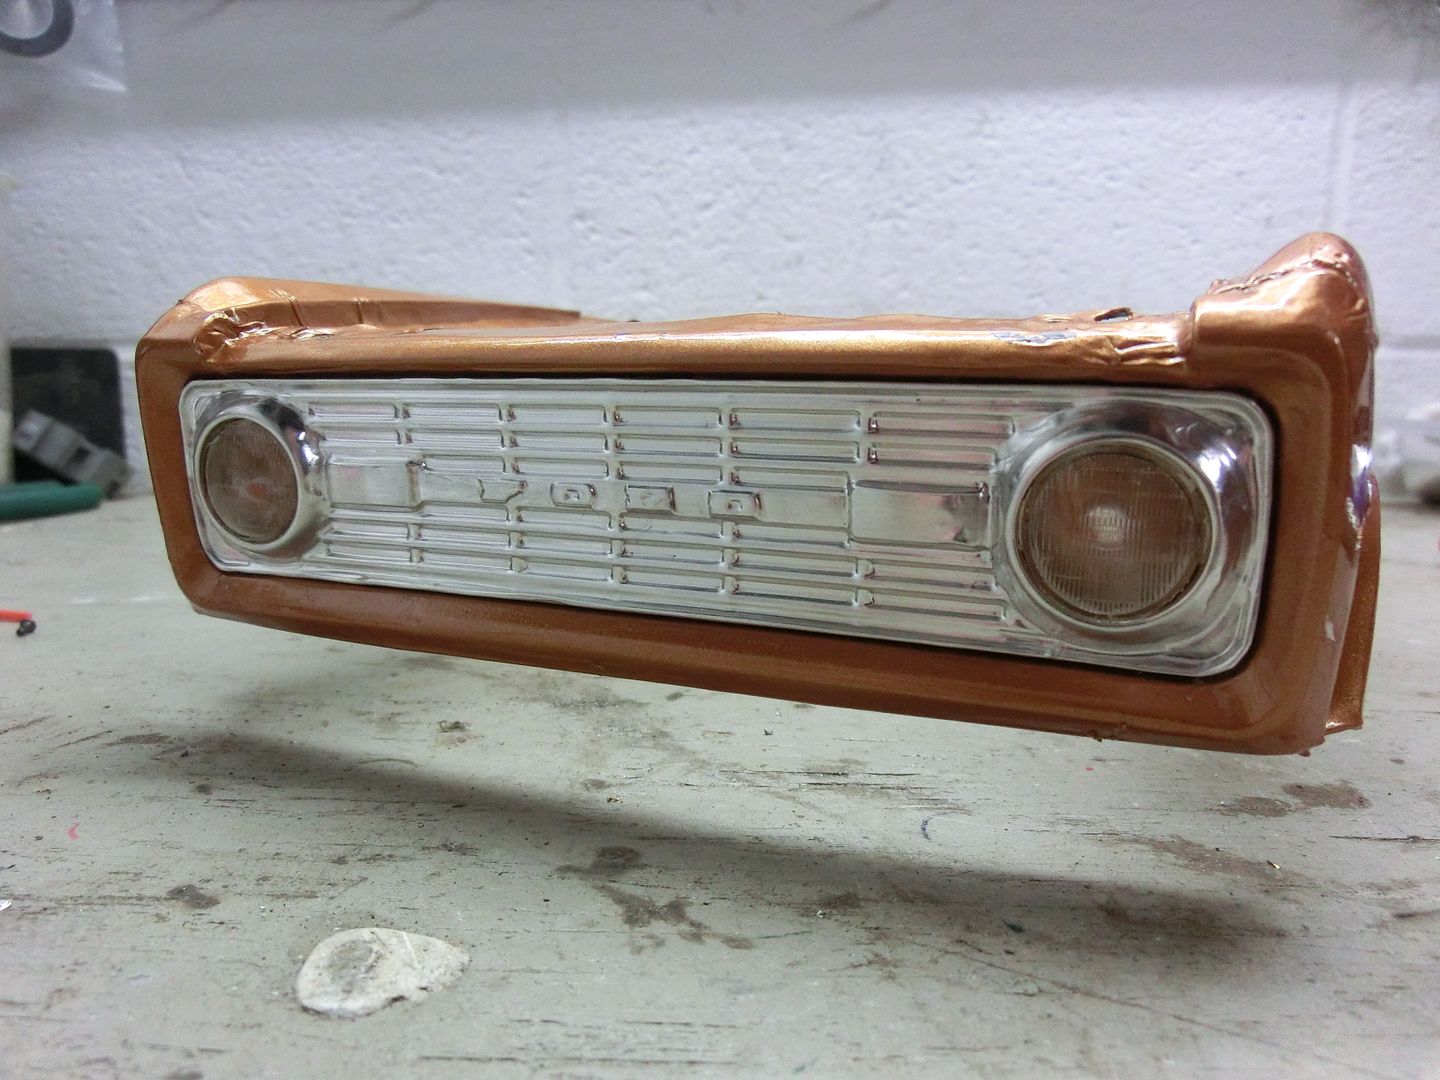 | ||||
| |  |
| | #57 |
| RCC Addict  Join Date: Aug 2005 Location: New Oxford PA
Posts: 1,290
|
Before the final assembly i aded some upgrades to the front axle in the form of aluminum C's and some CVD's 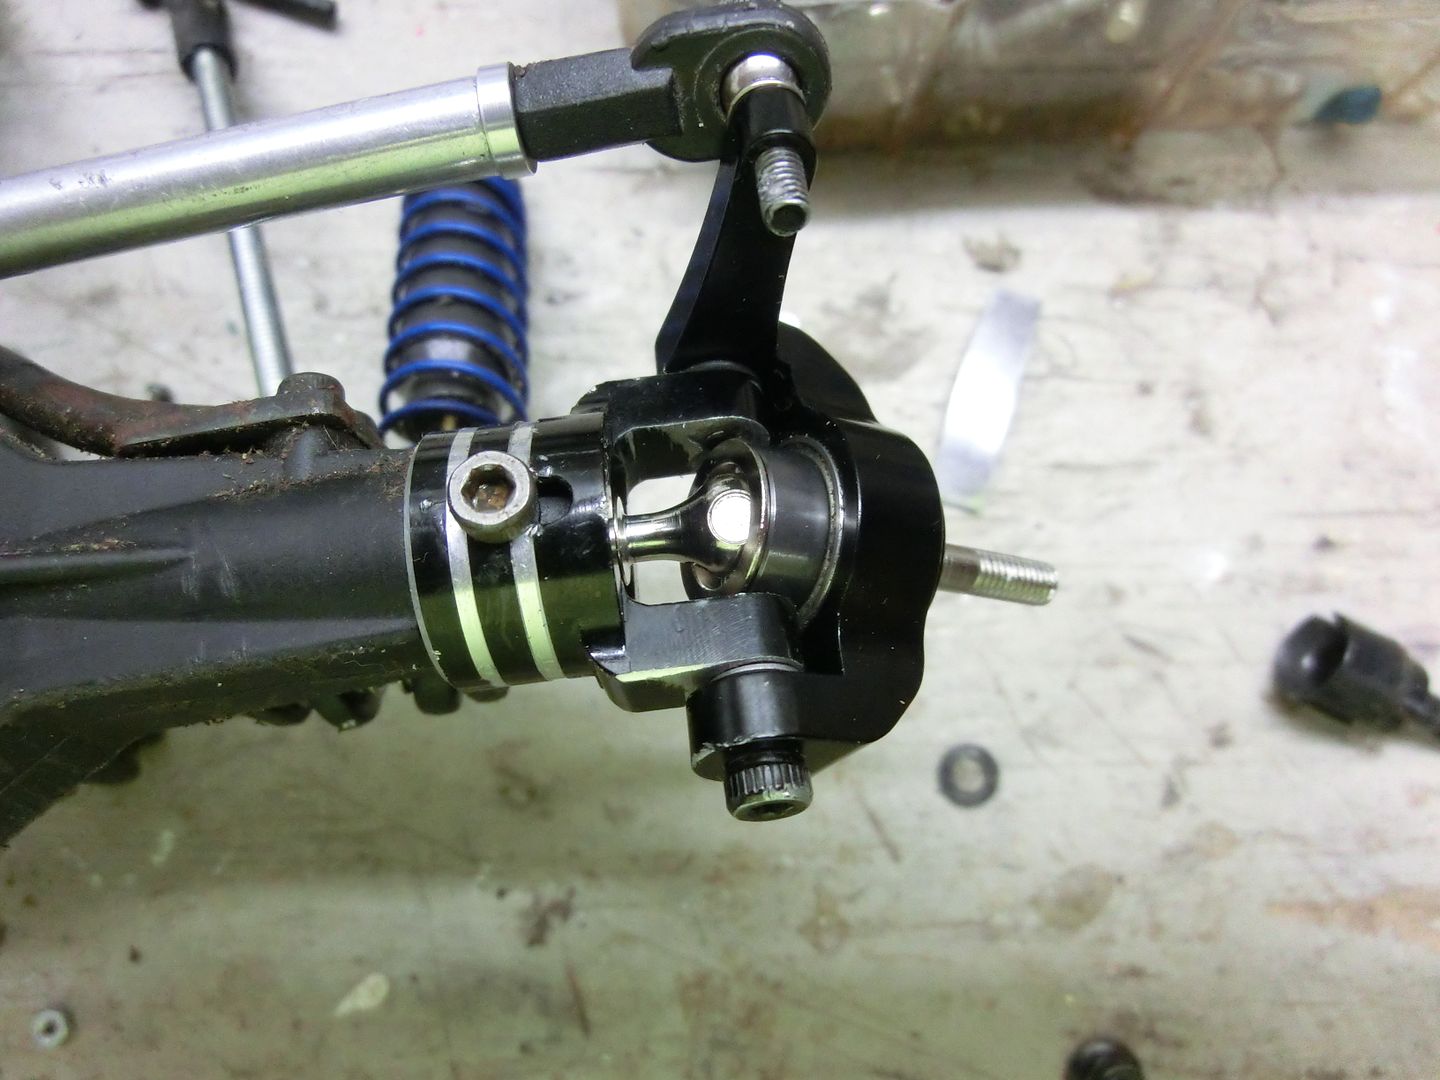 It was getting down to crunch time and i needed something to mount the electronics and battery so i rummaged through my scrap plastic and found some thick PVC sheet I cut a sheet for a firewall 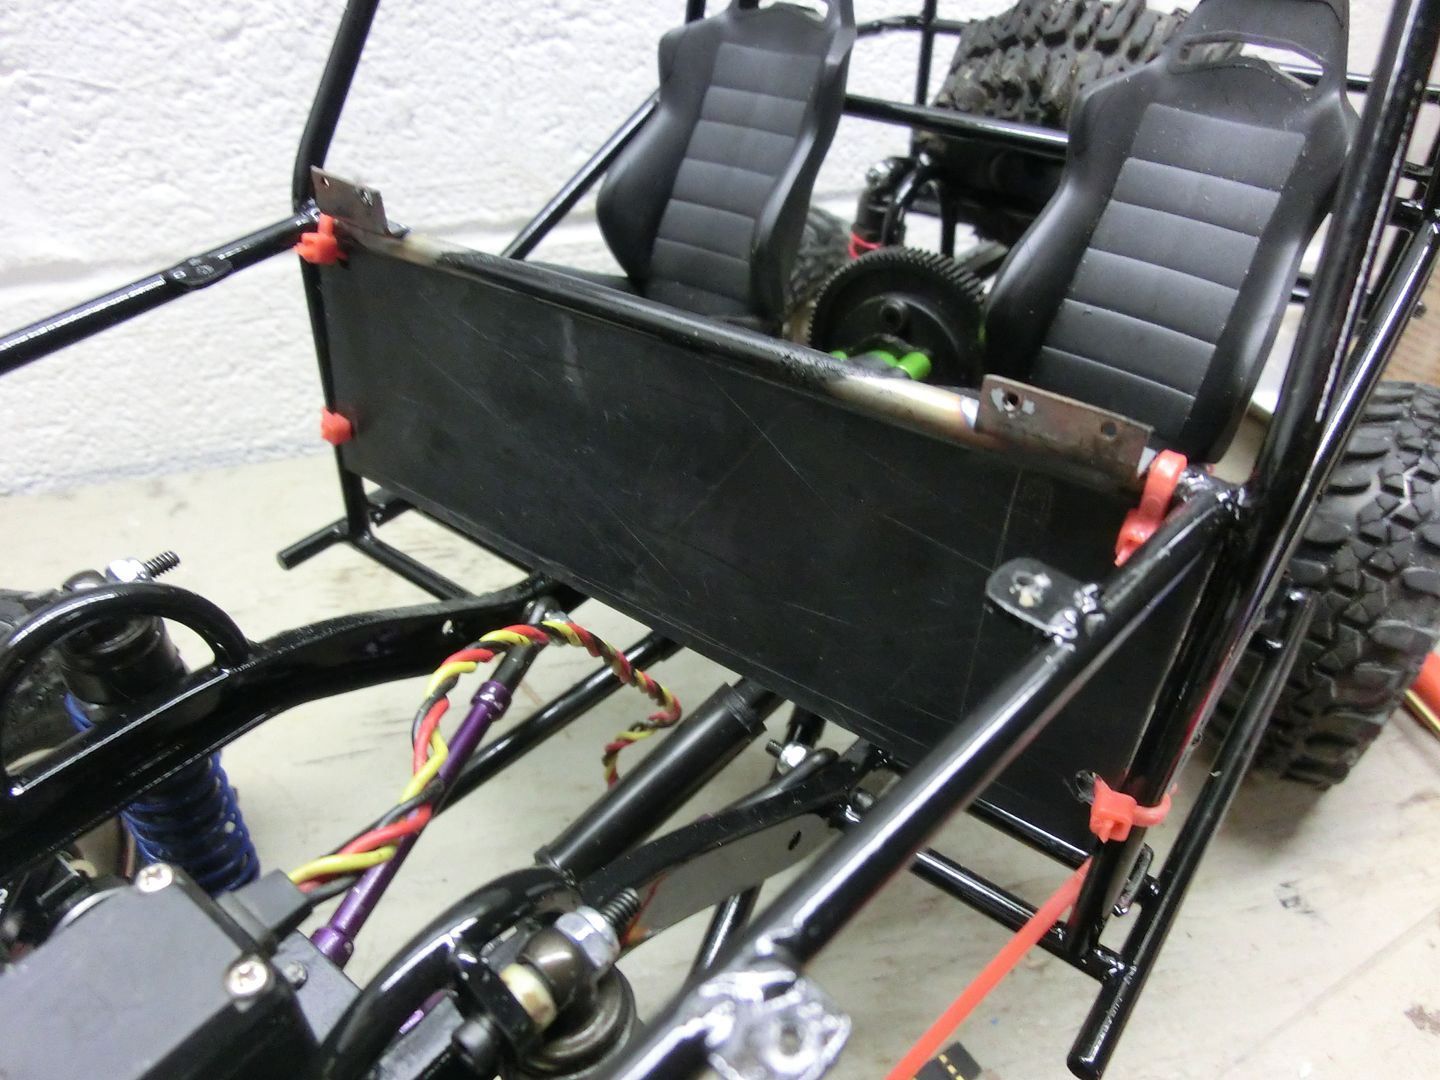 Then another for a battery mount that snapped in between the shock hoops 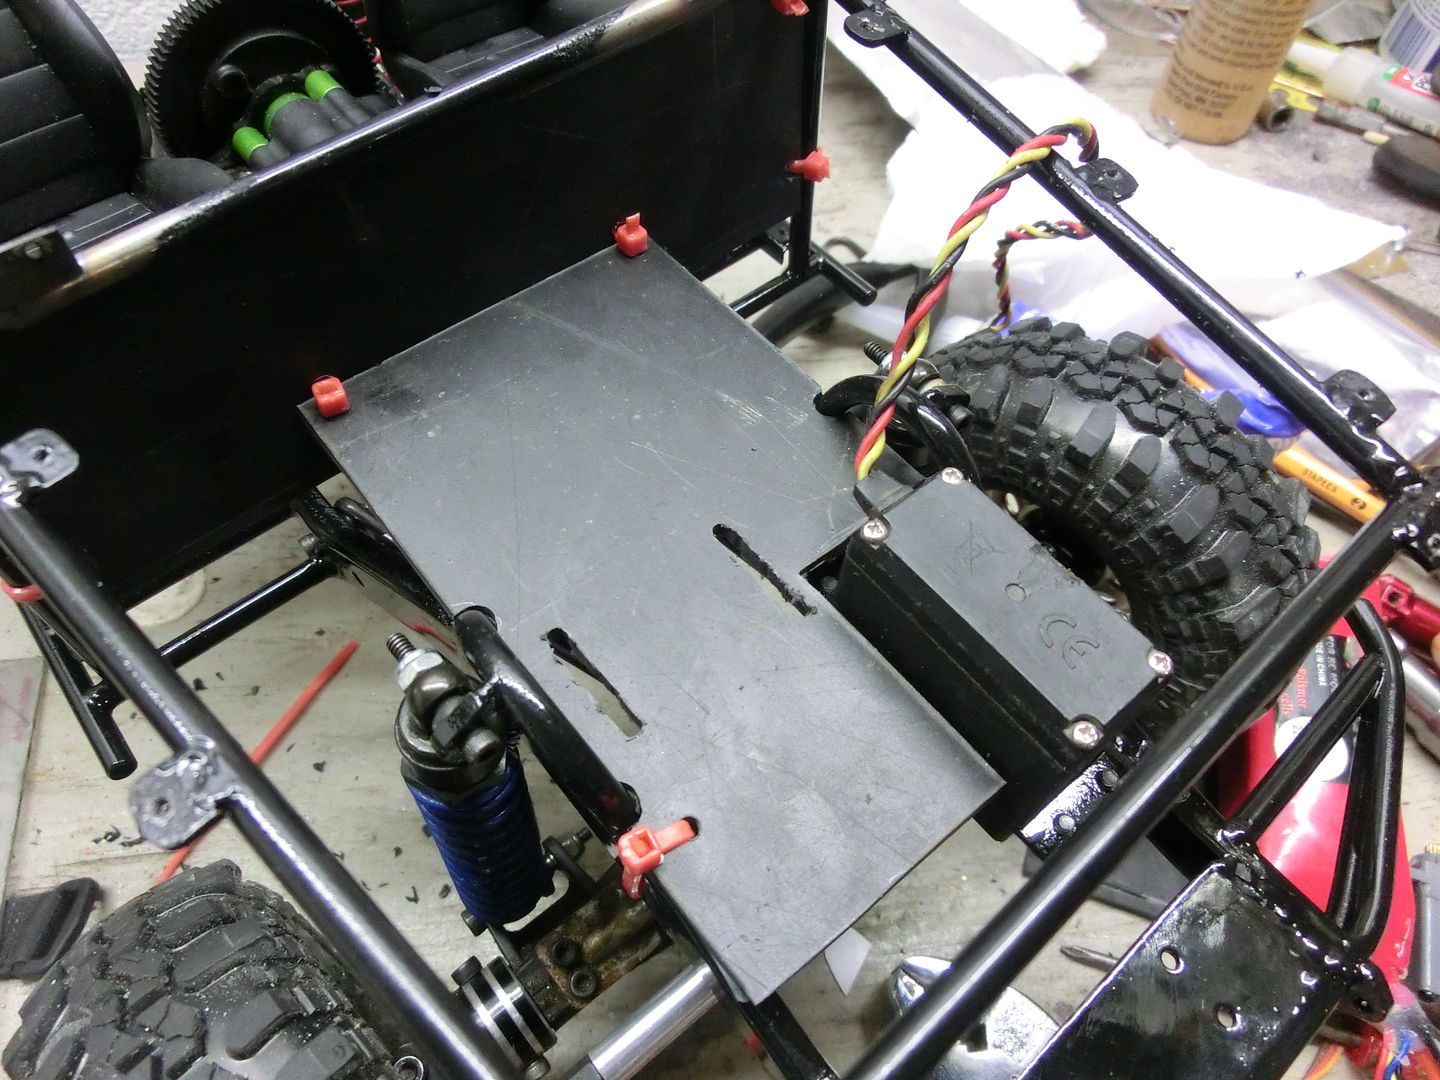 The slots make it easy to mount the battery 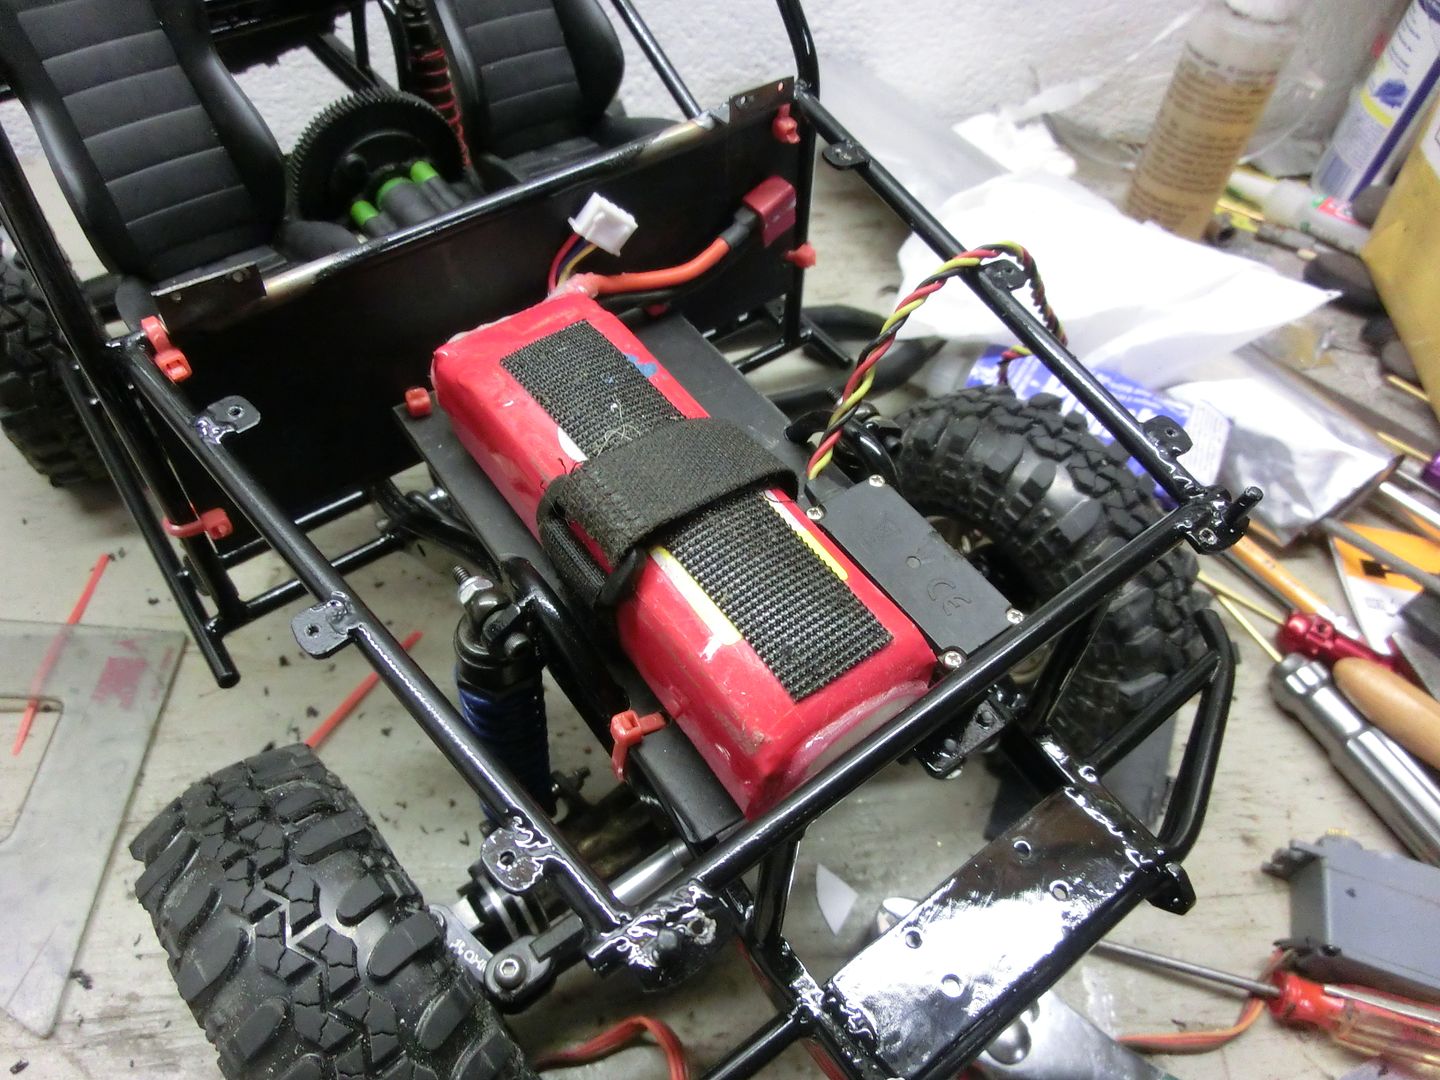 I wanted to hide the tranny a bit more so i threw a quick piece of metal in place to resemble a tranny hump 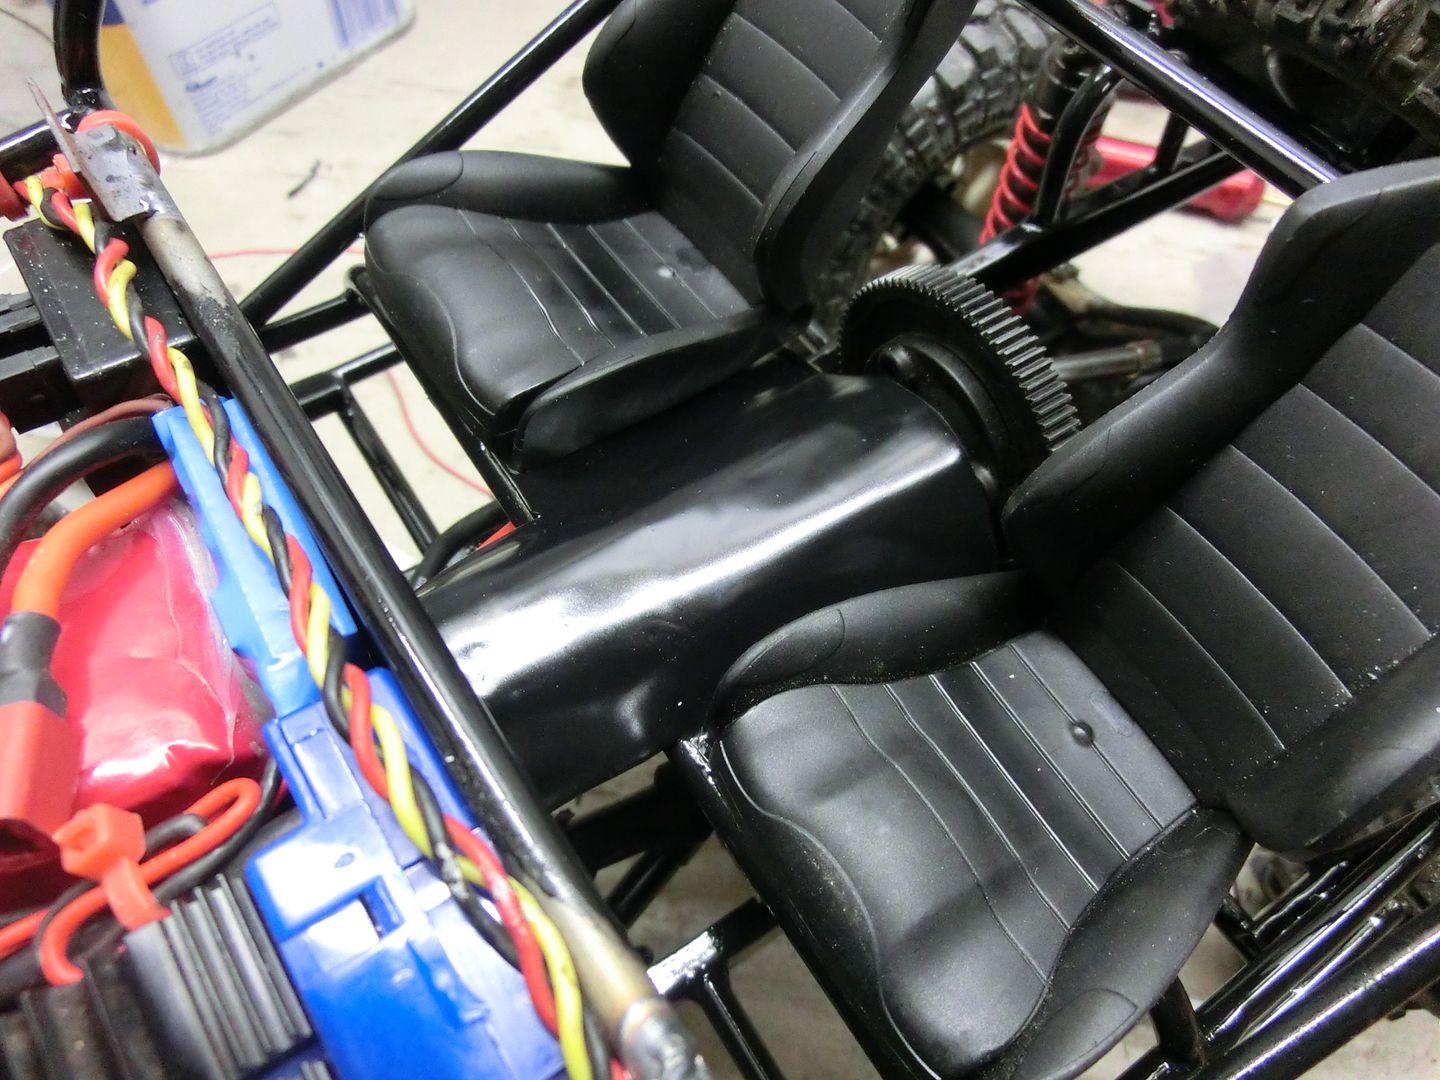 I'm running an FM radio in this as it is the only thing i had available with 3 channels so to hide the receiver wire i simply taped it to the cage. 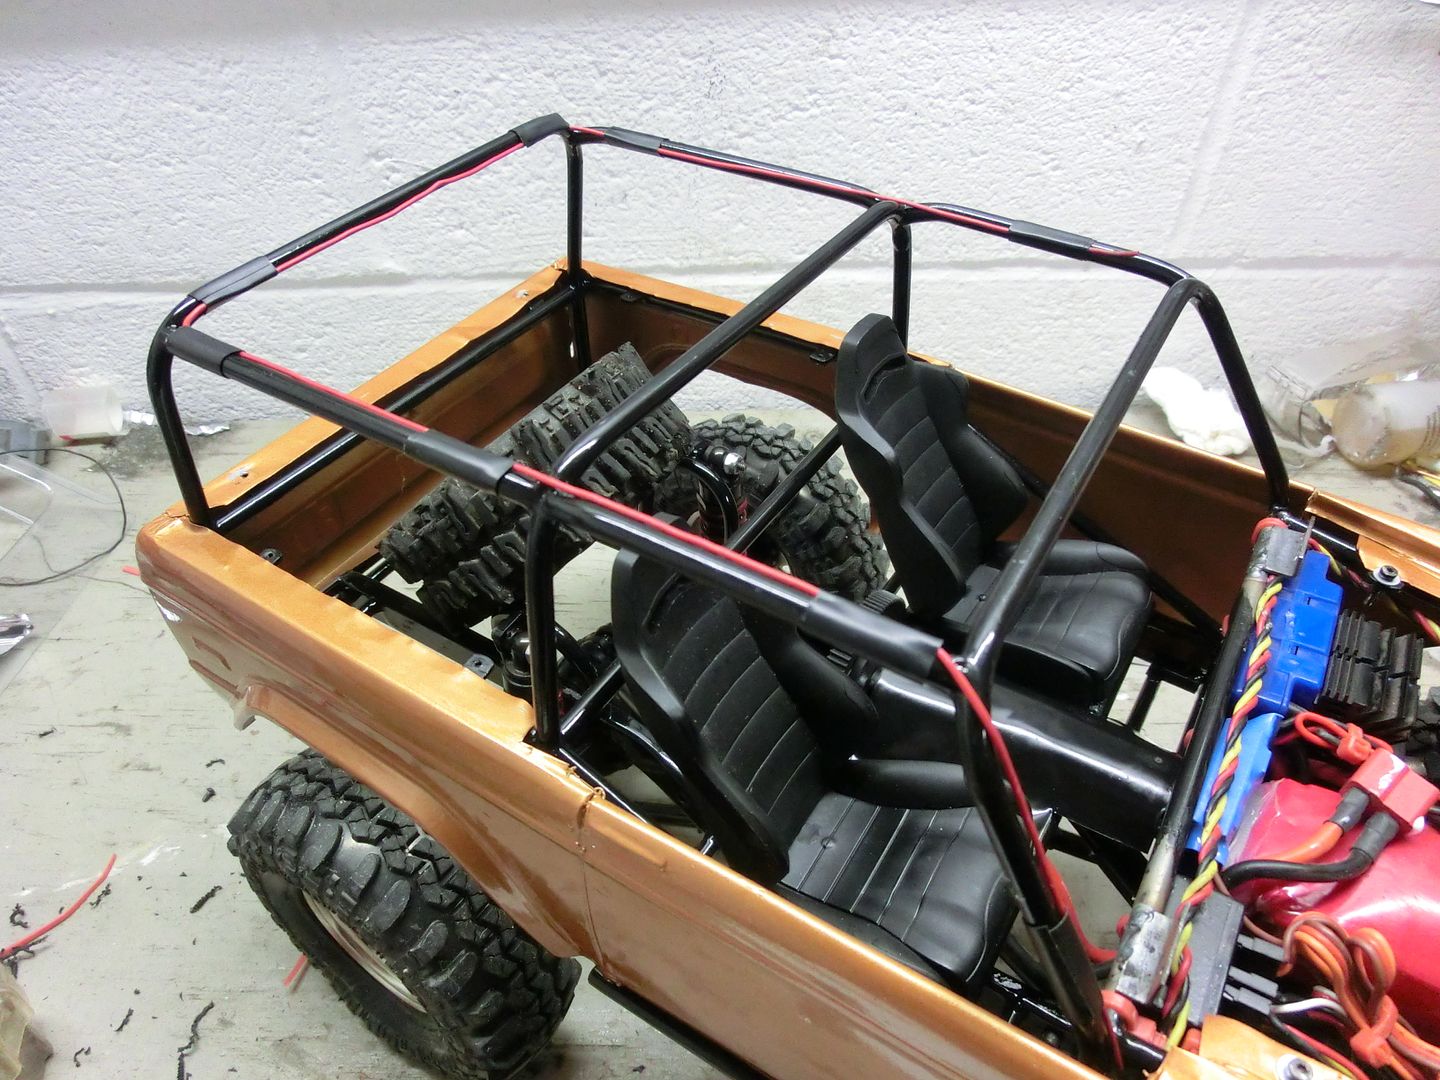 now i could clue the windshield in place to make it legal 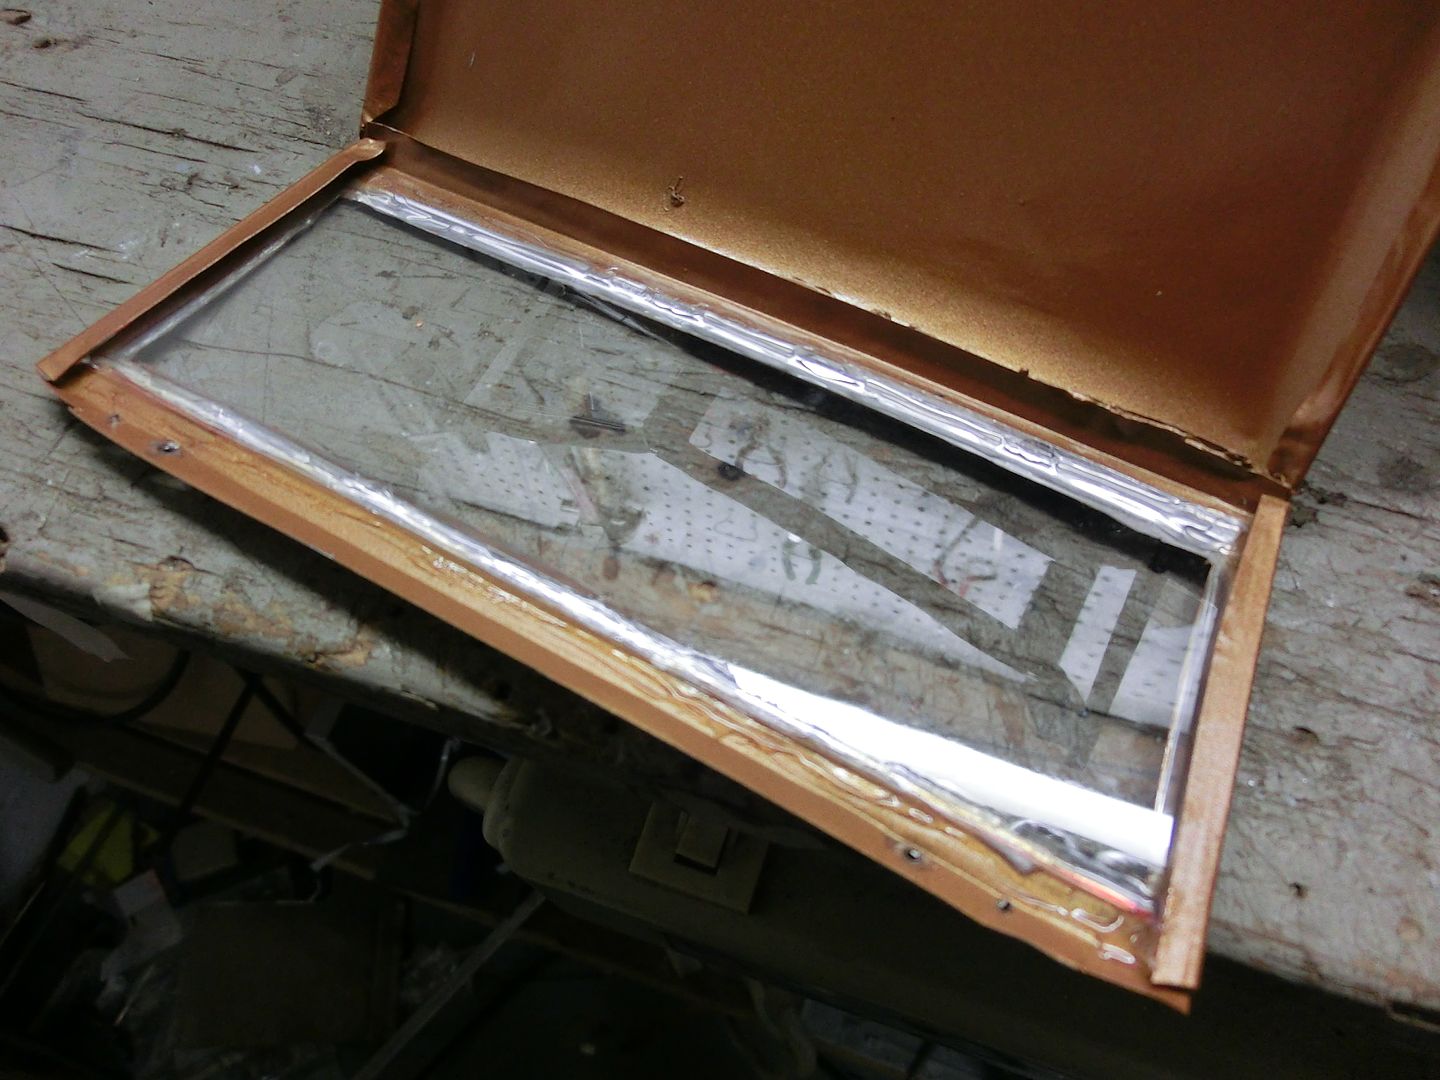 and mount the roof and hood. here is a shot of all the electronics in place 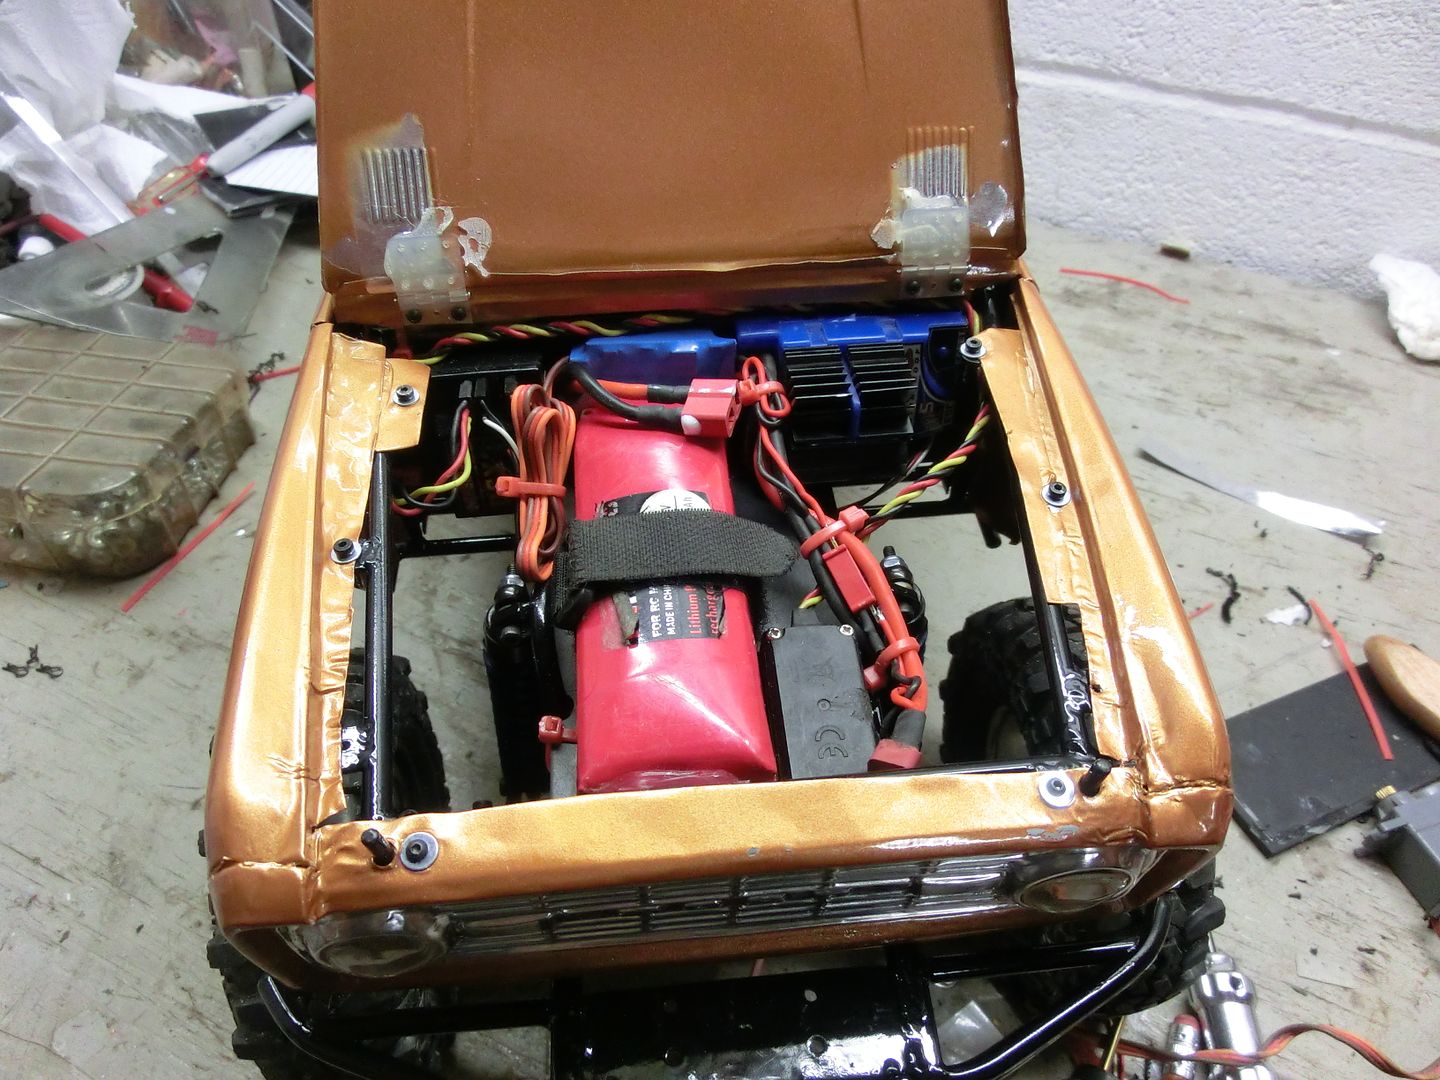 to hold the back of the roof on i made small tabs that clamped the sides to the cage 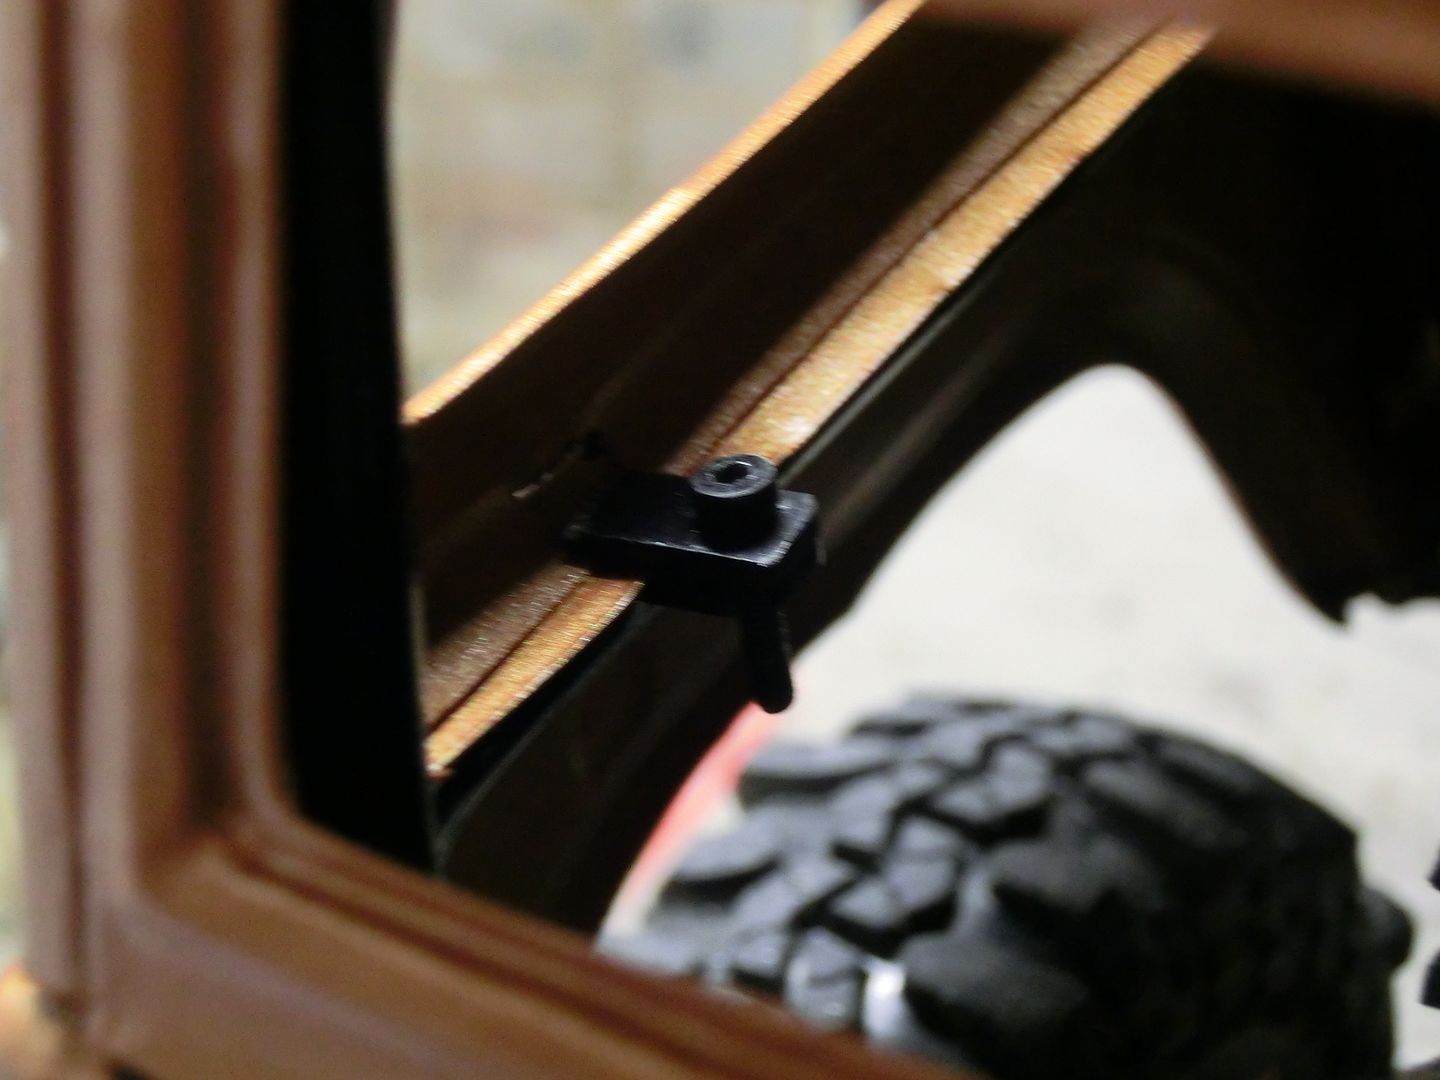 Finally i made up a new set of my steel tire inserts, mounted the new tires and wheels togterh and it was almost ready to go save for the winch controller 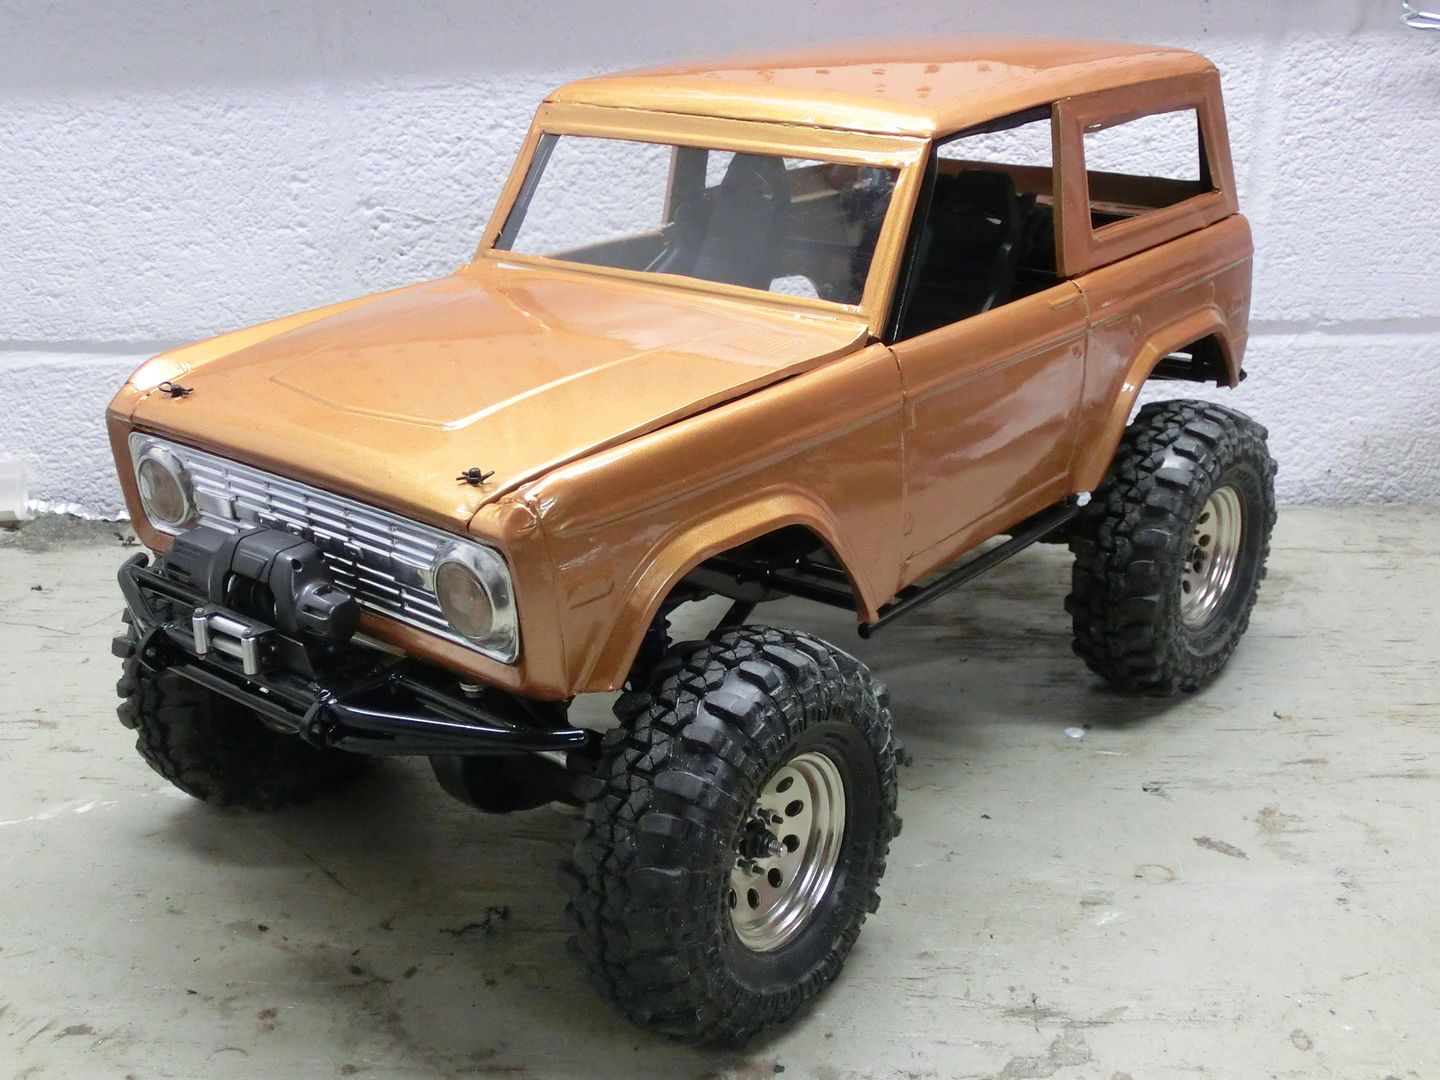 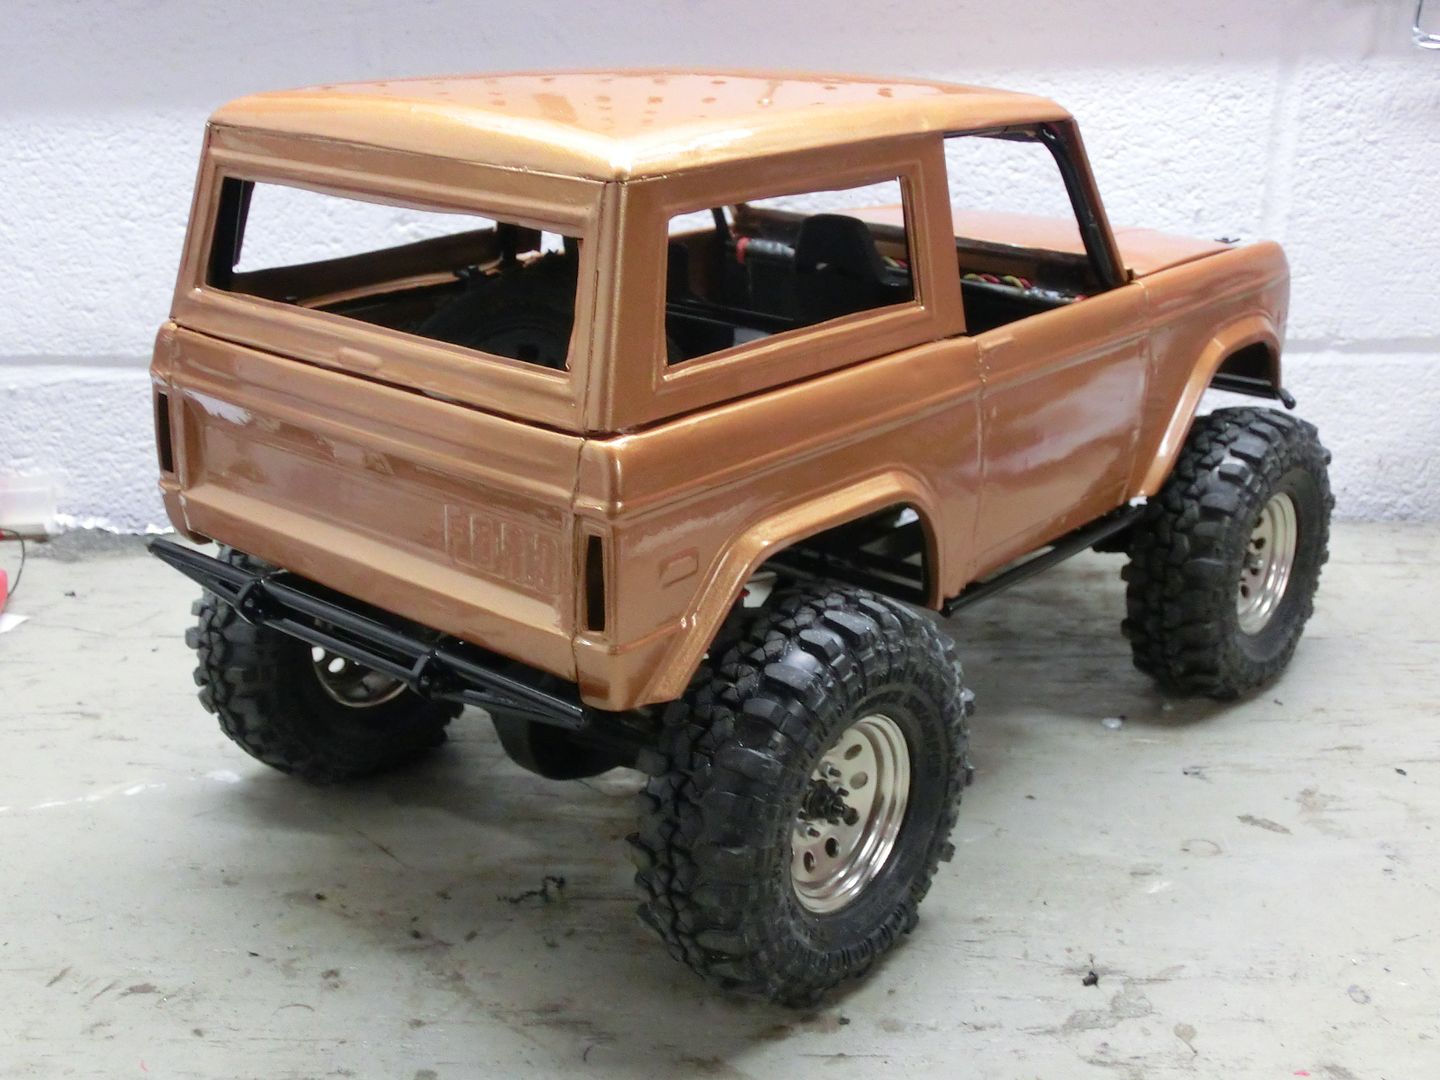 WOW that was long but i finally got it updated to before the comp. next will be after shots and some mods i have done so far |
| |  |
| | #58 |
| Rock Crawler Join Date: Sep 2012 Location: Roxborough, CO
Posts: 522
|
Awesome! I would imagine that all that metal makes it sound as unique as it looks when it is running. Any vids maybe? Thanks! |
| |  |
| | #59 | |
| RCC Addict  Join Date: Aug 2005 Location: New Oxford PA
Posts: 1,290
| Quote:
 gary class 2 run 1 - YouTube gary class 2 run 1 - YouTube | |
| |  |
| | #60 |
| Rock Crawler Join Date: Sep 2012 Location: Roxborough, CO
Posts: 522
|
That's pretty sweet - dents and mashes just like a 1:1 would with those impacts. Although its kinda like watching a puppy getting kicked when it gets munched - lol. |
| |  |
 |
 Early Bronco (oh yes it is!) - Similar Threads
 | ||||
| Thread | Thread Starter | Forum | Replies | Last Post |
| 1.5 Early Bronco | AkFordfan | 1.5 Scale Rigs | 261 | 02-05-2021 08:19 PM |
| Sharlie's Early Bronco. | lonleycreeper | 1.9 Scale Rigs | 13 | 07-22-2012 08:17 PM |
| Early Bronco | RAM2500 | Paint and Body | 5 | 09-05-2011 05:47 PM |
| Early bronco scale | 5150bronco | 2.2 Scale Rigs | 10 | 01-11-2007 10:23 PM |
| |