| |
| |||||||
 |
| | LinkBack | Thread Tools | Display Modes |
 01-01-2014, 07:56 AM
| #1 |
| Rock Crawler Join Date: Feb 2010 Location: Paw Paw, MI
Posts: 675
|
Build thread to track the progress/mistakes of my first ever attempt at an all-scratch built rig. I am going to try to make this look like an FJ40 front clip on a buggy chassis. This will be my FJ Cruiser's big brother.  Specs: Chassis - Custom made from 3/16" rod mostly - Weight: 2.77 lbs - Dimensions - 5.6" wide x 16.25" long Body and Interior - Custom made styrene hood/bib - Thin gauge metal body panels - Team3Six Racing Seats - Pro-line Accessories Drivetrain and Axles - SCXR front axle - Hardened differential gears (OD front, regular cut rear) - Beeftubes - Savox 1230 servo (500oz at 6v!) - MMP w/Redline - Axial transmission w/hardened gears - MIP driveshafts Suspension - 110mm KING shocks - Custom all-thread 4 link front and rear - Gear head 4 link truss on rear Tires and Wheels - 1.9 Pitbulls on Axial beadlocks w/MTHead Delrin rings - 1.9 Irocs on Axial beadlocks General - Total Weight RTR - 9.1lbs - Wheelbase - 12.5" - Dimensions - 9.5" wide x 17.5" long Current Look (updated 1/27/14)  Last edited by Ramination; 01-27-2014 at 07:24 AM. |

|  |
| Sponsored Links | |
| | |
|
01-01-2014, 08:04 AM
| #2 |
| Rock Crawler Join Date: Feb 2010 Location: Paw Paw, MI
Posts: 675
|
Starting with nothing has its advantages and disadvantages, I can build everything to my spec, however it leaves me with no reference or starting point. I really had no choice but to break into CAD for the design phase. This is what I am going for, although I am sure I will change things once I actually get going  And this is the styrene hood and bib I will be TRYING to make 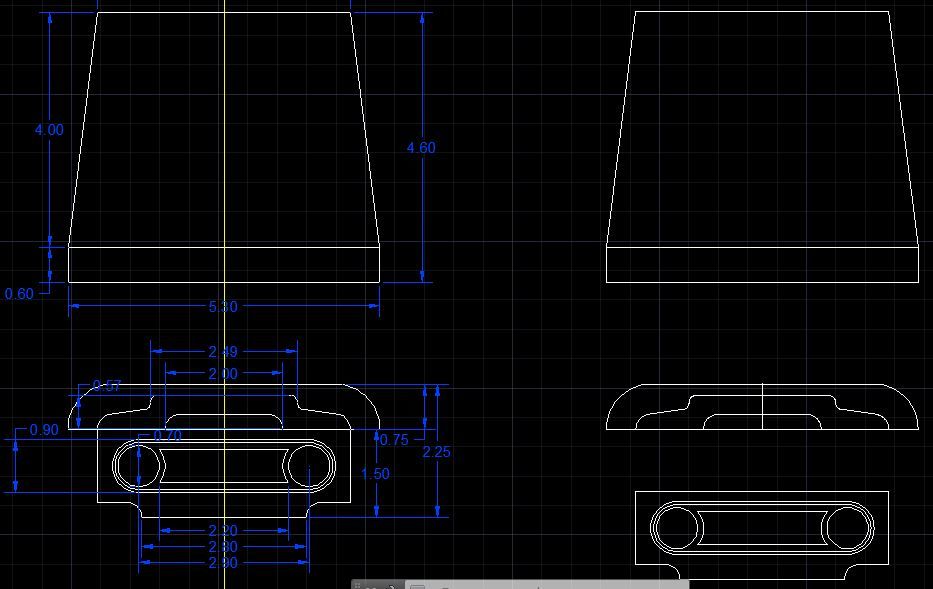 |
|
| |
|
01-01-2014, 08:08 AM
| #3 |
| Rock Crawler Join Date: Feb 2010 Location: Paw Paw, MI
Posts: 675
|
On day one of the build, I decided to start with the styrene work just to see how feasible this whole build really is (I have a horrible track record with styrene). So I took $7, cut it up and glued it together as a big block. My intent is to sand the curves and shape into it.  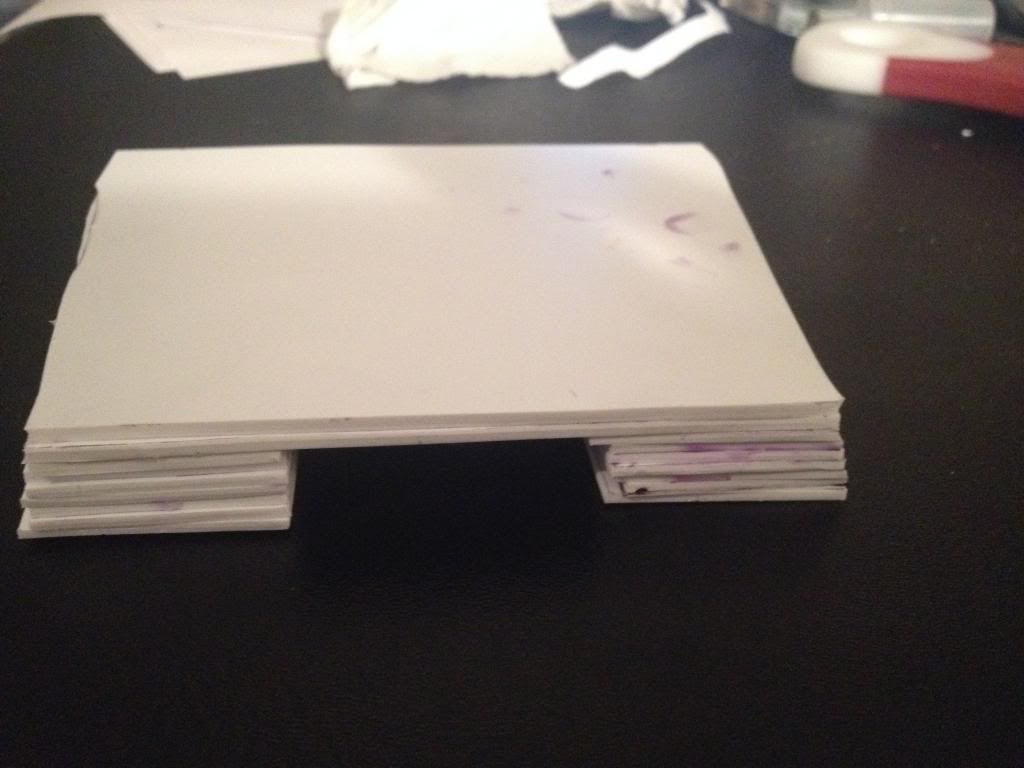 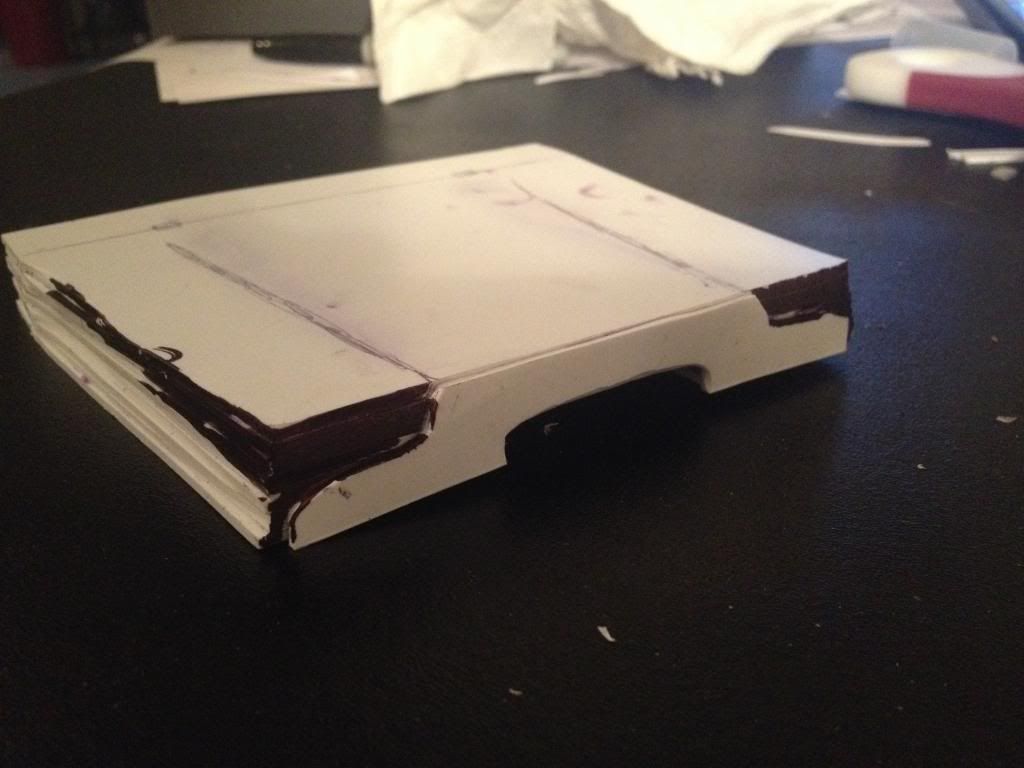 This is all the further I have gotten on this. Last edited by Ramination; 01-01-2014 at 12:29 PM. |
|
| |
|
01-01-2014, 08:08 AM
| #4 |
| Rock Stacker Join Date: Dec 2013 Location: Toledo
Posts: 70
|
Can't wait.. subscribed
|
|
| |
|
01-01-2014, 08:23 AM
| #5 |
| Rock Crawler Join Date: Feb 2010 Location: Paw Paw, MI
Posts: 675
|
While the hood was scaring the shit out of me, I decided to move onto something that I know I have the right tools (and hopefully skill) to do. I am doing the chassis rails in flat stock, as opposed to C-channel for the simple reason that I think it is easier to work with. Here is the progress so far. 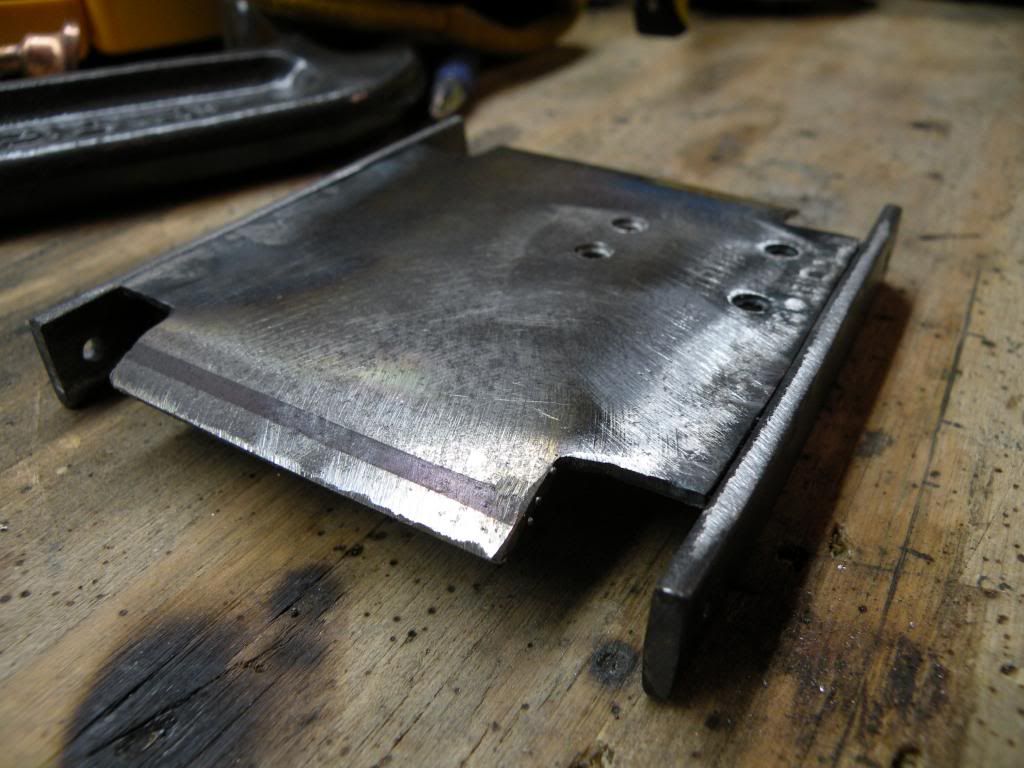 This time around when I bent the chassis rails I decided to introduce a relief cut into the mix and then weld it up. I like this, and it allowed me to bend easier and keep the rails perfectly symmetrical. We are going to try to keep that theme throughout. 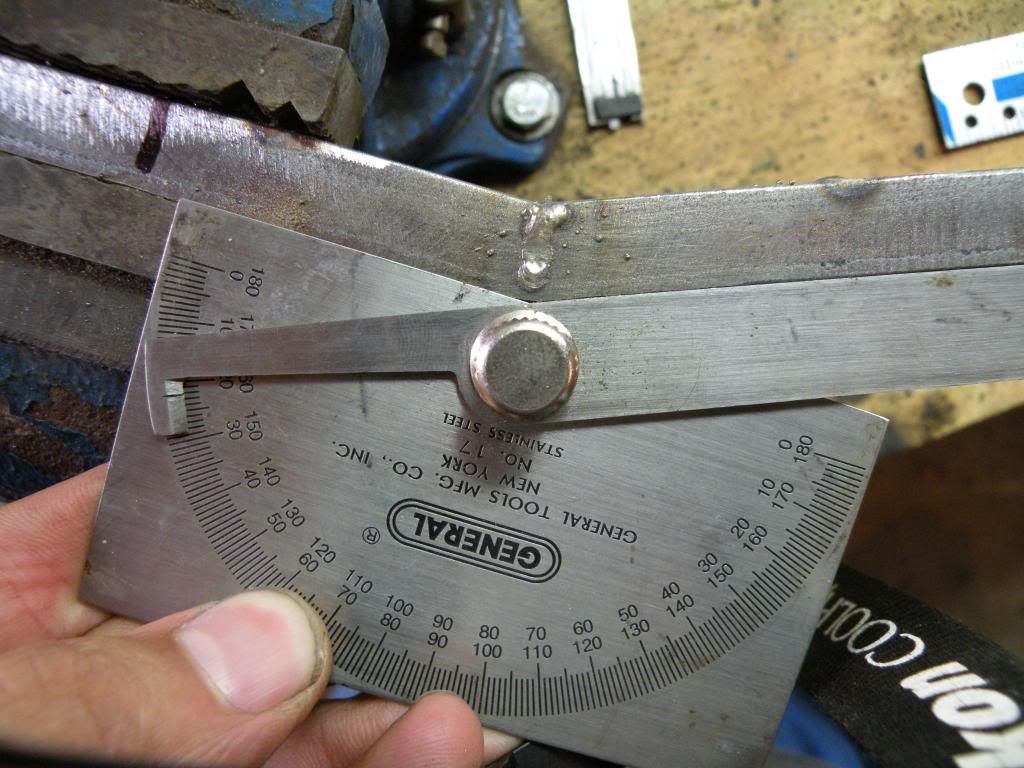 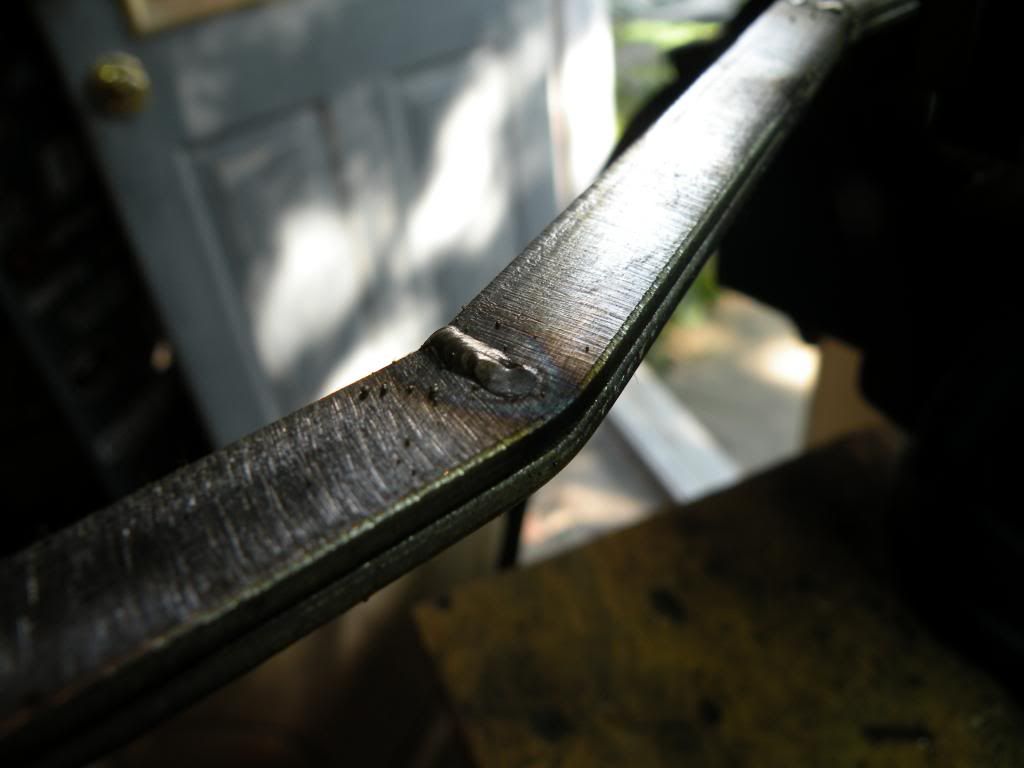 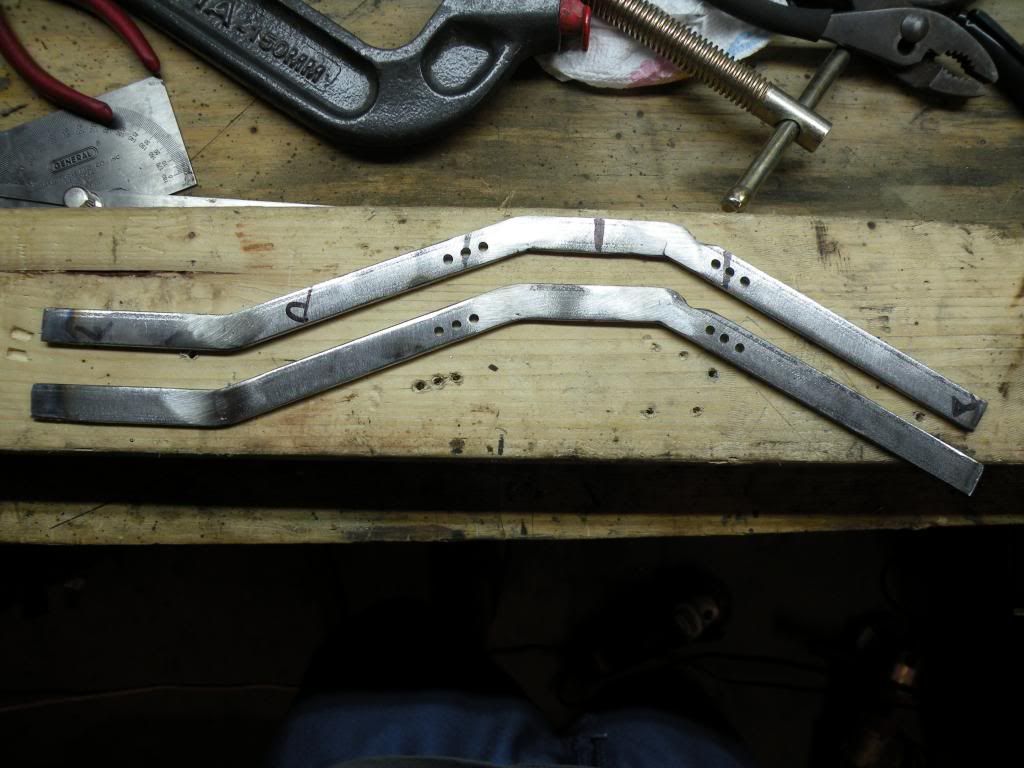 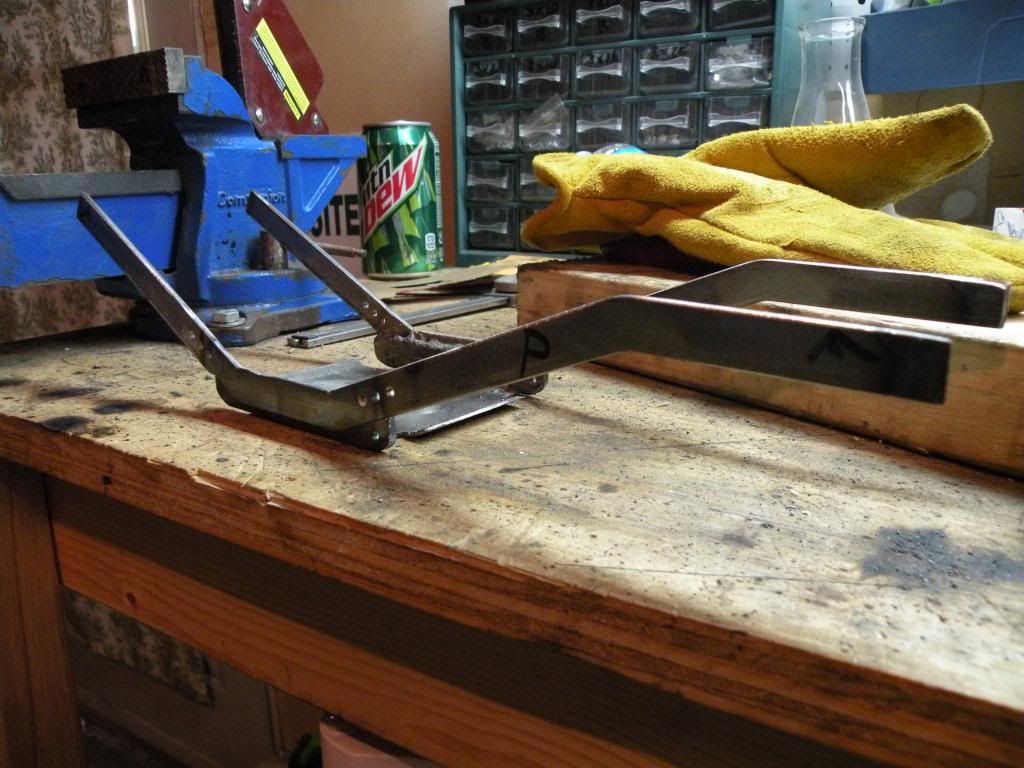 Sliders 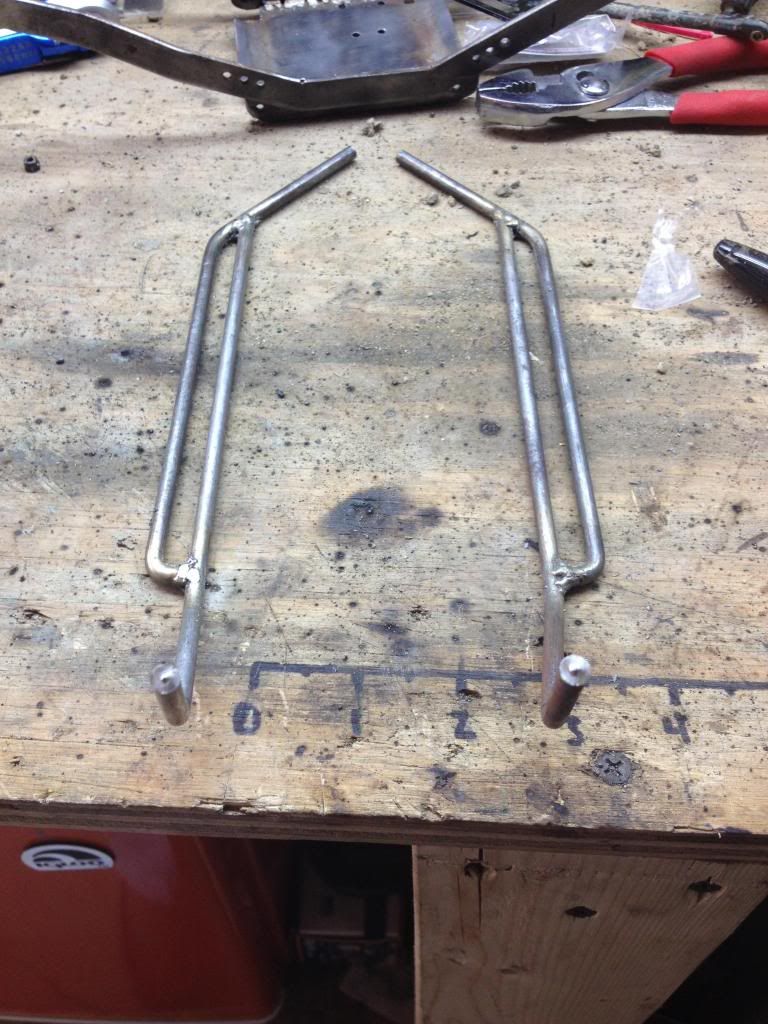 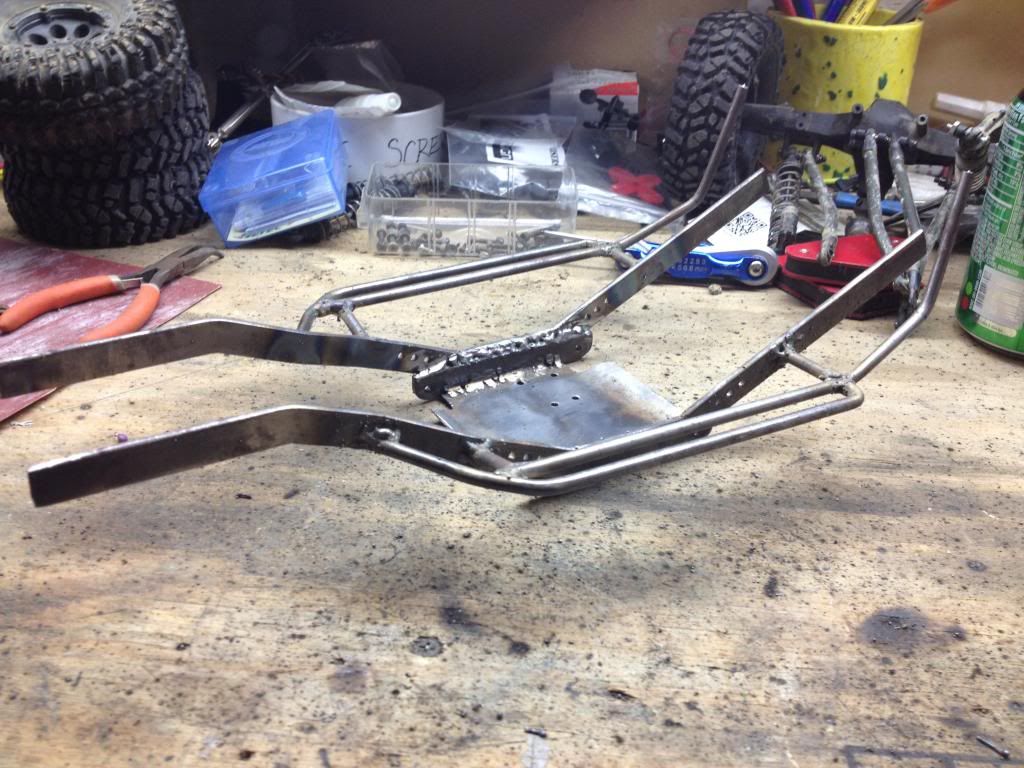 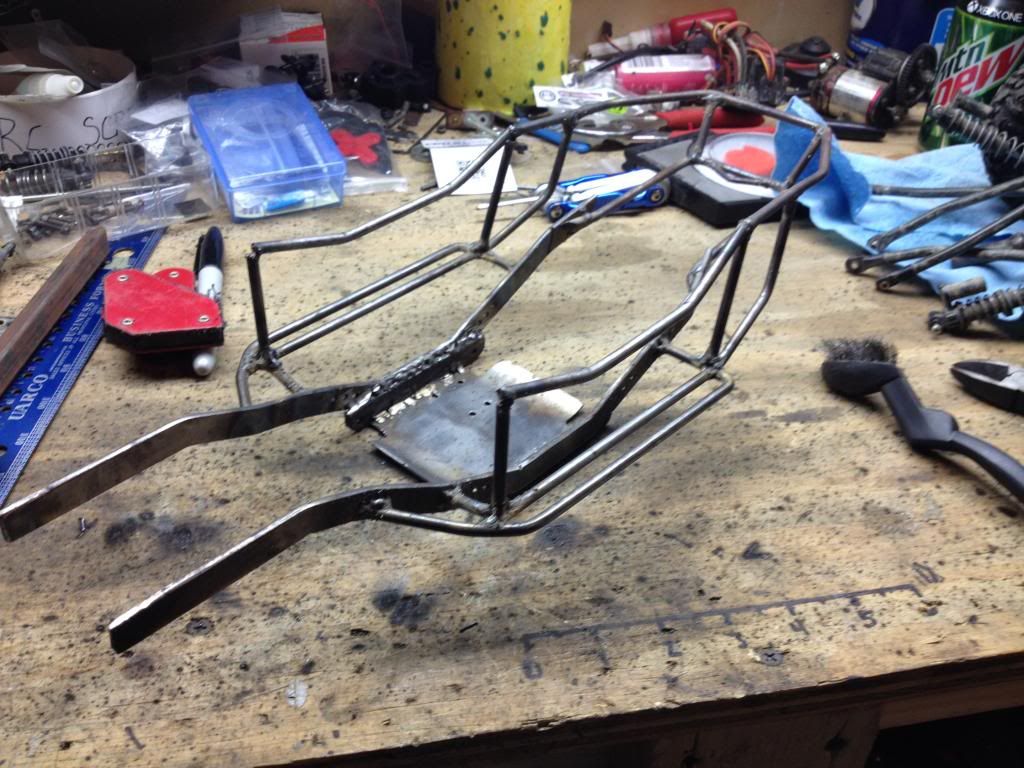 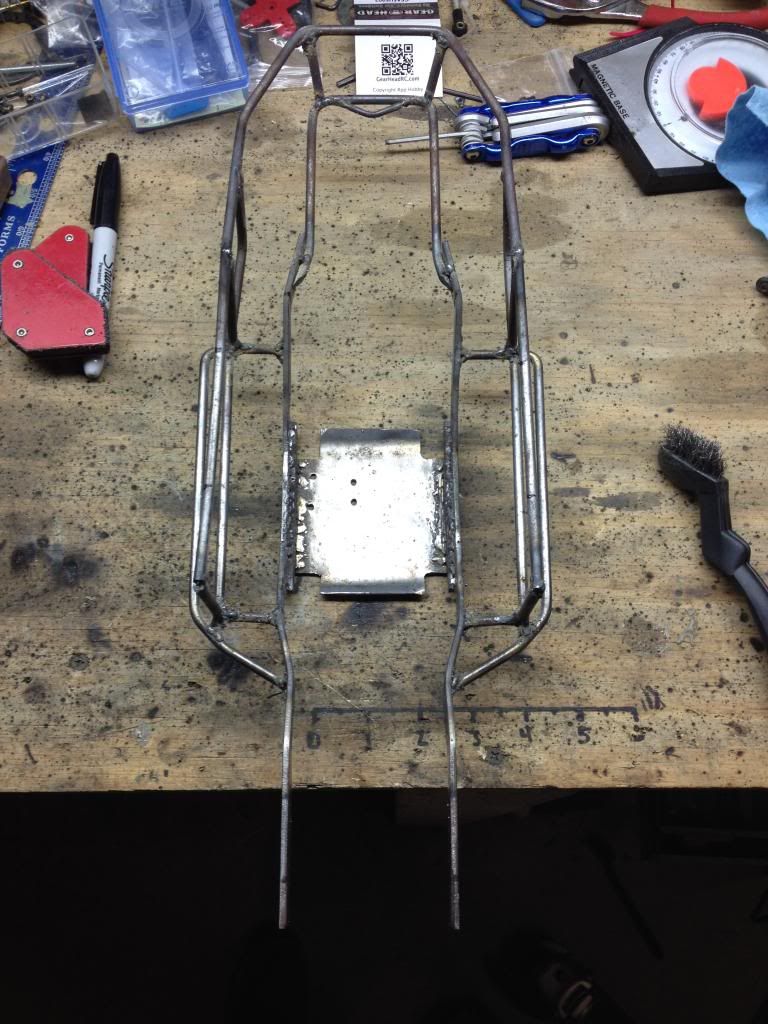 Fairly productive first day of fab. So far everything is within a degree of being symmetric. |
|
| |
|
01-01-2014, 12:33 PM
| #6 |
| Rock Crawler Join Date: Feb 2010 Location: Paw Paw, MI
Posts: 675
|
Made a little progress on the hood. Hood started off at 0.40lbs, down to 0.36lbs as it sits there. I plan to take some more fat out of the underside once I figure out how it is going to mount. 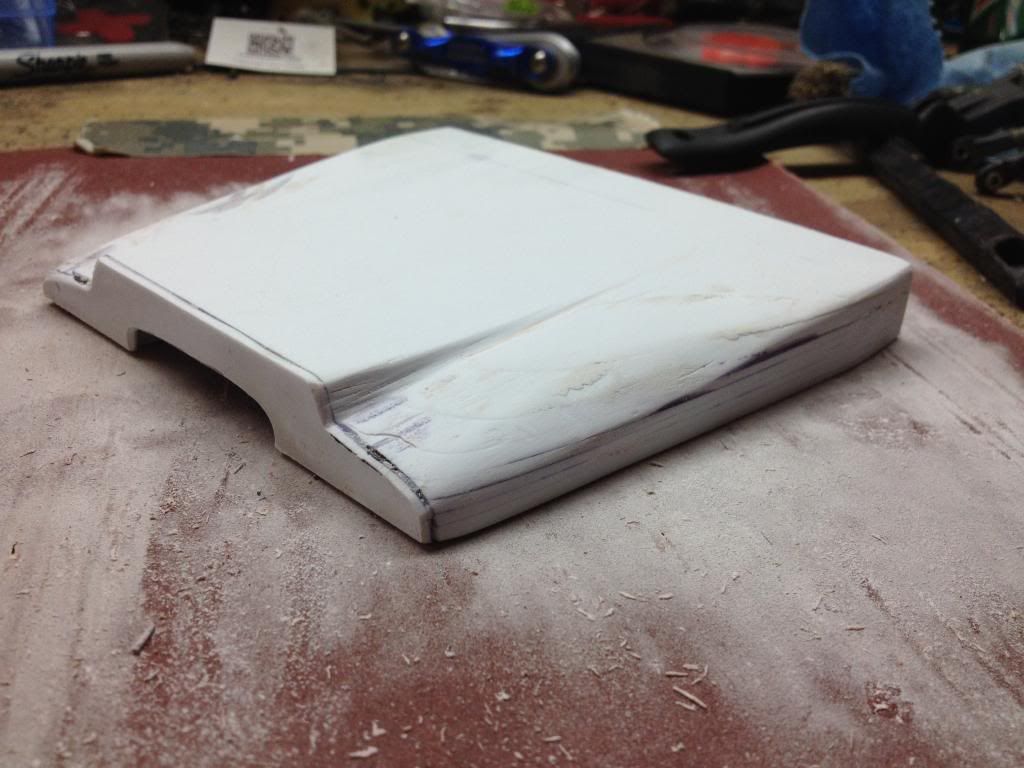 I am a little worried how some of the layers are visible on this one side. Please tell me if I am doing this wrong. |
|
| |
|
01-01-2014, 01:00 PM
| #7 |
| Quarry Creeper Join Date: Mar 2013 Location: Hampton Roads
Posts: 265
|
What a sexy ass build. Is it turning out 10th scale dead on?
|
|
| |
|
01-01-2014, 01:24 PM
| #8 |
| Rock Crawler Join Date: Feb 2010 Location: Paw Paw, MI
Posts: 675
|
I think so. Should be pretty damn close.
Last edited by Ramination; 01-21-2014 at 01:08 PM. |
|
| |
|
01-01-2014, 02:31 PM
| #9 |
| RCC Addict Join Date: Mar 2009 Location: hawaii
Posts: 1,139
|
Looks like the evo chassis on pirate! Very nice!
|
|
| |
|
01-01-2014, 03:17 PM
| #10 | |
| Rock Crawler Join Date: Feb 2010 Location: Paw Paw, MI
Posts: 675
| Quote:
I did make a few on the fly changes during fab though, and added about 3/4" to the length of the cab area. This is going to help all the goodies fit in there a lil better. Pics soon. | |
|
| |
|
01-01-2014, 03:25 PM
| #11 | |
| Rock Stacker Join Date: Dec 2013 Location: Toledo
Posts: 70
| Quote:
I imagine, with sanding and body filler.. it will come out clean and smooth | |
|
| |
|
01-01-2014, 08:53 PM
| #12 |
| Rock Crawler Join Date: Feb 2010 Location: Paw Paw, MI
Posts: 675
|
I hope you are right. I did a little more sanding and did an initial layer of filler earlier this afternoon. Hopefully I can sand it tomorrow and see where we are at. Chassis is coming together, ~18 feet of material burned in so far. I will skip the words and just put up a few pics for now. These pictures show it at roughly full bump (when the 110mm KINGs are installed). I do not have the KINGS on it yet obviously. I intend to initially run the shocks at about 50/50 sprung/droop, so I expect the ride height to be about 3/4" higher than as it sits right now. 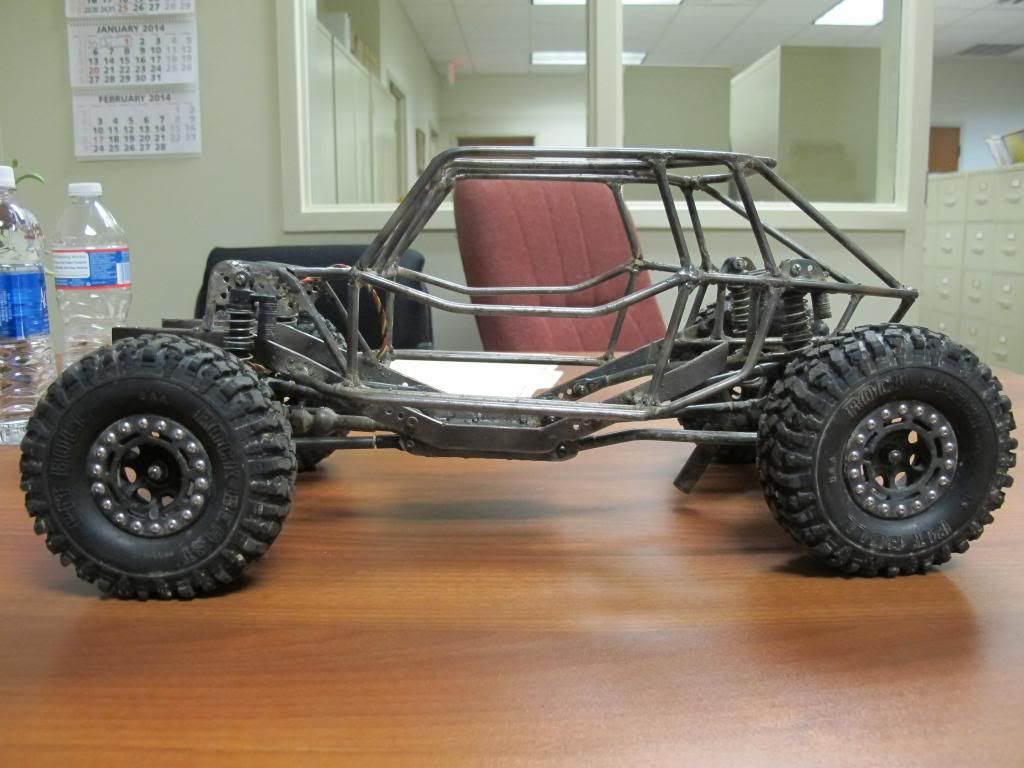 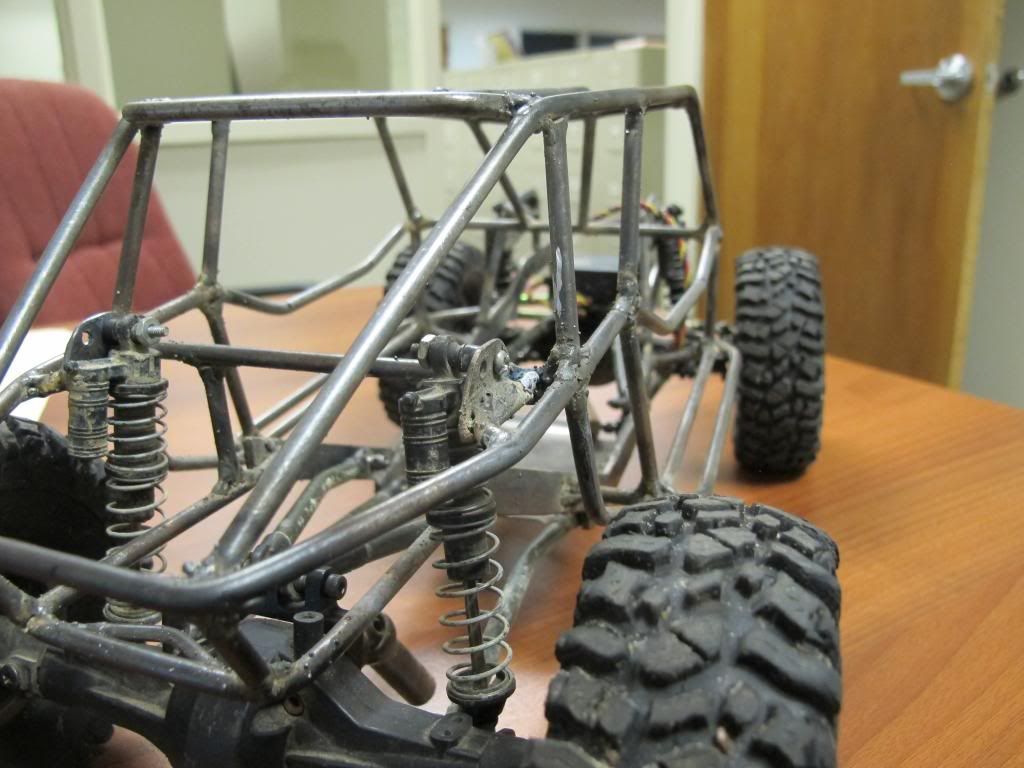 I suppose it is the angle of the pictures that make some of the cage look unsymmetric, but it is still REALLY close. It is such a pain making two identical pieces of EVERYTHING! lol! Have only wasted about a foot of material due to mistakes though! This week sometime we still need to bend the front hoop and tie that in, as well as take care of a lot of little details. Also need to do A LOT of styrene work still. Last edited by Ramination; 01-02-2014 at 07:30 AM. |
|
| |
|
01-01-2014, 09:03 PM
| #13 |
| Quarry Creeper Join Date: Mar 2013 Location: Hampton Roads
Posts: 265
|
I'm fired up. Grabbing beers and dissapearing immediately to work on the Landy. What color will the cage be?
|
|
| |
|
01-01-2014, 09:05 PM
| #14 |
| Rock Crawler Join Date: Feb 2010 Location: Paw Paw, MI
Posts: 675
|
Good, get that thing done!!! As for the cage, I am torn between black or silver... |
|
| |
|
01-01-2014, 09:05 PM
| #15 |
| I wanna be Dave Join Date: May 2009 Location: Tehachapi,Ca
Posts: 2,334
| Only a foot of scrap I'd pretty damn good, I'm pretty good at getting about 20' into a chassis and about 40' in the trash |
|
| |
|
01-01-2014, 09:12 PM
| #16 |
| Rock Crawler Join Date: Feb 2010 Location: Paw Paw, MI
Posts: 675
|
Thanks! I think some of the reason there has been so little scrap is that I made my scale CAD model and am sticking pretty close to it. The only thing I really changed was adding 3/4" in the cab area (which I regret seeing it now). I strayed away from the model on the front shock hoops, but that was an easy change. When it comes to styrene though, I know for a fact I have already thrown away more than I've used...and there is a lot of styrene in that hood!!! I will bring some non-phone pics to the table tomorrow and show some of my favorite details. |
|
| |
|
01-01-2014, 09:16 PM
| #17 |
| I wanna be Dave Join Date: May 2009 Location: Tehachapi,Ca
Posts: 2,334
|
I need a friend that's cad- capable. I'm still running on the "eyeball it-vise bend-eyeball it again" method. |
|
| |
|
01-02-2014, 07:22 AM
| #18 |
| Rock Crawler Join Date: Feb 2010 Location: Paw Paw, MI
Posts: 675
|
S'more pictures of the chassis. Here is the trunk I am thinking about laying down some fine mesh (to simulate expanded metal) on only the bottom. The plan is to stick a fuel cell in there and maybe some other scale gear. I threw the little loop thing in there last minute...not really sure what I plan to do with it but it seemed right at the time! 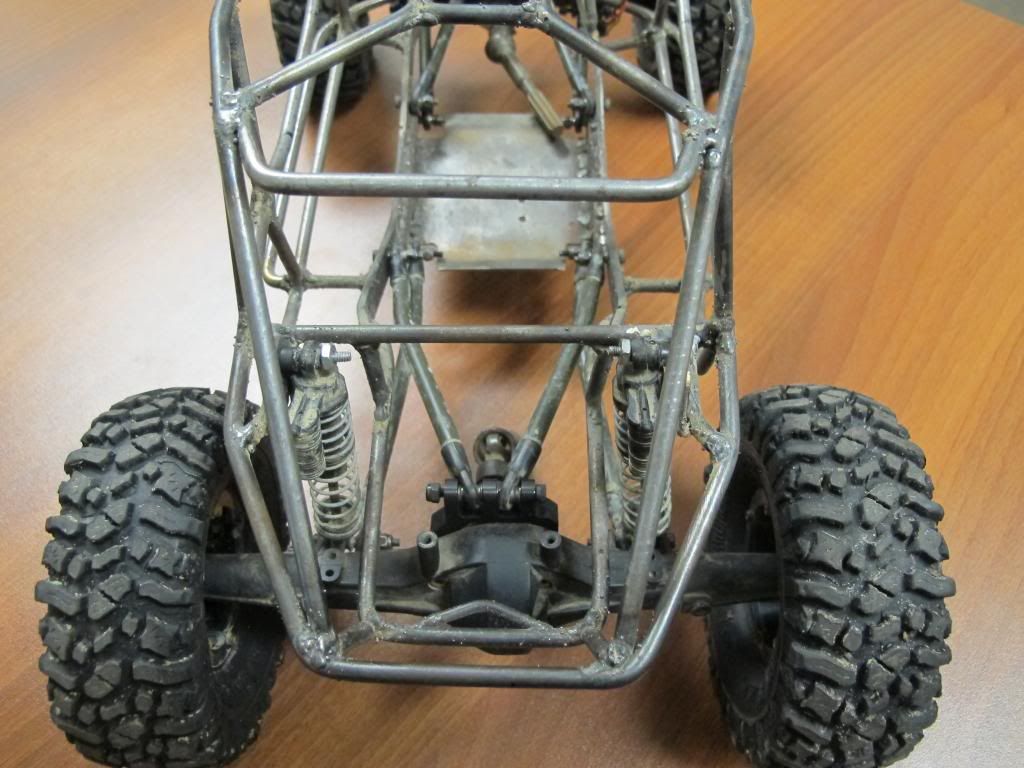 I added the halo ring on the top of the cage, it needed something to fill the space there. 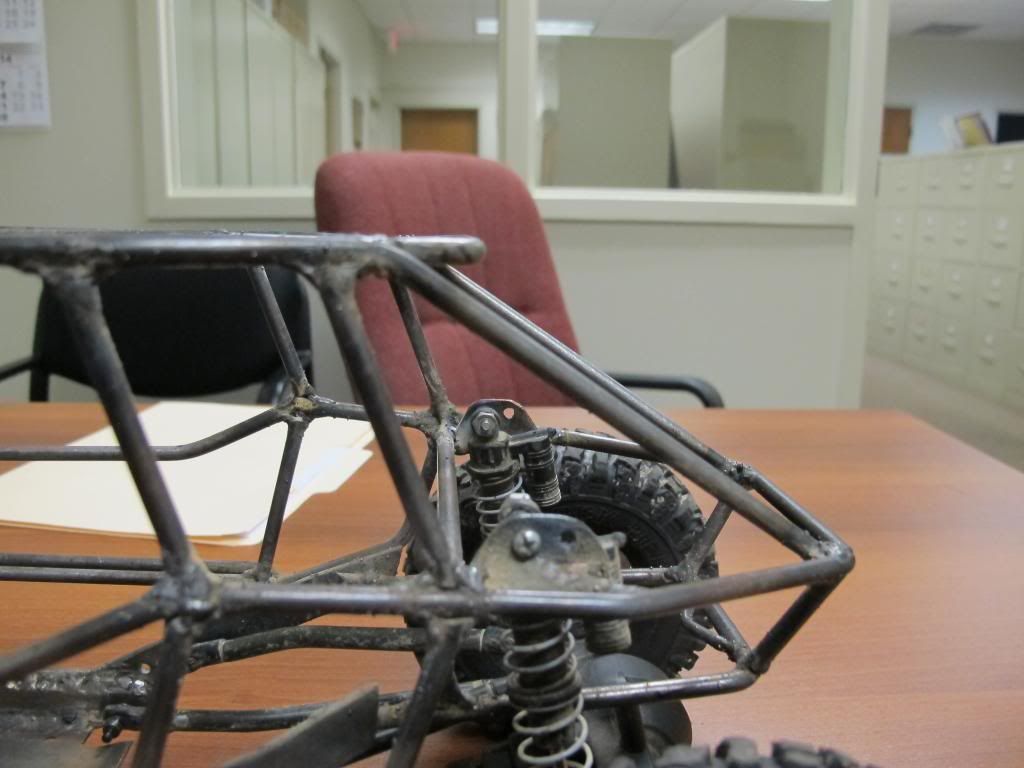 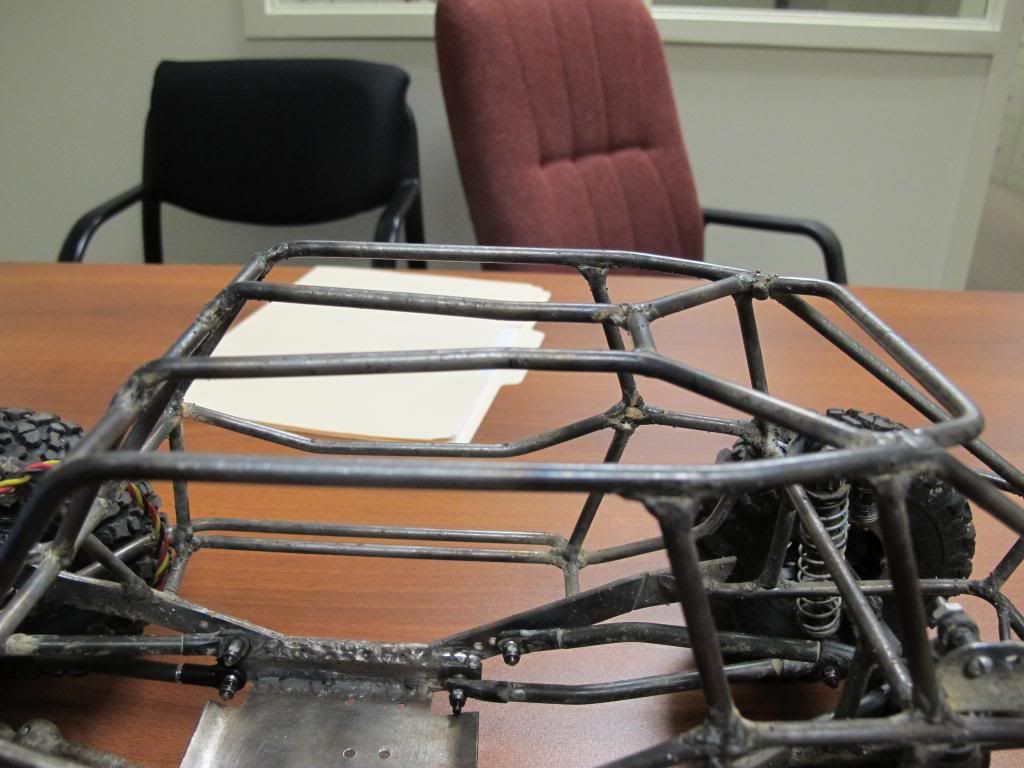 Here is a little more of a close up on the rear shock mounts. I have to clean this up still, because I had a different setup burned in (and completely solid) before I decided to do a cosmetic weld...worst choice ever! I had to cut the original stuff off completely and redo it. Overall it is ok, I like this design better anyways but it did waste an hour. 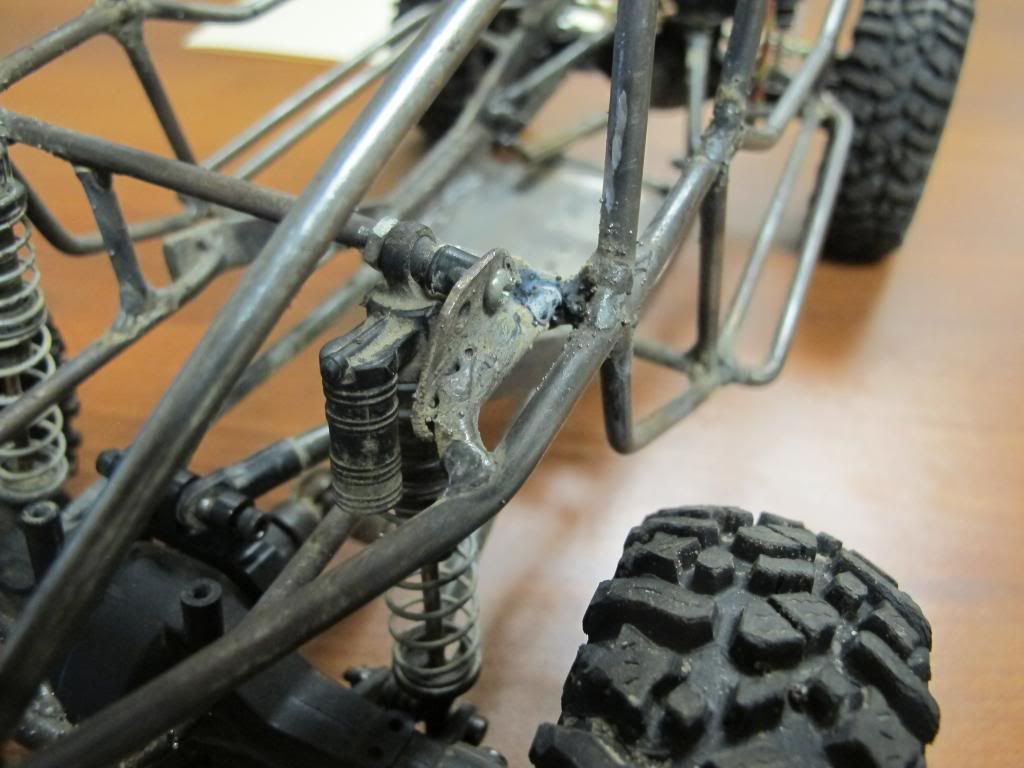 I did a flat belly skid like this on a previous home-built truck and really liked it, so I kept that idea alive in this one. 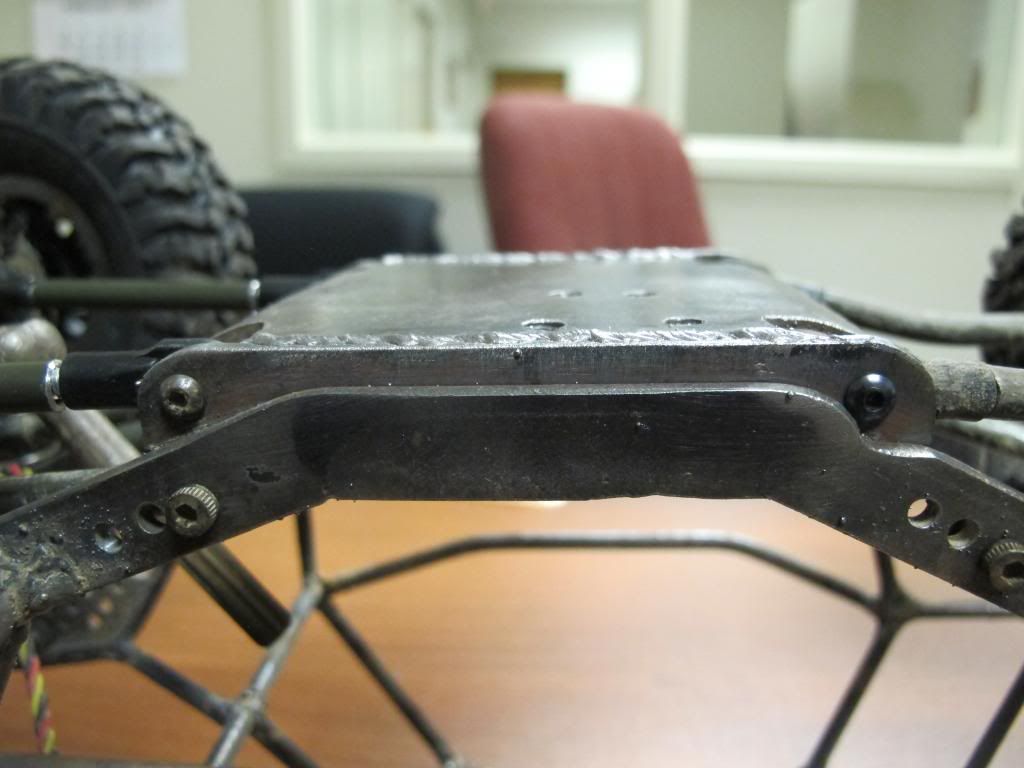 |
|
| |
|
01-02-2014, 07:53 AM
| #19 |
| Newbie Join Date: Dec 2008 Location: Virginia Beach
Posts: 44
|
Looks good man. Sent from my EVO using Tapatalk |
|
| |
|
01-02-2014, 09:34 AM
| #20 |
| Pebble Pounder Join Date: Mar 2013 Location: Chesapeake
Posts: 146
|
Subscribed. Looking good Bo. I look forward to seeing this rig in person in the near future. Popcorn for President!!! |
|
| |
|
| Tags |
| buggy, fj40, styrene, tuber |
 Ramination's FJ40 Buggy Build - Similar Threads
 | ||||
| Thread | Thread Starter | Forum | Replies | Last Post |
| Ramination's FJ Cruiser Build | Ramination | 1.9 Scale Rigs | 211 | 09-29-2014 02:12 PM |
| Pozman's fj40 buggy | pozman | 1.9 Scale Rigs | 44 | 08-27-2012 03:58 AM |
| FJ40 Re-Build!! | jongrill | Tamiya XC/CC01 | 6 | 07-04-2012 09:39 AM |
| Ramination's Blue Ox | Ramination | 2.2 Scale Rigs | 53 | 04-11-2012 02:21 PM |
| My FJ40 CR-01 Build | achtung6 | Tamiya CR-01 | 12 | 05-26-2008 02:36 PM |
| |


 Linear Mode


