| |||||||
Loading
 |
| | LinkBack | Thread Tools | Display Modes |
| |||||||
 |
| | LinkBack | Thread Tools | Display Modes |
| | #1 |
| Rock Crawler Join Date: Jan 2013 Location: Australia
Posts: 541
|
Welcome to my new Class 1 build. Here in Australia we have our own local specs to meet in order to compete in the local competitions, and this rig will be built to meet those regs. My FJ45 Troop Carrier is also built to those specs, but it was designed to fit a specific theme and is not well suited to be used as a comp truck. I have been slowly gathering parts this year and located a used chassis from a local bloke to form the basis of this build. So I hooked up my new car trailer to the Troopy and headed bush to pick up the newly acquired chassis. https://www.youtube.com/watch?v=lT9LB9hMeMQ Cheers H2Micr0 |
| |  |
| Sponsored Links | |
| | #2 |
| Rock Crawler Join Date: Jan 2013 Location: Australia
Posts: 541
|
So just what is the chassis I hear you all ask? Those with a keen eye will have noticed it is not an SCX10 chassis, and the transmission is distinctly from RC4WD. The Chassis is an original Gelande 1 chassis, and came mostly complete with T-Rex 60 axles, 4 link kit to suit, original 70mm shocks, Disruptor transmission and transfer case, Traxxas servo and an Axial 27t motor. There was no front bumper or wheels and tyres. For the purpose of the video I threw on some odd wheels and tyres I had lying around, and have removed the motor. Some photos of the chassis as it was in the video. 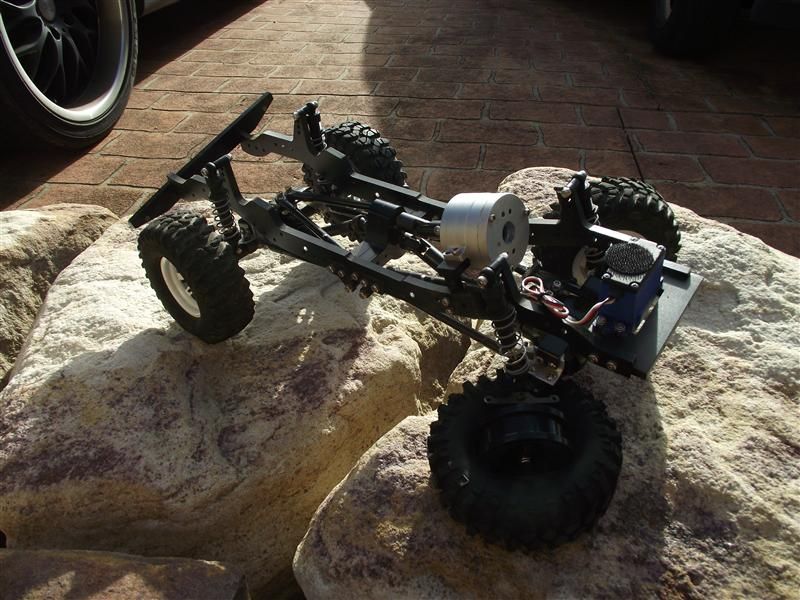 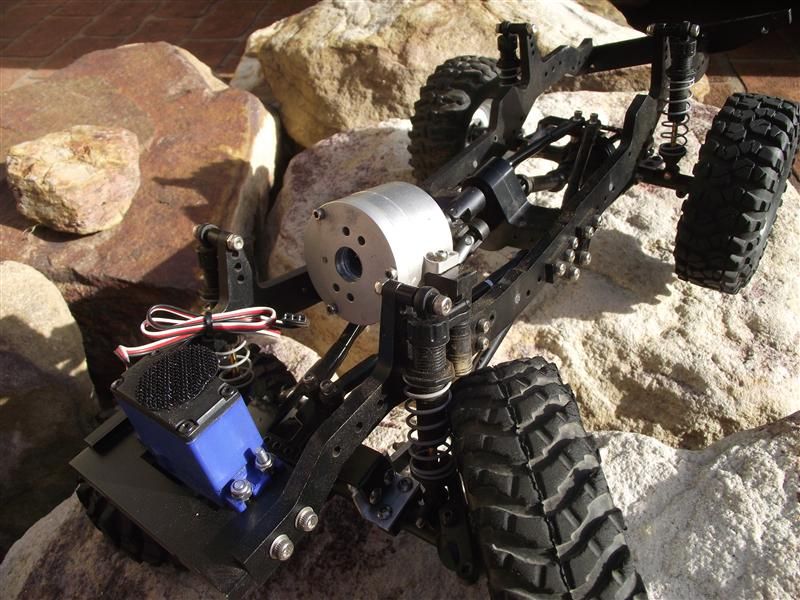 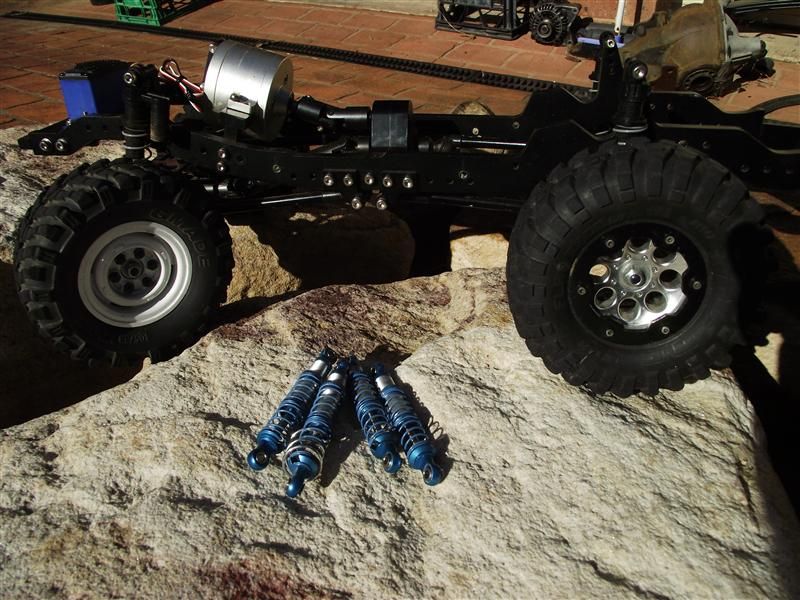 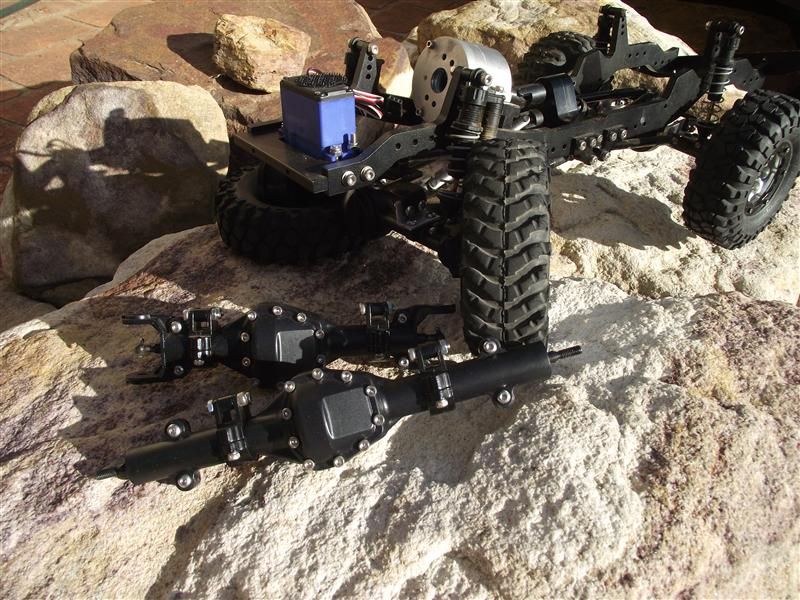 Really keen eyes will have noted that the T-Rex 60 diffs were not on the chassis in the video, and the last photo shows that. I looked at upgrading the T-Rex 60s with alloy parts, and XVDs. I already had a pair of the ARB versions as well. But the cost of the upgrades was already the same as one YOTA2 diff. When I was in the USA, earlier this year, I bought some Yota2 XVDs from RC4WD, with the intention of modding the YOTA1 diff in the Troopy to accept them. I have not yet attempted this, and seeing as I had them, and balancing that against the cost of upgrading the T-Rex diffs, decided to lay the cash out on a pair of YOTA2 diffs. BUT the front diff is always out of stock. However I did manage to buy a new pair recently from RC-Recycler. The postage was very reasonable too, and the postage was really fast at just over a week. I will detail how I adapted the T-Rex 4 Link truss and links to the YOTA 2 Diffs. The other change was the shocks. The stock 70mm blue shocks just didn't have enough articulation. I didn't want heaps, and I couldn't lift if much in order to meet one of the local specs that stipulates a max of 25mm from top of tyre to centre of guard/flare/barwork. I used stock SCX10 shocks with a few mods and am still testing and adapting things to suit. I have made good progress on the body and electrics as well, but there is still plenty of work to be done. I would like to have it ready for it's first comp in around 3 weeks, but we will see how I go. Please come along for the ride and I look forward to your comments and suggestions as we go. Cheers H2Micr0 |
| |  |
| | #3 |
| Rock Crawler Join Date: Jan 2013 Location: Australia
Posts: 541
|
Obviously the body is an FJ40. I sourced a new Tamiya FJ40 shell while I was in the USA, along with a bunch of other goodies. When I first got the Chassis I threw the shell on for a test fit and had to shorten the wheelbase to suit. Here is a couple of early photos of the initial mock up. The tyres are RC4WD Mickey Thompson MTZs which are class 1 legal here in Australia and will certainly start on this rig. The wheels are one of the choices, and later photos show the other LURC wheels I may use. 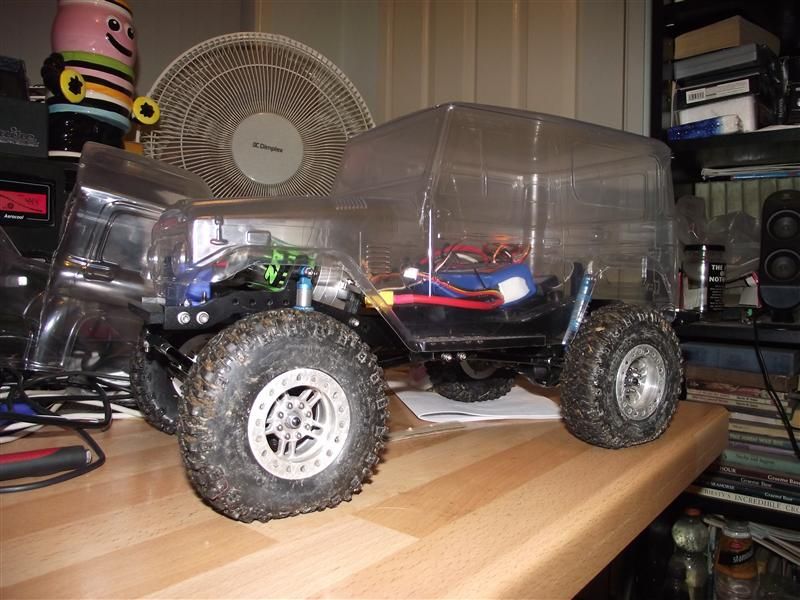 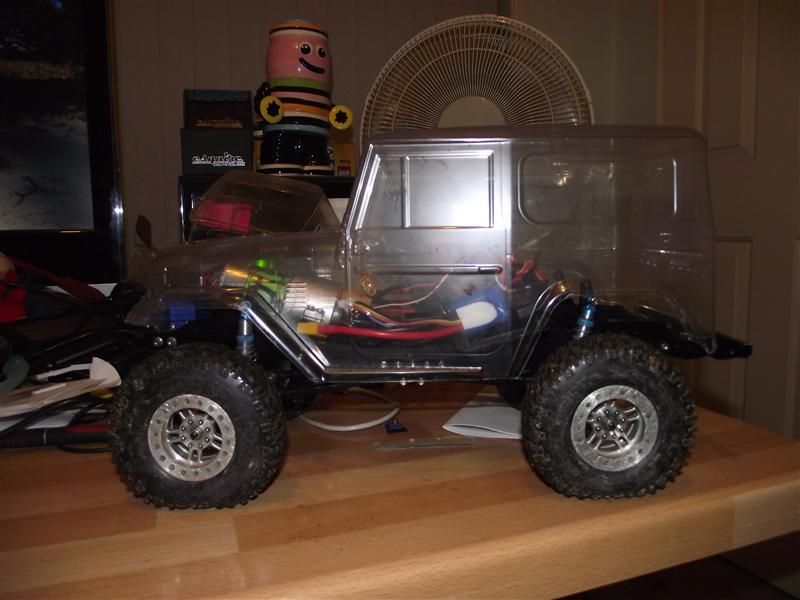 You can see I had quickly installed some electrics and battery, and it was drivable, but this update is about the body. Hmmm, what is going on here? 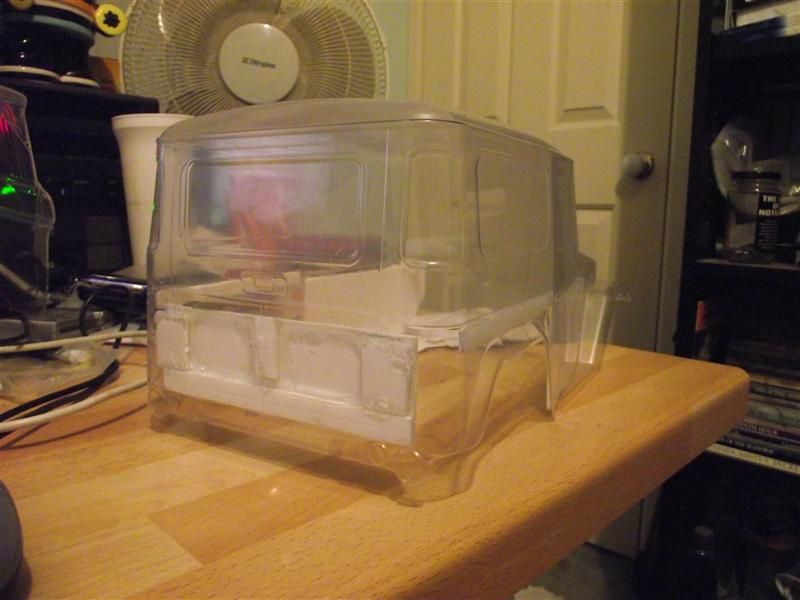 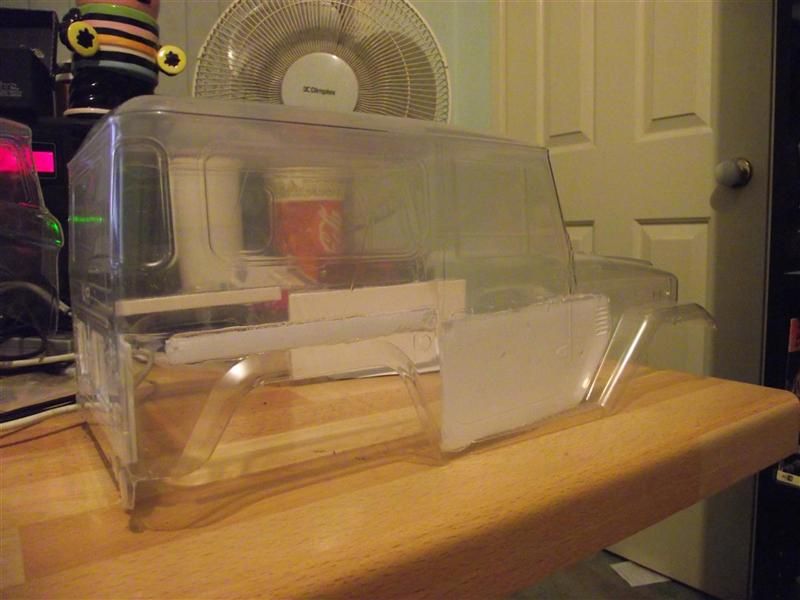 I used a silicone adhesive/sealer to bond strips of 2mm thick styrene to the inside of the shell to provide additional rigidity and prevent unwanted twisting. What for you ask? This is the answer. 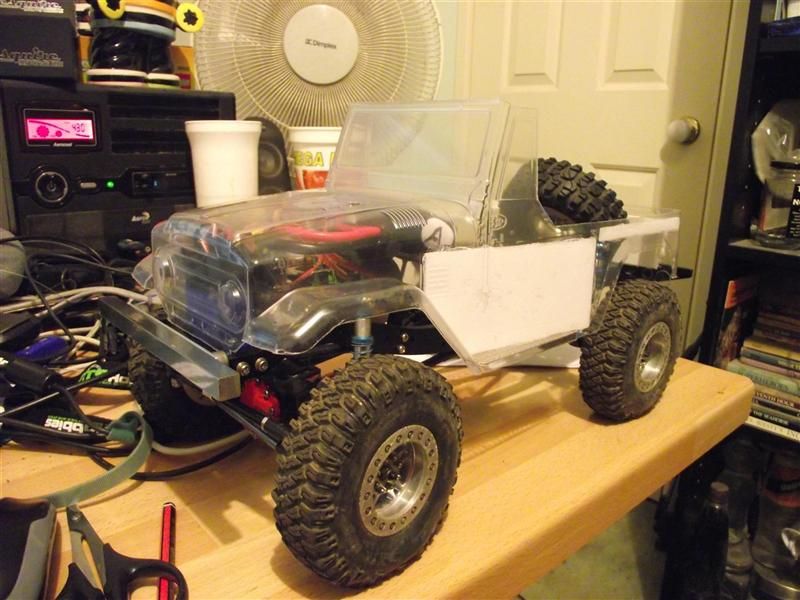 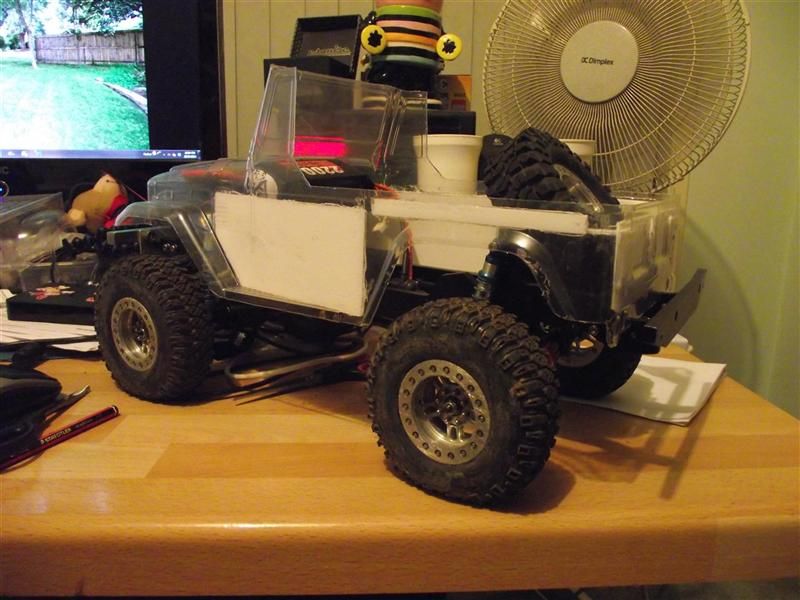 Hopefully you get the idea where I am headed with this build. I then proceeded to build a rear interior from 1mm styrene. This is my first attempt at this sort of thing and was very happy with how it came together. 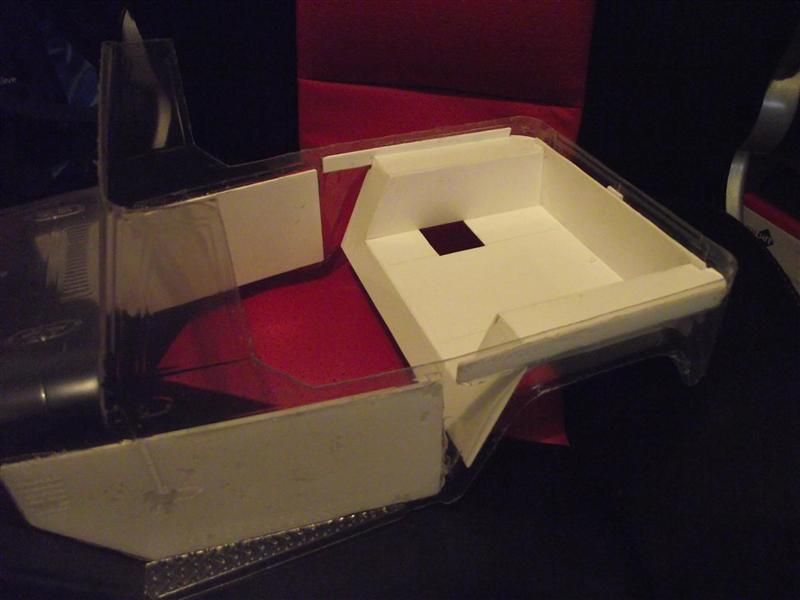 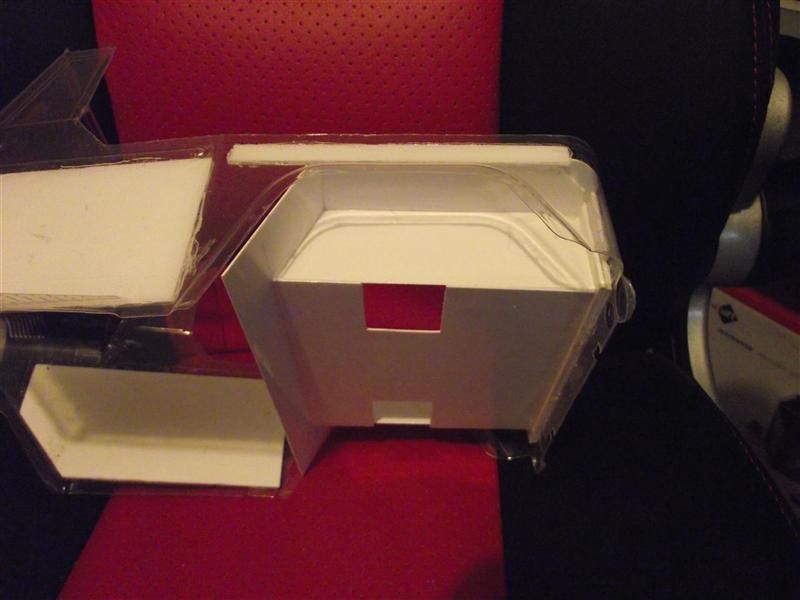 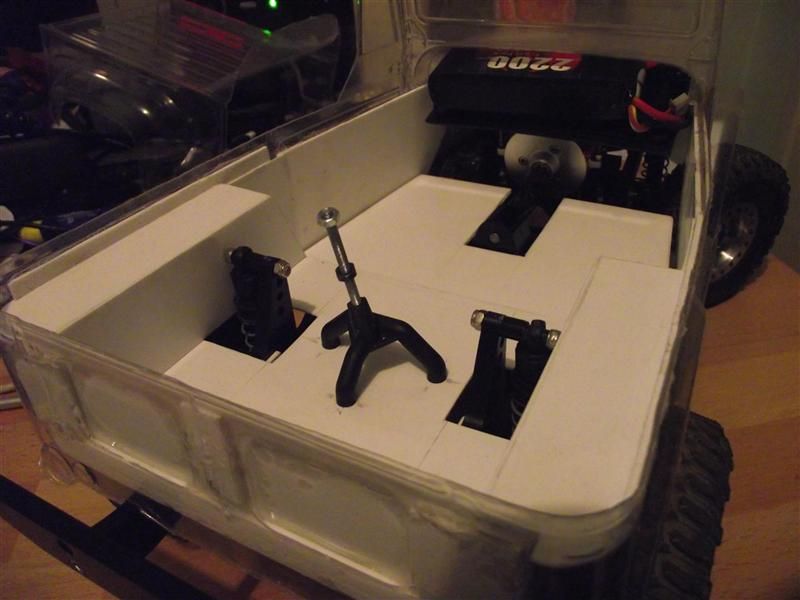 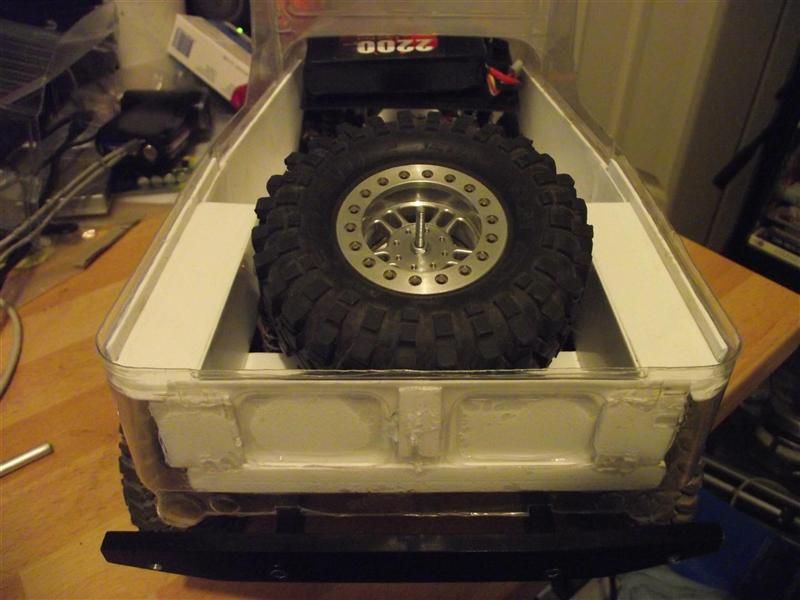 I also designed the rear mounting system. In doing this I added a 2mm styrene piece that neatly fits between the rear rails. The floor actually sits on the rails which gives plenty of support to the whole body. 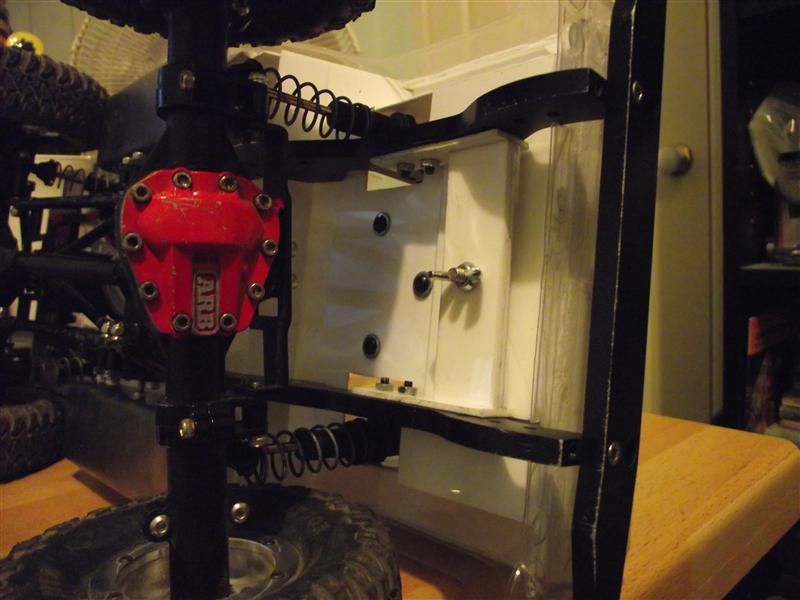 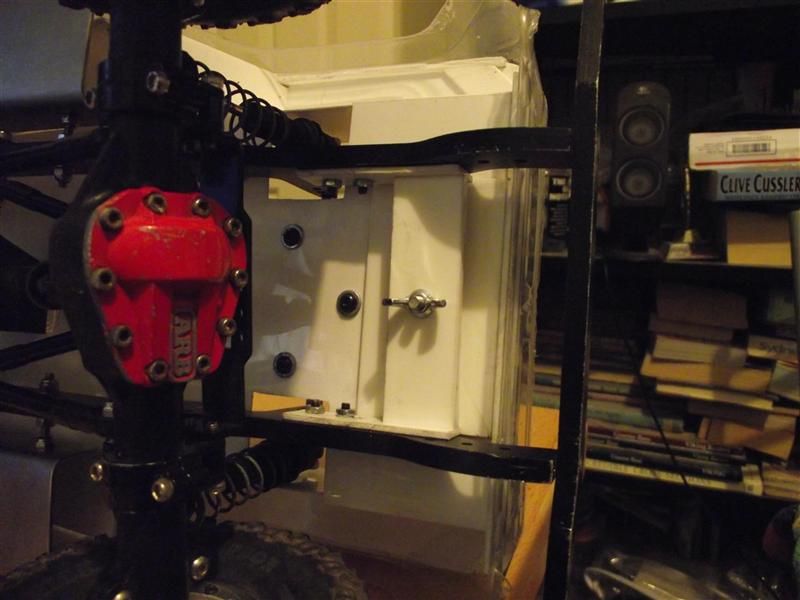 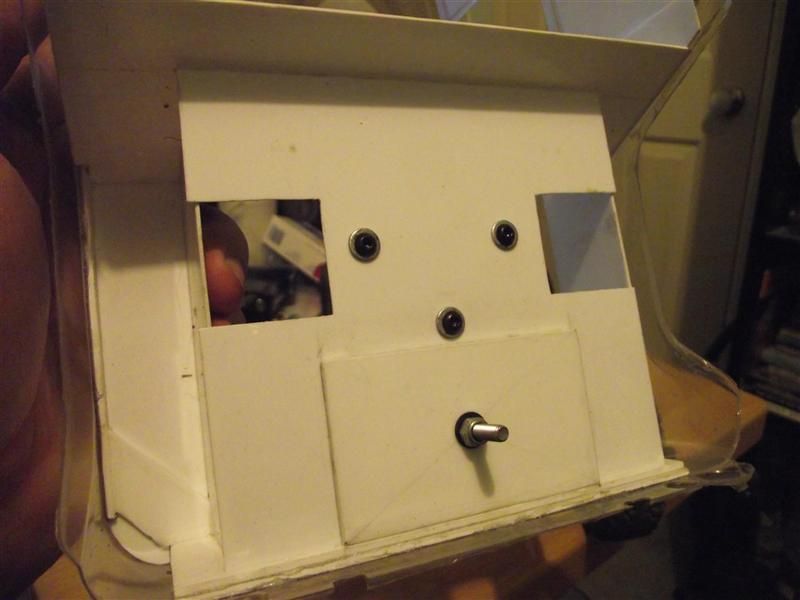 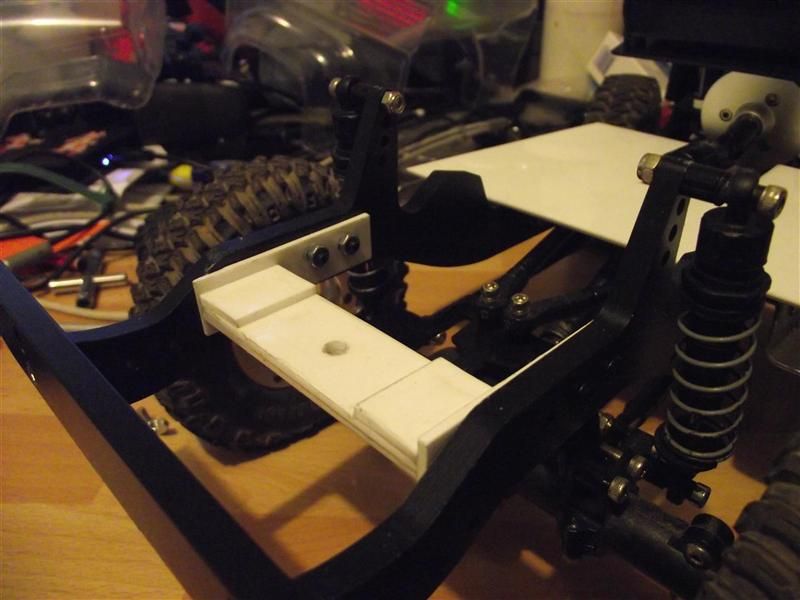 A stainless M4 bolt is secured to the body using a lock nut which then sits on the mounting bracket, and is neatly tightened down with the wing nut. I also built some scale seats from alloy sheet, and built some seat mounts from Styrene. 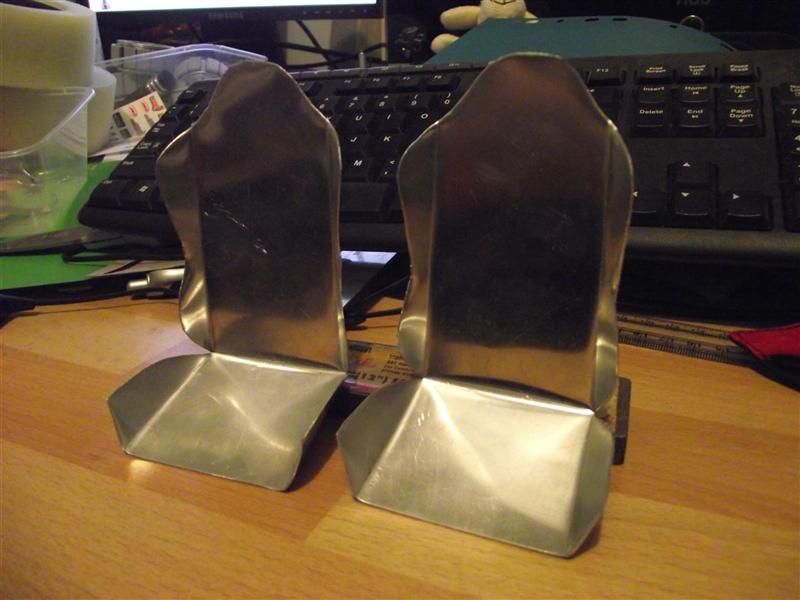 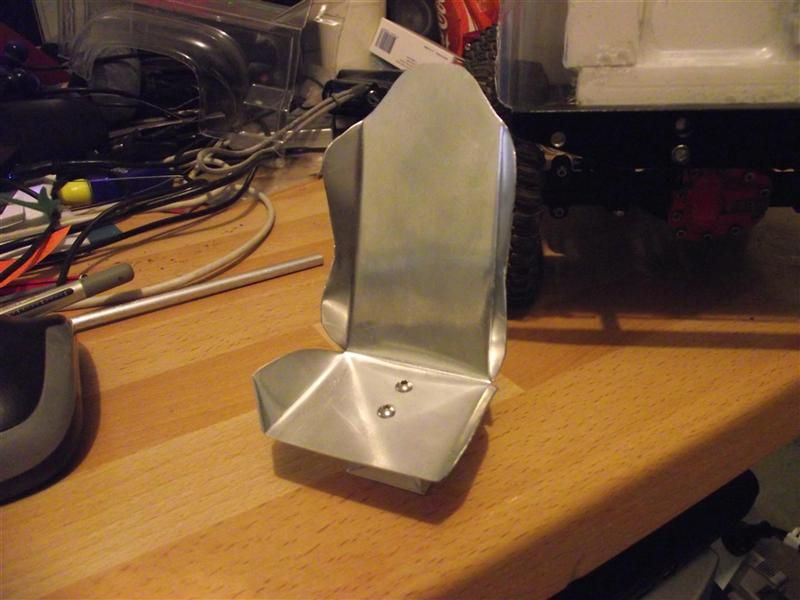 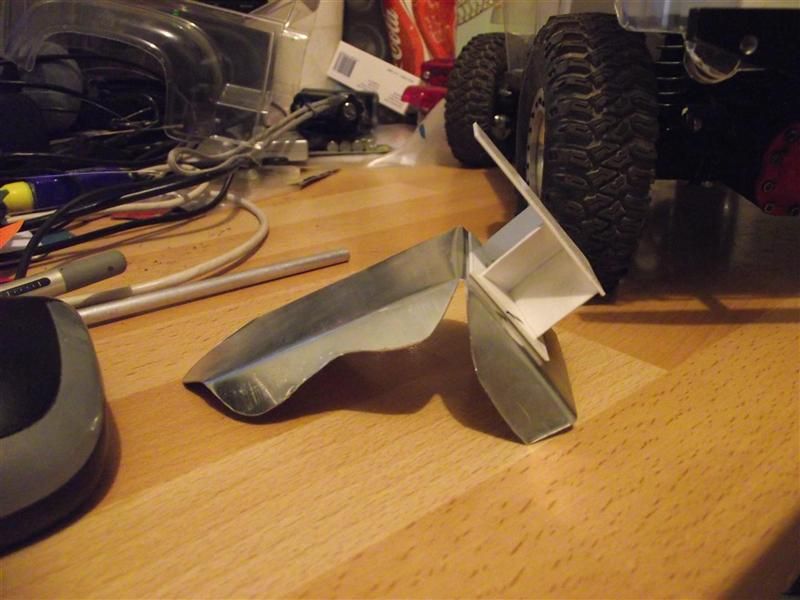 And a quick mock up with the seats, driver and Man's best friend as shotgun. 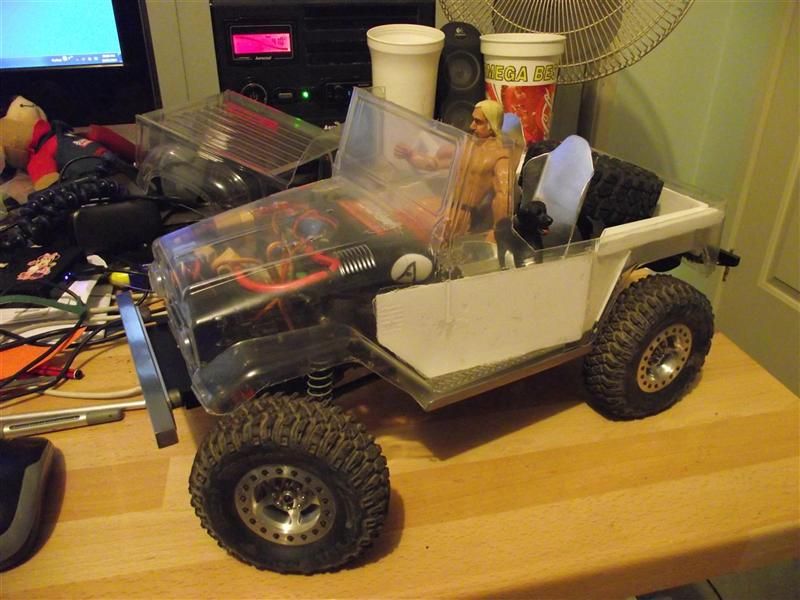 I have started on the floor and a dash. These items are more to get the feel of an FJ40, and authenticity is not the aim. There will be a roll cage installed, and the lid that was cut off is in one piece so I could use it as a removable hardtop in the future. Please let me know what you think, and any ideas, or constructive criticism are welcome. Cheers H2Micr0 |
| |  |
| | #4 |
| Rock Crawler Join Date: Jan 2013 Location: Australia
Posts: 541
|
As mentioned the stock Gelande 70mm shocks just didn't have the travel, and were too soft. I have found that the SCX10 shock has quite a lot of travel for its 90mm length compared to other options, and they are easy to get for a reasonable price. But, for this application they needed some work. In order to meet the regs for Class 1, I had to keep the body low and under 25mm from top of tyre to the wheel arch. The stroke of the SCX10 shock is almost double this, so I decided to go for a semi droop arrangement. I removed the short spring and wound down the pre tension ring so the shock would sit at around half of it's travel. This worked great, except the when cornering or sidehilling the shock would extend out to it's full length and unload allowing far to much roll. A bit of research and recalling my childhood LEGO days when I built suspension using springs out of BIC Pens, well before LEGO had their own design, I grabbed some cheap click type pens and got lucky with this spring. 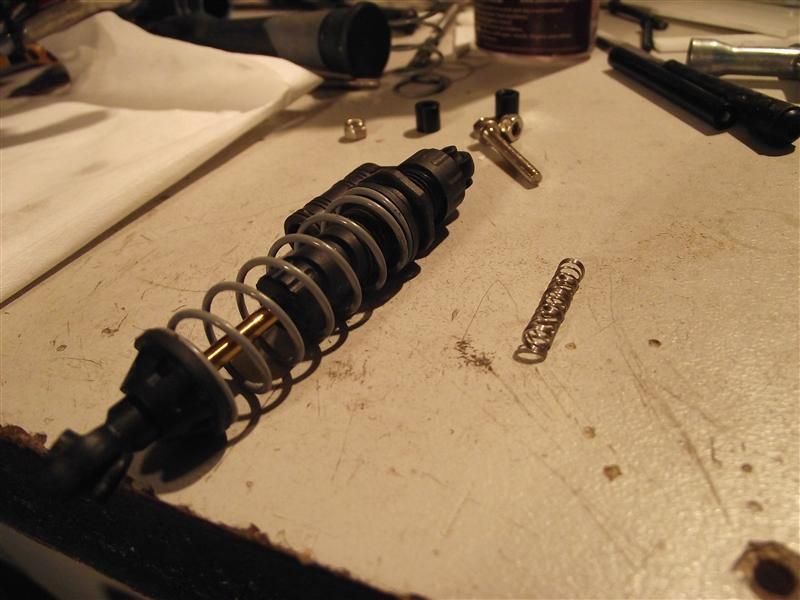 The spring was installed inside the shock body and provides sprung resistance to the extension or droop. This setup in my minor testing is working great. There is a slight reduction in overall travel but is quite realistic for a scale rig and is predictable. Cheers H2Micr0 |
| |  |
| | #5 |
| Rock Crawler Join Date: Jan 2013 Location: Australia
Posts: 541
|
The YOTA2 diffs are really a nice bit of kit. The rear is basically the same a the YOTA1, but the real upgrade is in the front with 8 degree round knuckles, and a beefier XVD option that allows for up to 45 degree steering angles. When looking at how to install the YOTA2 diffs in place of the original T-Rex 60 diffs, I considered purchasing the Ultimate 4 Link Mount that RC4WD make for them. But at $24.99 us each + postage, ruled them out. Instead I decided to adapt the T-Rex 4 link plate to the YOTA diffs. I used the lower link mount to work out the bolt locations on some 3mm x 12mm alloy stock and got to work. I also used 10mm angle alloy stock for the mounting brackets. The below pictures will make it clear. Oh, yeah, I also picked up some LURC Scale m3 bolts while in the US and thought this is the right build to bring them out in select areas. This is the front diff mounts. The lower link brackets are shaped to allow the later addition of BTA steering if desired. 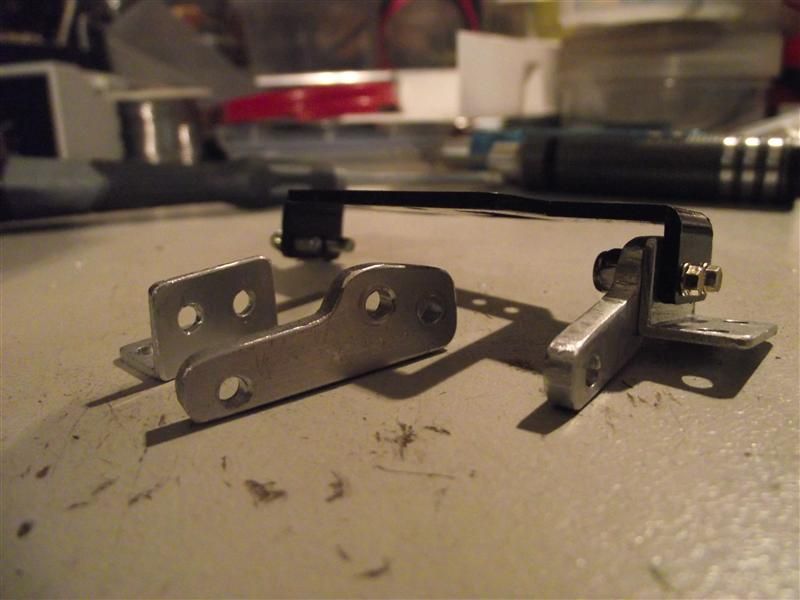 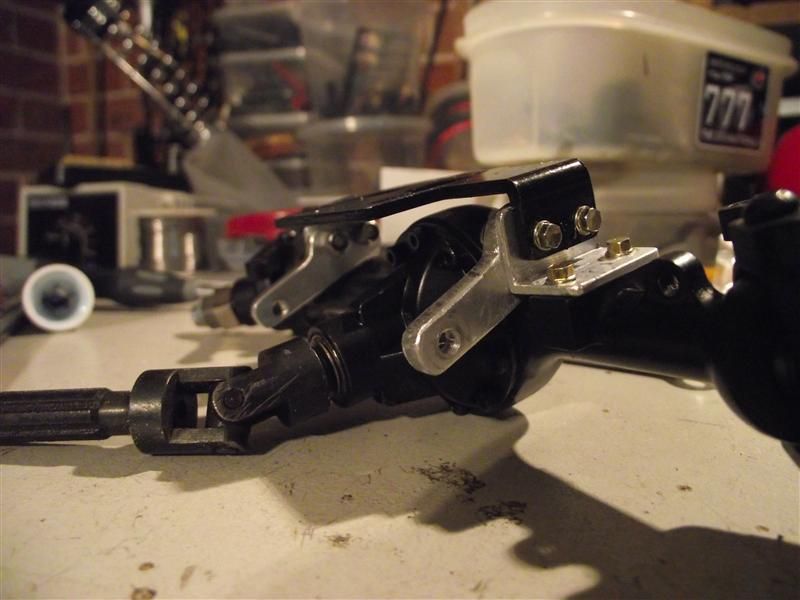 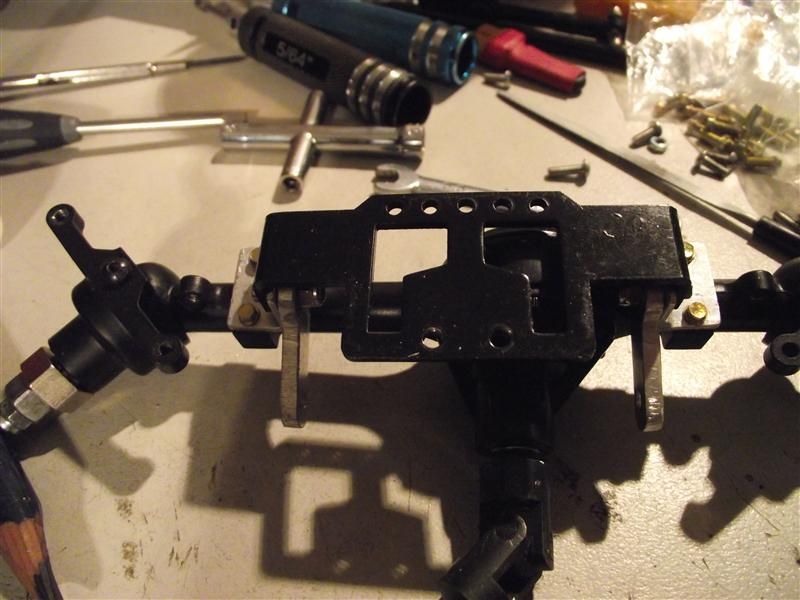 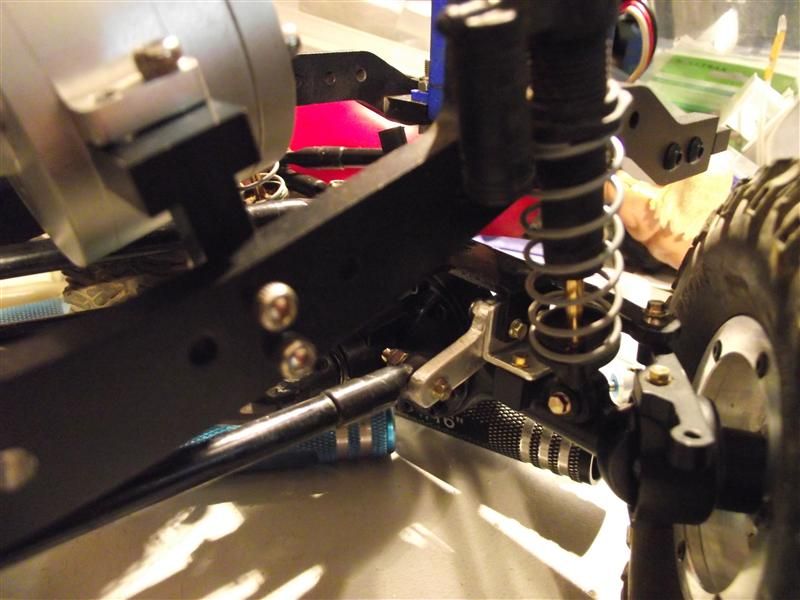 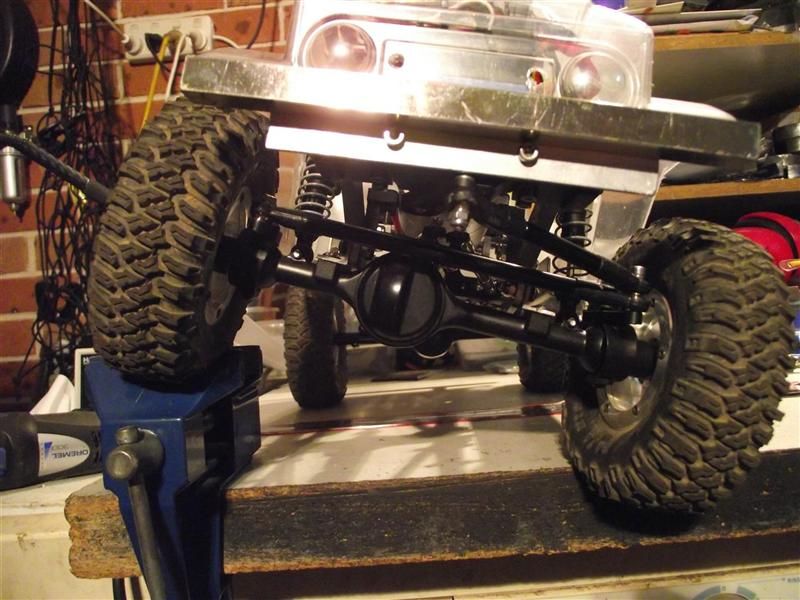 And the rear. Not shaped like the front. 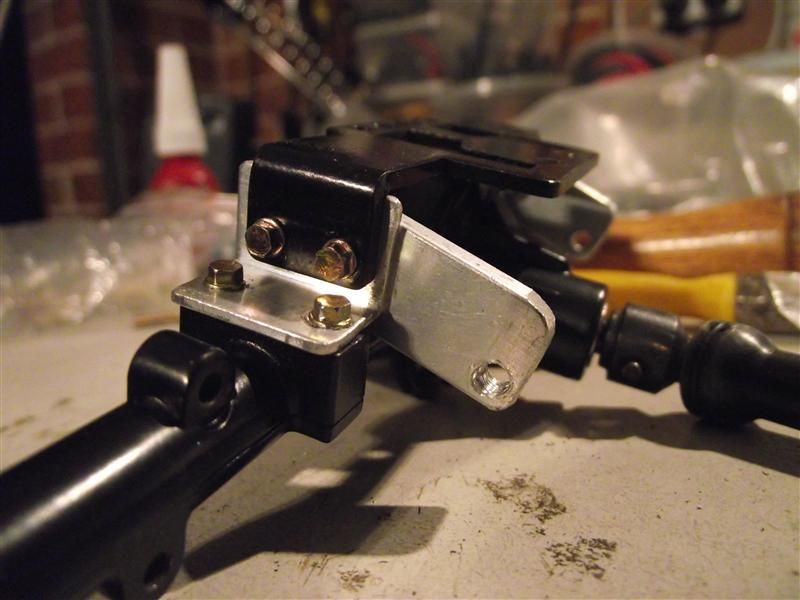 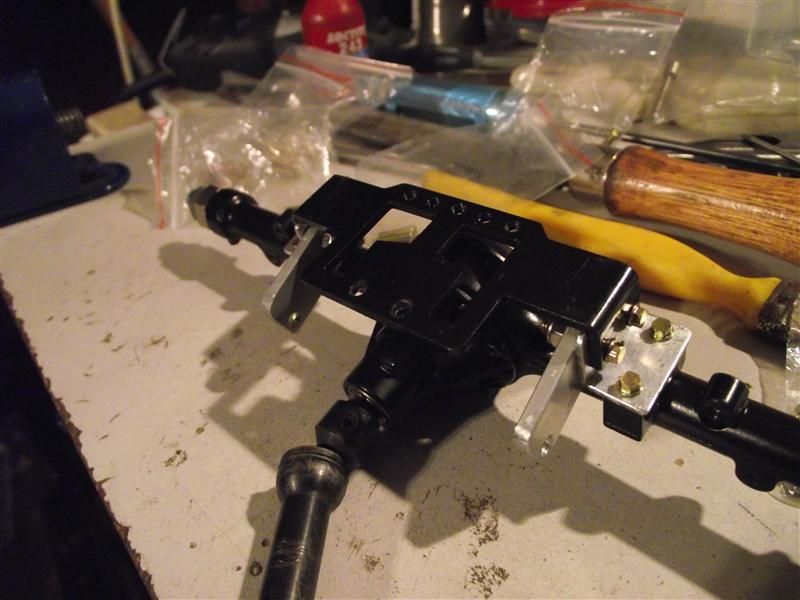 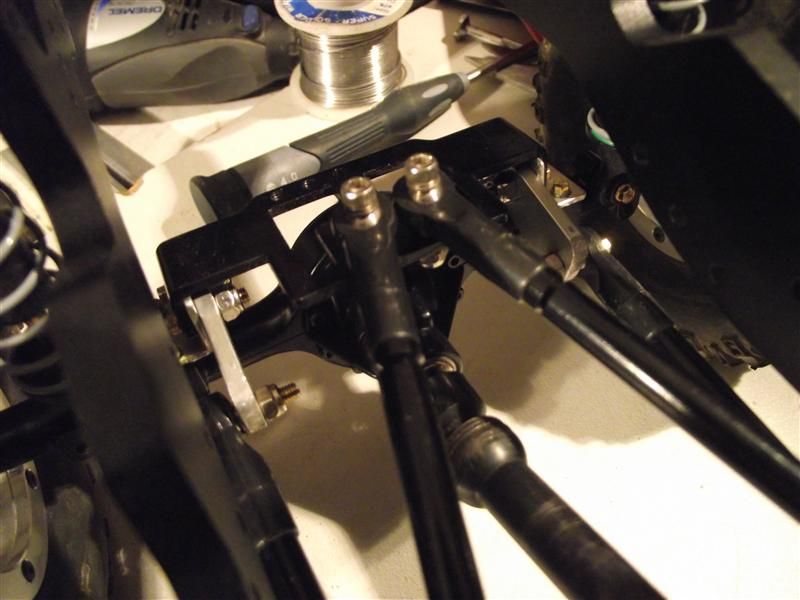 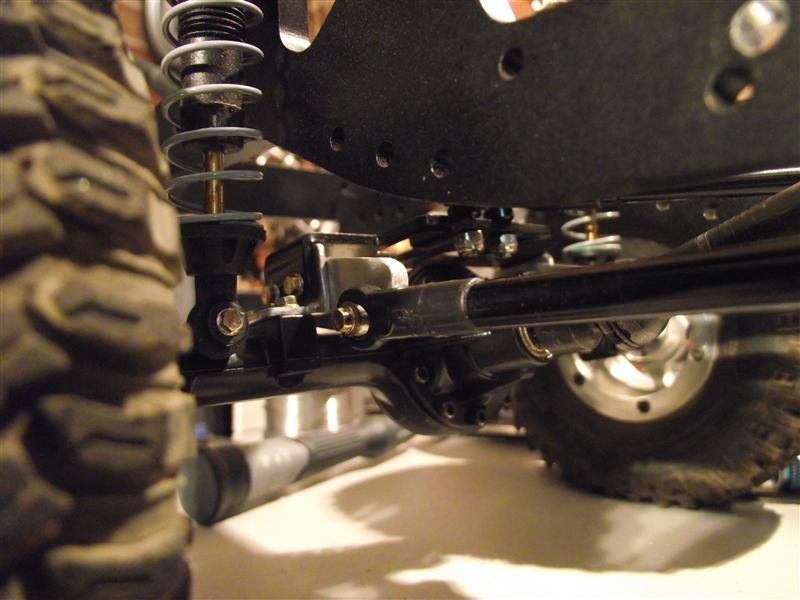 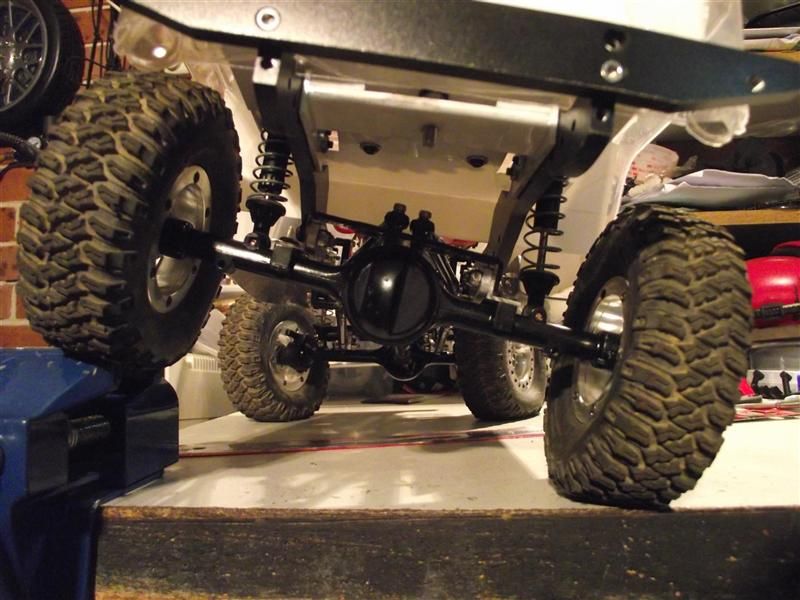 The front lower links are mounted inboard to allow clearance for the front tyres on full lock. They were rubbing on the outside. I took the rig out for a test run and discovered with all of the steering lock the tyres rubbed badly on the front shocks. And I still needed a front body mount, so fixed to issues with one addition. 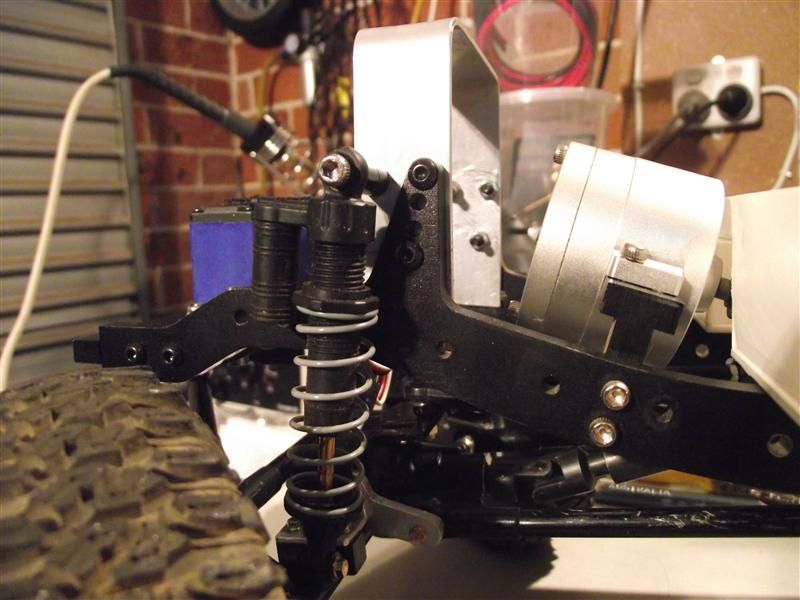 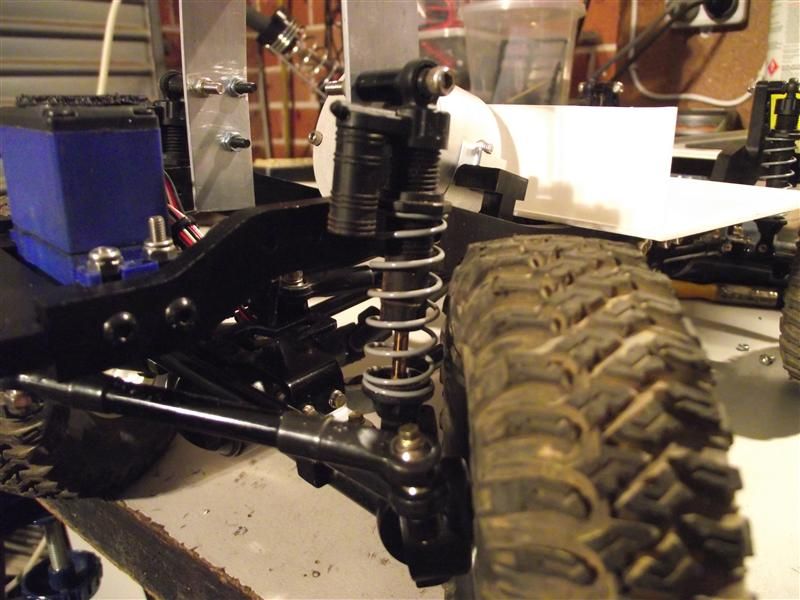 Now at full compression, there is only a very slight contact which I deem acceptable. LOL. 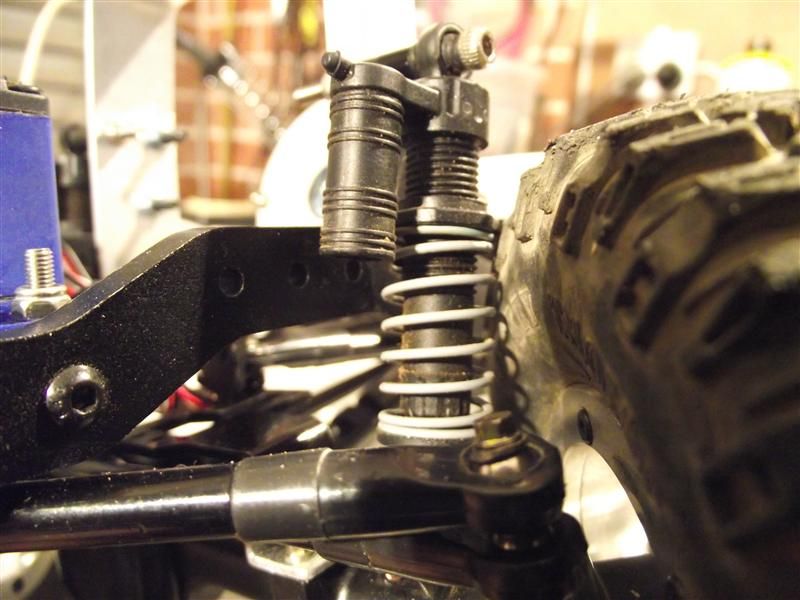 Cheers H2Micr0 |
| |  |
| | #6 |
| RCC Addict Join Date: Nov 2009 Location: Tulsa
Posts: 1,667
|
looks awesome man
|
| |  |
| | #7 |
| I wanna be Dave Join Date: Jan 2004 Location: Austin Texas
Posts: 3,866
|
Very cool! I like those link mounts you came up with.
|
| |  |
| | #8 |
| Rock Crawler Join Date: Jan 2013 Location: Australia
Posts: 541
|
Being a lexan body I needed to find a way to protect the front, rear and sides, and to meet the Class 1 regs, the body is not allowed to deform. The rear bumper was easy as the standard Gelande alloy bumper came with the chassis. I thought about building a front bar and rock sliders myself, as I had done for the Troopy, but wanted a different look and feel this time around. I was walking through Bunnings (local hardware chain) and recalled seeing a post on Facebook where the builder had used door hands for rock sliders. I went and had a look and found heaps of possibilities. I ended bringing home a couple of choices. For the front I decided on a solid square bar. It is quite heavy and will never break. I fabricated a mounting bracket, and tonight added some finishing touches. 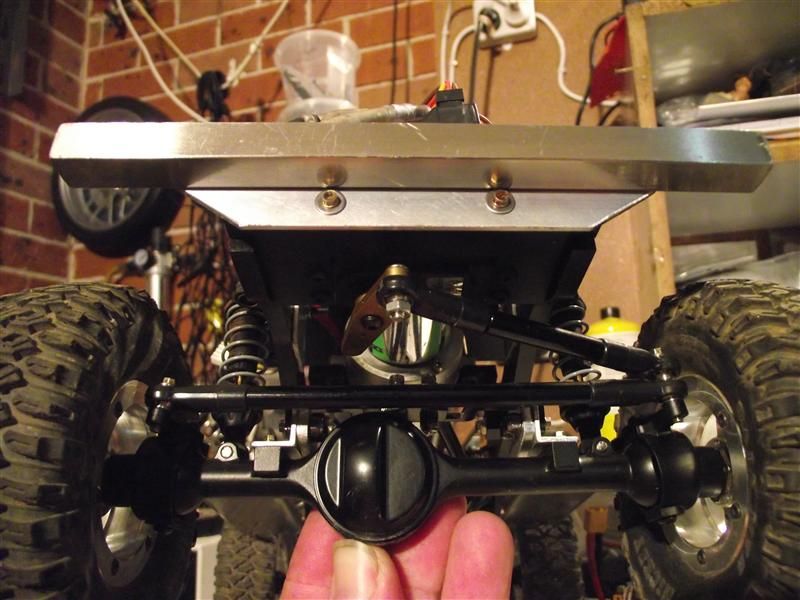 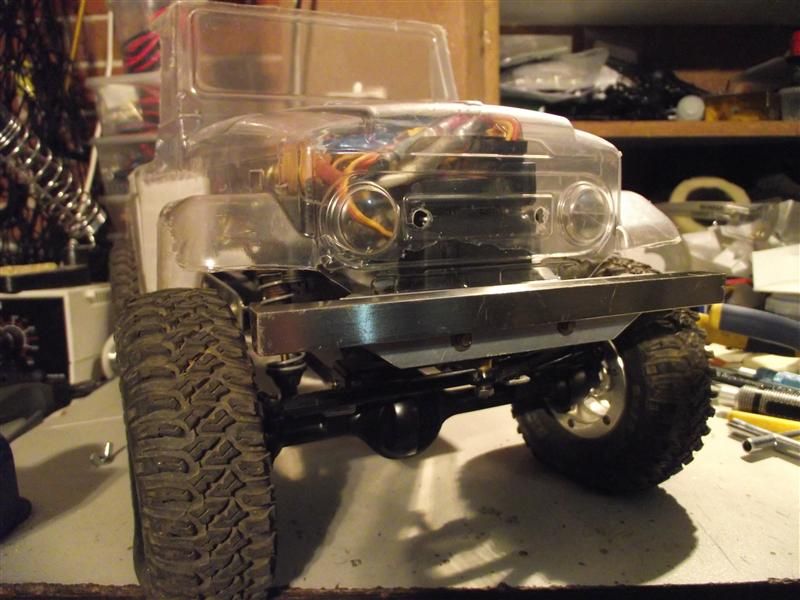 The rear bar needed to be tucked in closer to the body as the chassis was too long for the FJ body. This picture shows the gap.  After drilling the lower mounting hole much deeper, I trimmed the rear of the chassis with the grinder. Then I tapped the hole to suite m3 bolts. 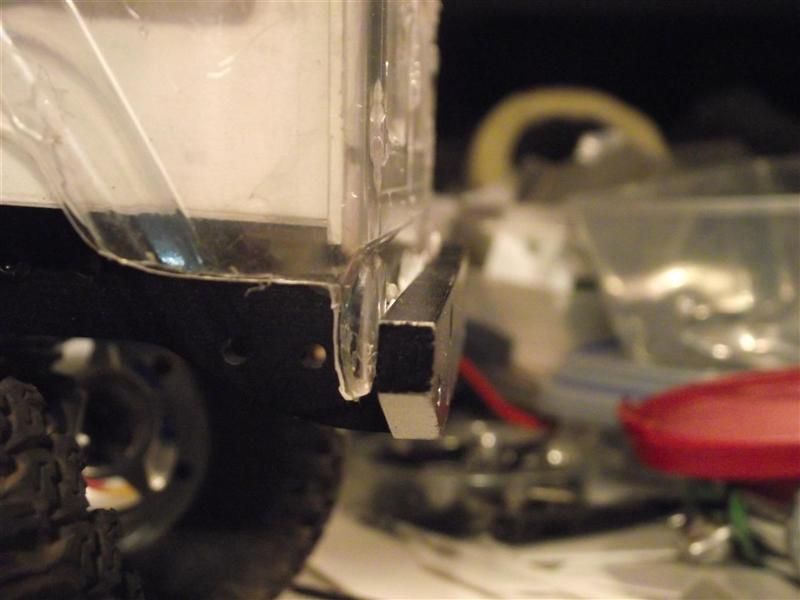 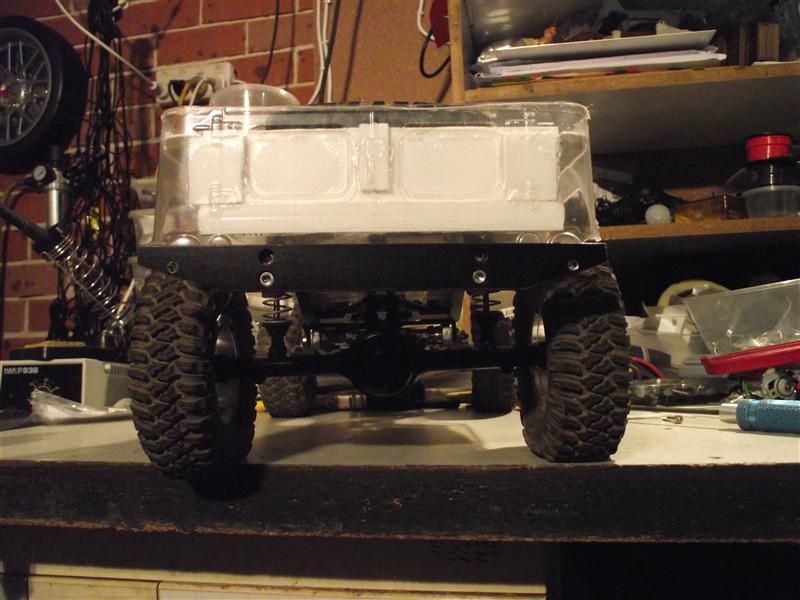 Looks much better, and the departure angle is much improved. For the rock sliders I found some stainless handles that were just the right length. 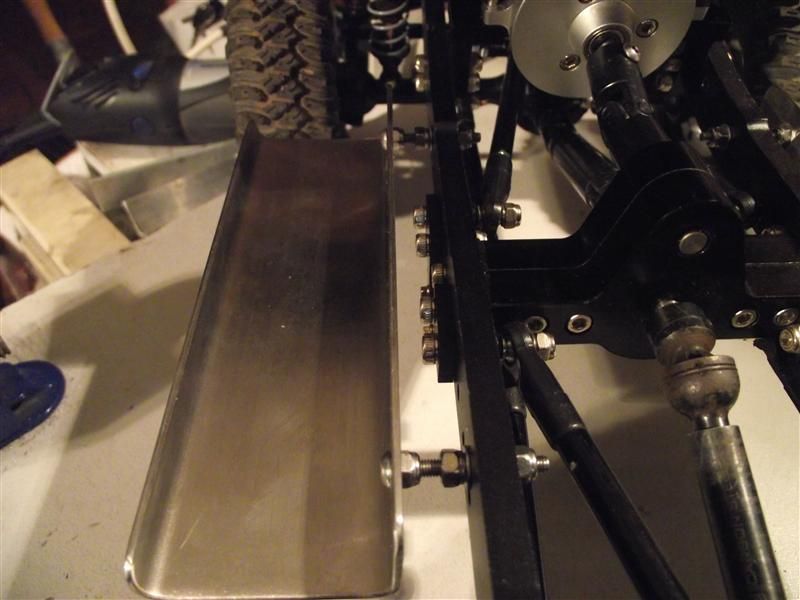 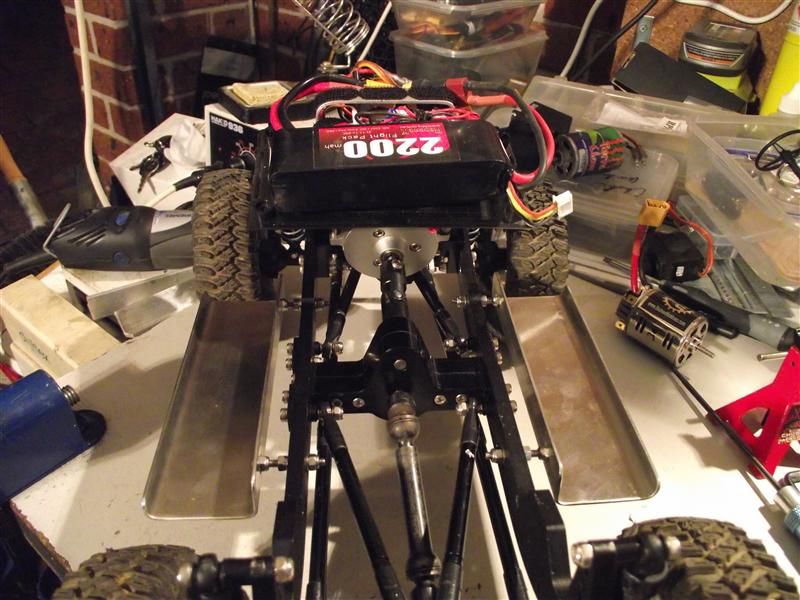 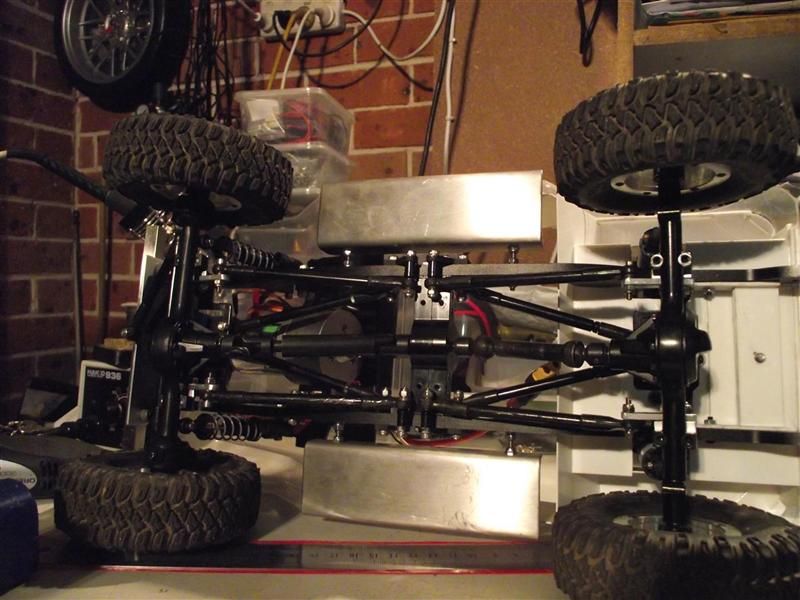 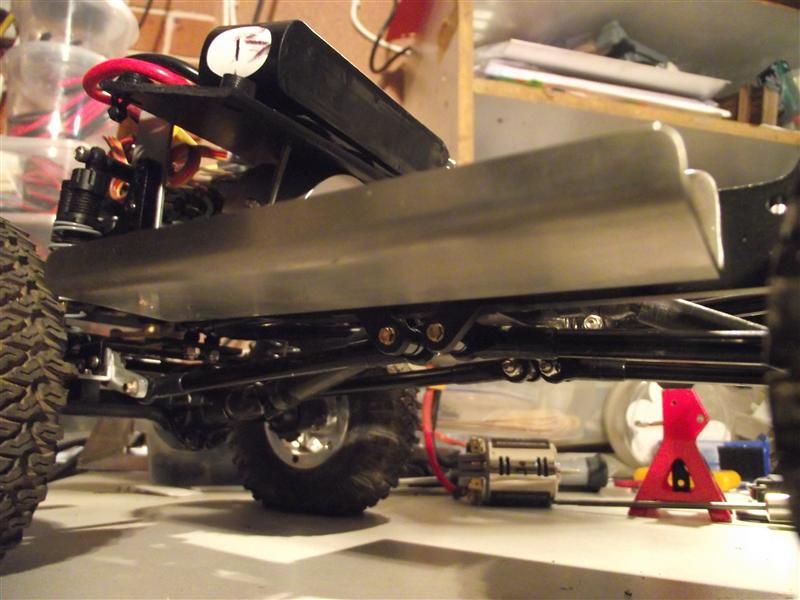 This photo shows how much flex there is, and how well the rock sliders fit the body. And of course the LURC wheels with scale hardware. 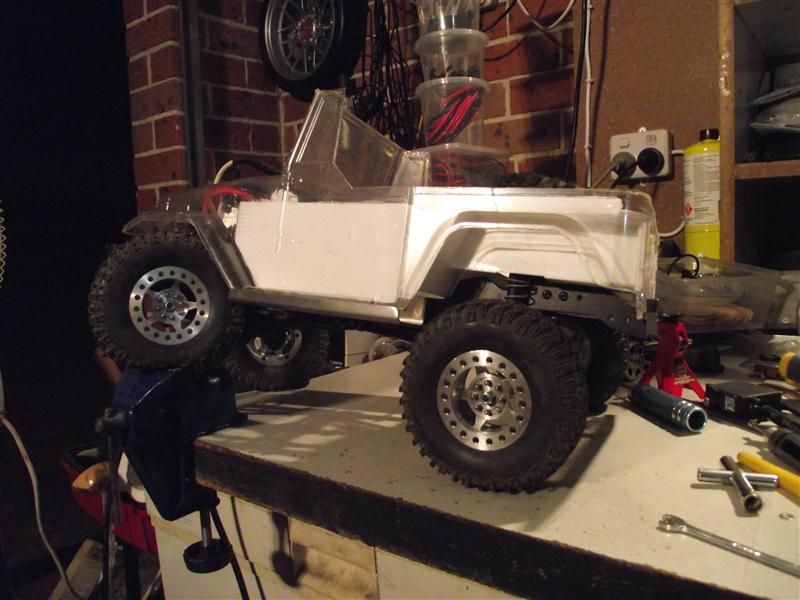 Cheers H2Micr0 |
| |  |
| | #9 |
| Rock Crawler Join Date: Jan 2013 Location: Australia
Posts: 541
|
I have been undecided on how to mount the dash for a couple of weeks now. Did I want to mount it to the body? Or to the floor? How? I started and gave up on it a few times. LOL. I had ordered in some more 2mm styrene and went ahead and made filler pieces to go on the inside of the doors up to the top edge. This added some depth, and strength to the door tops, and provided me the final piece of the dash puzzle. With new inspiration and motivation I made up a simple dash of the FJ flavour with some guage pods and bezels, mounted up an Axial steering wheel and column, and a grab bar on the passenger side. I also found some adhesive backed felt and upholstered the seats. I hope you like where this is going, as I sure do. 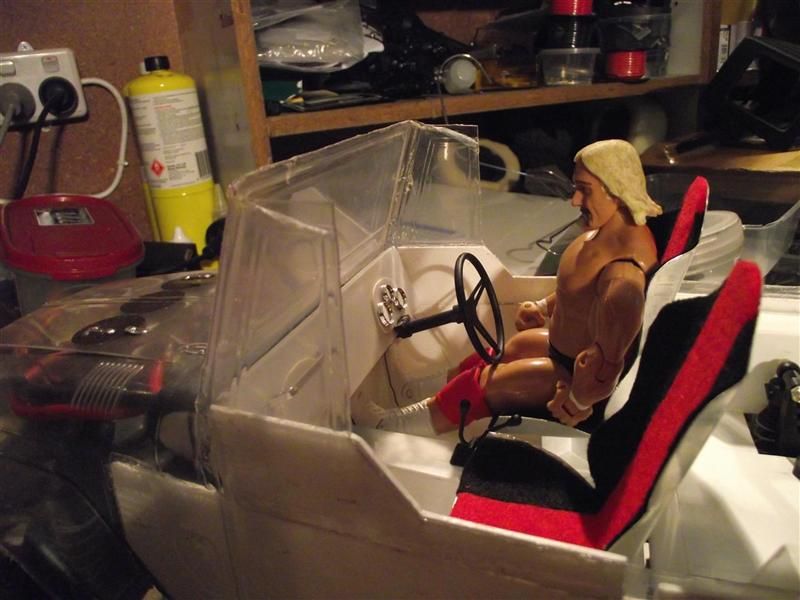 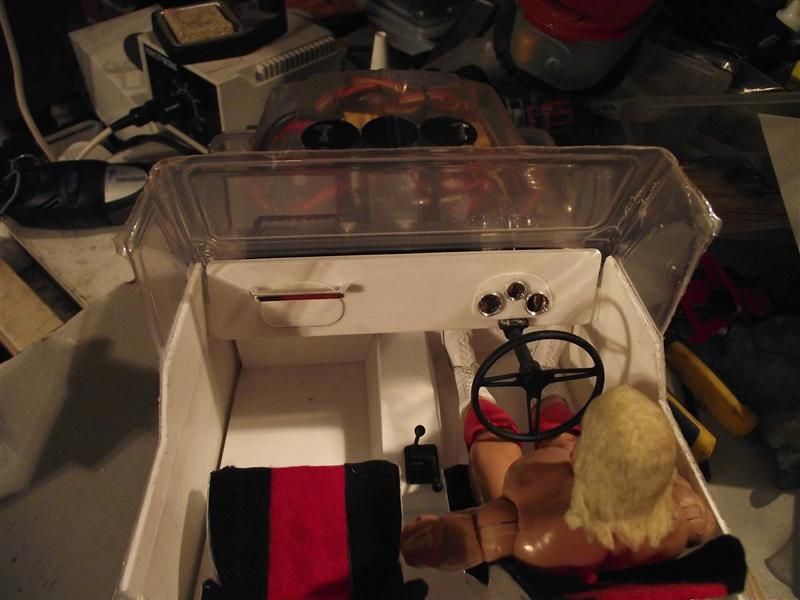 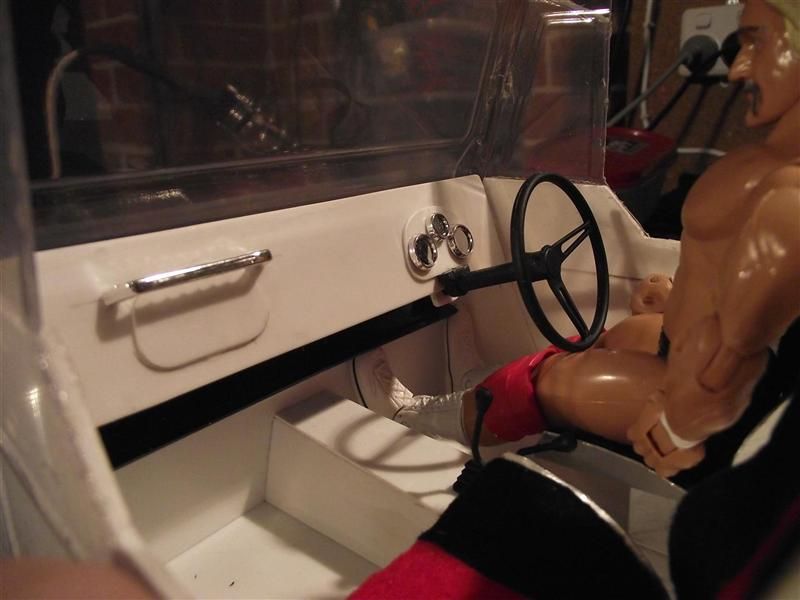 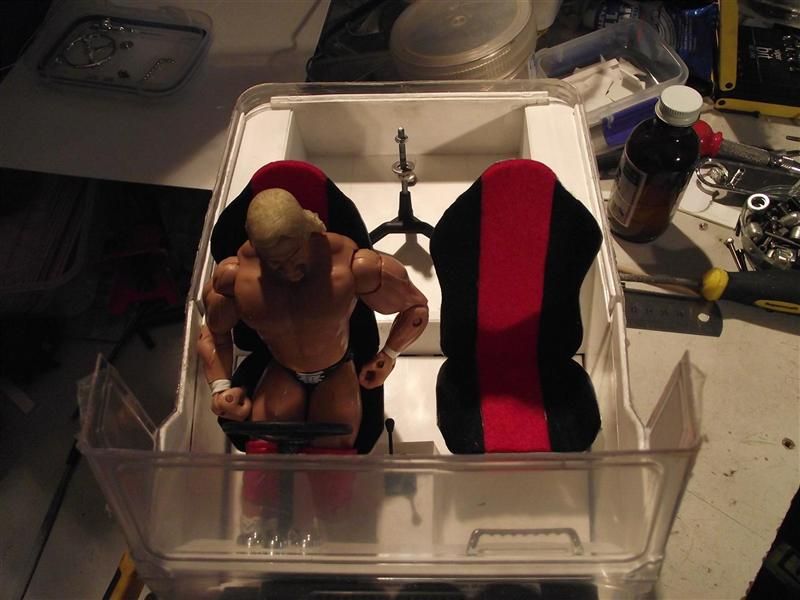 I also filled in the gap along the back edge with a small panel. 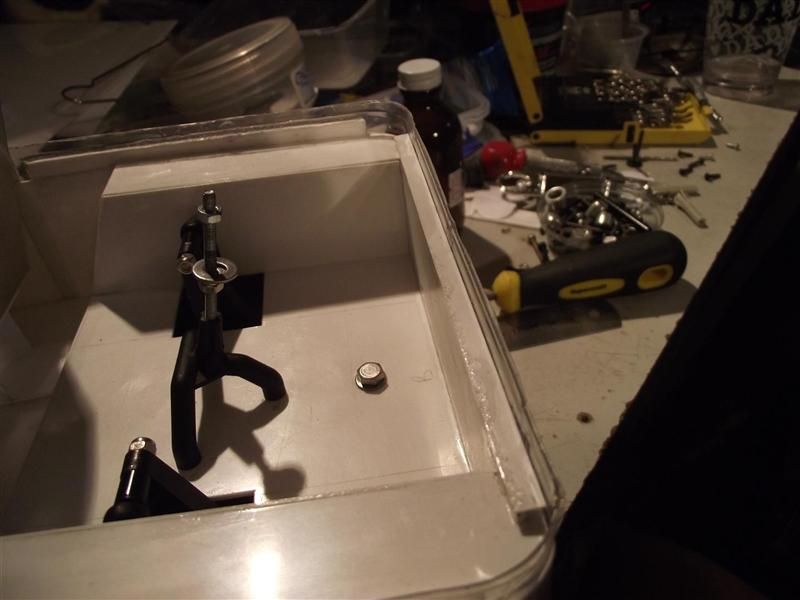 I may add in some inner door panels with armrests etc, and am also considering some inner quarter window frames and windshield surround. We will see as I am keen to finish this and get to wheeling. I found some pipe cleaners the other day and mocked up a loose idea for the roll cage. It is surprising how much this changes the visual perception of the truck. 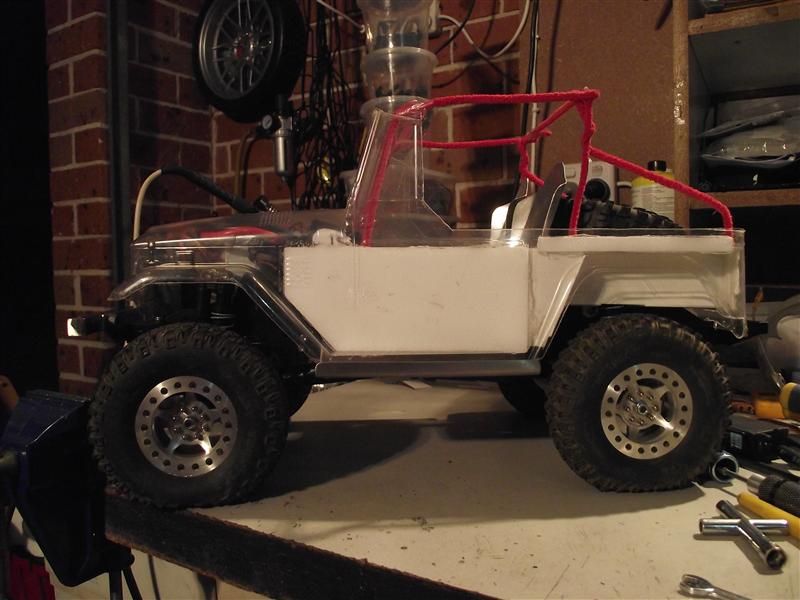 Building the roll cage is the next phase. Cheers H2Micr0 |
| |  |
| | #10 |
| Rock Crawler Join Date: Jan 2013 Location: Australia
Posts: 541
|
The past week or so of the build has been focused on designing and fabricating the roll cage. As per the 'pipe cleaner' mock up, I wanted a roll cage that was a simple design, yet would still absorb a few roll overs while protecting the lexan corners. This rig is going to be driven and challenged, and as such I expect quite a few tumbles along the way. Material of choice is 3/16 brake line. I couldn't achieve a tight enough bend with what I had to hand to have a continuous hoop. So the next best solution was to have corners. This actually worked out well in the end providing a distinctive shape to the silhouette. These pics are from part way through the build. 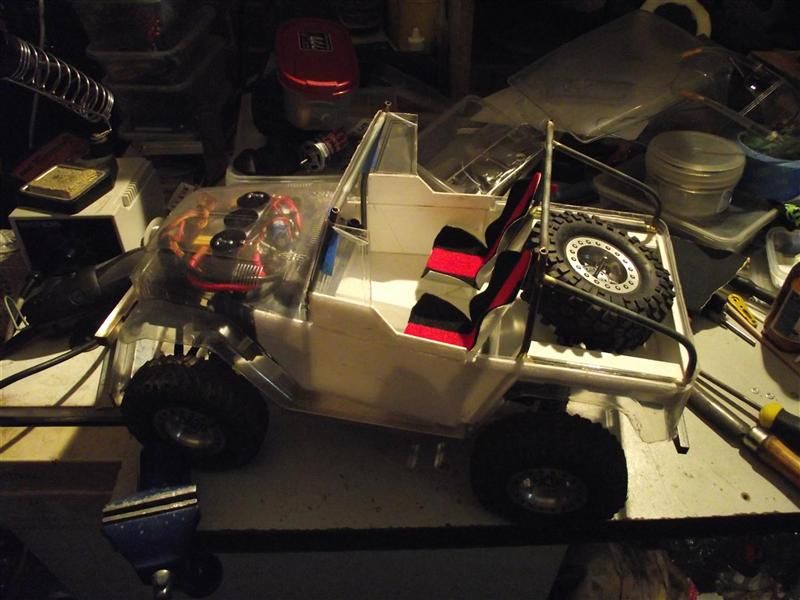 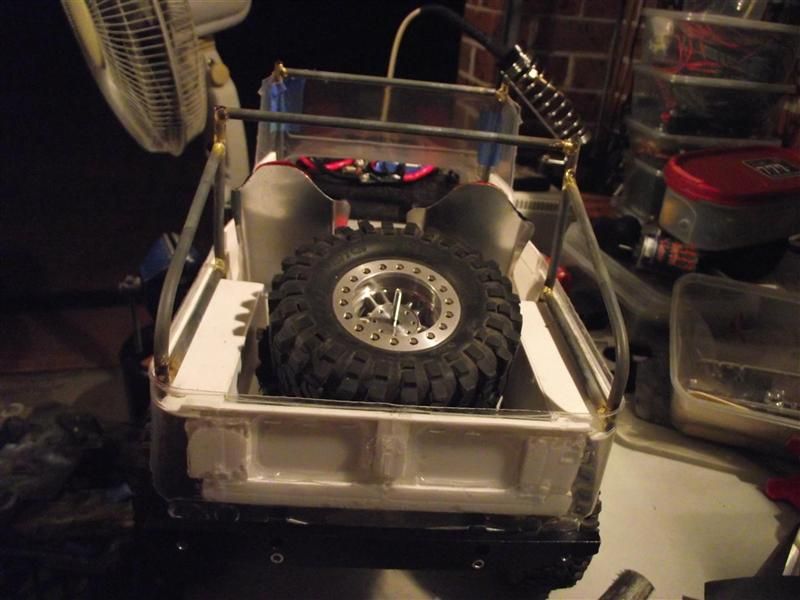 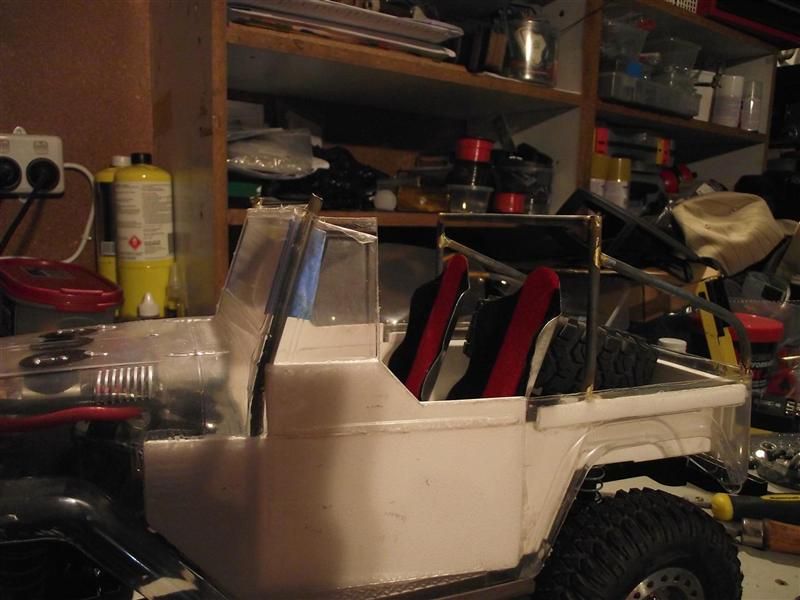 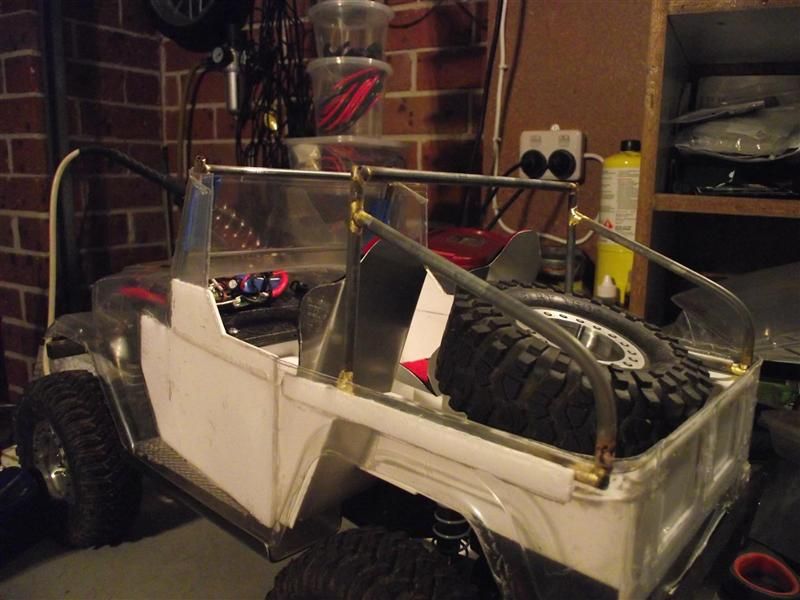 It was rather tricky positioning each bar in the right location, angle and orientation, but in the end the brazing was done. 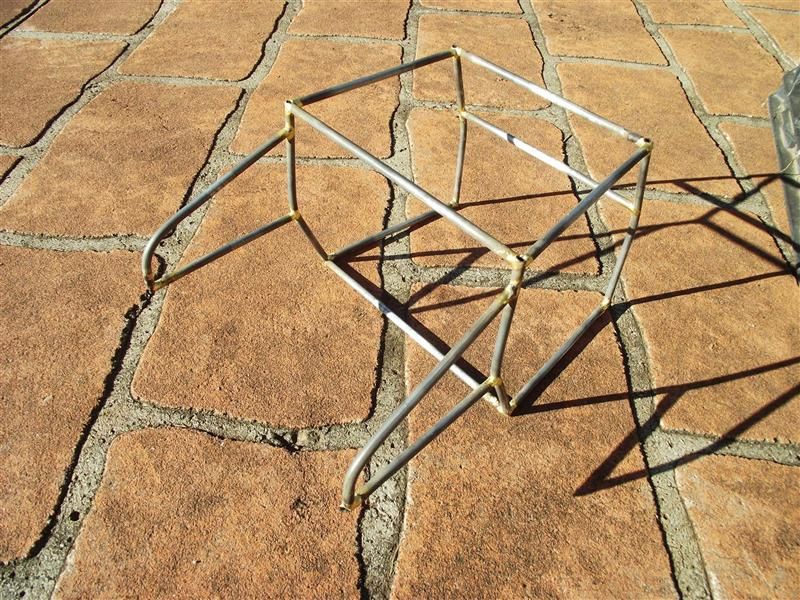 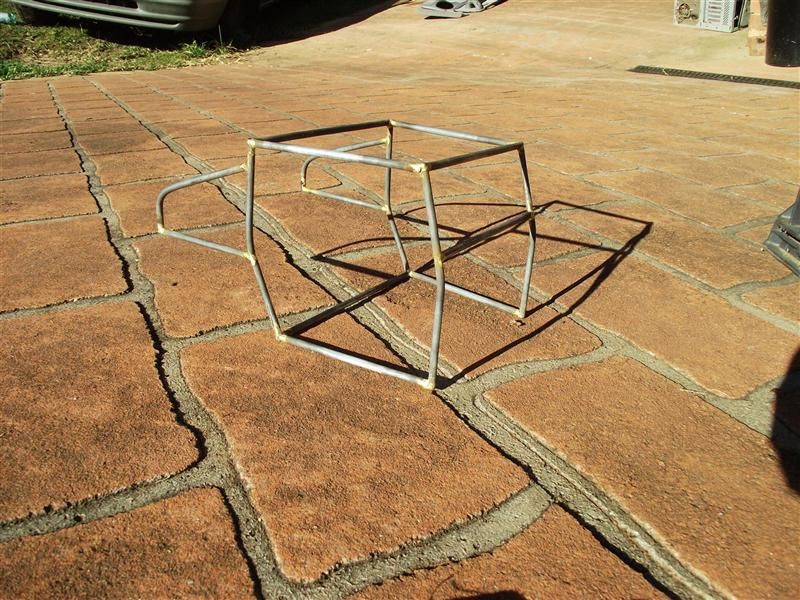 I painted the cage in a silver enamel as it was cheap and easy to get. Besides, I don't know how long it will stay on there LOL. Oh, you also get a look at the body colour as I painted the dash. 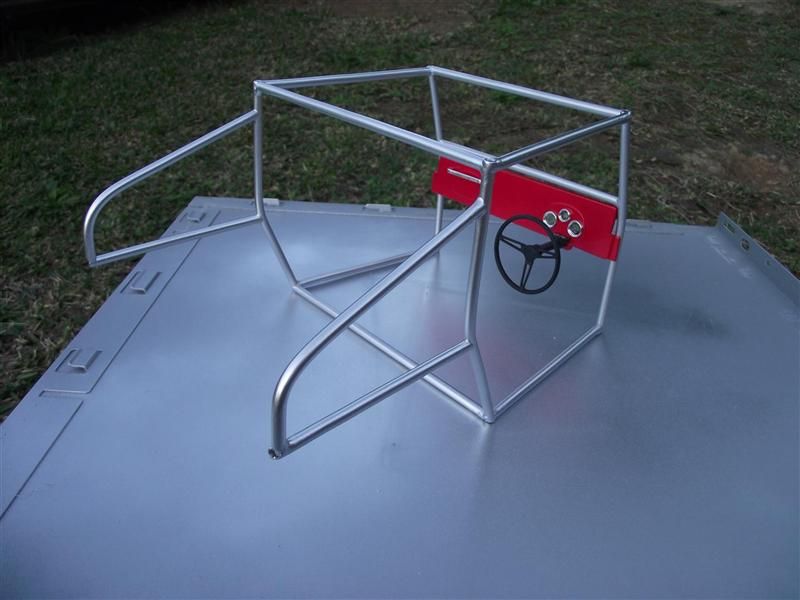 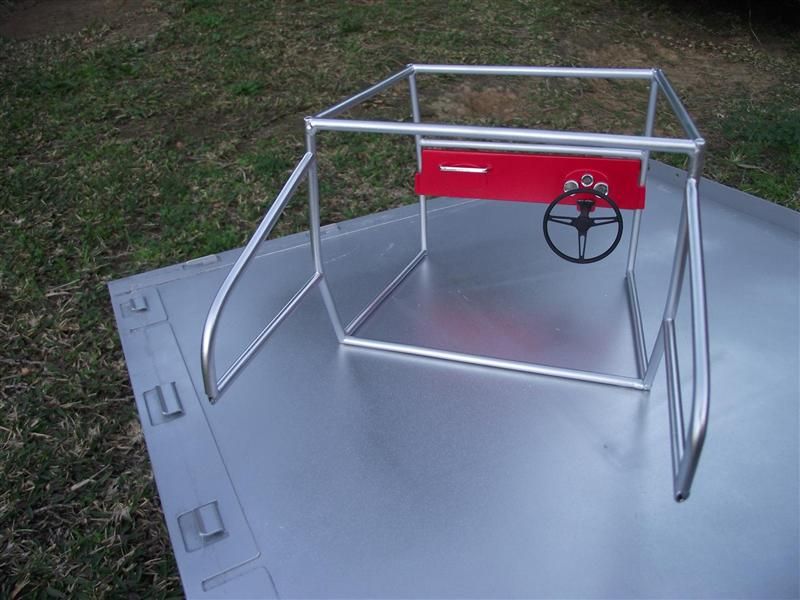 Very happy with how this has turned out. The red is just right, but, being sprayed on white styrene, I now realise I need to paint the entire body white first to ensure colour consistency LOL. The cage is an 'interference' fit in the body, and is soooo tight I don't need to actually fasten them together. I have finished filing and sanding the styrene parts of the body, and only need to drill some holes for tail lights, mask off the 'glass' and break out the spray cans. Cheers H2Micr0 |
| |  |
| | #11 |
| Rock Crawler Join Date: Jan 2013 Location: Australia
Posts: 541
|
With time rapidly diminishing, I masked up the body and painted it in white using Tamiya paints. First light coat. 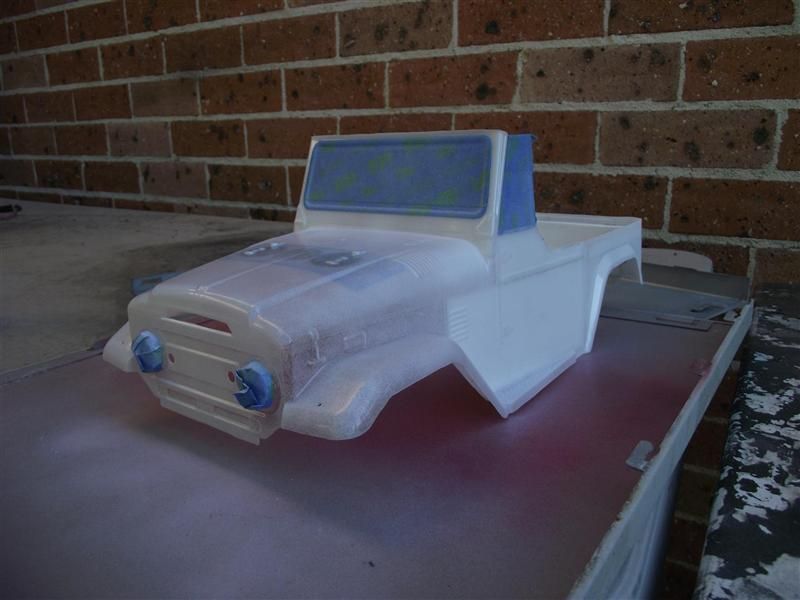 and done, letting it dry overnight and most of the next day. 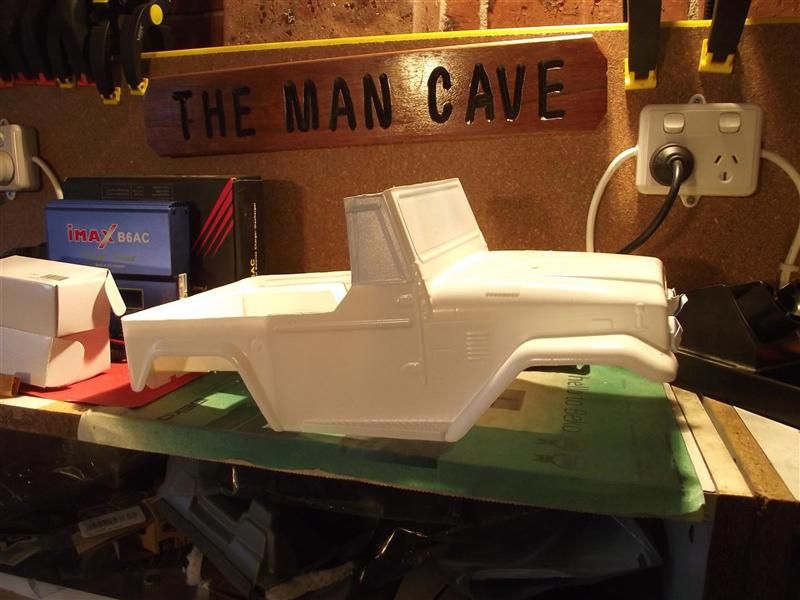 After work the following day, I got out the Metallic Red Tamiya paint and lay down 4 coats in total, all over the body. 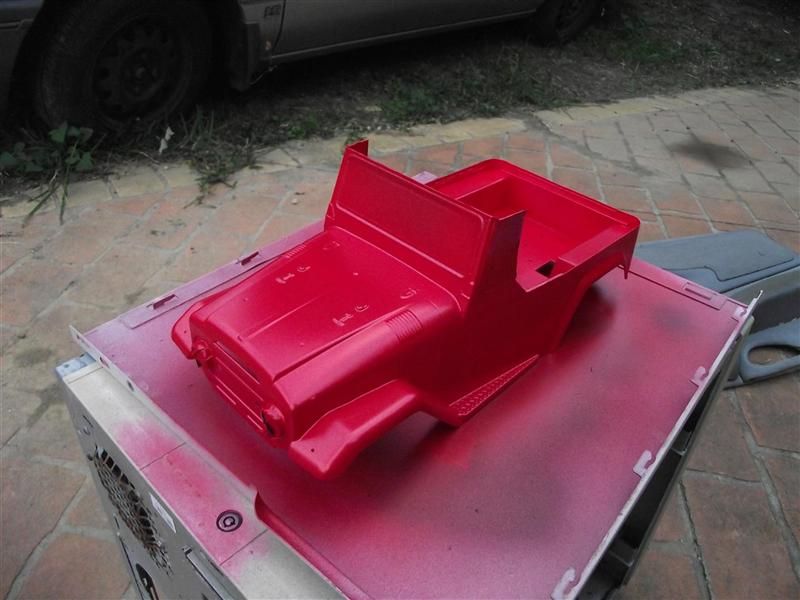 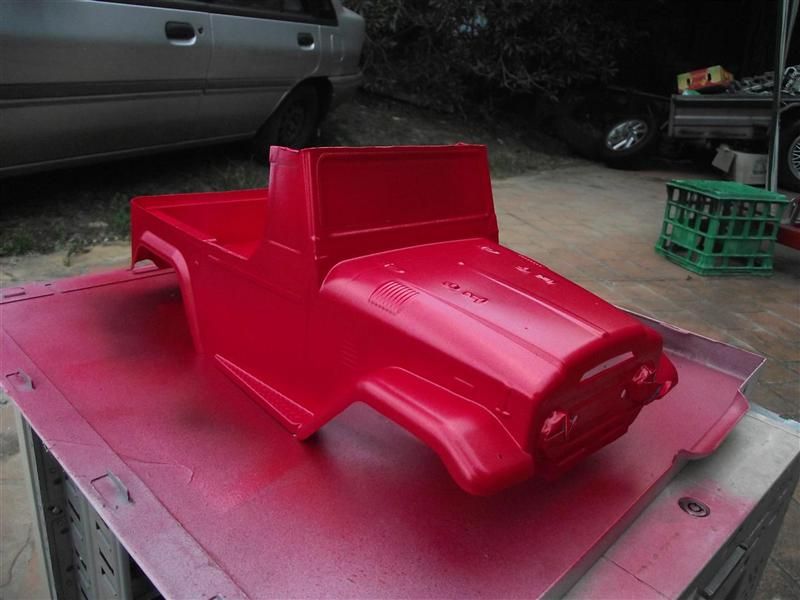 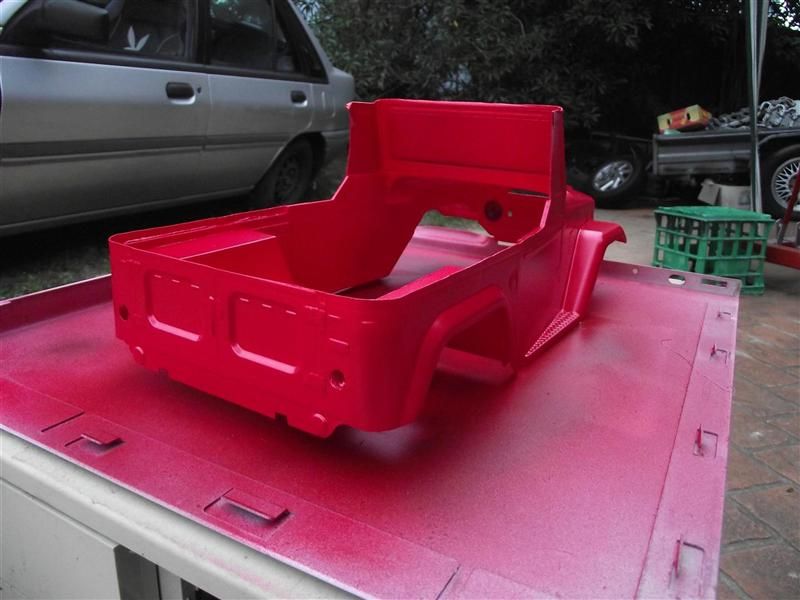 Last one sitting loosely on the chassis, had to get an idea of what it was going to look like in colour. 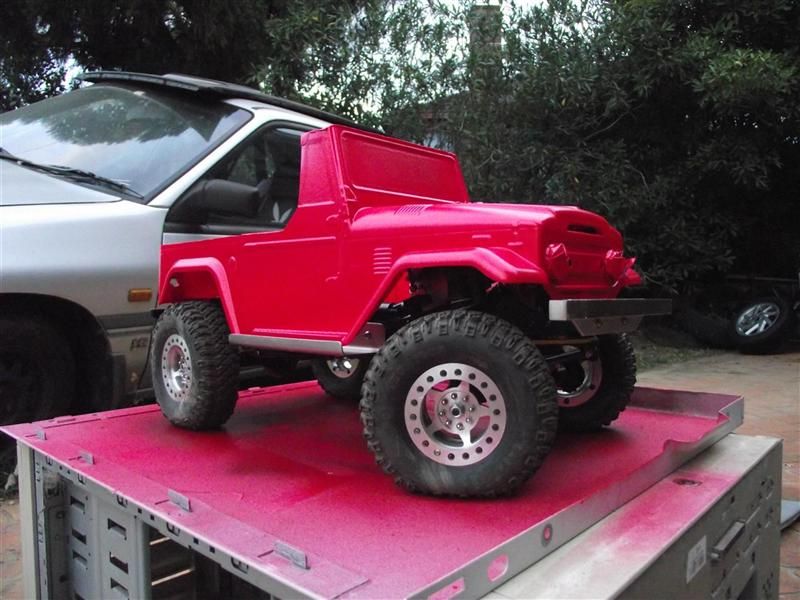 I then let the red also dry overnight and all the next day and night. I needed to mask off the window frames and window rubbers, so wanted to be sure the red wouldn't lift when removing the masking tape. Here it is masked up after spraying on the black. Had to mask inside and out as it has no roof LOL. 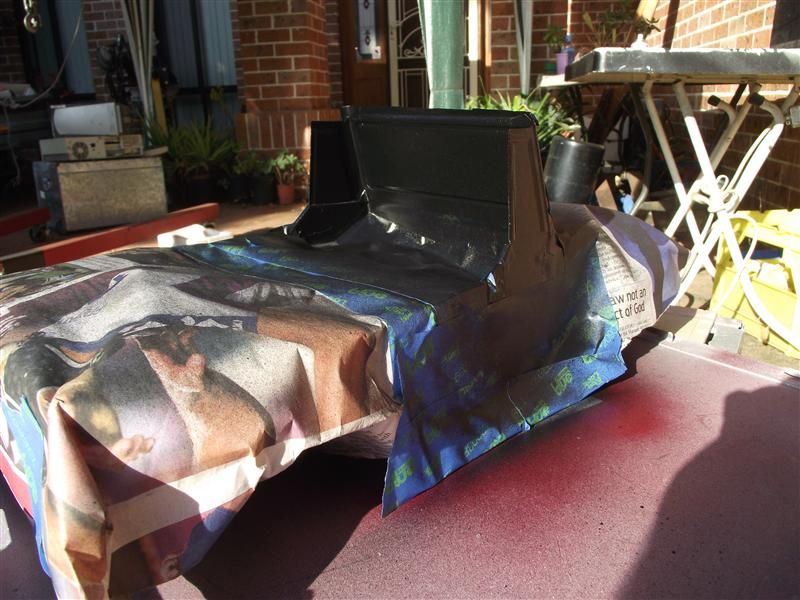 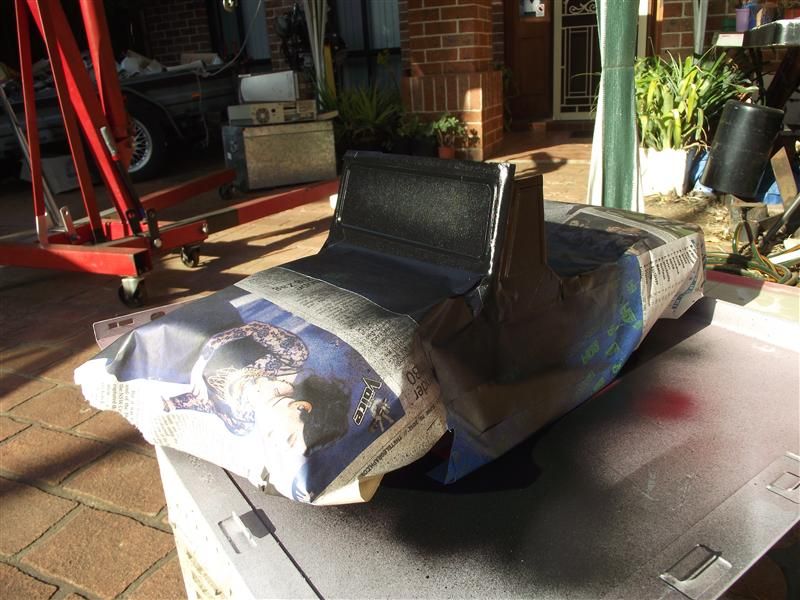 After a few hours in the morning sun I was able to remove all the masking and start the final assembly. The cage is a PRESS fit, and the body stretches around it as it is put in place. You can pick up the whole truck from the cage and it won't come out. The dash was sat in place for these pics, and at this stage the floor was yet to be mounted to the chassis. Seats also are loose. But, it is looking awesome!!!!! 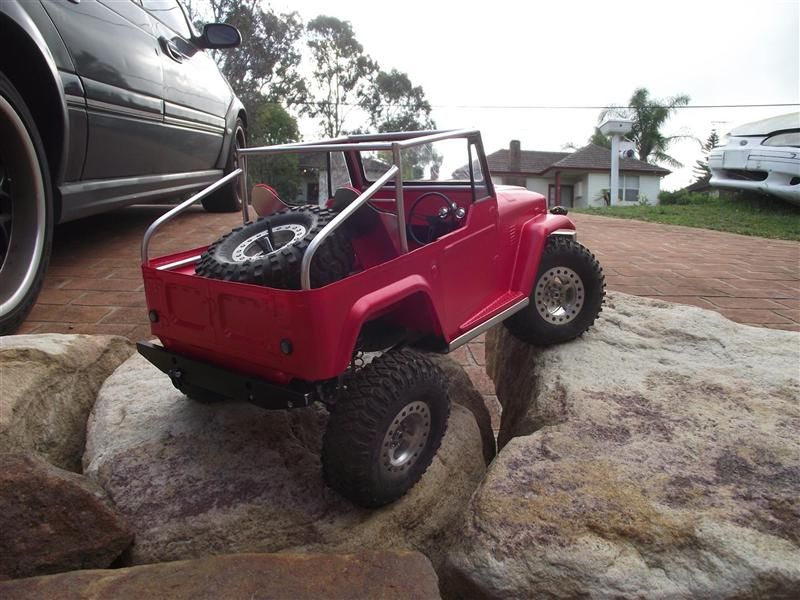 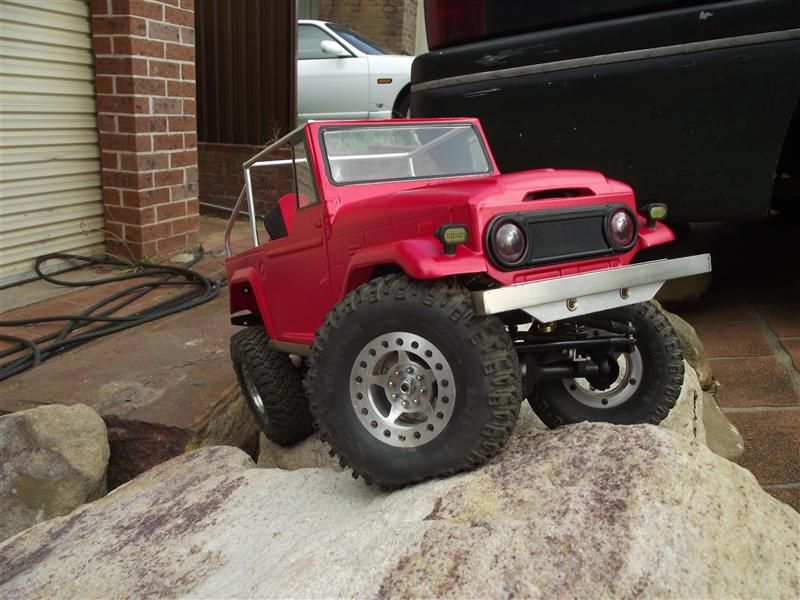 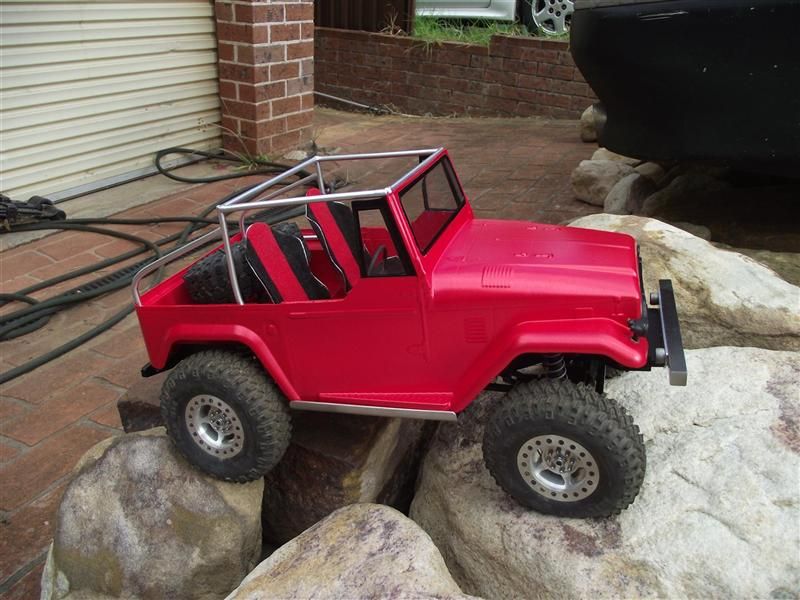 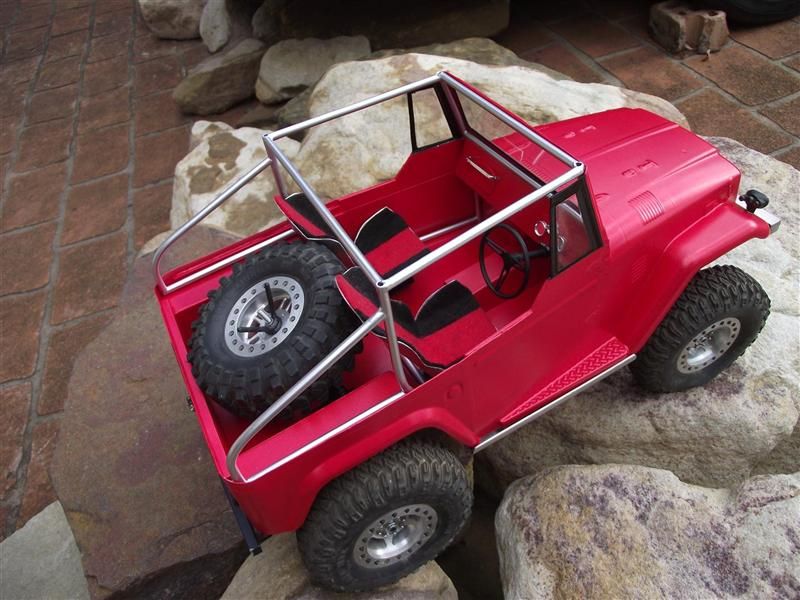 Cheers H2Micr0 |
| |  |
| | #12 |
| Rock Crawler Join Date: Jan 2013 Location: Australia
Posts: 541
| |
| |  |
| | #13 |
| Rock Crawler Join Date: Jan 2013 Location: Australia
Posts: 541
|
I have been having too much fun wheeling and continuing to evolve the Shorty 40 to update, so this is overdue. I realised I have left out a couple of things from the initial build. Firstly, the floor pan with the seats etc was mounted to the chassis using some aluminium right angle brackets bolted to the insides of the rails. 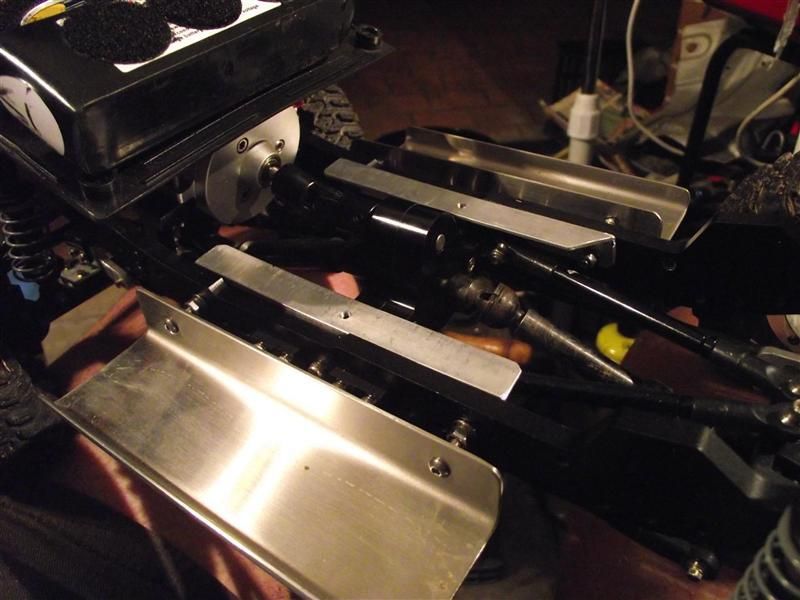 I also added a bit of scale bling to the center console to break up the red a bit. 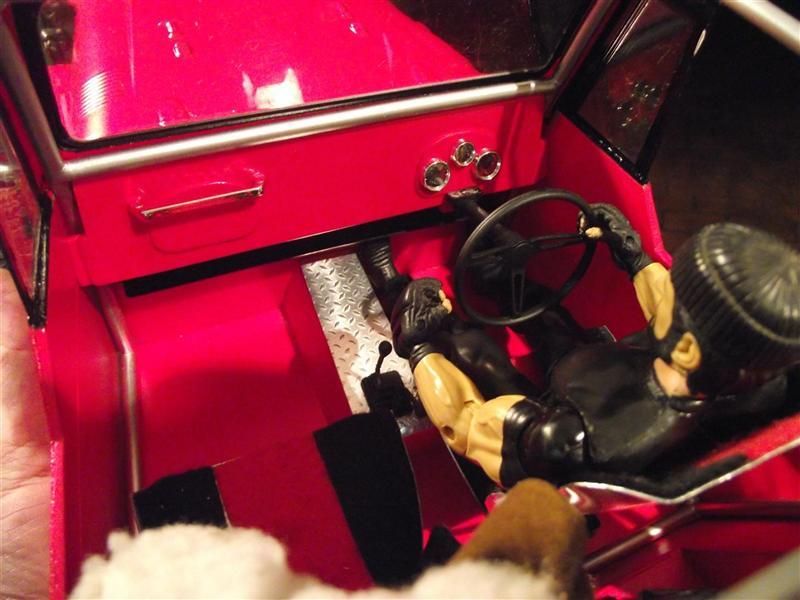 The other area I neglected to discuss was what is powering the Shorty 40. I am running a HH Pro Hand Wound 30T motor, a HH Mini BR ESC with a CC BEC. Servo is a cheap 12kg unit soon to be upgraded. Batteries are 3s 2200mah, soon to be replaced with 1800mah as they are a bit thinner than the current ones. The wiring is temporary and I will be revisiting under the hood again later on. All of the electronics are under the bonnet. I still have to add lights in the future, and a winch controller. Should be fun sorting it all out. 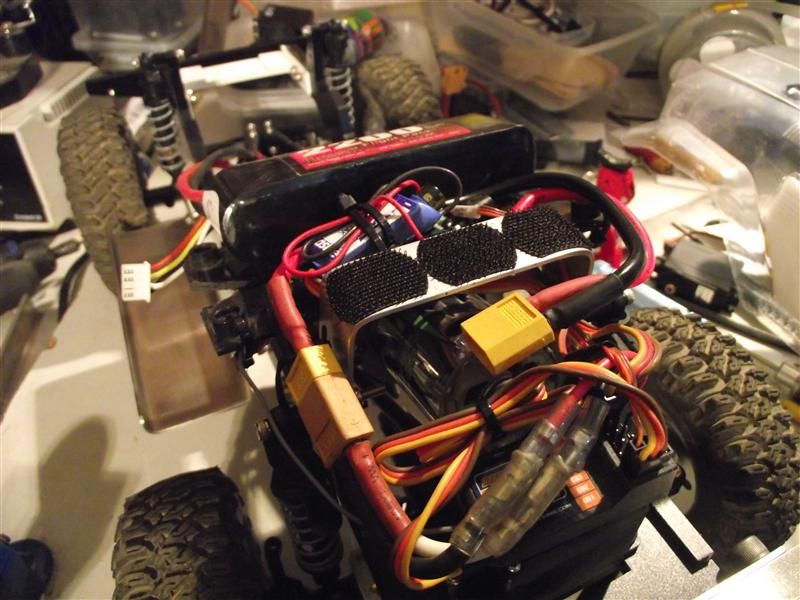 I took the Shorty 40 out to it's first comp two weeks ago now, and I was happy to finally start to get a feel for how it drives. I didn't expect to win, and I didn't. One of my fellow competitors did take some great pics of the rig though. I hope you enjoy. 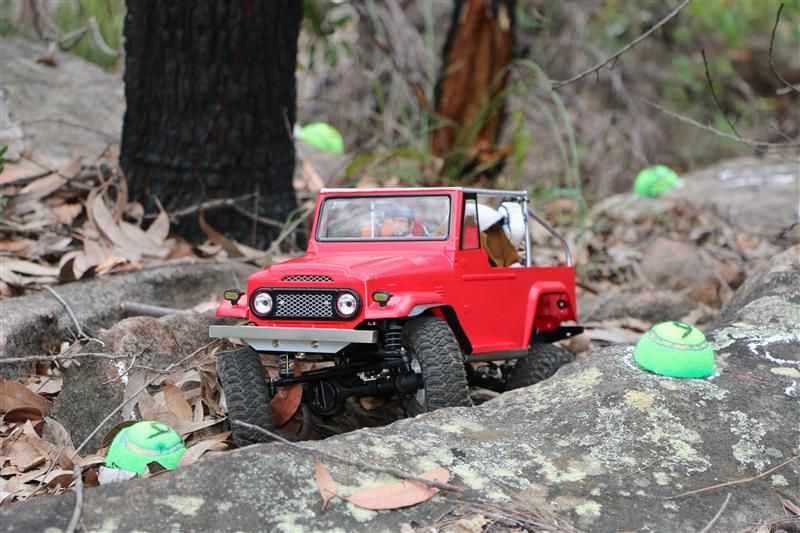 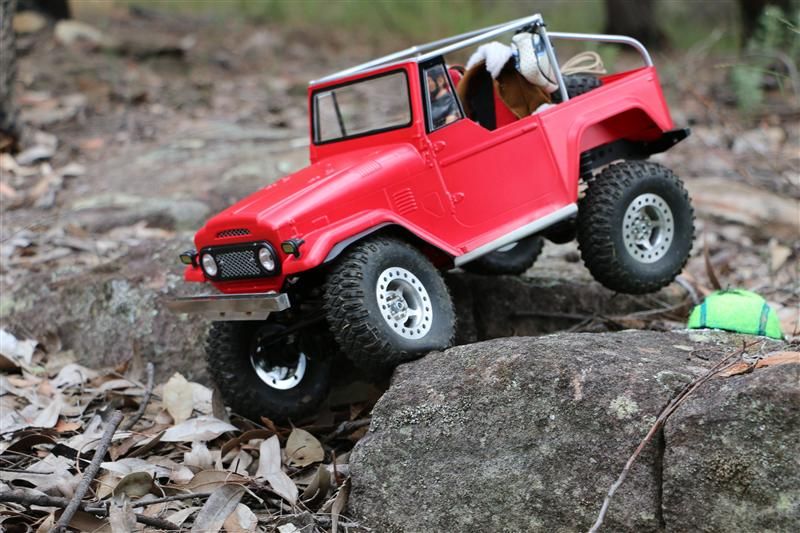 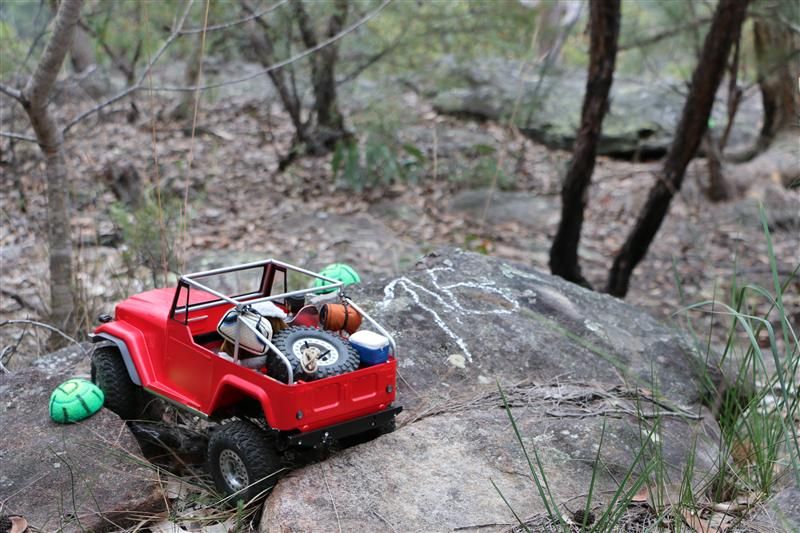 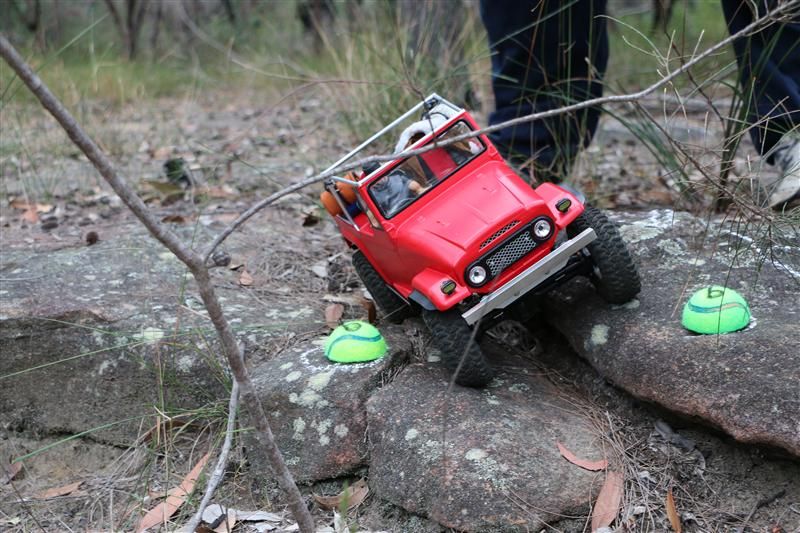 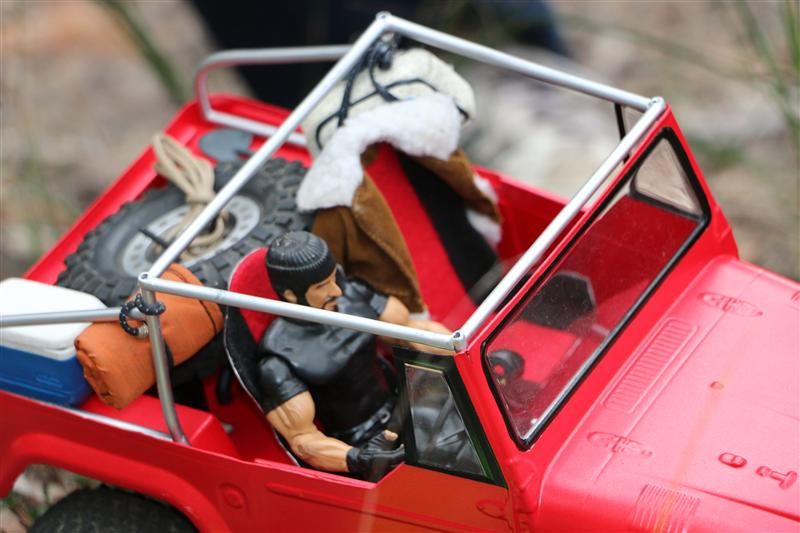 After the comp, I made some changes. Which will be covered in the next update. Please comment and say what you think. Cheers H2Micr0 |
| |  |
| | #14 |
| Rock Crawler Join Date: Jan 2013 Location: Australia
Posts: 541
|
After the first comp I noticed there was a LOT of lateral movement in the front axle. It would move almost 8mm left to right when steering. I am still using the original Gelande 1 links and rod ends, which feel quite loose, and as I had to move the lower front links inboard to clear the tyres on full turn, the triangulation is not as effective as it should be. The solution was to install a panhard rod, effectively making it a 5 link front end. I made up the panhard rod from two short axial rod lengths and axial rod ends. This is very close to the length of the drag link from the servo horn to the steering knuckle. I fabricated two mounts, one to be bolted to the chassis and one to be bolted to the differential. I was lucky there was sufficient room and nothing interferes with the panhard rod. Hopefully you can make sense of the photos. Chassis bracket and upper panhard mounted with a scale bolt. 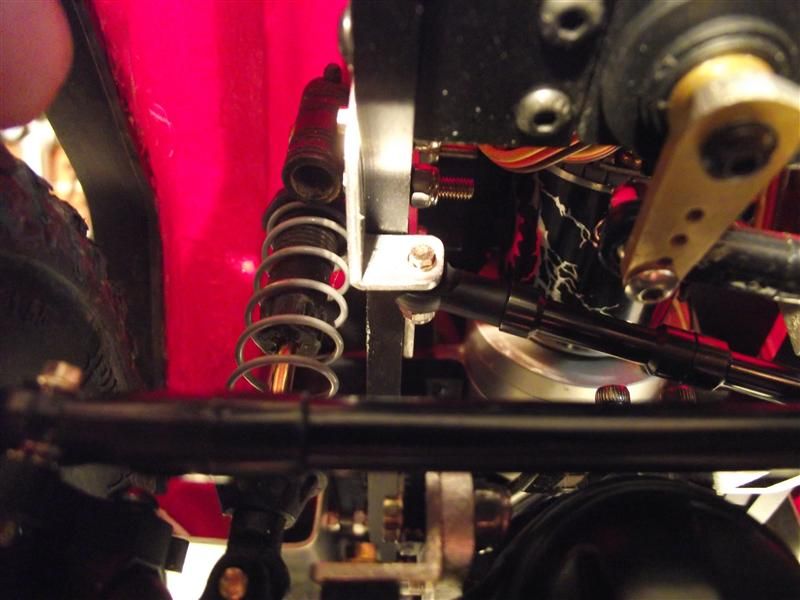 Overall shot. 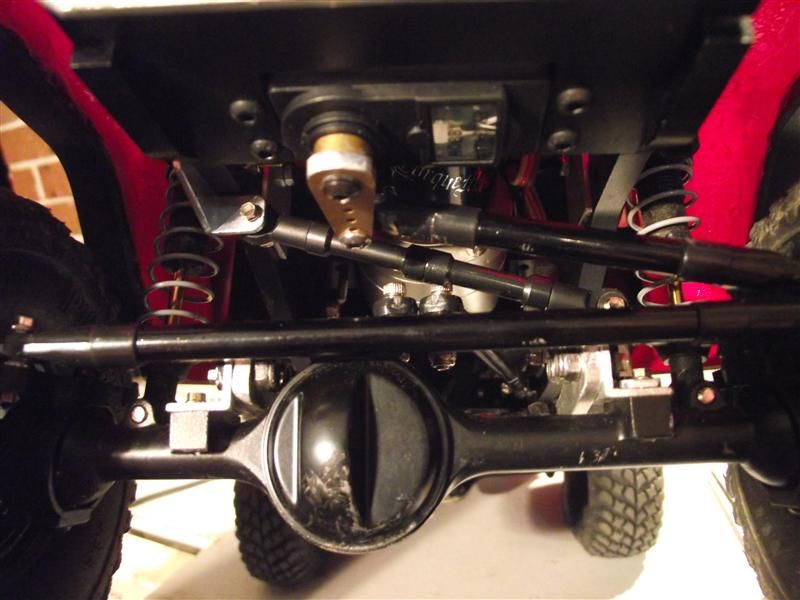 Diff bracket and lower panhard mounted with a scale bolt. 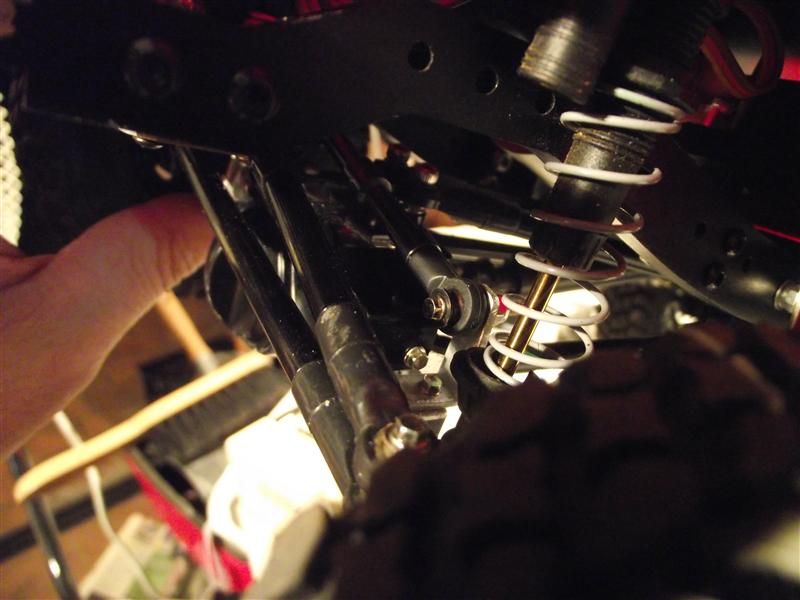 This addition has completely removed all lateral movement and the front end is tight. Articulation is still the same. The following weekend we had a scale 1 social run and brought the FJs out for some wheel time along with a couple of mates. 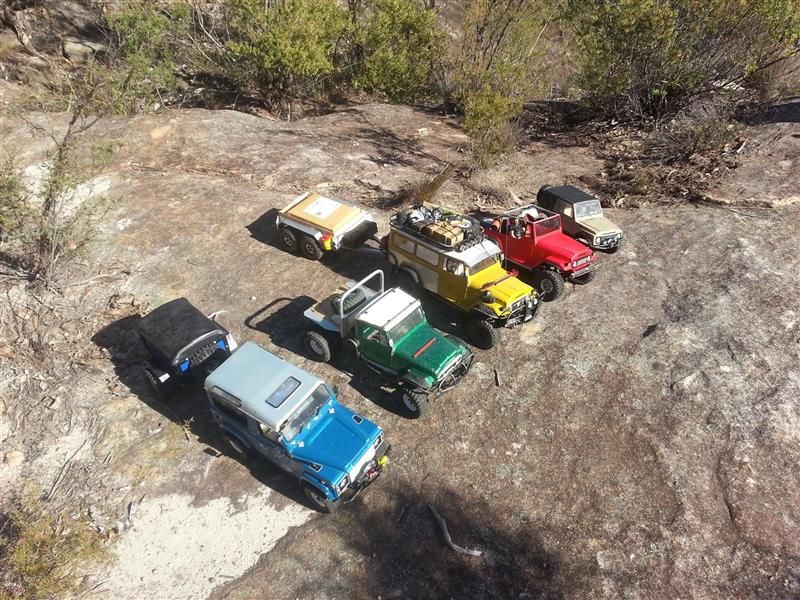 Then some goodies arrived from the scaleaddict.com who I am a Team Driver for. I also decided the 1.9 wheels just didn't have the right feel for the shorty so swapped them out for some Pitbull Growlers and 1.55 steel wheels, which I customised. A set of scale hubs finished it all off nicely. 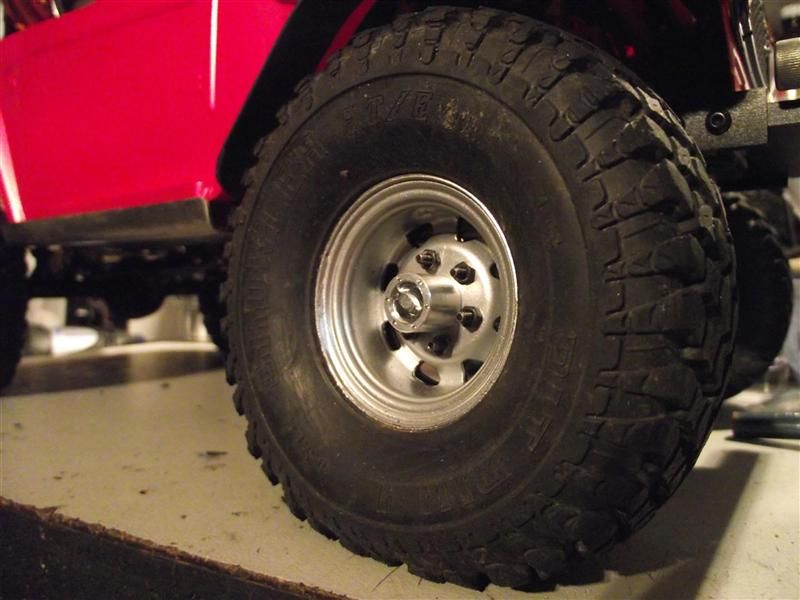 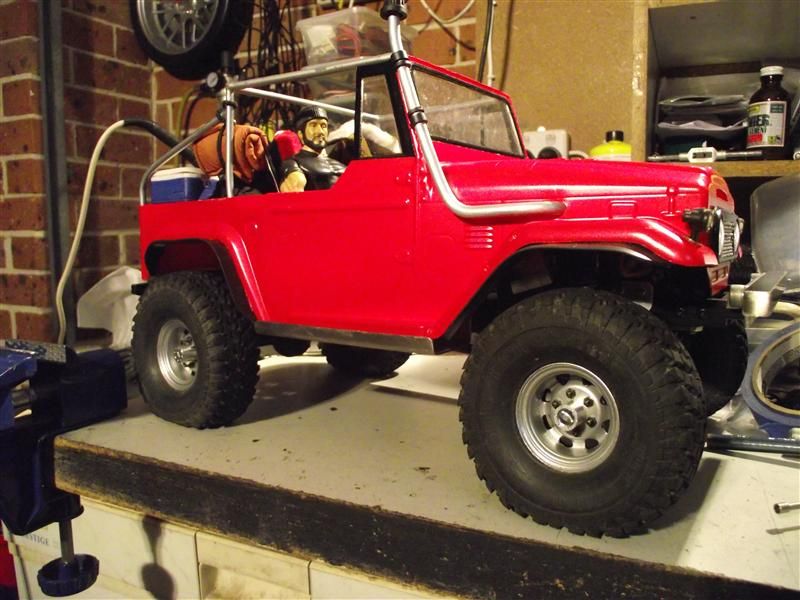 Much improved. I added a tow rope to the back and used and Axial spare wheel brace as a way to mount the strap. 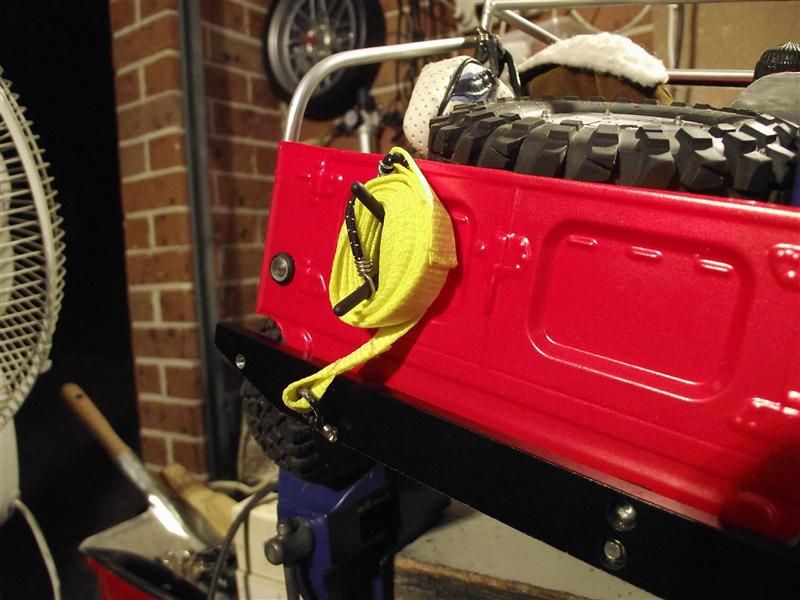 Using some solid 6mm aluminium rod and some axial body mounts I made a snorkel for the shorty. 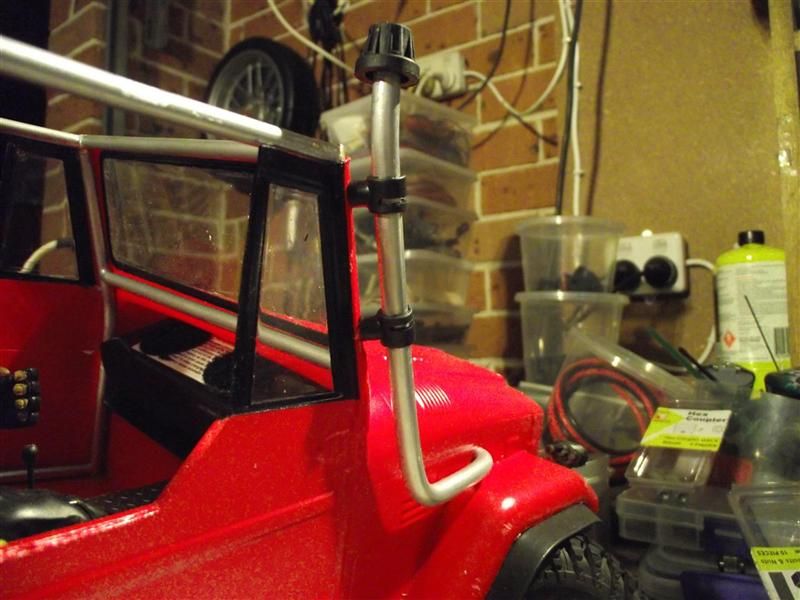 Plenty of flex for a class 1 rig 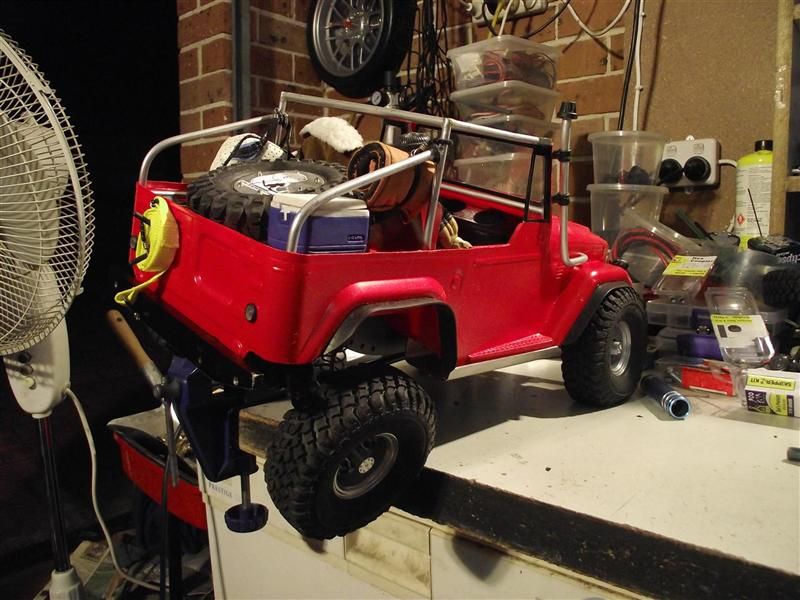 And most importantly, fabricated a custom mount for the Scaleaddict.com sticker. 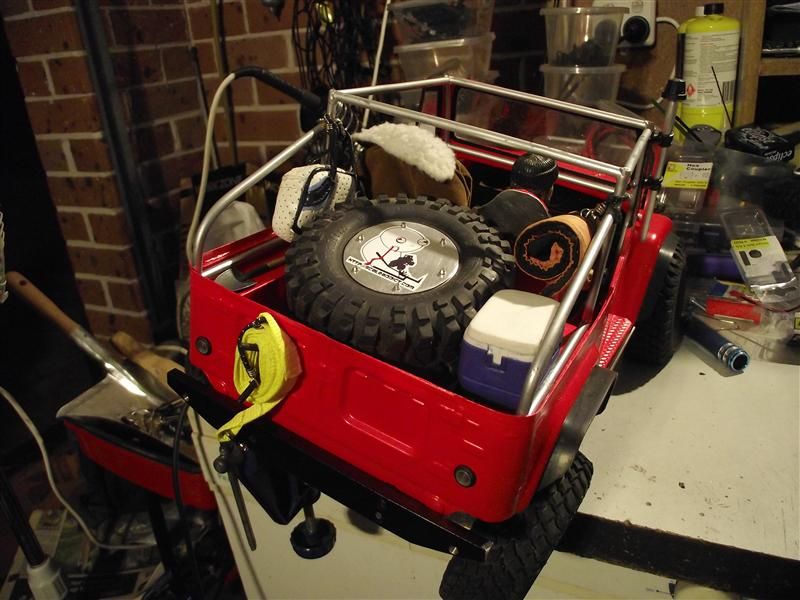 I hope you all approve of the changes. More to come. Cheers H2Micr0 |
| |  |
| | #15 |
| Rock Crawler  Join Date: Mar 2010 Location: Onalaska
Posts: 547
|
Very nice work great job on interior
|
| |  |
| | #16 |
| Rock Crawler Join Date: Jan 2013 Location: Australia
Posts: 541
|
A couple of locals and I got together and did a Class 1 trail run with the intention of making a video. We had a great time, and got to use some of our recovery gear, more than once LOL. Click on the below links to watch the videos. Part 1 https://www.youtube.com/watch?v=4LvEQ_GZNso Part 2 https://www.youtube.com/watch?v=1N402zDy4cw And here are a couple of pics from the day out. 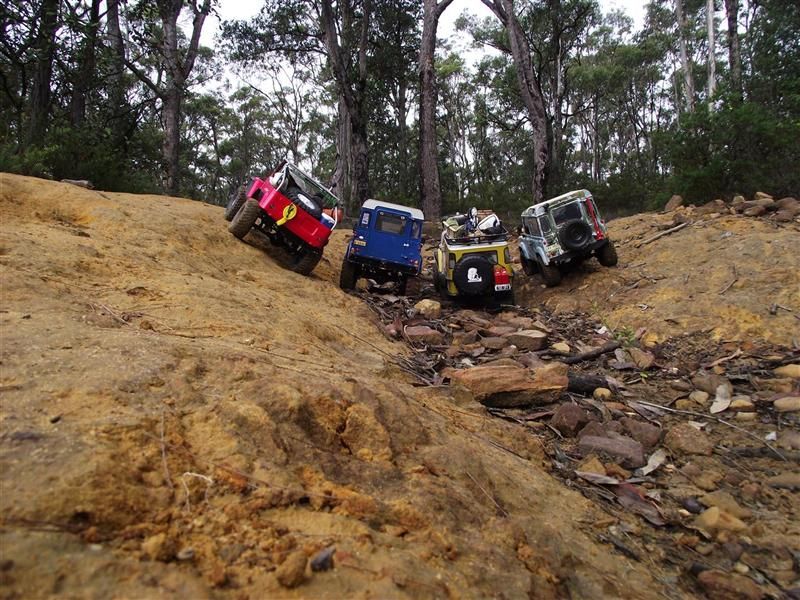 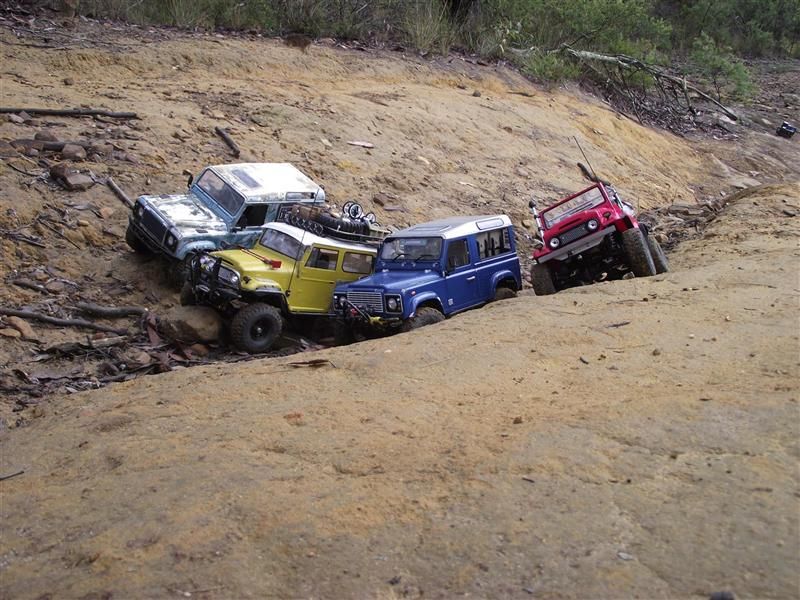 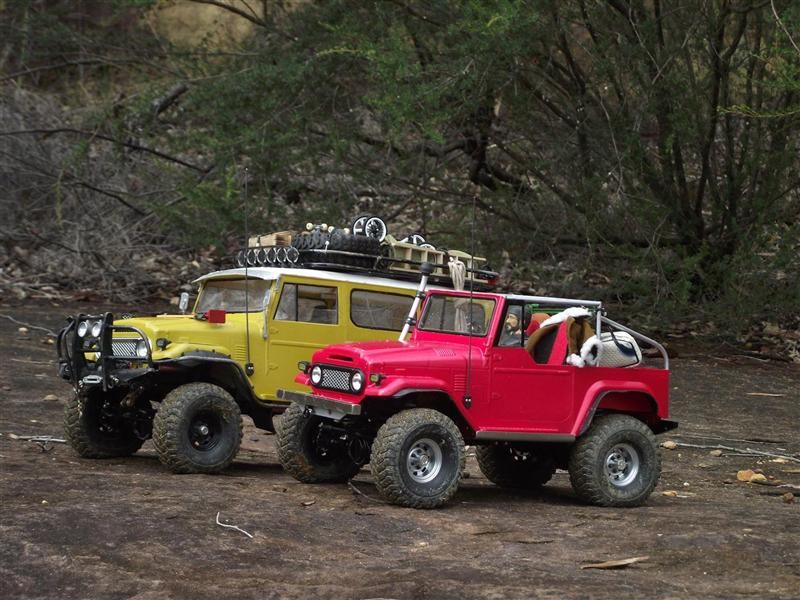 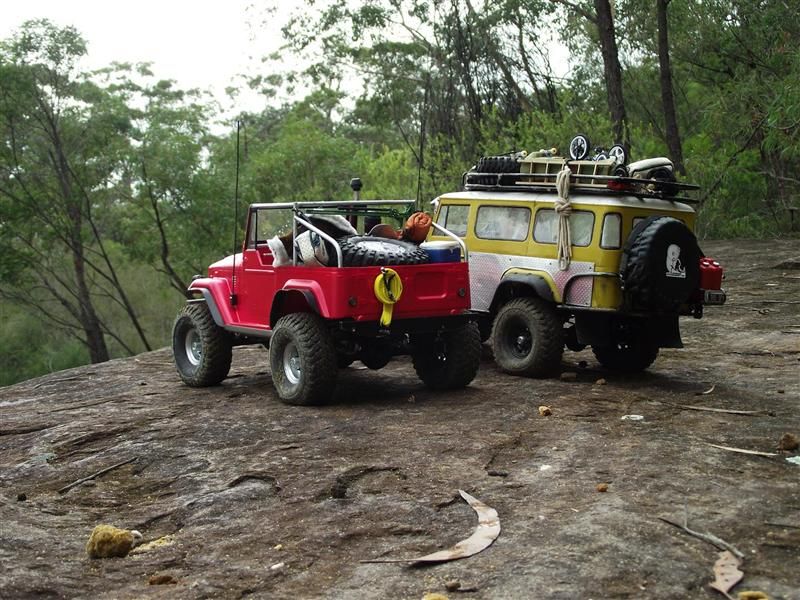 Cheers H2Micr0 |
| |  |
| | #17 |
| Rock Crawler Join Date: Jan 2013 Location: Australia
Posts: 541
|
It has been a while since my last update. The Shorty has been earning it's keep out on the trails. It is a fun rig to wheel, and offers a different driving experience to the Troopy. I did break a tooth off a pinion gear in the rear diff when I was a little to throttle happy when it got bound up. Heavy rig, sticky tyres and this is the result. 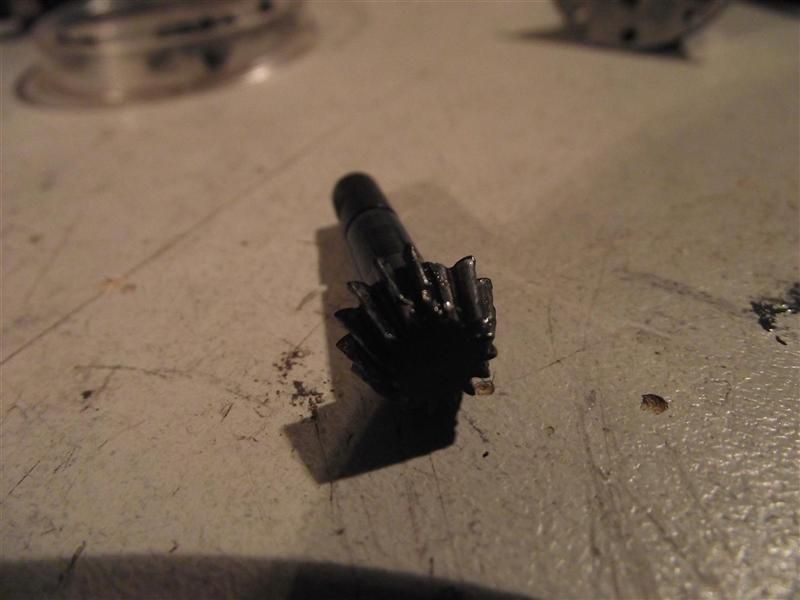 Here are some pics and links to the Shorty out on the trails. 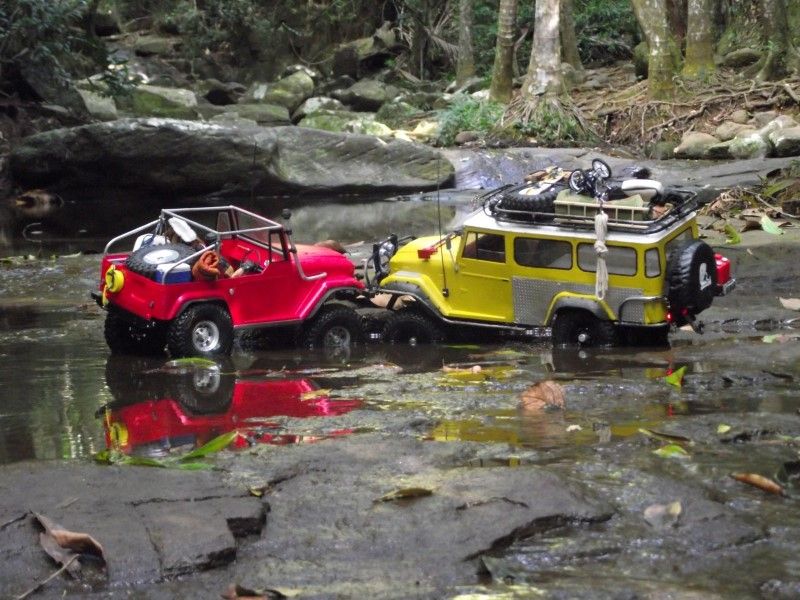 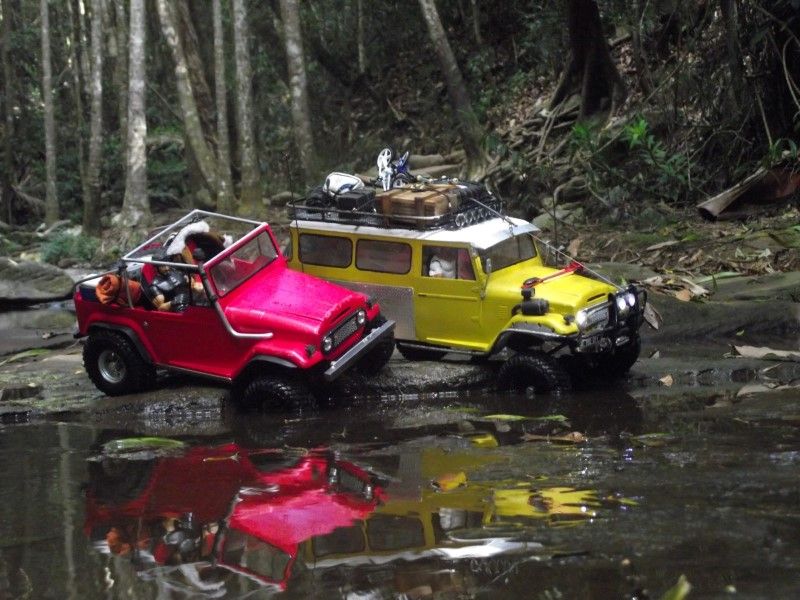 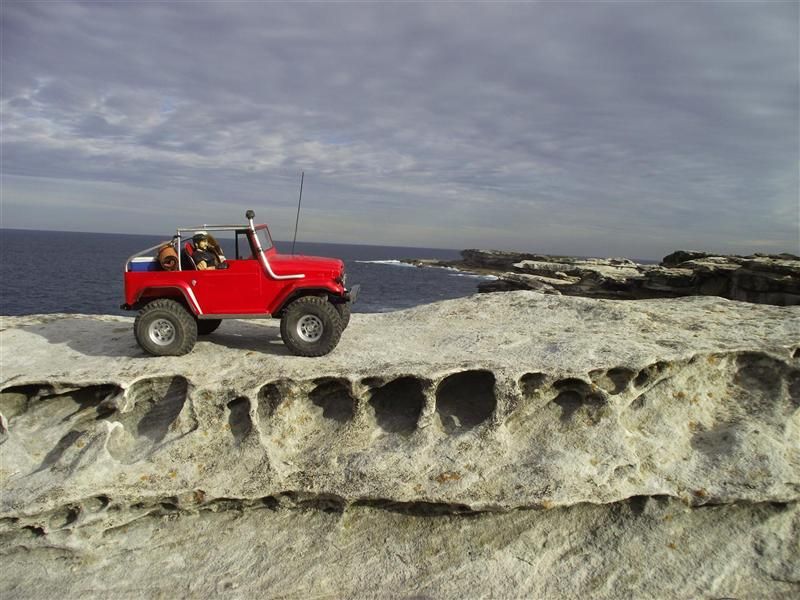 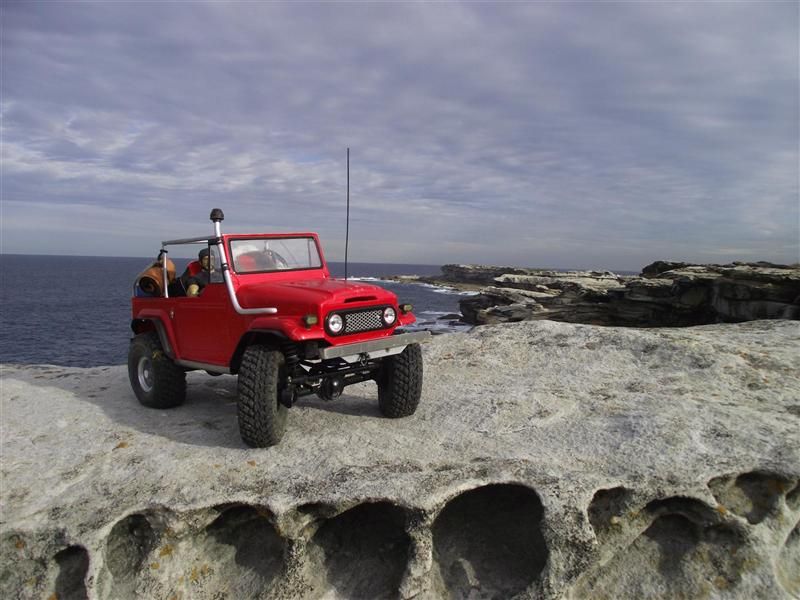 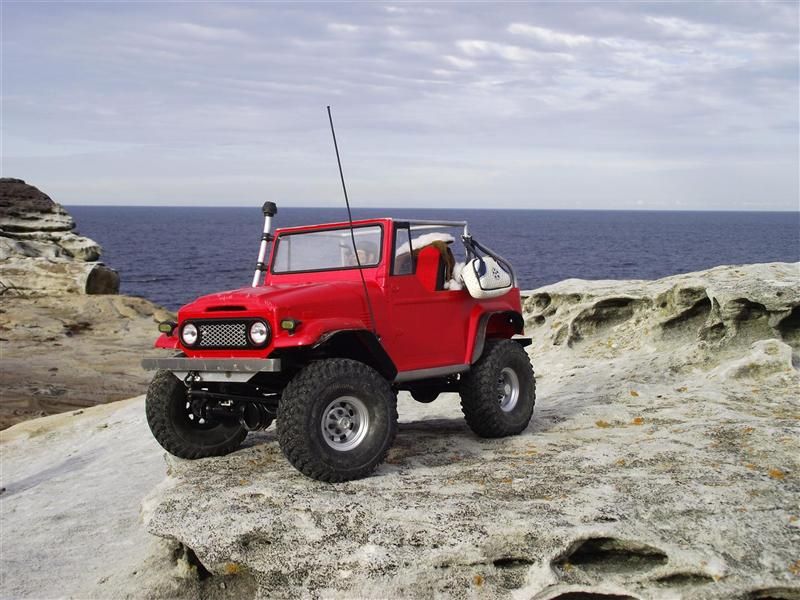 https://www.youtube.com/watch?v=LZ-ljMXT_lA https://www.youtube.com/watch?v=5dZGxd2p9kE https://www.youtube.com/watch?v=xNTnaSl80es I ordered in some number plates and fitted up a Warn winch. 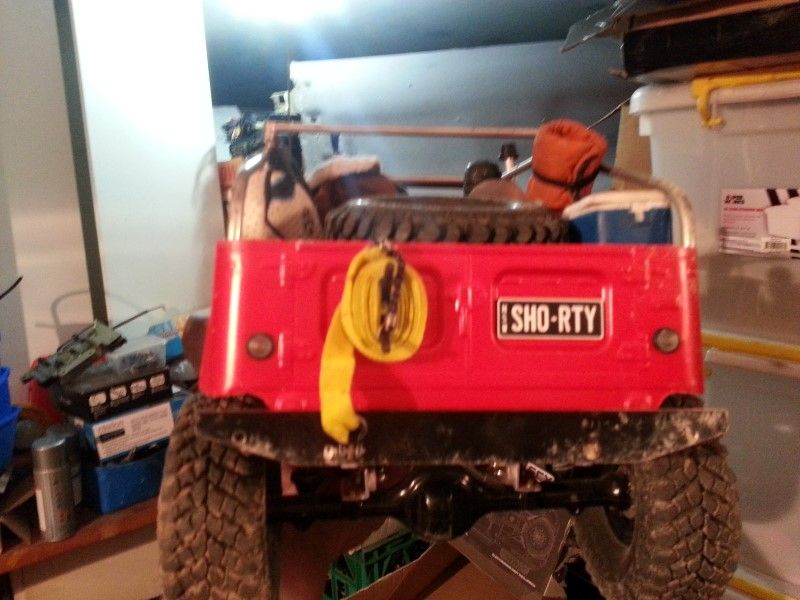 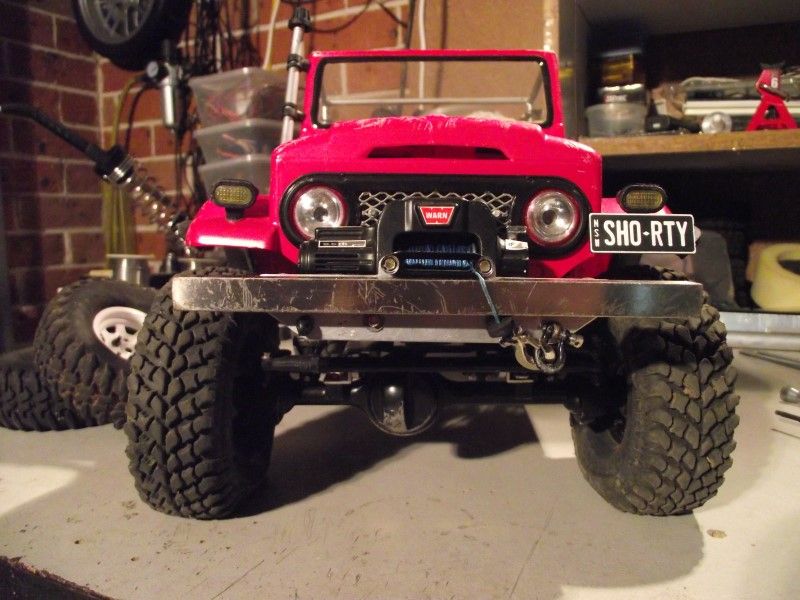 There are a few things I still would like to change and I will update as they occur. Cheers H2Micr0 |
| |  |
| | #18 |
| Rock Crawler  Join Date: Mar 2010 Location: Onalaska
Posts: 547
|
What did you use for fender flare extension ?
|
| |  |
| | #19 |
| Rock Crawler Join Date: Jan 2013 Location: Australia
Posts: 541
| Thanks! I found some rubber strips with a T section on the top at a local rubber and plastic specialty store here in Australia. I trimmed one side of the 'T' off and then hot glued them in place. A decent scrap on rocks can loosen or tear them off, which is cool LOL. Cheers H2Micr0 |
| |  |
| | #20 |
| Rock Crawler Join Date: Jan 2013 Location: Australia
Posts: 541
|
OK, update time. Soon after making the changes in the previous post, I met up with Shannwah from Sams' Garage, and went on a trail run with Chelle in her Jeep. https://www.youtube.com/watch?v=cqNj9cH3uto After the run was complete and we were heading home, the panhard bracket on the front diff snapped again for the second time is as many weeks. The original bracket was made from 1.75mm angle alloy, and lasted quite a while. But eventually ended up like this. 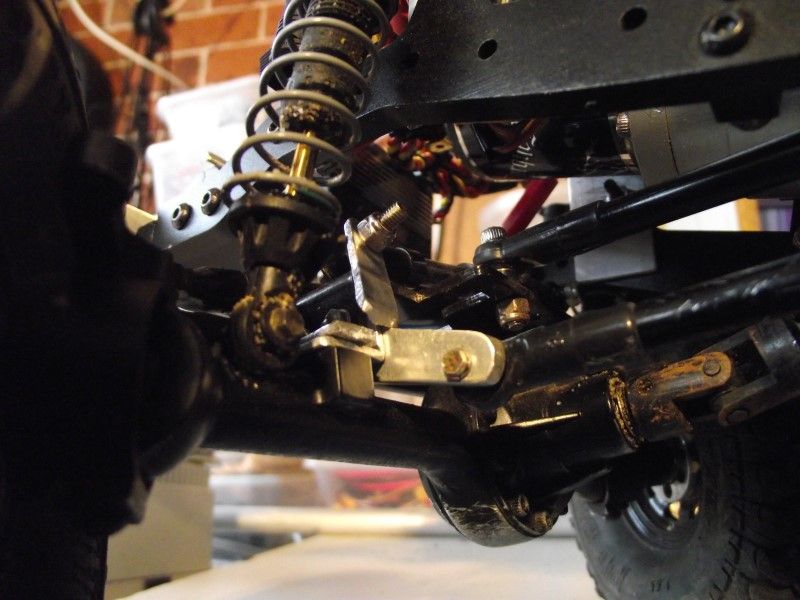 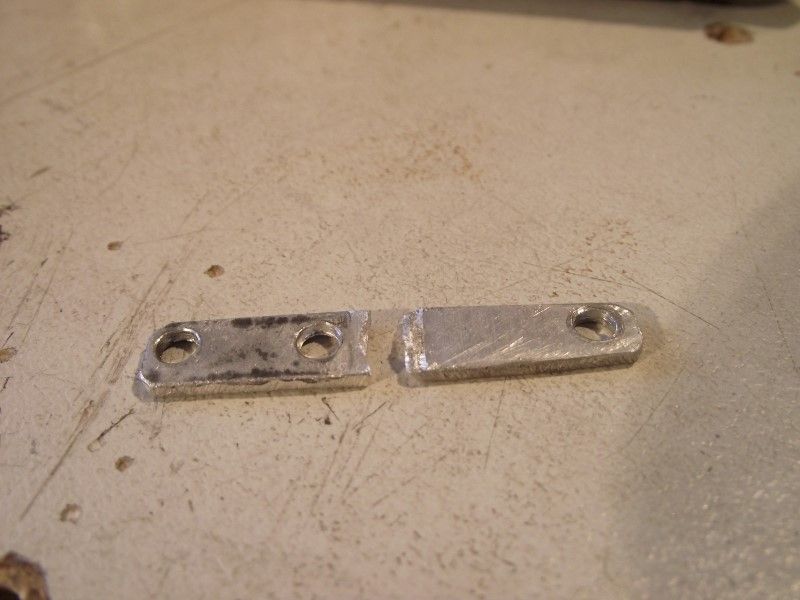 So I made a new one from some sheet steel I had laying around. It lasted only for the day we made the above video. 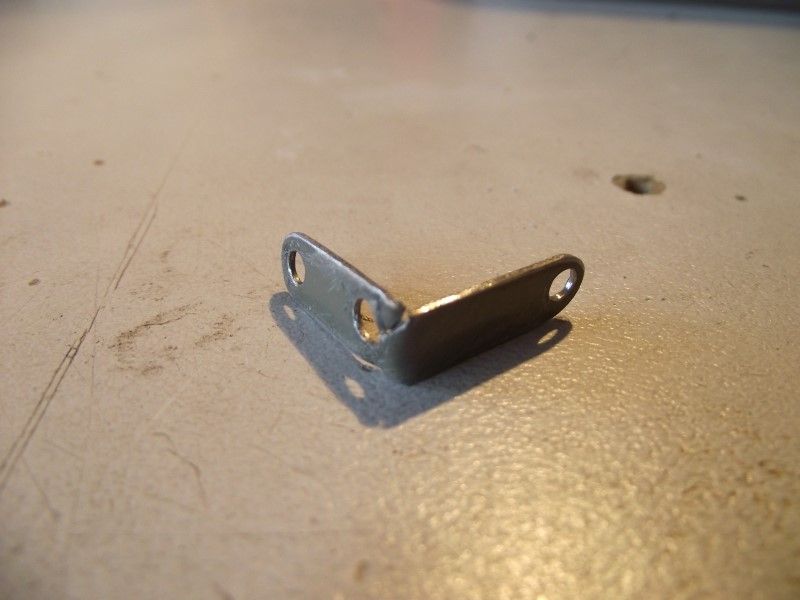 So I made another bracket from 3mm angle alloy. Only seem to have pics of it installed. But I doubt this one will break soon. 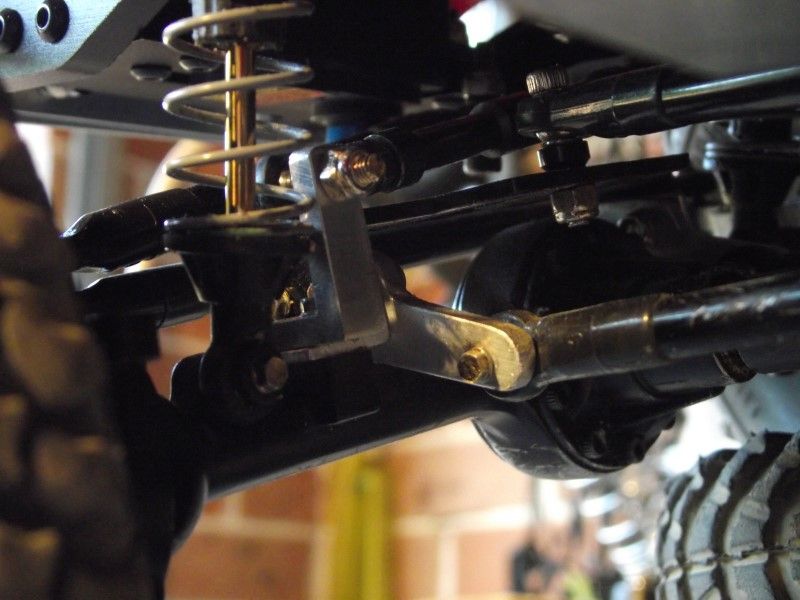 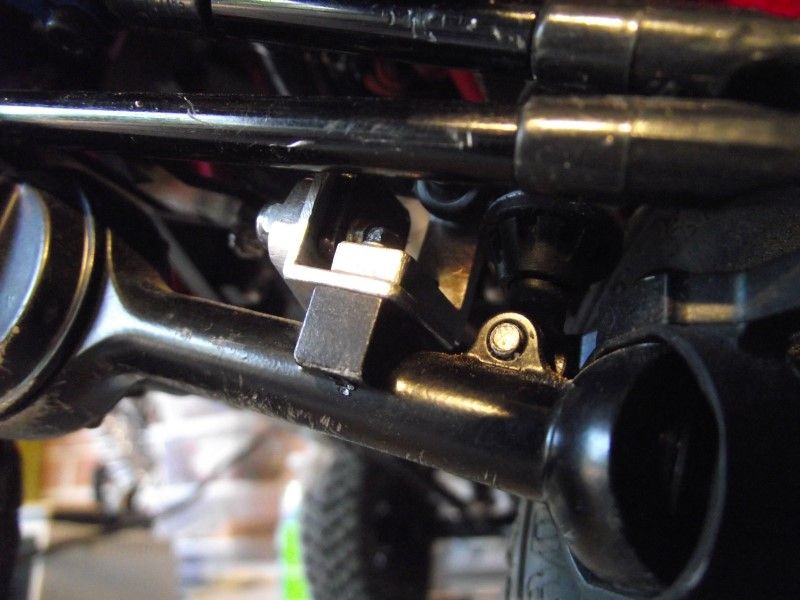 Next job was to FINALLY finish a job I planned to do when Shorty was first in the build phase. When I cut the roof off to make the convertible, I deliberately kept the top intact so I could have a removable hard top. I masked up the windows and lay down the white paint. 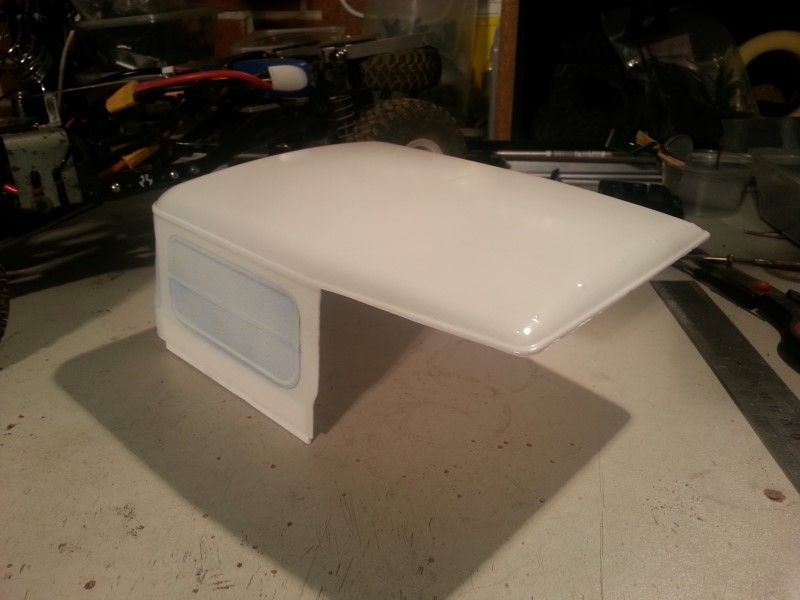 Let that dry for a few days, then finished it up. 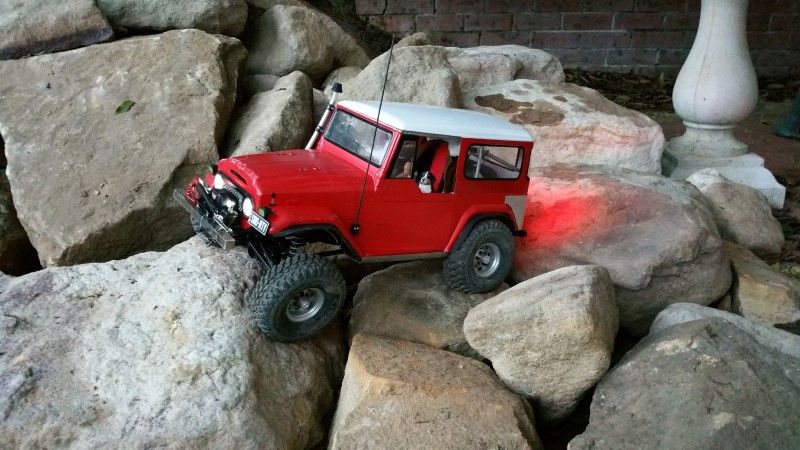 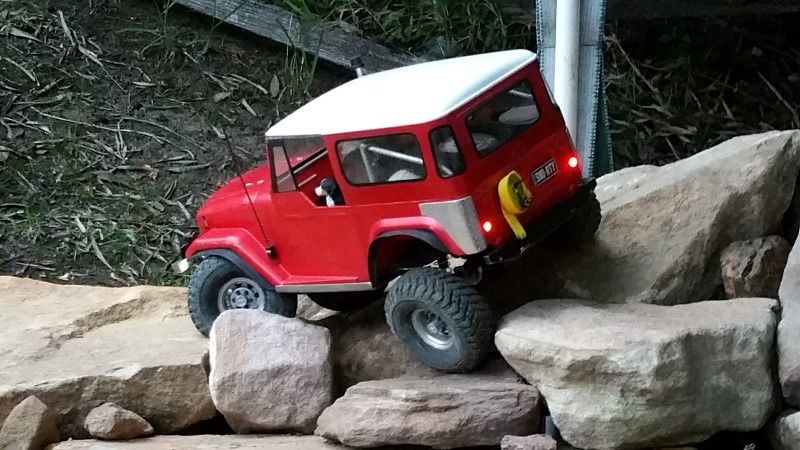 I glued some 2mm styrene strips to the inside edge of the hard top and they form tabs that sit neatly on the inside edge of the rear cargo area. I also picked up a new Pull Pal from RC4WD for Shorty. 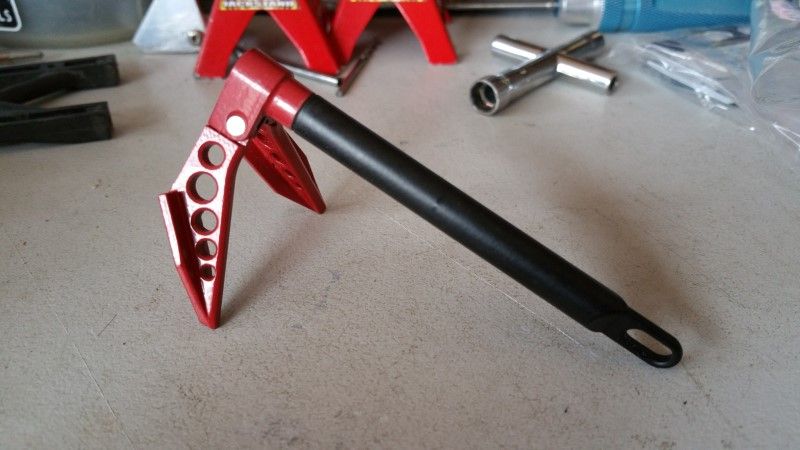 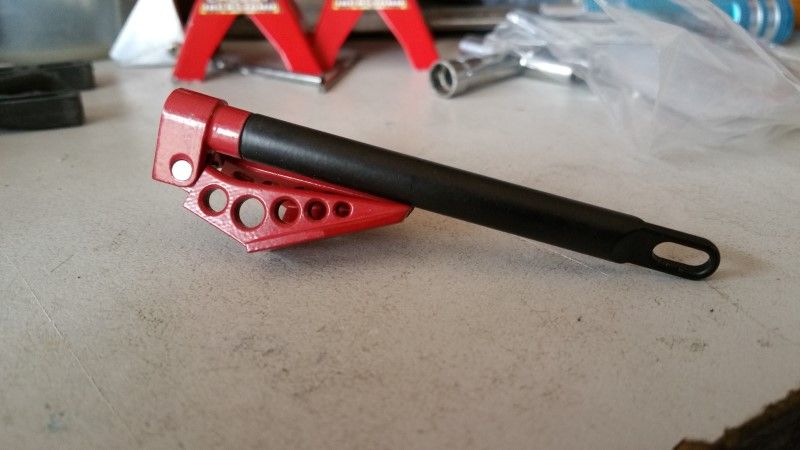 This is a very nice bit of gear. And is right at home on the front bar. 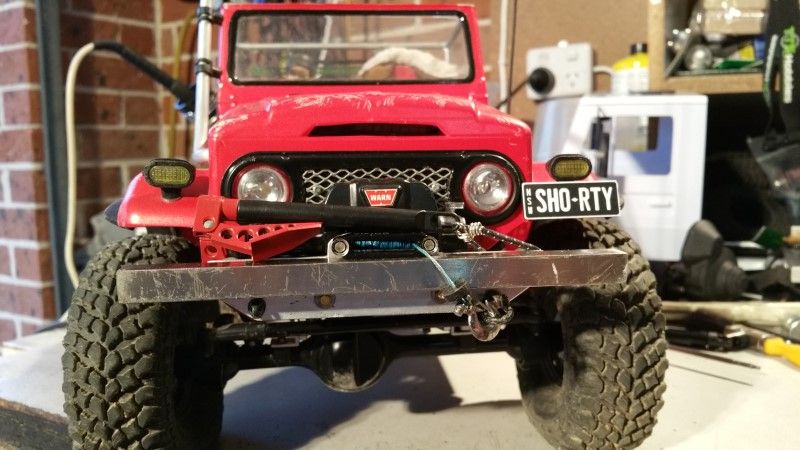 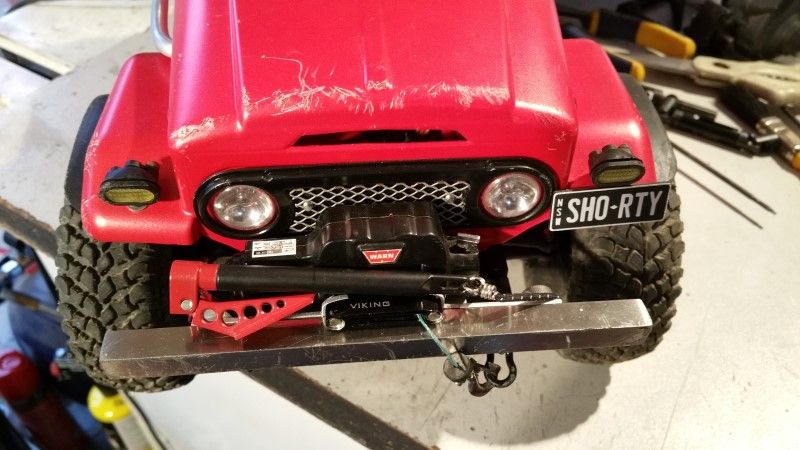 Went out with some mates last weekend for a couple of ours on the trail. 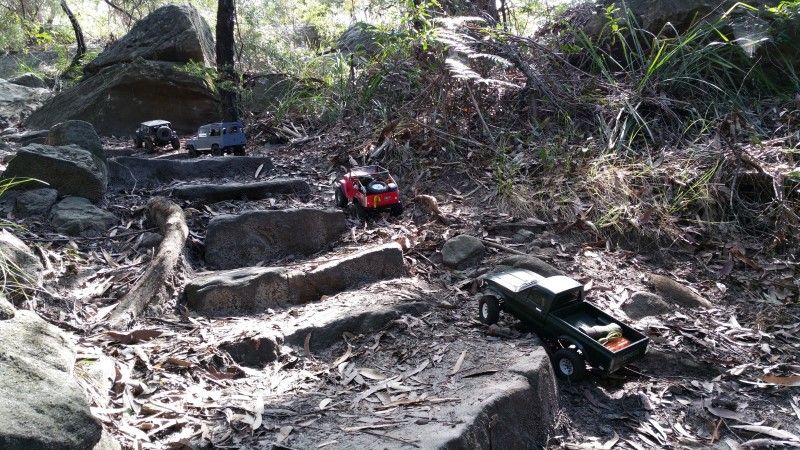 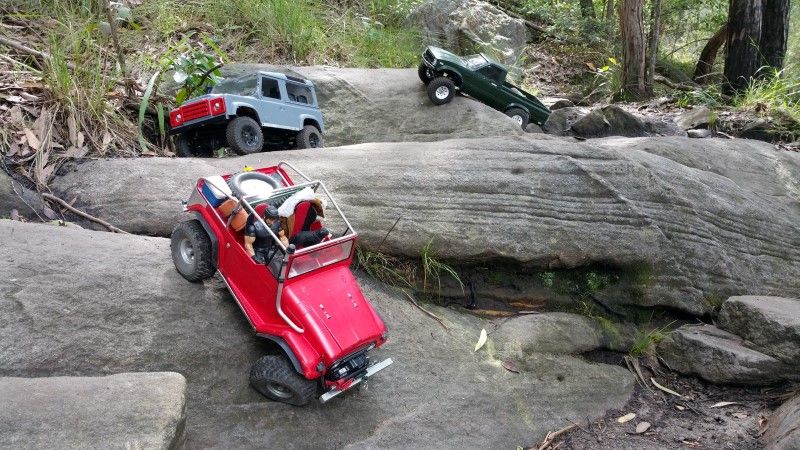 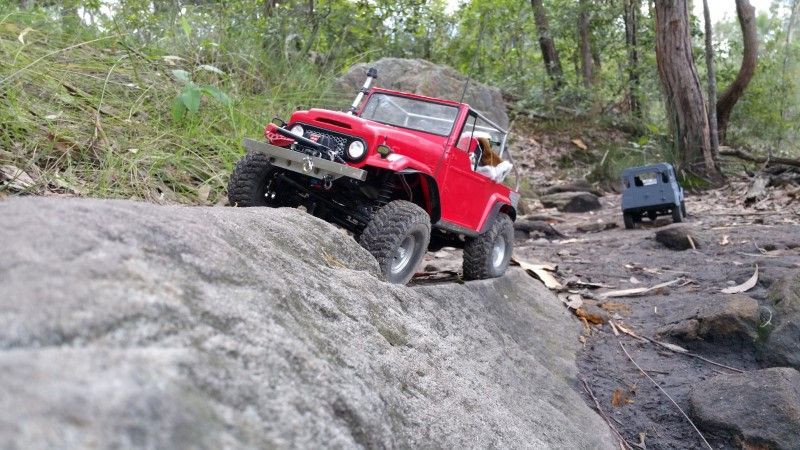 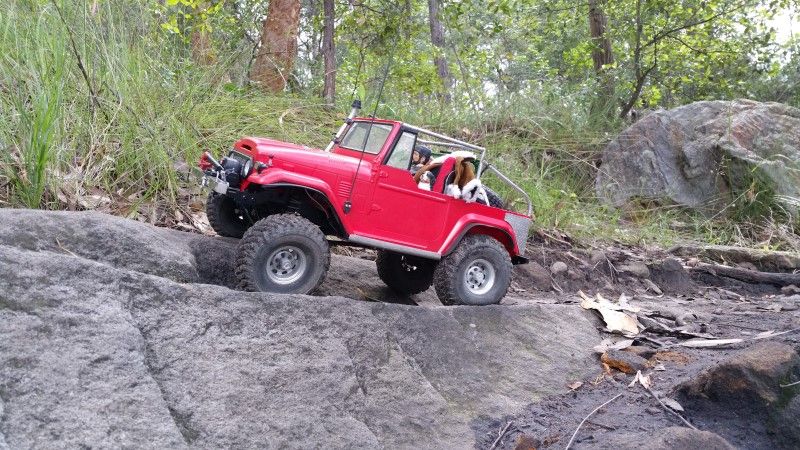 Performed really well, and even got to test out the winch and pull pal a couple of times. Cheers H2Micr0 |
| |  |
 |
 H2Micr0's FJ '40 Shorty' Trail Rig - Similar Threads
 | ||||
| Thread | Thread Starter | Forum | Replies | Last Post |
| H2Micr0's FJ45 Troop Carrier | H2Micr0 | 1.9 Scale Rigs | 43 | 03-25-2016 12:25 AM |
| H2Micr0's Scale 1 FJ45 Ute | H2Micr0 | 1.9 Scale Rigs | 22 | 02-04-2016 03:57 AM |
| H2Micr0's Tandem Box Trailer | H2Micr0 | Scale Accessories | 7 | 04-04-2014 12:33 AM |
| H2Micr0's SCX10 FJ40 Trayback | H2Micr0 | 1.9 Scale Rigs | 38 | 03-23-2014 07:37 AM |
| Another Shorty 40 | Highlucks | Tamiya CR-01 | 5 | 01-11-2010 07:35 PM |
| |