| |||||||
Loading
 |
| | LinkBack | Thread Tools | Display Modes |
| |||||||
 |
| | LinkBack | Thread Tools | Display Modes |
| | #1 |
| Rock Crawler Join Date: Jan 2013 Location: Australia
Posts: 541
|
It is with great pleasure that I bring to you my new Class 1 build. A Defender D110 fondly known as 'The Brigadier'. The Brigadier is a daily driver, and handles all duties from grocery getter and the school run, hitting the town and living the high life, to exploring the great outdoors in style with camp gear in tow. ************************************************** ************************************************** ************** Building a D110 is not a simple as ordering a complete Gelande 2 D90 kit, opening the box and assembling the kit following the supplied instructions. I ordered the D110 body from RC4WD, along with the D110 rock sliders, D90 diamond place accessory pack and the D90 inner fender wells. The body fresh out of the box and the diamond plate pack. 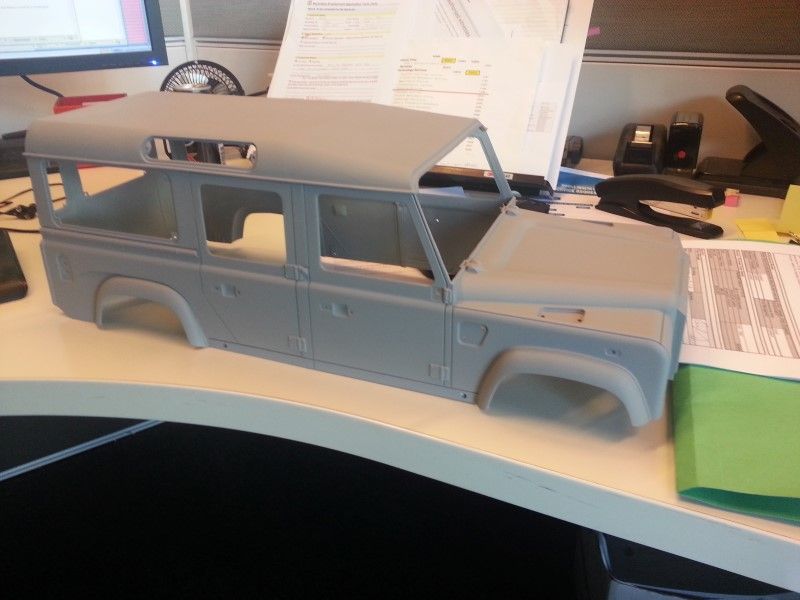 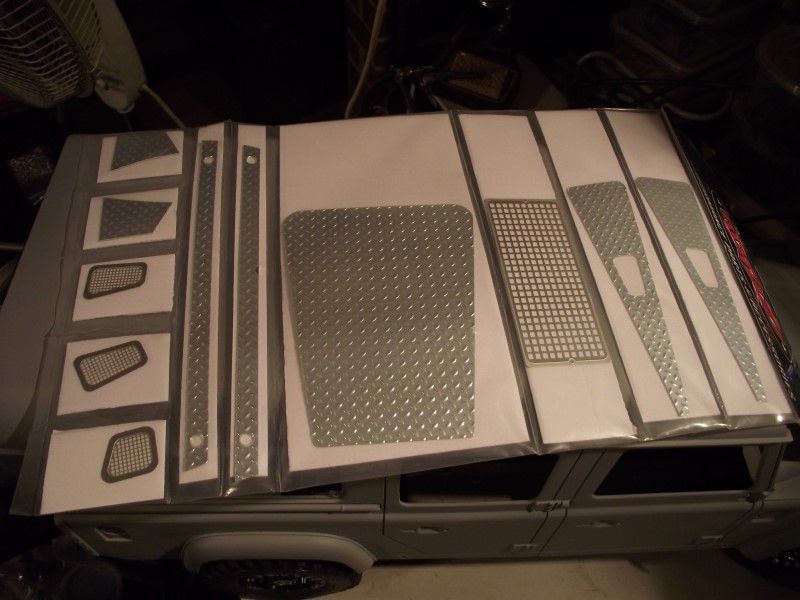 Wanting a more modern interpretation with some street cred I ordered a few parts from DJ Designs to enhance the look and appeal. 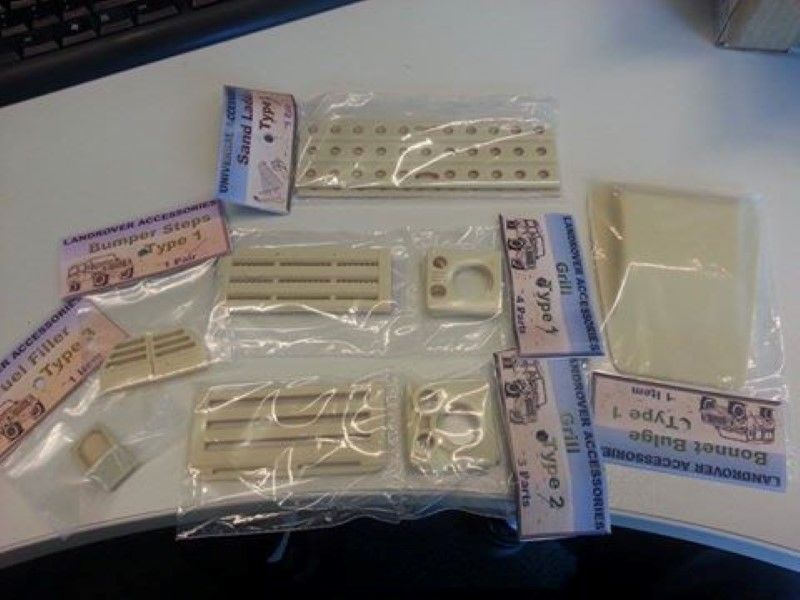 As The Brigadier is a daily driver the wheel and tyre combo was chosen with care. The tyres are 'D ick Cepek' Fun Country II 1.9 95mm wrapped around 1.9 Motorworx 9 Hole LE SLW beadlock rims, from The Scale Addict, with scale hardware. 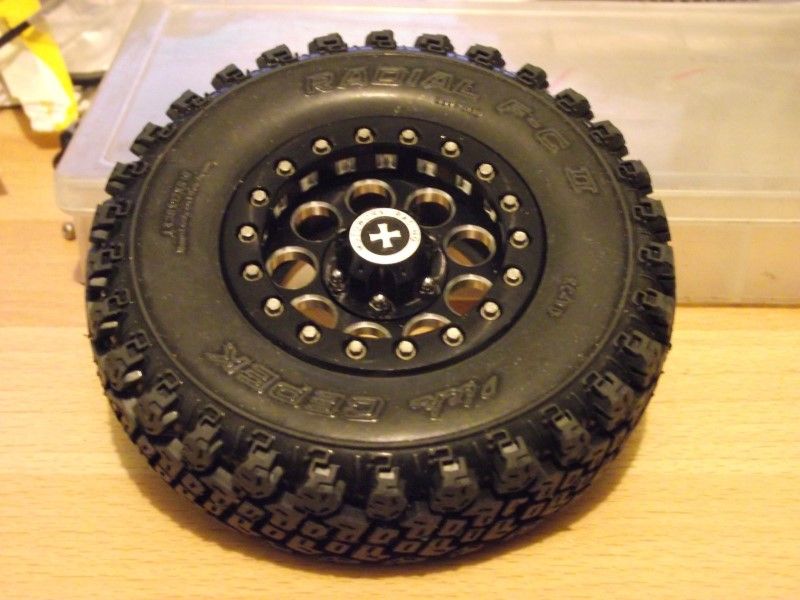 As for the chassis, you can't buy one from RC4WD. I was going to use an SCX10 Chassis and modify it to suit but then found an eBay seller in Korea GEP Plus with a listing for a D110 Chassis, complete with front and rear bars, body mounts, CMS, transfer case and relevant hardware. The chassis is based on the Gelande I kit and has many similarities. The planetary gearbox is not included and I sourced that separately second hand locally. Apart from the length the main difference with this chassis is the shock mounts are separate and can be relocated. The Gelande I chassis has them cast as part of the rail. Not the best pic, but this was taken after initial assembly. 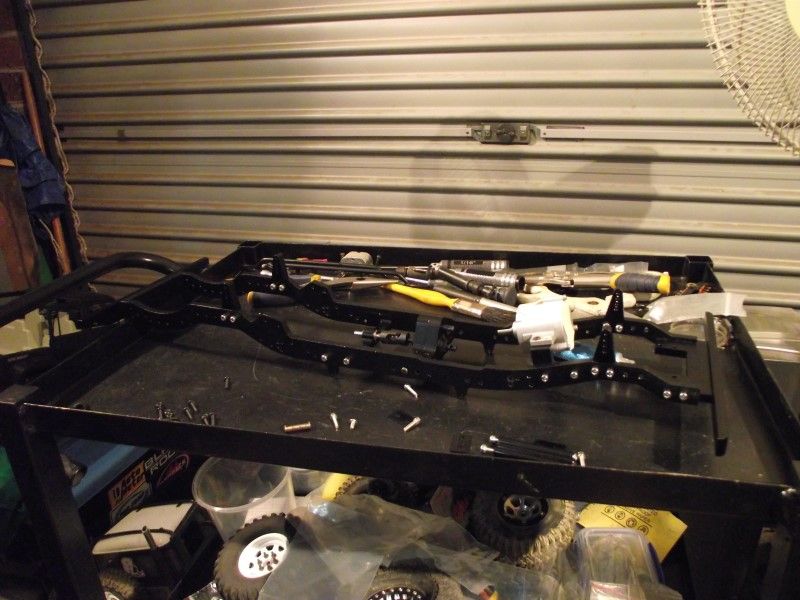 Axle choice was easy. Yota II diffs, with XVDs for the front. RC4WD was out of stock at the time, but was able to find these on eBay for the right price. Also out of stock at RC4WD was the Ultimate Axle 4 Link mount, however while searching through the Gelande II parts list I found the rear 4 link mount and the front 3 link + panhard mounts in stock, and grabbed those. 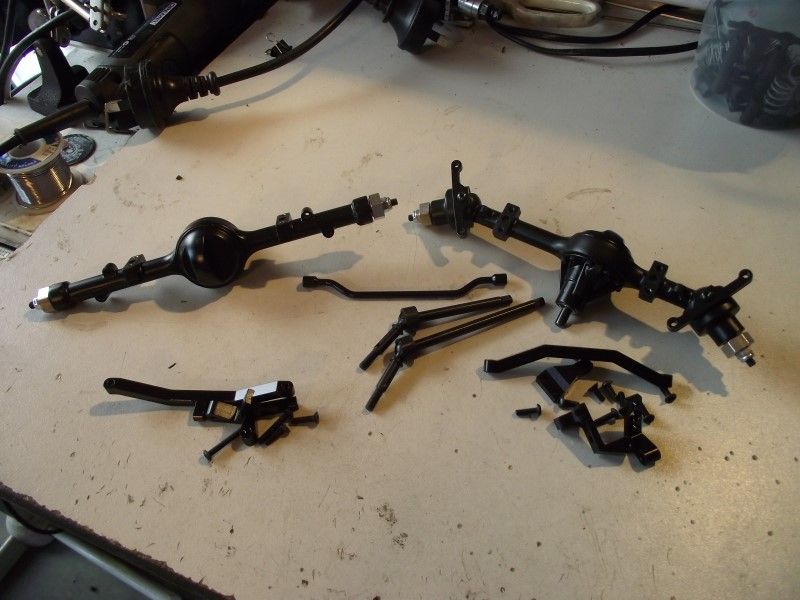 The Brigadier won't have the usual luggage rack and bar set. There will be some protection built for the windscreen area and a mount for an LED light bar. The plan is to have a winch and I will fabricate a custom front bar for that. In terms of overall style and colour choice this is what it will be based on. 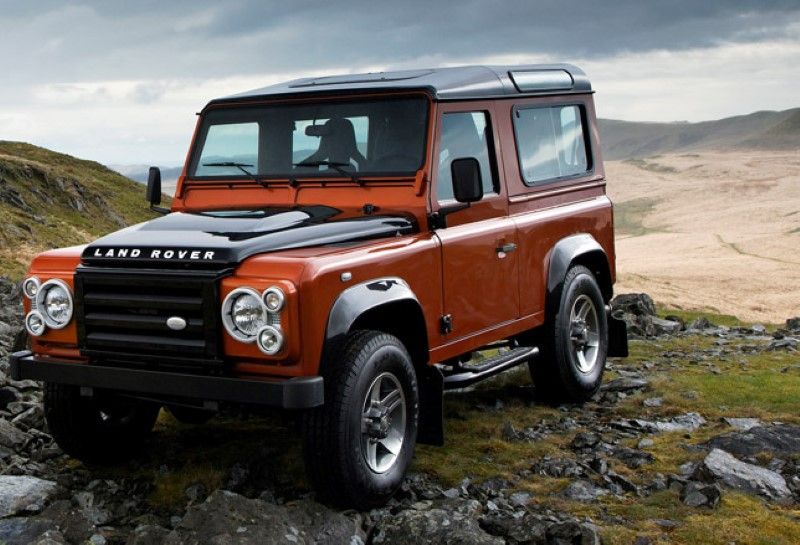 I hope you all enjoy following along with this build. It will progress along at it's own pace, and I have completed some things already, which will be posted up soon. Your comments and suggestions as always are welcome. Cheers H2Micr0 |
| |  |
| Sponsored Links | |
| | #2 |
| Rock Crawler Join Date: Nov 2012 Location: Charlotte
Posts: 931
|
Looks like a great plan is in place. Now go get at it!
|
| |  |
| | #3 |
| RCC Addict Join Date: Jun 2009 Location: Australia
Posts: 1,703
|
Good name choice. Couldnt have picked it better myself Have seen this in person snd the pictures so far dont do it justice . Keep up the good work Ben |
| |  |
| | #4 |
| Rock Crawler Join Date: Jan 2013 Location: Australia
Posts: 541
|
Let's take a closer look at the main component of this build. The D110 Body. The D110 is built using a D90 body and then additional pieces are hand assembled together. RC4WD in the text for this body state it will need some finishing, sanding, painting and assembly. And fair enough too. Even the D90 Gelande II body out of the box needs a bit of TLC before you paint and assemble. Sadly, my D110 body arrived fresh out of a mint condition box with a bit of damage. If you look closely at the rear fender in this pic, which I took straight out of the box while at work, you can see something is not right.  Closer inspection at home found the following. 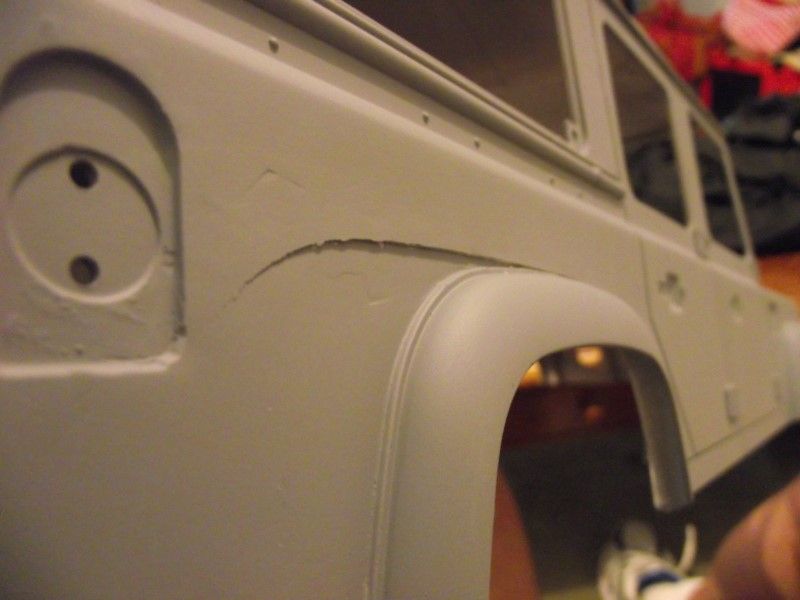 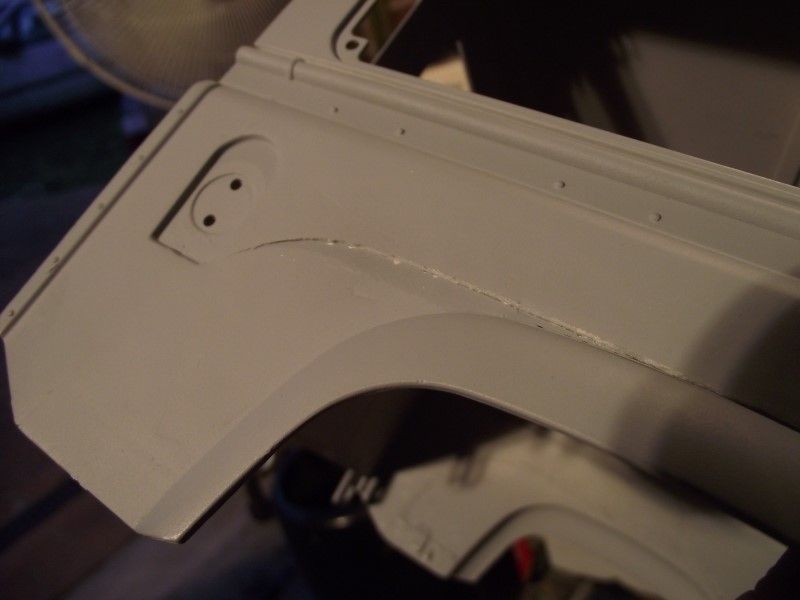 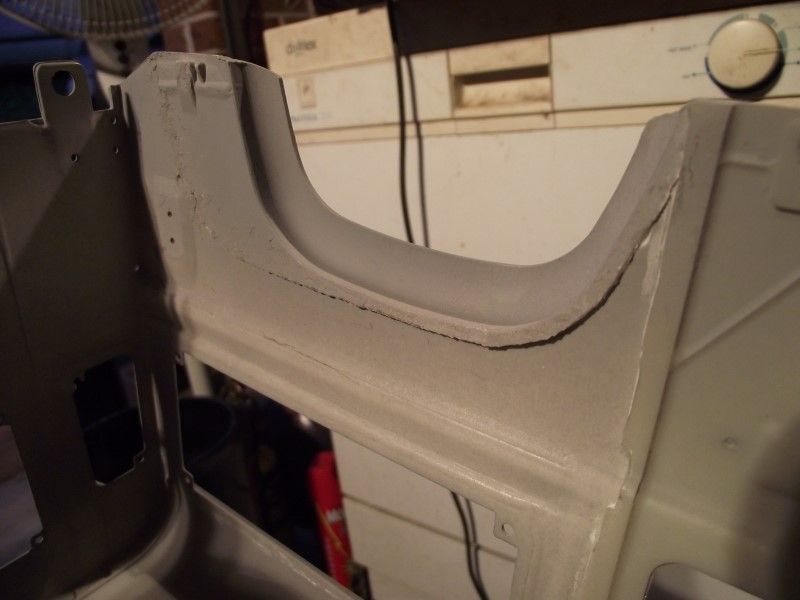 Looking at the fender on the left side you can see the right side has cracked along a join line. 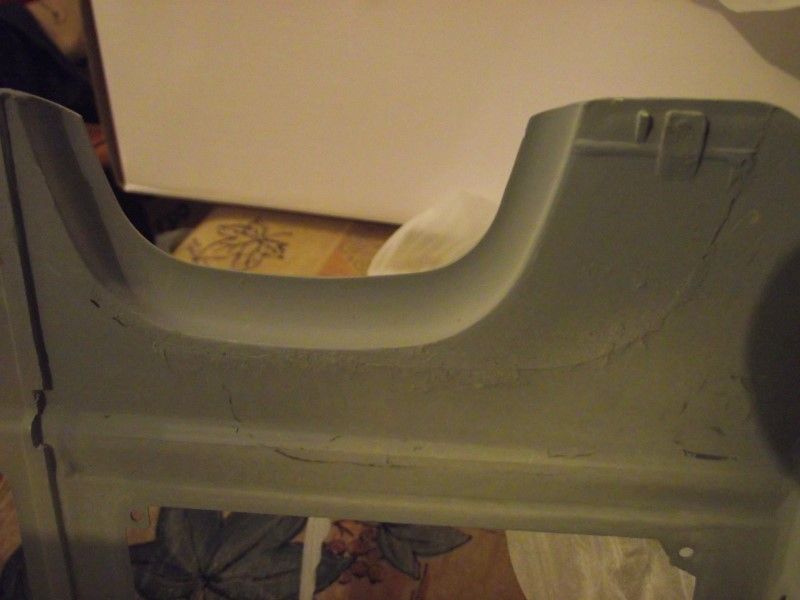 The rest of the body is great. You can see in the below pics that additional parts are cast separately and then attached with overlapping joins, providing a strong yet tidy join. The sunroof has been filled in too and is well done. 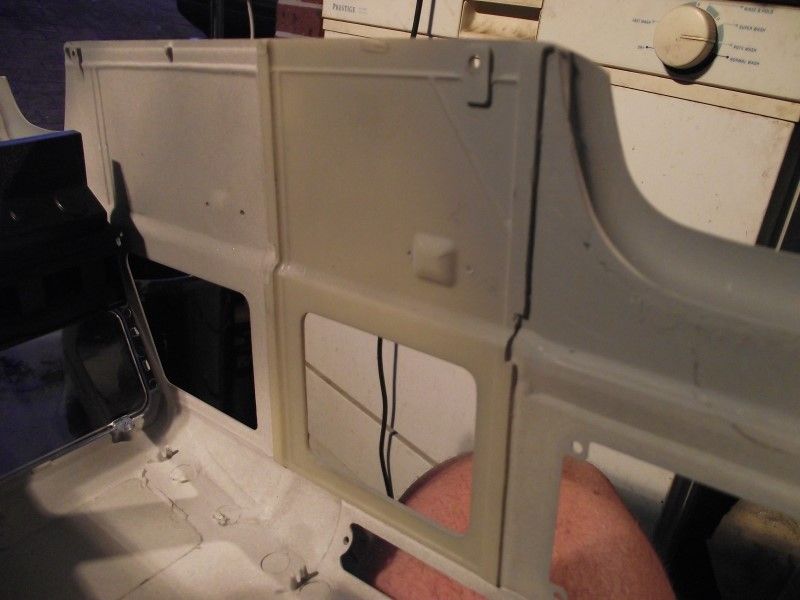 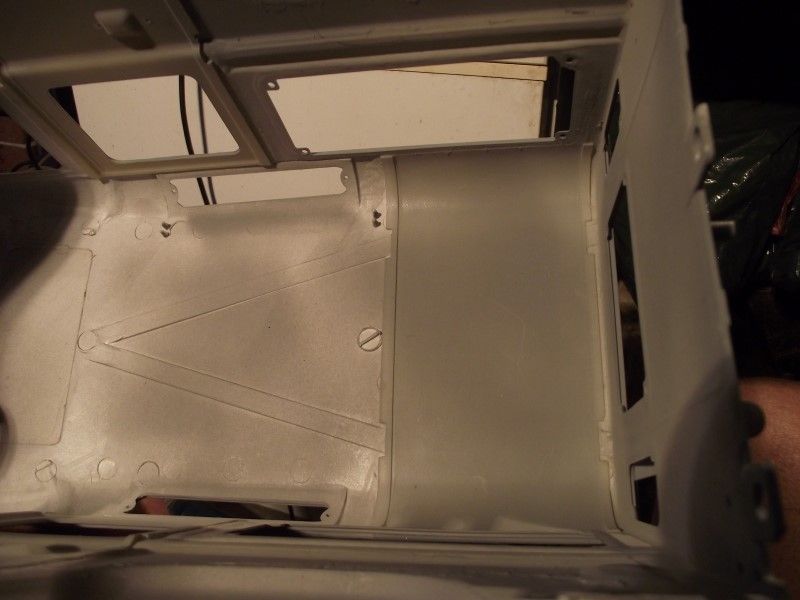 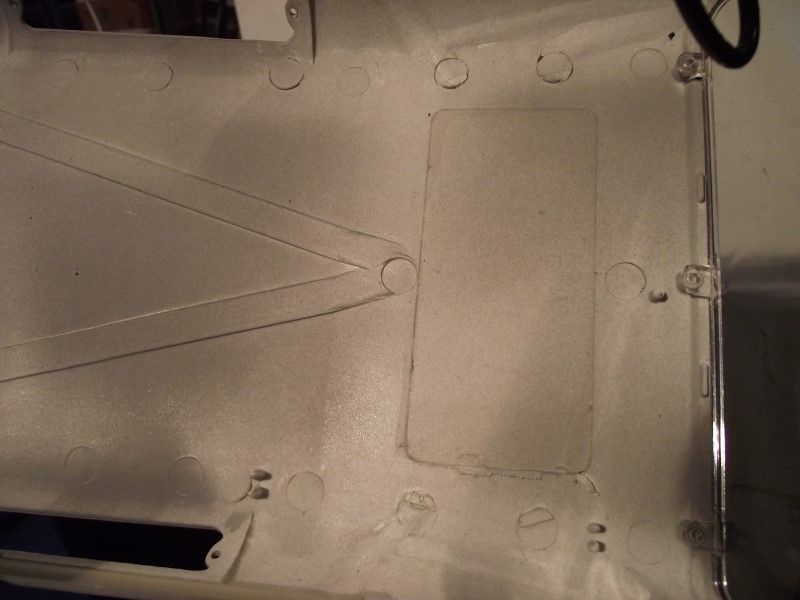 I was obviously disappointed in the condition of the D110 body and contacted RC4WD support and advised them of the situation. Normally you would send back the damaged part and get an exchange item for it. However, I am in Australia, postage would be close to $90 to return it, and then another $90 to get the replacement sent. I suggested this was untenable as a viable solution due to the costs and time frames involved. I found a local enthusiast experienced with styrene who said he could repair it, and RC4WD agreed to cover the costs of the repair work. I asked if I could have parts to the equivalent amount of the repair and they agreed. I ordered a 2nd D90 interior base, seat backs and door cards, which have now arrived. I can't say enough good things about the high level of customer service I received from RC4WD. They listened to the issues and were flexible enough to assist me even though I am on the other side of the planet. Cheers guys, and many thanks. I will show the repair work later when it is done. I will also use some styrene sheet on the inside of the rear fenders to provide some additional strengthening. Cheers H2Micr0 |
| |  |
| | #5 |
| Rock Crawler Join Date: Jan 2013 Location: Australia
Posts: 541
|
The chassis arrived quite quickly considering the 5 week ETA provided on the eBay listing. It arrived in this oddly shaped box and was well packed. 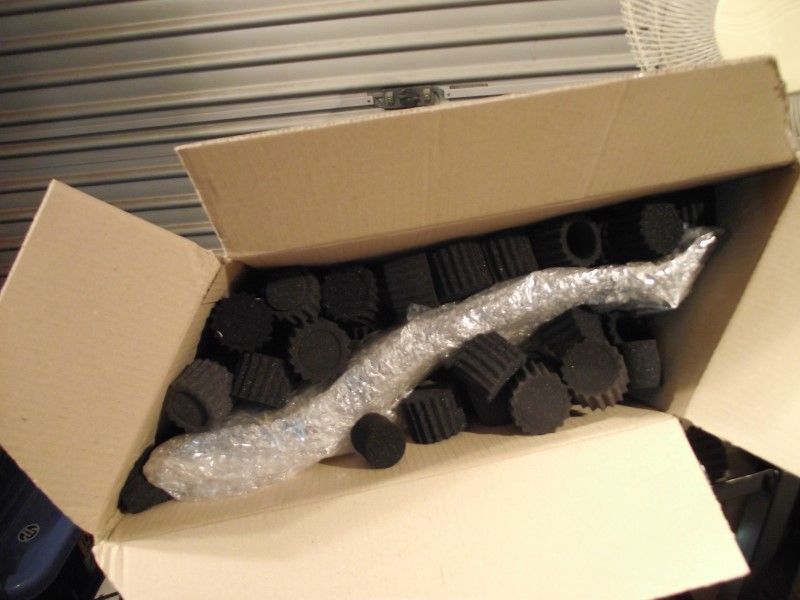 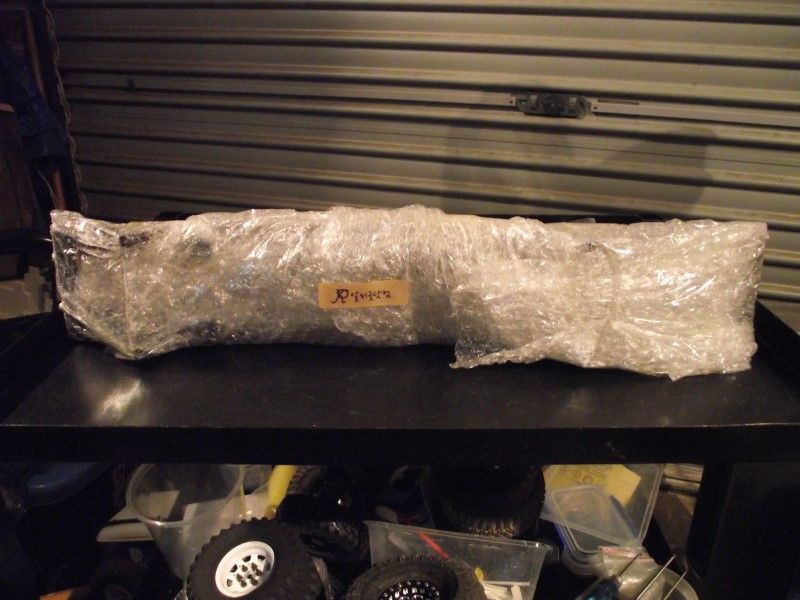 I bolted it together for the initial mock up using the supplied shock towers, and installed the transfer case and support bearing in their intended locations. I already had acquired the Planetary Trans so I fitted it too.  First meeting of body and chassis. 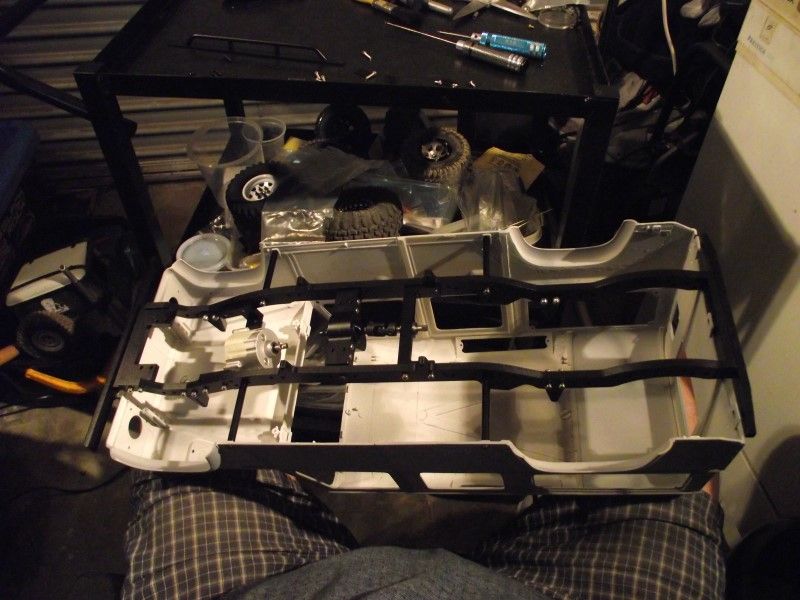 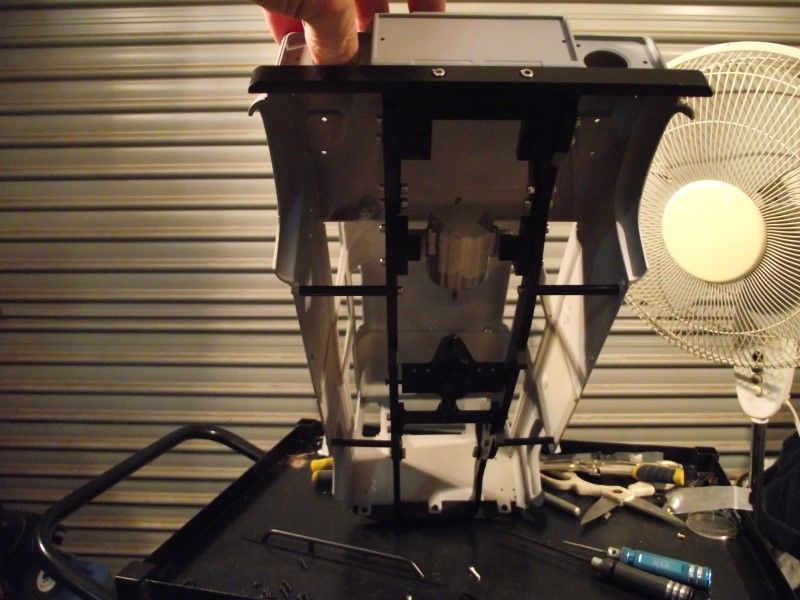 A few adjustments were made and I sorted where the body mount posts needed to be etc. I used stock SCX10 shocks set up in semi droop. There are small internal springs to limit and control the droop. By using only the long spring I can set the stance as I want it, and still retain travel in up and down directions. 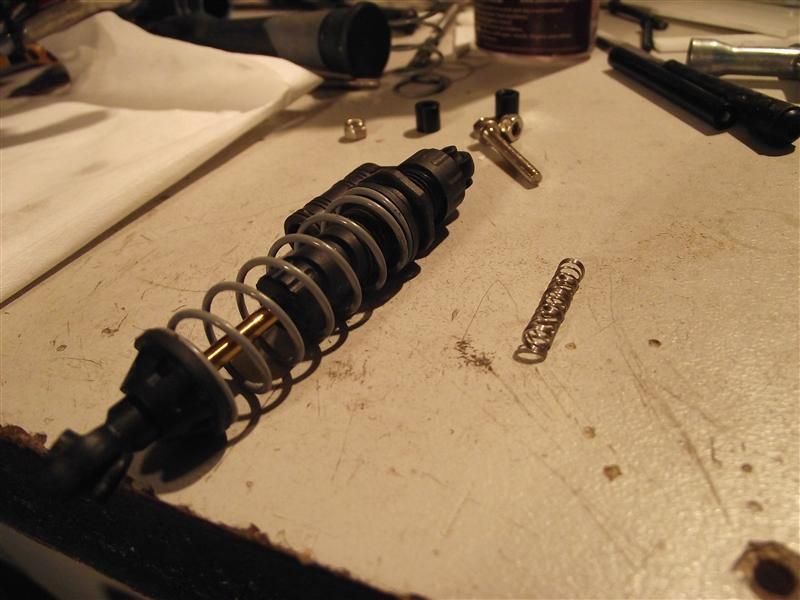 Then the Yota II diffs and the link trusses arrived. Front diff and Gelande II 3 link mount plus panhard mount. 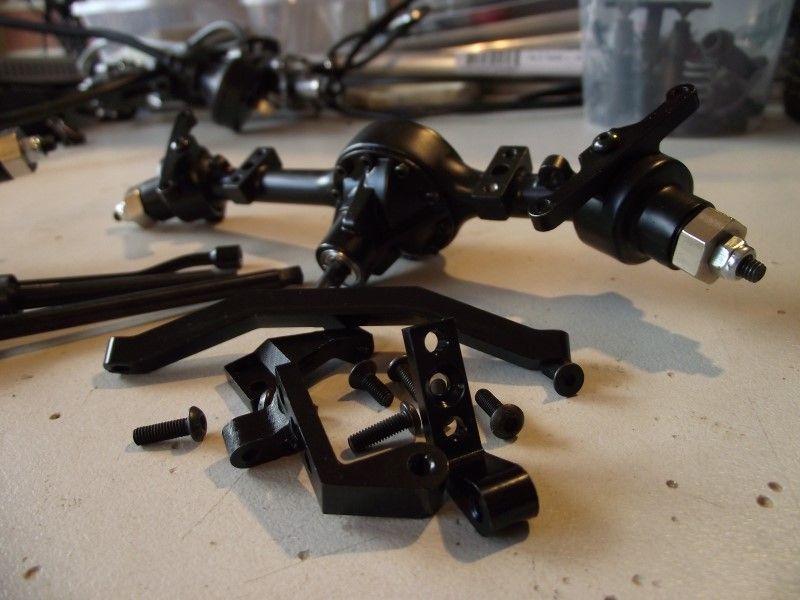 Rear Diff and 4 link mount. 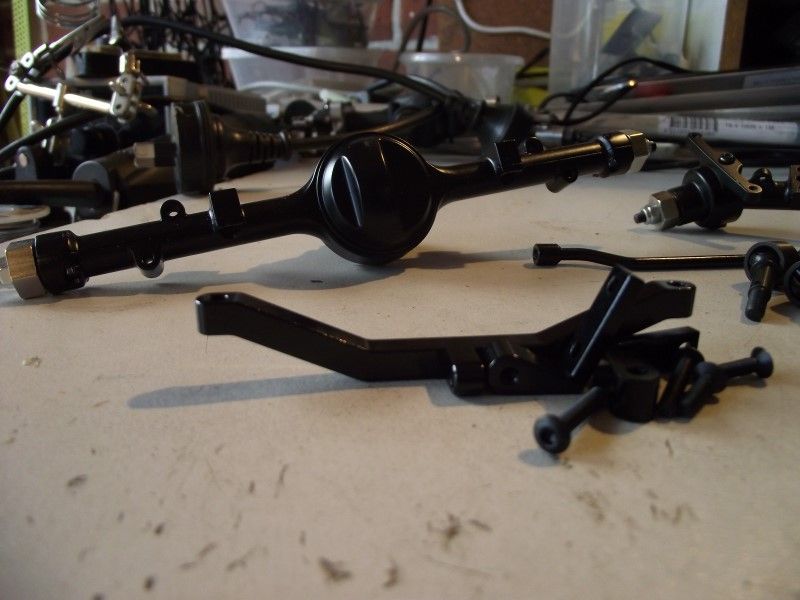 Seeing as I was using a chassis and diffs not designed to work together I mounted the body and made up custom links using M4 Allthread and RC4WD rod ends drilled out to M4. 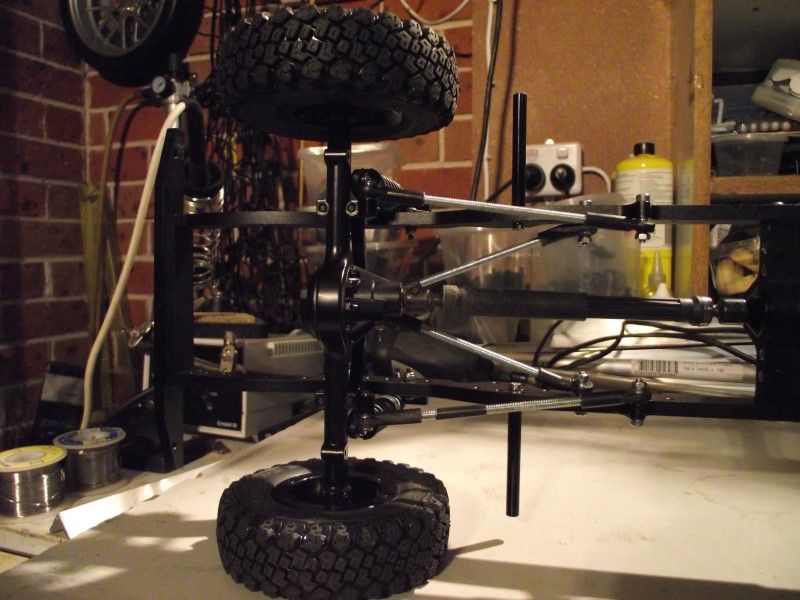 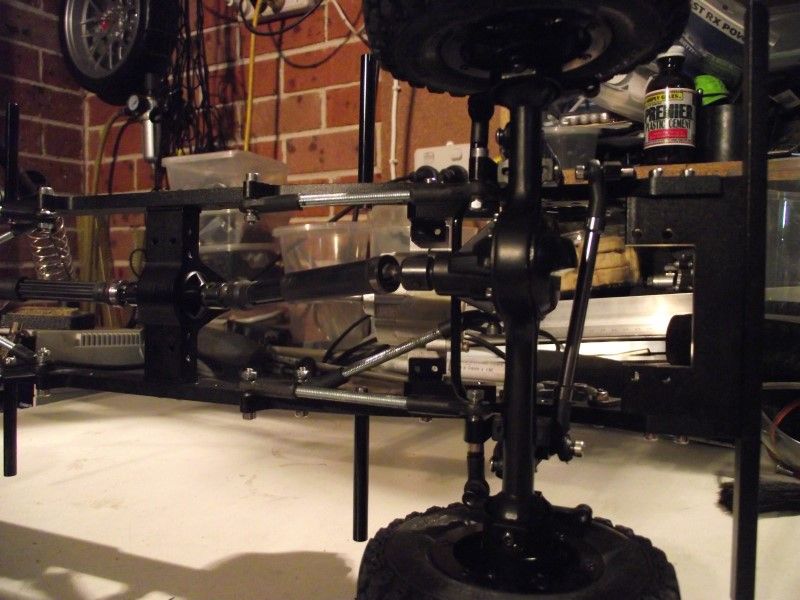 The front panhard mount will need a new hole drilled in the frame to secure it correctly. 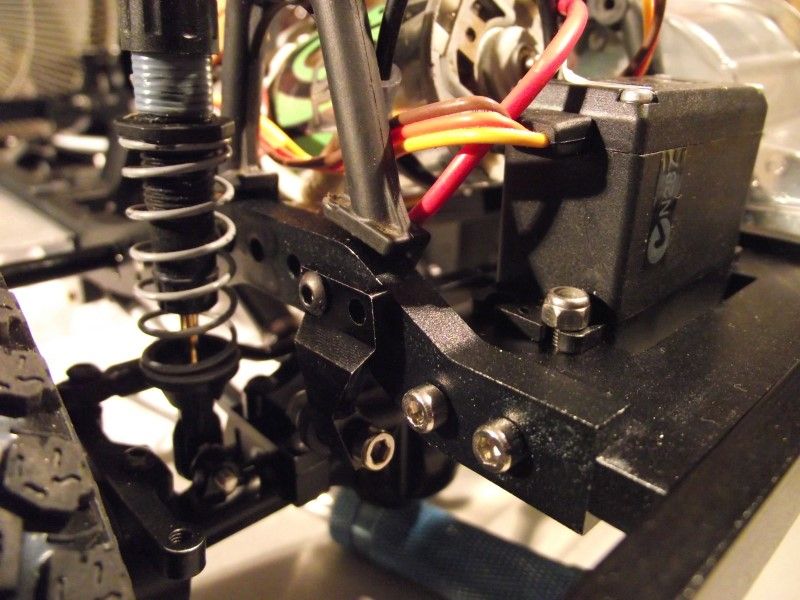 First mock up pictures with wheels and axles attached to frame. 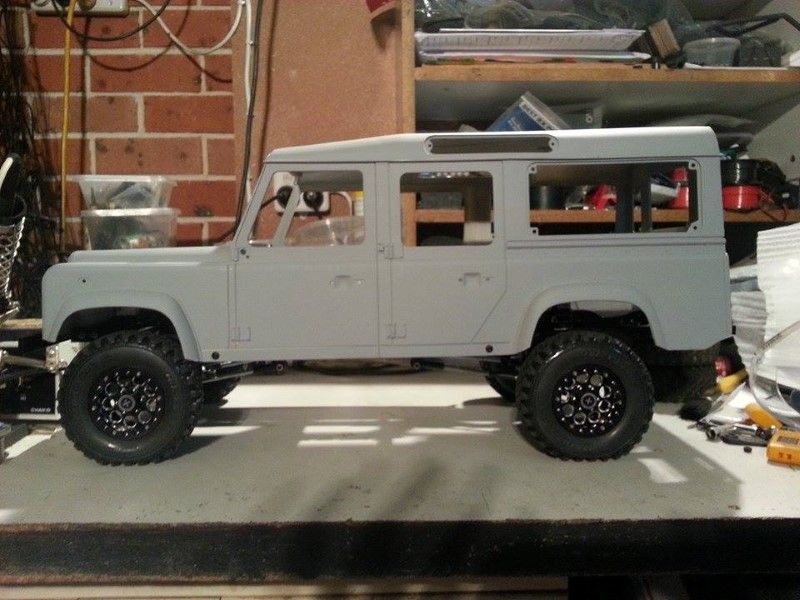 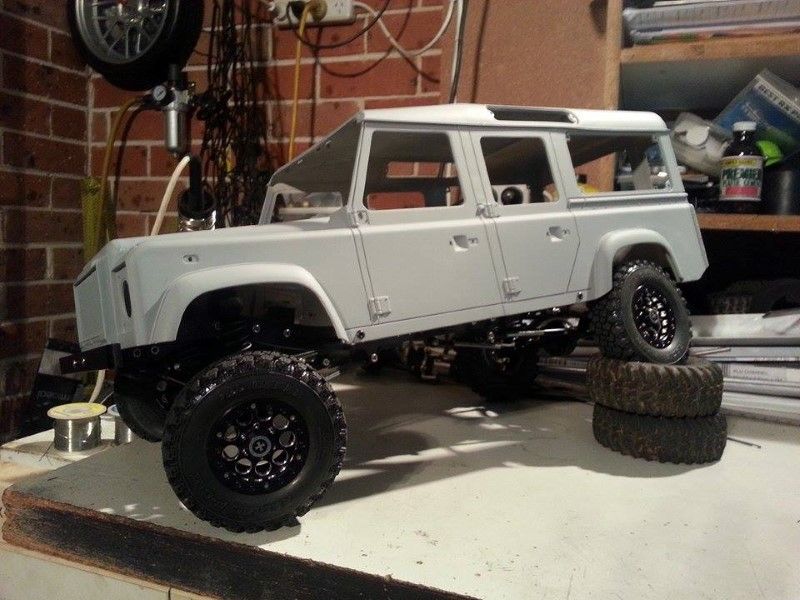 Certainly a good start. However, the stance is far to tall for my liking. I wanted the tyres to tuck into the guards on full compression. A bit of hunting through the parts bin and I found and mounted some SCX10 shock hoops. As you can see here, this raised the top mount point of the shock by a good 10mm allowing a lower ride height but still retaining the travel I was hoping for. 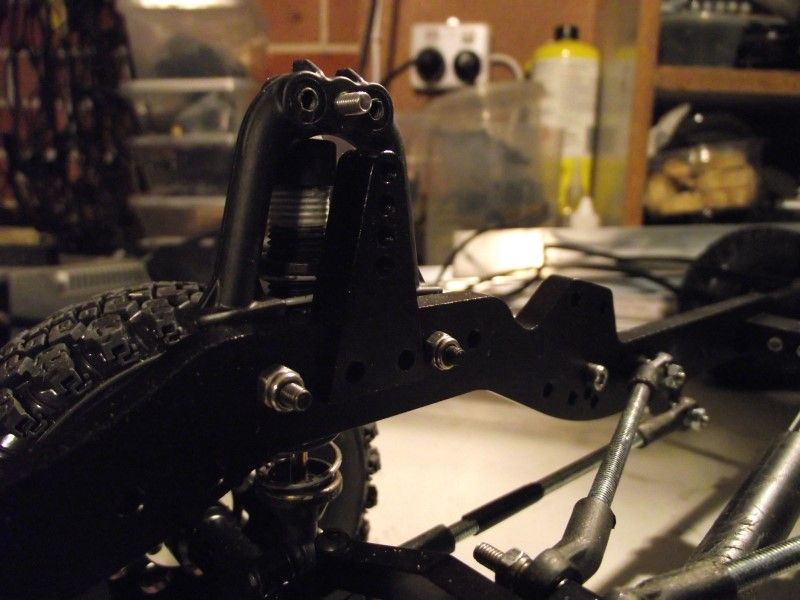 I have subsequently removed the SCX10 shock hoops from the rear to reduce the intrusion in the cargo space. I re installed the stock shock mounts, and using the lower shock mount on the Yota II diff am still able to keep the travel and ride height I want. 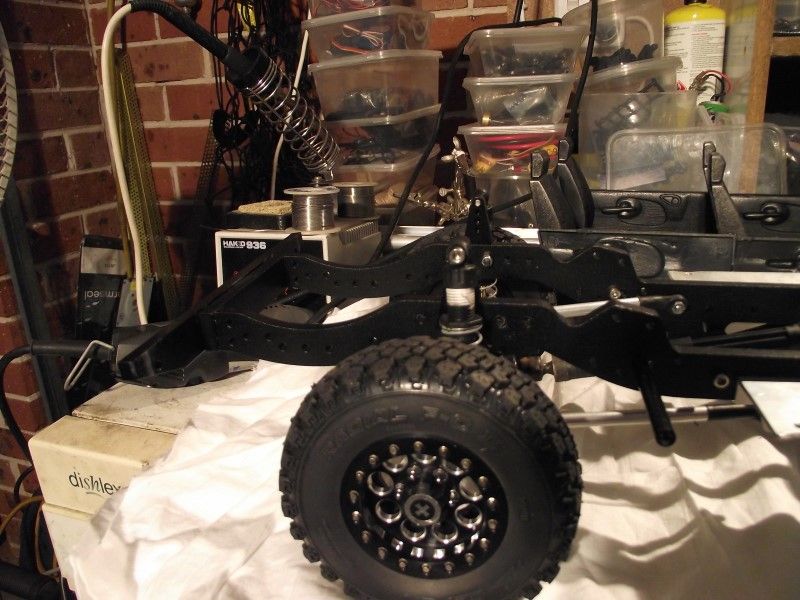 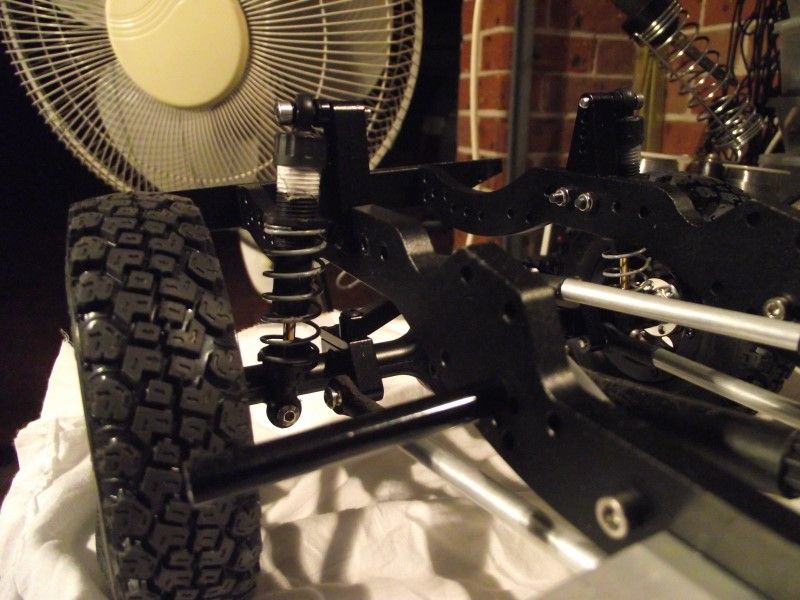 The next question is how to make a 2 door interior work in a 4 door body. Cheers H2Micr0 |
| |  |
| | #6 |
| Rock Crawler Join Date: Jan 2013 Location: Australia
Posts: 607
|
looks like its gonna be good!
|
| |  |
| | #7 |
| Rock Crawler Join Date: Jan 2013 Location: Australia
Posts: 541
|
Interior for a D110?. Interesting question. The D110 body comes with a D90 interior and glass etc. But the D90, only has two front facing seats and four jump type seats in the back. Not going to work in a D110 with four doors. I considered building a bench seat for the back, and theoretically, I still can, but elected to use a second D90 floor pan and give The Brigadier a luxury upgrade with 2 additional bucket seats in the rear. Two floor pans. 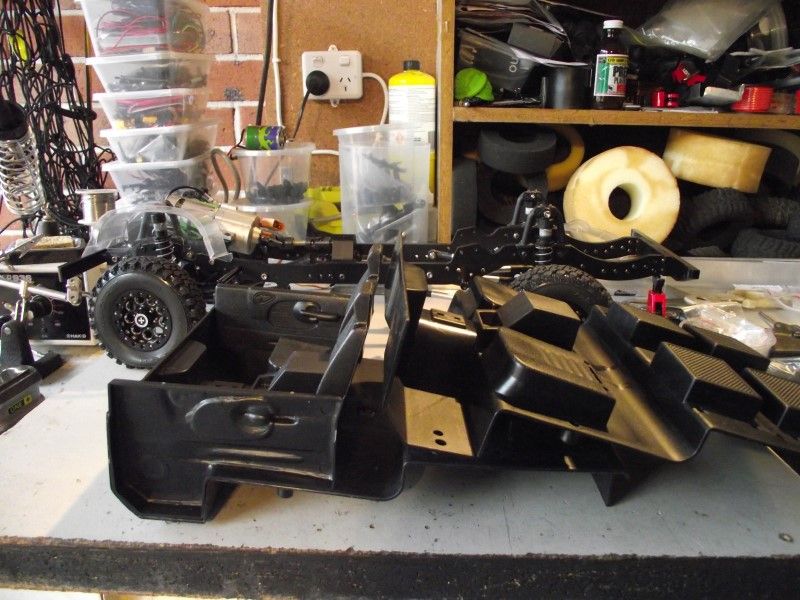 Selective use of a cutting implement, and the jump seats are history. 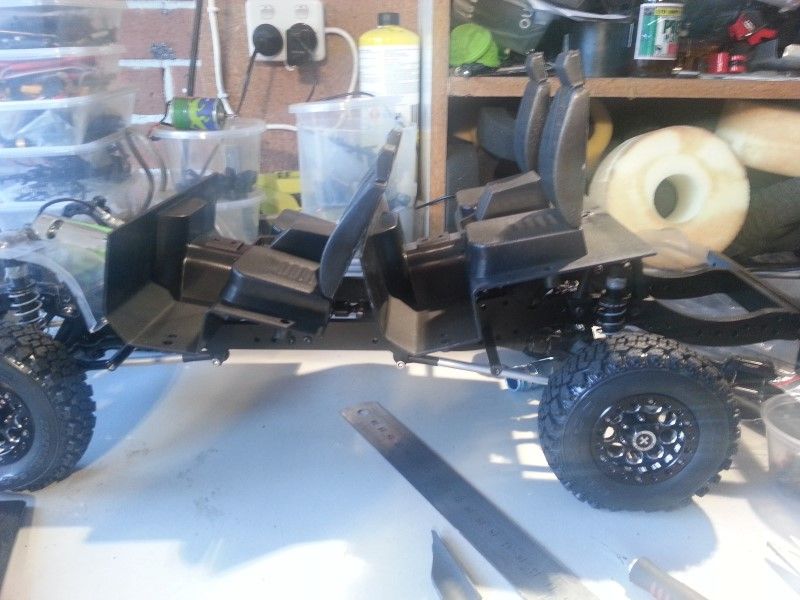 This is a bit more like it. Heading in the right direction. 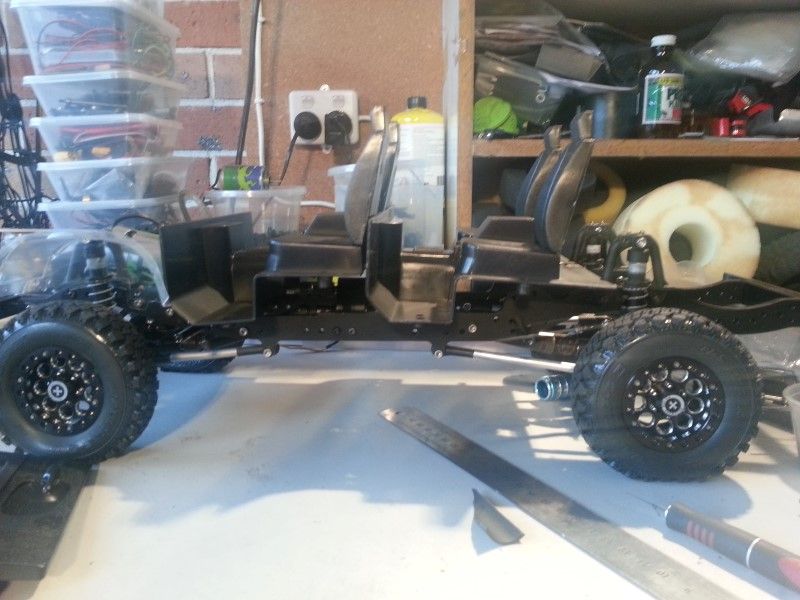 A test fit of the door trims found me reaching for my dremel. 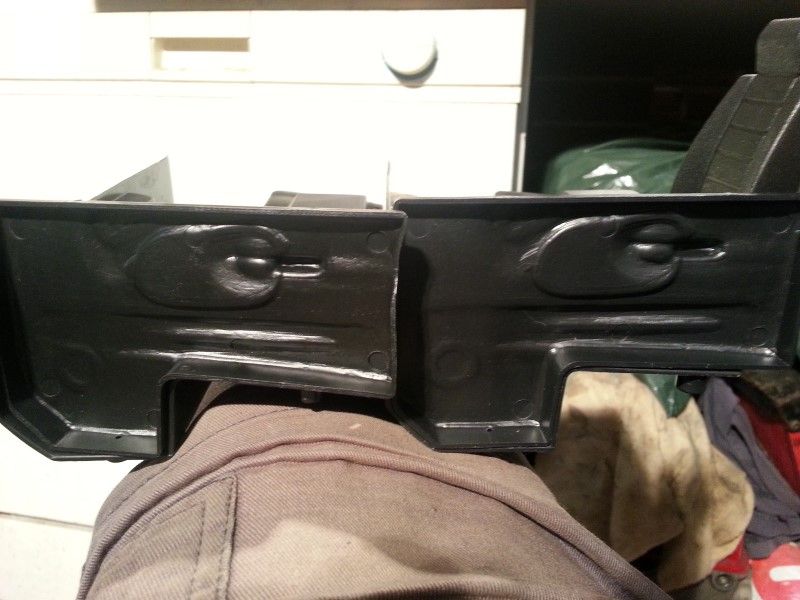 That's better. 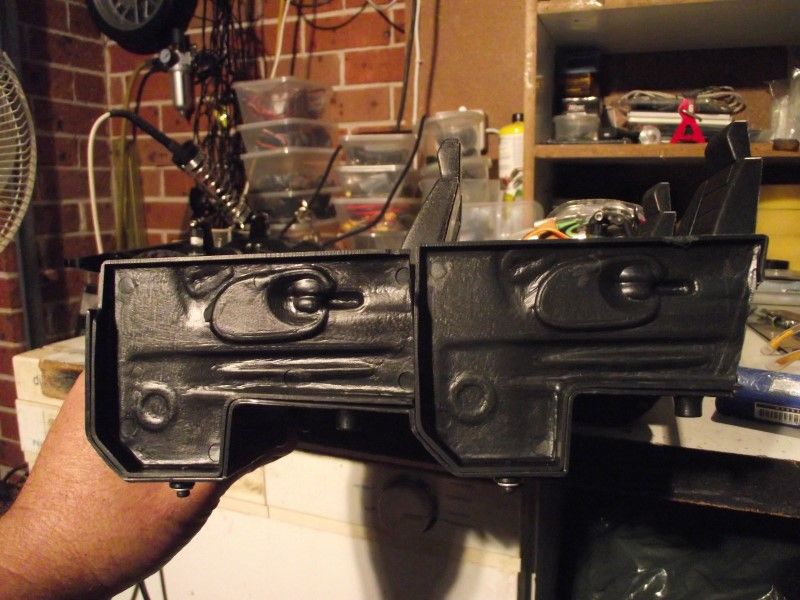 A quick test of the seats in the body and I quite like the way the rear seats sit further back. The Brigadier should have ample leg room in the rear. 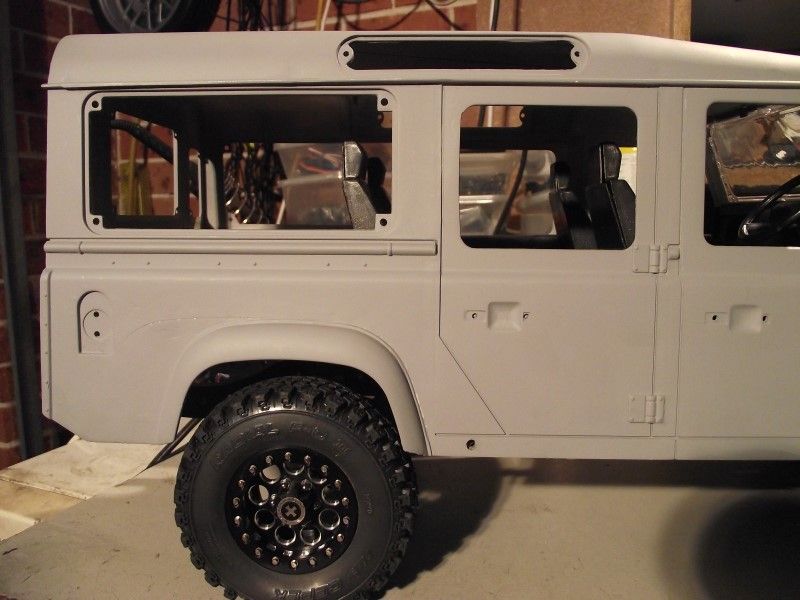 Next I installed the modified door cards. Hmmmm, something is not right here. 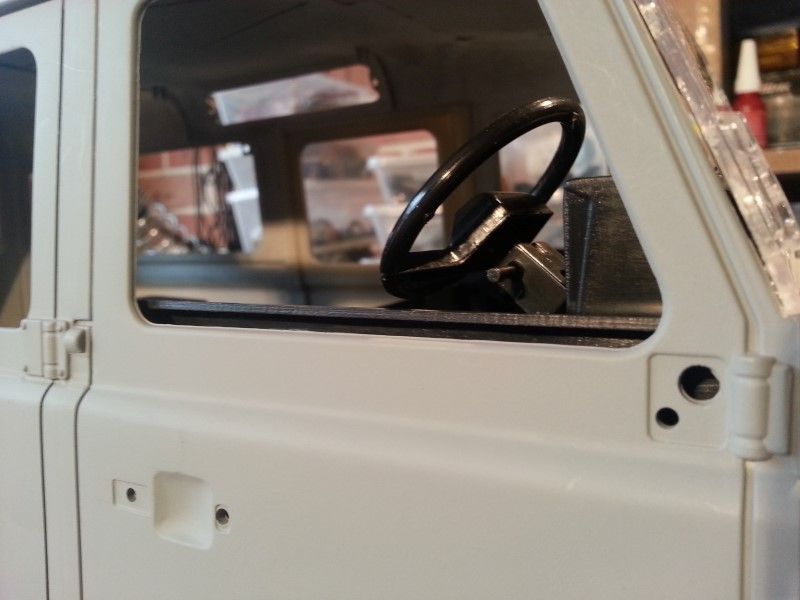 and it gets worse in the back. 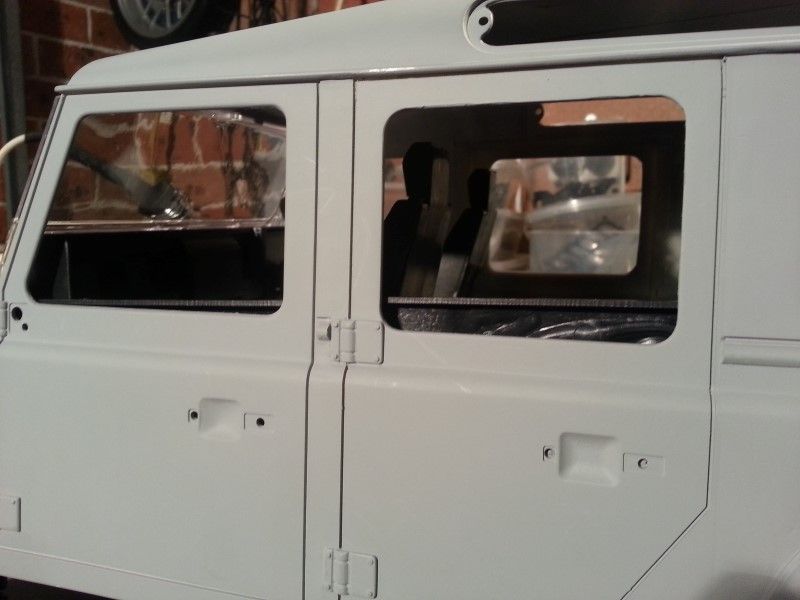 I am trying to combine parts that were not designed together, so these sorts of issues are not surprising. If you look closely at the above picture, you can see the rear window sill is actually lower than the front sill. This exaggerates the issue. I had a number of options to correct this. I could lift the body higher on the chassis, but that means the stance I am looking for will be gone. I could section the door cards and glue them back together, but while that will work, is a lot of cutting and shutting. My solution in the end was to lower the floor plan over the chassis. I marked out where the floor sat on the chassis, and then cut strips out of the floor. 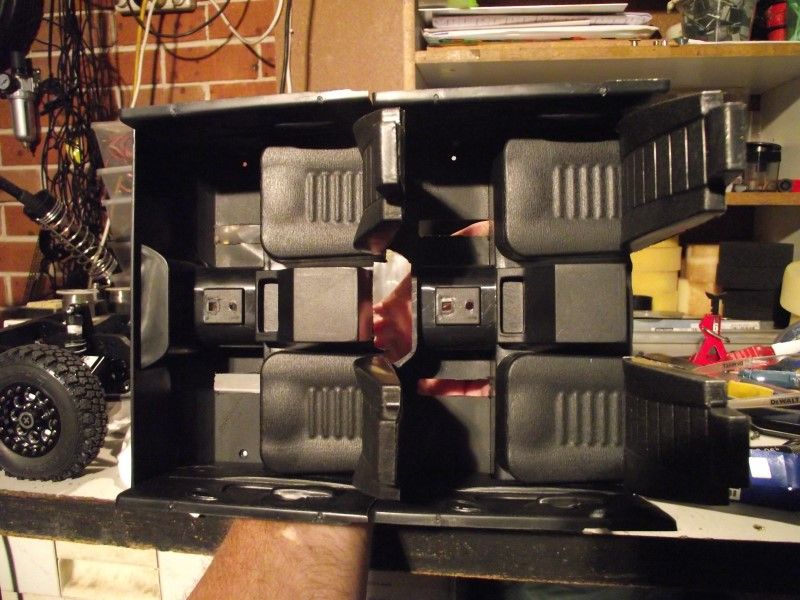 I then used some angle alloy and fabricated a pair of floor mounts. 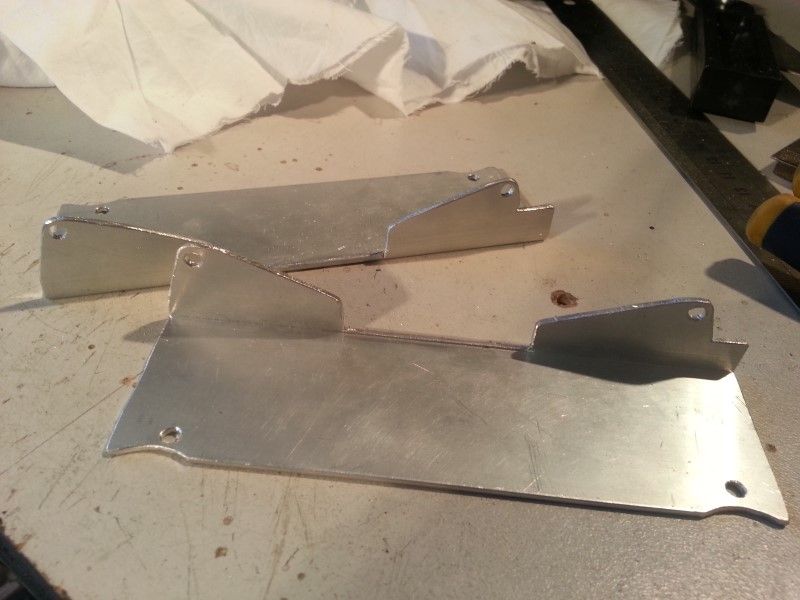 These attach to the chassis and the floor is bolted to them. 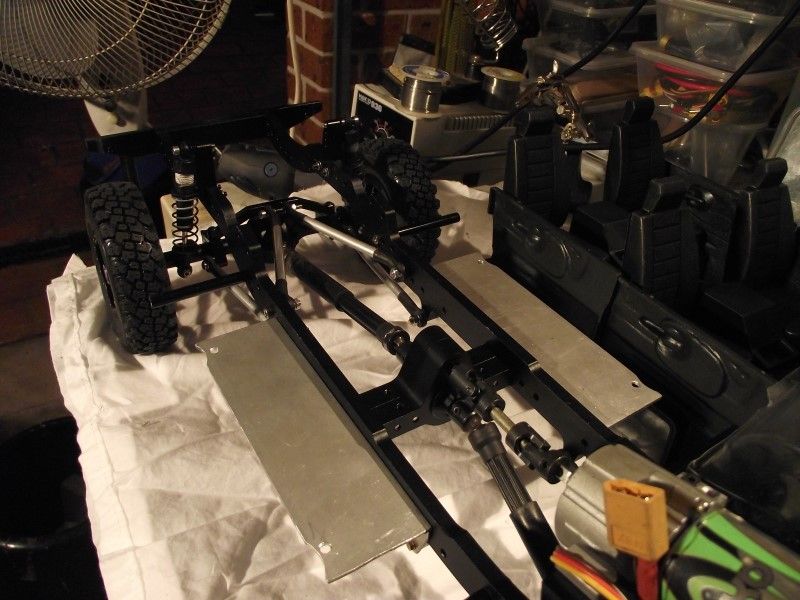 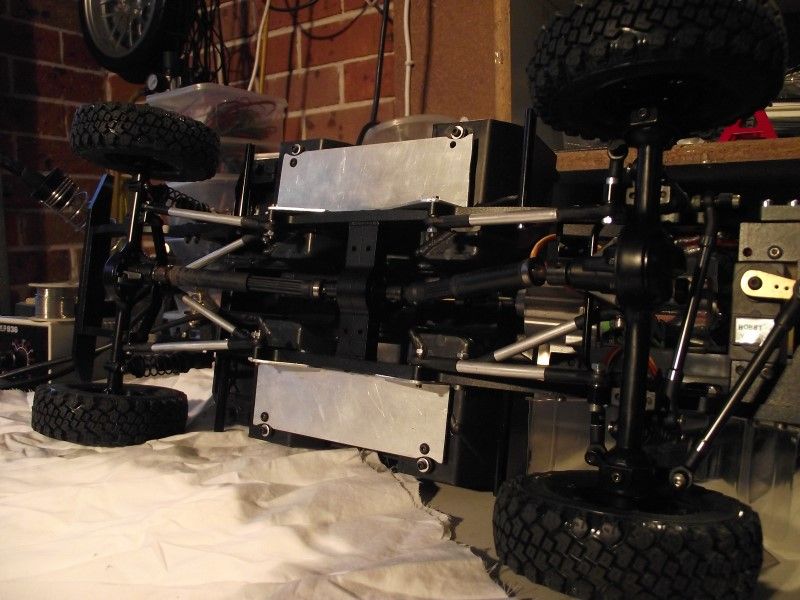 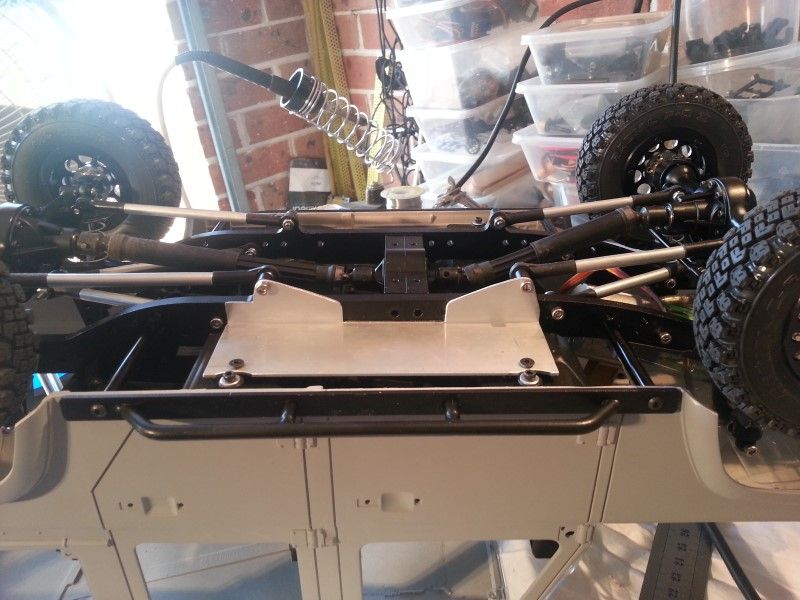 These brackets will provide a mount for the ESC to sit on under the front seats, and I also built in some slide ramps in an attempt to prevent the lower link mounts from getting hung up on rocks etc. The following pictures show how far down the floor sits over the chassis. 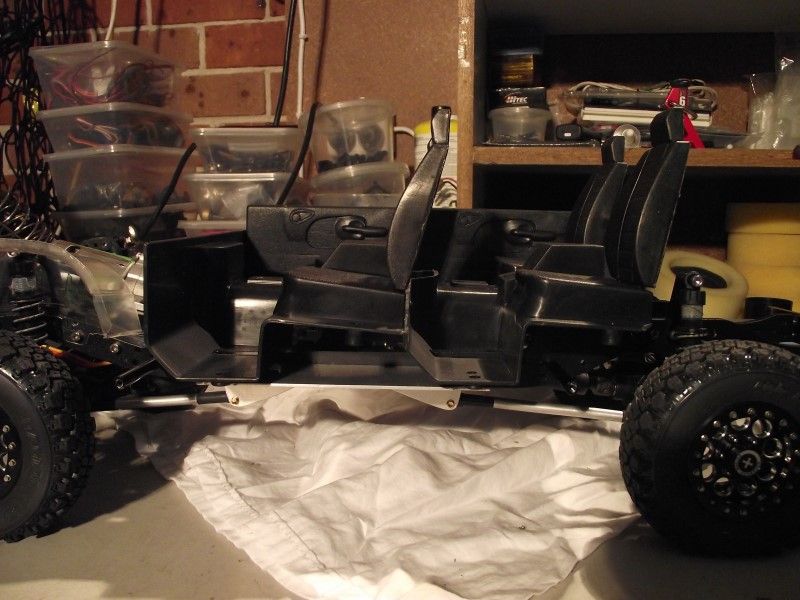 Front. 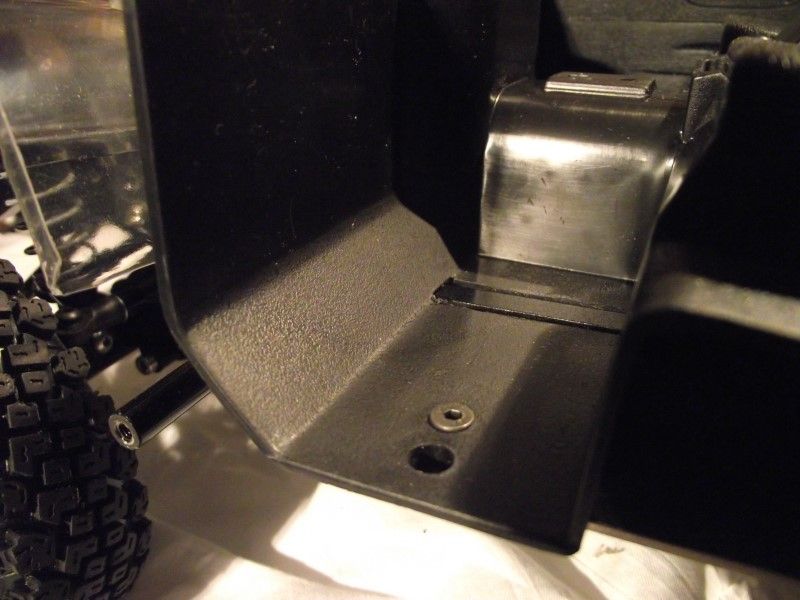 Back. 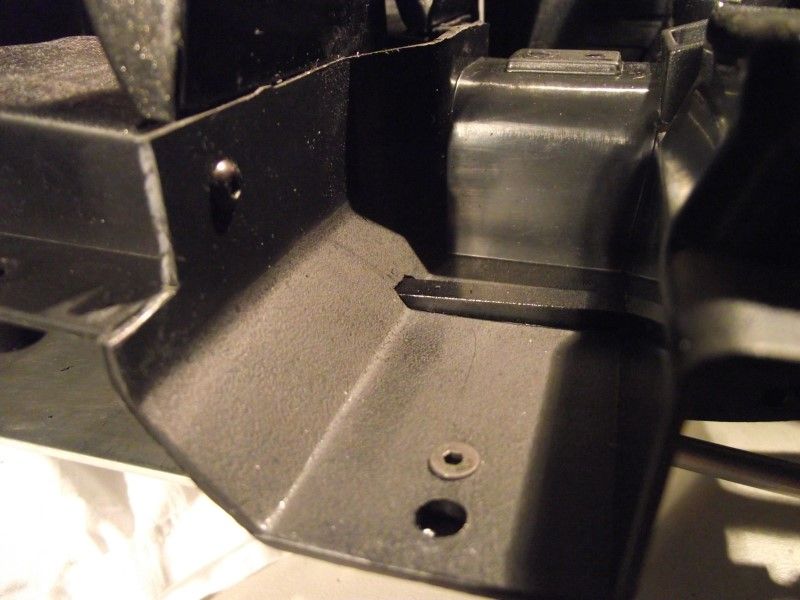 Here you can see that I just bolted the front and rear floor sections together. 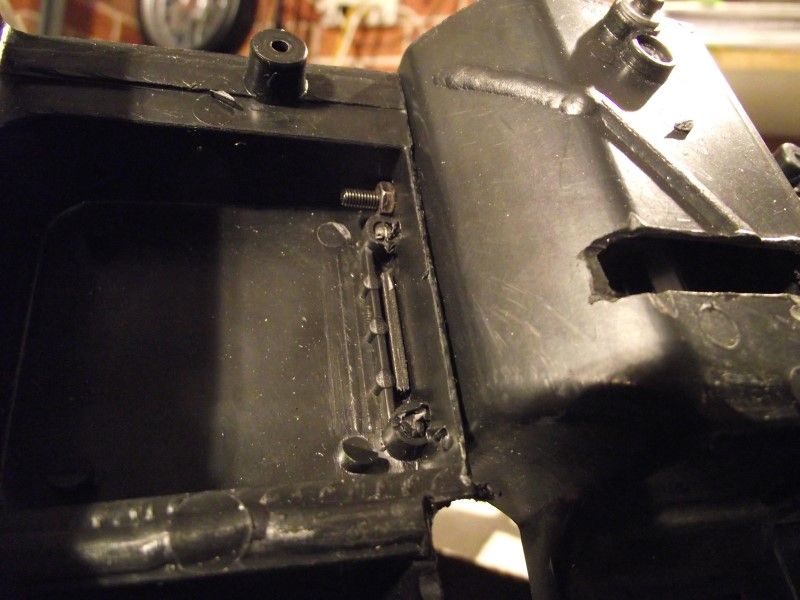 The interior will be attached to the chassis, while the dash is attached to the body. This reduces the weight the body mounts need to cope with too. 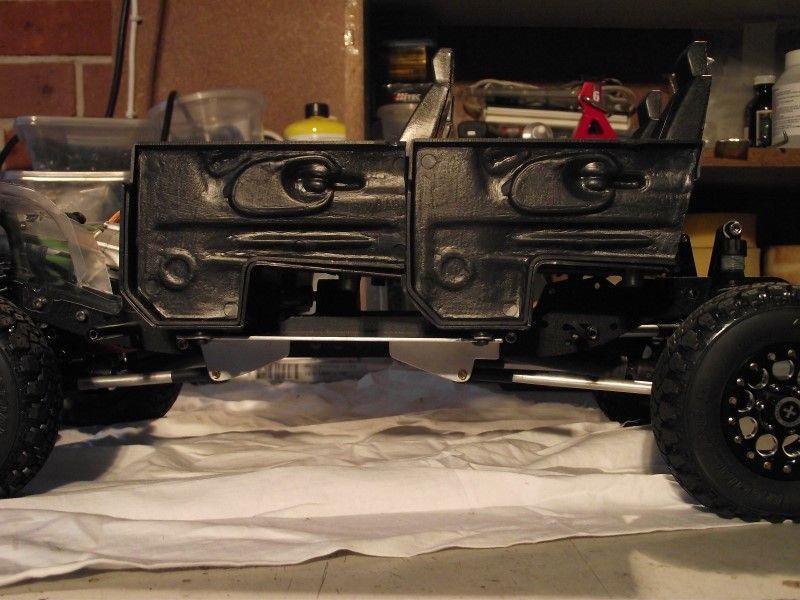 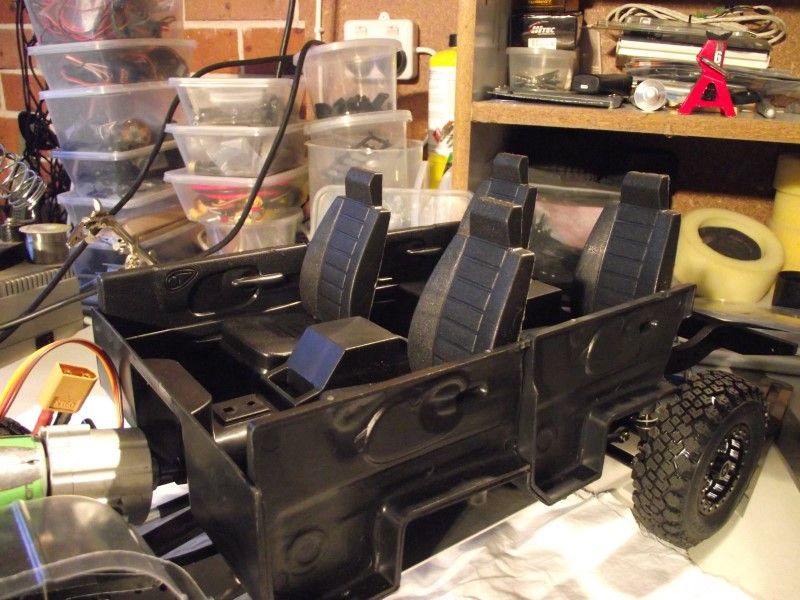 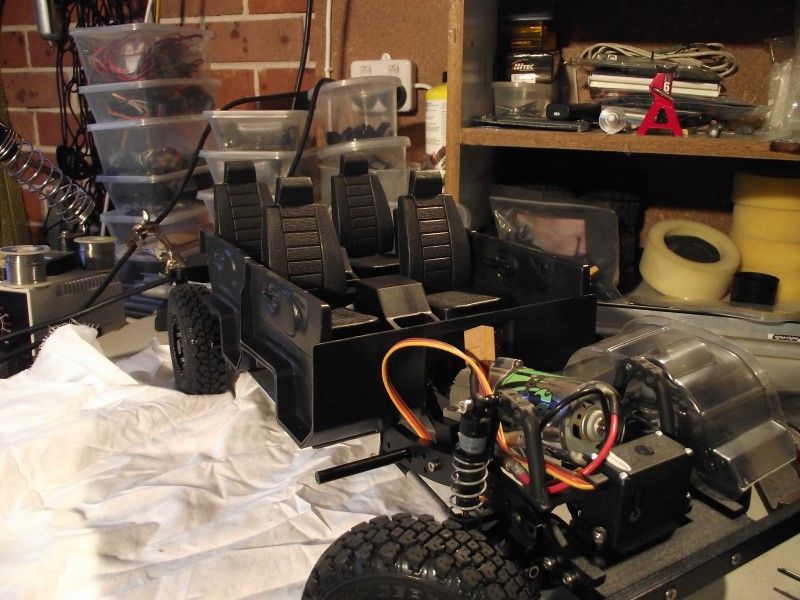 Final test fit looks great. The door trims are at the same height as the body door sills. 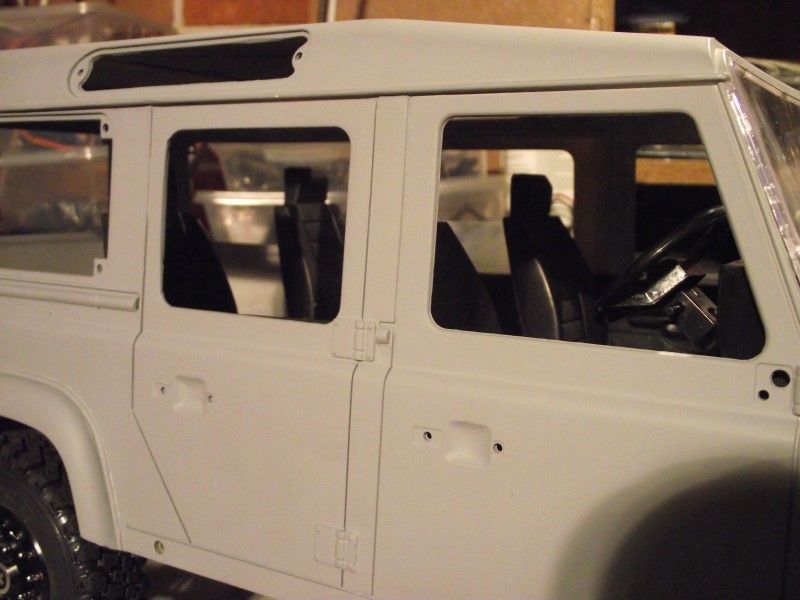 The floor will receive some 'carpet' which will cover the chassis etc nicely. The rear cargo area will have a drop bed and inner wheel arches made up to suit. Cheers H2Micr0 |
| |  |
| | #8 |
| Rock Crawler Join Date: Jan 2013 Location: Australia
Posts: 541
|
Firstly, thanks for the comments. A bit of feedback is awesome, especially when it is all so encouraging. The Brigadier, being a modern example of all that is stalwart, upstanding, and well, just British (we'll ignore all those horrible rumors about oil leaks and electrical gremlins), needs to present the best face to the world. As such the original Defender front end needed a face lift. Along with the Motorworx wheels, which bring modern design and awesome functionality, the following parts from DJ Designs were acquired. 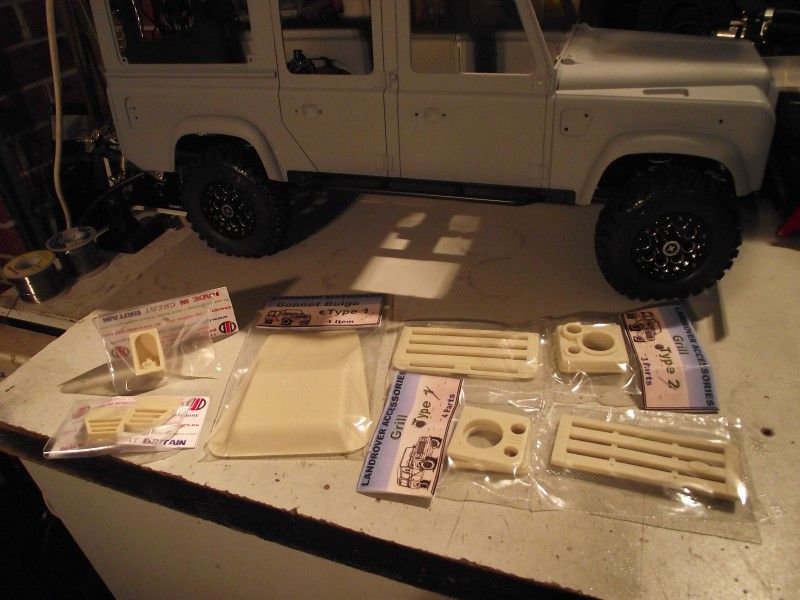 These are made from resin by the seller who designed the parts, created the molds, and then on-sells the parts for very reasonable prices. I have temporarily fitted the front end parts so I can get a feel for the overall look. For the light bezels and grills, you will note that I purchased two sets. I wanted to use the SVX grill, but am not really a fan of the light bezels with the bold rings, so decided to mix and match with something more refined, as you would expect from The Brigadier. The bits I didn't use. Although the mesh piece behind the grill is likely to end up behind the SVX grill. 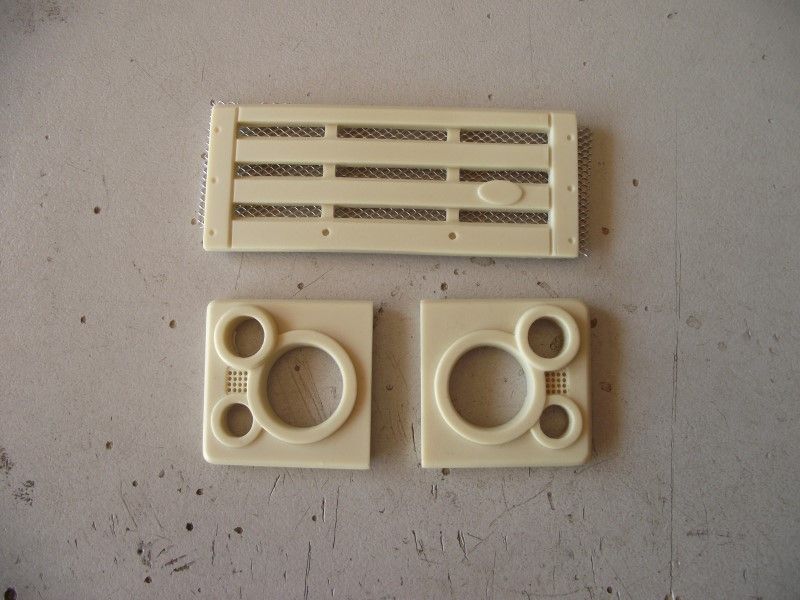 I used the existing holes in the front and marked and pilot drilled mounting holes in the back of the parts before using some old M2 bolts I had laying around. 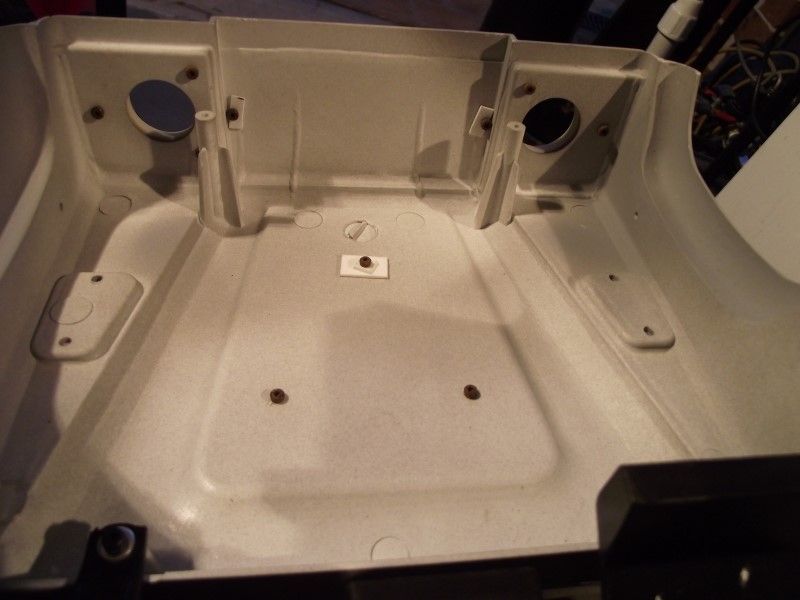 The bonnet required a bit more thought and also needed three holes drilled in the bonnet (yikes) to secure the bonnet bulge. 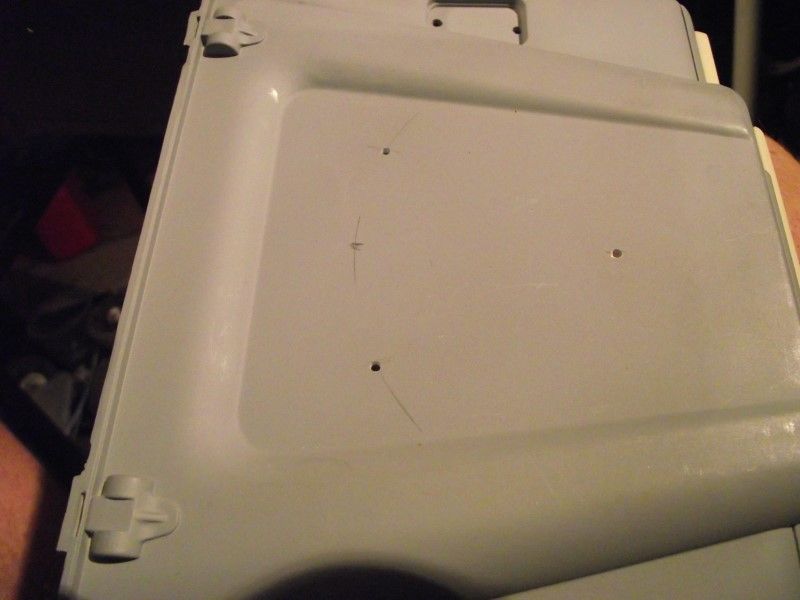 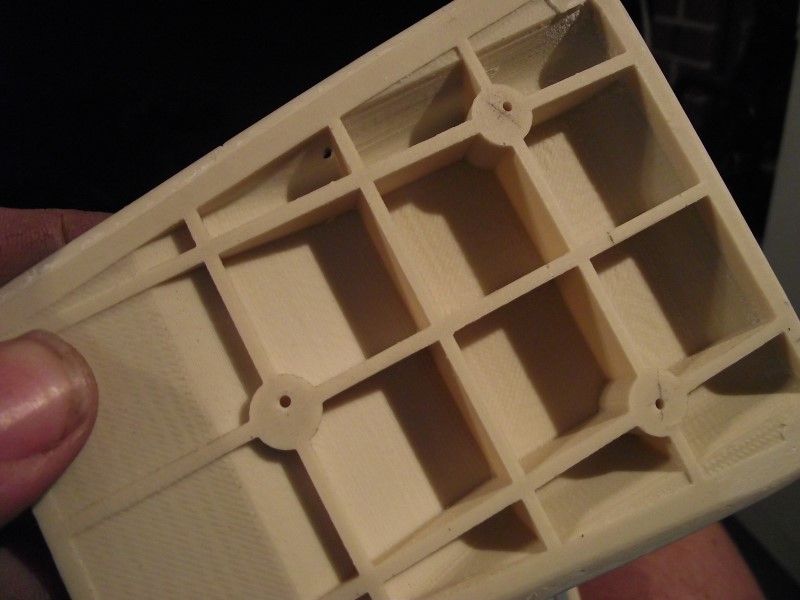 The bonnet bulge had a slight bow in it, and using the bolts means I can pull it down flat and this will help the final fit when they are glued in place. The overall effect is what I was hoping for. 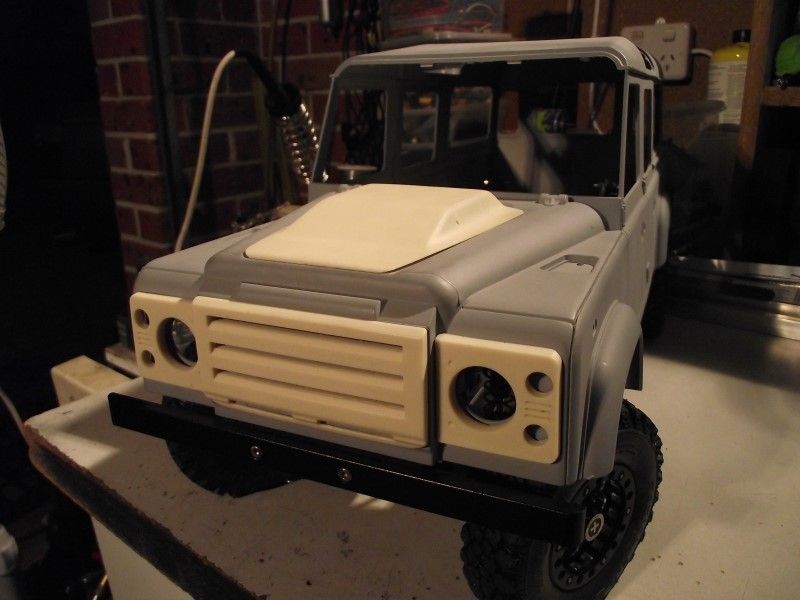 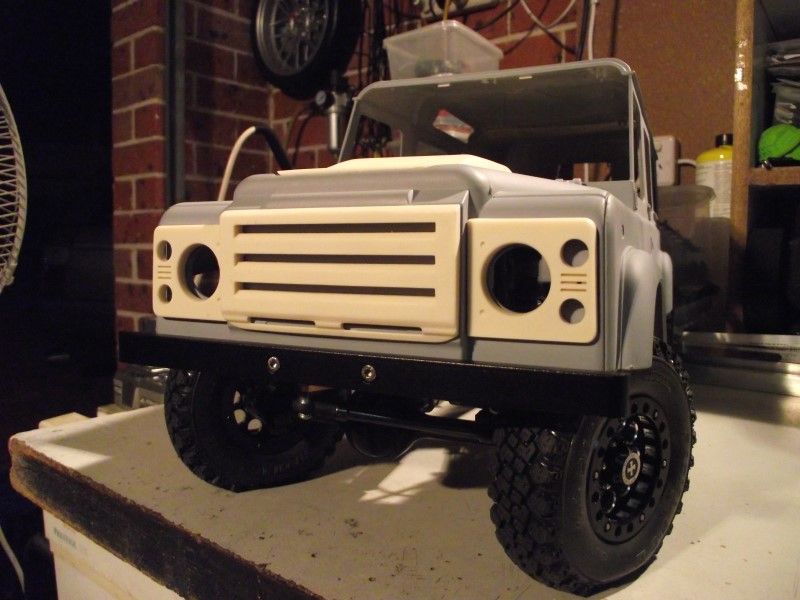 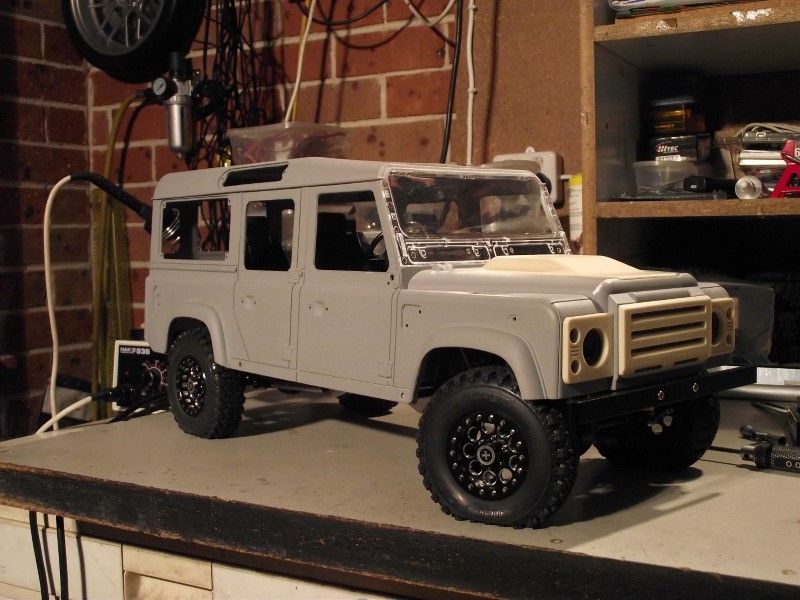 And the obligatory flex shot. The Brigadier likes to brag a bit. More than enough for a daily runabout I think. 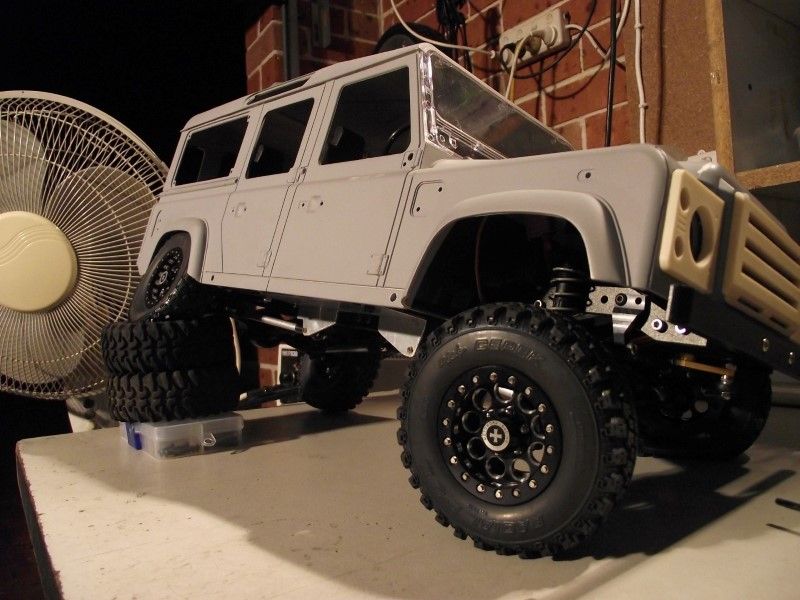 This brings the build up to date with where it now stands. As I progress updates will follow accordingly. Comments and suggestions are welcome. Cheers H2Micr0 |
| |  |
| | #9 |
| Rock Crawler Join Date: Jan 2013 Location: Australia
Posts: 541
|
The Brigadier likes to be self sufficient and accordingly requires a winch to assist the passing of those spots a daily driver should never have attempted in the first place. A full bull bar type bumper distracted too much from the good looks of the Brigadier and so a custom winch mount was in order. I started with a template. 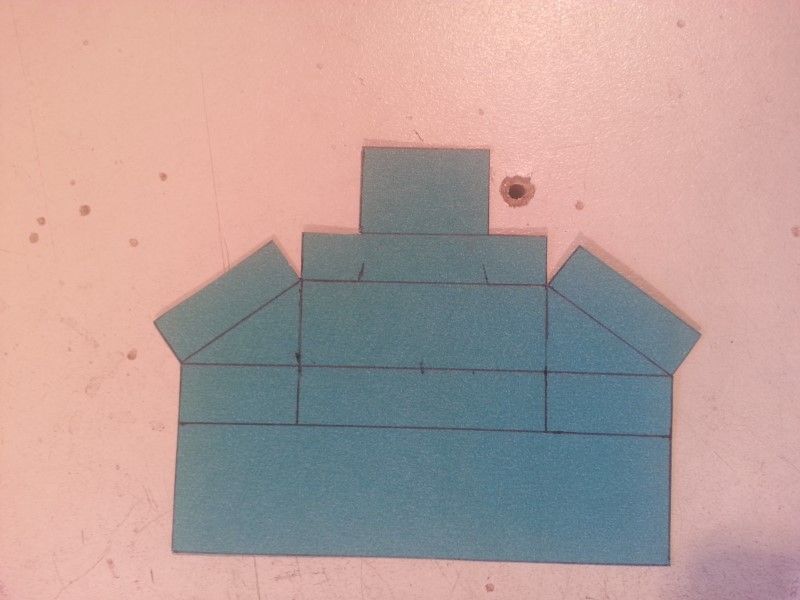 A bit of origami work later and the test fit looks to be going as planned. 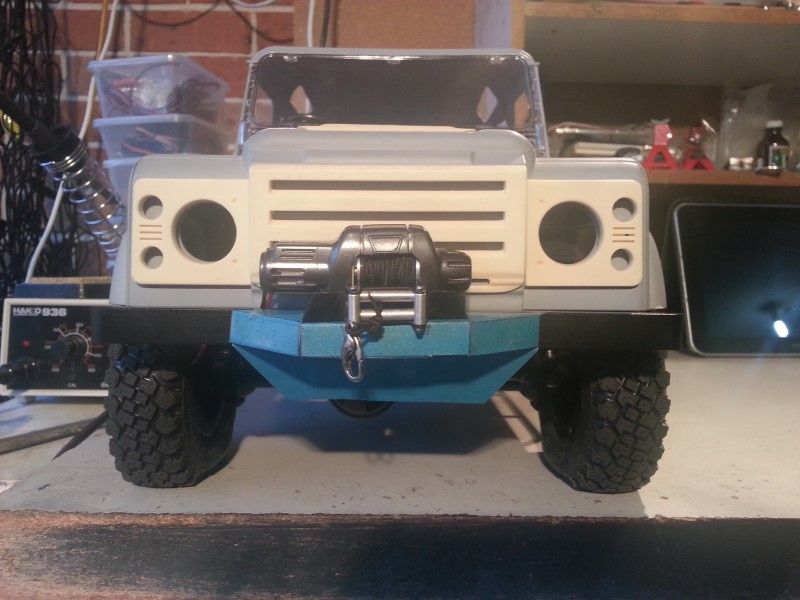 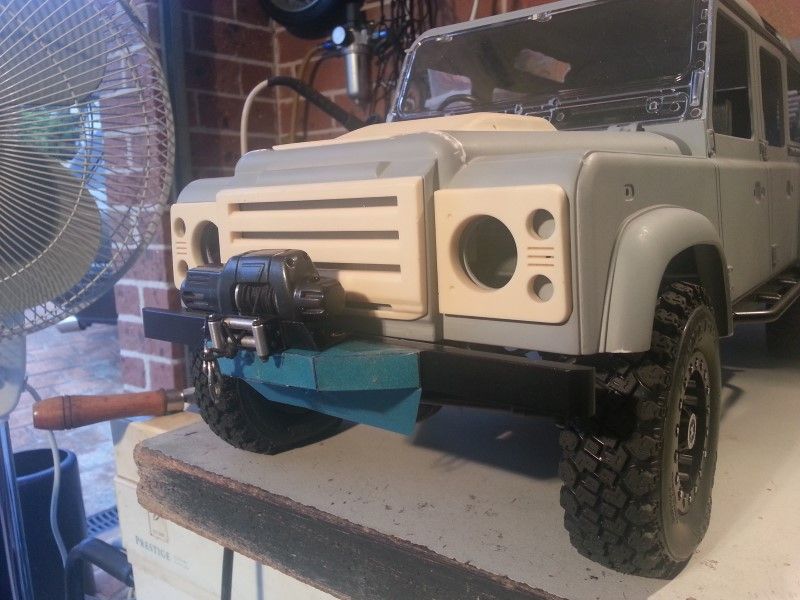 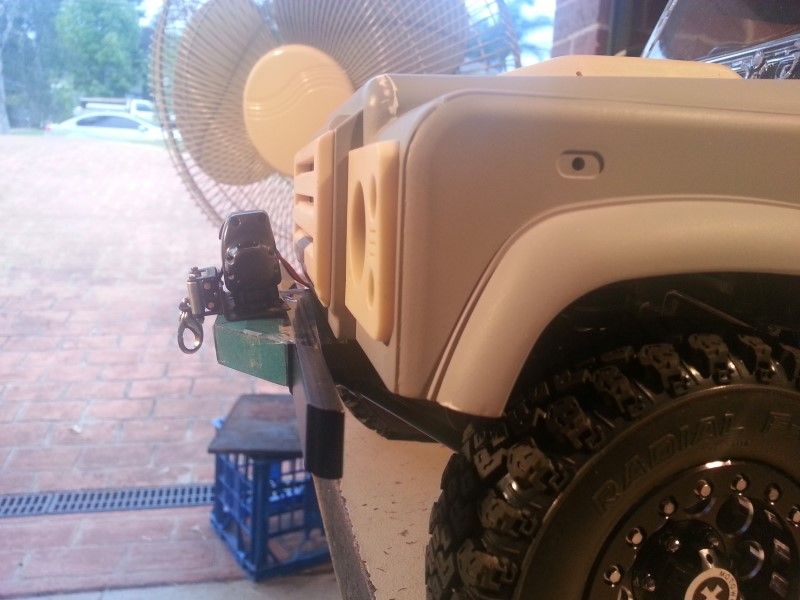 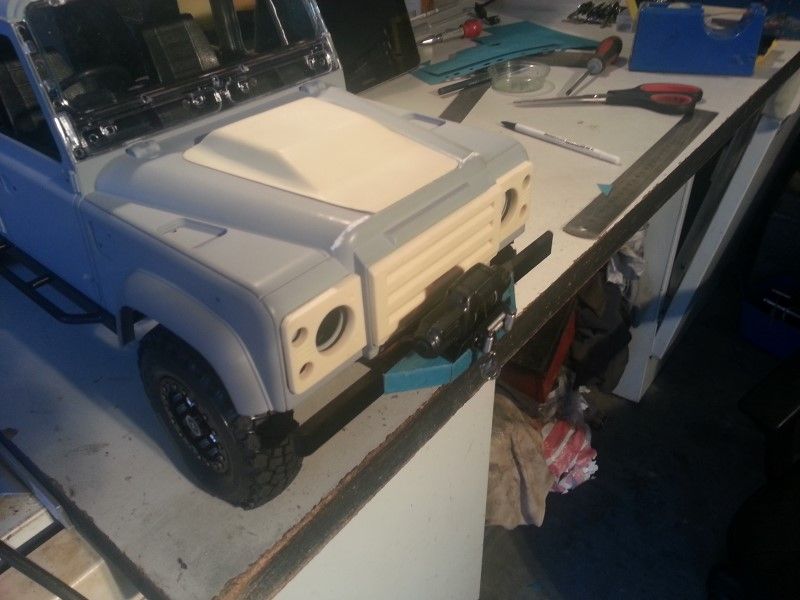 The next step was to transfer the pattern to some sheet metal and bend it into shape. 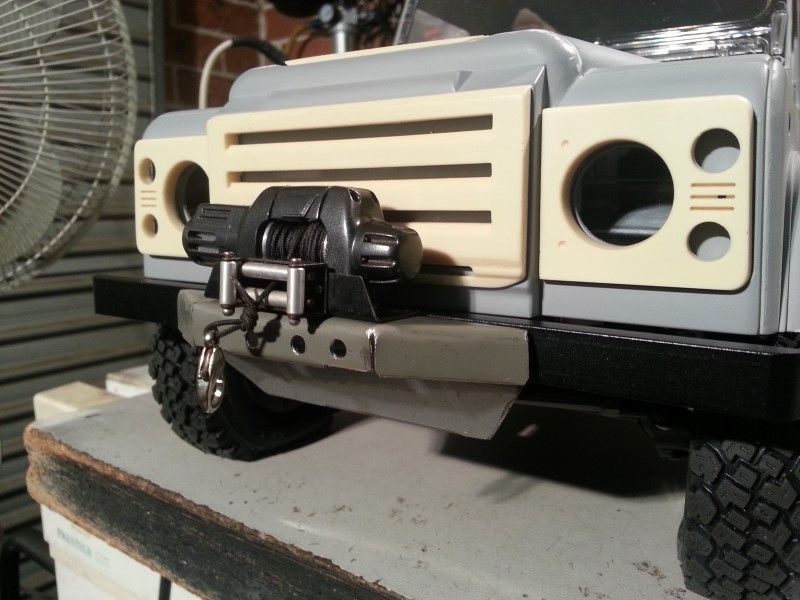 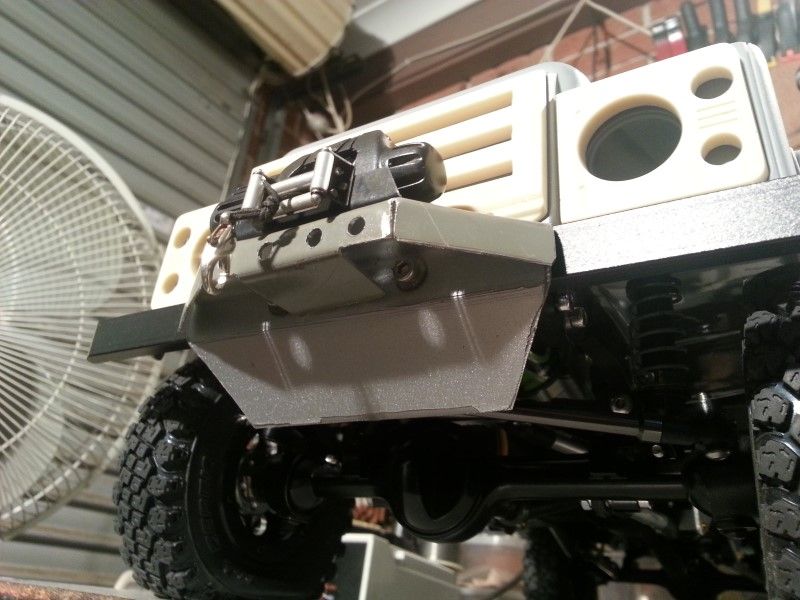 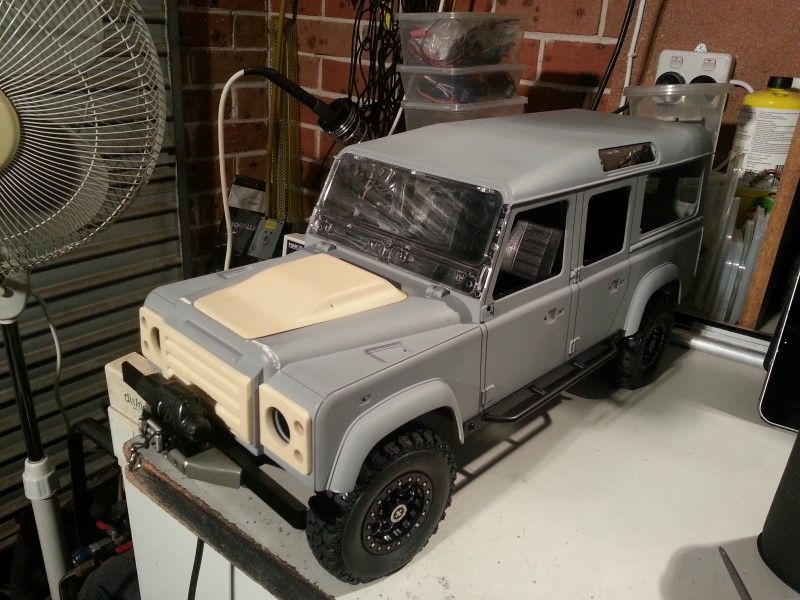 Then it was out with the Map Gas and Brazing rods. Some work with needle files after cleaned it all up, and some holes were drilled in the steering guard. 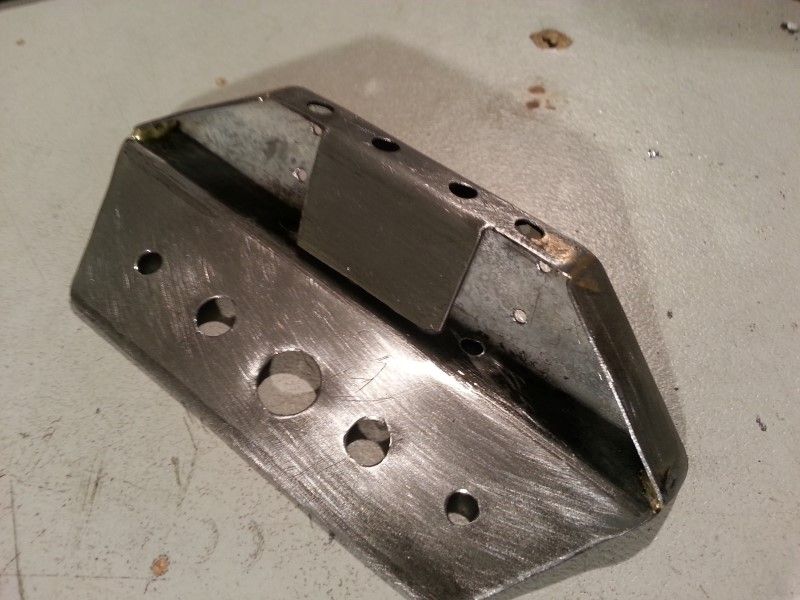 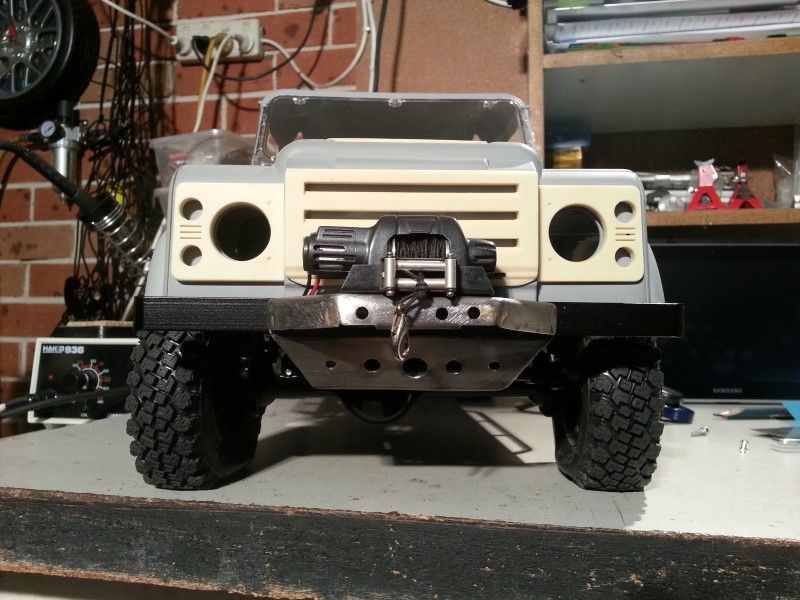 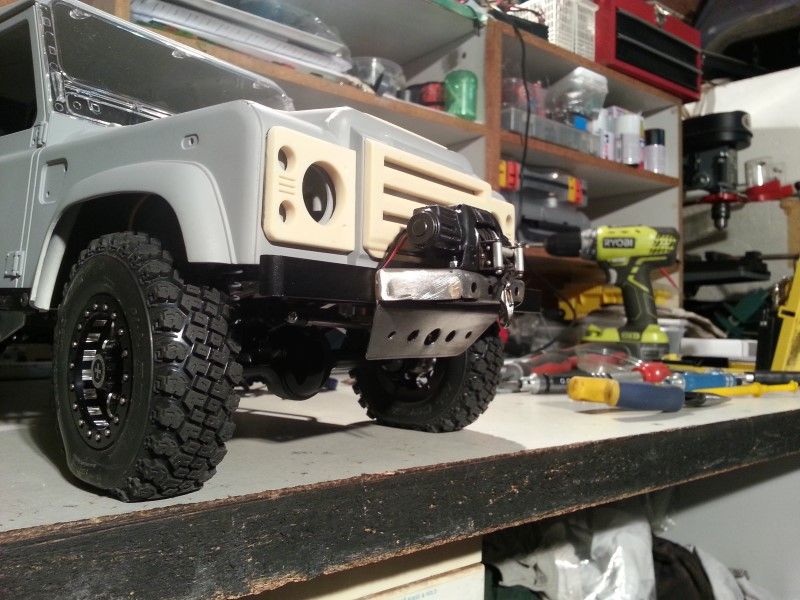 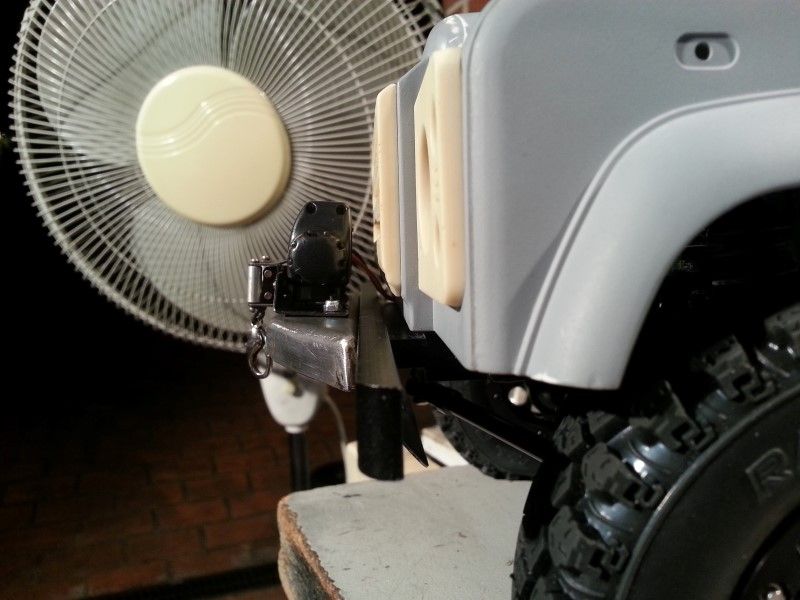 And finished off with some flat black paint. 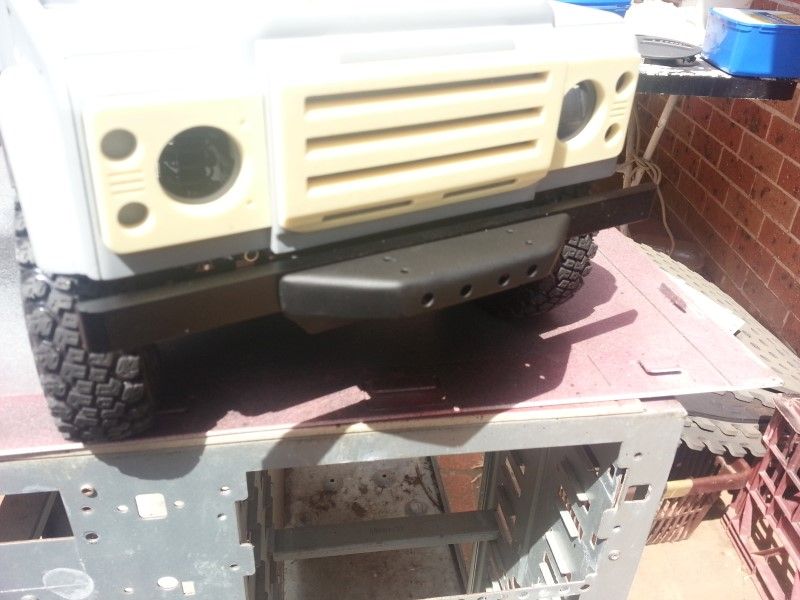 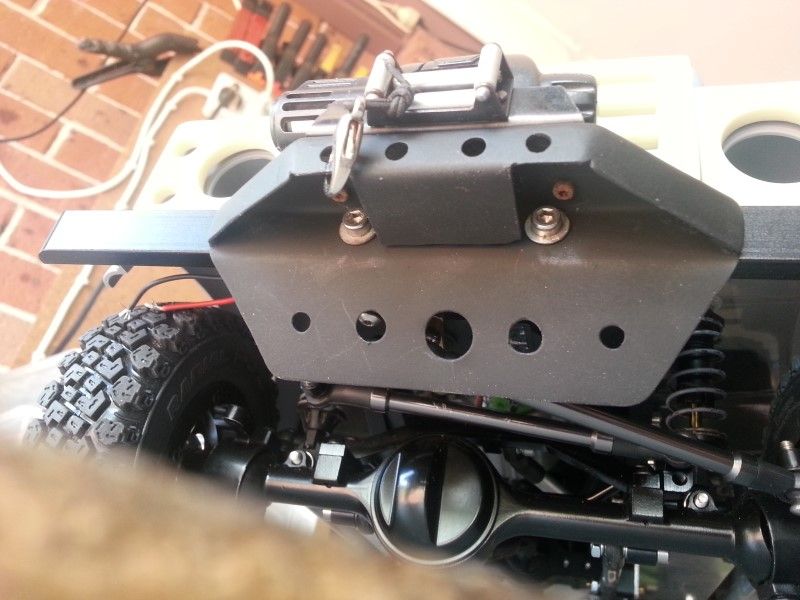 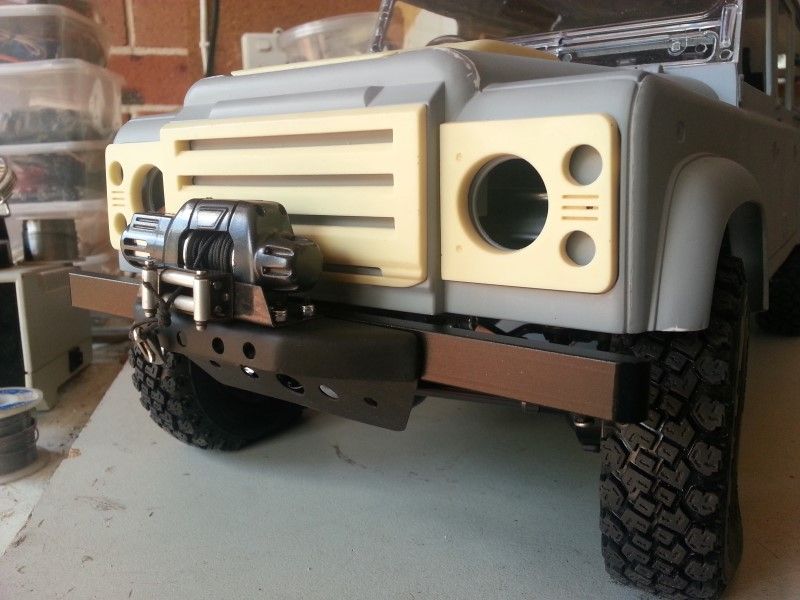 I am quite happy with how this turned out. Visually it is subtle yet functional. Cheers H2Micr0 |
| |  |
| | #10 |
| Quarry Creeper Join Date: Oct 2014 Location: Baltimore
Posts: 234
|
Have you decided on a color?
|
| |  |
| | #11 |
| Quarry Creeper Join Date: Mar 2013 Location: Hampton Roads
Posts: 265
|
Nooooooooo!!!! I reached the bottom of the page All in all I like where the the Brigadier is headed. I can't wait to see more  |
| |  |
| | #12 |
| RCC Addict Join Date: Jun 2009 Location: Australia
Posts: 1,703
|
I can say i seen it and its bloody shmick!!
|
| |  |
| | #13 |
| Rock Crawler Join Date: Jan 2013 Location: Australia
Posts: 541
|
Before I can talk about paint there is more to do. Next I tackled the body of the Brigadier. First task on the list was to repair the crack in the right hand rear fender. I used a cheap alternative to the usual Hobby Store MEK derivative solutions. I grabbed some of this. 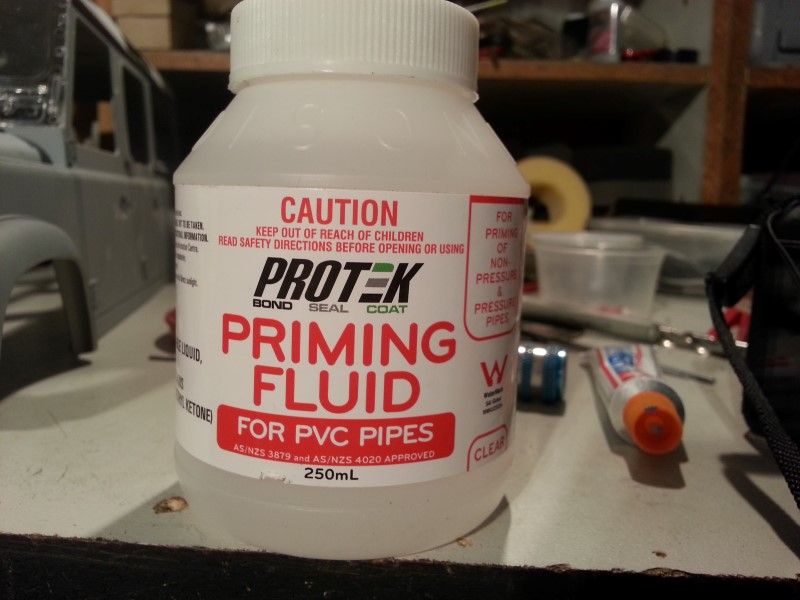 Primary ingredient is MEK. Works great too. I sanded back the primer on the inside and outside of the body around the crack, pushed the crack out a bit and then using a small brush applied the fluid to both surfaces, waited a moment, and then slid it back together. This allows the two surfaces to soften and then bond as one. More solution was applied to the outside edge on both sides and within minuets I had a solid join. 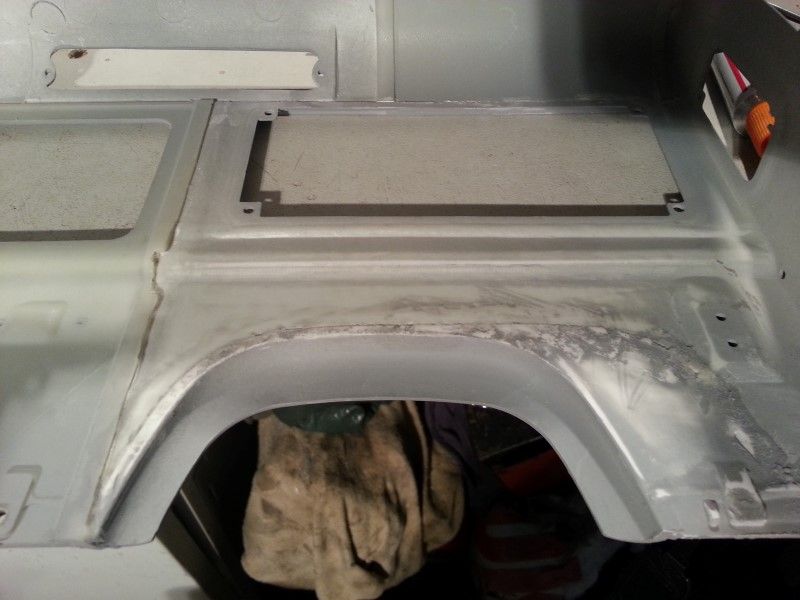 I then cut some 1mm strips of styrene and laminated the inside of the fender. 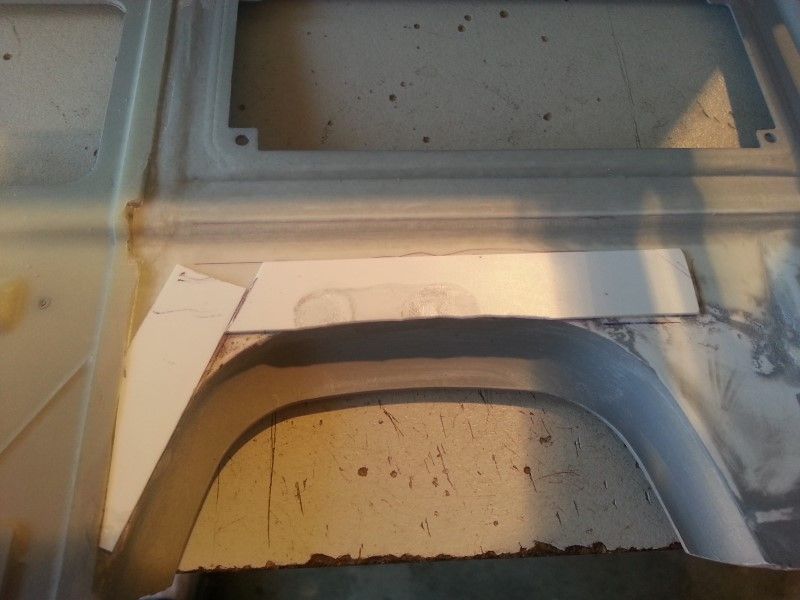 I also laminated the left hand side for extra support. Now this was done I could start on adding a few more bits. I drilled out the fuel filler recess, then filed and smoothed the opening. 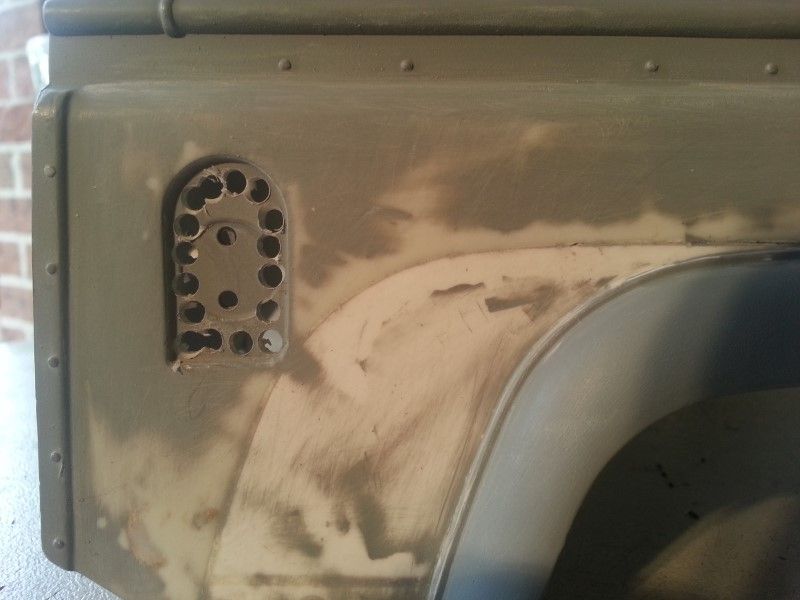 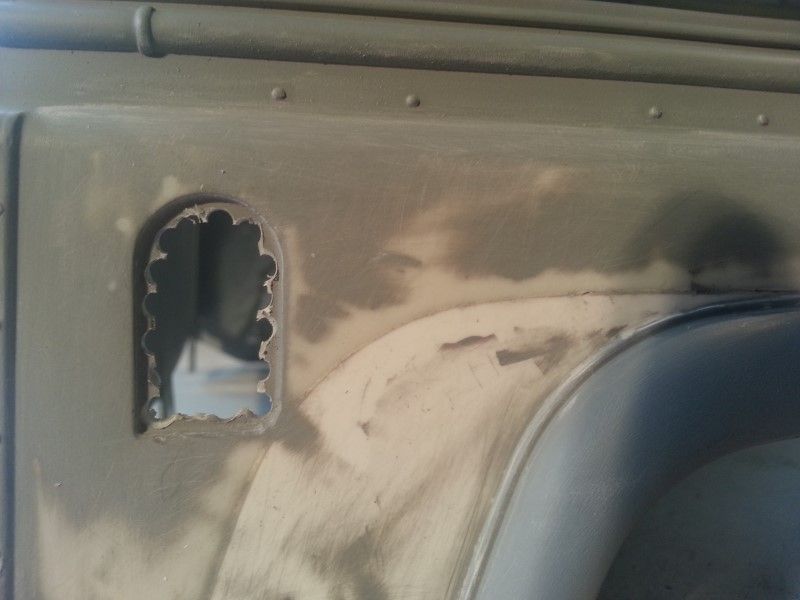 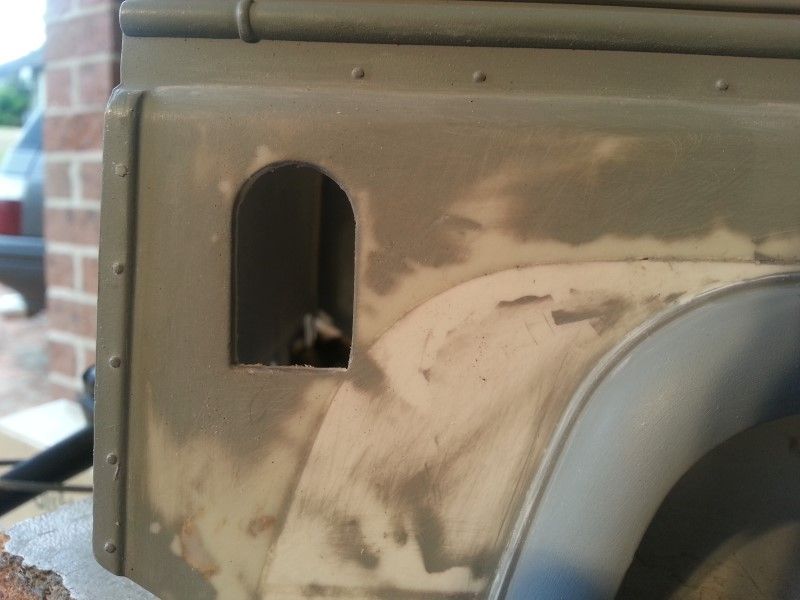 The inside of the filler opening has a raised section that I smoothed flat with careful use of my dremel. 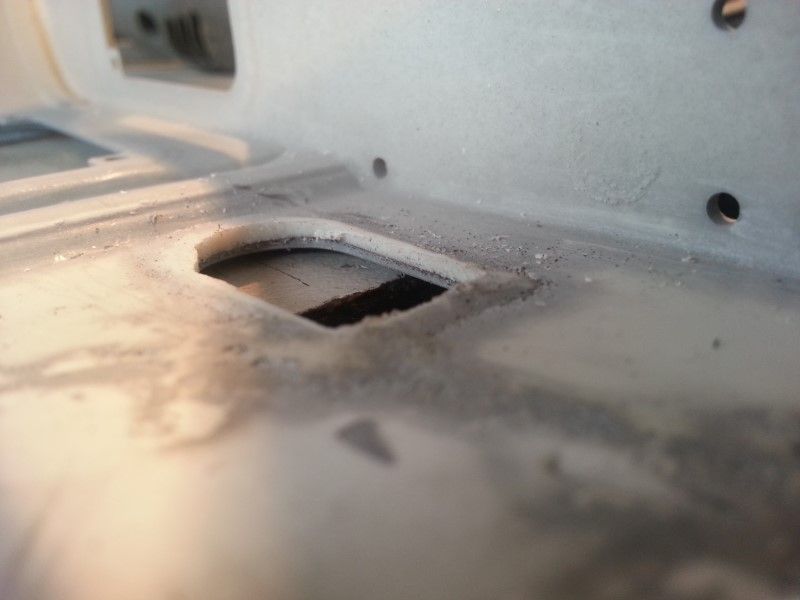 Then using more of the MEK fluid I attached the recessed resin filler. 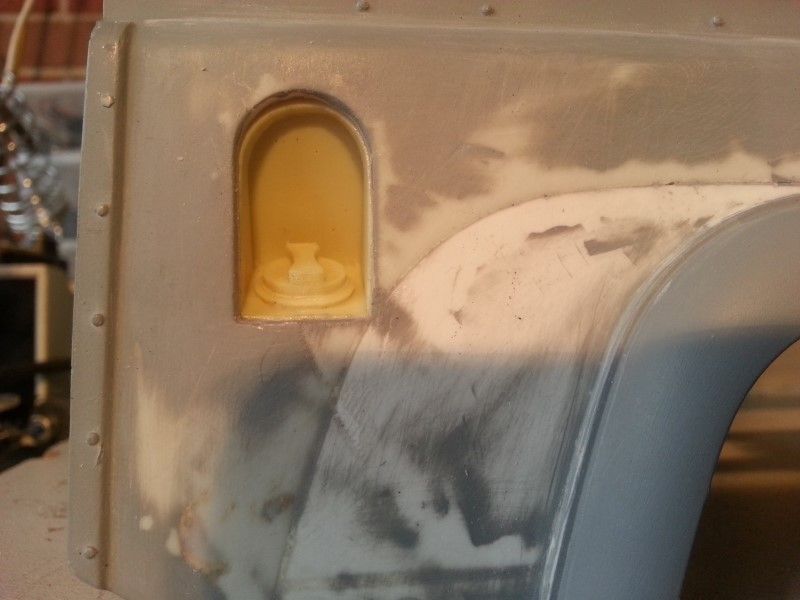 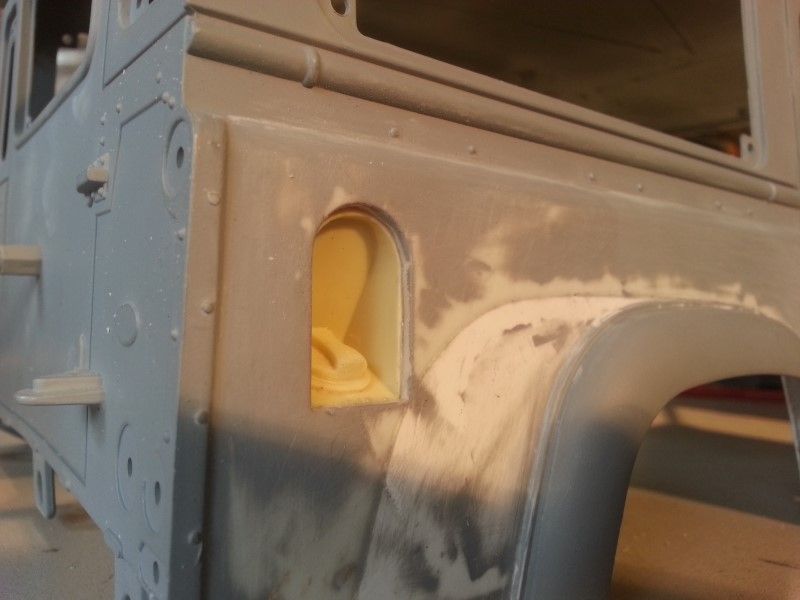 I used some filler to smooth the transition between the two pieces as part of the body prep. More to come soon. Cheers H2Micr0 |
| |  |
| | #14 |
| Rock Crawler Join Date: Jan 2013 Location: Australia
Posts: 541
|
Now to tackle the bonnet bulge. I previously detailed how I bolted it in place. I did a bit more filing of the front area that is at the leading edge of the bonnet. It sat a bit higher on the right hand side and I was able to reduce that almost completely. Now was time to fix it permanently. After sanding the depression in the bonnet I used some clear Silicon Adhesive and then bolted it down for the last time. 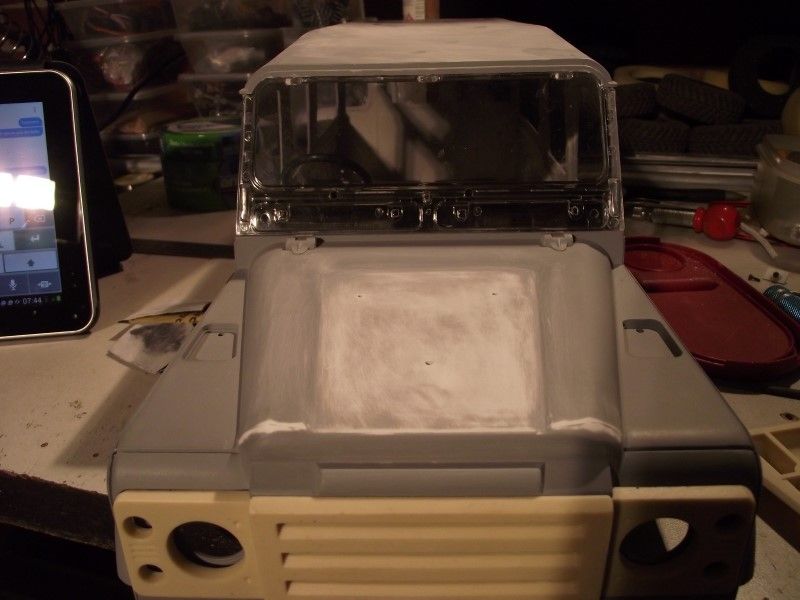 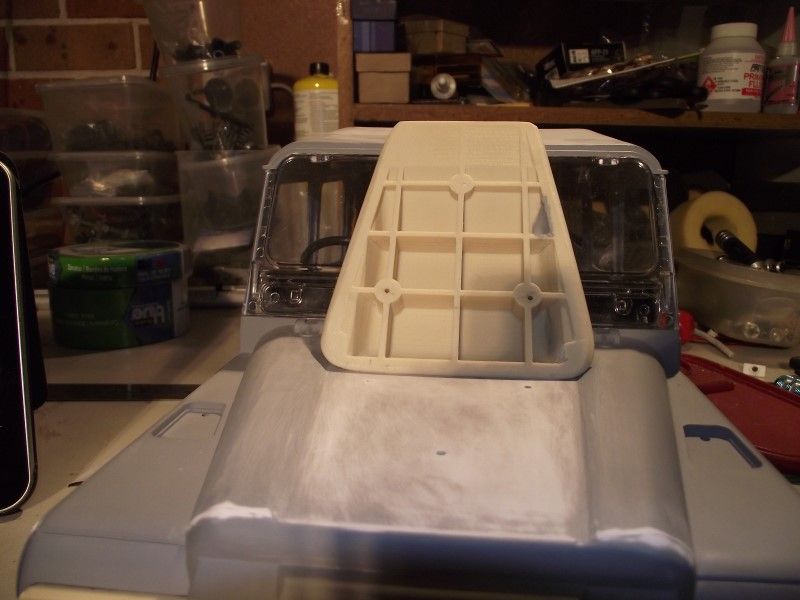 Then I used Tamiya putty and put down the first of many layers in the areas around the bulge. 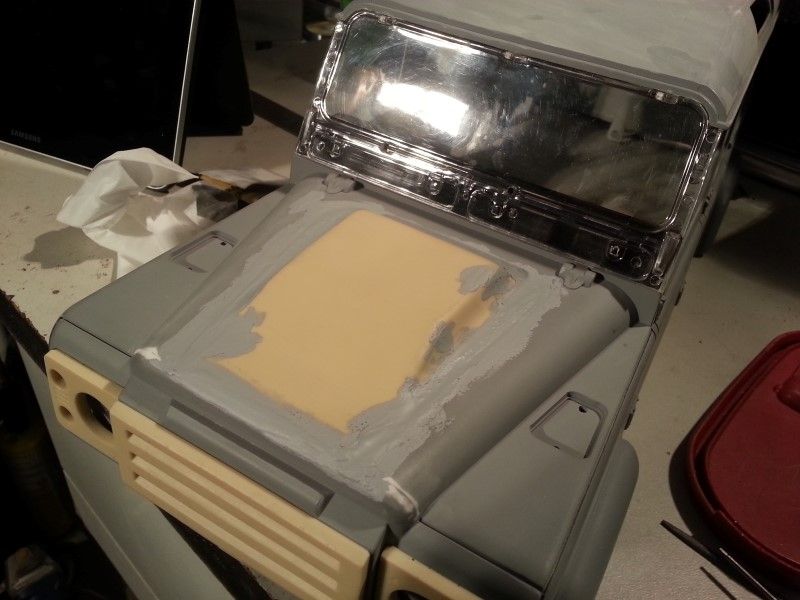 I sanded it back between each layer. This is after the first time. 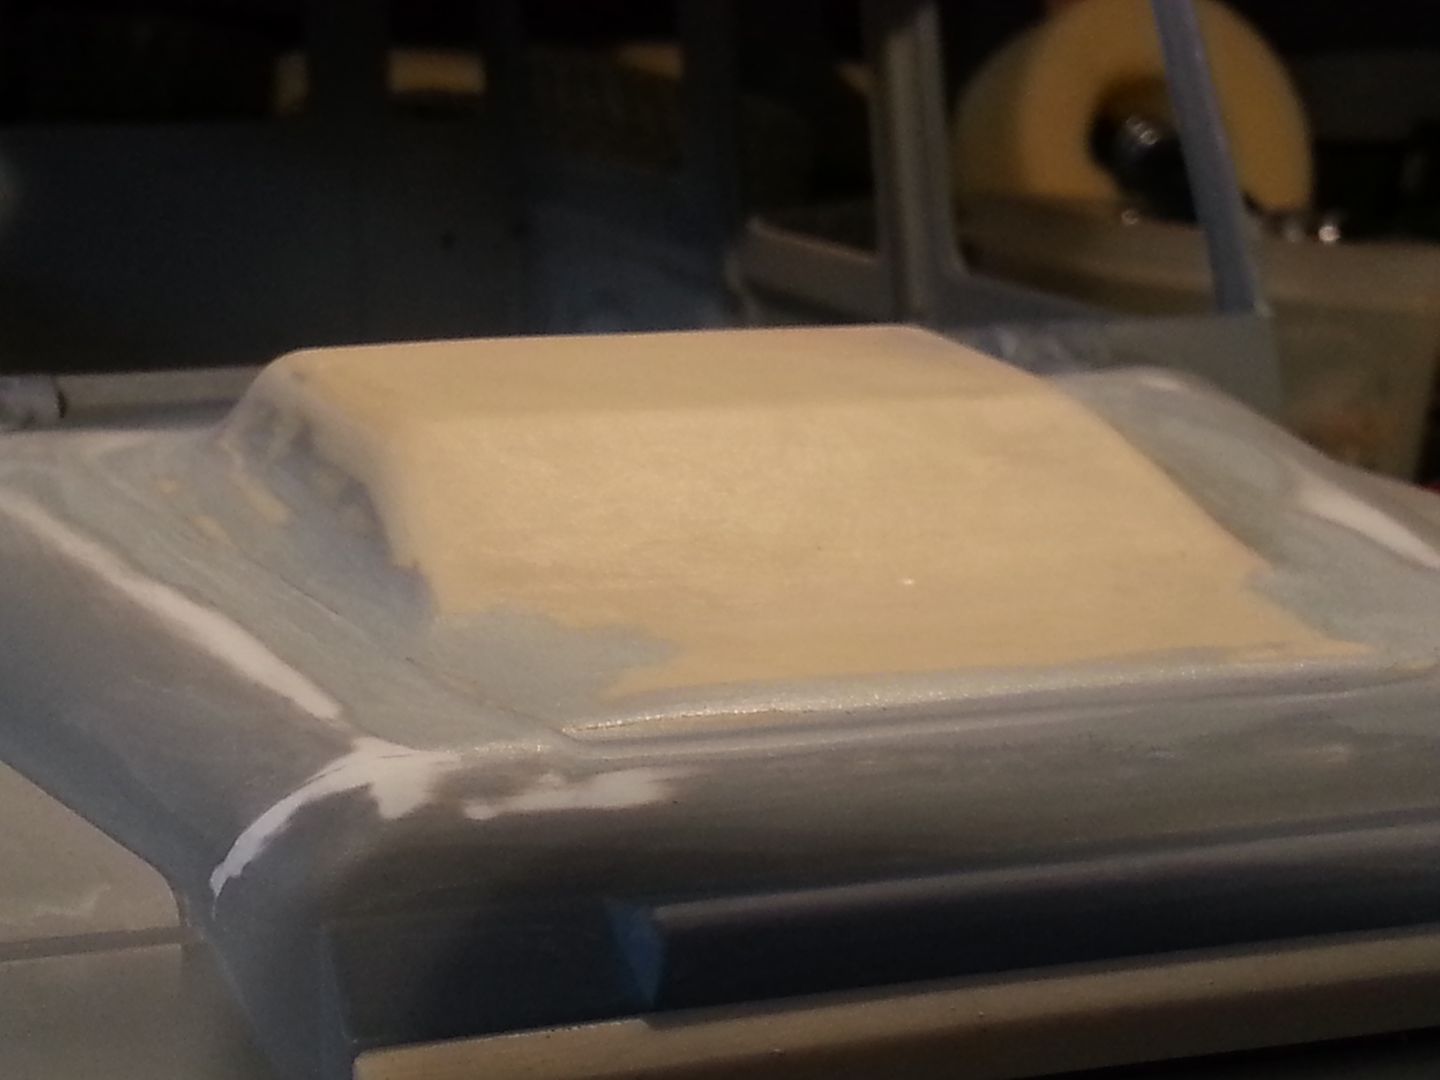 I just kept going until I was pretty happy. 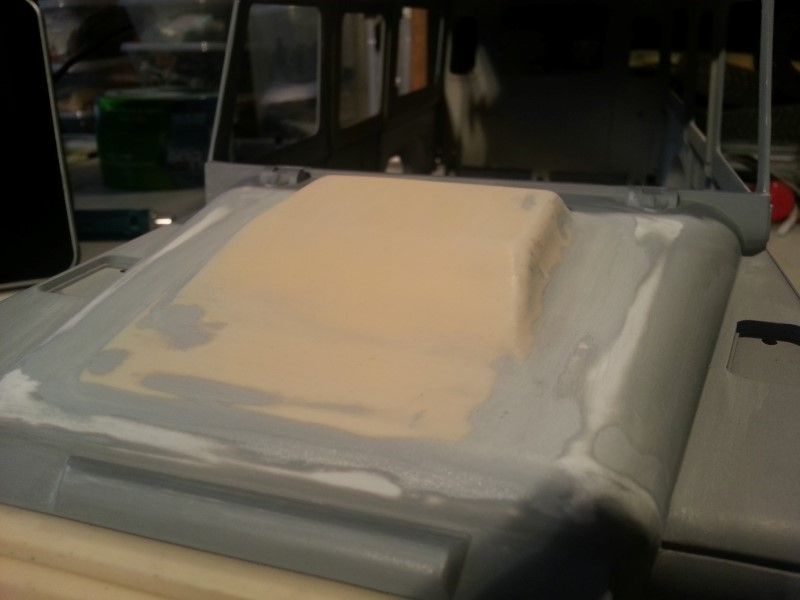 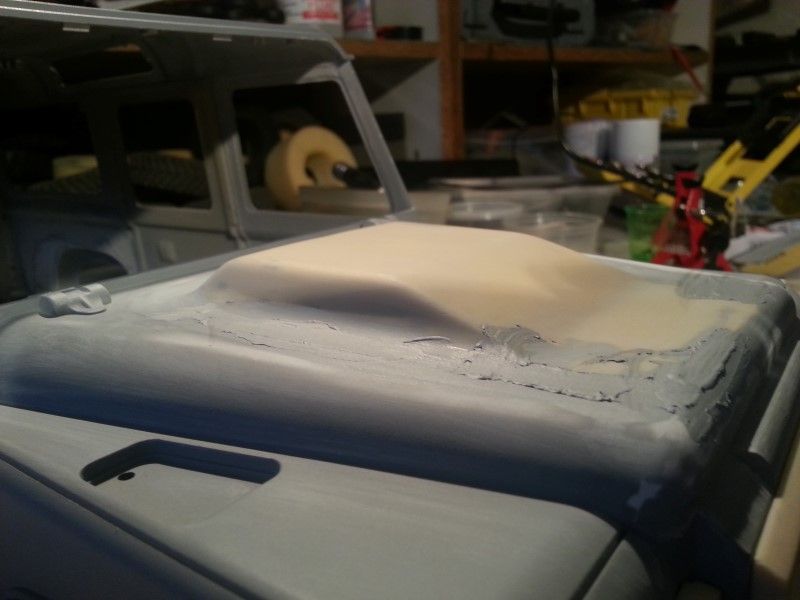 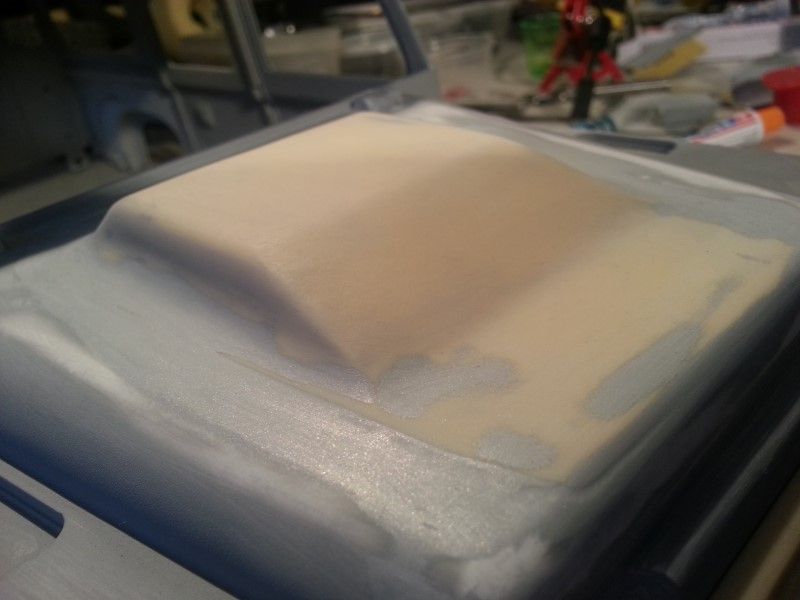 Still wasn't happy at this stage, but you can just imagine the rest. HaHa I also filled in a number of low spots all over the body doing my best to minimise the issues without being too particular. Then it was time for the first full undercoat. 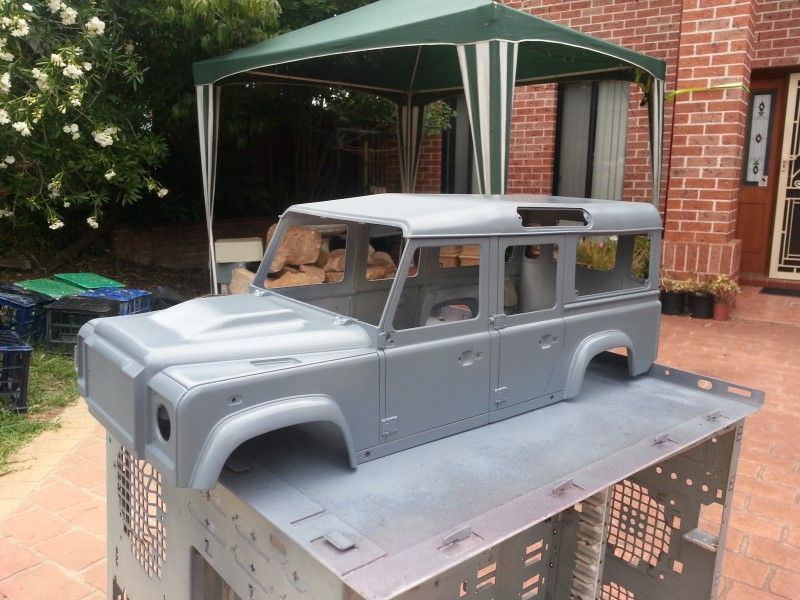 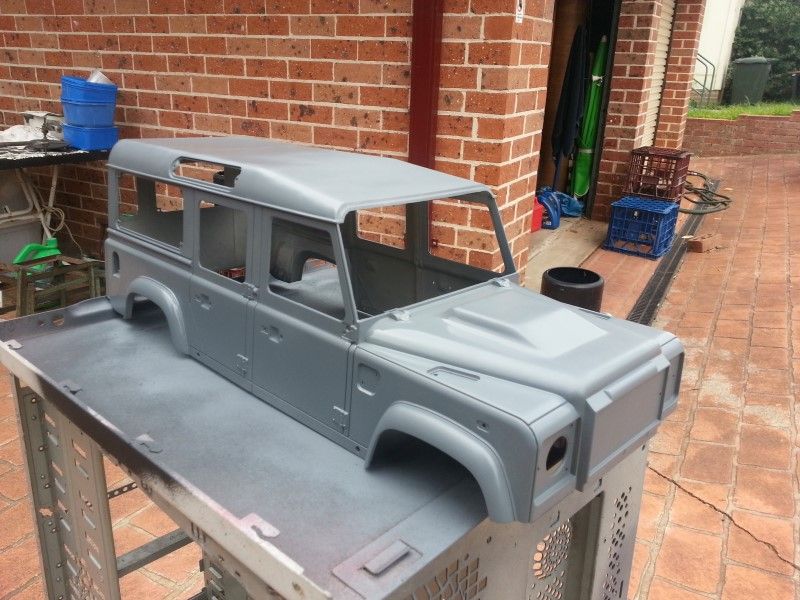 It was good to get it all in one uniform colour, and of course, highlighted still more issues. So more putty, more waiting and more sanding followed. During all the waiting bits, I did work on other aspects of the build which will follow soon. Cheers H2Micr0 |
| |  |
| | #15 |
| Rock Crawler Join Date: Jan 2013 Location: Australia
Posts: 541
|
I always knew the Brigadier deserved a proper cargo area. So I set about designing and building a drop bed. Cardboard is a good place to start and I put together a template. 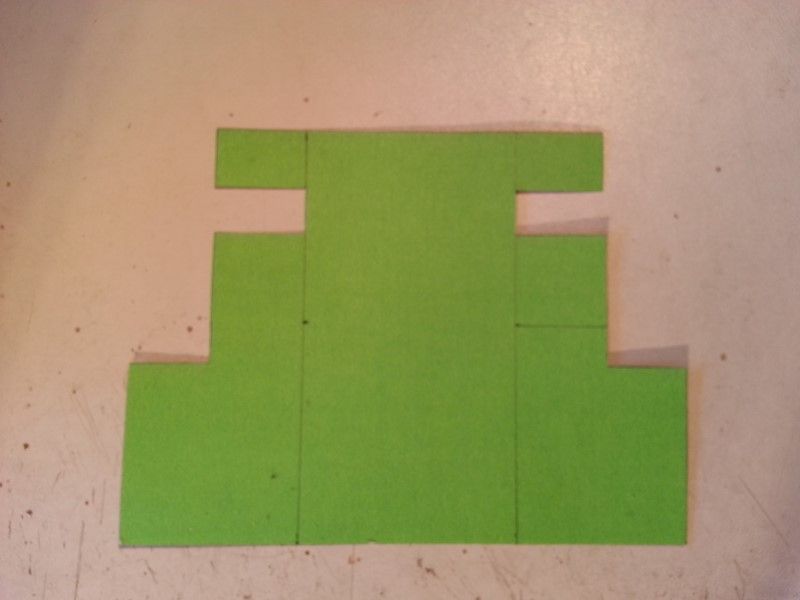 This fit quite nicely. 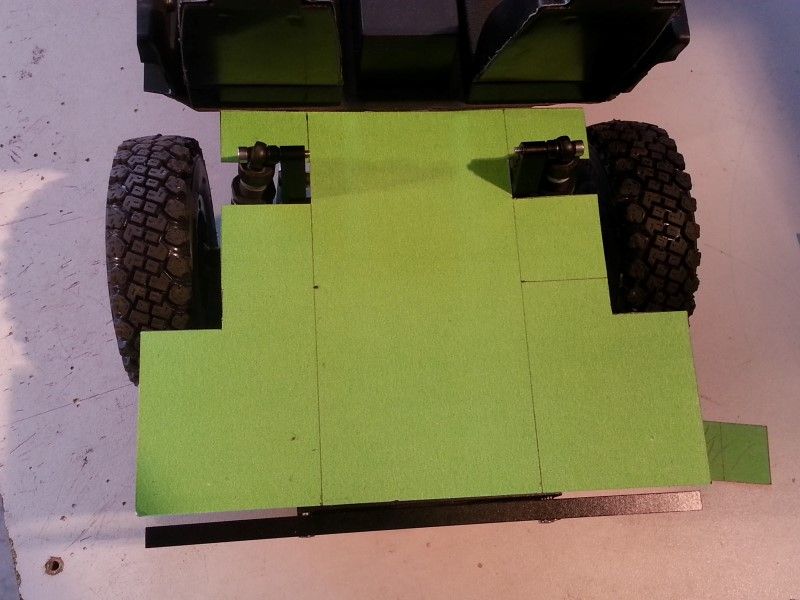 Using 1mm Styrene I fabricated the floor and wheel wells. The floor sits on the rails behind the seats. 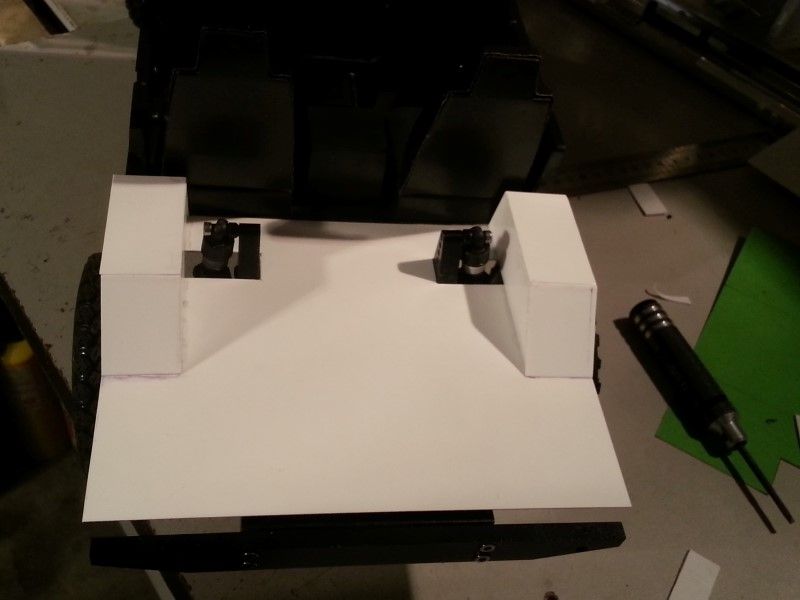 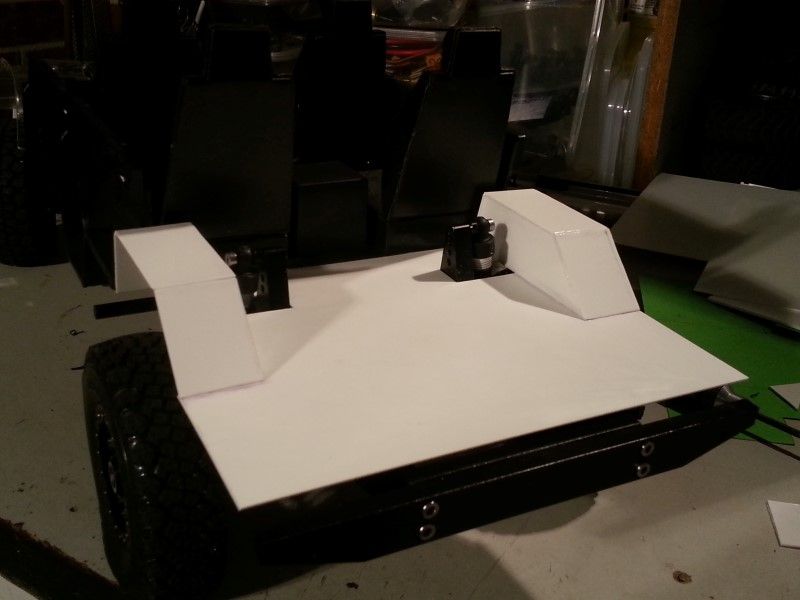 A test with the body confirms I am on the right track. 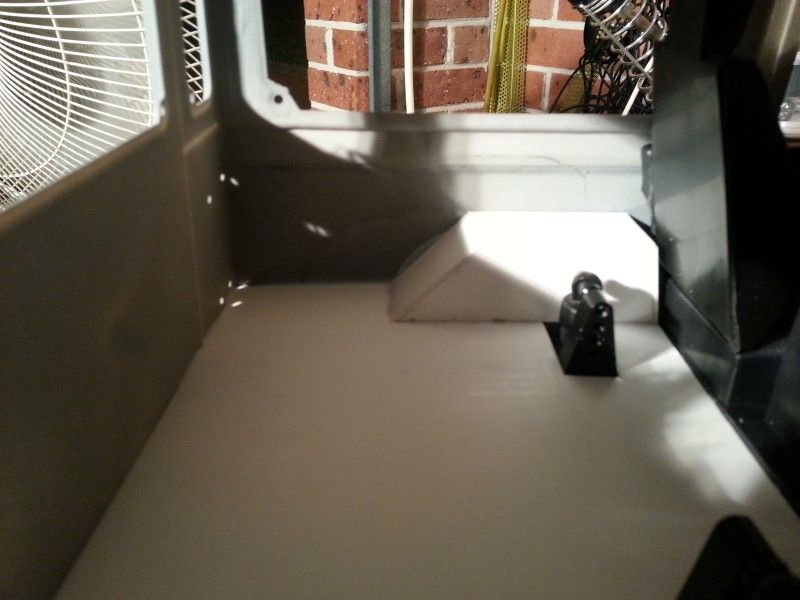 Hmmmm, I do need to find something to disguise those shock towers though. 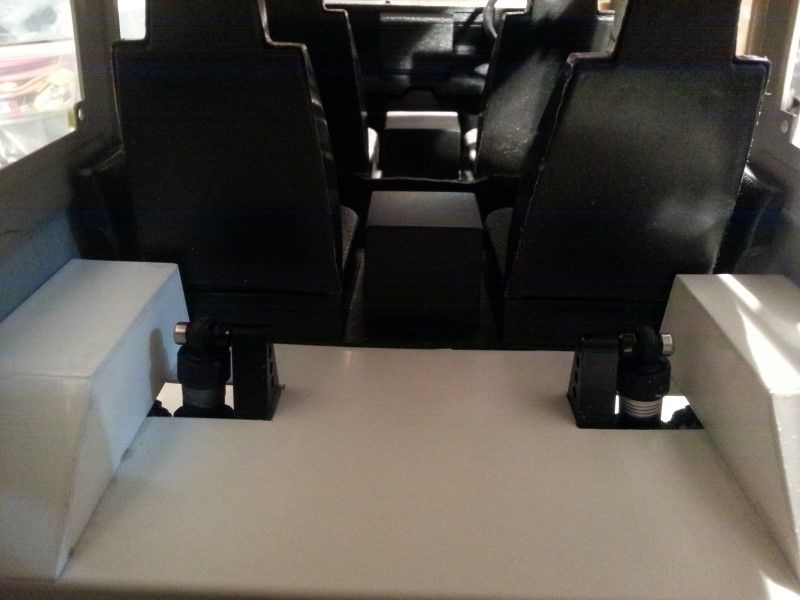 The chassis dips down after the shock towers and the bumper is lower than the floor at the back. So some support brackets were added in to the mix. 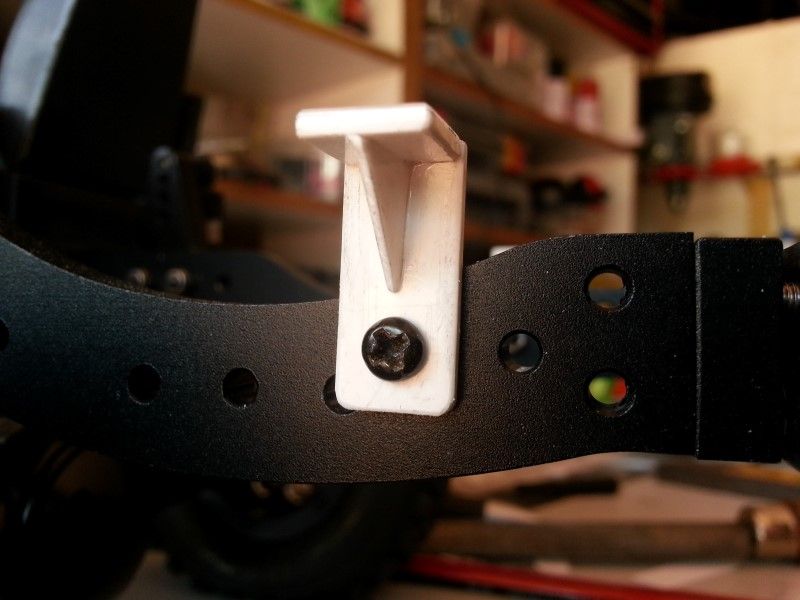 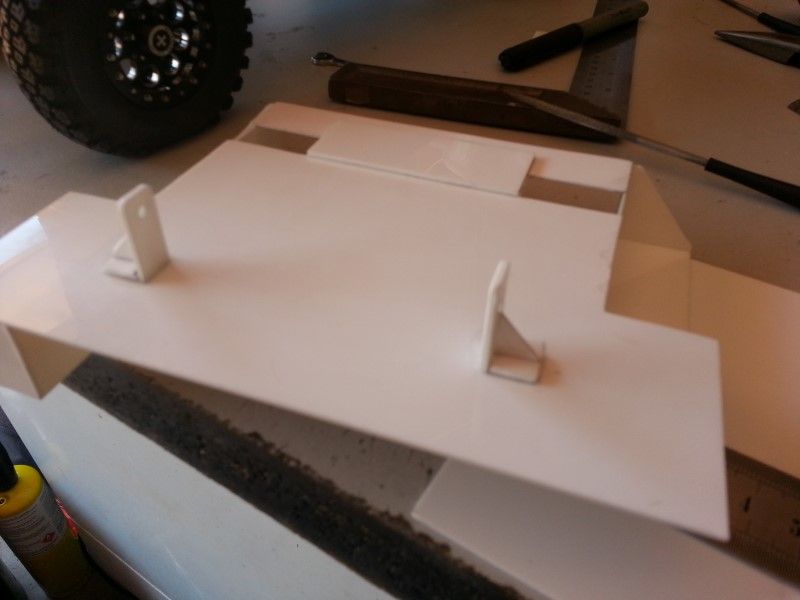 With the floor firmly located, I needed to finish off the wheel well area. In a Defender the wells are boxed in completely, so I emulated this. 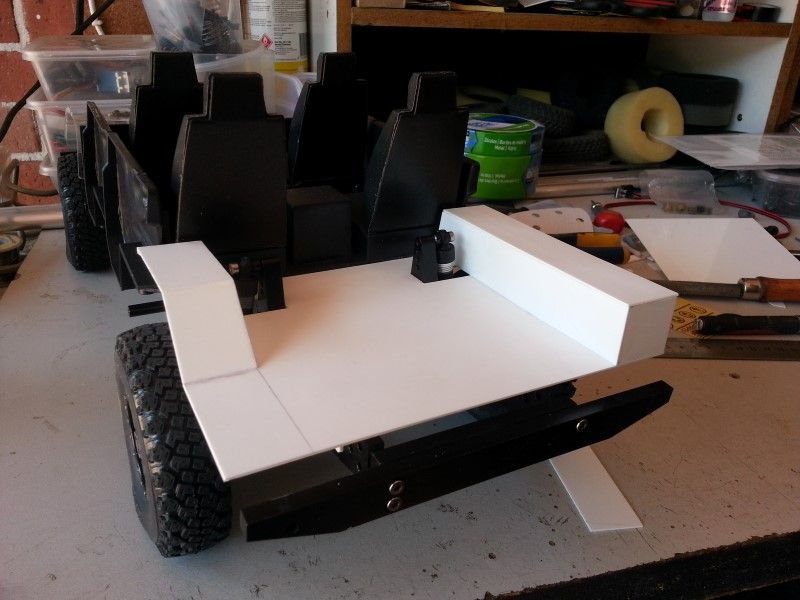 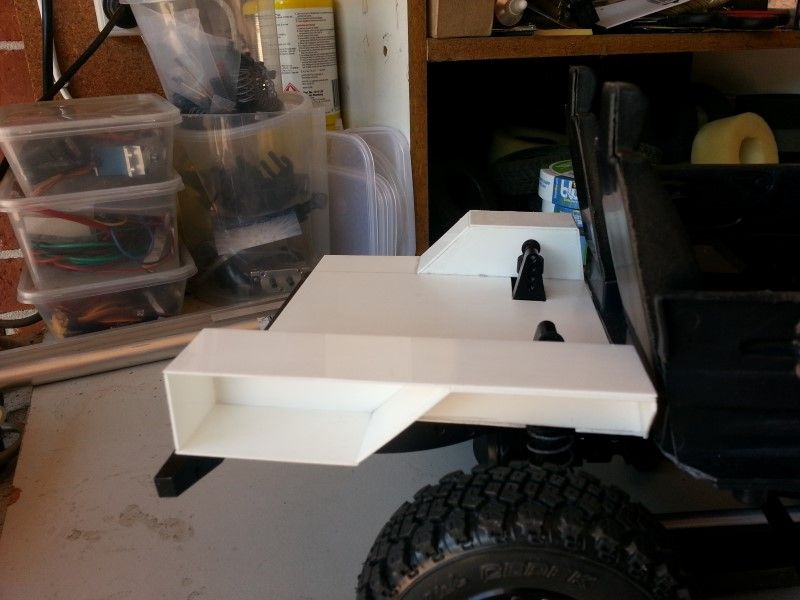 I had to cut a section from the boxed area to allow for the fuel filler too. I also found that the tail light lenses needed some clearance so this was accommodated for as well. The Brigadier is a daily driver and often carries some unusual objects not normally found in the back. A present and a large teddy bear are gifts/bribes to the feminine half of the couple as the young fella spent far too much time out wheeling recently. (Plus they look cool hahaha) 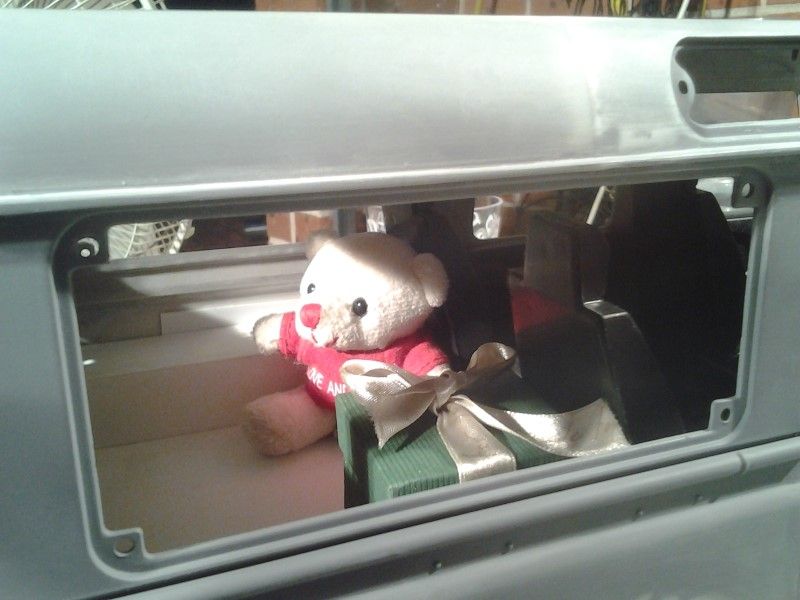 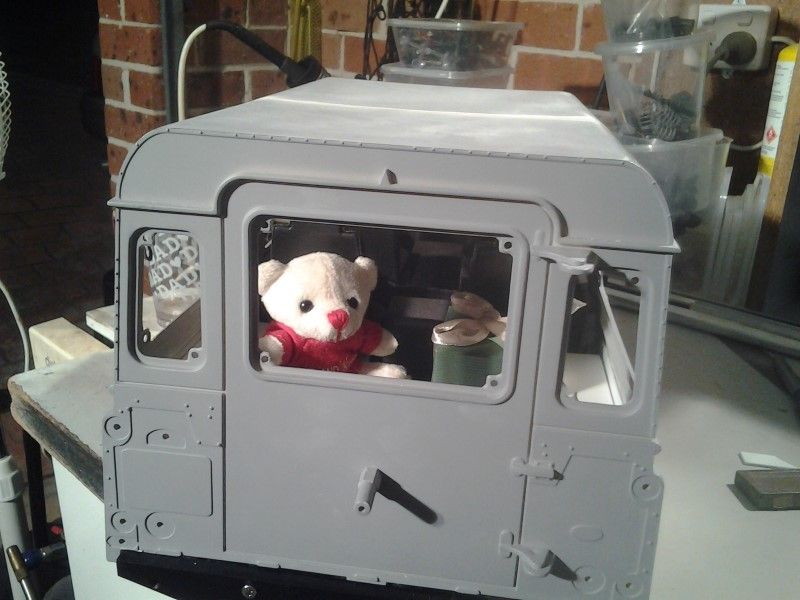 The floor was painted black and some other scale items were added to complete the look. 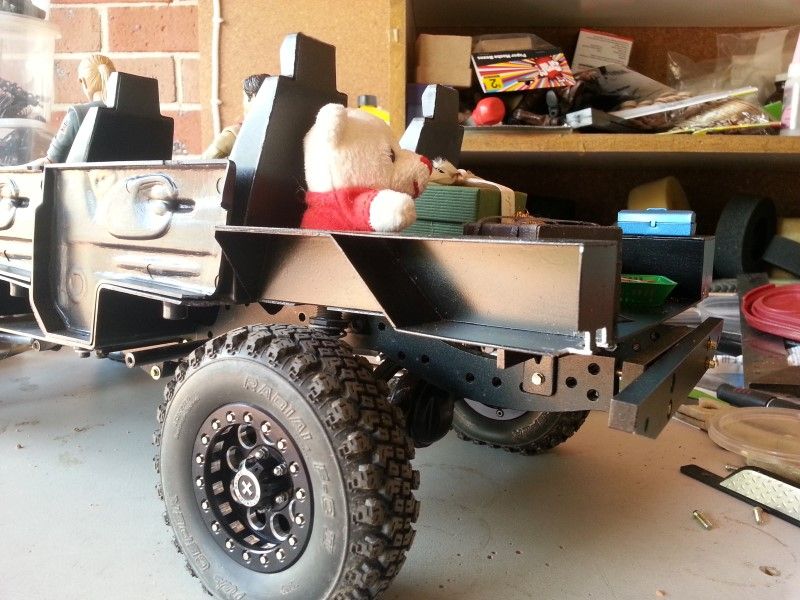 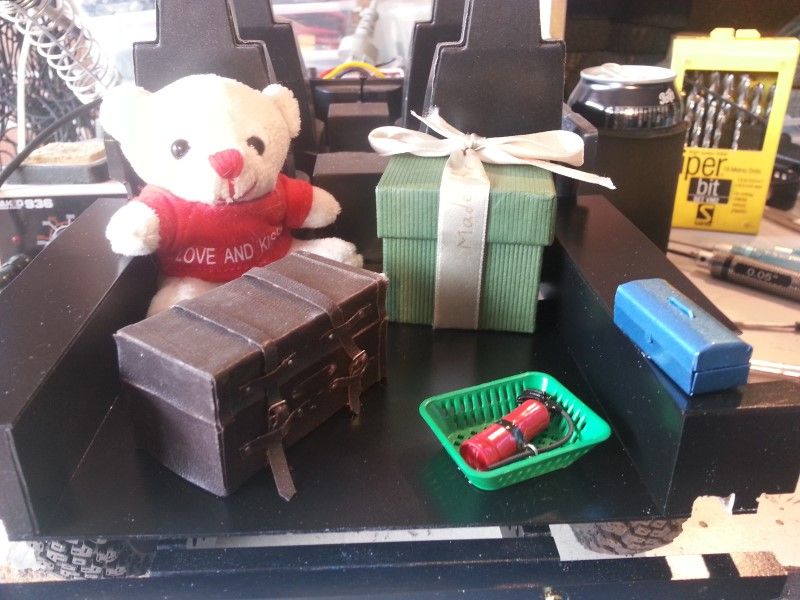 I also masked up and painted the glass. 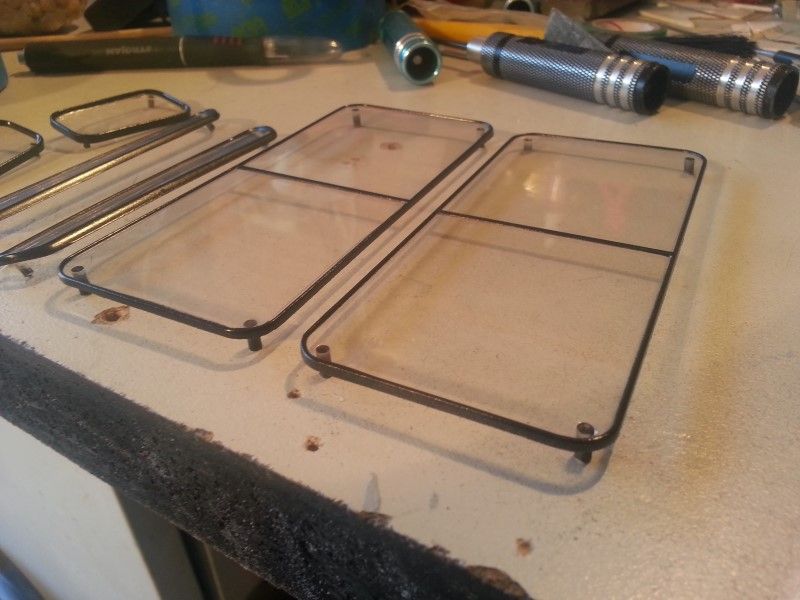 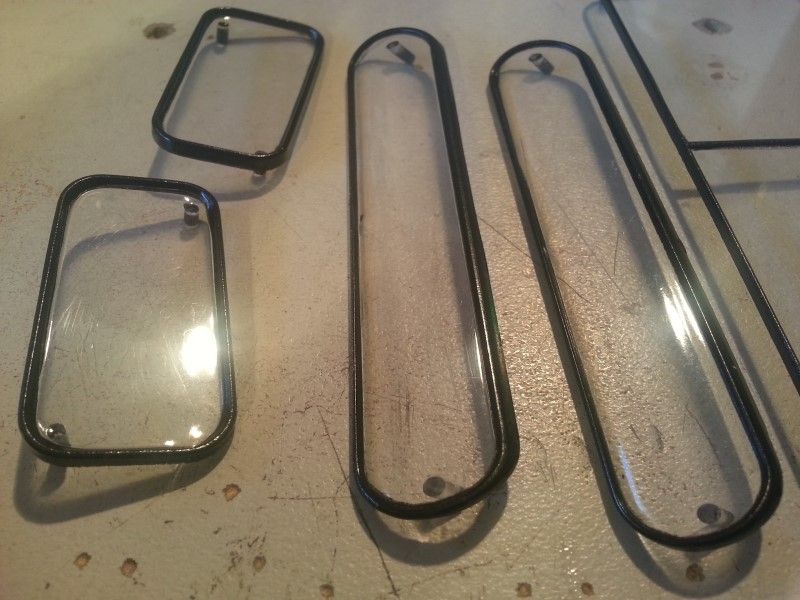 I might add in some glass to the rear doors at a later stage. Some primer was also sprayed on the other resin parts. 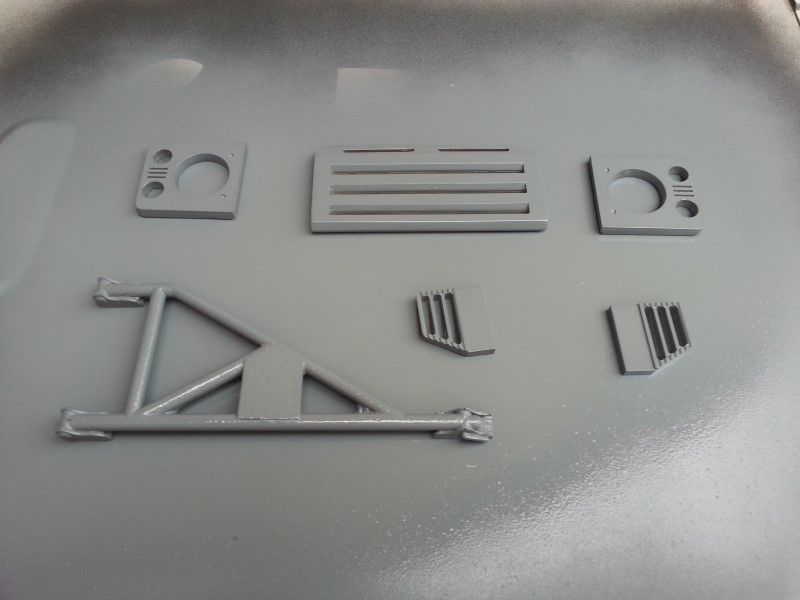 It is about time we looked at how to power the Brigadier I think. Cheers H2Micr0 |
| |  |
| | #16 |
| Rock Crawler Join Date: Jan 2013 Location: Australia
Posts: 541
|
With the Chassis of the Brigadier being based on a G1 it has a disruptor 16:1 planetary transmission and a 2.18:1 transfer case, so this will never be a fast rig. I had an Axial 27t motor with the correct 15t 1.5 pitch pinion gear stuck on it, so that will do the trick for now. I also had a spare cheap metal gear 13kg servo in my spare parts box, and will do duty until a better option is acquired. But, I don't have an ESC spare. So after doing a bit of research on the origins of the new AE-5 ESC from Axial, it turns out this is based on an EZERUN 1040 ESC. Some more reading discovered there is a big brother to this ESC the Hobbywing QUICRUN WP1060 available for the grand sum of $26 delivered. I found a couple of reviews where this ESC had been used in SCX10 rigs and the owners were more than happy. So for the price I figured it was worth a gamble and bought one. 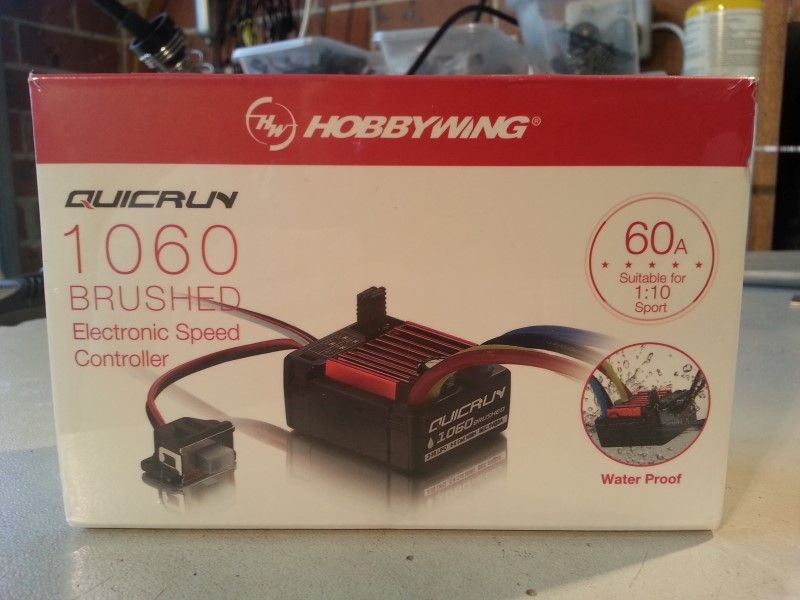 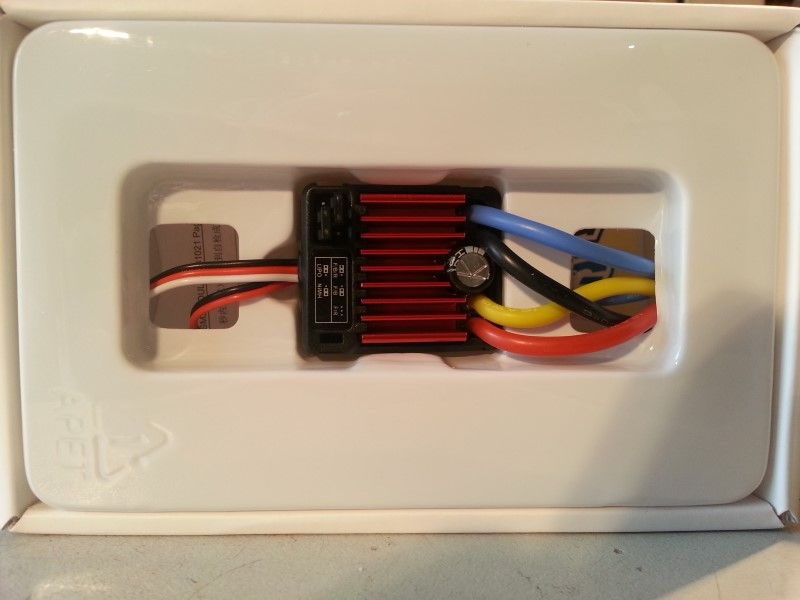 It is smaller than I thought and uses jumper pins to select the few options. This ESC is 3s capable and has three 'tunes' you can select from. Fwd/Brake/Rev - no thanks Fwd/Brake - ahhh, nup Fwd/Rev - this is the one. The next dilemma was where to put the battery. No room under the rear tray obviously, and I didn't want to mount it up high above the transmission. The main thing I wanted to achieve was the ability to swap in a new battery out on the trail WITHOUT removing the body. After much careful thought, and then picking up some shorter 3s 1500mah batts I found the perfect solution. 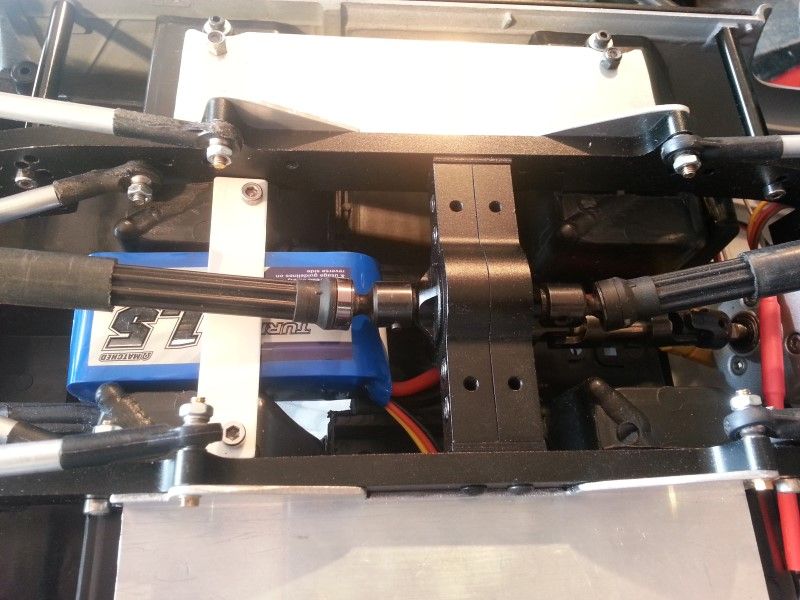 I then mounted the ESC and the RX on the firewall and a quick power up test and the Brigadier was ALIVE!!!!! 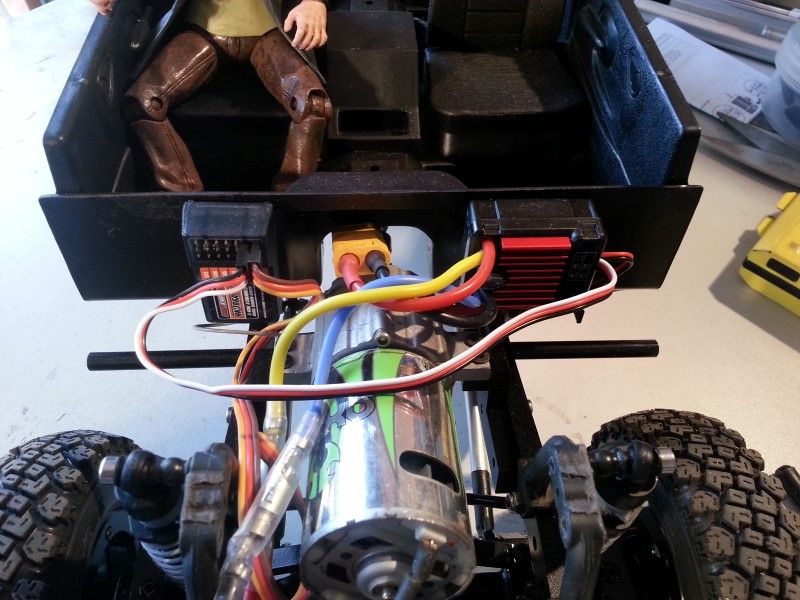 I soldered up a short extension for the battery and made sure it wouldn't foul on the drive shafts. I better get my act together and get some colour on this ride. Cheers H2Micr0 |
| |  |
| | #17 |
| Rock Crawler Join Date: Jan 2013 Location: Australia
Posts: 541
|
Initially, I had planned on Orange and Black, but I had a change of heart. I found a plastic friendly paint product at Bunnings (local hardware chain) that was pretty cheap, and when I asked Mr Google about it found some YouTube vids of it being used with success. Claude thinks it should do the job too. 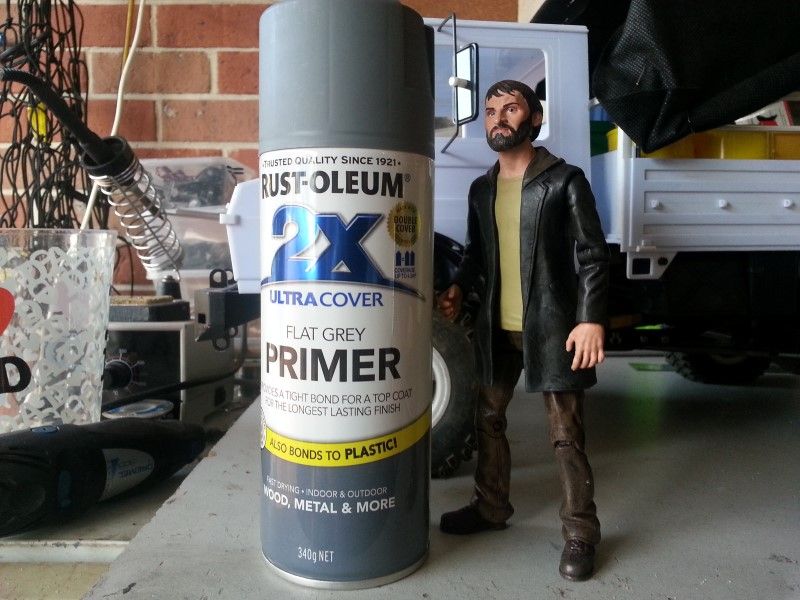 I used this primer to undercoat the body in the previous posts. I found some interesting colours that I liked. 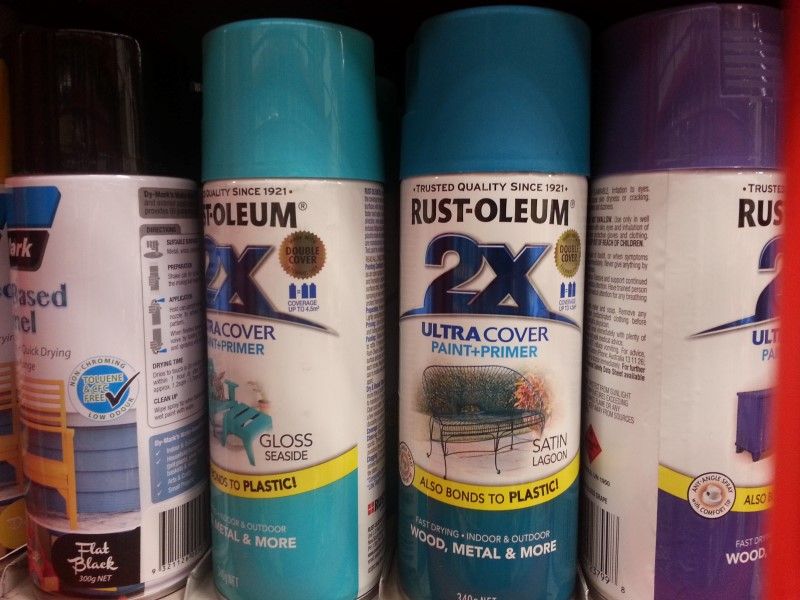 I toyed with a couple of colour combos and did a test paint on the headlight bezels and grill. I will say that it is REALLY hard to photograph the correct shade. I had to Photoshop this pic to get close to the right colour. You will find the rest of the pics do not accurately represent the colour I am sorry to say. 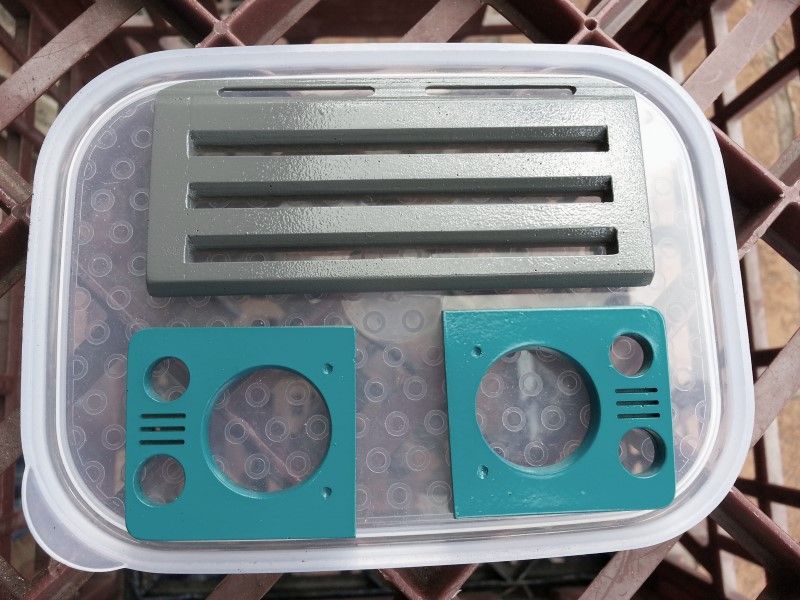 The Teal colour is called Satin Lagoon, and the grey is a Gloss Dark Grey. I really liked the Lagoon for the main body and went ahead and gave the Brigadier some colour. 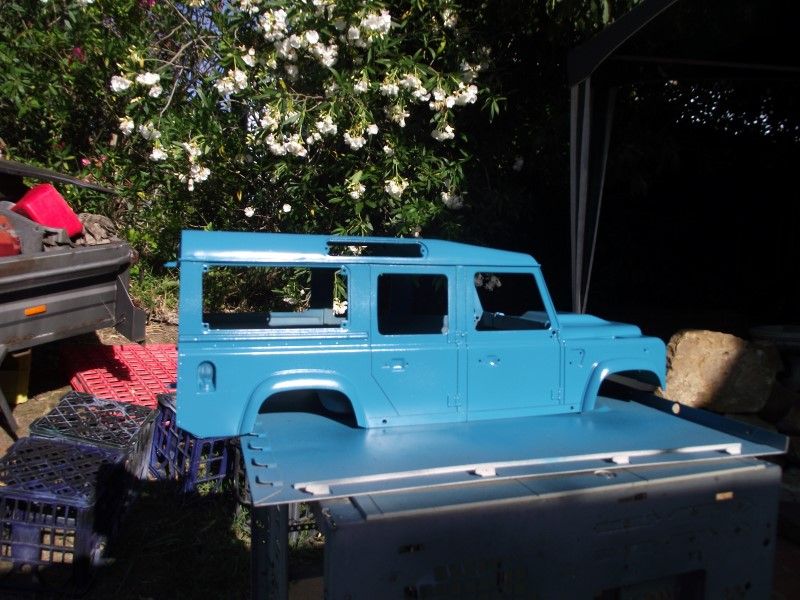 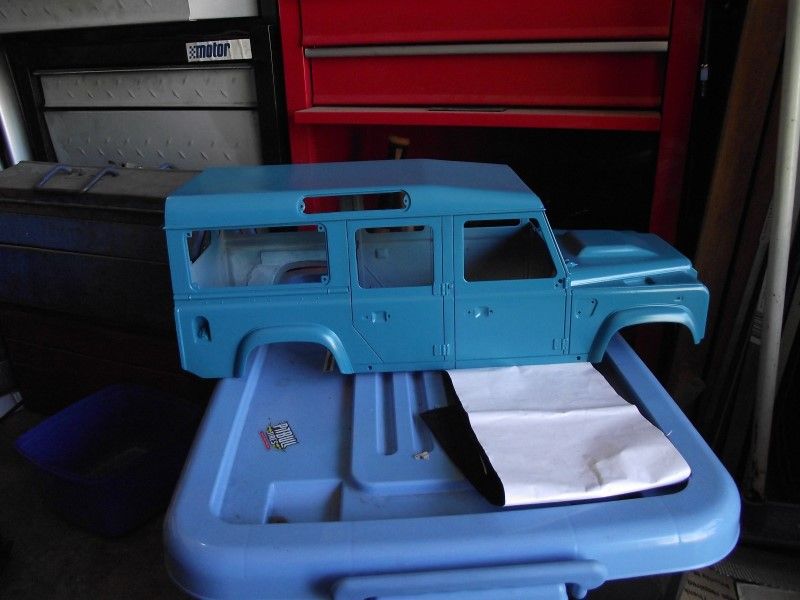 Had to mock it up on the chassis of course. 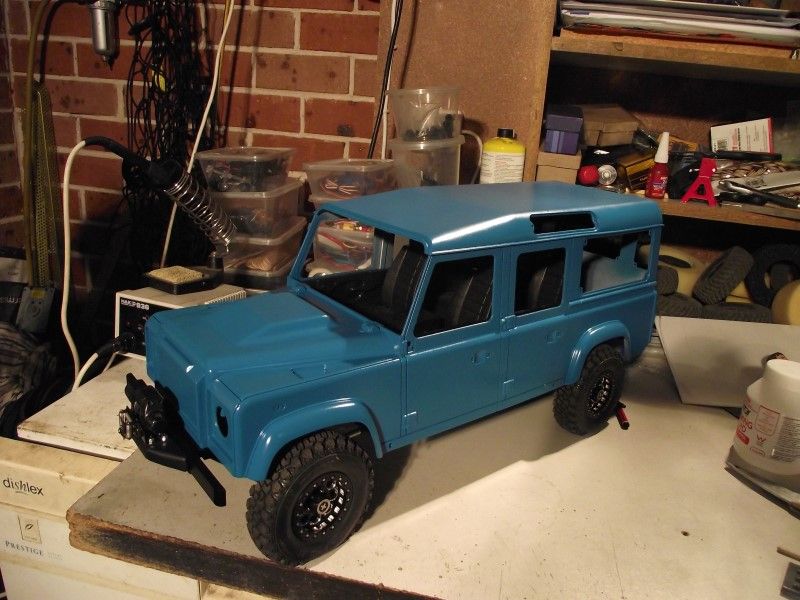 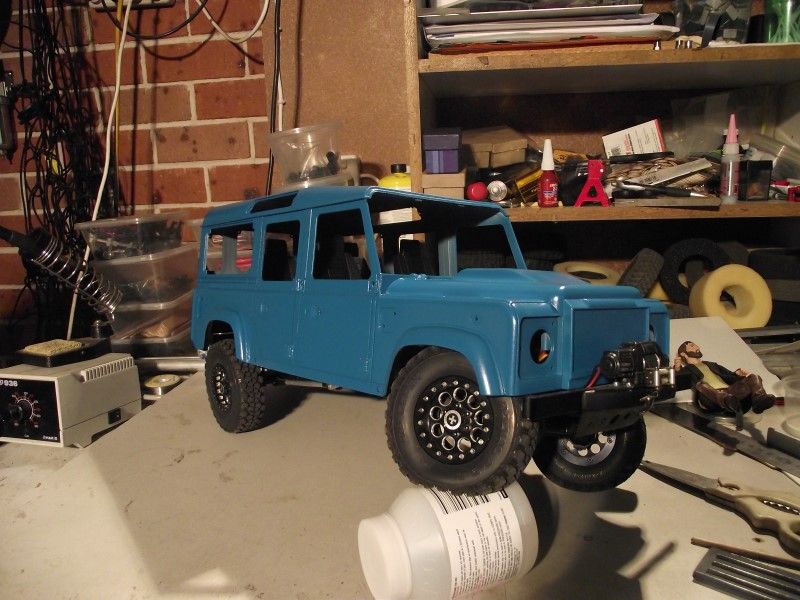 The Satin finish was just what I wanted but I wasn't feeling the grey for the roof and grill. I realised I still had some Black Pearl paint left over from my previous 1:1 ride, and I really liked that colour. I had used it on some plastic interior parts with no issues, so painted the grill as a test. 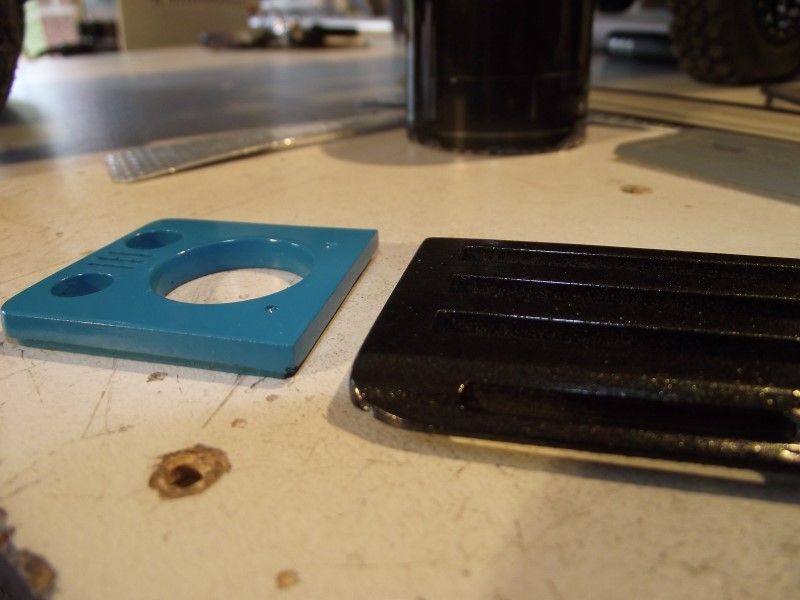 Oh YES! I don't seem to have many pics of this step, and only the one of it mocked up after the tape came off. 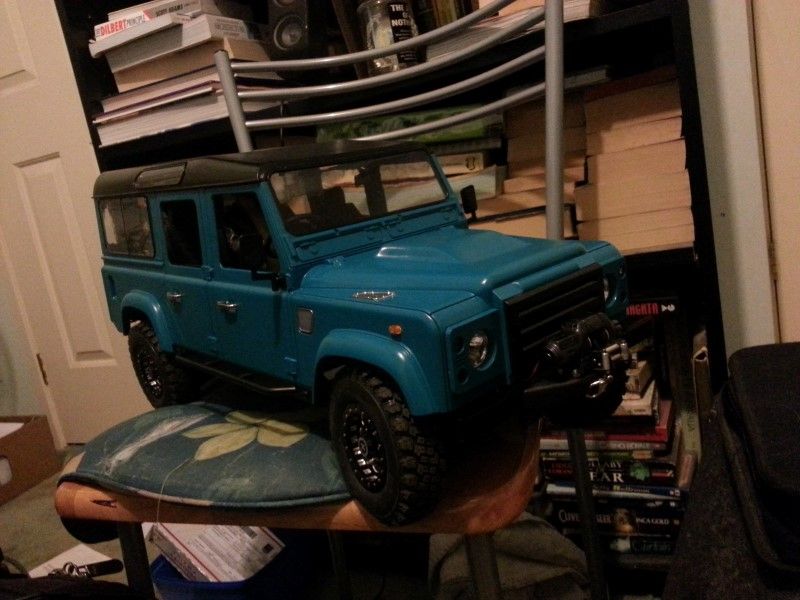 I am very happy with the colour combo, and like the way the gloss and satin work off each other. I also went ahead and painted the interior black. Next up the Brigadier gets some more scale details. Cheers H2Micr0 |
| |  |
| | #18 |
| Rock Crawler Join Date: Jan 2013 Location: Australia
Posts: 541
|
The Brigadier is owned by a nice young couple and they have dropped by to see how progress is going. 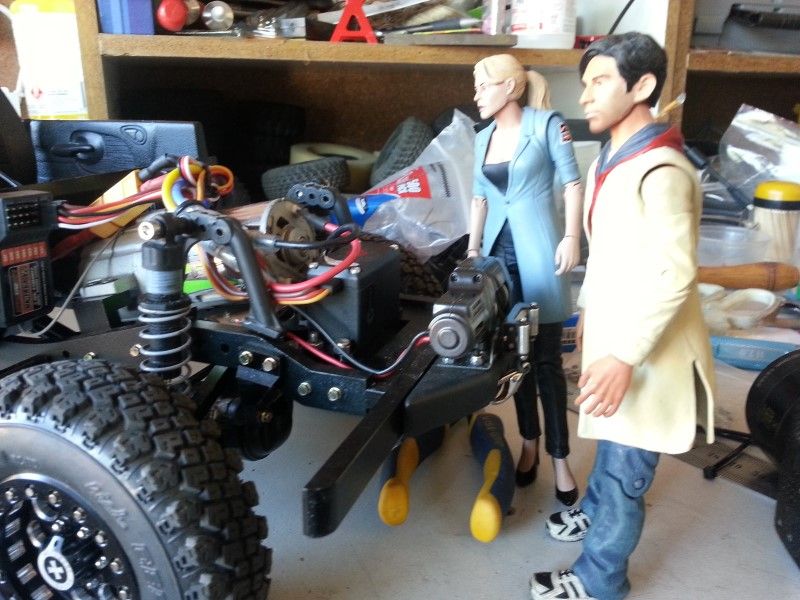 Very Comfy! 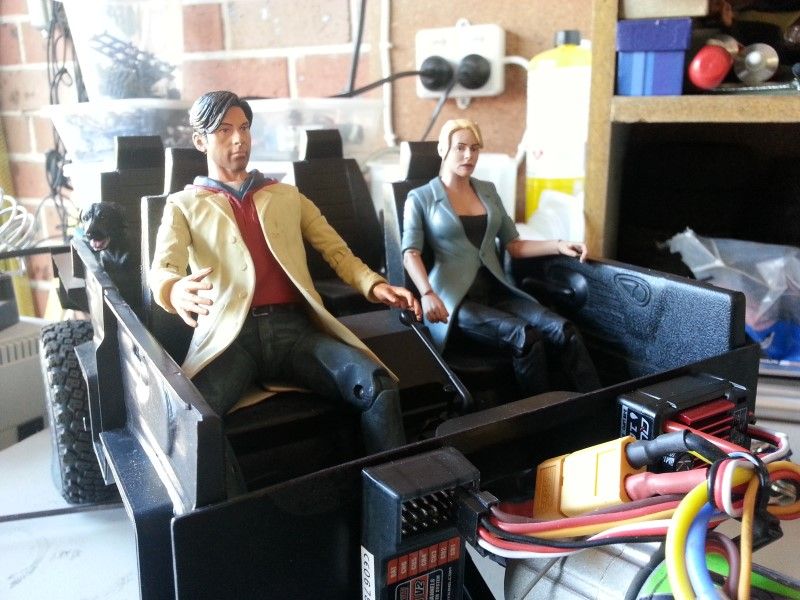 Meet Gina and Peter, and their dog Chipper. While at the workshop they helped add in some detail pieces for the Bridagier. Custom spare wheel holder. 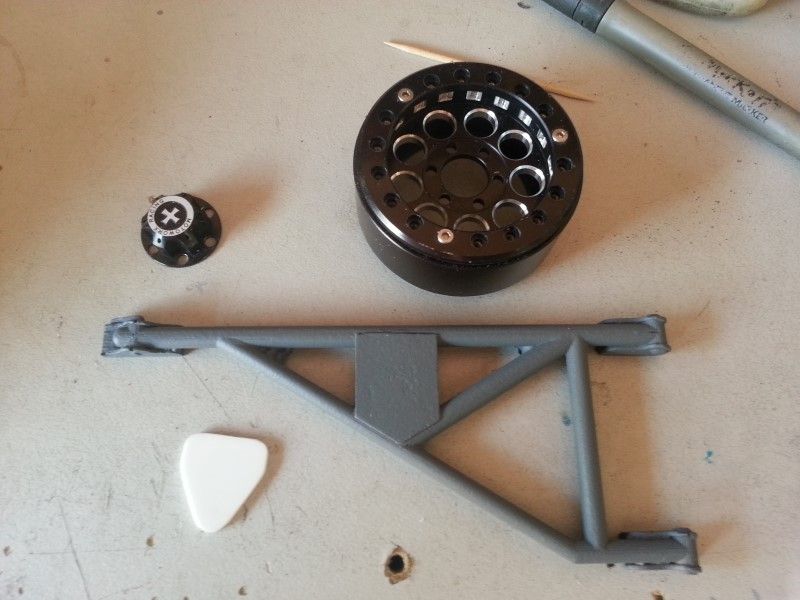 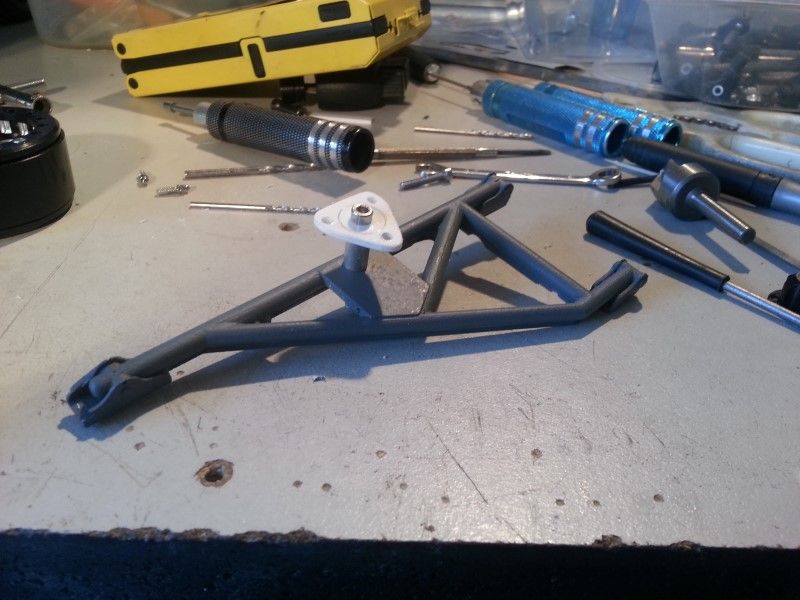 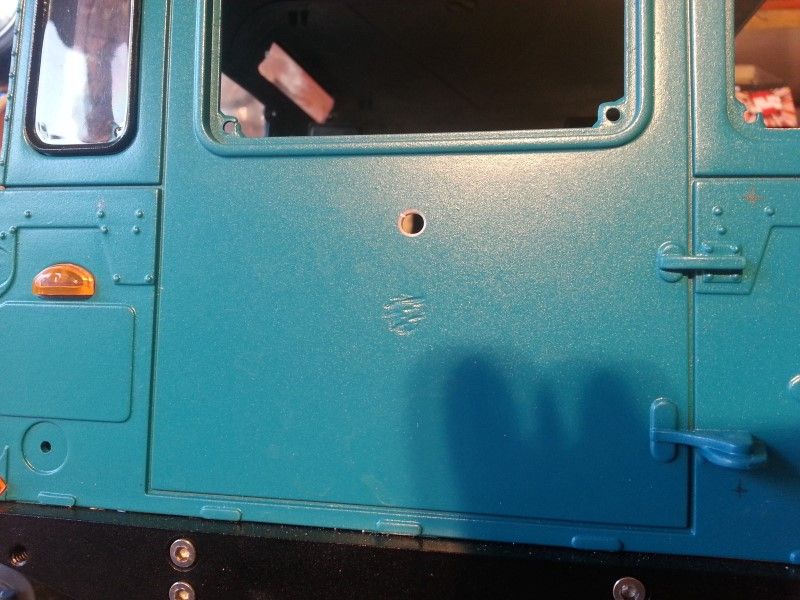 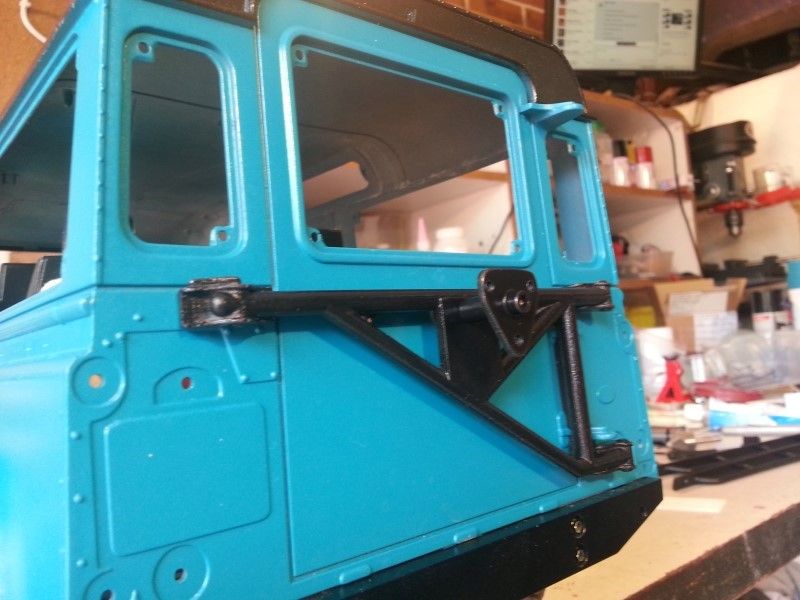 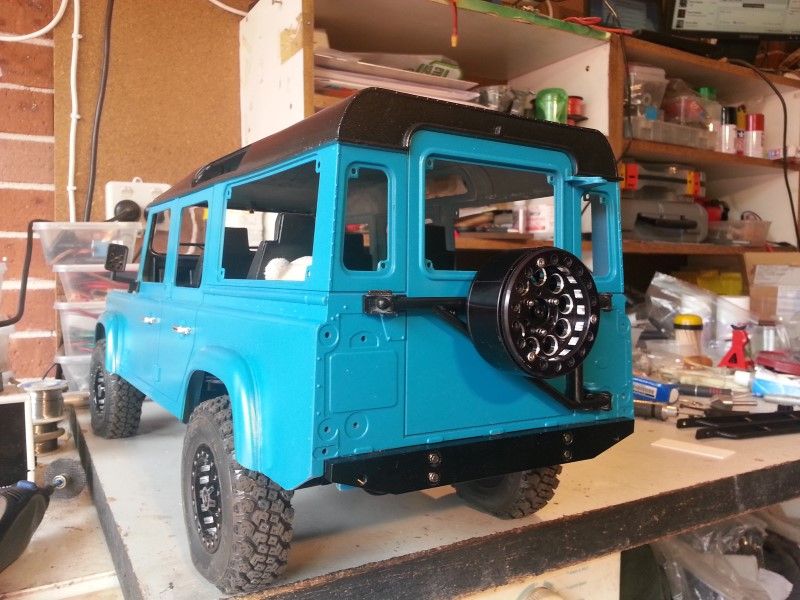 The tyre is on back order. Some scale bolts are added in. 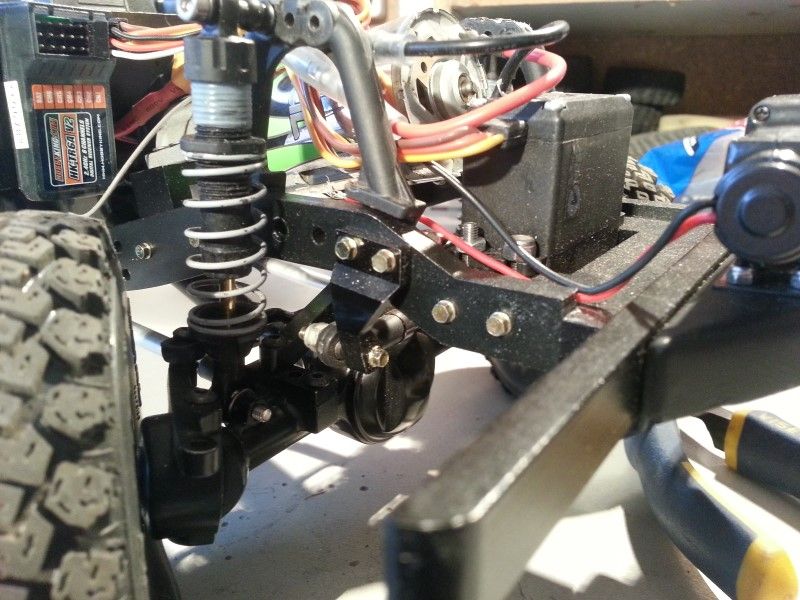 Metal trim details are added to provide some bling, protection and practicality. 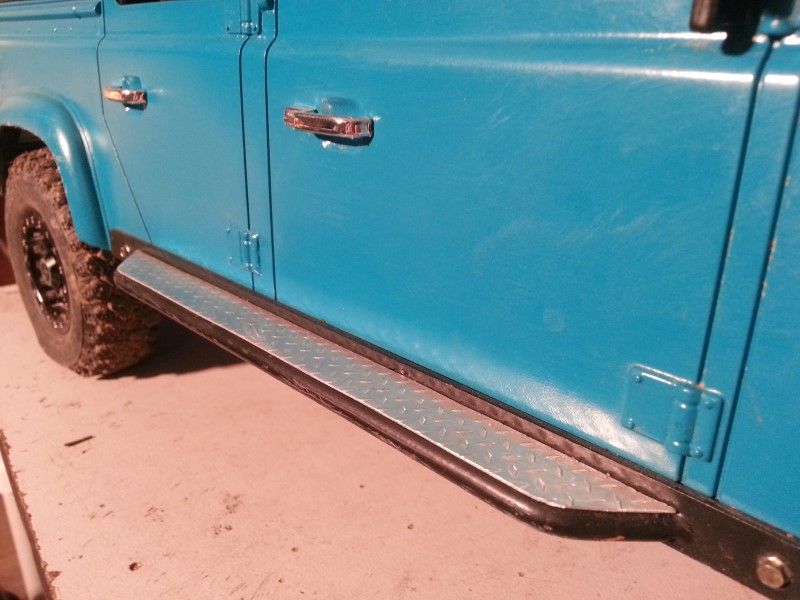 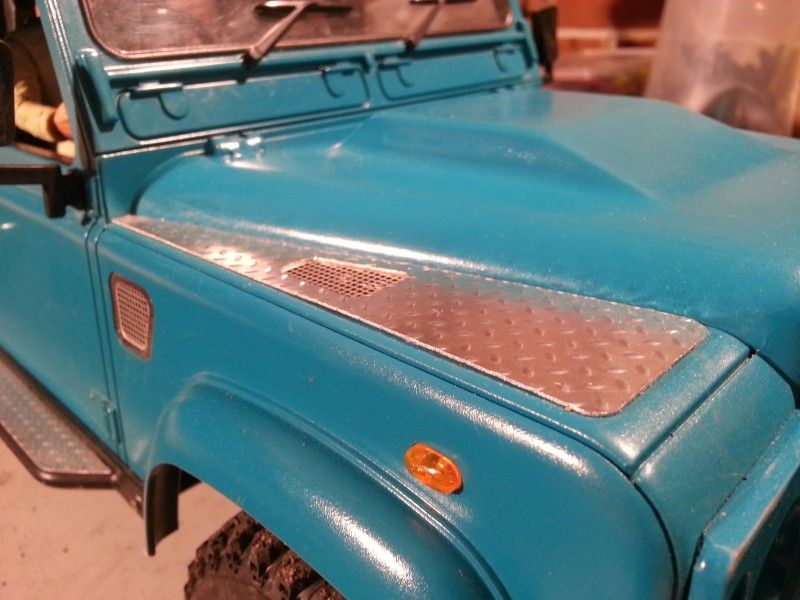 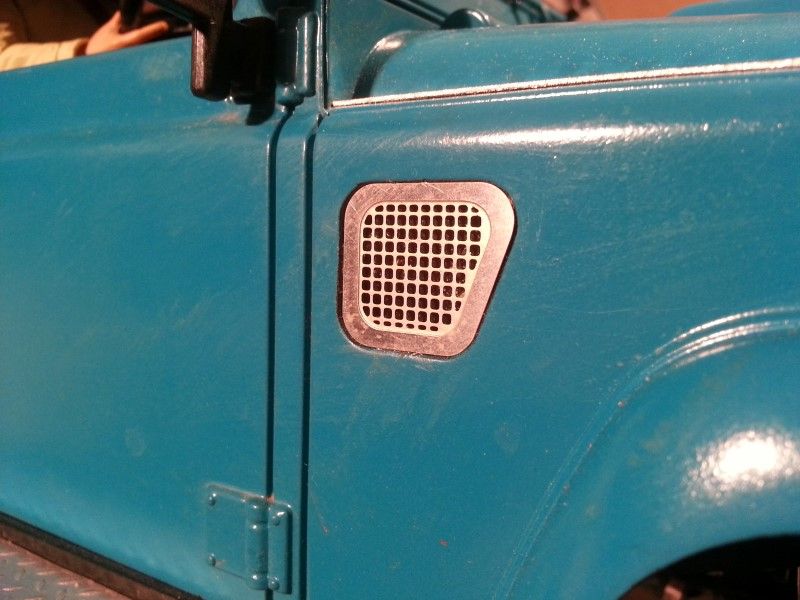 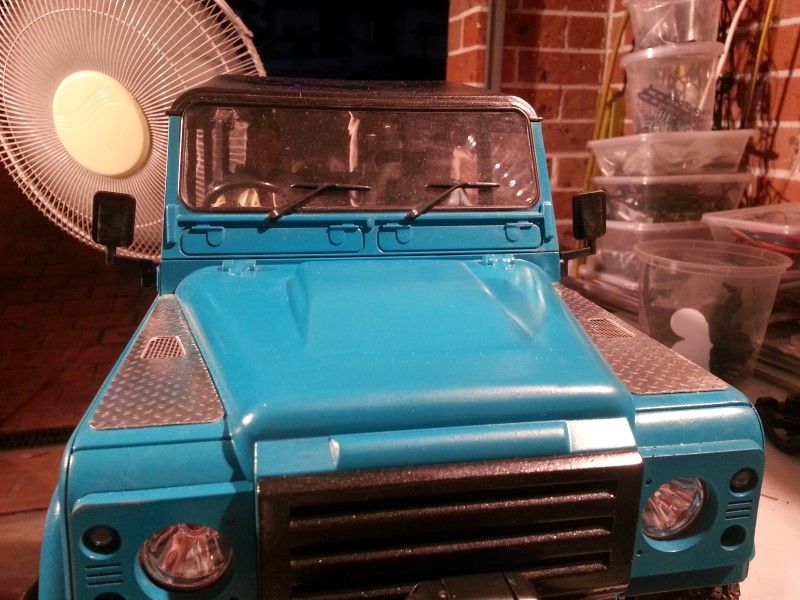 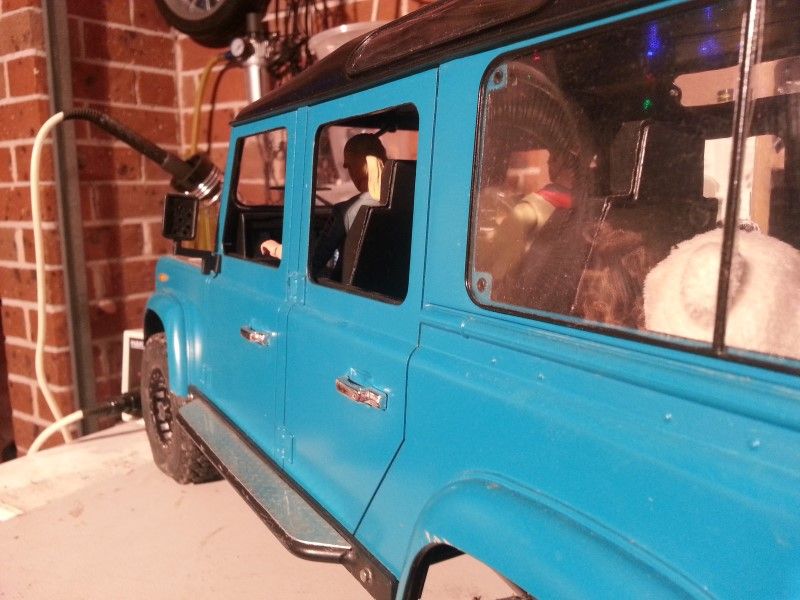 Chipper certainly likes it. 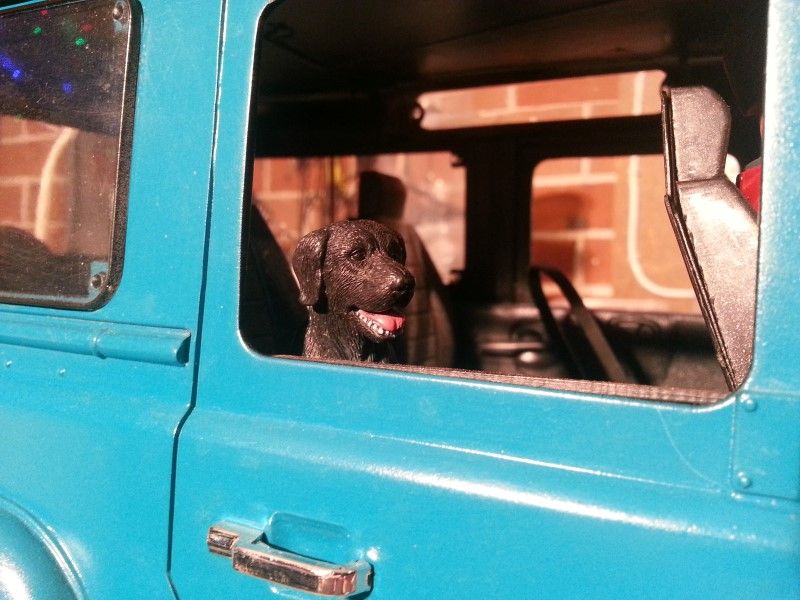 Peter and Gina are keen to get out in the countryside. 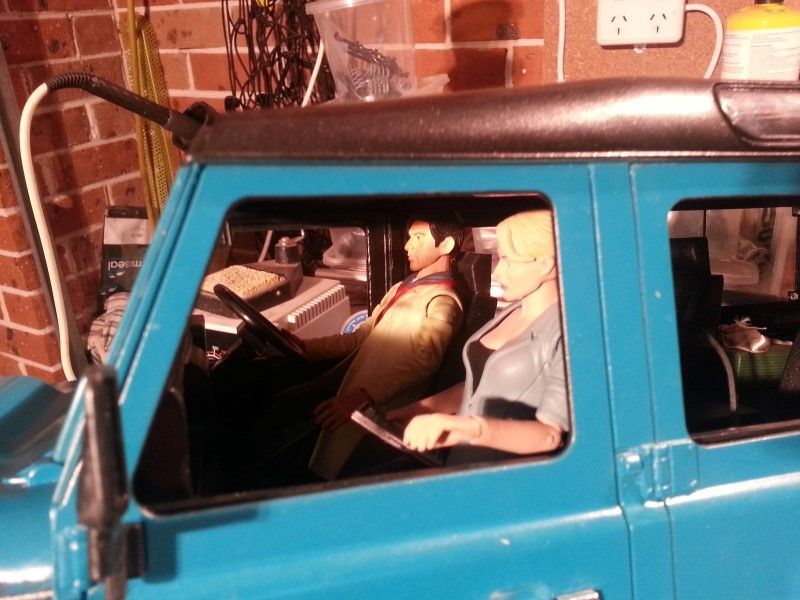 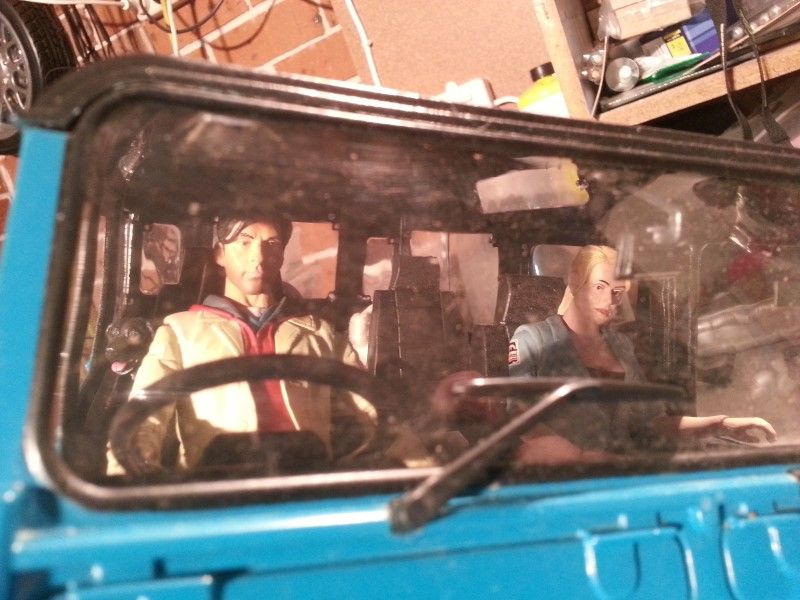 Not long now guys, just be patient. A couple more details need to be finished first. Cheers H2Micr0 |
| |  |
| | #19 |
| Rock Crawler Join Date: Aug 2011 Location: Baton Rouge
Posts: 965
|
Great work ! Highly detailed and good story line!
|
| |  |
| | #20 |
| Rock Crawler Join Date: Jan 2013 Location: Australia
Posts: 541
|
Woohoo!!!!! The day for the first trail run finally arrived! Two local mates have been working on their G2 D90 builds, and both were in driveable condition. All being keen to get some wheel time on our new rides we ventured out to Norton's Basin in Western Sydney. Here we are lined up at the top of the track. 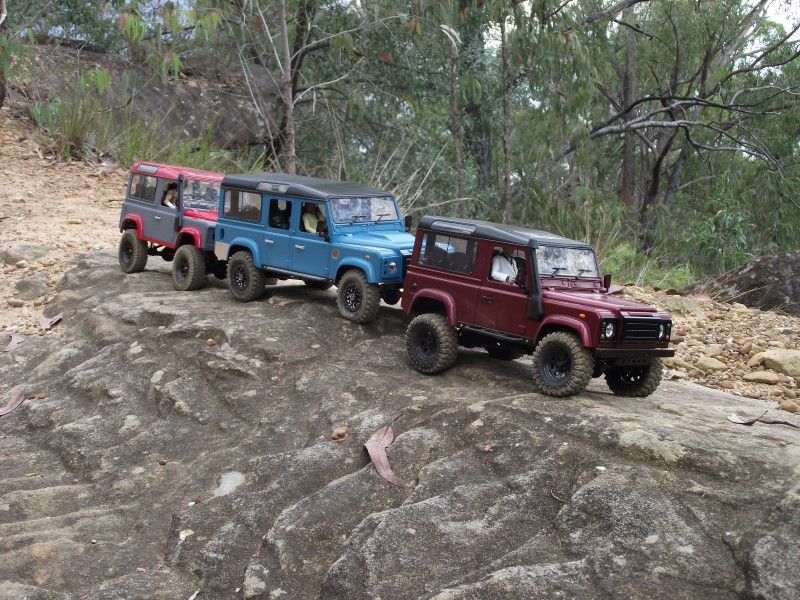 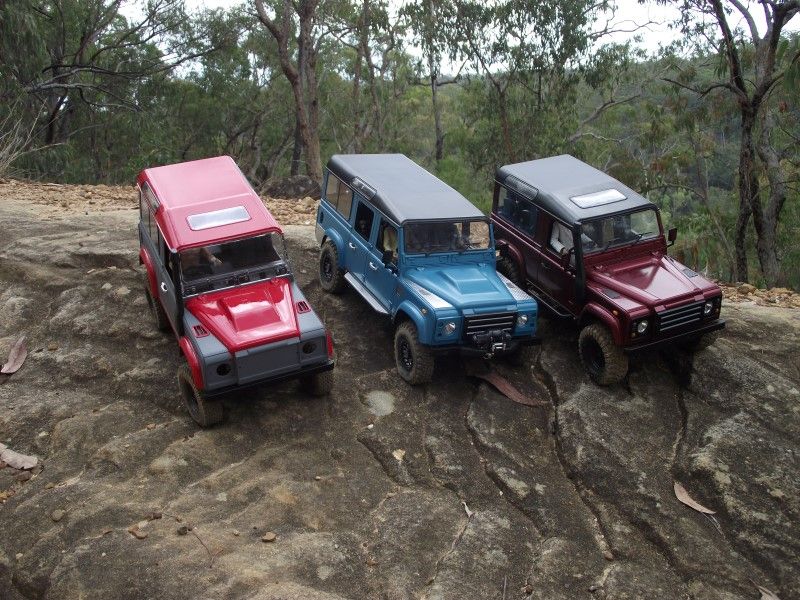 Then a storm blew in. Started with a bit of rain. 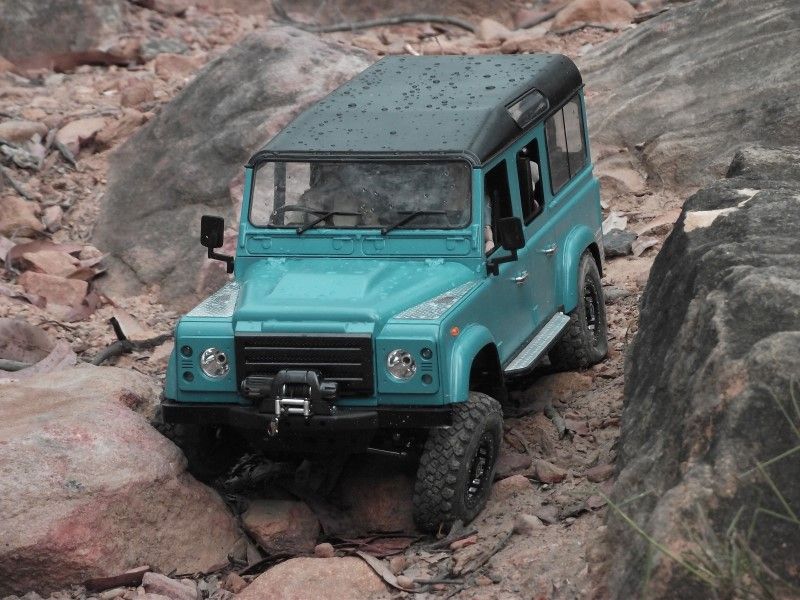 Then we drove madly back up the trail heading for cover from the thunder, lightening and driving rain! Got less than an hours drive time and ended up with a dirty rig LOL. 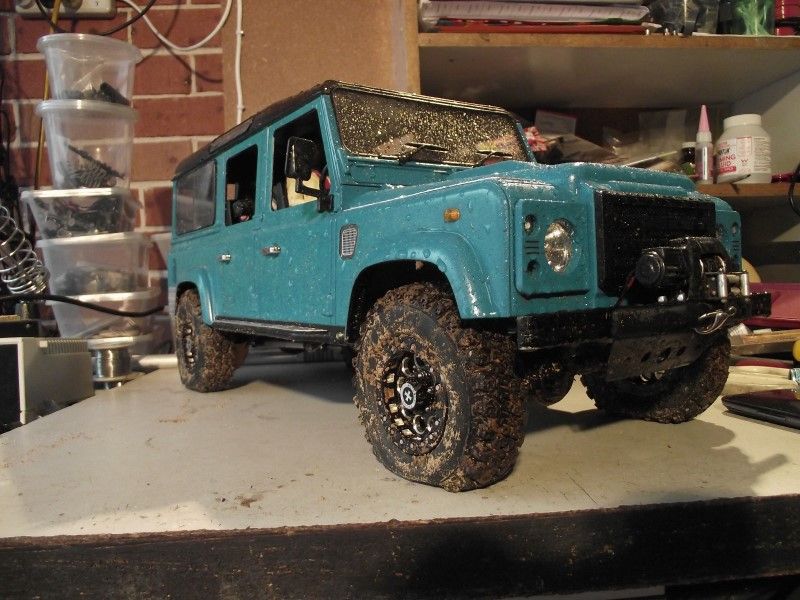 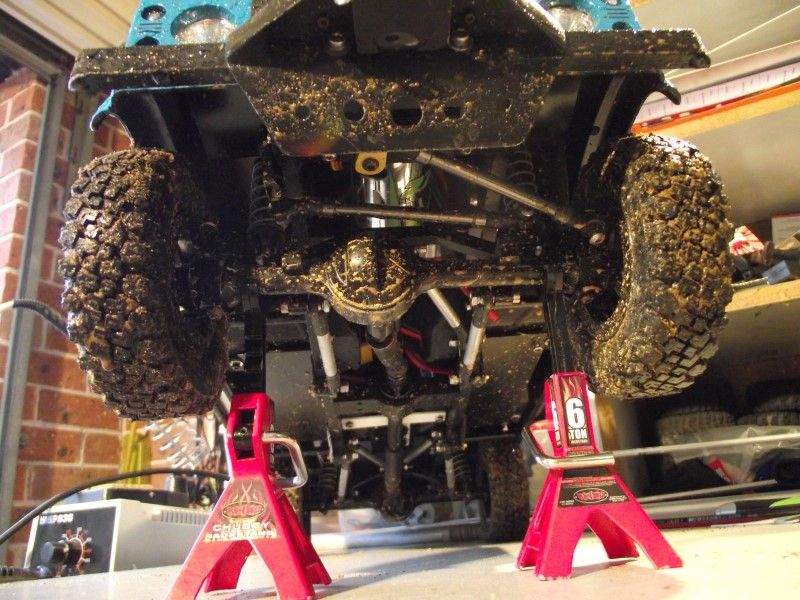 Certainly one way to break in a new rig. Had a few loose bolts in the steering, nothing a bit of blue loctite couldn't remedy. The morning before we left that day I quickly made up some front inner fender wells. Good thing too LOL. 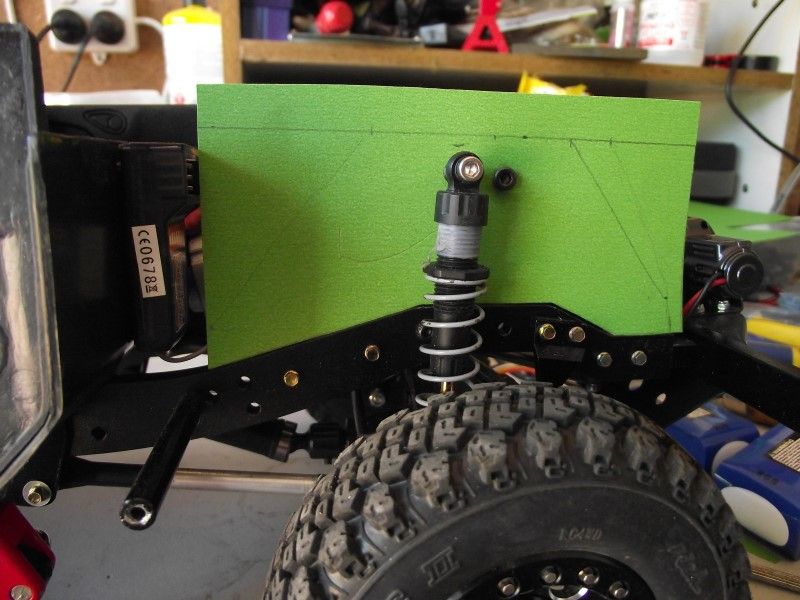 Seems to work ok. 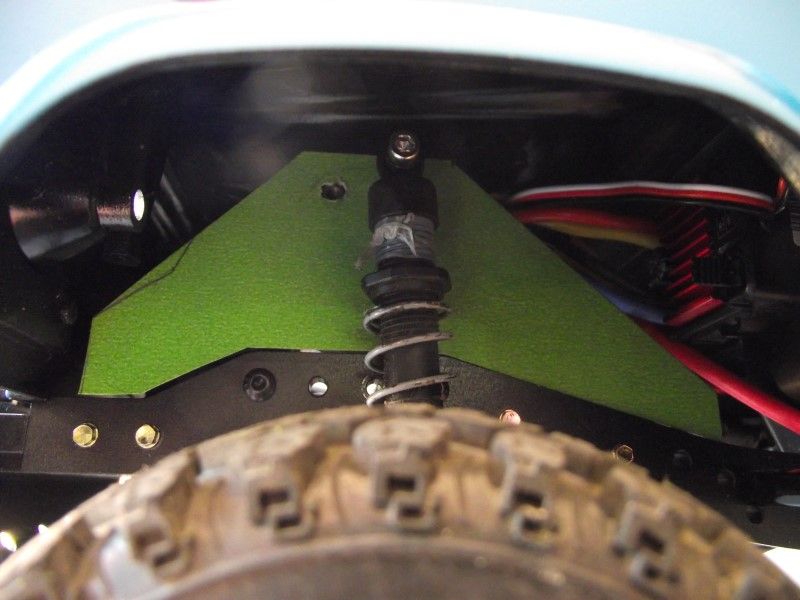 Refinement of design. 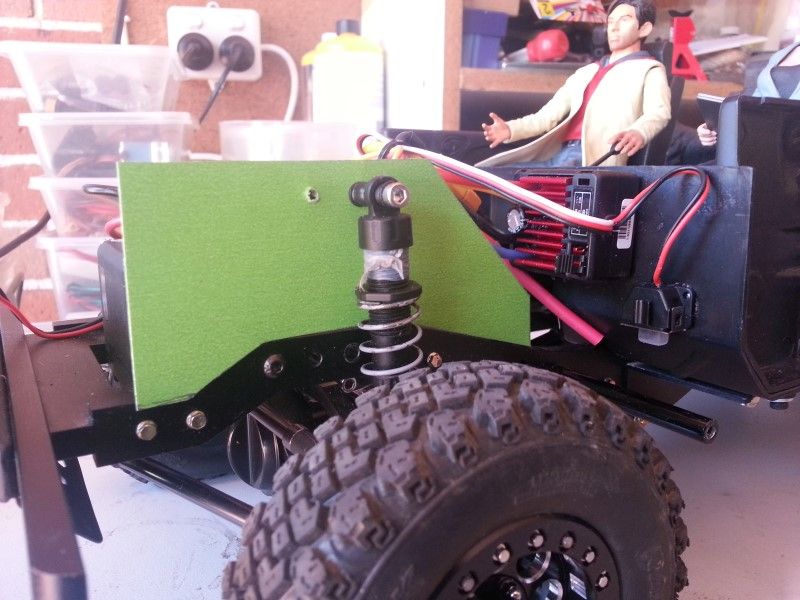 Styrene parts cut out. 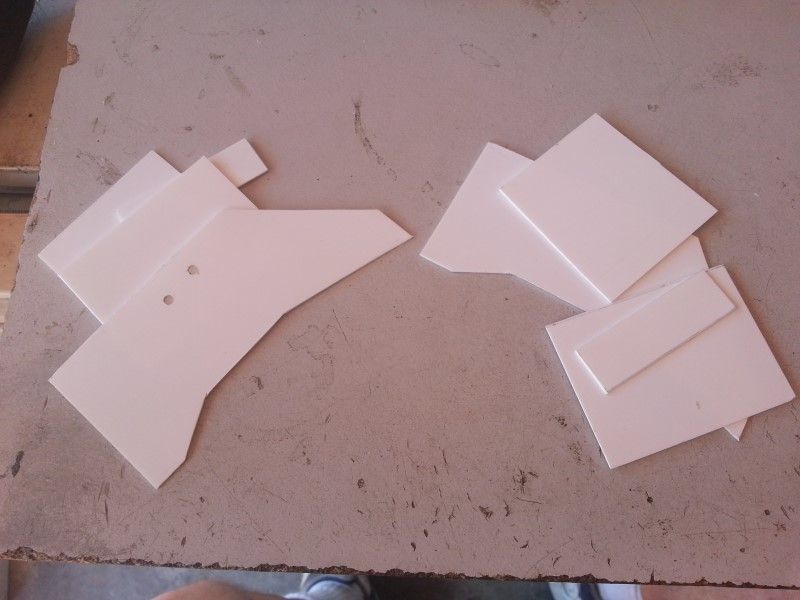 This is after the first run. They really did the job well. 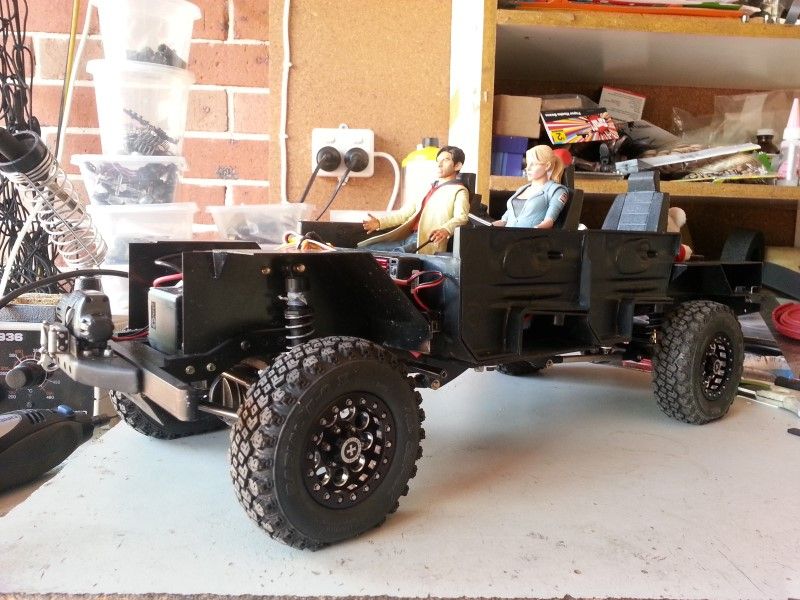 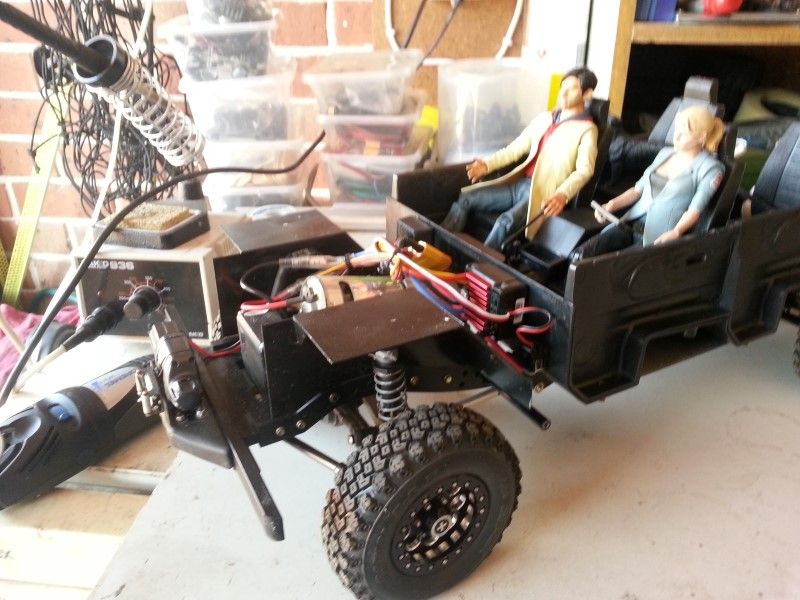 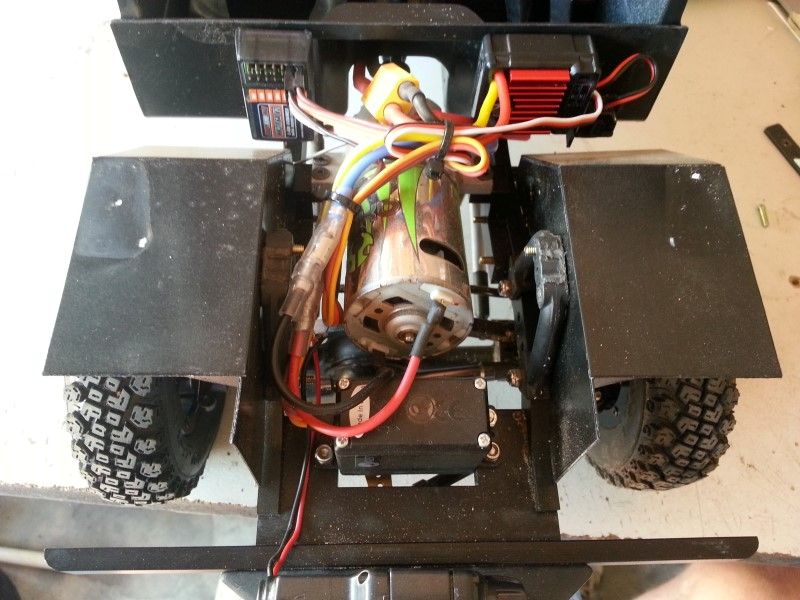 Even though the outing was shorter than we wanted, I decided the stock foams in the Fun Country II tyres were far too soft. So grabbed a pair of Pitbull Rockbeast dual stage foams, for the front, and a larger single stage for the rear. 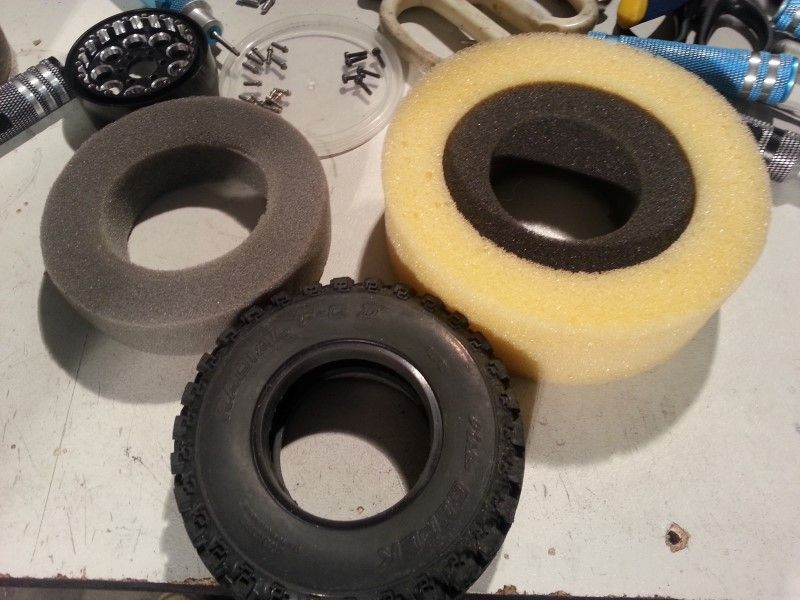 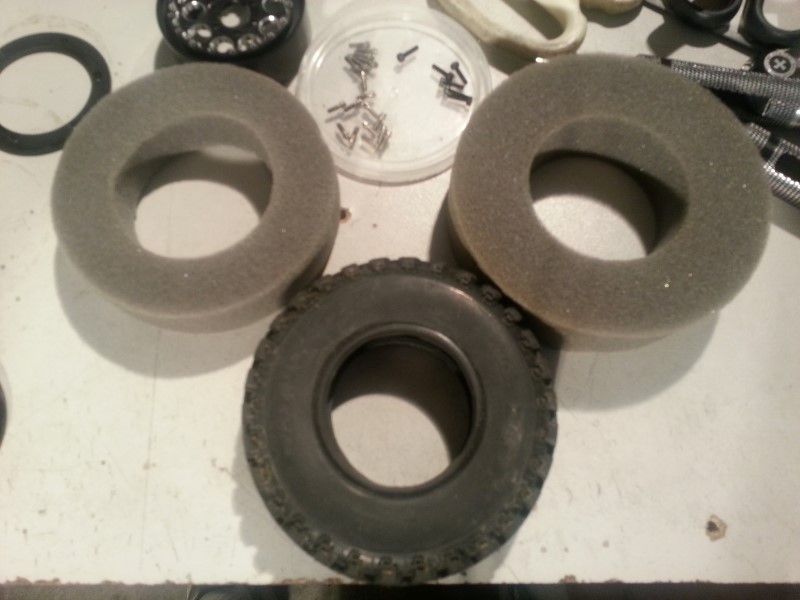 A week later, the three of us went to Lake Parramatta and the weather was much kinder this time around. Got a good 2.5 hours wheel time in. 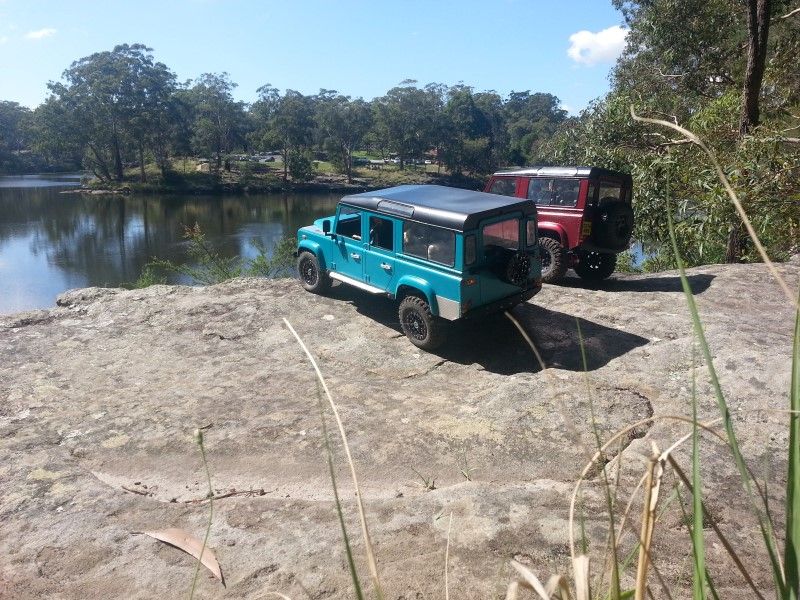 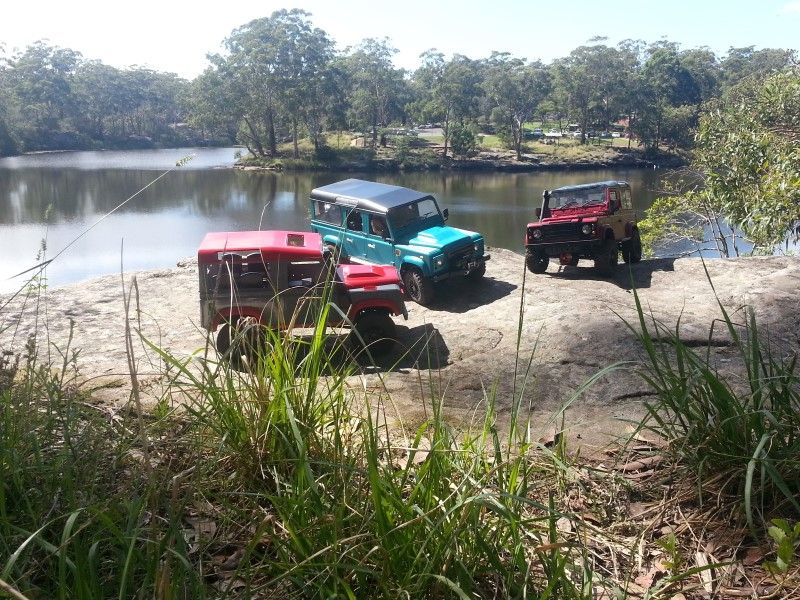 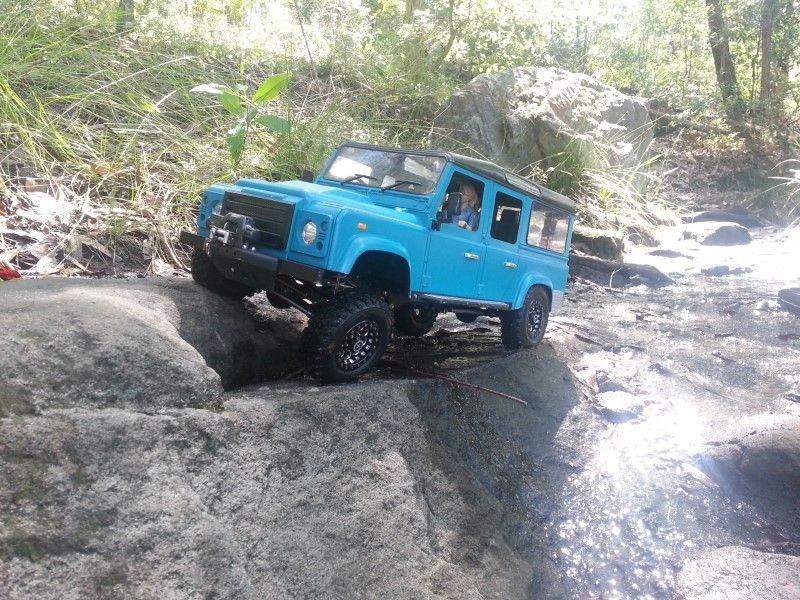 So far I am loving the way The Brigadier drives. There are some alterations that need to be made, but I will elaborate on those in a forthcoming post. Cheers H2Micr0 |
| |  |
 |
 H2Micr0's D110 'The Brigadier' - Similar Threads
 | ||||
| Thread | Thread Starter | Forum | Replies | Last Post |
| H2Micr0's FJ45 Troop Carrier | H2Micr0 | 1.9 Scale Rigs | 43 | 03-25-2016 12:25 AM |
| H2Micr0's Scale 1 FJ45 Ute | H2Micr0 | 1.9 Scale Rigs | 22 | 02-04-2016 03:57 AM |
| H2Micr0's FJ '40 Shorty' Trail Rig | H2Micr0 | 1.9 Scale Rigs | 33 | 01-25-2016 02:29 PM |
| H2Micr0's Tandem Box Trailer | H2Micr0 | Scale Accessories | 7 | 04-04-2014 12:33 AM |
| H2Micr0's SCX10 FJ40 Trayback | H2Micr0 | 1.9 Scale Rigs | 38 | 03-23-2014 07:37 AM |
| |