| |
| |||||||
 |
| | LinkBack | Thread Tools | Display Modes |
 07-24-2016, 02:58 PM
| #1 |
| I wanna be Dave  Join Date: Apr 2014 Location: North Carolina
Posts: 2,254
|
After having so much fun with my GCM Skeleton JK, I decided I wanted (needed?) a second one. I had a second JK body sitting on the shelf waiting to become the topless sibling to my first JK. But other projects took priority, so on the shelf it sat, looking something like this:  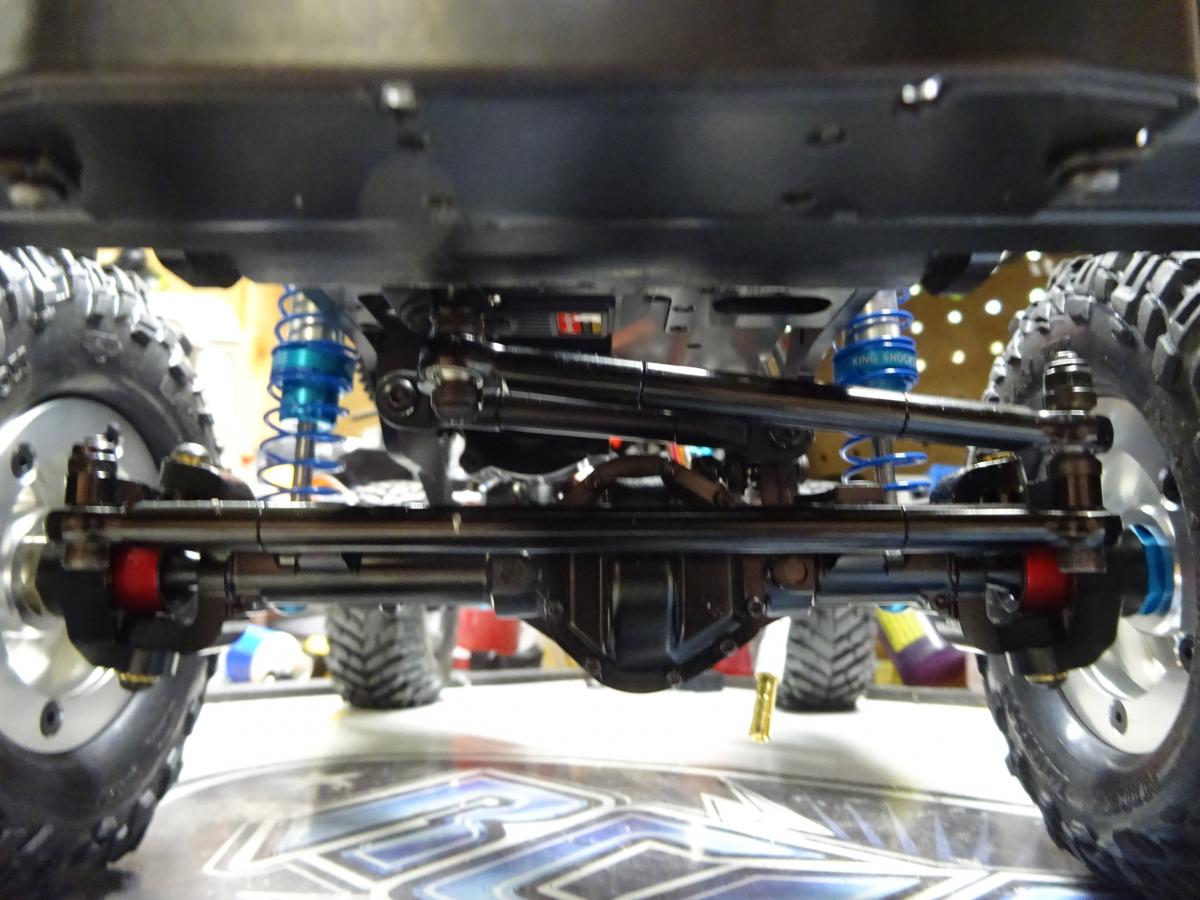  Vitals include an HH Puller Pro Stubby 2700 with Mamba Micro X to be run on 3S (one of my favorite tiny truck powerplant combos), Hot Racing SCX10 tranny with hardened steel gears and spur, RC4WD K44s, and RC4WD Mickey Thompson 1.9 Baja Claw 4.19" Scale Tires on the new RC4WD Breaker 1.9" beadlock wheels. On one my of my periodic stops by the goods folks over at RC Recycler, I picked this up:   It came with a dash but will need the rest of the interior:  So I came up with the idea of putting the D90 instead of another JK on Skeleton 2. I finally got time to start working on it, so I figured this would be a good time to start a thread. Disclaimer: this will go in fits and starts in between other projects, so I can't promise continuous progress. But it's almost ready to run at this point, so it shouldn't take too long. I want to go for a more aggressive modified look with this one, something like these:   So I ordered a set of Dingo fender flares and started working on the bumper mounts. I cut up some Delrin block to make a rear bumper mount for the RC4WD Tough Armour Swing Away Rear Tire Carrier w/Fuel holder for the Gelande 2 (yes...that's the full name for this bumper, lol). Here's what I came up with:  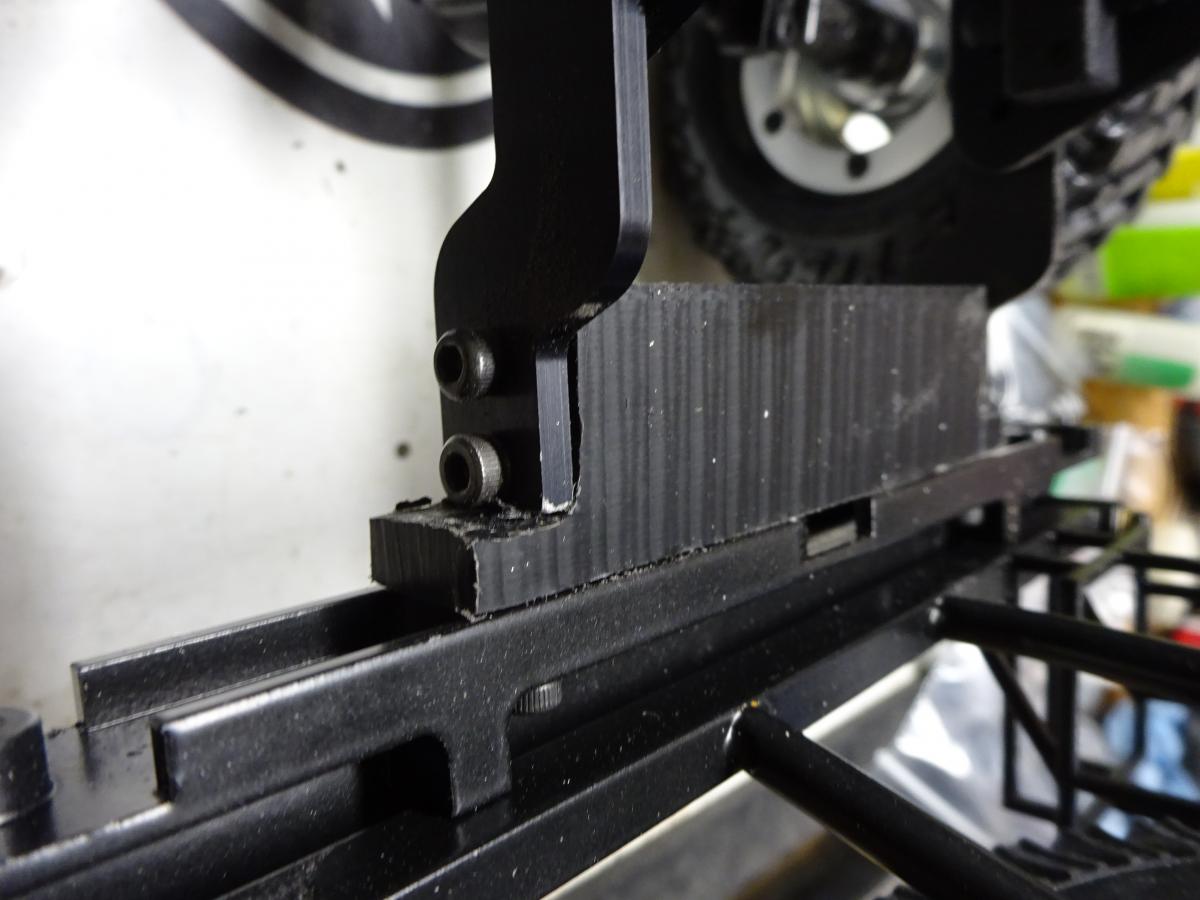 Delrin is super strong, so this won't be going anywhere. Then it was onto the front, where I decided to mount one of these:   I had previously cut a Delrin brace for the rear before I knew how this build would play out. That brace was a close enough that I could make it work with a couple of 2mm spacers between the brace and bumper:   That left me with this:    Wheelbase of the D90 body is within a few mm of the JK, so I lined everything up in front and used slightly longer rod ends in back to make up the difference. Time to see what it looks like with the body on:    I like. On to the bodywork... |

|  |
| Sponsored Links | |
| | |
|
07-24-2016, 03:21 PM
| #2 |
| I wanna be Dave Join Date: Apr 2014 Location: North Carolina
Posts: 2,254
|
Flares came in, so it was time to get to work. First step was to cut off the molded-in flares:  I was going to crack some joke about parts falling off of British cars, but no need. I used lexan scissors and then a hobby knife to shave down what was left without scratching the paint. After the first cut:  After some trimming:  Since it's going to be covered by the flares, it doesn't need to be perfect. Just close enough that the flares don't leave a noticeable gap. The virgin flares are a familiar sight:  I started on the right side, which was a bit harder due to the need to work around the snorkel and gas cap. I began by figuring out where top center would be for each flare and then attaching the top center mounting screw:  From there, I worked my way around to get the lines to work the way I wanted them to:  The combination of very flexible nylon and strategically placed stock mounting holes makes these flares very easy to work with. I added cutouts for the snorkel and gas cap:   And then started trimming excess material from the flares as well as the body inside the flares. Here's an example before:  And after: 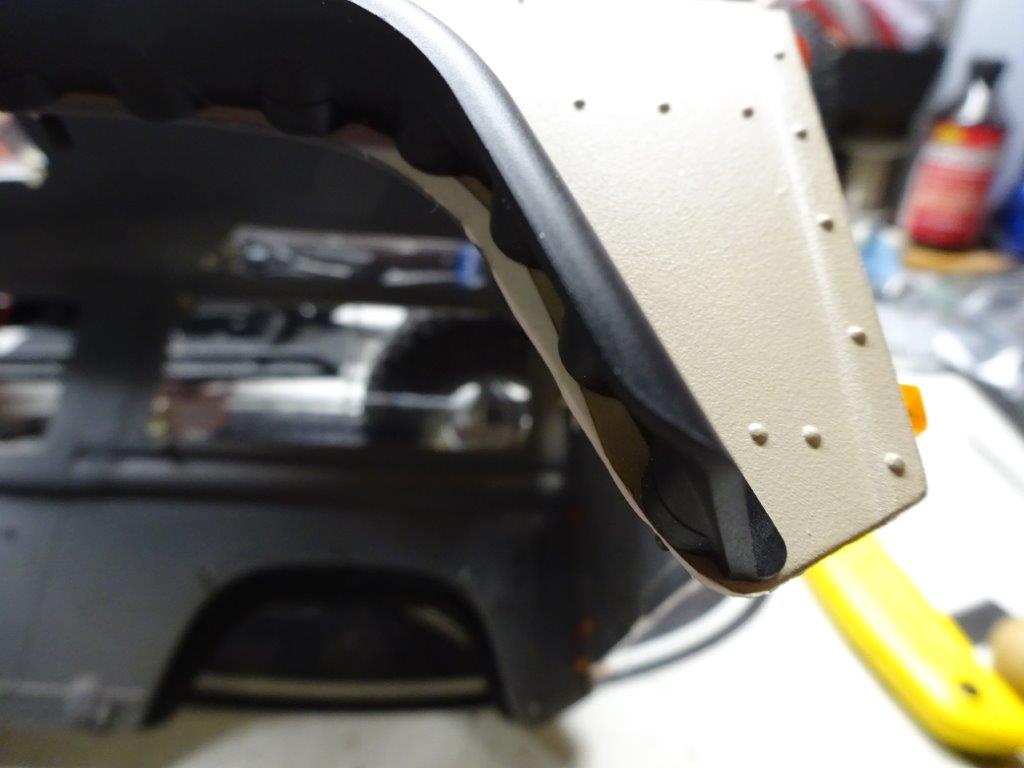 I eventually got to this:    I am playing around with wheel offset at the moment. One side has 4mm hexes and the other side has 6mm hexes. I think I like the wider hexes to fill out the flares. Next up will be figuring out body mounting. I'll probably try to do something using captured screws in the stock body mounting holes along the lower rocker panels. More to come as I get to it.  Last edited by new2rocks; 07-24-2016 at 06:55 PM. |
|
| |
|
07-26-2016, 08:56 PM
| #3 |
| I wanna be Dave Join Date: Apr 2014 Location: North Carolina
Posts: 2,254
|
I have a major confession to make. I forgot just how much of the chassis assembly Roo did until I stumbled across the pix on a different flash card than my normal one. Not one to take credit for the work of others (unlike a particular first lady hopeful), I must give him props the best way I know how...by starting from the beginning:  Roo likes the streamlined packaging:  Let's start with the rails:  Then the servo mount to go between the rails:     The motor mount sits in place without screws (nifty engineering!):  Screw the other rail into the servo mount to hold it all together:   Add the electronics plate:   Time for links:  Roo's learned a few tricks to speed up assembly:  Roo likes:  Roo's done with links: 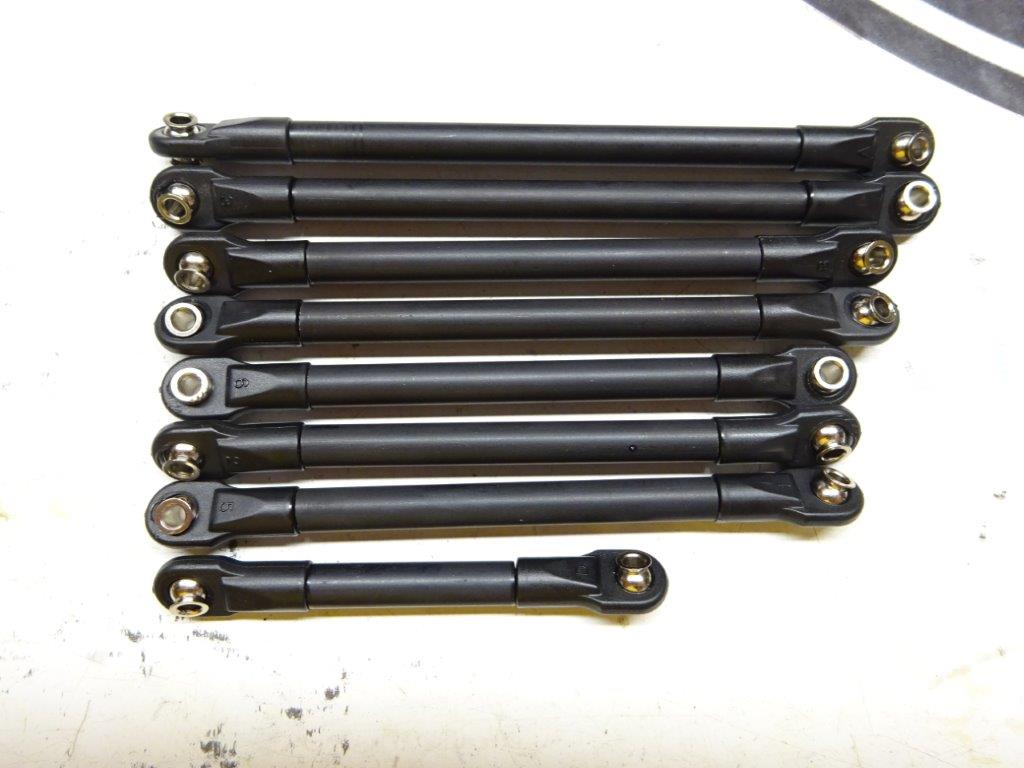 Time for the transfer case:  Roo had already done a couple of these, so he knew the drill:  Mount the gears to the shafts:  Allow the thread lock to cure overnight before assembling, greasing, and closing it all up. As you can see, Roo's getting pretty good at tiny trucks! |
|
| |
|
07-26-2016, 09:12 PM
| #4 |
| I wanna be Dave Join Date: Apr 2014 Location: North Carolina
Posts: 2,254
|
I did the grease this time:  Then closed it all up:  True to form, Roo doesn't let me do too much before he's right back at it:  On went the rear axle:  GCM is very thoughtful to include multiple link mount positions so that you can tweak and tune to your liking:  From there, we added the shocks:  Spacers as needed for clearance:  And it was onto the tranny (I chose the Hot Racing tranny for this build):     RC4WD makes a hardened steel driveshaft that's just the right size for tranny to t-case:   These RC4WD Breaker 1.9" Beadlocks look fantastic:   So...that largely gets us caught up to where we started (and left off). Last edited by new2rocks; 07-27-2016 at 04:08 AM. |
|
| |
|
07-27-2016, 09:07 AM
| #5 |
| Rock Crawler Join Date: Jul 2005 Location: Spartanburg
Posts: 860
|
Looking good David! Cool to see some mildly upgraded D90's kicking around lol
|
|
| |
|
07-29-2016, 06:36 PM
| #6 | ||
| I wanna be Dave Join Date: Apr 2014 Location: North Carolina
Posts: 2,254
| Quote:
Quote:
Now that we've completed the trip back down memory lane, back to the more recent past to get caught up. Test fit of the body and floor pan revealed a few tweaks needed to get everything to fit:  First up were cutouts to the firewall and floor pan to make room for the slipper and the corner of the transfer case and t-case-to-tranny shaft:   I added a bit of styrene to cover the cutouts. The slipper cover kinda reminds me of a modesty under a desk to keep visitors from looking...well, you know...  I also needed to notch the electronics plate to clear the bulkhead on the passender side:    And with that, everything fit quite nicely:  With the body and dash on, you can hardly tell what I did:  Considering that this chassis was specifically designed to fit like a glove under a completely different body (the so-called China Jeep JK), this worked out very well! With the floorpan sorted out, the next task was body mounting. I wanted something that would be clipless, invisible from the outside with body on, and tough enough to withstand tumbles. I decided to go with a captured screw setup like the one I used on my TF2 Mojave 2. I started with Delrin blocks attached to the chassis and lined up with the body mounting holes in the rocker panels of the D90 body:   Holes drilled into the ends of the blocks to accept the captured screws:  Here's a view of one of the captured screws from the inside:  With body on:  I still have a little bit of tweaking to get the fit just right before puttying, sanding and painting over the screw heads from the outside. I'll also be replacing the fender flare screws with shorter ones so they don't stick out as much inside the truck. I was playing around a bit with wheel offset, as you can see from the front:  Right side has 4mm hubs, left side has 6mm hubs. I'll be going with the 6mm hubs to fill out those flares. One last angle:  Consider yourselves warned...! | ||
|
| |
|
07-29-2016, 06:59 PM
| #7 |
| Rock Crawler Join Date: Jul 2005 Location: Spartanburg
Posts: 860
|
That rear bumper looks good on there!
|
|
| |
|
09-05-2016, 10:04 AM
| #8 | |
| I wanna be Dave Join Date: Apr 2014 Location: North Carolina
Posts: 2,254
| Quote:
So now that we're done with summer travel, Roo is knee-deep in his SCX10 II build, and GCM Adventure Series at Uwharrie is around the corner, time to get back on this one. But there were problems. First, the front seat bottoms fell off:  So I had some holes to fill:  I think these will do the trick:  Then the floor pan snapped in two:  Must be the notorious Land Rover rust. I'd say they don't make them like they used to, but I think they've always been made like this. Well, time to rebuild:   Much better. Hopefully it won't fall apart again before I get this back together. | |
|
| |
|
09-18-2016, 07:19 AM
| #9 |
| I wanna be Dave Join Date: Apr 2014 Location: North Carolina
Posts: 2,254
|
More progress on the floor pan:      Still needs paint, upholstery, and some detailing, but the bulk of the styrene work is done. Also needed to make a snorkel cap since it was missing from this reclaimed body. Started with some 2-part putty:  Turned it into this:  Then this:  I have about 2 more weeks to finish this one before GCM Adventure Series USA. Better get back to work! |
|
| |
|
09-18-2016, 08:08 AM
| #10 |
| Pebble Pounder Join Date: Nov 2015 Location: Gilsum, NH
Posts: 126
|
Think I've fallen for these D90's. The interior and how people approach it differently is one of my favorite things about it. Yours is coming along nicely man. Those seats are a great match for the truck. Really like the look of just two seats in the rear. Looks like you still have the option to fit some small things behind them if you wanted. Top of the snorkle is mint! The front bumper looks killer too! Been very unhappy with the limited approach of the ARB bumper and have been on the fence with the CChand for a while now. Information on it seems to be sparse. Would you mind giving us a closer look along with your thoughts on it so far? It would be much appreciated =) Sweet work as always dude. Looking forward to seeing more! |
|
| |
|
09-25-2016, 05:45 PM
| #11 | |
| I wanna be Dave Join Date: Apr 2014 Location: North Carolina
Posts: 2,254
| Quote:
And thanks for the 2kind words about the interior. I'll be sure to provide some updates on the bumper once I get the interior together and get some run time on it.On to some more updates. With the floorpan sorted, it was time to decorate. First up was carpet:  Then some diamond plate for the way back. I went with the CC Hand Style A, because I really like the pattern...  ...and was very pleased with the look:  The diamond plate is pretty easy to work with. You can cut it with Lexan scissors or a good pair of household scissors. Just take your time and be careful not to bend the metal. Since this is a reclaimed body, there were some missing pieces. Decided to use shifters off an Axial parts tree:  And then one broke:  Oops! No worries...wanted to shorten that one up a bit anyway:  Also needed a steering column, so out came the 2-part putty again:  While that was curing, I had back at the interior and started putting things together to see how they look:   Not bad. I like it even better inside the truck:    Still have to finish the steering column, add the steering wheel, and do some accessorizing inside. After that, it will be on to strengthening the body mounts and few more tweaks to the body and she should be ready to roll in time for GCM Adventure Series USA in a couple of weeks. Can't wait! | |
|
| |
|
09-27-2016, 01:49 PM
| #12 |
| I wanna be Dave Join Date: Jan 2005 Location: Raleigh-ish vicinity
Posts: 3,846
|
I have taken time out of my already behind schedule build to inform you that it is time to hurry up. Only a little more than a week until this needs to be ready to roll. Roo would have replaced you already if you weren't bankrolling the whole operation. |
|
| |
|
09-27-2016, 04:05 PM
| #13 |
| I wanna be Dave  Join Date: Jan 2006 Location: Corruptifornia
Posts: 12,107
|
Lol, nice so far. |
|
| |
|
 A Skeleton D90 in my closet - Similar Threads
 | ||||
| Thread | Thread Starter | Forum | Replies | Last Post |
| Rckcrwlr is letting the Skeleton out of the Closet with the help of GCM | Rckcrwlr | 1.9 Scale Rigs | 72 | 08-13-2014 11:37 AM |
| dark closet | rockerrc | Chit Chat | 1 | 03-26-2011 07:26 PM |
| Bedroom Closet | tmaxxking1 | Chit Chat | 9 | 09-19-2007 06:50 PM |
| Thread Tools | |
| Display Modes | |
| |


 Linear Mode


