| |
 02-21-2007, 09:57 AM
| #41 | |
| Sinking with the ship   Join Date: Mar 2005 Location: El Capitan...sole survivor and sinking fast
Posts: 8,864
| Quote:
 Harley- Ill take some pics tonight | |

|  |
| Sponsored Links | |
| | |
|
02-21-2007, 10:32 AM
| #42 |
| RCC Addict Join Date: Jan 2006 Location: The Amish Ghetto
Posts: 1,932
|
hey mike please dont bring this one to monster jam... i finally start on mine to rival the trekker and runners at mj and you start building this thing...... looks good. |
|
| |
|
02-21-2007, 11:01 AM
| #43 |
| Rock Crawler   Join Date: Aug 2005 Location: salunga
Posts: 717
|
lookin' good mike.
|
|
| |
|
02-21-2007, 02:00 PM
| #44 | |
| Rock Crawler Join Date: Nov 2004 Location: Lost in Florida
Posts: 934
| Quote:
dont worry he said it might take a loooooonnnngggg timeeee | |
|
| |
|
02-21-2007, 03:51 PM
| #45 |
| Sinking with the ship Join Date: Mar 2005 Location: El Capitan...sole survivor and sinking fast
Posts: 8,864
| 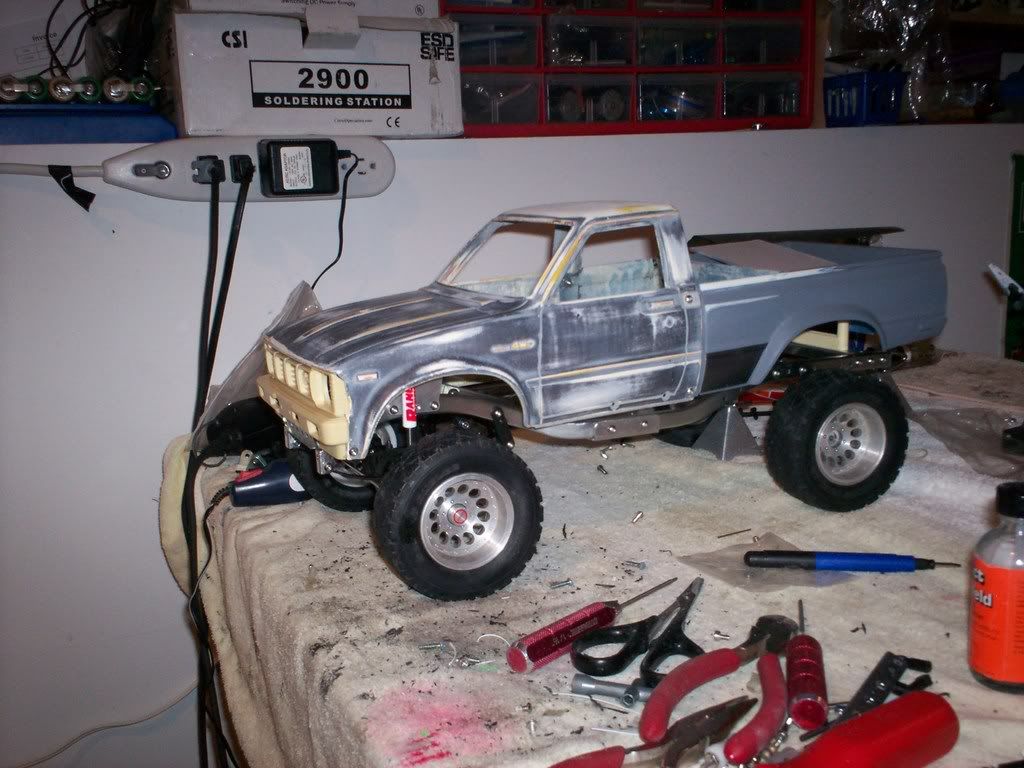 cab is wetsanded and ready to go, worked on it LATE last night, all the primer came off nicely. I am going to wet sand the bed down today when I get home from work. cab is wetsanded and ready to go, worked on it LATE last night, all the primer came off nicely. I am going to wet sand the bed down today when I get home from work.O and dont buy these resin repro grills you see on the bay...they SUCK 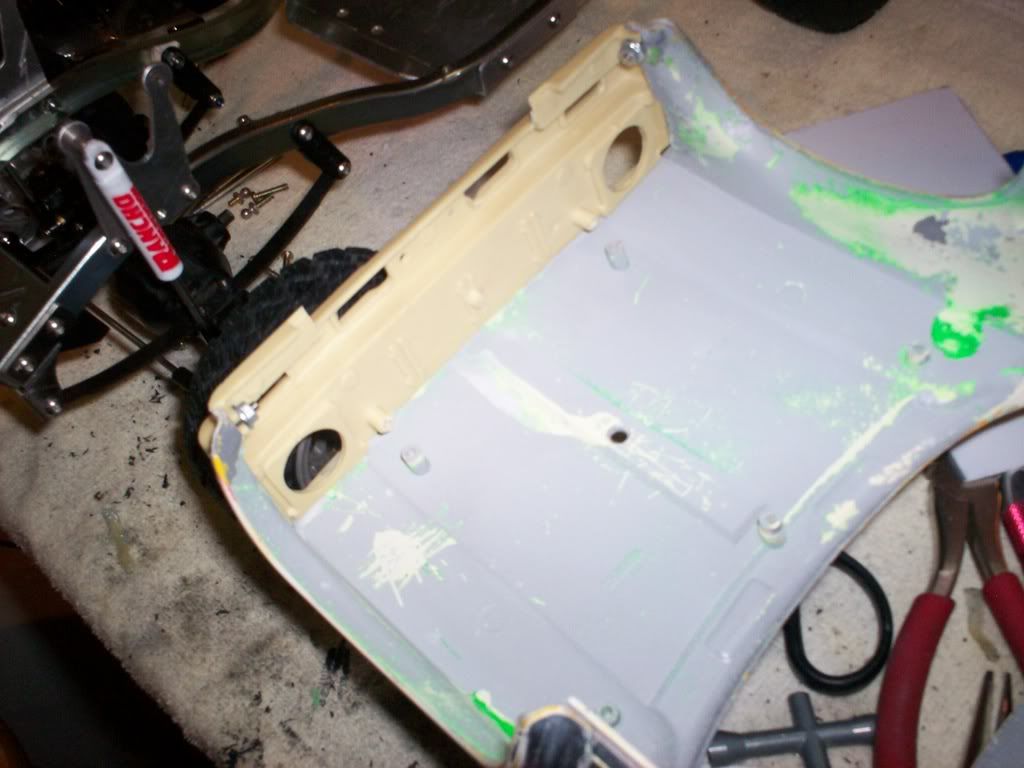 -Mike |
|
| |
|
02-21-2007, 03:59 PM
| #46 |
| Quarry Creeper  Join Date: Oct 2006 Location: McChord AFB
Posts: 236
|
is that the grille that came with the body? i bought it off rc4wd and had the same thing happen. they sent me a replacement and im guessing that is the one you have on it. yeah they suck!
|
|
| |
|
02-21-2007, 04:25 PM
| #47 |
| RCC Addict Join Date: Jan 2006 Location: The Amish Ghetto
Posts: 1,932
|
wow and i just hacked up a real bruiser grill.... |
|
| |
|
02-21-2007, 05:16 PM
| #48 | |
| Sinking with the ship Join Date: Mar 2005 Location: El Capitan...sole survivor and sinking fast
Posts: 8,864
| Quote:
Damn keith, o well, I have another grill on that other body, I am going to steal that one for now...that body wont be done anytime soon | |
|
| |
|
02-21-2007, 05:27 PM
| #49 | |
| Rock Crawler Join Date: Nov 2004 Location: Lost in Florida
Posts: 934
| Quote:
deng its a salvage yard :( | |
|
| |
|
02-21-2007, 05:49 PM
| #50 | |
| Sinking with the ship Join Date: Mar 2005 Location: El Capitan...sole survivor and sinking fast
Posts: 8,864
| Quote:
| |
|
| |
|
02-21-2007, 05:56 PM
| #51 |
| Rock Crawler Join Date: Feb 2006 Location: Easthampton
Posts: 747
|
hey 1BJB do you have any tips for preping hardbodies for paint?, i have to redo mine and i dont want to screw it up. Ps not trying to hijack your thread |
|
| |
|
02-21-2007, 10:09 PM
| #52 |
| Newbie Join Date: Feb 2007 Location: troy
Posts: 23
|
i was thinkin you should lower your body down to where a 1:1 rigs would sit with no body lift.
|
|
| |
|
02-22-2007, 10:18 AM
| #53 | |
| Sinking with the ship Join Date: Mar 2005 Location: El Capitan...sole survivor and sinking fast
Posts: 8,864
| Quote:
its still go the stock rear body mounts but I have different ones, I need to find someone to bend me up a shorter one for the front... Maybe Kevin can help me out with that Ps not trying to hijack your thread [/quote]Everyone does it a little bit differently, I dont want to say my way is the right way, there are many other guys on here that do much better body work then me but here is my process. I stripped the body in castrol super clean/purple power. Try to get as much paint off that I can. I then wet sand it, cant remember what paper right now, ill look when I get home. I then prime it, and let it sit for a day, let the primer cure. The any imperfections I see, Ill decide if I want to make it pretty or not. If I am making it nice, ill fill with tamiya putty or regular bondo. let that cure for a day. then ill went sand the whole body again and re prime it. let it cure again. youll need to repeat that process untill all perfections are gone. then I typically lightly wet sand again, and lay a coat of paint. Let it cure, and lightly wet sand again. Then paint again. if it looks good, Ill very very lightly wet sand (if its a glossy paint) just to break through the shine, then I clear it. Once the clear cures and "shrinks" Ill wet sand lightly again and clear it again. Thats pretty much my process, that works for me. Anyways, someone requested pics of the front axle shaved down.. and the cab is primered, looks good for a runner, so im not going to go to crazy with it fixing its few inperfections. Itll look just once paint and detailing is done  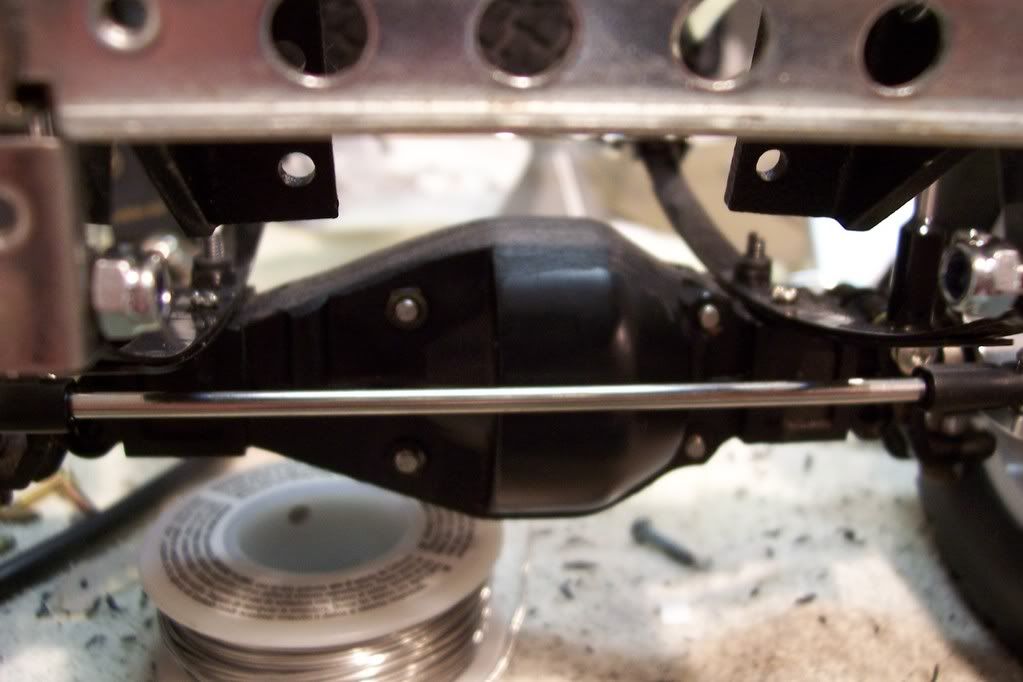 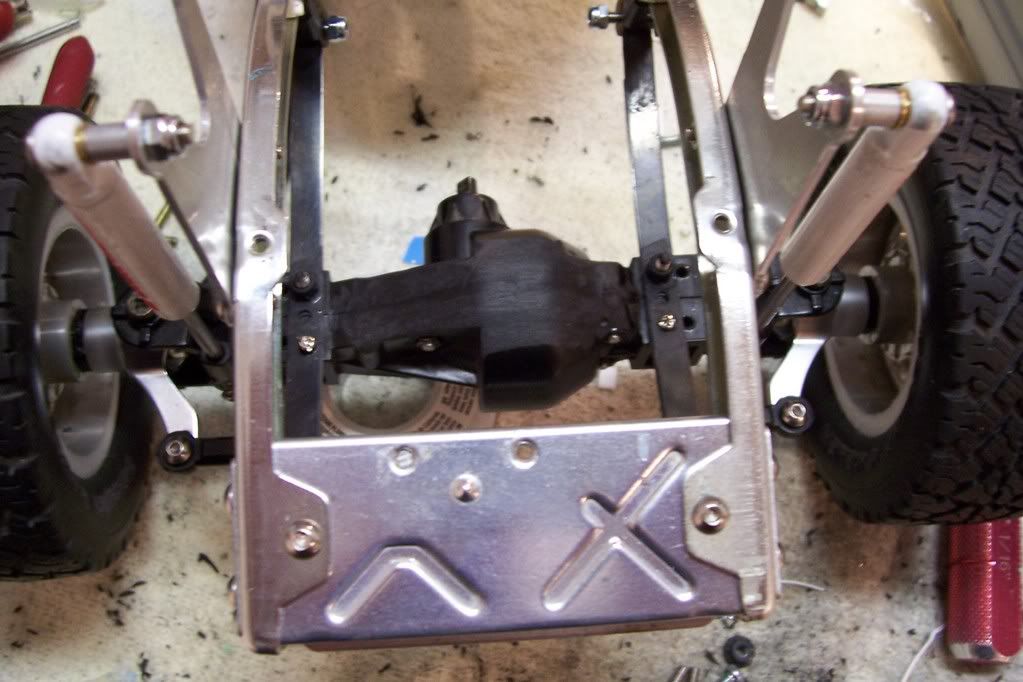 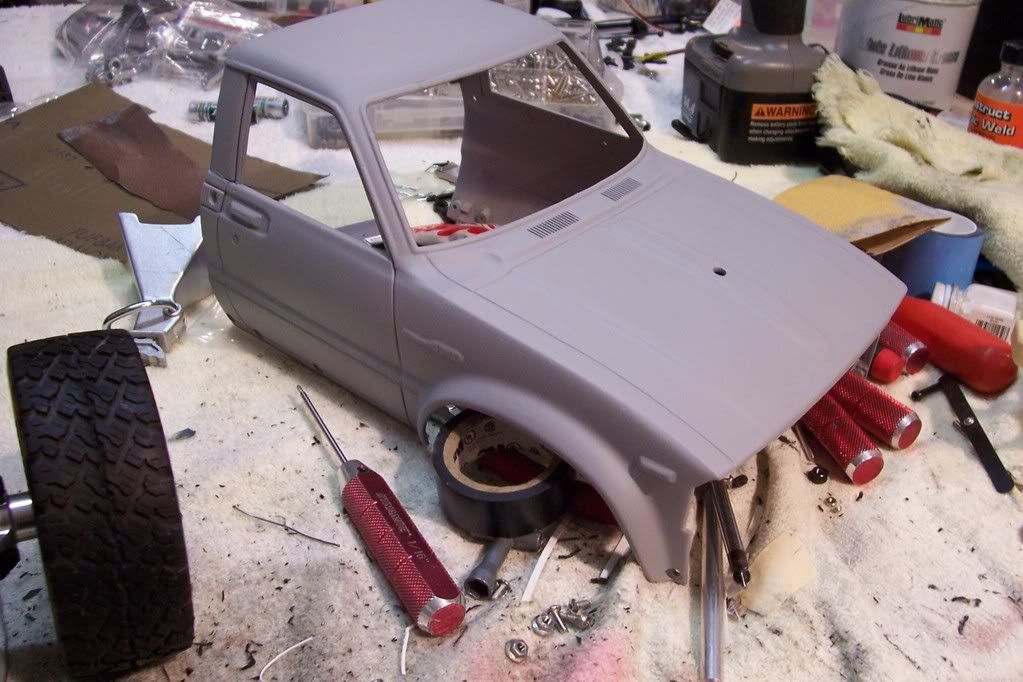 | |
|
| |
|
02-22-2007, 10:52 AM
| #54 |
| RCC Addict Join Date: Jan 2006 Location: The Amish Ghetto
Posts: 1,932
|
your progress looks awesome, i may need your help with how to build a bed. |
|
| |
|
02-22-2007, 11:28 AM
| #55 | |
| Quarry Creeper Join Date: Jul 2006 Location: Northglenn
Posts: 310
| Quote:
| |
|
| |
|
02-22-2007, 11:54 AM
| #56 | |
| Sinking with the ship Join Date: Mar 2005 Location: El Capitan...sole survivor and sinking fast
Posts: 8,864
| Quote:
I cant wait to see the flipped tail gate handle, now thats gonna be trick | |
|
| |
|
02-25-2007, 10:10 PM
| #57 |
| Sinking with the ship Join Date: Mar 2005 Location: El Capitan...sole survivor and sinking fast
Posts: 8,864
|
well this weekend was a busy one, I went to the WRAM show saturday to race clods and the COOLEST person ever was there ANYWAYS, I opted not to go back today, didnt feel like waking up at 5:30 and driving the Yota 80 miles to whiteplains...and since my gf wasnt going to be there to control me from causing an all out scene, I figured it would be best to stay home. so I woke up at 9 and started on RCs so today I got the 4 link done on the rear, I flipped the kunckles around for a cleaner look. 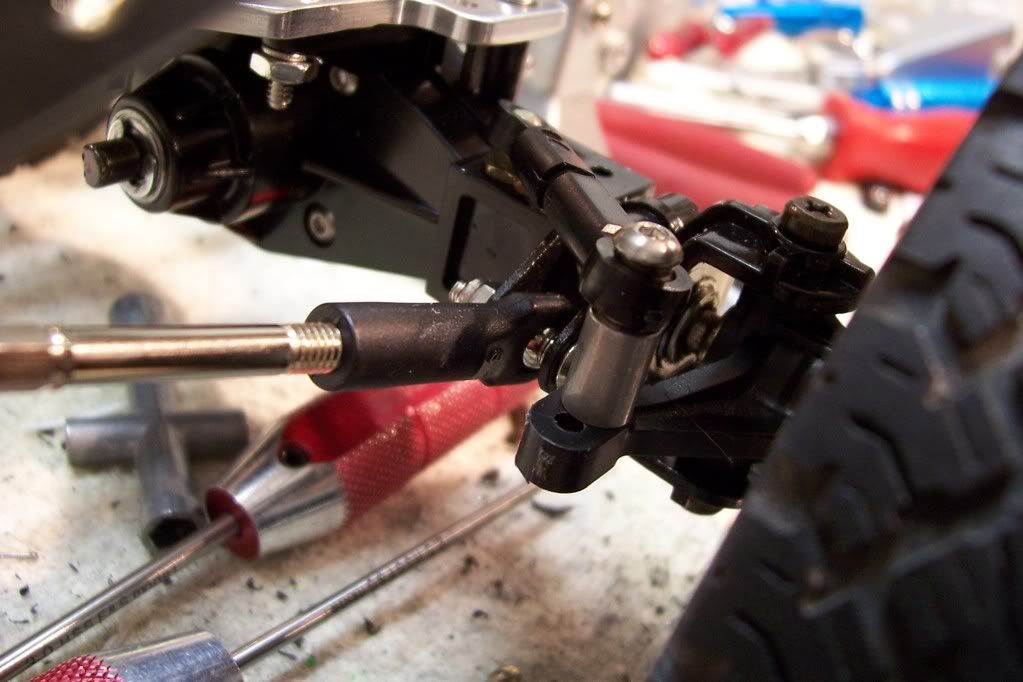 My favorite machinist and bestest friend Juggsterr hooked me up with some extra servo/4 link mount plates he had laying around, a long and short version this way I can fine tune.. THANKS KEV! 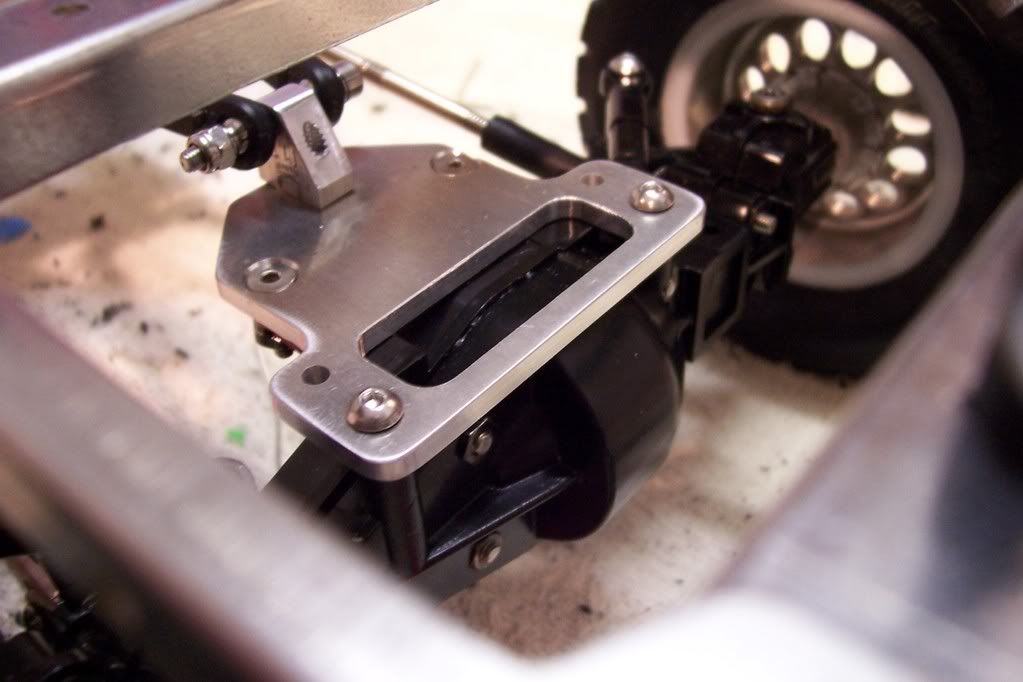 I used Ti upper links, lunsford ones from the LHS, and traxxas revo lower links 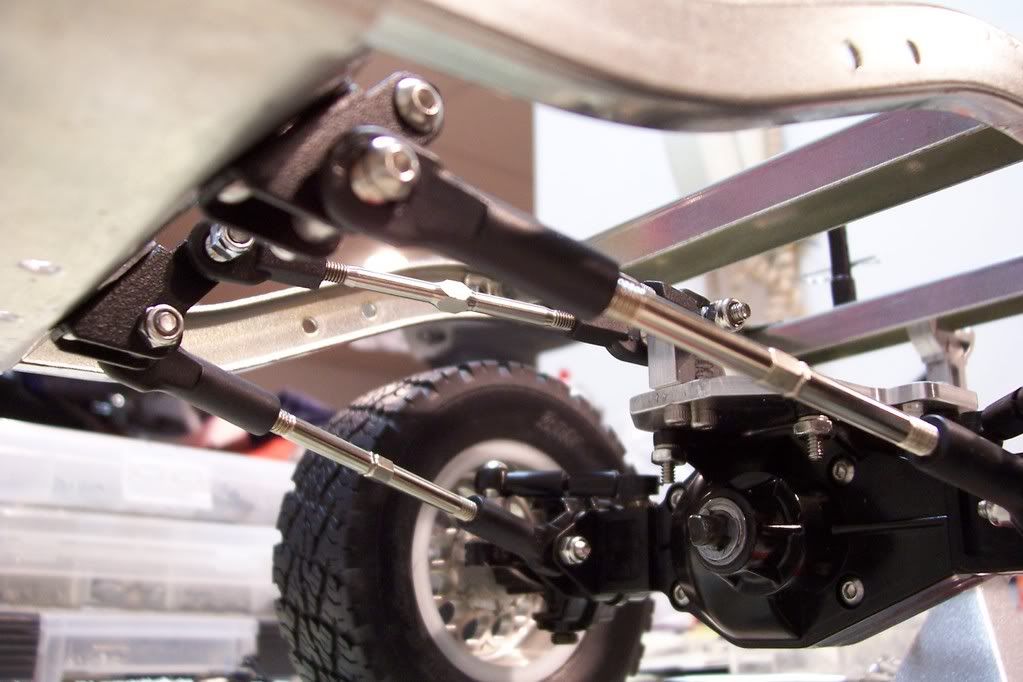 Here is how it ****s now, I realized that I am going to need a bracket of some sort off the rear cross member to mount the shocks too, I gotta look at some of Deans pics and some of the other clones out there and maybe Kevin can help me AGAIN (I am horrible with that type of stuff). 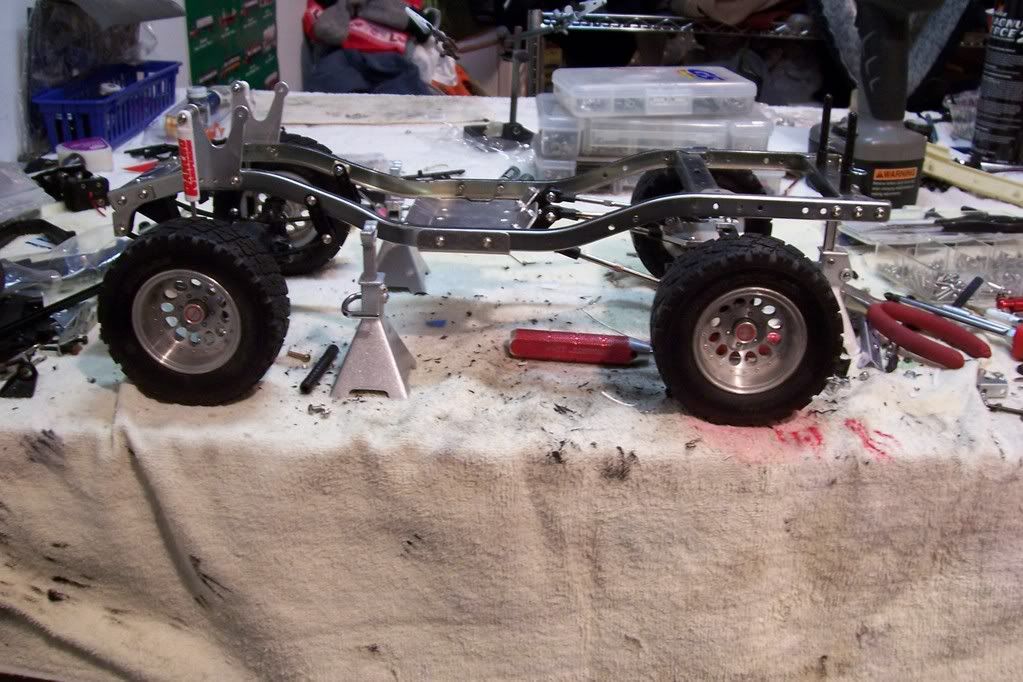 I love colquits 4runner and HAD TO borrow his idea with the fender, it just looks so damn cool. So I cut out the market light, then I glued in a ligh bucket out of styrene and itll get lit up with those tiny iny rice light bulbs I got 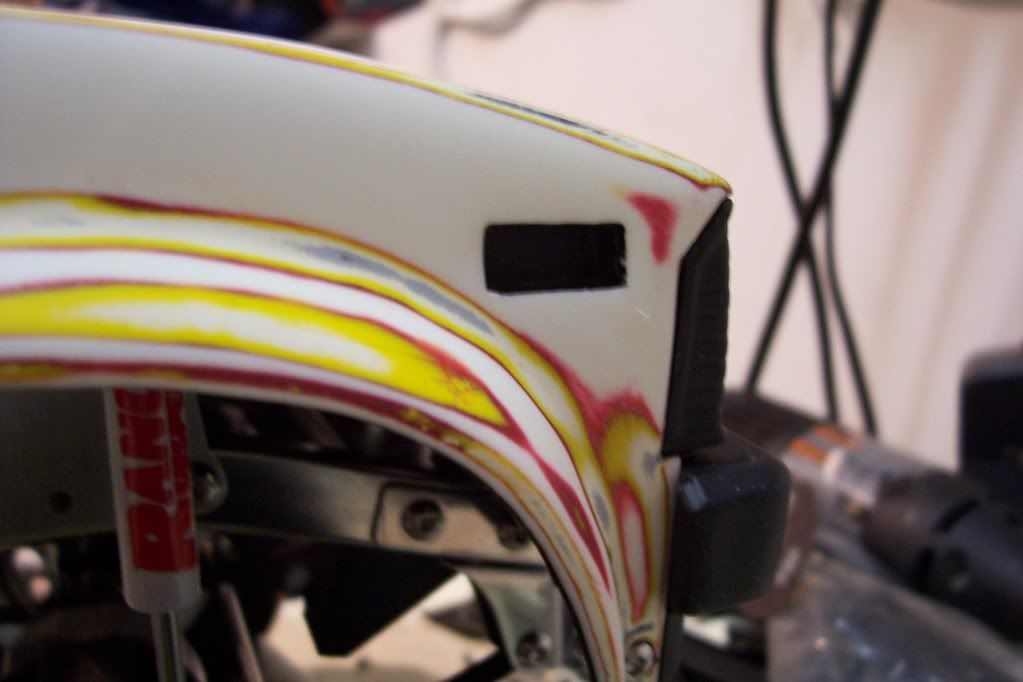 I also shaved off the hilux 4x4 and drilled the "mounting wholes" the fender will be left in primer 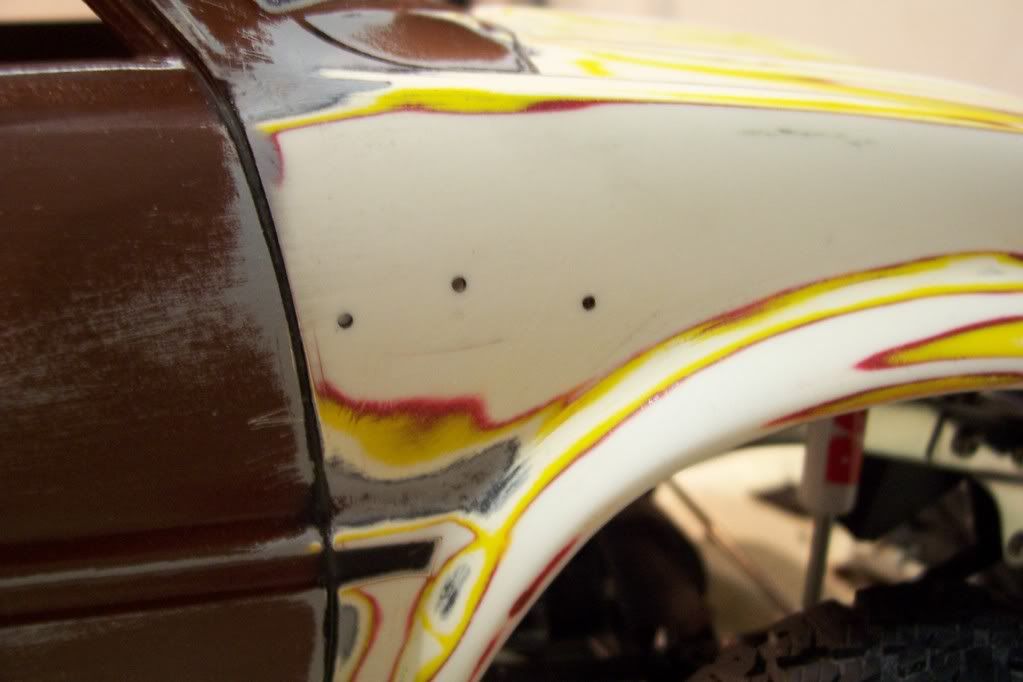 well that last pic gave away the color, its DOODY bomb brown 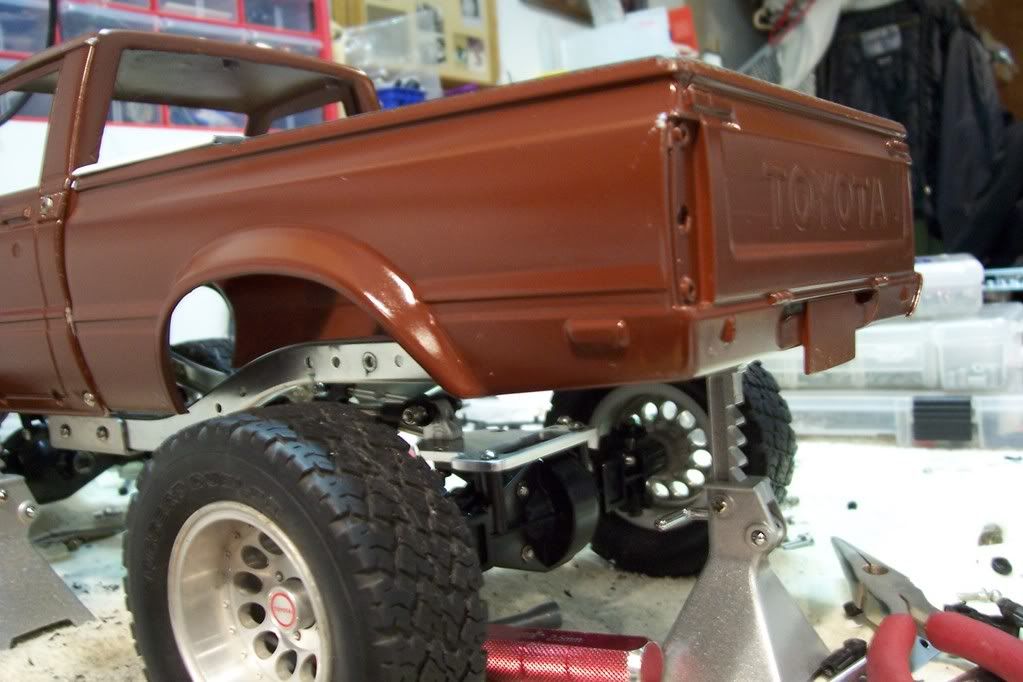 I "rhino lined" the bed, and its going to get a fuel cell over the electonics box hole  The truck was entirely painted, but I had some issues with my black and I had to sand the WHOLE DAMN hood completely down AGAIN, did it 3x in one day before I figured there had to be a paint issue with the black 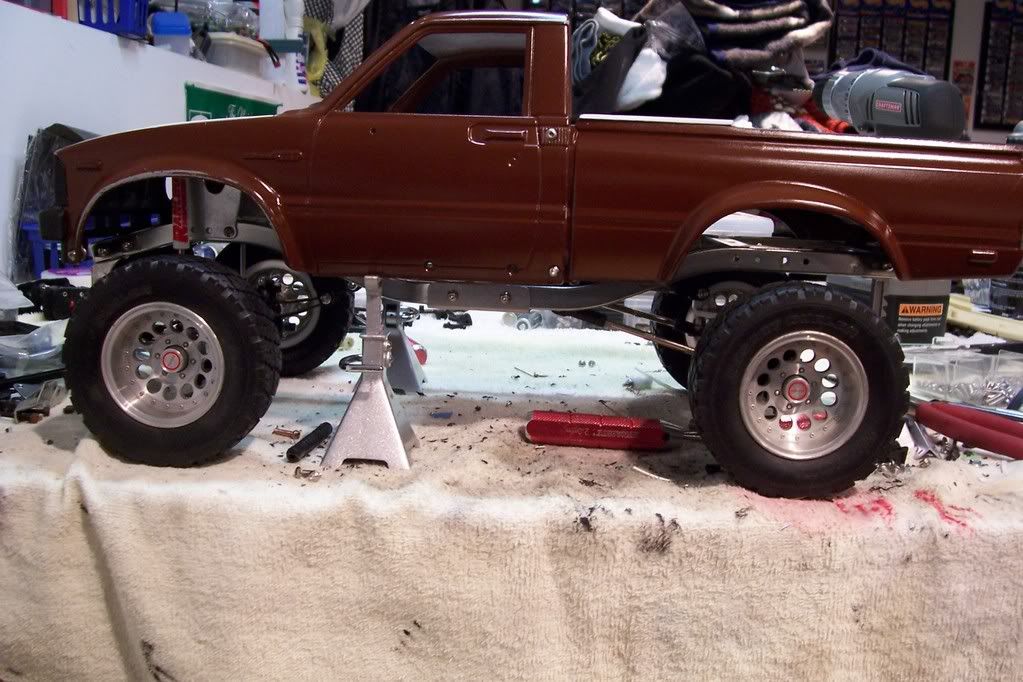 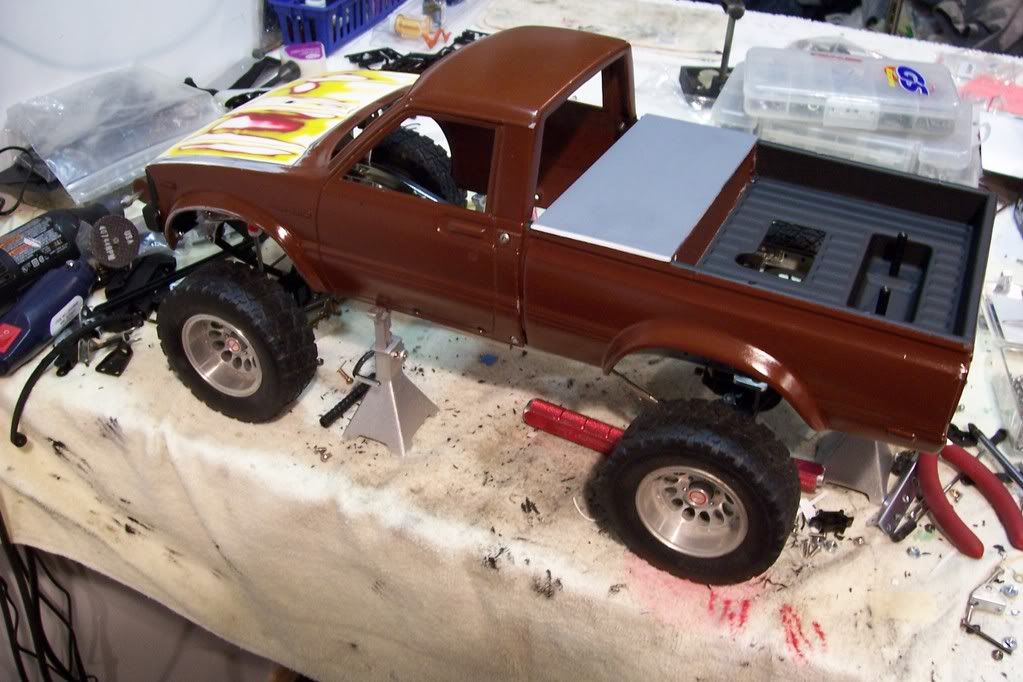 Back window, and repro winshield are here as well, I painted the back window, just gotta take a quick pics Let me know what ya guys think lata mike |
|
| |
|
02-25-2007, 10:23 PM
| #58 |
| Quarry Creeper Join Date: Oct 2006 Location: McChord AFB
Posts: 236
|
for the rear shocks use an angle alum. plate and just bolt it to the stock cross member. heres a pic  |
|
| |
|
02-25-2007, 10:28 PM
| #59 |
| Quarry Creeper Join Date: Jul 2006 Location: Northglenn
Posts: 310
|
Mike looking good, I may need your assistance as well.. LOL Hey can you tell me what length your rods are for the 4 link set up? I am sure that the rod ends will make a difference as well in the length. Chino is going to hook me up with a tranny skid plate and I just spent an arm and a leg on a bunch of parts. As for the mount for the rear shocks I know for my truck that wont work as it would be going up through the floor of the bed... so I will need to figure something out. Any suggestions Mike since you will be going through the same issue? |
|
| |
|
02-25-2007, 10:28 PM
| #60 |
| Sinking with the ship Join Date: Mar 2005 Location: El Capitan...sole survivor and sinking fast
Posts: 8,864
|
few more pics New rear window from BruiserBuilder, i stuck it in my hoodie before with the grill and it scratched it 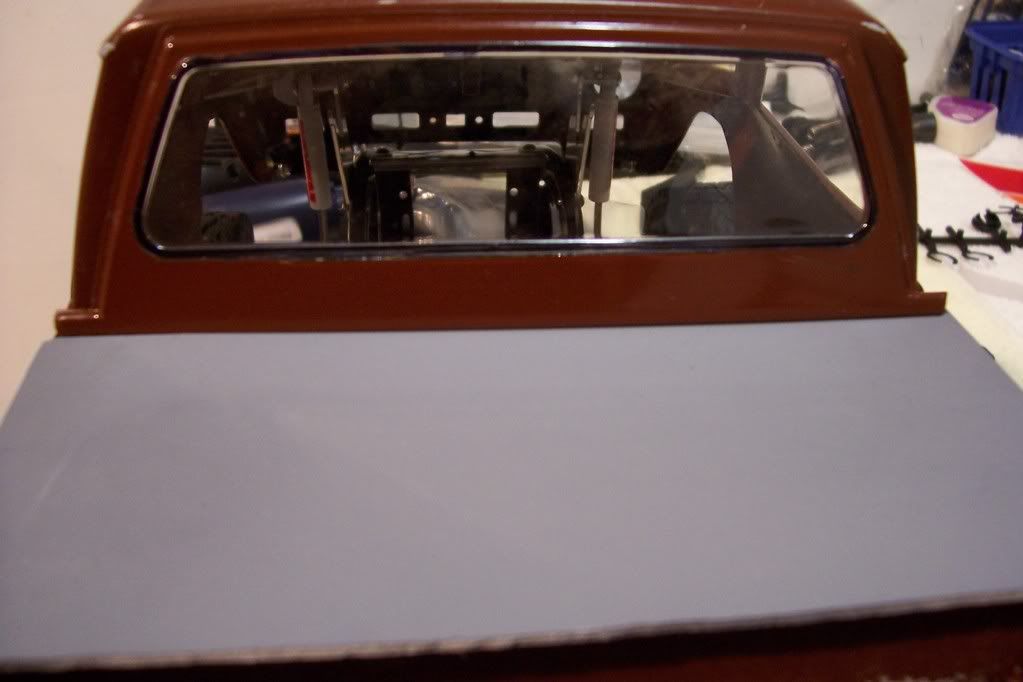 I also have some repro headlight buckets from my friend Matt at scalehobbies and some repro head lights from rcgrab bag with 5mm 8000mcd LEDs 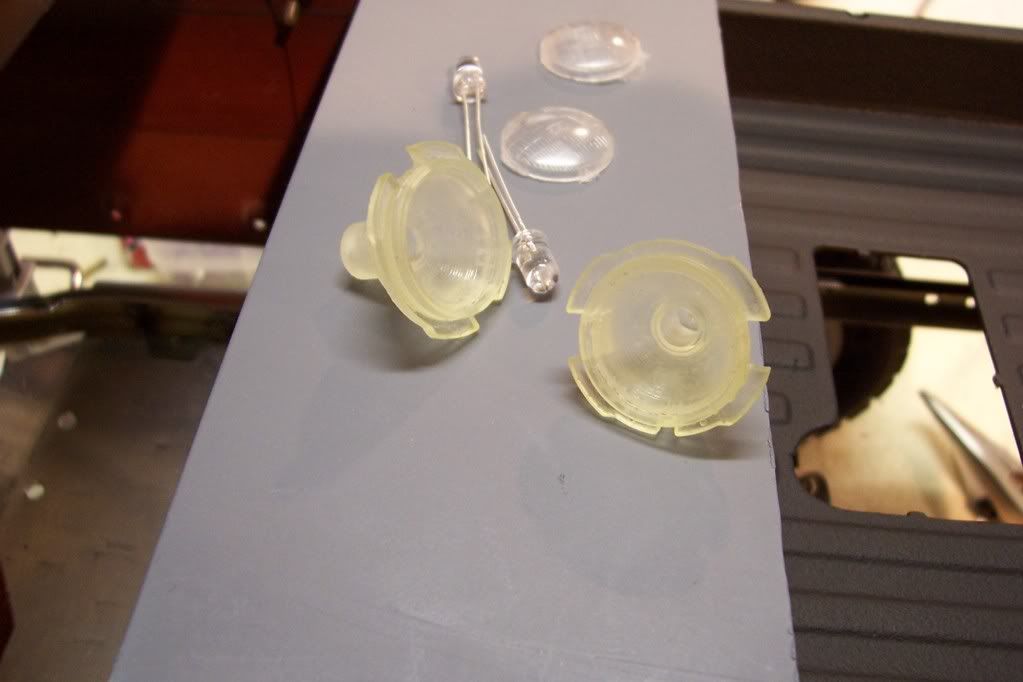 New super clear windshield from BruiserBuilder, all cut out and ready to rock 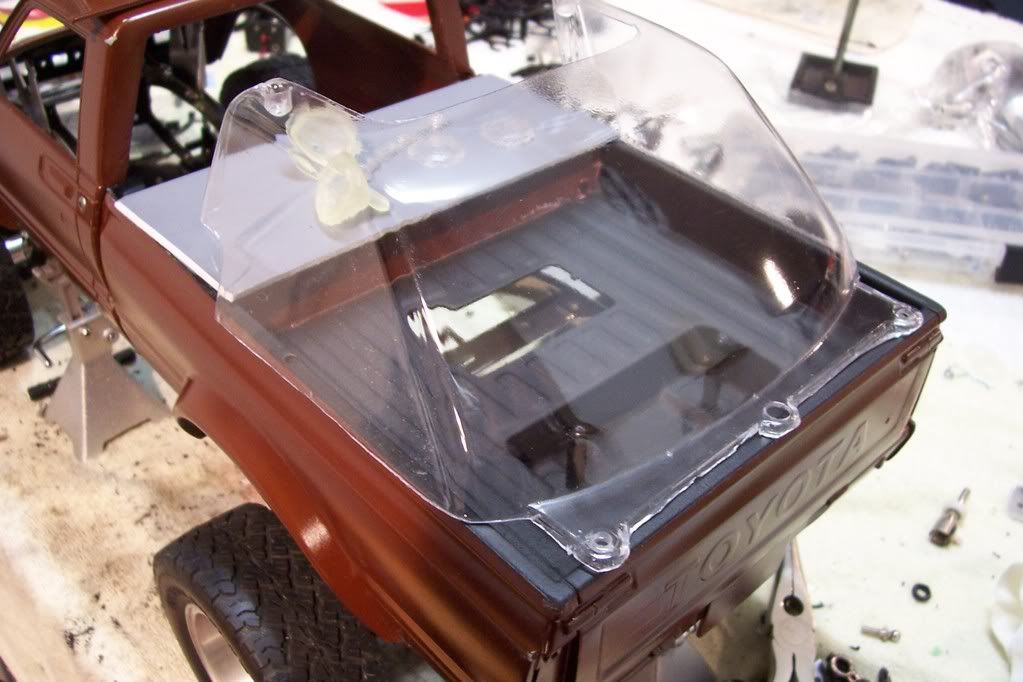 well thats it for now guys...its bed time...work 2morow and its late hur |
|
| |
 |
 1BadJeepBruisers Chino Clone. An RCC Legend - Similar Threads
 | ||||
| Thread | Thread Starter | Forum | Replies | Last Post |
| The "Chino Clone" - Chapter 2 | 51WillysJeep | 1.9 Scale Rigs | 17 | 05-18-2010 01:22 PM |
| Opinions sought: Can I get there from here? High Lift --> Chino clone | surfimp | 1.9 Scale Rigs | 12 | 12-28-2007 08:30 AM |
| |


 Linear Mode


