| |
 02-25-2007, 10:34 PM
| #61 | ||
| Sinking with the ship   Join Date: Mar 2005 Location: El Capitan...sole survivor and sinking fast
Posts: 8,864
| Quote:
Quote:
 | ||

|  |
| Sponsored Links | |
| | |
|
02-25-2007, 10:48 PM
| #62 | |
| [HOONIGAN]  Join Date: Nov 2005 Location: Grand Junction
Posts: 4,269
| Quote:
| |
|
| |
|
02-25-2007, 10:49 PM
| #63 | |
| Sinking with the ship Join Date: Mar 2005 Location: El Capitan...sole survivor and sinking fast
Posts: 8,864
| Quote:
ahhhhhhh thats a saweet idea, thanks for the tip, ill try to hit up one of those places this week... I am pretty good with a file so that shouldnt be a problem | |
|
| |
|
02-26-2007, 12:24 AM
| #64 |
| Gettin back on the horse Join Date: Feb 2006 Location: Hoonsville
Posts: 6,671
|
Dang wrecker has all the tricks. god i love these builds havent seen one you've done that doesnt look amazing. keep it up! |
|
| |
|
02-26-2007, 11:15 PM
| #65 |
| Oppan Gangnam Style   Join Date: Jun 2005 Location: Shingle Springs
Posts: 5,164
|
Looking good Mike! My rear shock mount is bolted to the rear of the crossmember, just drilled two holes. I think I already sent you this pic. the tops of the shocks are spaced 33mm apart (if you are running the Traxxas long 3.5" shocks) for minimal torque twist and decent articulation.  |
|
| |
|
02-27-2007, 01:17 PM
| #66 |
| I wanna be Dave Join Date: Aug 2005 Location: G6'N
Posts: 7,391
|
Mike I like poop brown |
|
| |
|
02-27-2007, 03:11 PM
| #67 | |
| Sinking with the ship Join Date: Mar 2005 Location: El Capitan...sole survivor and sinking fast
Posts: 8,864
| Quote:
-Mike | |
|
| |
|
02-27-2007, 03:55 PM
| #68 |
| Rock Crawler Join Date: Nov 2004 Location: Lost in Florida
Posts: 934
|
what trans you puttin in this baby, mike?
|
|
| |
|
02-28-2007, 11:44 AM
| #69 |
| I wanna be Dave Join Date: Dec 2005 Location: Orlando
Posts: 7,420
|
Looking good Mike,Duddy Brown should be the name. *Did you get a new camera?Nice pictures.... |
|
| |
|
02-28-2007, 01:11 PM
| #70 | |
| Sinking with the ship Join Date: Mar 2005 Location: El Capitan...sole survivor and sinking fast
Posts: 8,864
| Quote:
Actually alot of time I try to use my GFs camera as my camera doesnt have a powerful enough flash and is only a digital zoom. Hers has a little less pixes, but has a much better flash, many different pre sets for taking pictures and is a optical and digital zoom. Plus I also found a small mini tripod that I had for a digital camera from like 4-5 years ago and it turns out to be the same thread so I have been using her camera on the Tripod and it really takes nice pictures then I am currently working on making the area where the sleeper shell was into a tool box, just like deans rig...hence why its a clone eh? more progress pics soon, still waiting for some parts in the mail -Mike | |
|
| |
|
02-28-2007, 01:23 PM
| #71 | |
| Quarry Creeper Join Date: Jul 2006 Location: Northglenn
Posts: 310
| Quote:
| |
|
| |
|
02-28-2007, 02:49 PM
| #72 | |
| Sinking with the ship Join Date: Mar 2005 Location: El Capitan...sole survivor and sinking fast
Posts: 8,864
| Quote:
I am going to be using the plastitruc diamond plate to construct mine, then hit it with some testors silver and itll look like the real deal.I havent forgotten about those link lengths yet either, but I adjusted the wheelbase last night, moved the rear axle forward a mm or 2 (it was a tad bit off) and I am not sure if the way I have my top links mounted if its going to clear the drive shaft off the pede trans yet, so once I get all that figured out Ill give ya a final length -Mike | |
|
| |
|
02-28-2007, 04:52 PM
| #73 | |
| Quarry Creeper Join Date: Jul 2006 Location: Northglenn
Posts: 310
| Quote:
I have painted mine in the past with Alclad II laquer but found by using House hold Aluminum foil as it looks more like real metal from the tint. Just need to clear it as the foil is really fragile. Here is a pic from the rear with the toolbox lid closed. 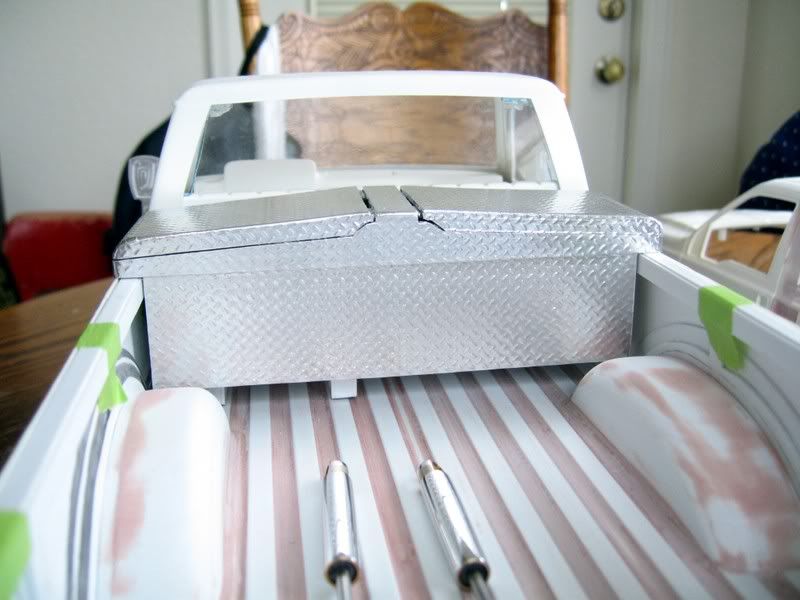 Mike you need to squint so you don't see the project in the background. F350 Quad Cab w/ Shortbed. I cut about 3/4" out of the bed. Side view with both lids open. 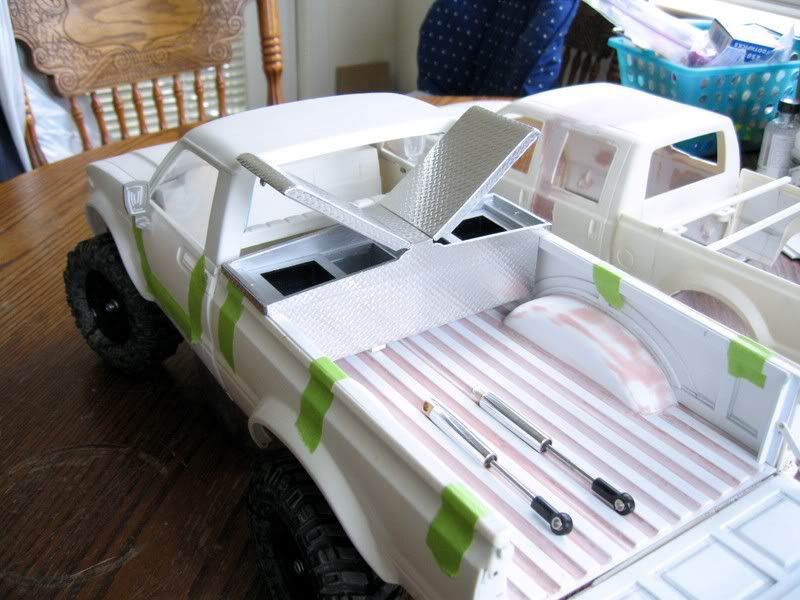 Then Lastly is with the toolbox out of the bed of the truck. 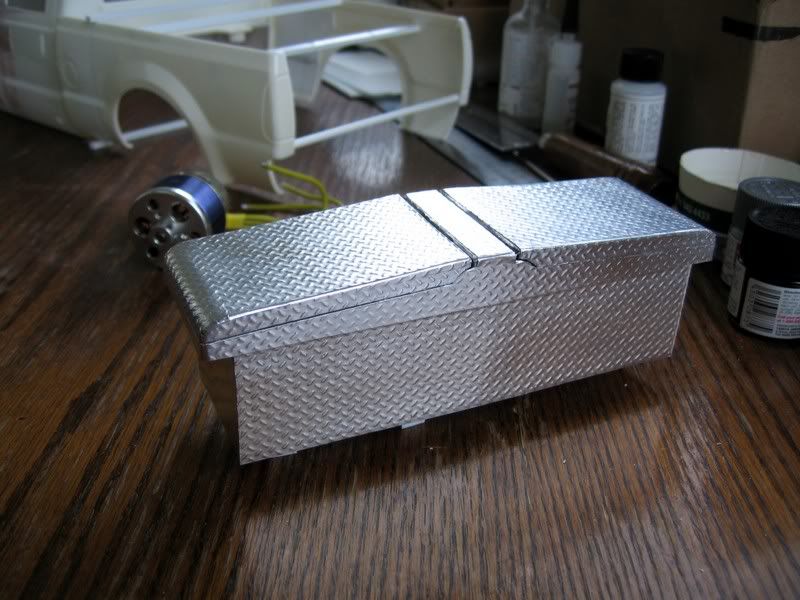 Sorry for the dark pic. | |
|
| |
|
02-28-2007, 08:49 PM
| #74 |
| Newbie Join Date: Feb 2007 Location: Winnipeg
Posts: 6
|
Wow! This build has me on the edge of the chair. I love these trucks and the detail is amazing. The shocks and doors stand out for me. Nice tool box pics too. Eugene |
|
| |
|
02-28-2007, 09:13 PM
| #75 |
| Oppan Gangnam Style Join Date: Jun 2005 Location: Shingle Springs
Posts: 5,164
|
Eviltwin, that tool box is insane! Way better than mine. |
|
| |
|
02-28-2007, 09:45 PM
| #76 |
| Pebble Pounder Join Date: Jul 2005 Location: in the basment with a box of chocolate
Posts: 149
|
Nice color choice My 81 is painted that same color.
|
|
| |
|
03-01-2007, 07:10 AM
| #77 |
| Sinking with the ship Join Date: Mar 2005 Location: El Capitan...sole survivor and sinking fast
Posts: 8,864
|
Bart that is AMAZING BTW, the ford is looking awesome -Mike **EDIT*** LMAO we have the same kitchen chairs...haha just in case you wanted to know |
|
| |
|
03-01-2007, 07:59 AM
| #78 |
| [HOONIGAN] Join Date: Nov 2005 Location: Grand Junction
Posts: 4,269
|
Holy crap that is a nice toolbox! I can't wait to see your's Mike. |
|
| |
|
03-01-2007, 09:05 AM
| #79 |
| Sinking with the ship Join Date: Mar 2005 Location: El Capitan...sole survivor and sinking fast
Posts: 8,864
|
Ok here is a small update... I detailed the Grill, and painted up the head light bucket 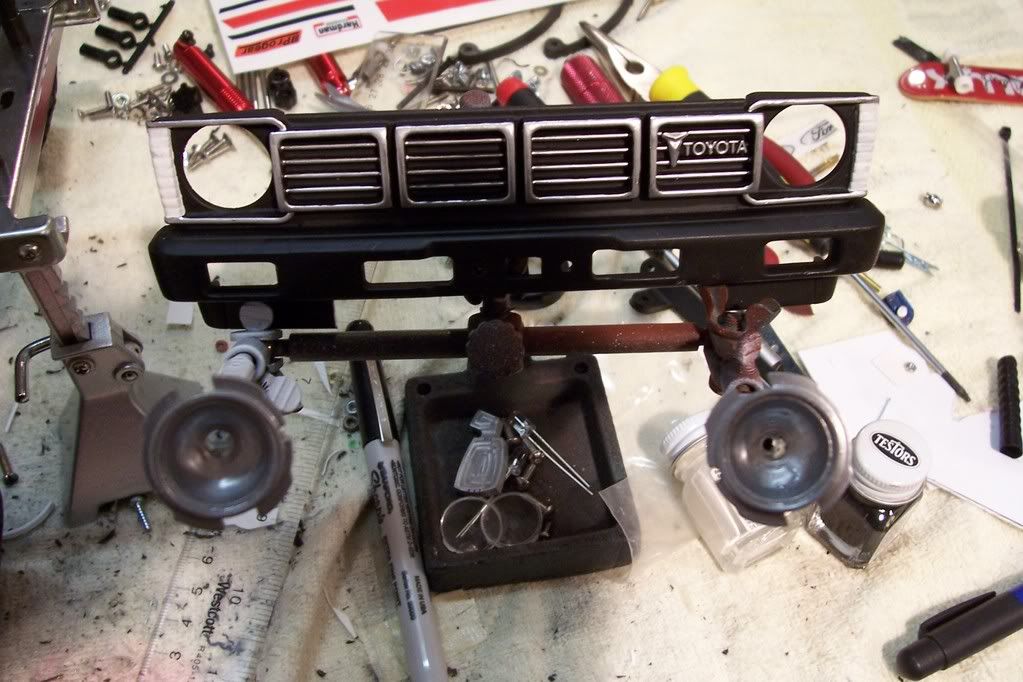 I also primed the cab hood and one fender again, this primer took nicely, so I am going to wet sand, prime it again and go from there (no pics...yet) I then started on the tool box...Originaly I was just going to glue a cover over the area like the body had when I got it, but since I am waiting on alot of parts still, and the paint work isnt done yet, I decided to do it the right way. This thing is going to end up look totally bada$$...1st roll over will make me cringe so I started by roughing the bed surface with some sand paper 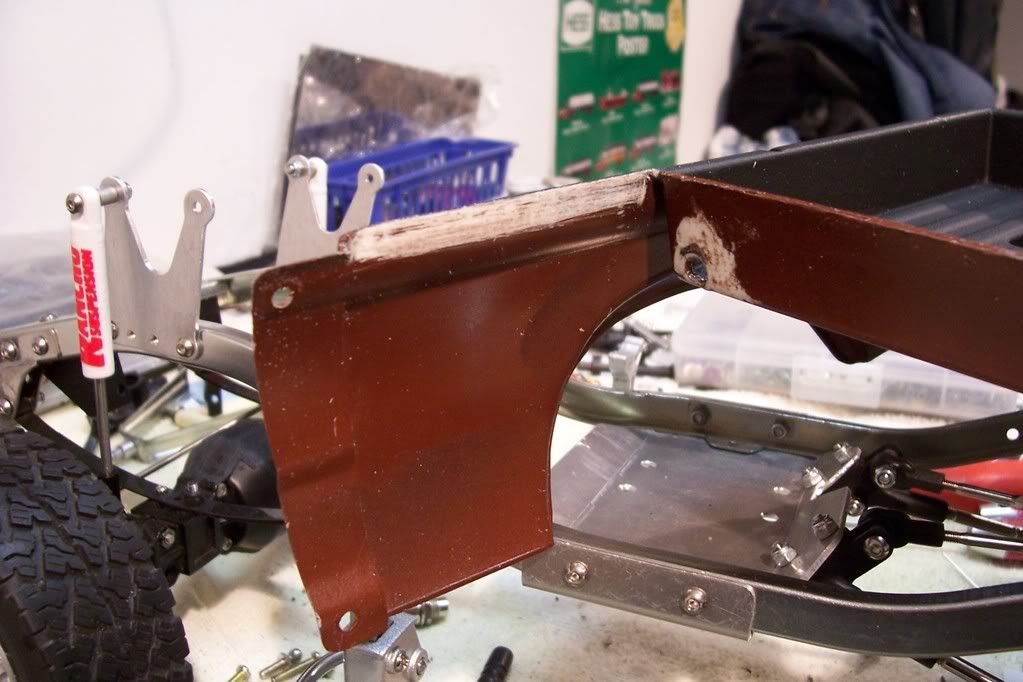 Then I glued in some styrene 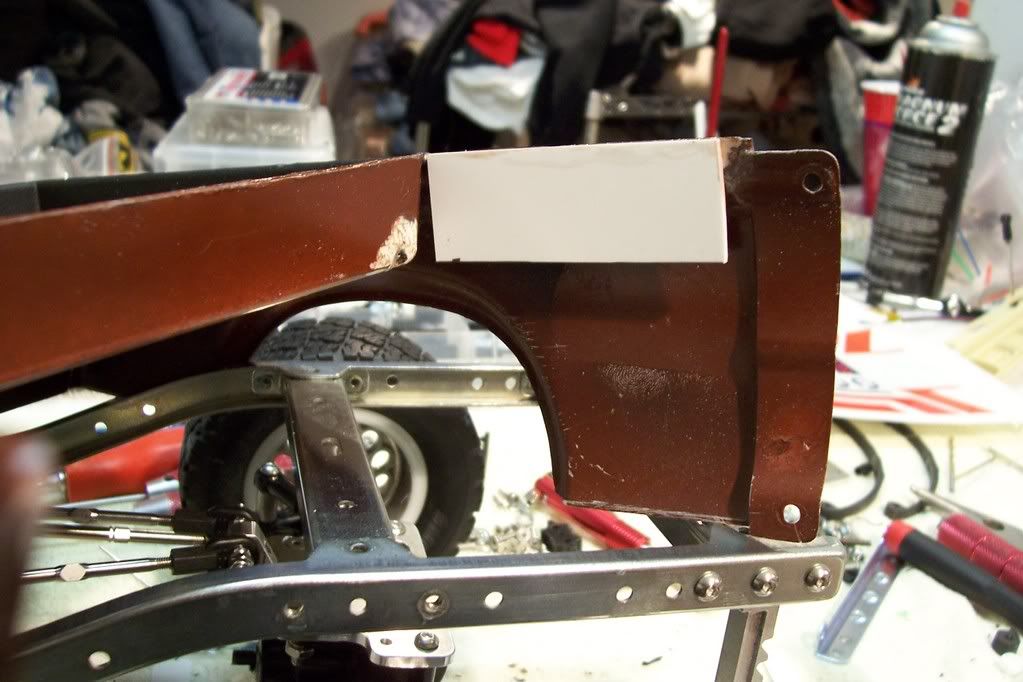 I got some nice thick stuff from the LHS, should hold up nicely and add some rigidness to the bed now that the sleep is gone 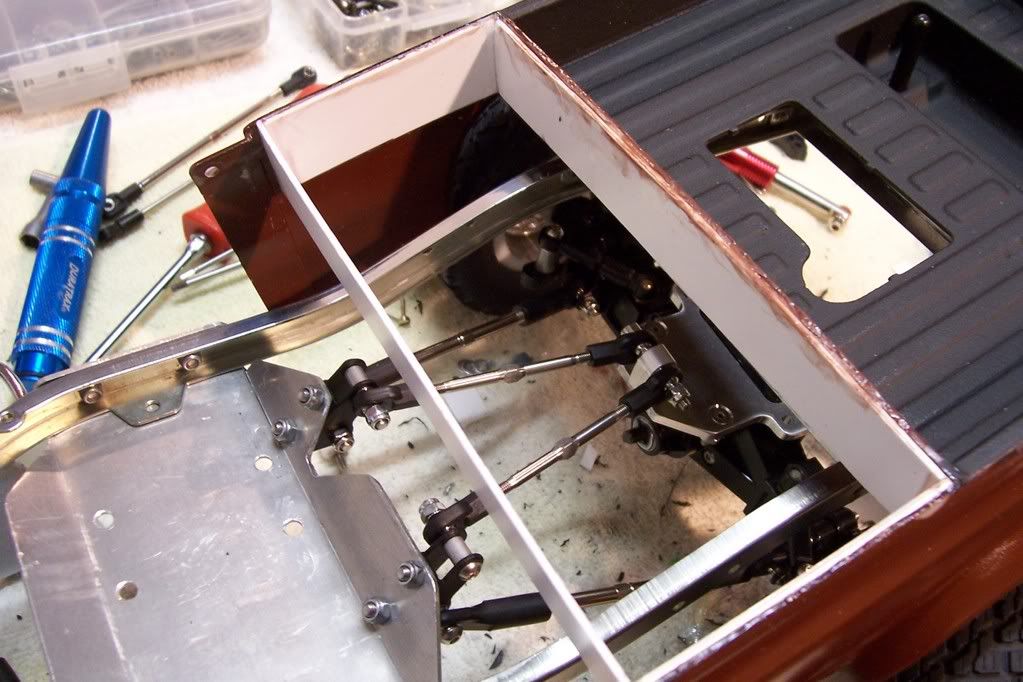 The I glued in the front and back panels The bed had some weird random holes drilled in it right in the corners where the sleeper shell ended...well almost like something hot enough to melt the plastic was poke through...weird. luckily, that is spot is part of the tool box, and the new diamond plate styrene has *almost* completely covered the holes, cept for one lil spot on the left 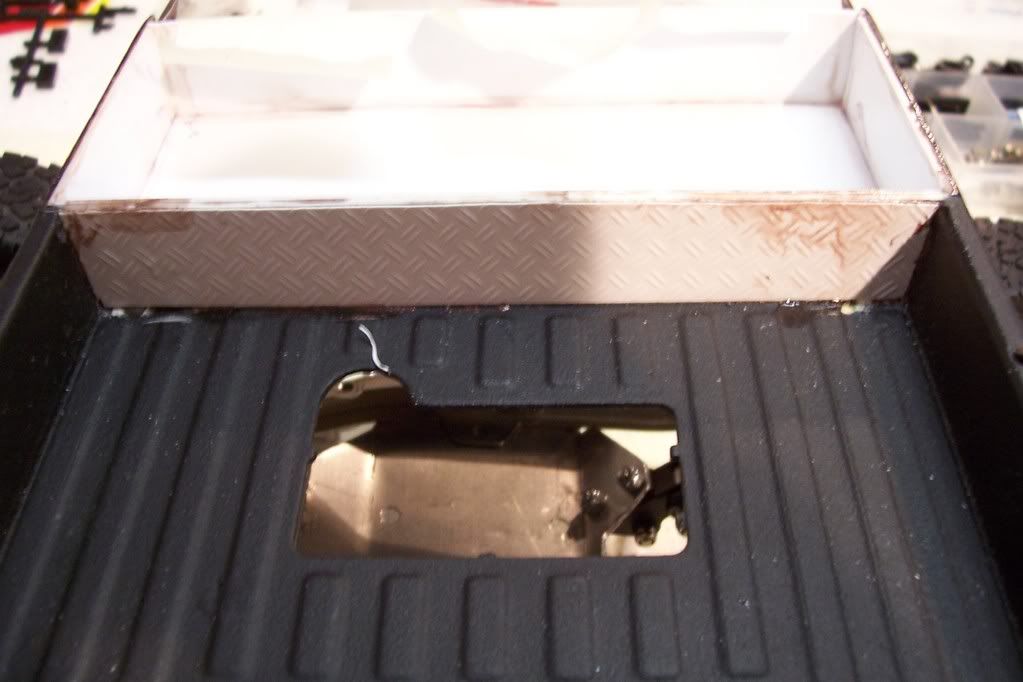 As you can see, I also added the bottom part of the tool box in 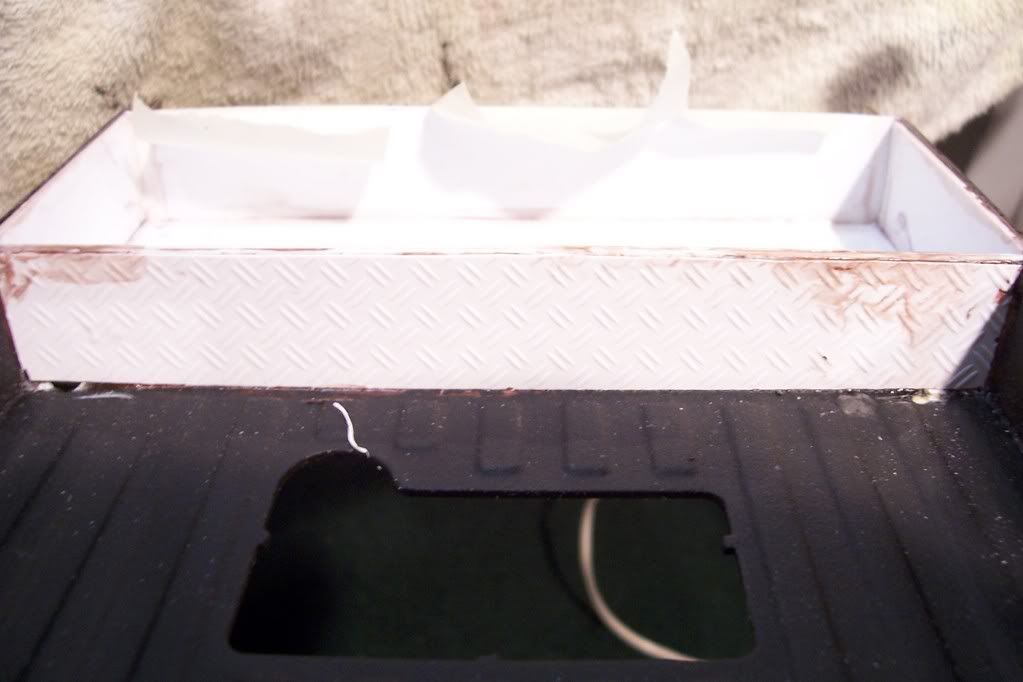 Next up is the tool box top, I am going to build it up some to look like an actually lid rather then just a flat piece across. I was thinking of hinging it, but cant think of a good way to hinge and keep it closed, so I am probably just going to make it Velcro so I can take the top on and off, plus I am going to do like Dean did and hide my switches for the lights and stuff inside, to one side, I am also going to make some separate compartments out of styrene, this way I can group the tools and extra parts. I was thinking today, that I will top the tool box off by mounting my MSD high lift jack to it, I think that will look cool I am also thinking of making fake latches on the out of tool box lid, like the kind you would grab to open it, I wish I had some extra door handle decals from a body, those would probably look perfect...anyone have any extras Well thats it for now. much more to come -Mike |
|
| |
|
03-01-2007, 09:37 AM
| #80 |
| Quarry Creeper Join Date: Jul 2006 Location: Northglenn
Posts: 310
|
Hey Mike the Double Diamond Plate looks sweet, I almost bought some of that myself. Looking really good can't wait to see it finished up. Something else that you can do is just put like a button as some toolboxes just have a button on the outside and the lid just pops up. As for a latch before you diamond plate the sides if you drill a hole for some stainless steel piano wire through and on the lid you just drill a hole in a small piece of styrene. Then from the hole take an Xacto knife just cut a "V" to the edge. This piece will then just lock onto the small rod and hold the lid down. Just like scale 1/24 and 1/25 model builders do to hold the doors shut. This process I would also use on your Doors on the other Mounty (opener). |
|
| |
 |
 1BadJeepBruisers Chino Clone. An RCC Legend - Similar Threads
 | ||||
| Thread | Thread Starter | Forum | Replies | Last Post |
| The "Chino Clone" - Chapter 2 | 51WillysJeep | 1.9 Scale Rigs | 17 | 05-18-2010 01:22 PM |
| Opinions sought: Can I get there from here? High Lift --> Chino clone | surfimp | 1.9 Scale Rigs | 12 | 12-28-2007 08:30 AM |
| |


 Linear Mode


