| |
| |||||||
 |
| | LinkBack | Thread Tools | Display Modes |
 05-09-2009, 08:37 AM
| #1 |
| I wanna be Dave Join Date: Oct 2008 Location: Golden
Posts: 2,588
|
Ok, stepping into the Scale arena here. I'm building a Crew Cab Chevy Monster Truck. The theory is, someone bought a monster truck (monster patrol) and decided to make it back into a road/trail vehicle, but wanted a crew cab, so they spliced two bodies together and left some huge tires on it to fill the wheel wells. This is what my build will be. I've had this body for over 11 years. Yup 11 years, I got a Radio Shack Monster Patrol for Christmas one year, and I still have it, and it still runs. Last year, I decided to take the body off and make it into something different, but use hobby electronics, and came up with this: 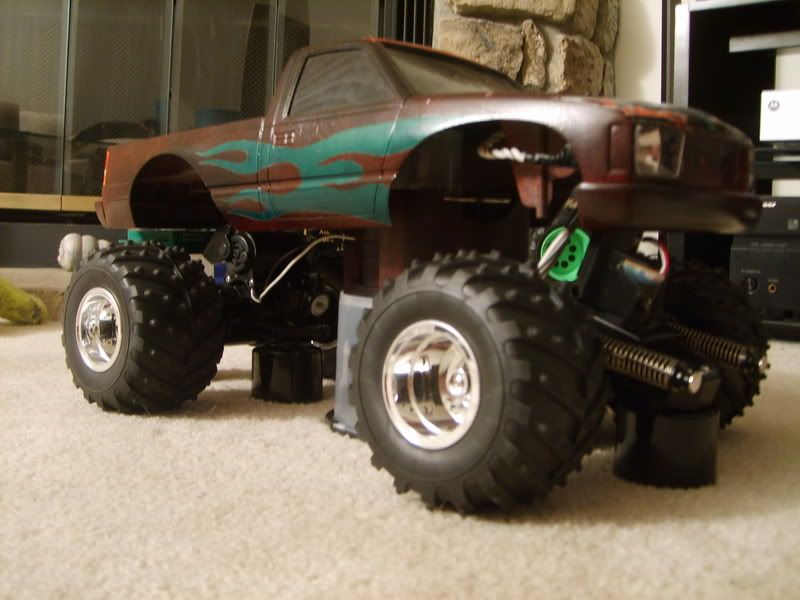 After some paint and a chassis: 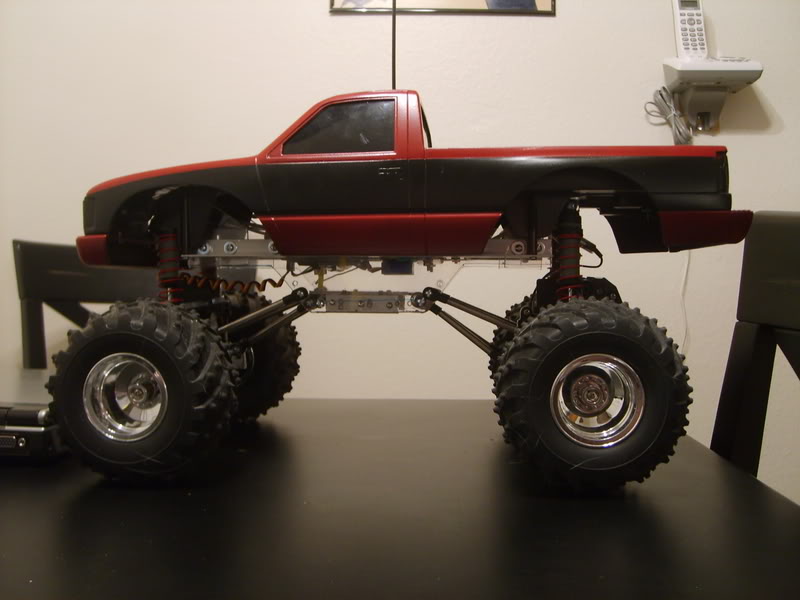 I went to radio shack to get a spare body for since this one has been through hell and back in 11 years. But because the truck was too fast for how tall it was, I kept scraping up the original body. So, that truck got a new body shell for it:  So, I decided to take the two bodies I had and make the crew cab: 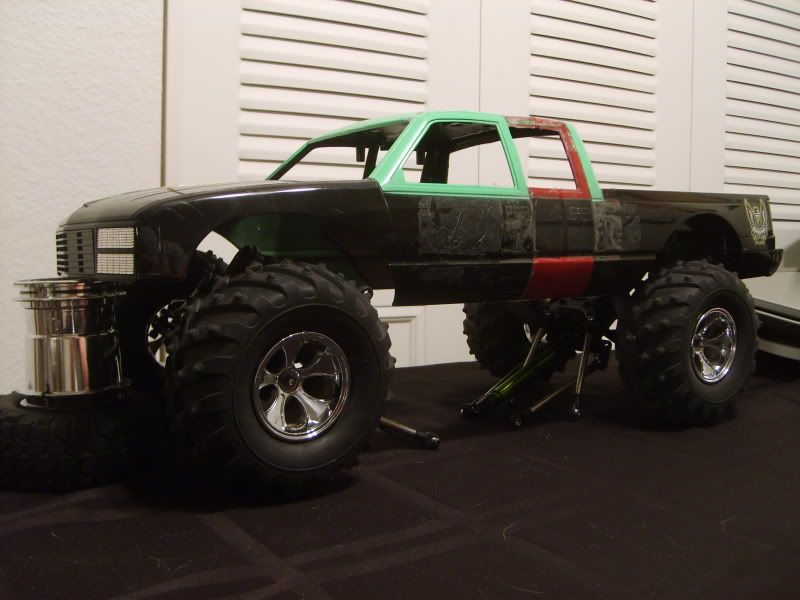 Those wheels just didn't look right though, So I picked up some 2.2 Claws on a trade, they looked like this when I received them: 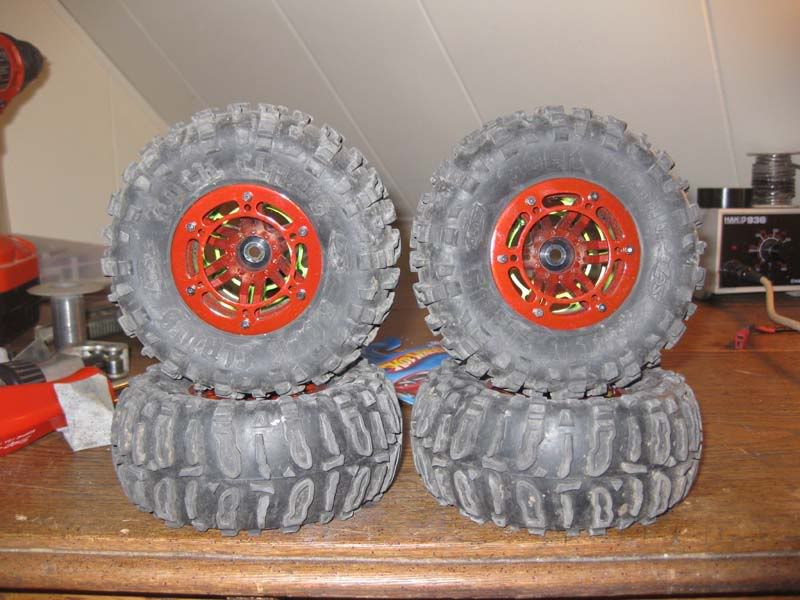 So I stripped the paint, and sprayed down some flat black on the rock rings: 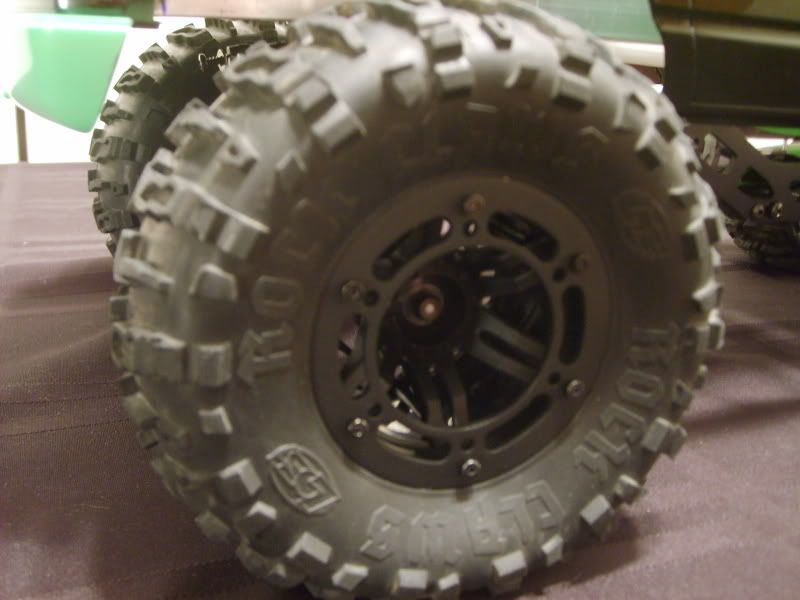 I had tried 1.9 wheels, but they looked so small in the existing wheel well cut-outs (since the body used to be a monster truck) so the 2.2's look a lot better: 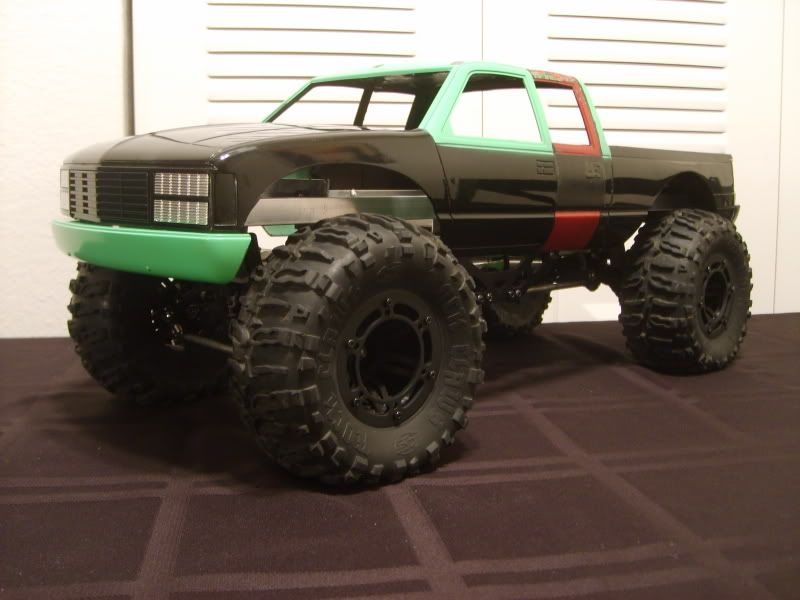  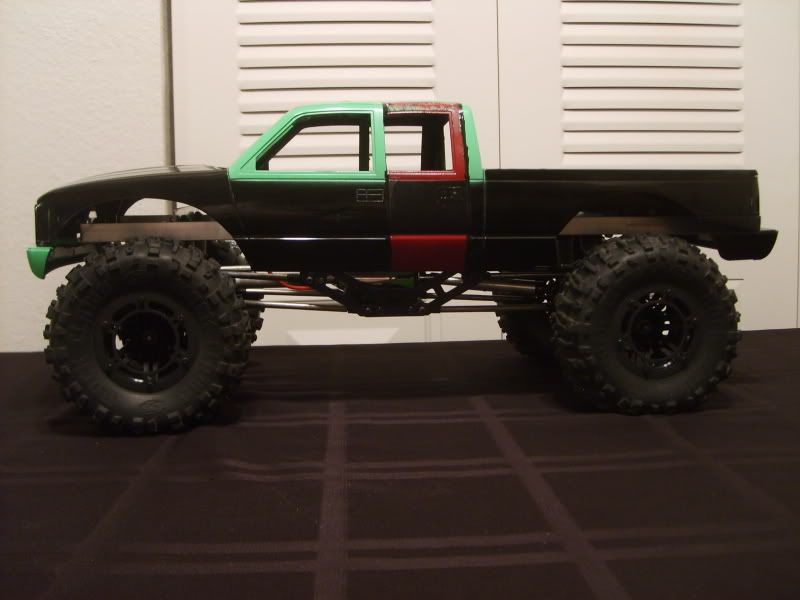 And, of course, the mandatory flex shots: 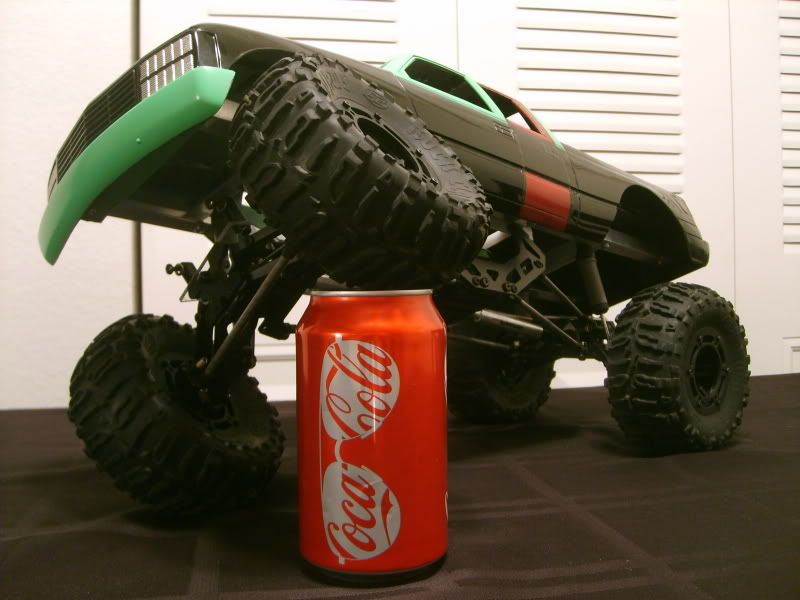 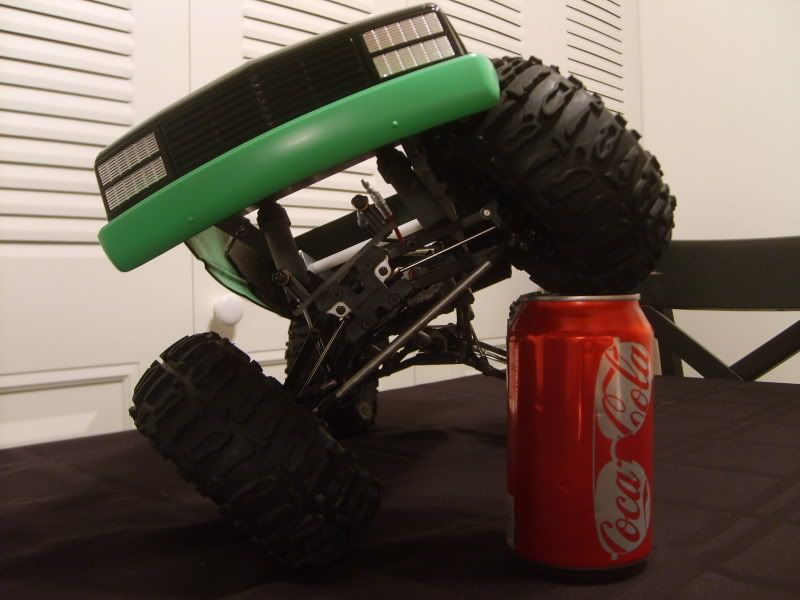 Right now it's got MLST axles, but I'm looking for a new axle combo. I like the width right now, so that is going to be hard. I may go with MRC axles, but I'll have to sell some extra parts to get them. The body is made of ABS, so I just used Oatey Brand ABS Cement to join the pieces, and as a filler: 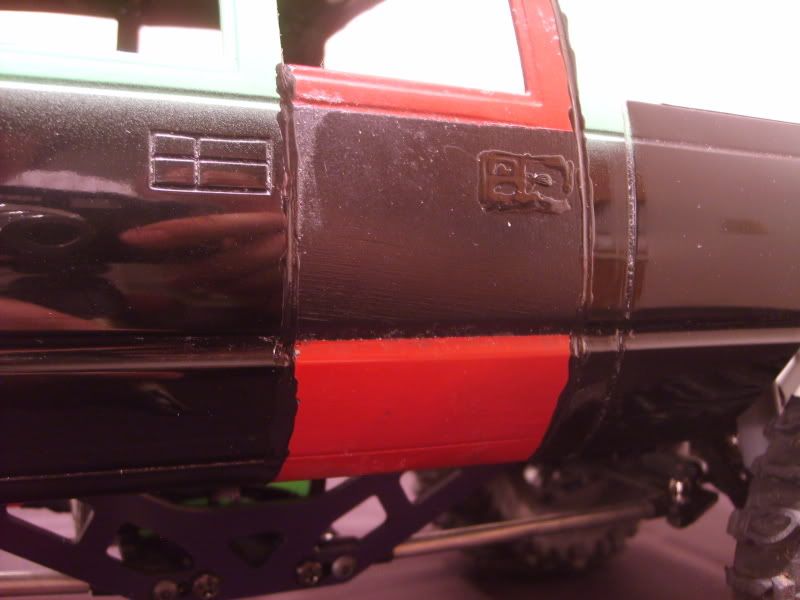 Roof holes being filled: 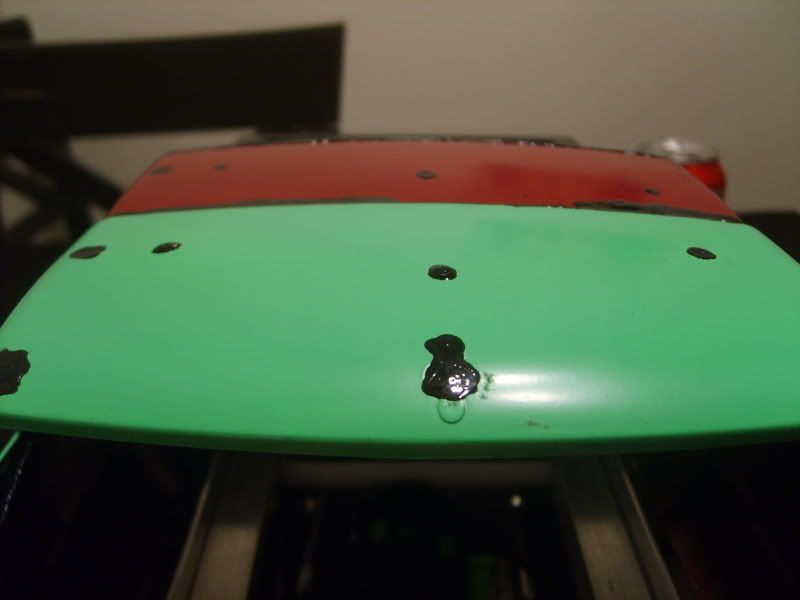 I braced the joints with some scraps from the old body to make them a lot more structurally sound:  I can twist the body pretty hard and the joints just twist along with it. Basically I fused the two pieces together so they are chemically one piece. The ABS cement has MEK that starts to dissolve the base material, and as the MEK evaporates, the ABS resin starts to bond to the partially dissolved base, and creates new molecule chains. I still have quite a bit to do to consider this done. I'm not doing an interior, yet, because I don't have one, so the original blacked out windows are going back in. The body still needs sanding and more cement to fill in low spots (no bondo on this truck) and some paint. Still kicking around ideas for paint though. I'm going to paint the chassis flat black so it doesn't stand out as much. The trans needs a spur and pinion installed. I need to make a plate to mount the electronics. I need to get a servo for it, considering the CPE $20 high torque servo. I need to find a good place to mount the battery pack, since this is a little taller ride height, as low in the chassis as possible would be ideal. I have the spare bed from the second body, I think I'll make into a trailer, as well as a flat bed trailer to tow the Crawler and Drifter around. The bed will get a soft shell maybe, and some scale accessories tossed in. I'm going to work on lighting, maybe make a roof mounted light bar. If I can get some brazing done, I may end up with some new bumpers and rock sliders. So, basically there's a lot to do. Constructive criticism appreciated. |

|  |
| Sponsored Links | |
| | |
|
05-09-2009, 10:55 AM
| #2 |
| RCC Addict Join Date: Mar 2009 Location: In a very dark cave can't you tell...
Posts: 1,708
|
I like what I see so far. Keep us posted on your build.  |
|
| |
|
05-09-2009, 01:38 PM
| #3 |
| Rock Crawler Join Date: Jul 2008 Location: gilbert
Posts: 613
|
Do you think that the cement you used will work on a new-bright body? I have some body lines to fill and that seems to be a strong bond.
|
|
| |
|
05-09-2009, 04:50 PM
| #4 | ||
| I wanna be Dave Join Date: Oct 2008 Location: Golden
Posts: 2,588
| Quote:
Quote:
The small bead of cement was done with a small squeeze bottle so that I could control the flow of the cement, so if you are filling body lines, then you'll want to get some. I got some electronics, and made a little mount for them, but I'm not sure they work, so I'll charge up a battery and test it all out later. Update coming soon. | ||
|
| |
|
06-03-2009, 07:33 AM
| #5 |
| I wanna be Dave Join Date: Oct 2008 Location: Golden
Posts: 2,588
|
I got the electronics mounted, took it outside and blew the plastic diffs in about 3 seconds. It was going pretty good for those three seconds though. So, I got some metal gear diffs from the MLST2 and MRC. I also needed to trim the driveshafts just a little to get them to mount to the MRC input shafts. I put the 87t spur/20t pinion back on, and it's a lot better than the 81/24 that was on it before. It's still quick but not crazy. I still need to find a good place to mount the battery, right now it's on top of the chassis rails, and it makes the truck a little top heavy. I'm thinking on the rear axle/links, since there's space there for it. I also need to find better shocks, or maybe just better springs. These are too stiff right now. Now I need to start working on the body and making it look nice. |
|
| |
|
08-03-2009, 09:03 PM
| #6 | ||||||
| I wanna be Dave Join Date: Oct 2008 Location: Golden
Posts: 2,588
|
Been a while for an update, but here it is: Quote:
Quote:
Quote:
Quote:
Quote:
Quote:
Up till recently, I haven't done a lot to it, since the MLST axles weren't going to work out. I got the Wheely King Axles in a trade, so I figured I could put them to good use on this build. They are of course a little wide for the body with the Axial wheels, so I got some HPI3036 2.2 Black Mesh wheels and glued the claws to them. This helps keep the width down. I'm still going to need to try and make some fenders to help make the wheels not look so ridiculous. Here's some updated pics: 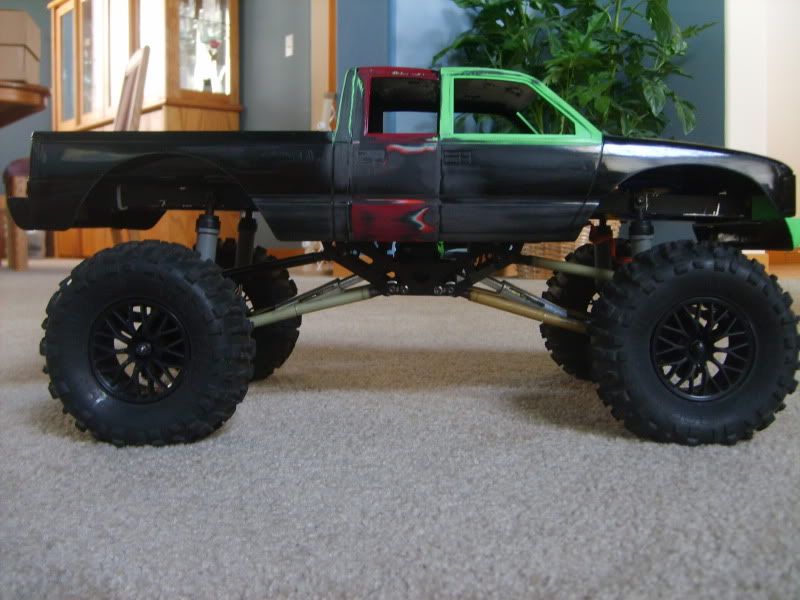 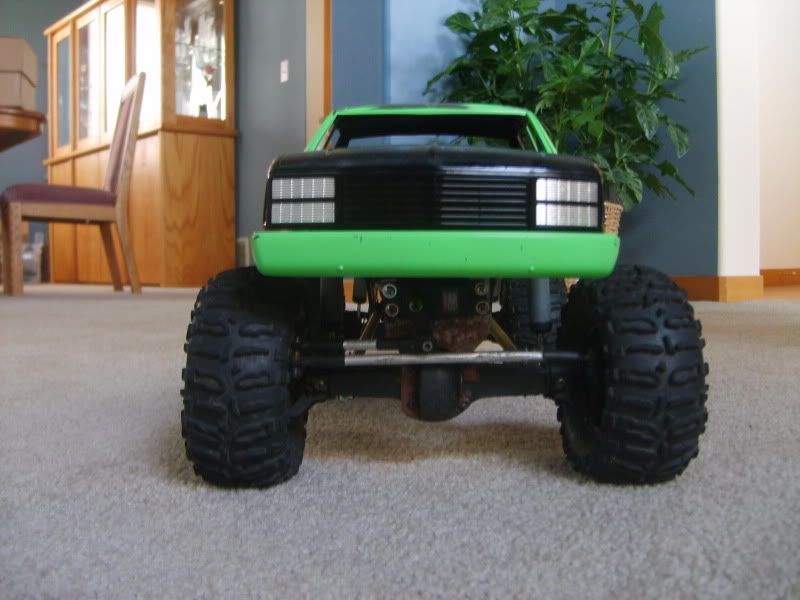 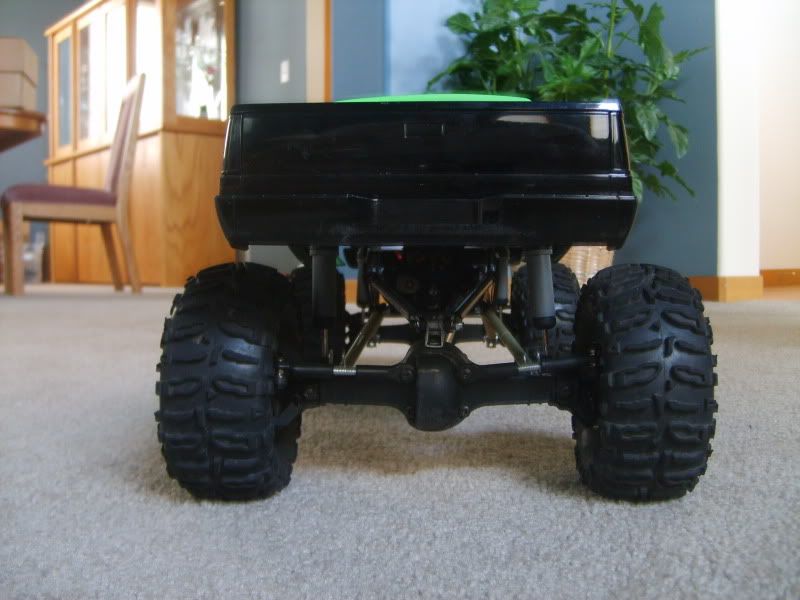 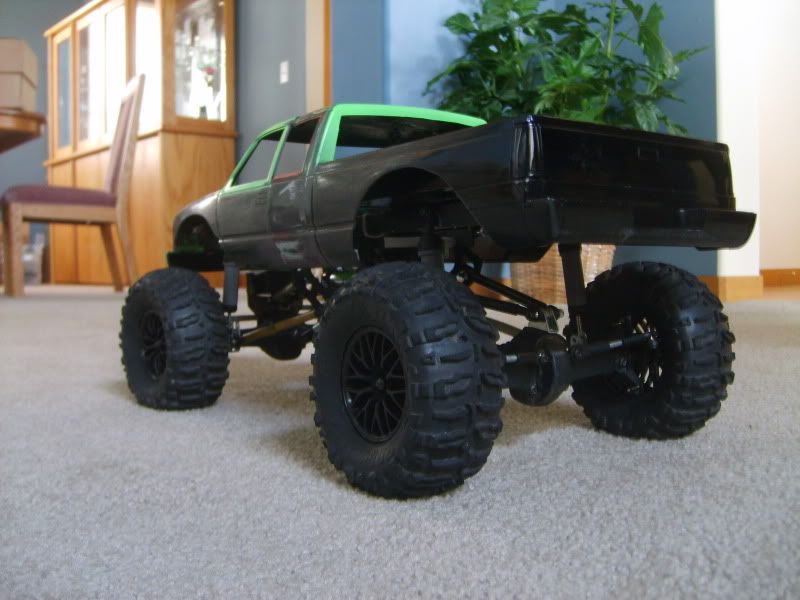  I've still got plenty of work to do with the body and making the crew cab look right. I also plan to make a servo winch (or get a 3racing one maybe) and make a new front bumper, rock sliders, and a spare tire mount in the bed along with a few small accessories. (Need better metal working and brazing equipment to do it though) I'd like to get some maglite reflectors and make a set of headlights to replace the chromed plastic ones the body came with. I've got a 3Racing Light kit to put in once that's all done. Still trying to figure out the color for it. I'm leaning towards red or 'Murdered Out' but may do some kind of two tone. I may also look for some slightly shorter shocks, or maybe angle them in a little to drop the ride height a little. BTW the links in the photos are temporary to get the wheelbase right, but the back wheels are about 1/8" or 1/4" too far back. What do you guys think? | ||||||
|
| |
|
08-09-2009, 05:41 PM
| #7 |
| I wanna be Dave Join Date: Oct 2008 Location: Golden
Posts: 2,588
|
I got some pics from the little trail run on HWY 103 (towards Mt. Evans): 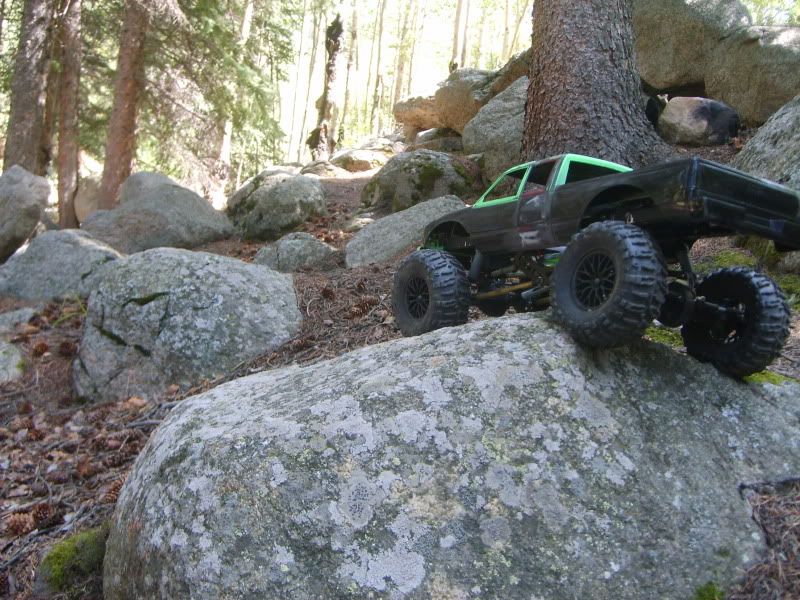 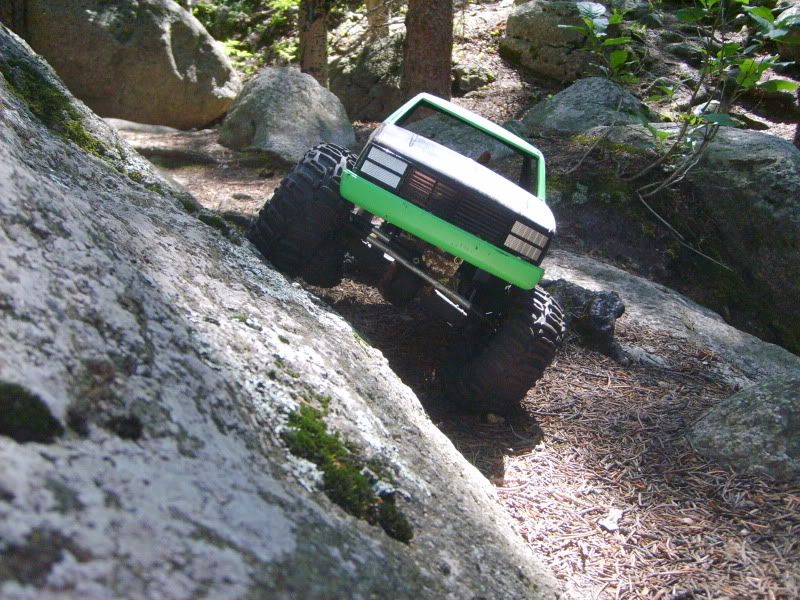 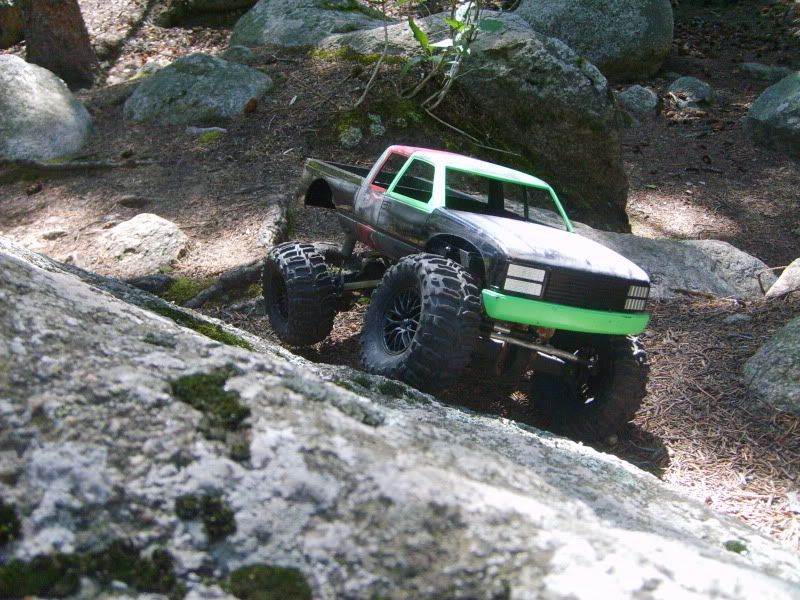 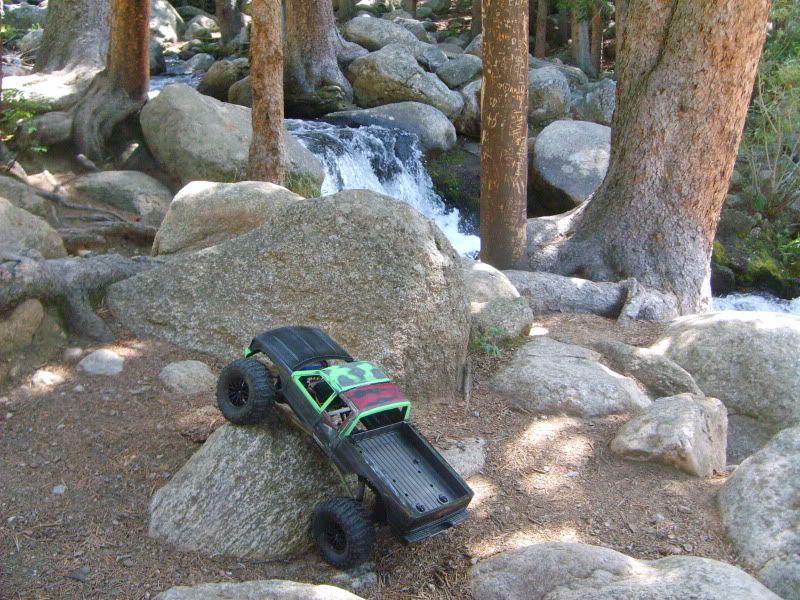 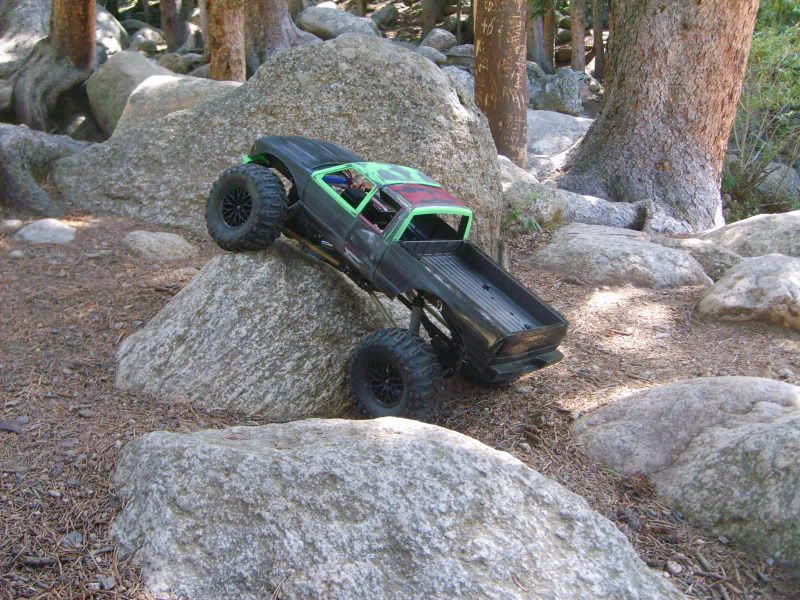 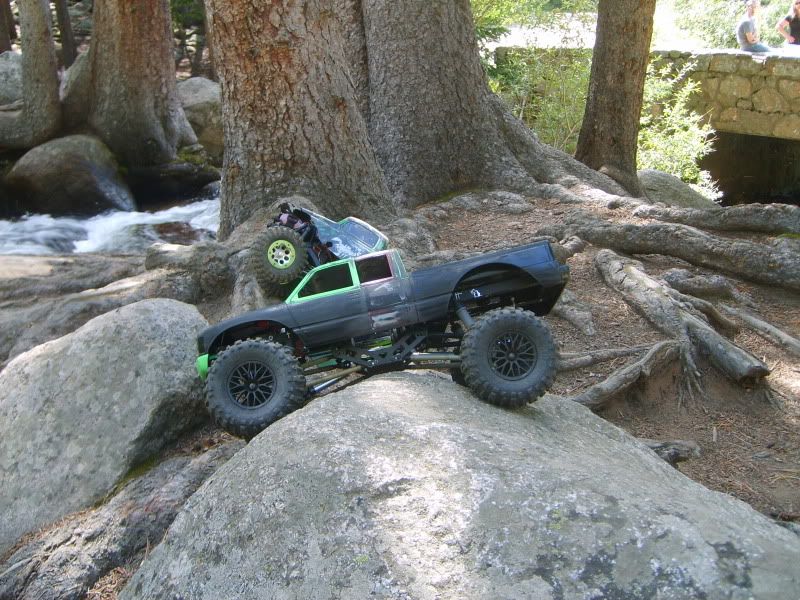 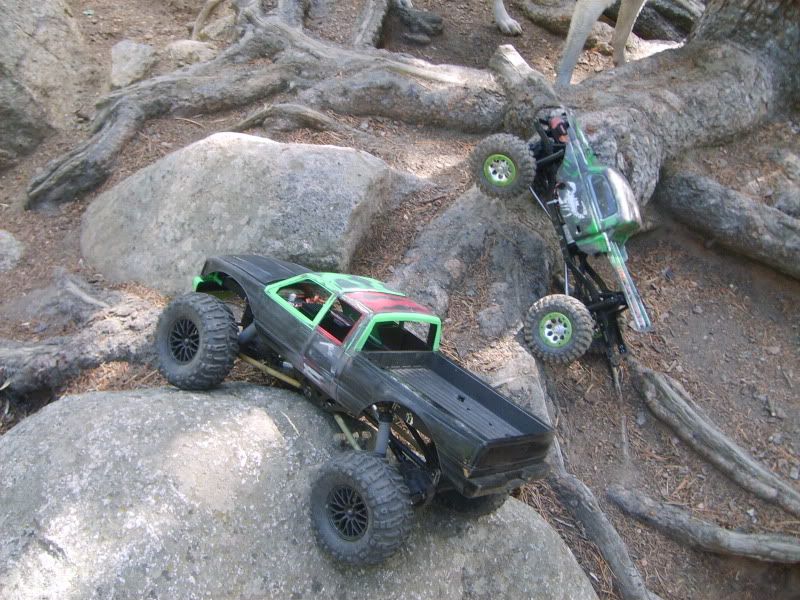  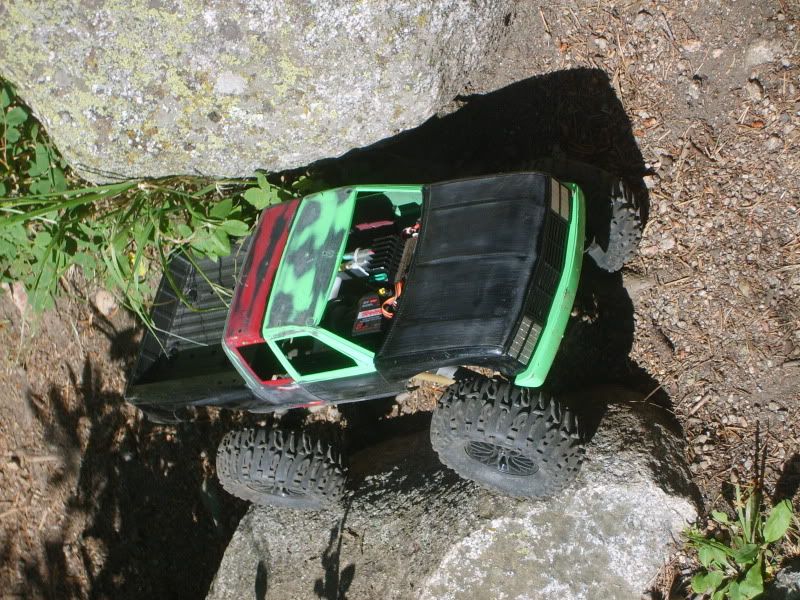  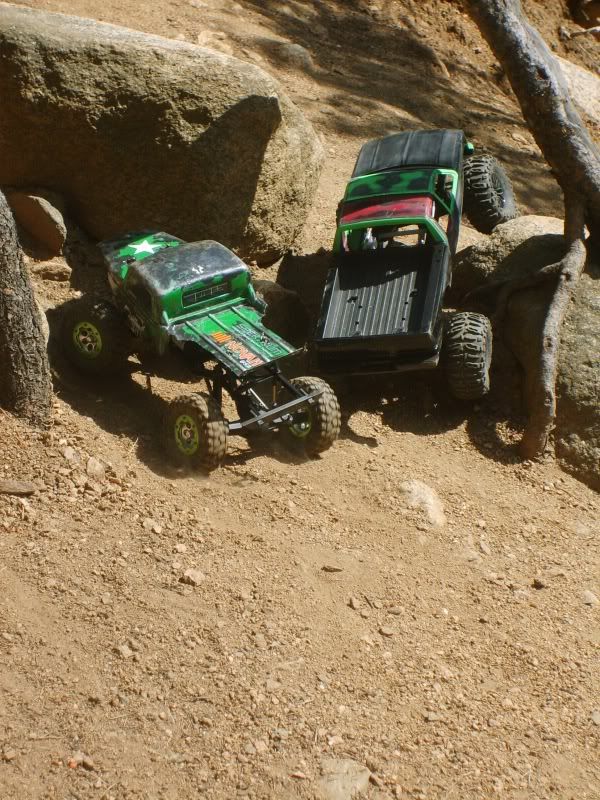 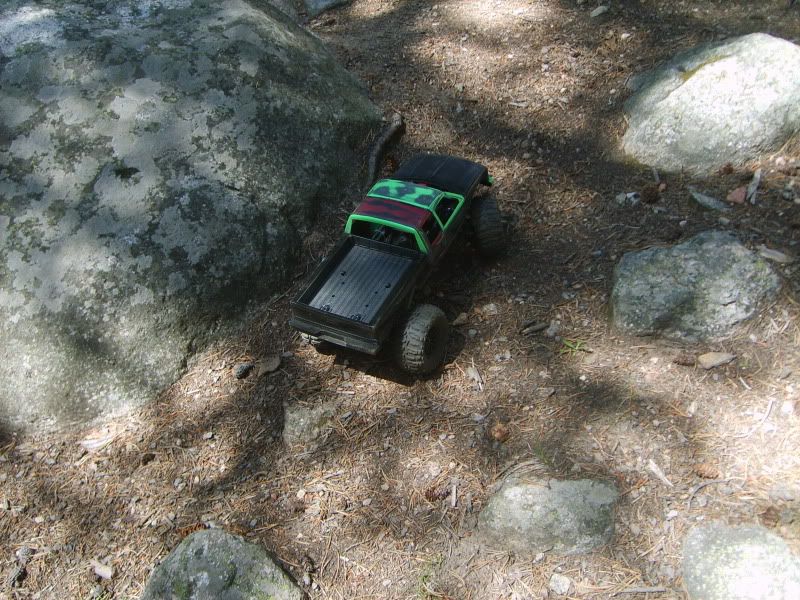 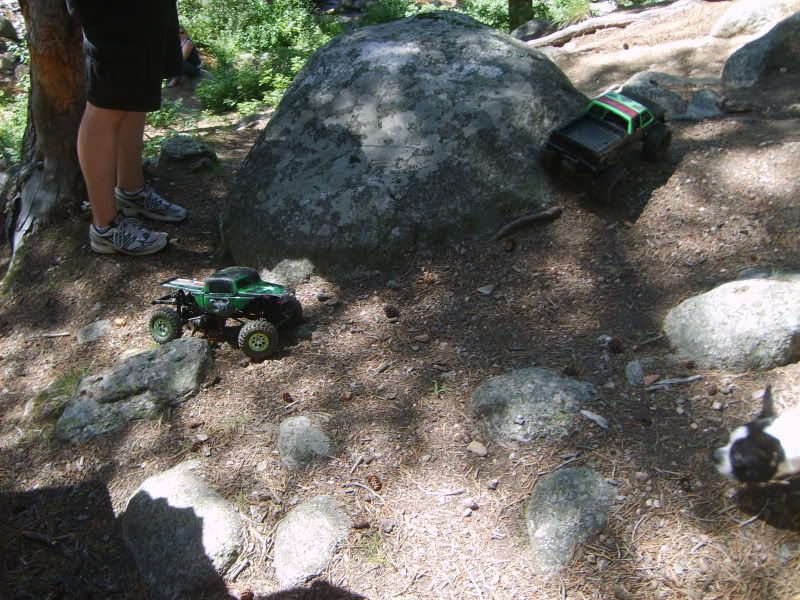 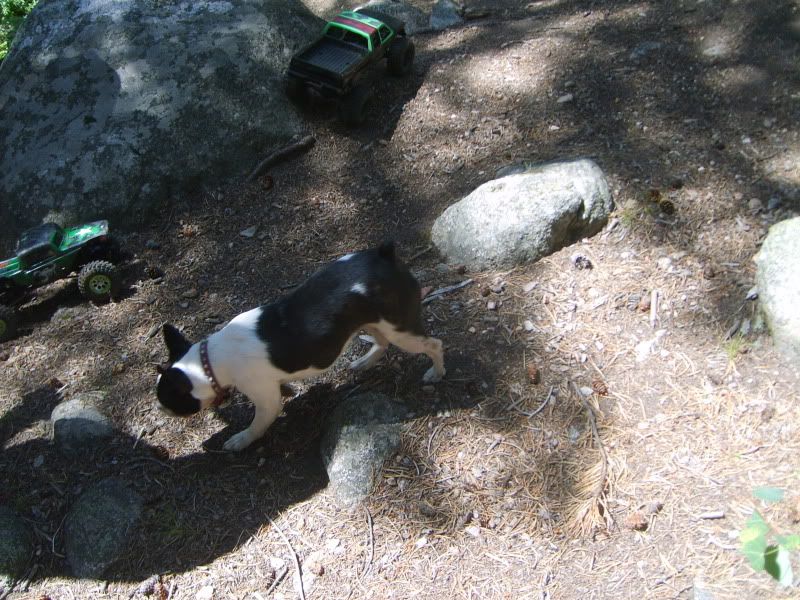 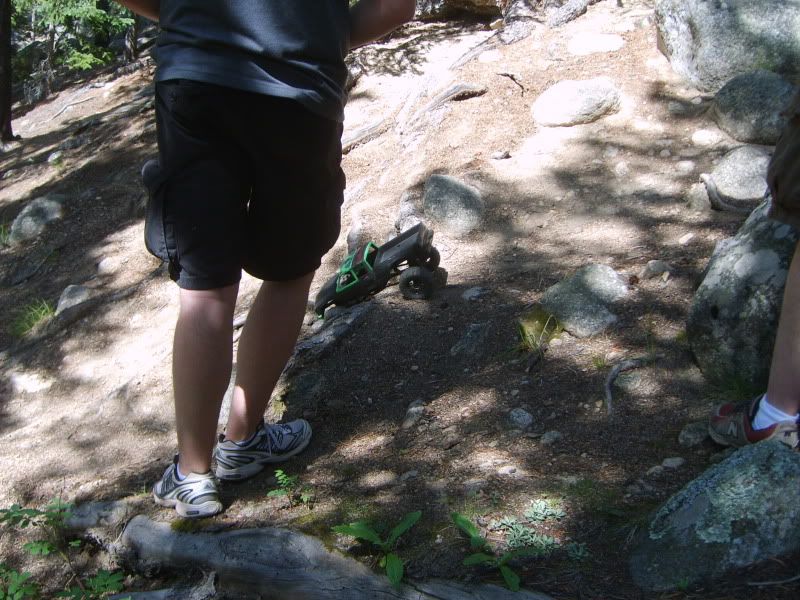  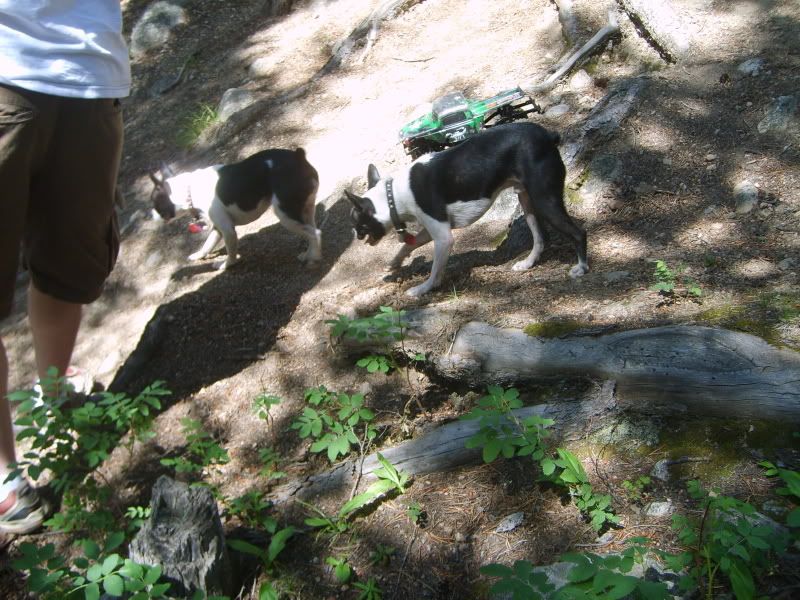 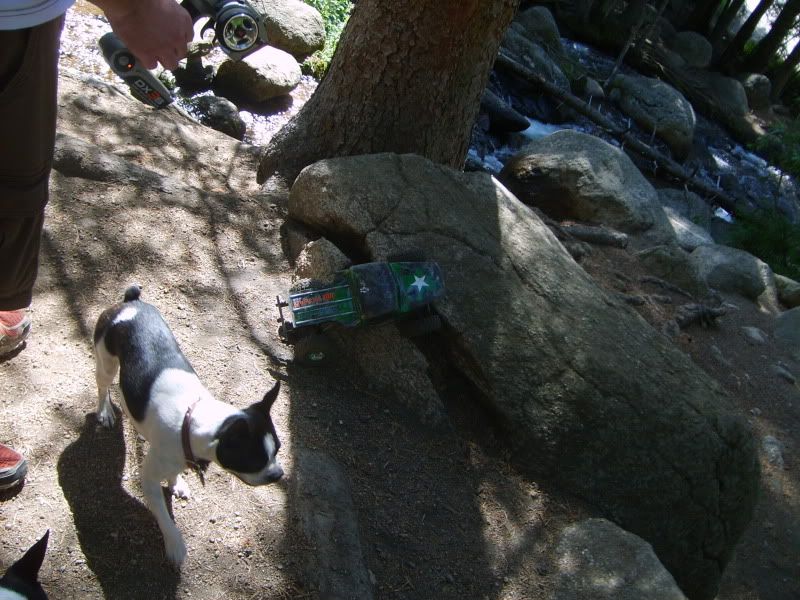 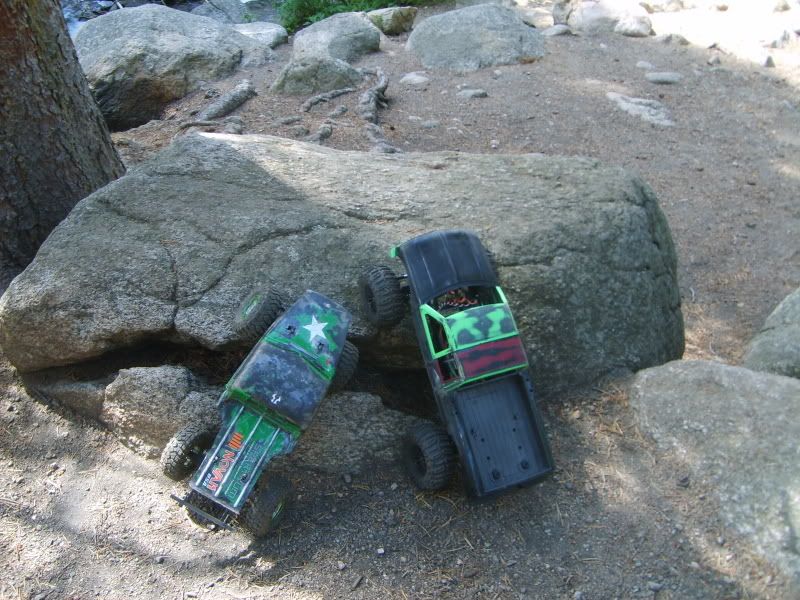 Fun Day! Now, I gotta get back to work on making this thing look nice. Last edited by monkeyracer; 08-20-2009 at 11:51 PM. |
|
| |
|
08-11-2009, 06:47 PM
| #8 |
| I wanna be Dave Join Date: Oct 2008 Location: Golden
Posts: 2,588
|
Small update: I got my new esc from a recent trade installed in the truck to replace the crappy Duratrax/Futaba ESC100 that was in it before. Now I can do reverse wheelies, and I still have nice low end control. |
|
| |
|
08-11-2009, 09:01 PM
| #9 |
| Newbie Join Date: May 2008 Location: Fountain Valley
Posts: 16
|
Looks good - thats my favorite Chevy Truck Body style. reminds me of my old 1:1
|
|
| |
|
08-12-2009, 07:49 AM
| #10 |
| I wanna be Dave Join Date: Oct 2008 Location: Golden
Posts: 2,588
|
Thanks! I like this version too, but I kind of like the newest ones more. I know new bright has the 1/8 silverados, so I may get a couple of those bodies and make an updated version. This truck is what I was after when I first started this build; Something that can go over the rocks and tree roots on the trails, but has a little better top speed than a crawler. I can creep along, but I can also do wheelies (which would be "scale" for an ex-monster truck) I'm still planning on using the MLST axles for a 1.9 build, but I need beefier dogbones until I can get the rear converted to MRC. This build will be the fun Monster Truck, the 1.9 will be the more "scale" build. I'm going to have to try and convert this to waterproof eventually though, most scale/trail runs involve some kind of water or mud. |
|
| |
|
08-12-2009, 12:44 PM
| #11 |
| RCC Addict Join Date: Mar 2009 Location: In a very dark cave can't you tell...
Posts: 1,708
|
Can't go wrong with a chevy. |
|
| |
|
08-12-2009, 09:37 PM
| #12 | |
| I wanna be Dave Join Date: Oct 2008 Location: Golden
Posts: 2,588
| Quote:
True! | |
|
| |
|
09-16-2009, 05:45 PM
| #13 |
| Quarry Creeper Join Date: Mar 2006 Location: Manitoba, Canada
Posts: 215
|
I have a scale build with my MP body as well! I love them and would love to get another one or two!! I'm wondering though, what scale is our monster patrol bodies? Thanks
|
|
| |
|
09-16-2009, 05:53 PM
| #14 |
| Quarry Creeper Join Date: Mar 2006 Location: Manitoba, Canada
Posts: 215
|
found my answer, its 1/10th!
|
|
| |
|
09-16-2009, 05:57 PM
| #15 |
| Rock Stacker Join Date: Jun 2009 Location: Chester
Posts: 93
|
Good job man!
|
|
| |
|
09-16-2009, 06:02 PM
| #16 | |||
| I wanna be Dave Join Date: Oct 2008 Location: Golden
Posts: 2,588
| Quote:
Quote:
Goobs also has a scale build using this body and he also did the crew cab to it. Quote:
| |||
|
| |
|
11-08-2009, 07:31 PM
| #17 |
| I wanna be Dave Join Date: Oct 2008 Location: Golden
Posts: 2,588
|
Wow, I haven't updated this thing since september? Well, decided to go with a widebody mod for this... Having the plastic delivered tomorrow and should get some pics of the work as I do it. I also need to soon make the new wide bumpers for it. The rear is just the plastic bumper extended, but the front will be metal, not sure what metal yet though. The rear fender extensions will have some angle to them so when it's up against a rock, it doesn't just get stuck (and it will look more like a trail-race-truck.) Here's a mock-up pic of the widened fenders:  And, I had a comp today, so last night I quickly fabbed up a chassis and cut some links, oh and waterproofed it, all in a couple short hours. I actually ran it with the cardboard and masking tape! The cardboard got a little soggy in the creek, but nothing too crazy. Only received -6 on my score for scale deductions, but when the body is done, I'll max out our local -30 max deduction. I'm looking to narrow the width just a little bit, so I will look into getting some axial knuckles for it, which should bring the width in 3/8" on each side. I need to find a good motor, and a better ESC, so I'll be trolling the FS section in the coming weeks to try and find that once-in-a-while great deal. The scale comp was a lot of fun, first one I've been to, and definitely I will be going to as many as I can make it to. Stay tuned soon for some updates on the body work. |
|
| |
|
11-09-2009, 11:51 PM
| #18 | |
| I wanna be Dave Join Date: Oct 2008 Location: Golden
Posts: 2,588
|
Some pics rogue took from the scale event: Quote:
| |
|
| |
|
11-16-2009, 09:38 PM
| #19 |
| Pebble Pounder Join Date: Feb 2009 Location: here
Posts: 134
|
damn man that is going to look sick!!!
|
|
| |
|
11-16-2009, 09:59 PM
| #20 |
| SORRCA Committee Member   Join Date: Dec 2008 Location: Parkston, SD
Posts: 4,523
|
How's it coming Jens. A lot of body work there! |
|
| |
|
| |


 Linear Mode


