| |
 02-01-2008, 08:43 PM
| #41 |
| Pebble Pounder Join Date: Sep 2006 Location: everson
Posts: 184
|
i wanna see that thing at states again. it was great running "fallow the leader" with joe. I wanna wheel whit him again. (maybe barbie will be there next year) |

|  |
| Sponsored Links | |
| | |
|
02-03-2008, 06:49 PM
| #42 |
| Quarry Creeper Join Date: Feb 2006 Location: Surrey B.C Canada
Posts: 218
|  |
|
| |
|
02-06-2008, 08:14 PM
| #43 |
| Newbie Join Date: Jun 2007 Location: Berkley
Posts: 30
|
i love it i must have one
|
|
| |
|
02-16-2008, 11:47 PM
| #44 |
| Quarry Creeper Join Date: Jun 2004 Location: 462-Da Fock
Posts: 352
|
My hats off to this project. Imo you took it to the next level "Realistic R/C Rock crawling". New Tubs $5.99 lol! Good Job man. |
|
| |
|
02-17-2008, 07:59 AM
| #45 | |
| I wanna be Dave Join Date: May 2007 Location: Taylors Falls just hanging with the MNRCRC crew.
Posts: 7,843
| Quote:
| |
|
| |
|
02-25-2008, 09:05 PM
| #46 | |||||
| RCC Addict  Join Date: Aug 2005 Location: New Oxford PA
Posts: 1,290
|
WOW I guess I need to check this more often. I didn't realize there were so many responses! Quote:
Quote:
Quote:
Quote:
Quote:
| |||||
|
| |
|
03-01-2008, 02:00 AM
| #47 |
| Quarry Creeper Join Date: Jan 2008 Location: fair oaks nor-cal
Posts: 340
|
friggin awsome i tried to make make a body like that and i couldnt get any of the crinkles out of it and yea ill try again that is crazy, all that carnage a stuff keep it up
|
|
| |
|
03-01-2008, 08:56 PM
| #48 |
| RCC Addict Join Date: Aug 2005 Location: New Oxford PA
Posts: 1,290
|
Truthfully I don't get them all out either. I just make them less obvious by working the metal with something hard like a socket over the folds. once the paint is on it's hardly noticeable.
|
|
| |
|
08-02-2008, 08:48 PM
| #49 |
| RCC Addict Join Date: Aug 2005 Location: New Oxford PA
Posts: 1,290
|
Well after beating on this thing for almost a year i figured it was time for a re-vamp. One of the things i did recently was to ditch the crappy wheels i had in favor of some stampede's. to make them work I needed to get some wheel wideners and scored a set in a trade. The new set-up makes it a little wider but I like how it looks 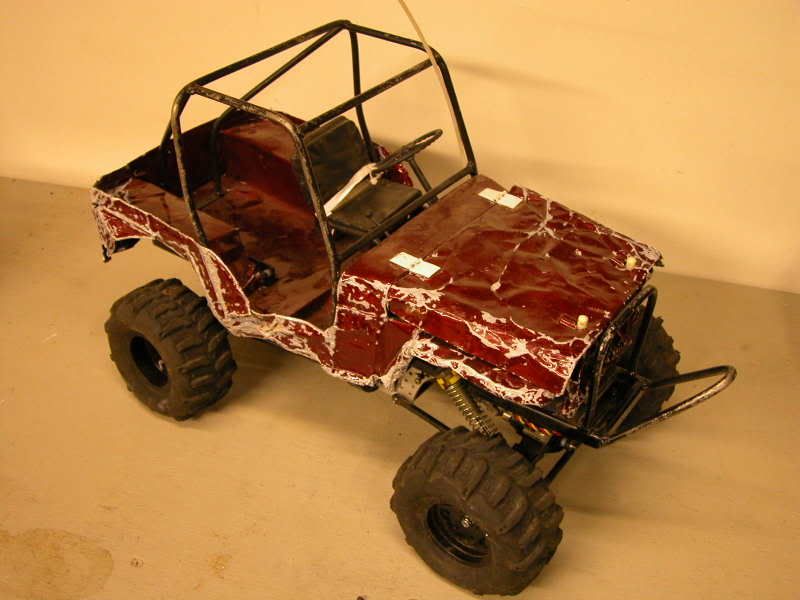 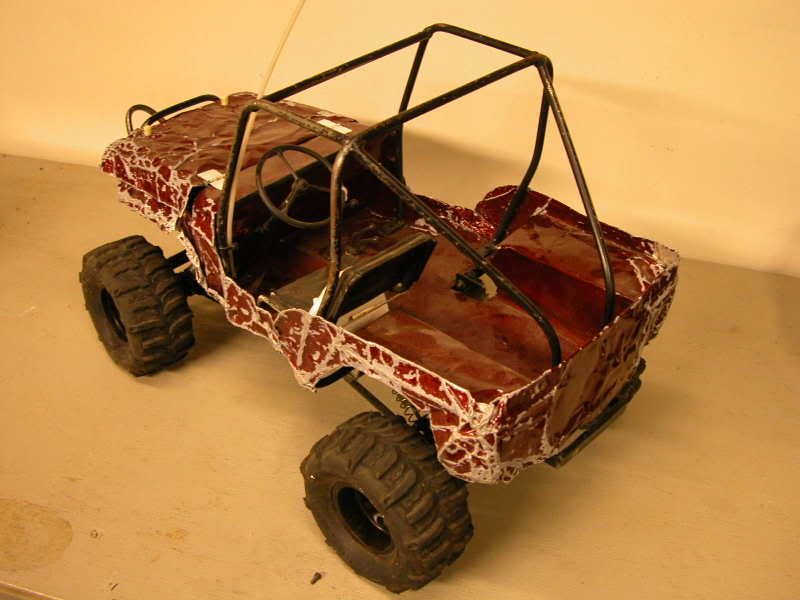 Now it's pretty obvious that the poor flatty is in need of a new body so off came the old one 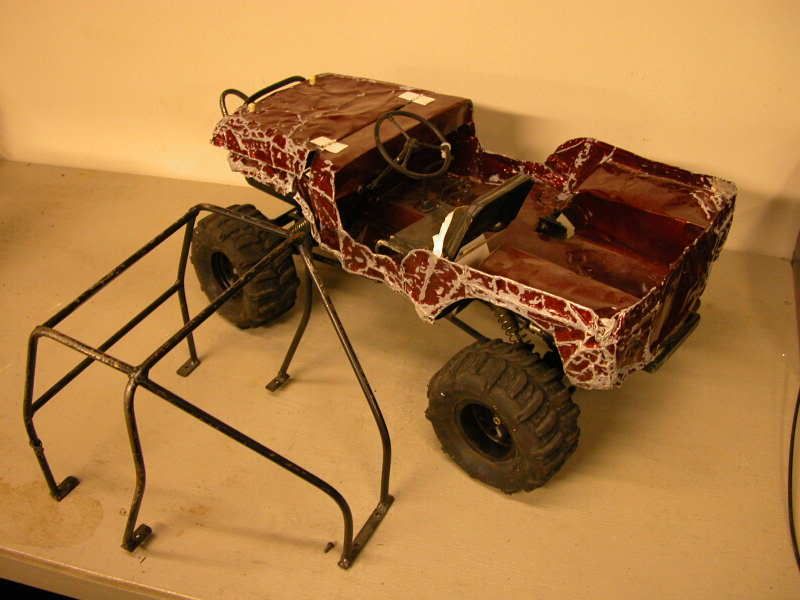 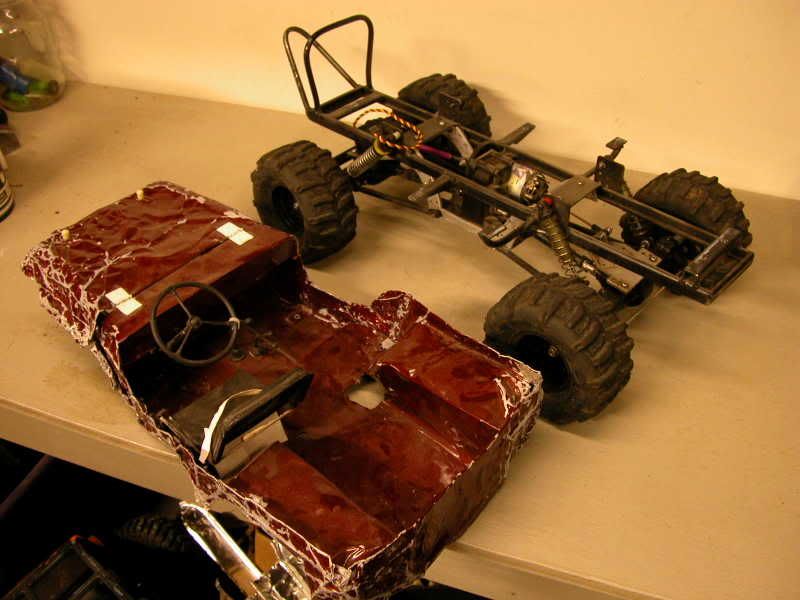 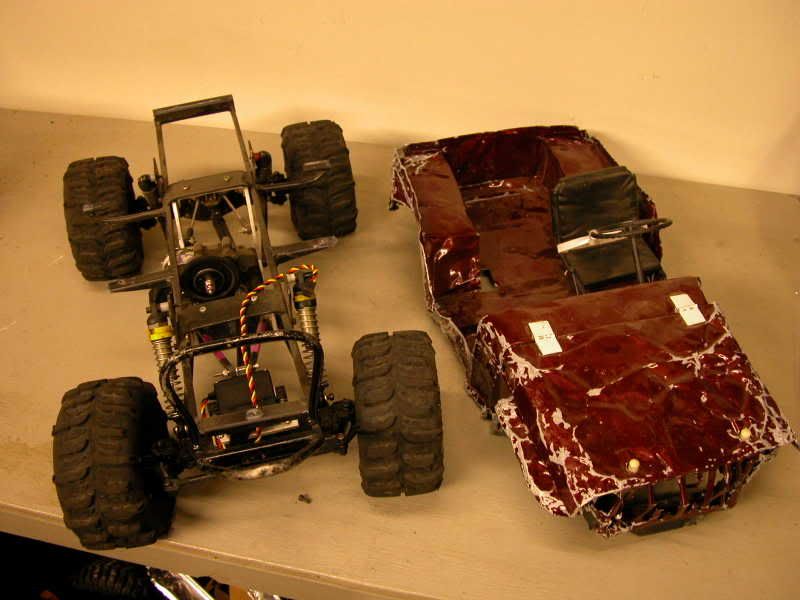 The tranny set-up was always temporary as being under the frame made it way too low and I always got it hung up on things. I also wanted to lower the ride hight a bit so once I stripped the chassis I mocked it up with the ride hight I was shooting for. 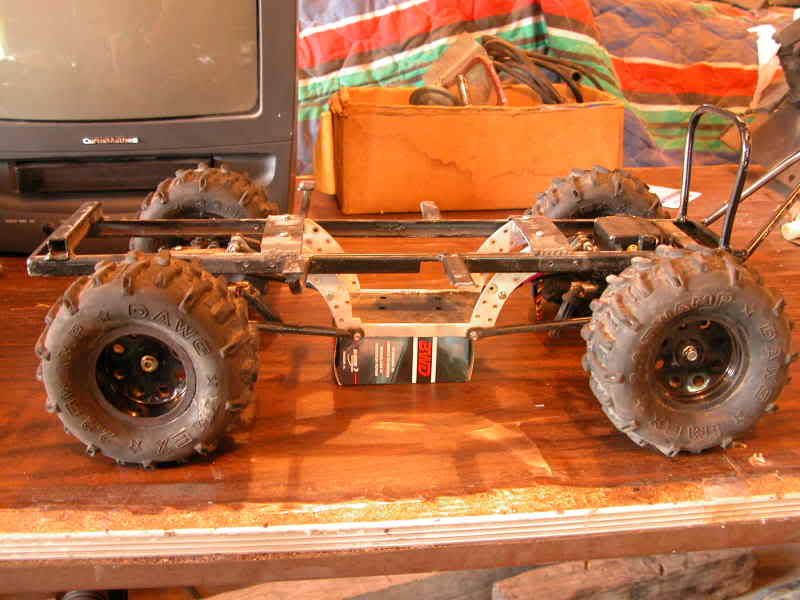 then I cut out some new lower link mounts 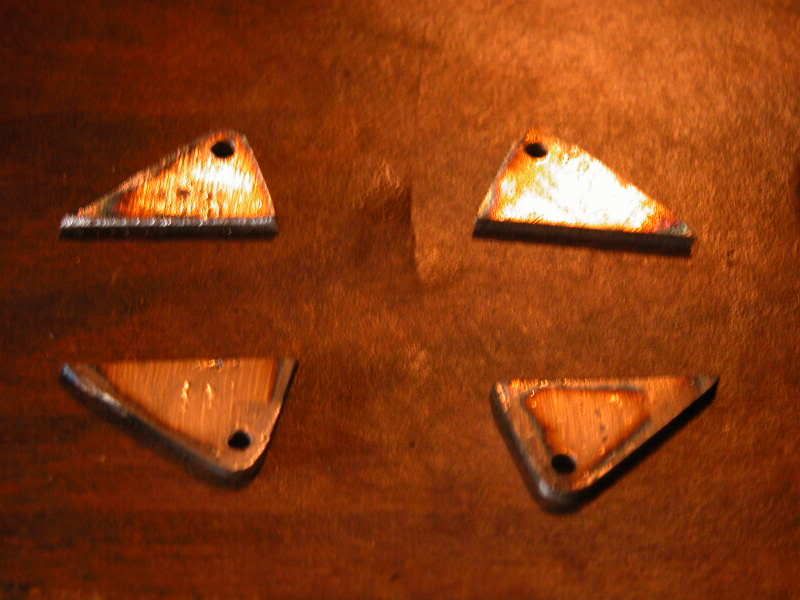 and welded them to the frame 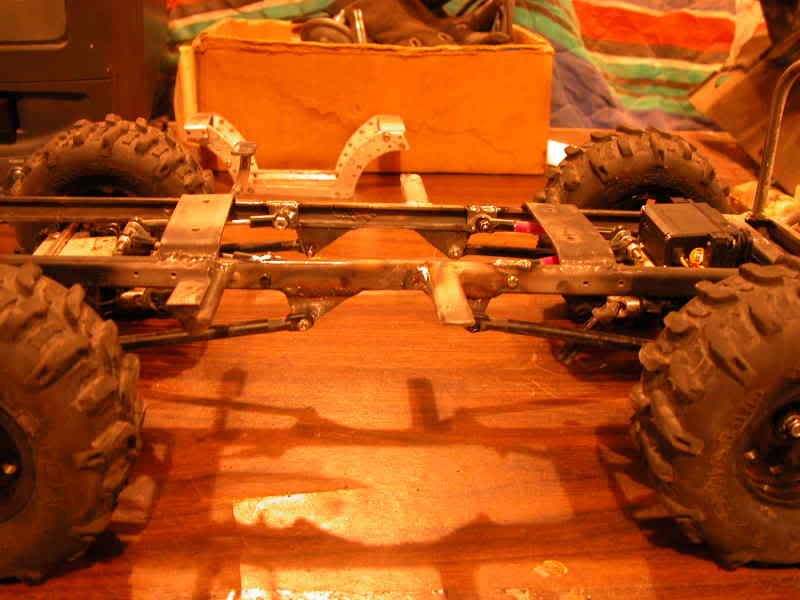 I have tons of clearance now! 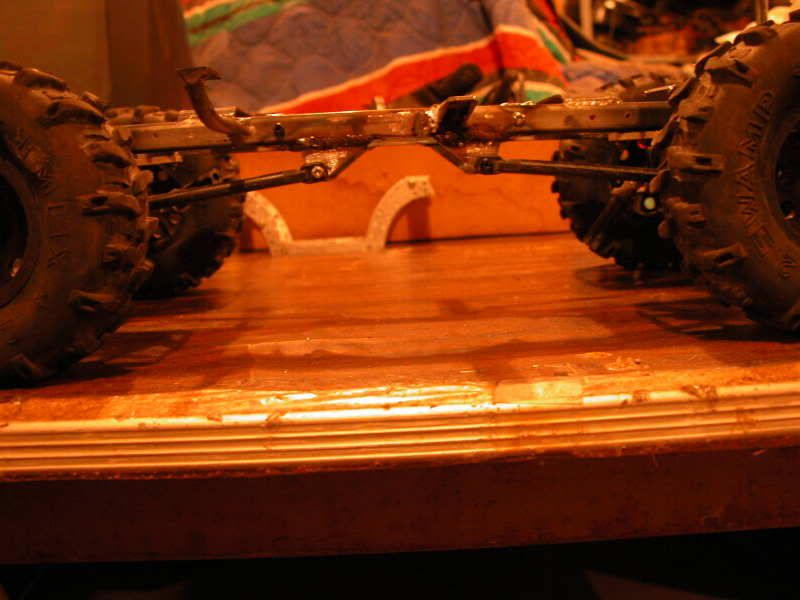 for the upper links I welded a plate inside the frame and ran a bolt through it 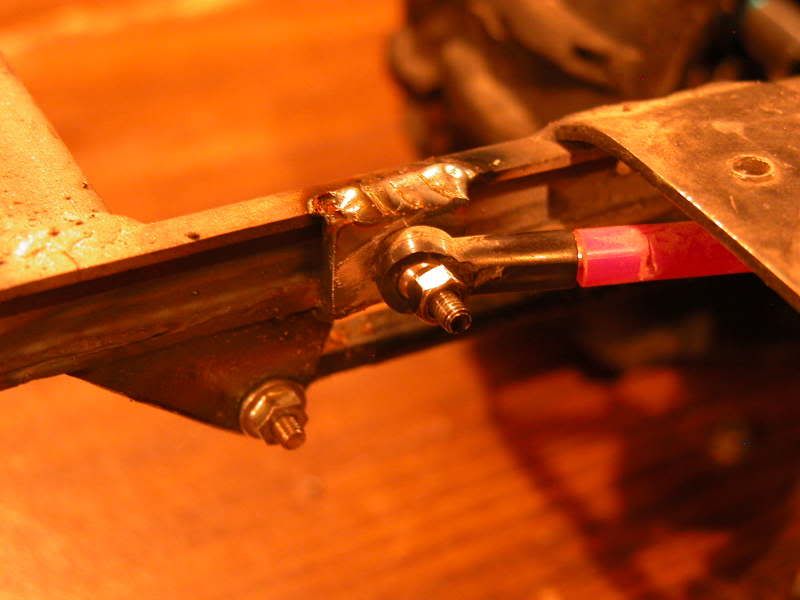 finally I wanted to make the shock set-up a bit more realistic so I bent up some shock hoops to put the shocks in a more vertical position. 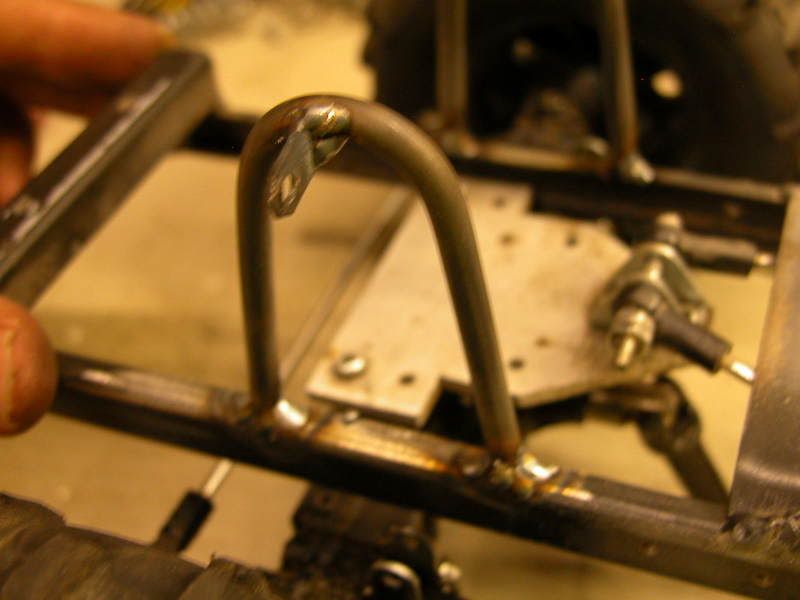 I'll go into the new tranny set-up later |
|
| |
|
08-03-2008, 05:57 AM
| #50 |
| RCC Addict Join Date: Nov 2007 Location: Massachusetts
Posts: 1,184
|
The re-build is coming along AWESOME so far..!!! I've ALWAYS loved this rig..!!!!! Its just Looks SO real, ( all beat up and abused) - My Hats off to you my friend..!!! Excellent work..!!!
|
|
| |
|
08-03-2008, 09:01 PM
| #51 |
| RCC Addict Join Date: Aug 2005 Location: New Oxford PA
Posts: 1,290
|
Thanks man! I got you're PM, i'll get back to you on it in a bit.Well the next thing I have been wanting to do for some time is to move the tranny up into a more natural position under the hood but I would need a way to transfer the power to the wheels. After looking at the parts out of an old 3 speed, I realized what i was going to do. I started by grabbing the shafts I would need 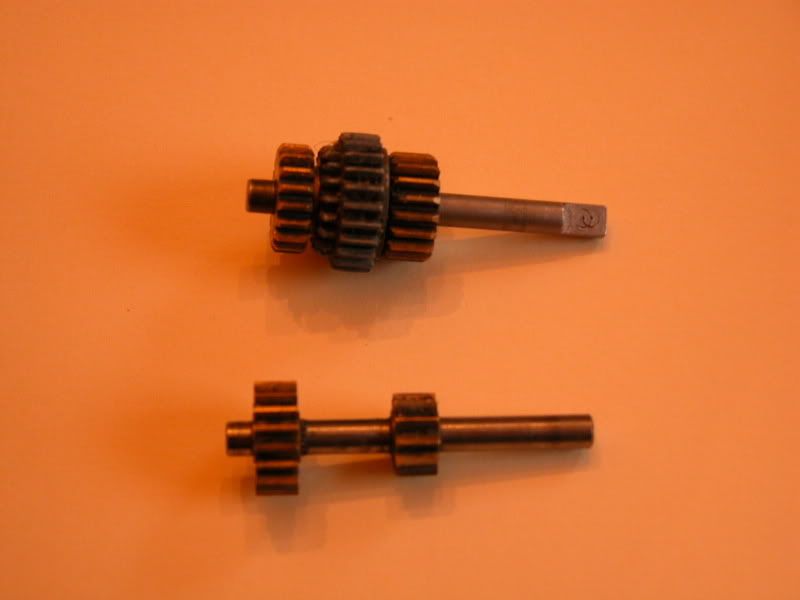 I'm not sure what they are for in the tranny but after a little trimming I had an input gear 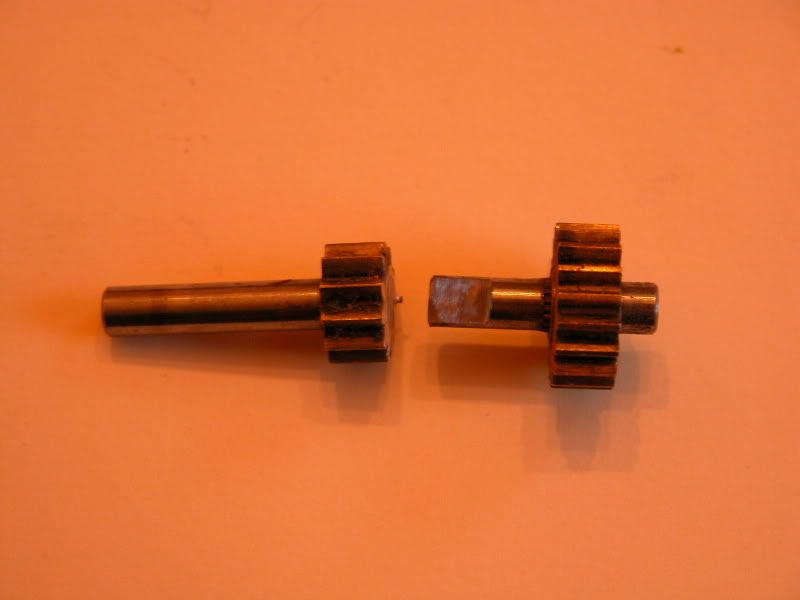 and an output gear 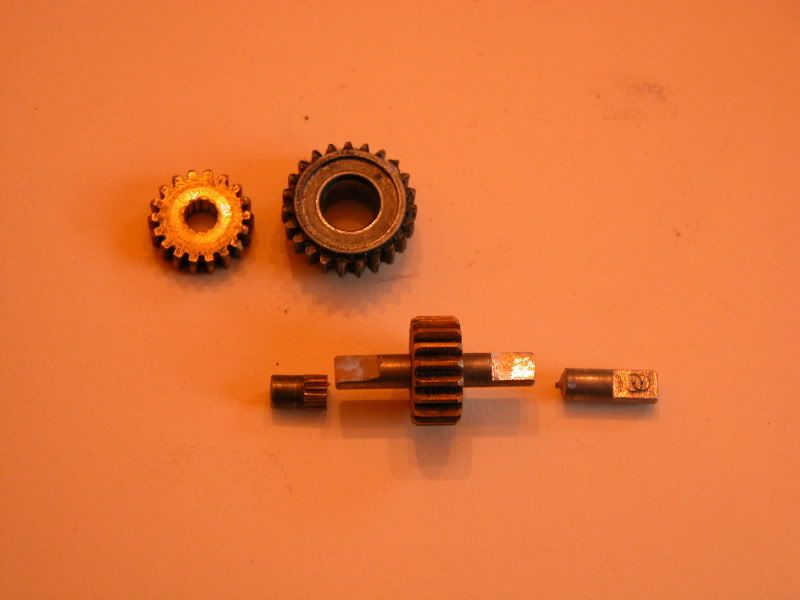 Here is how they will be laid out 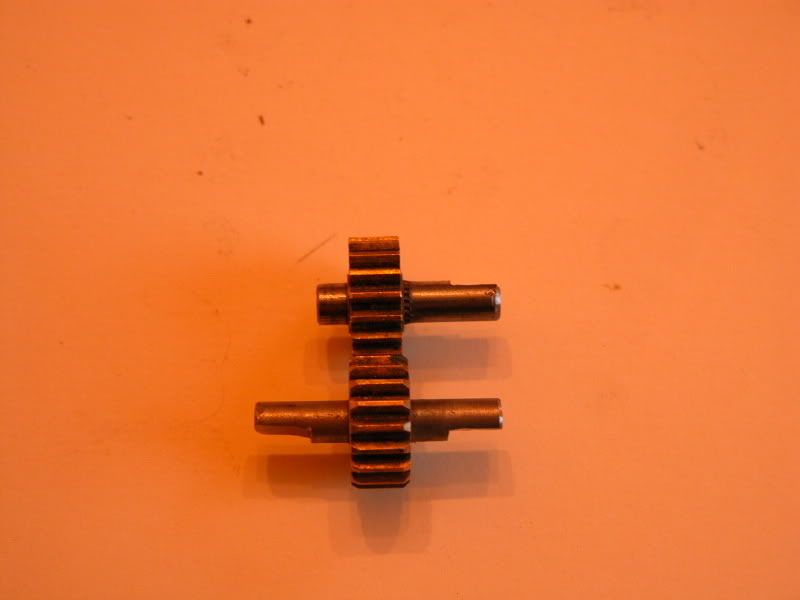 Then I took what was left of my battery trey from my AX10, and cut it down to make side plated for the T-case 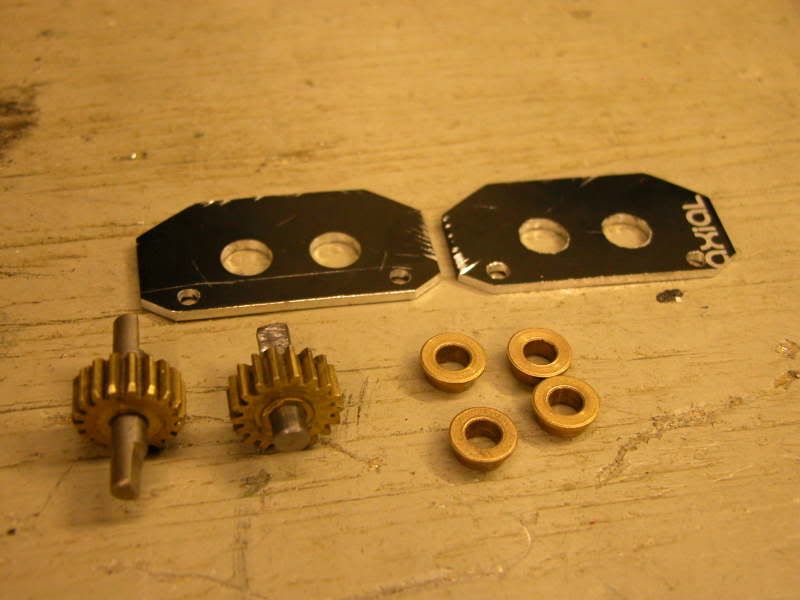 with gears installed 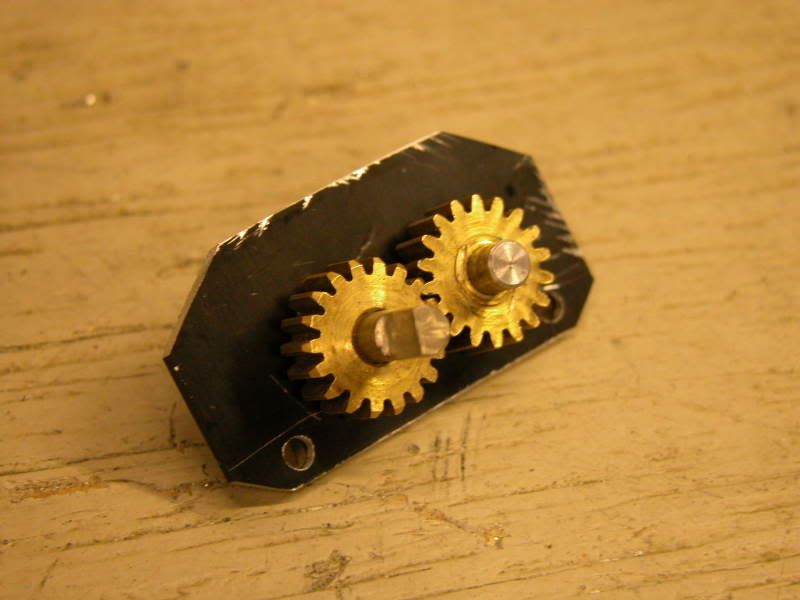 Input side from tranny 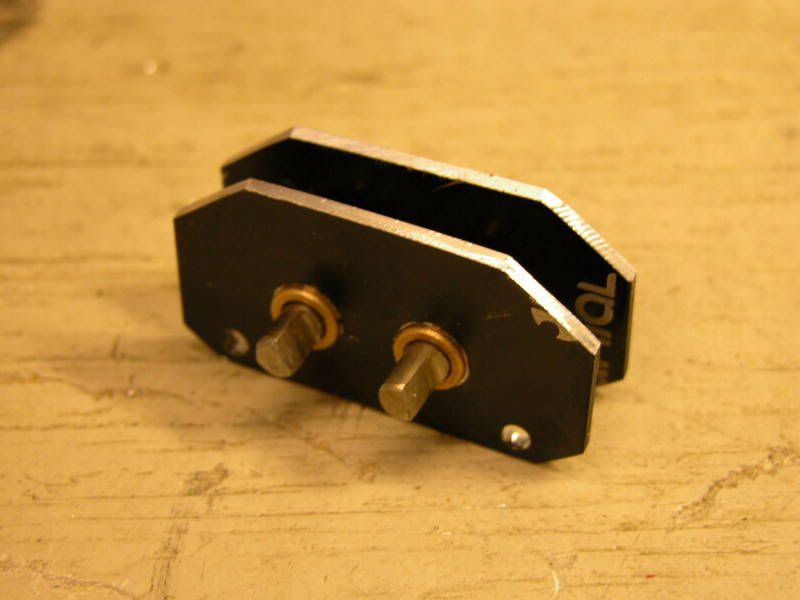 back side 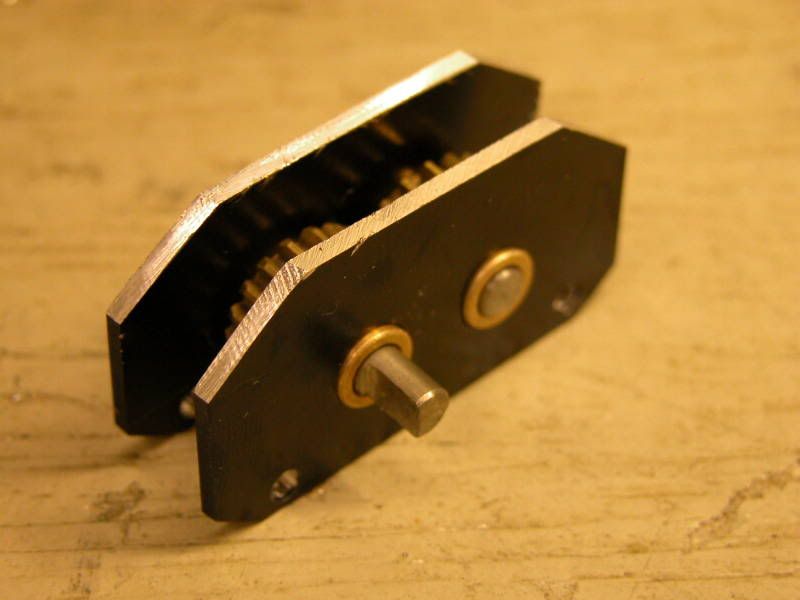 Now to mount it into the chassis I bent up some sheet metal into a cross member, drilled and tapped it, and welded it to the chassis 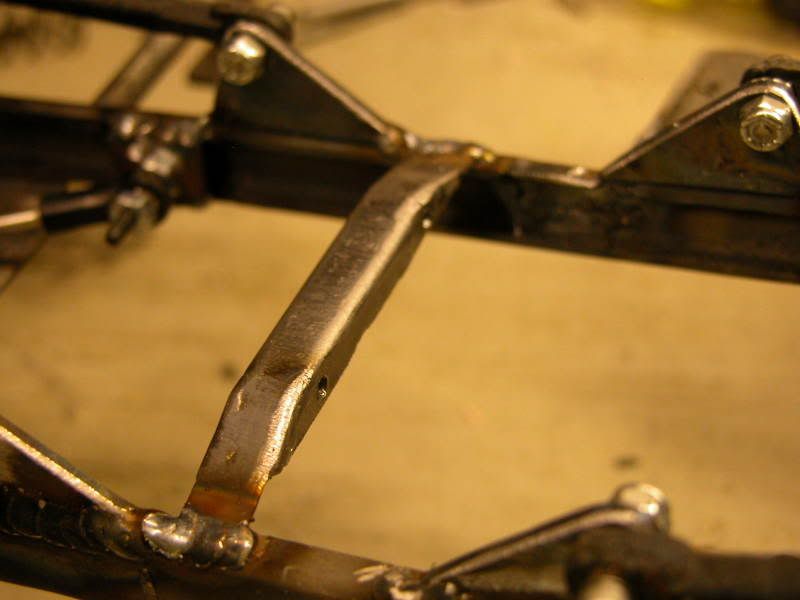 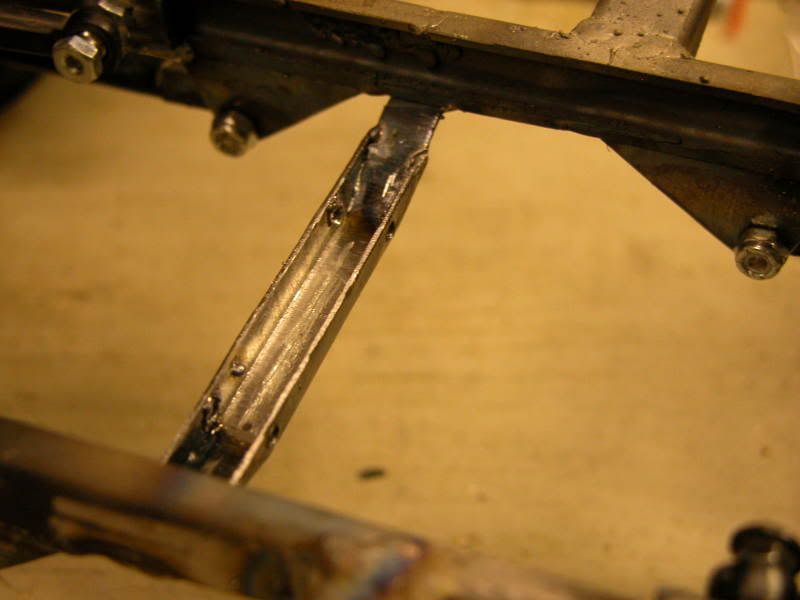 Here is the T-case in it's final position 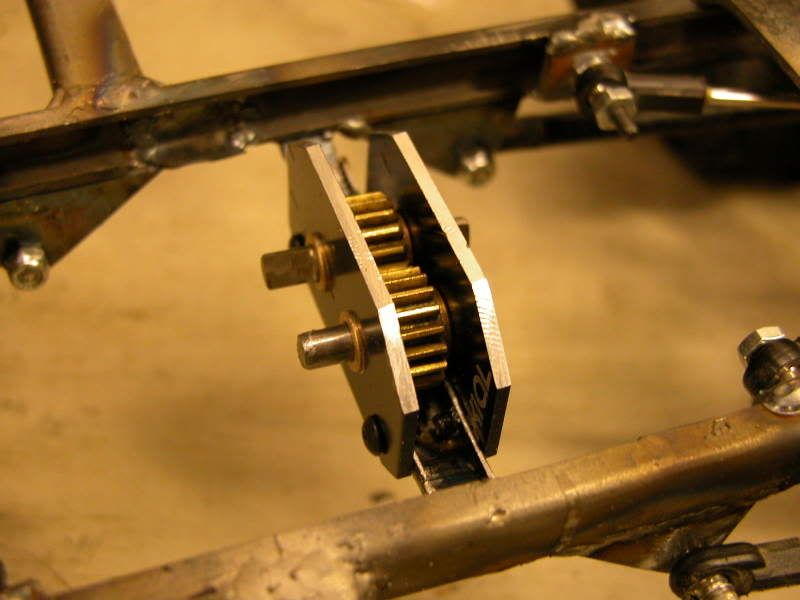 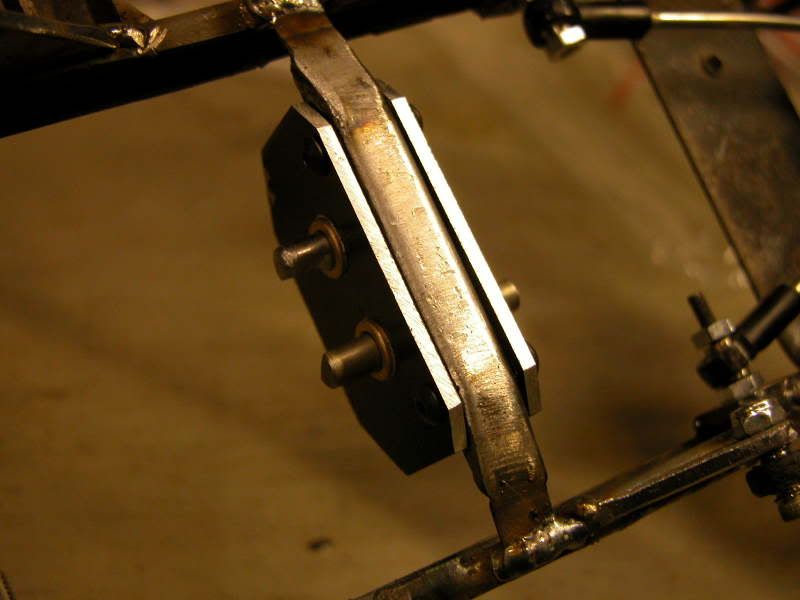 And here it is with the tranny in it's new spot 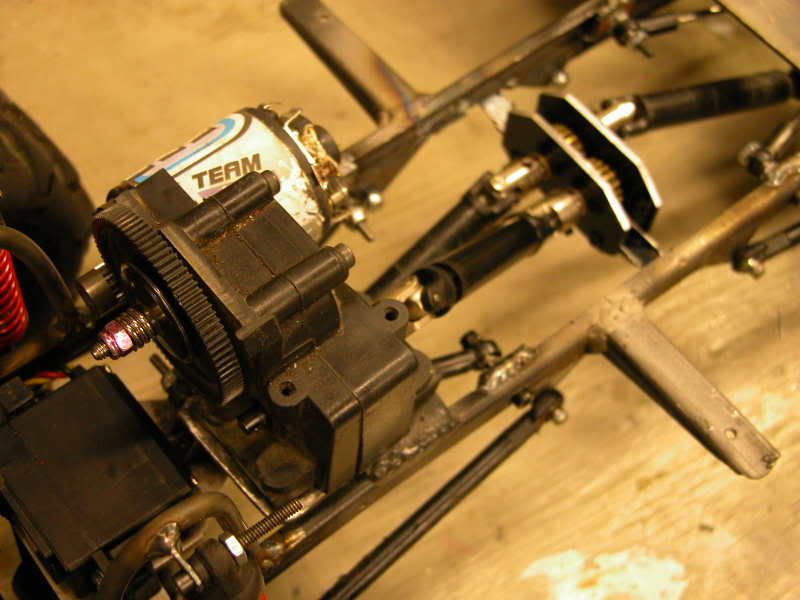 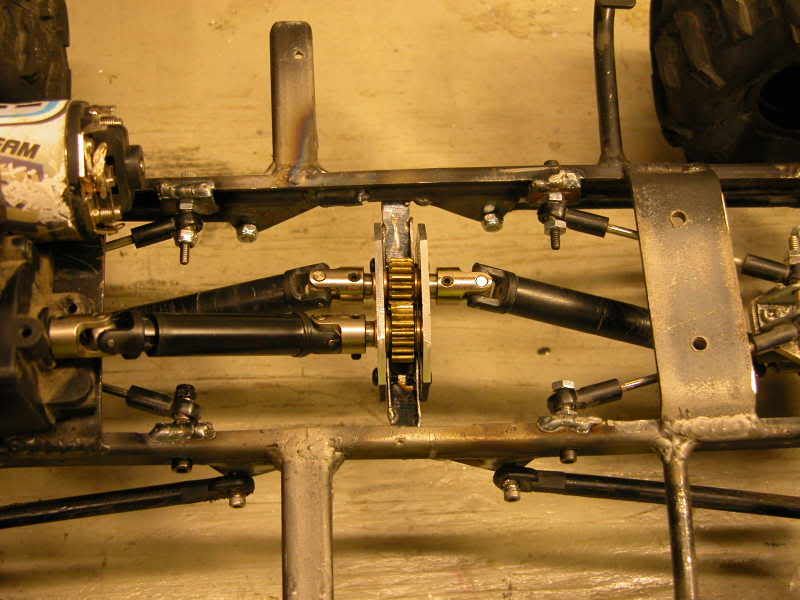 I Still have excellent ground clearance and the DS angles are real good as well 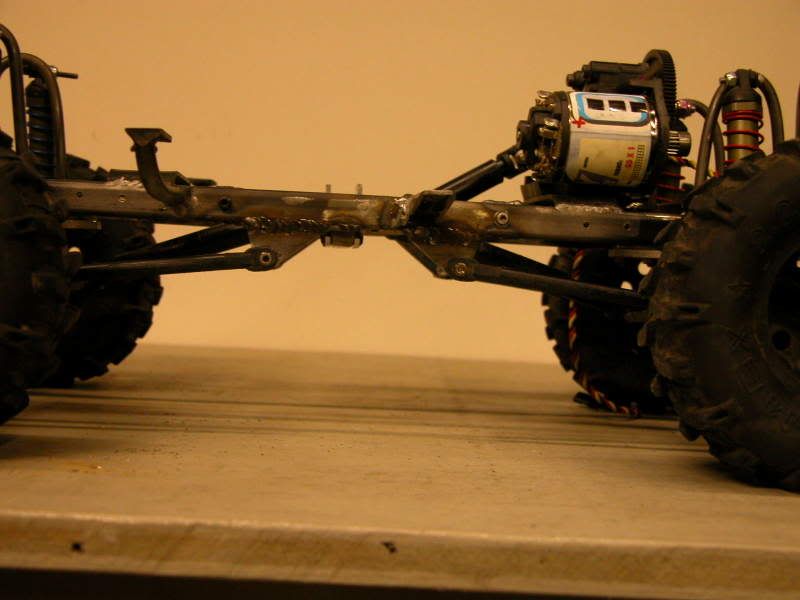 Finally here are some poser shots of the rolling chassis 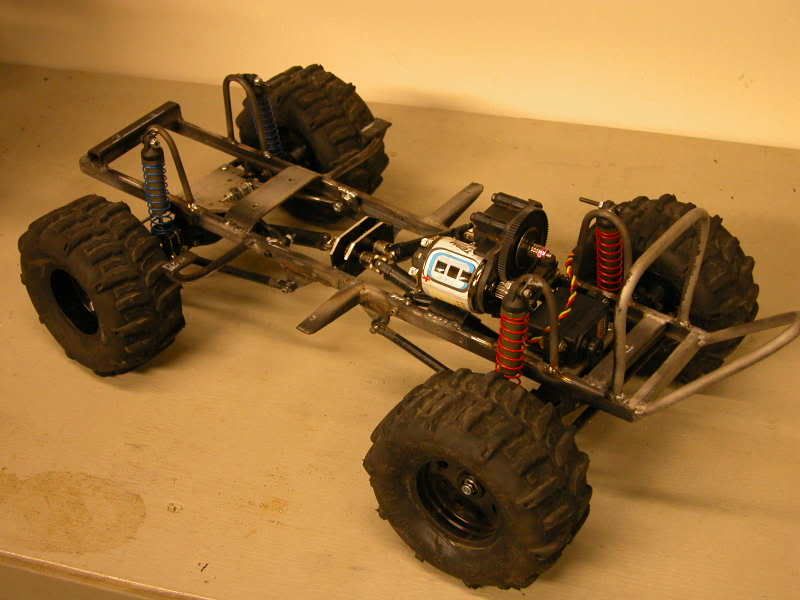  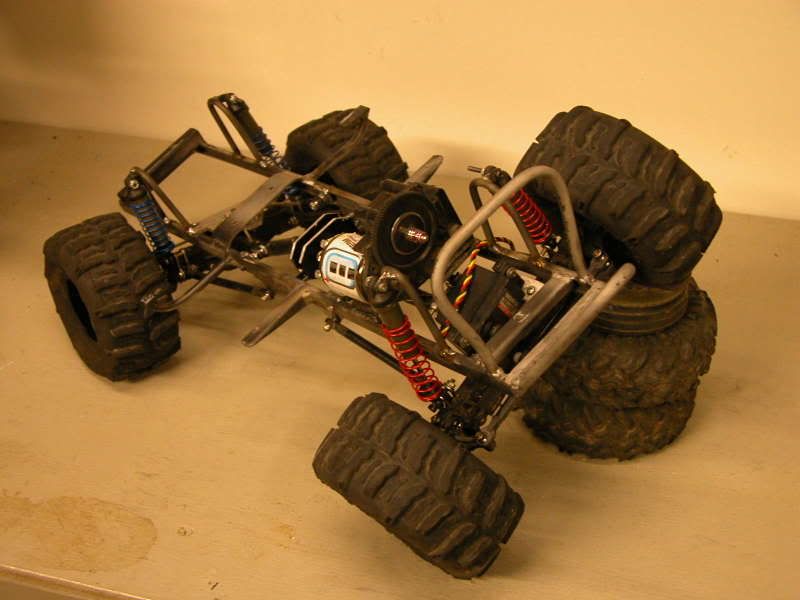 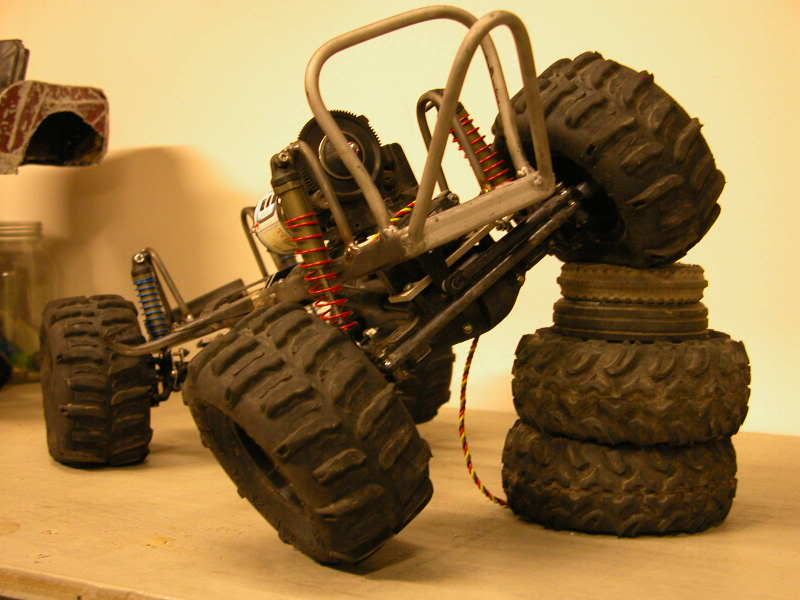 Next is the new body! |
|
| |
|
08-03-2008, 09:52 PM
| #52 |
| Rock Crawler Join Date: Jan 2008 Location: Cotati
Posts: 704
|
Great job! That T-case is awesome.
|
|
| |
|
08-04-2008, 01:29 AM
| #53 |
| Pebble Pounder Join Date: Feb 2008 Location: .
Posts: 99
|
Looks awesome |
|
| |
|
08-04-2008, 05:52 PM
| #54 |
| I wanna be Dave Join Date: May 2008 Location: Baltimore
Posts: 4,442
|
I had the joy of watching this Jeep run 2 weeks ago. You have to be there to appreciate hearing the body getting mangled! Hopefully you'll be out for the 10th, I'm looking foward to it.
|
|
| |
|
08-04-2008, 08:12 PM
| #55 |
| RCC Addict Join Date: Aug 2005 Location: New Oxford PA
Posts: 1,290
|
Thanks man! Sorry I won't be at the next comp. I have a family reunion that day. I'll try to make the next one but I won't know for sure until it gets closer.
|
|
| |
|
08-04-2008, 08:37 PM
| #56 |
| Quarry Creeper Join Date: Jan 2008 Location: Edmonton, AB
Posts: 443
|
that tcase is sweet it reminds me of an r2. come to think of it you could make it look like a dana 300 or an atlas tcase if you rounded the sides off
|
|
| |
|
08-04-2008, 09:03 PM
| #57 |
| RCC Addict Join Date: Jun 2007 Location: Indian Village Pontiac
Posts: 1,910
|
That is the craziest lowbuck build I have ever seen!! Great work!!!! We ahve a guy here that puts monster can skins on his Betty B17 body just for the sound and fun so I an truly appreciate the sound factor Very innovative build!!! |
|
| |
|
08-05-2008, 05:36 AM
| #58 |
| RCC Addict Join Date: Aug 2005 Location: New Oxford PA
Posts: 1,290
|
I never intended it to be a low buck project but i suppose it is. I've always used what i had lying around so it seems natural to me. Well I don't have any progress shots of the body , I was in a hurry to get it done before the PA Jeep show a couple weeks ago, So here is the completed rig before I ran it. 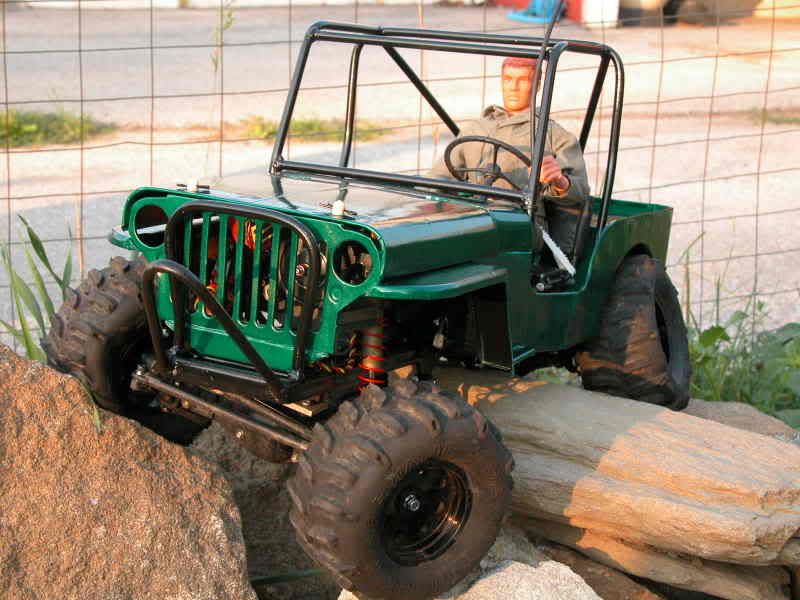 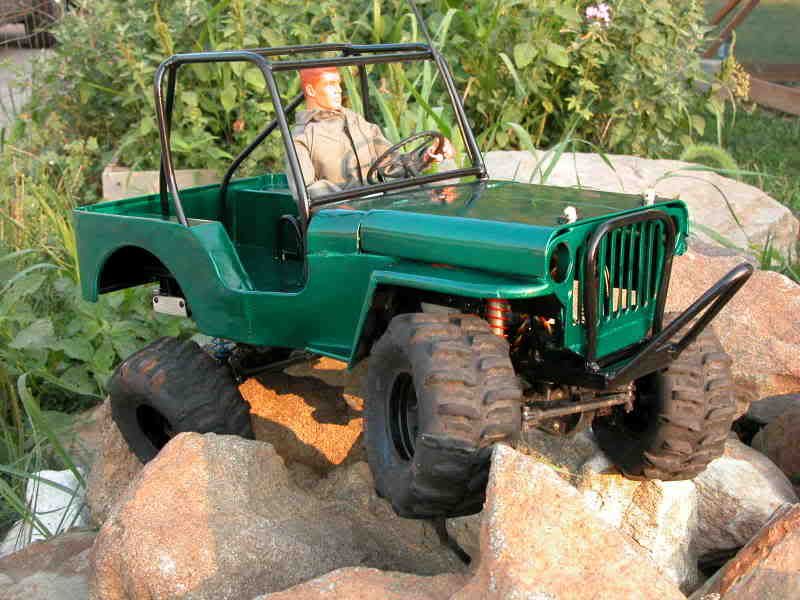 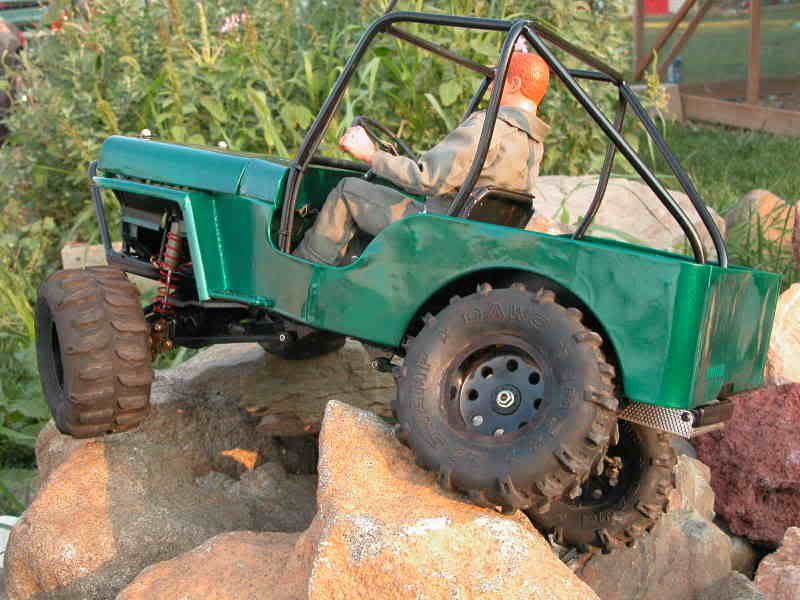 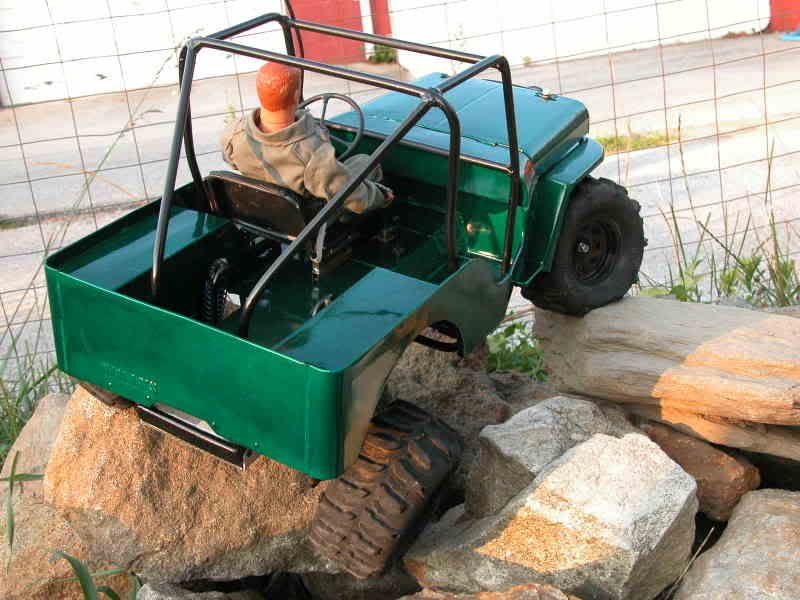 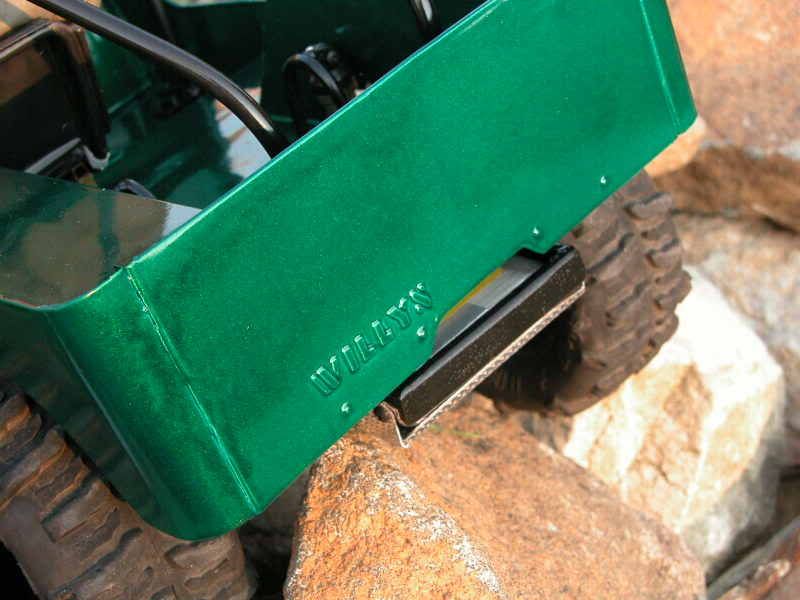 Yes the "Willys" is actually embossed into the metal 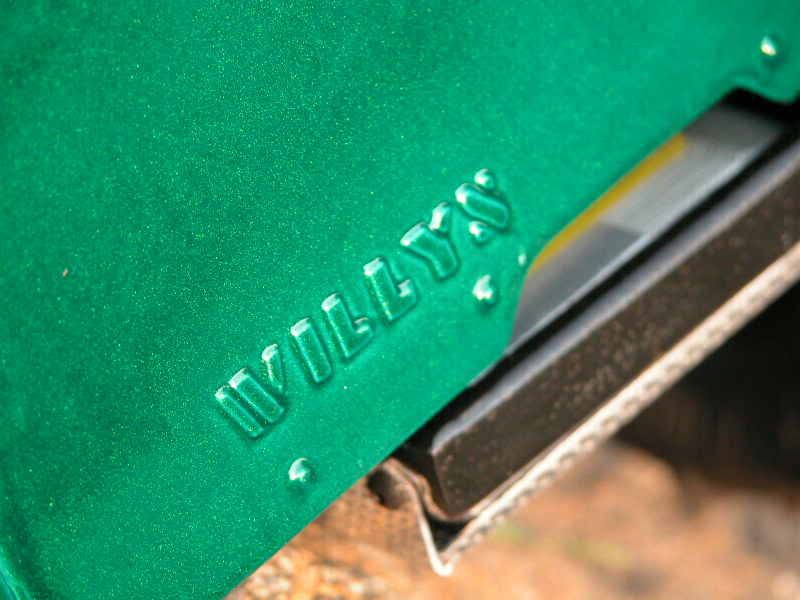 The new body has some refinements to it. I added a little more detail like the lettering on the back. I cut the front fenders off the original truck to get a better mold of them, I added more bracing this time to help with the weak spots I had in the old body, and the radiator support is of a heavier gauge metal to help keep it from collapsing like the last one. Her is a not so clear shot of the underbelly 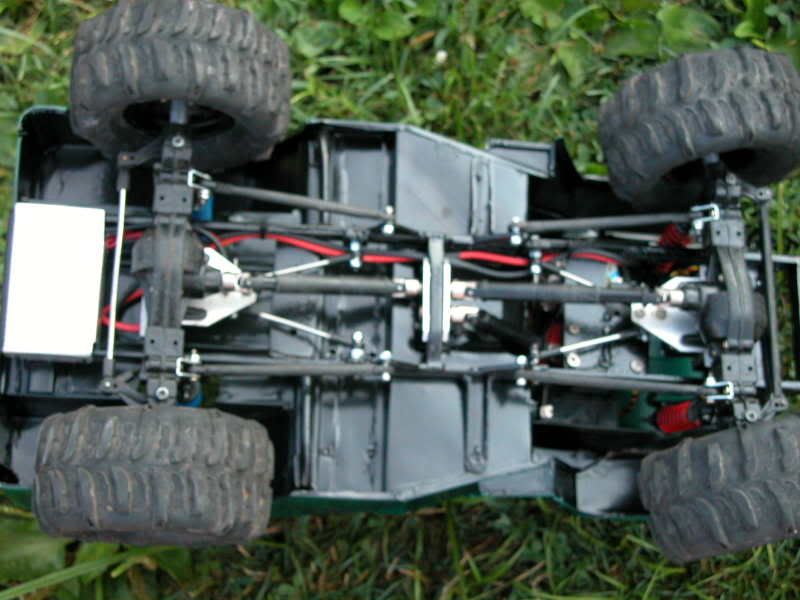 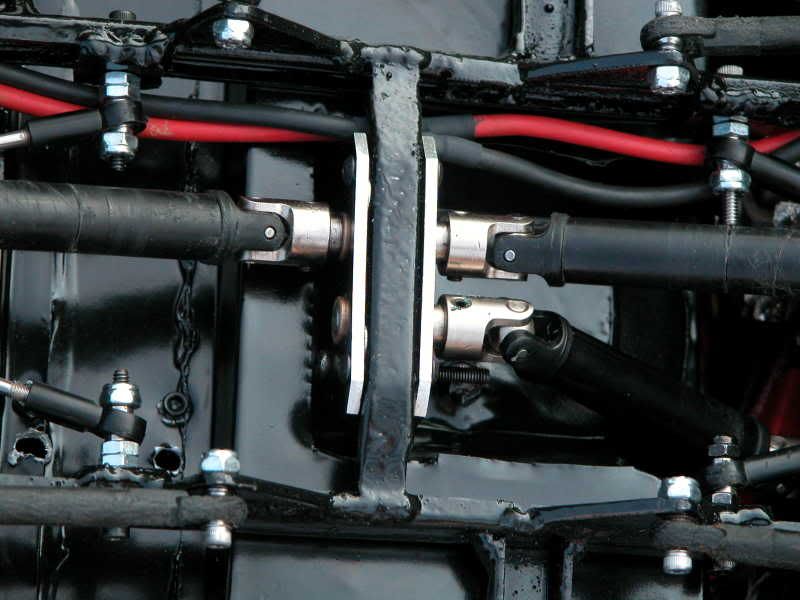 One last thing, the skid plate to the left in the upper photo is actually the battery trey 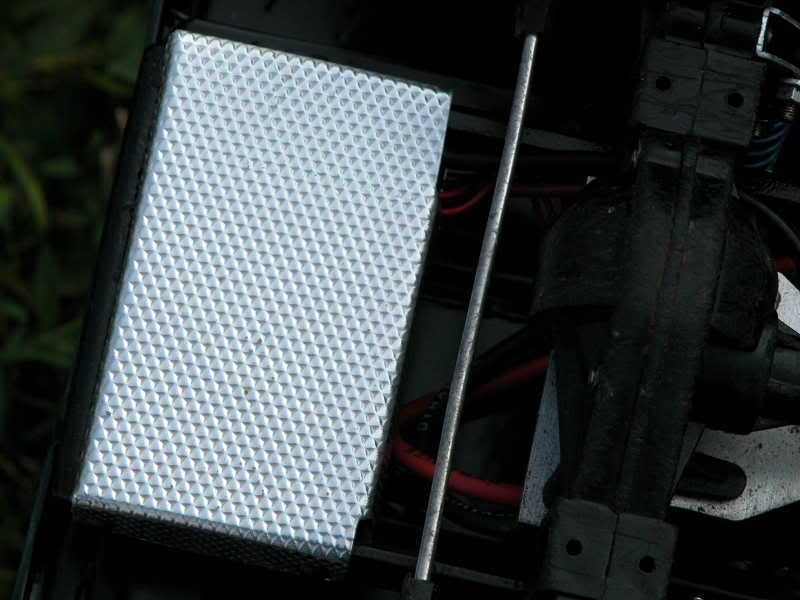 I had to put it there because the tranny now occupies the original location. The 2 cell LiPo fits perfectly and is easly removed by simply removing the 2 back screws and hinging it down. I'll get some after run shots up soon |
|
| |
|
08-05-2008, 07:00 AM
| #59 |
| Rock Crawler Join Date: Jul 2007 Location: Beechview/Pittsburgh
Posts: 536
|
Dang... Looking better than the original! Cant wait to see it at the states! Hope to see you there! |
|
| |
|
08-05-2008, 07:08 AM
| #60 |
| Quarry Creeper Join Date: Aug 2007 Location: Lumberton
Posts: 463
|
Looks freaking sweet man!!! |
|
| |
 |
 LinkBacks (?)
LinkBack to this Thread: http://www.rccrawler.com/forum/2-2-scale-rigs/82901-joes-flatty-revival.html | ||||
| Posted By | For | Type | Date | |
| Зарубежные проекты 1.9 - Страница 4 | This thread | Refback | 10-05-2011 03:36 AM | |
| |


 Linear Mode


