| |
 06-12-2008, 09:32 PM
| #21 |
| RCC Addict  Join Date: Aug 2005 Location: New Oxford PA
Posts: 1,290
|
Well I couldn't hold out any longer. I was going to wait until I started my 1.9 scale truck before i revealed the body but here is a teaser shot. 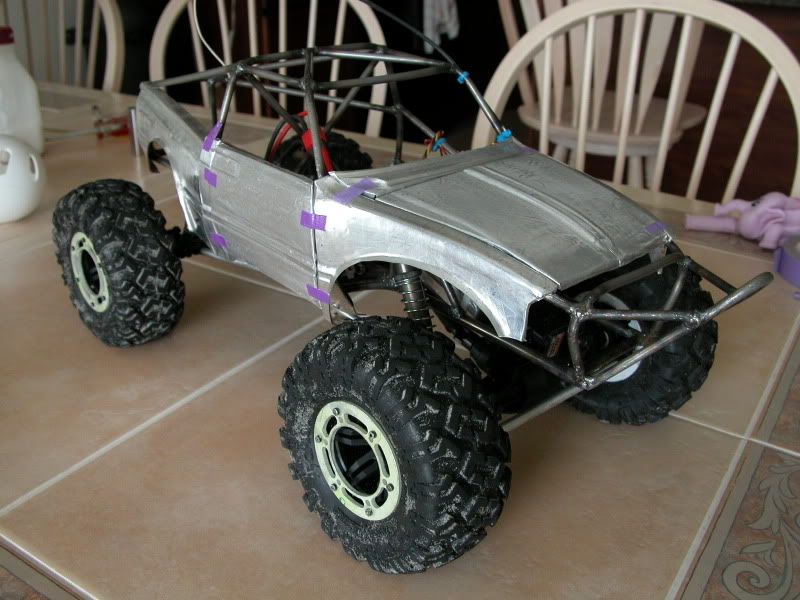 Yes the panels are all hand formed aluminum, dove tailed front and rear with the bed sides bobbed. I will go into detail later on how i did it but i figured i would let the cat out of the bag just to stir things up |

|  |
| Sponsored Links | |
| | |
|
06-12-2008, 09:42 PM
| #22 |
| Rock Crawler Join Date: May 2008 Location: Mansfield, PA
Posts: 560
|
WOW that's sweet Metal Masher, amazing aluminum work on that body Please do tell... how did you made the aluminum body panels so perfect?? Nice work man, very impressive  |
|
| |
|
06-12-2008, 10:06 PM
| #23 | |
| RCC Addict Join Date: Jan 2006 Location: The Amish Ghetto
Posts: 1,932
| Quote:
looks good blake | |
|
| |
|
06-13-2008, 07:23 AM
| #24 |
| Newbie Join Date: Nov 2007 Location: San Antonio TX
Posts: 49
|
WOW thatt cool how thick it the metal ??? is it a easy dent to look real body or a thick never brake one ???
|
|
| |
|
06-13-2008, 10:45 AM
| #25 |
| Rock Crawler Join Date: Feb 2006 Location: jacksonville beach
Posts: 848
|
yeah thats a pretty cool truck so far. im interested in how you did the panels
|
|
| |
|
06-13-2008, 10:51 AM
| #26 |
| RCC Addict Join Date: Dec 2007 Location: Calgary
Posts: 1,575
|
that looks sick. Nice work, cant wait to see more pics.
|
|
| |
|
06-13-2008, 10:53 AM
| #27 |
| Pebble Pounder Join Date: Sep 2005 Location: somewhere on earth
Posts: 188
| |
|
| |
|
06-13-2008, 11:13 AM
| #28 |
| I wanna be Dave Join Date: Mar 2007 Location: roland,ar
Posts: 5,981
|
wow awesome job! you got my attention |
|
| |
|
06-13-2008, 12:03 PM
| #29 |
| Quarry Creeper   Join Date: Sep 2006 Location: Orange, CA
Posts: 365
|
WOW! This just took an unpredicted turn, can't wait to see it progress |
|
| |
|
06-15-2008, 08:14 PM
| #30 |
| RCC Addict Join Date: Aug 2005 Location: New Oxford PA
Posts: 1,290
|
Thanks everyone. Didn't have time this weekend to go into detail about the panels but I figured I'd give you another teaser shot now that I got the boat sides done 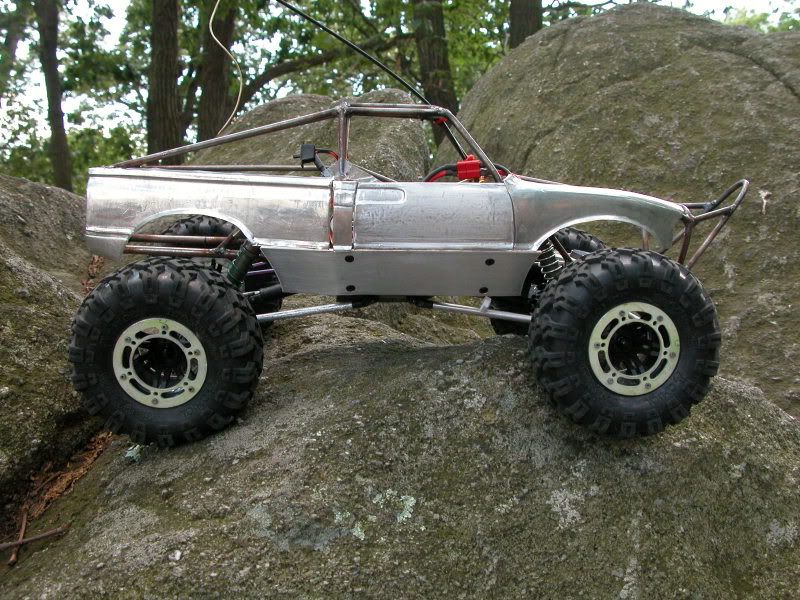 I also coughed up the $$ for a Mamba Max and switched to my FM to practice today at the comp location. Did really well and I like the Mamba but for some reason I can't seem to get rid of the delay when I punch the throttle. Other than that once I change tires I think it'll be all set to compete. Only one week left to get it ready!! |
|
| |
|
06-15-2008, 10:57 PM
| #31 |
| RCC Addict Join Date: Jan 2006 Location: The Amish Ghetto
Posts: 1,932
|
ok blake so whats the story? you went up to test today how did it turn out...
|
|
| |
|
06-17-2008, 09:16 PM
| #32 | |
| RCC Addict Join Date: Aug 2005 Location: New Oxford PA
Posts: 1,290
| Quote:
It worked awesome! Just ask Bob. there is almost no torque twist and it made some of the harder lines look easy. It does have a tough time on the really steep climb on the back side of the large rock formation but it was simply slipping the tires so once i get the moabs on and some weight in them, that will take care of it. It won't be completly finished for the next comp (not painted and no dig yet) but I will be competing and right now that's more than i can ask for | |
|
| |
|
06-17-2008, 10:25 PM
| #33 |
| Quarry Creeper Join Date: May 2008 Location: malvern
Posts: 233
|
That is some sick work. Looks great. |
|
| |
|
06-24-2008, 09:45 PM
| #34 |
| RCC Addict Join Date: Aug 2005 Location: New Oxford PA
Posts: 1,290
|
Well I needed to make some changes to the truck for the comp this past weekend first off I wasn't happy with the frame in the front. It hung down to low and the stinger was up to high so I wacked it off 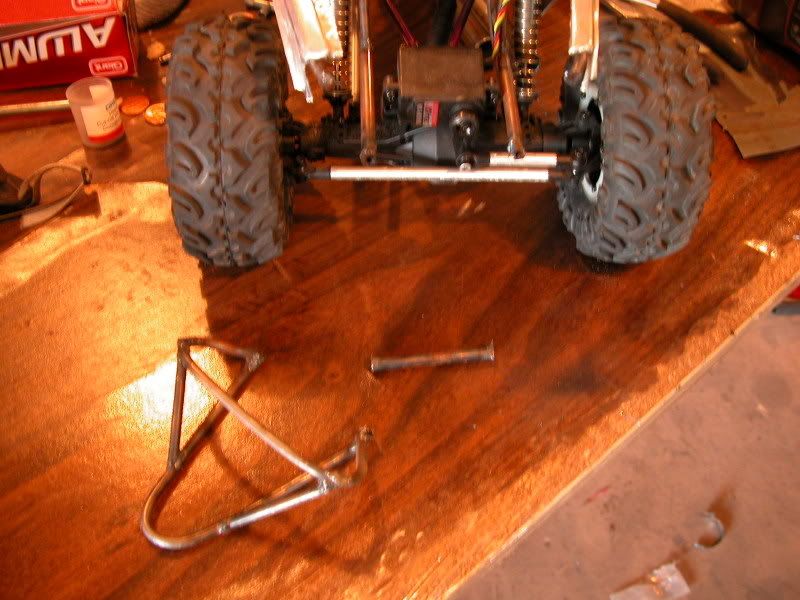 while the front was cut, I reshaped the forward bars to more closely match the fenders 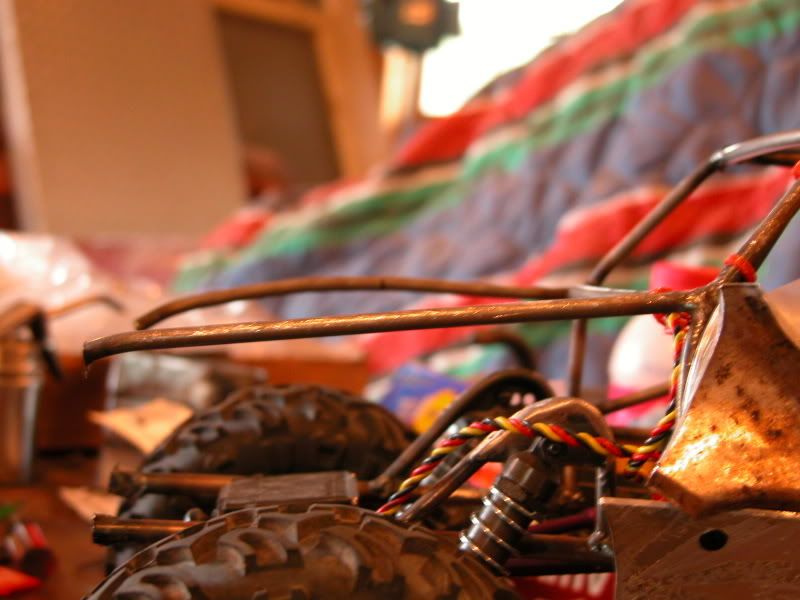 then I tacked the rad hoop back on at a slight angle and bent the frame up to meet it 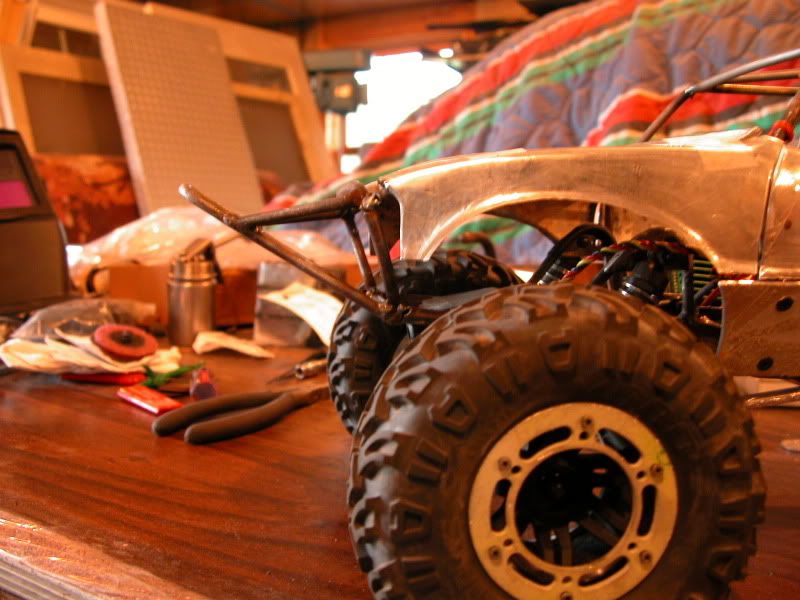 Next i added some tabs to the door bars to attach the body panels to 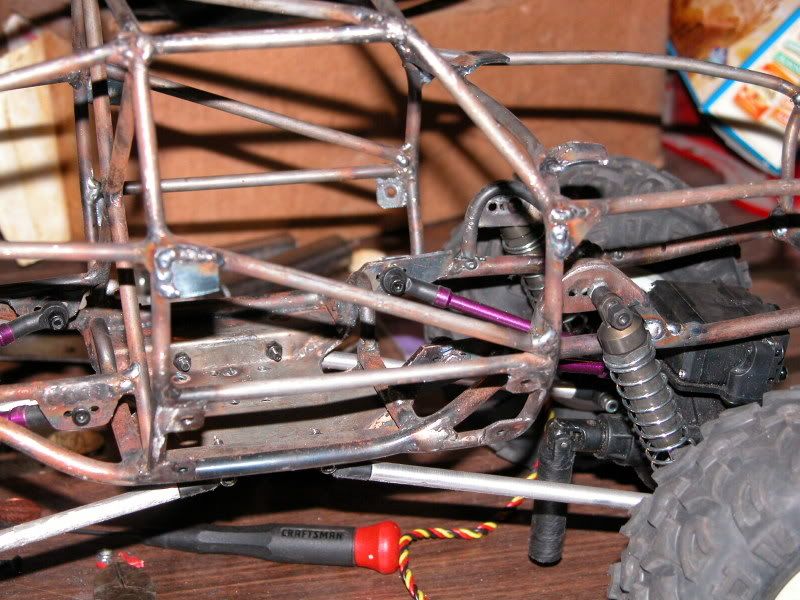 I also added some tabs on the dash bar to mount the cowl panel and hood hinges 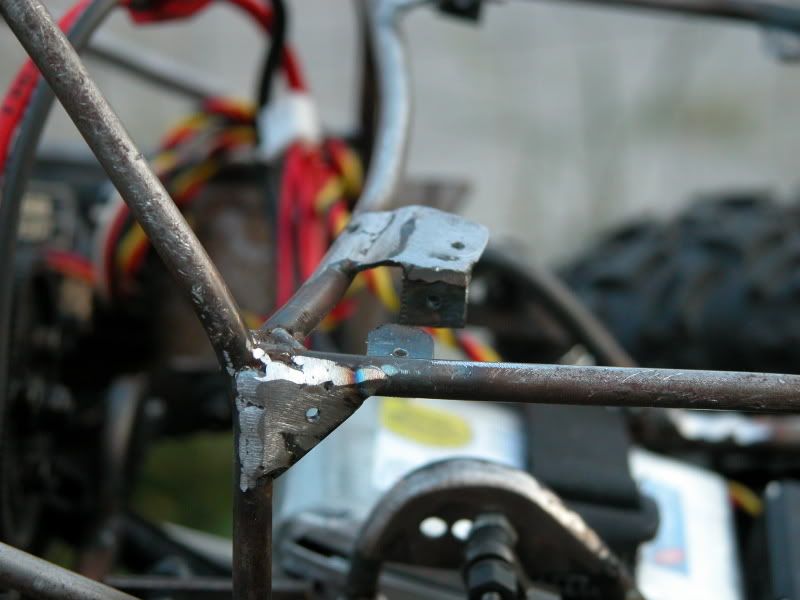 Then i added tabs for the front fenders and hood pins as well 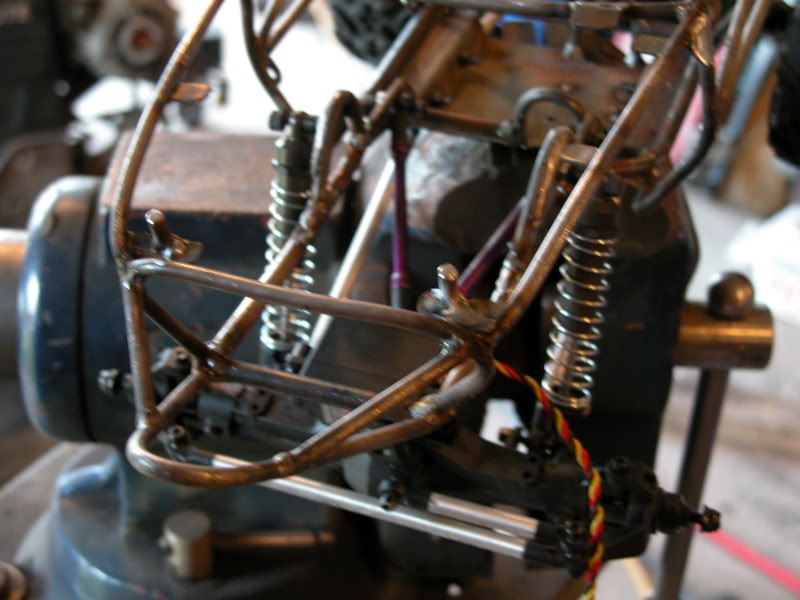 Next I cut about 3/8" off the front shock hoops to lower the shocks the help keep the body from tearing up the fenders 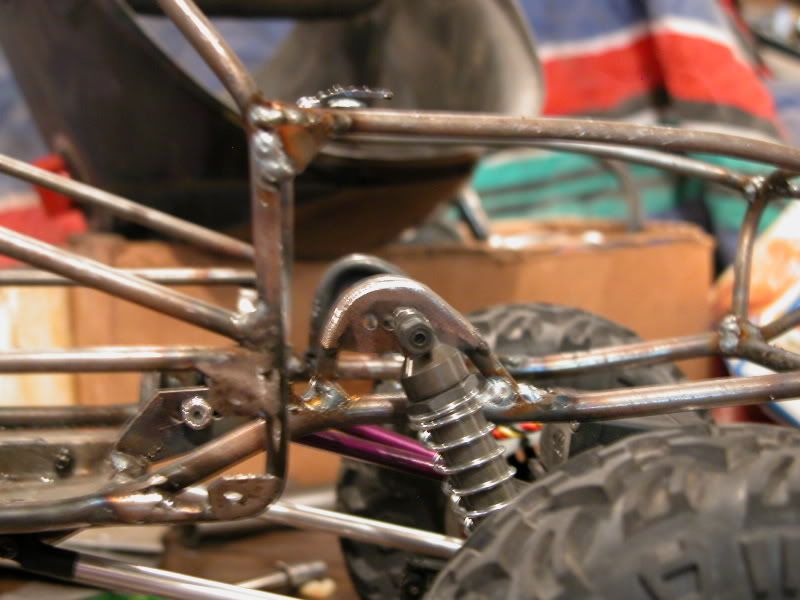 Finally I needed to make room for the dig. The hoop i had was not wide enough so out came the cut-off wheel 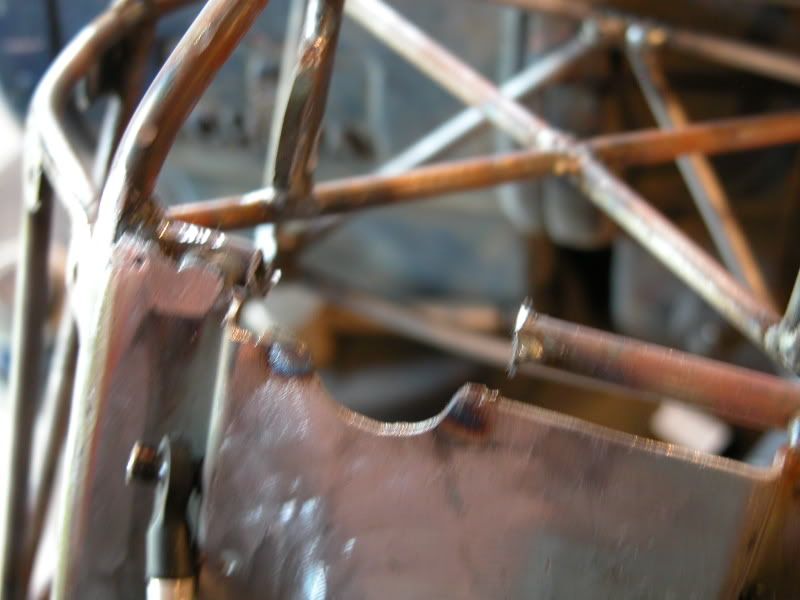 Then i bent up a new hoop using a socket and a couple bolts 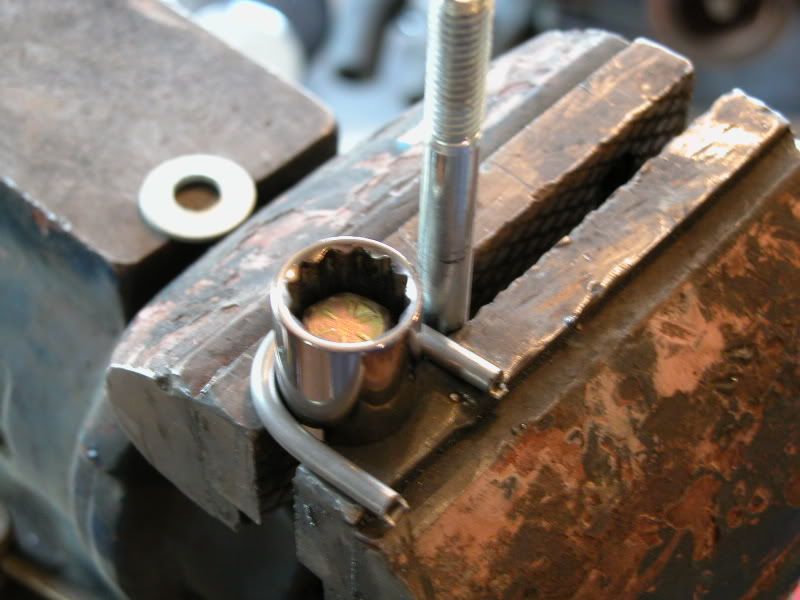 and welded it in place 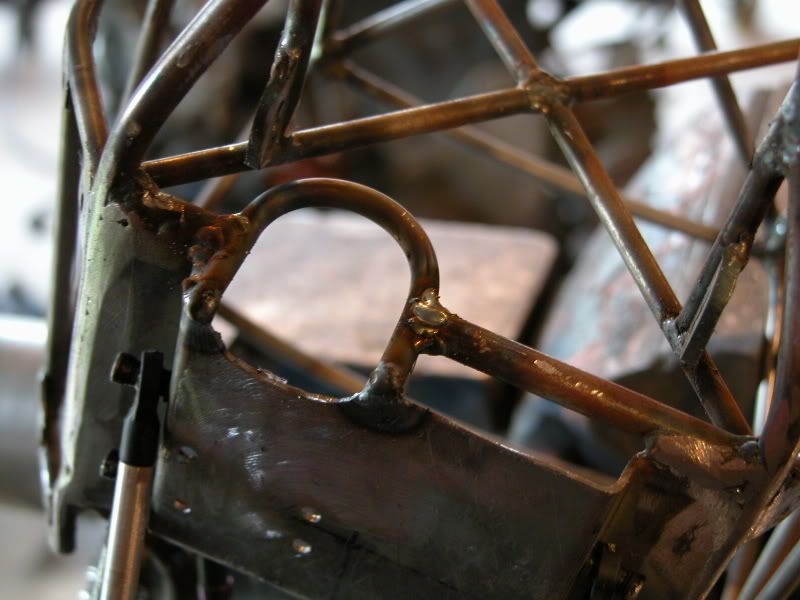 Here it is ready to roll less the body 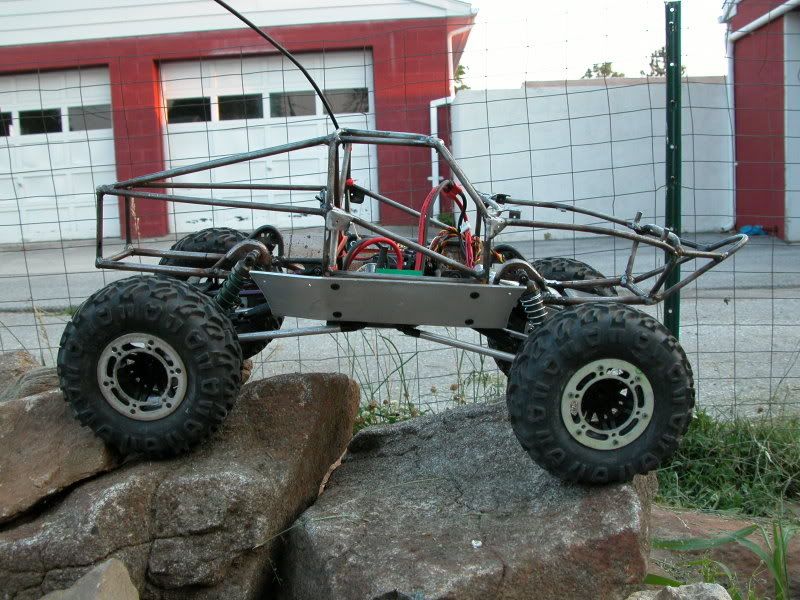 Moving the shock hoops really opened up the front end. I like the added flex. just enough but not to much 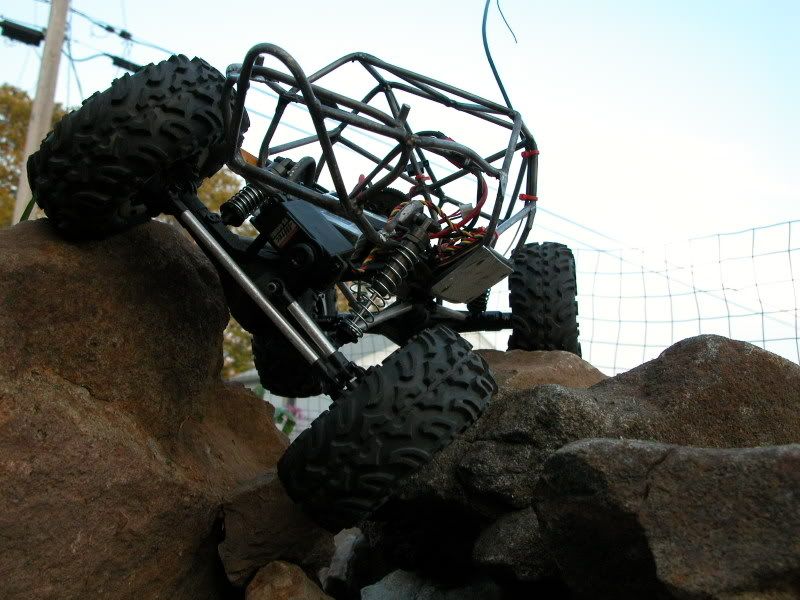 The other things i did was adding rear strait axle kit, switching to Moabs, switching to an FM so i could run the dig. Digging outside the box I'll post up tomorrow how it did in the comp. I'm ready for bed. |
|
| |
|
06-25-2008, 05:56 PM
| #35 |
| RCC Addict Join Date: Aug 2005 Location: New Oxford PA
Posts: 1,290
|
Well here are some pics of the almost finished body. I didn't have time before the comp to do the roof but i wanted to have at least the rest there to beat up. Simple flat black for testing purposes. 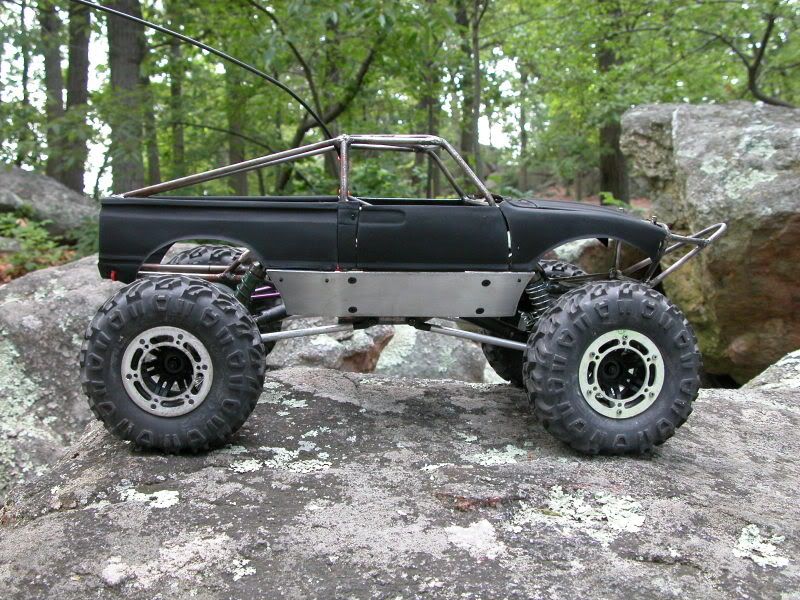 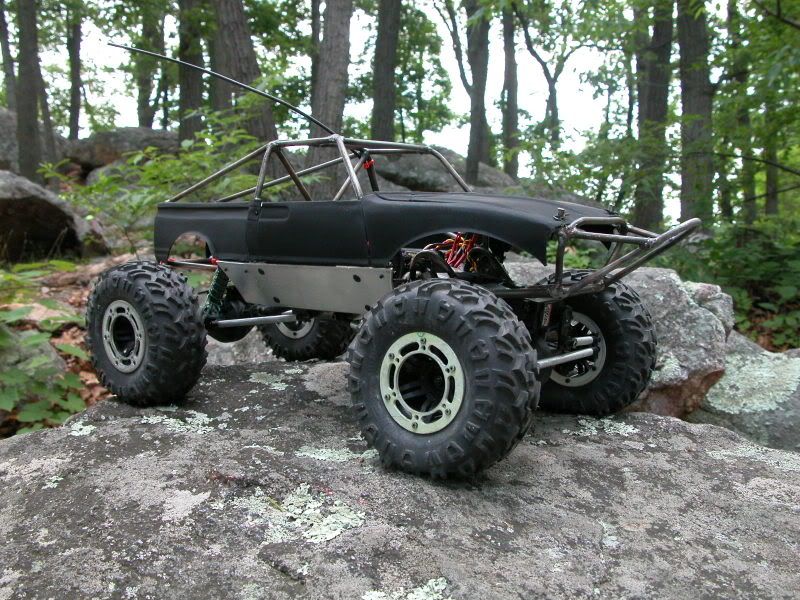 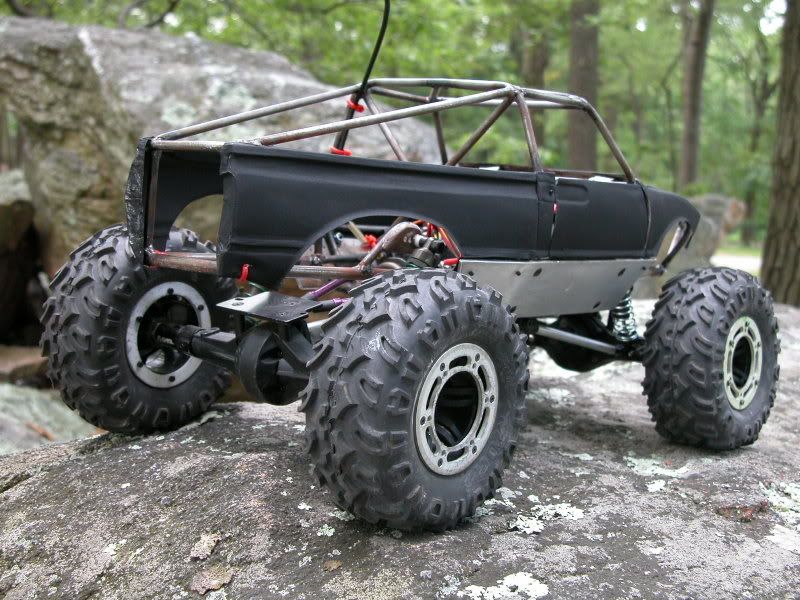 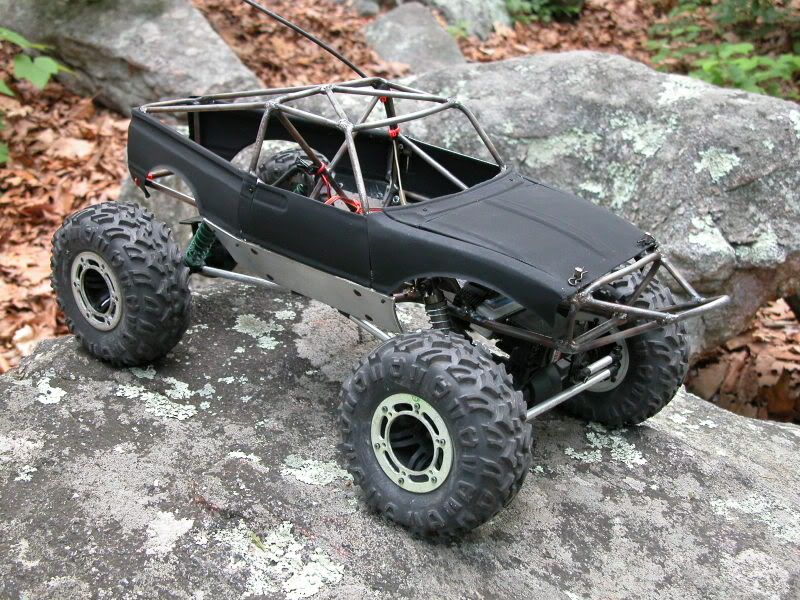 I have full range of motion in the suspension without any interference with the body. 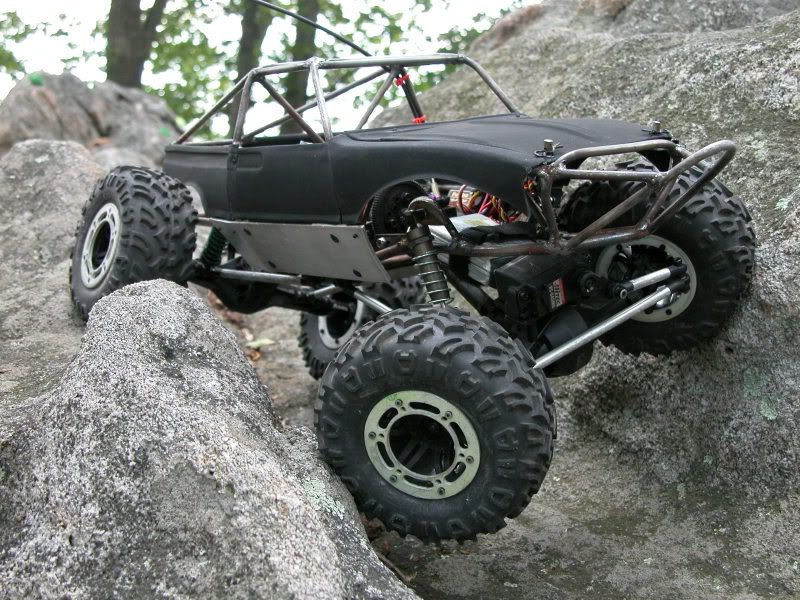 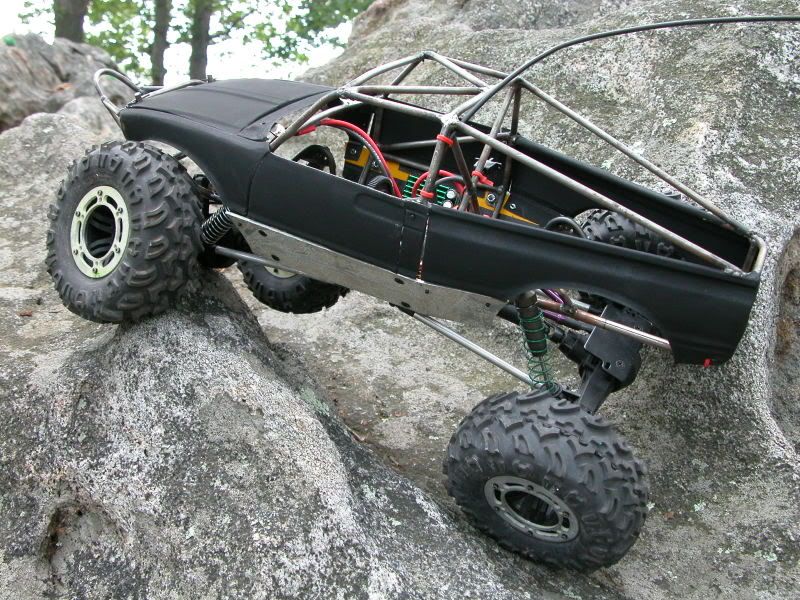 To attach the rear quarters and doors I glued tabs to the body and ran screws through the boat sides and tabs in the cage 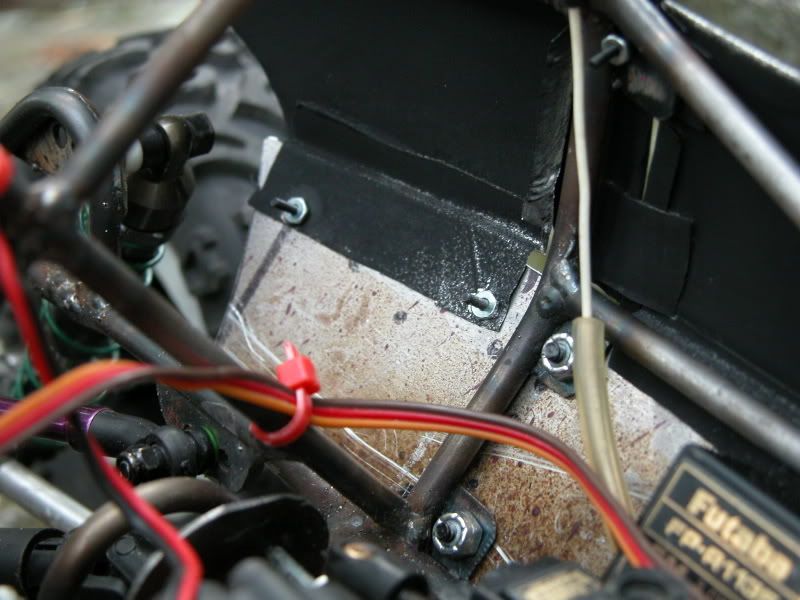 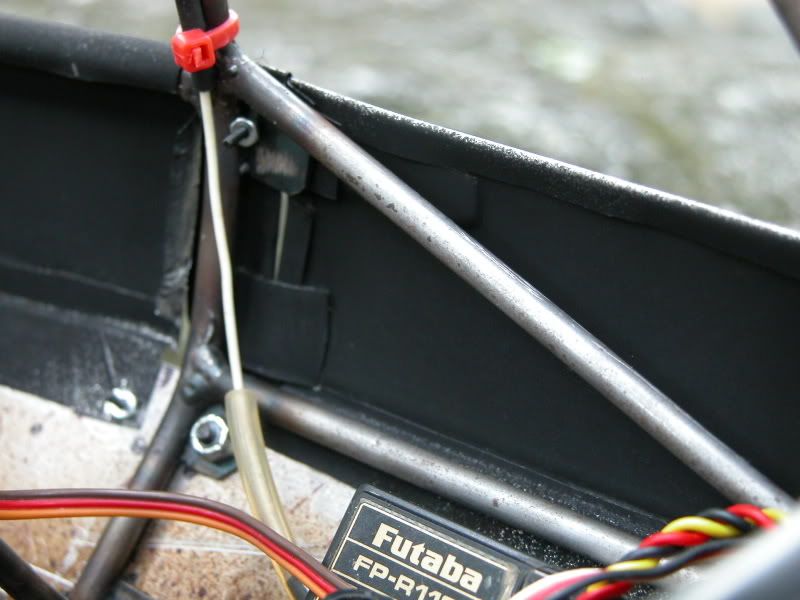 the front fenders mount to tabs on the cage like the real thing 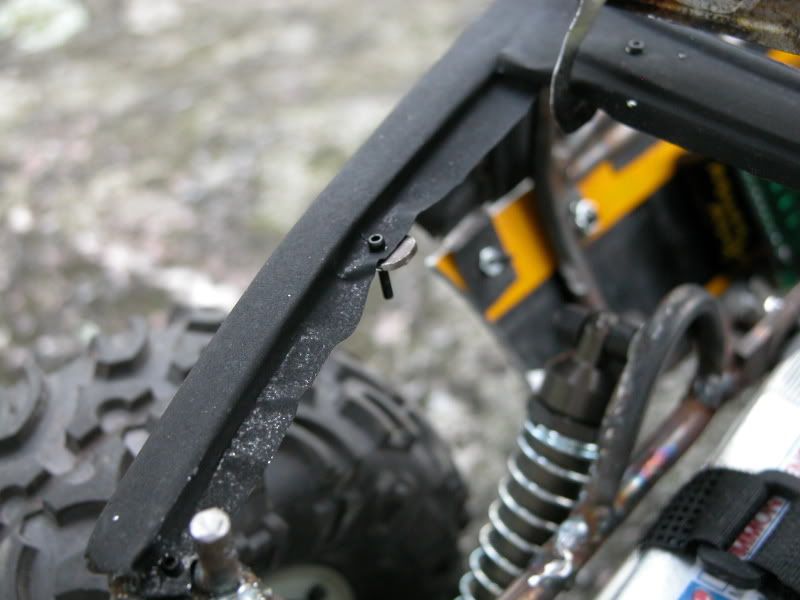 while the hood uses hinges 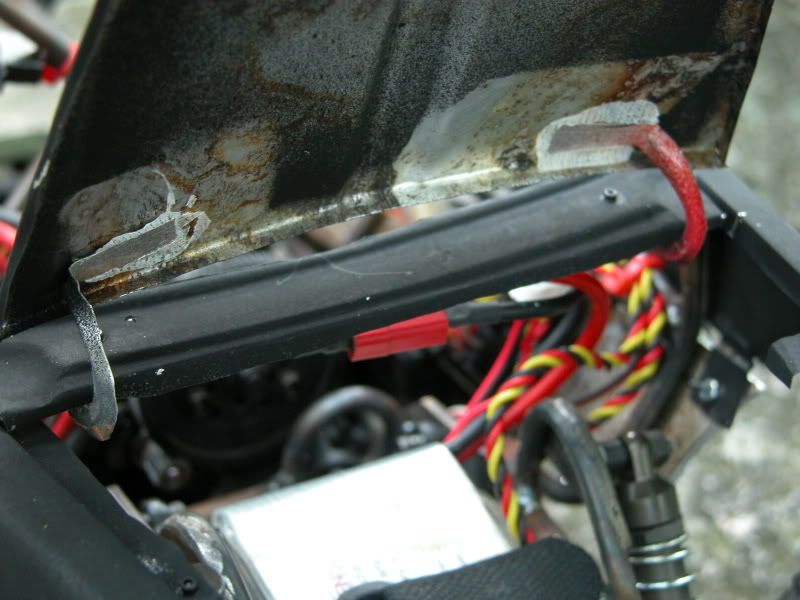 For the comp the truck did real well. The dig worked without any trouble until The setscrews started to loosen in the tranny gear (I forgot to loctite them :whatever 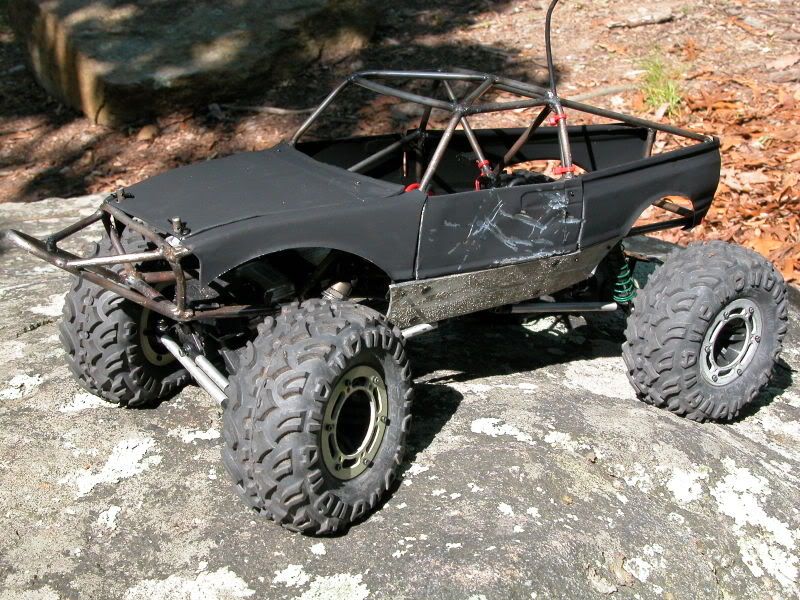 This was after the first course! 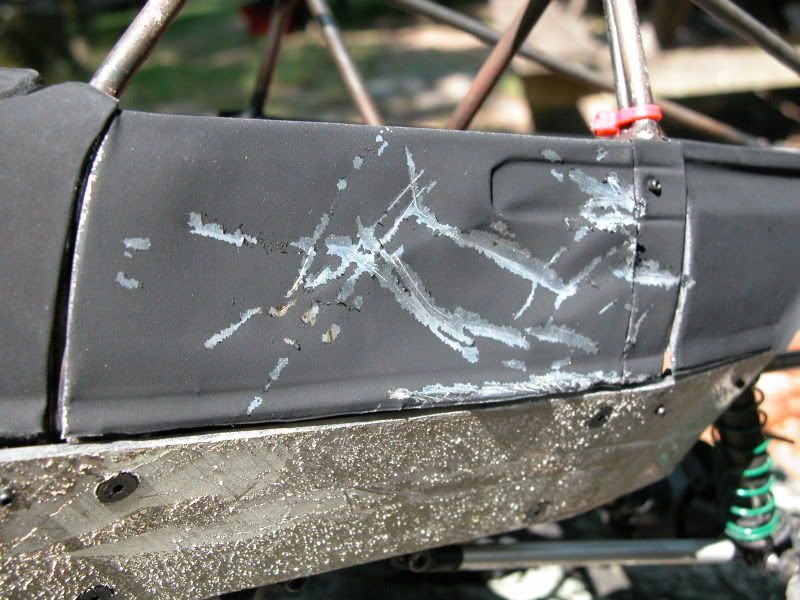 After a full day of competition the body actually held up real well 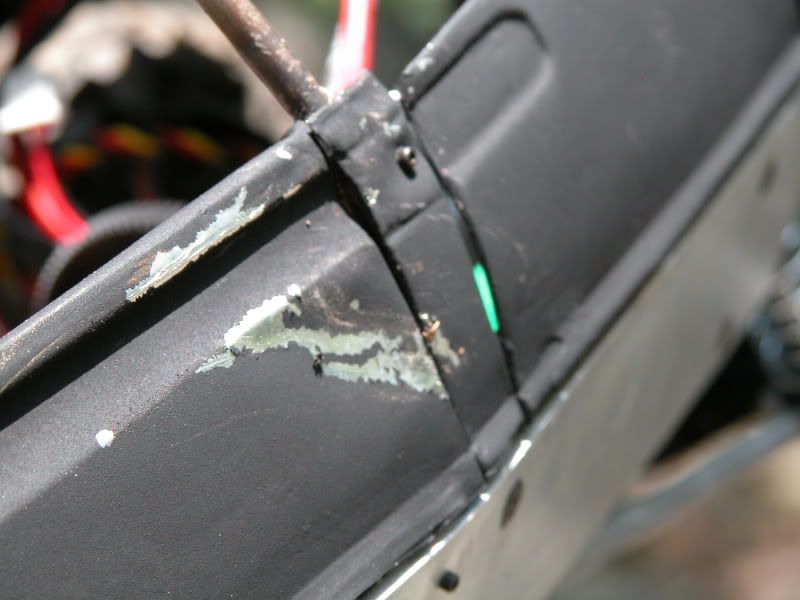  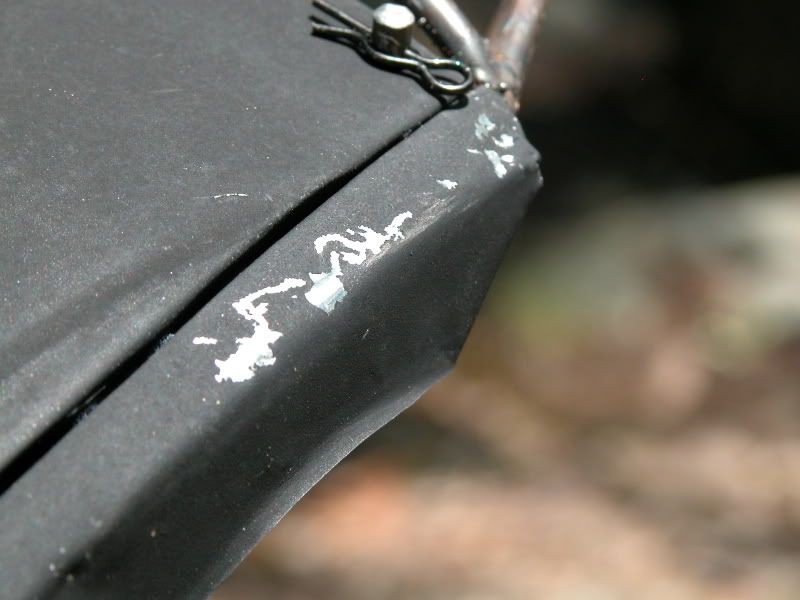 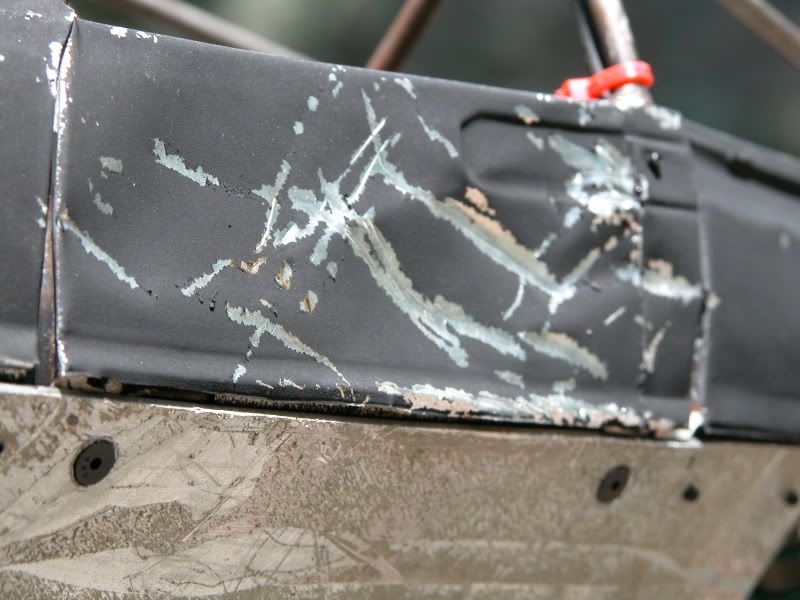 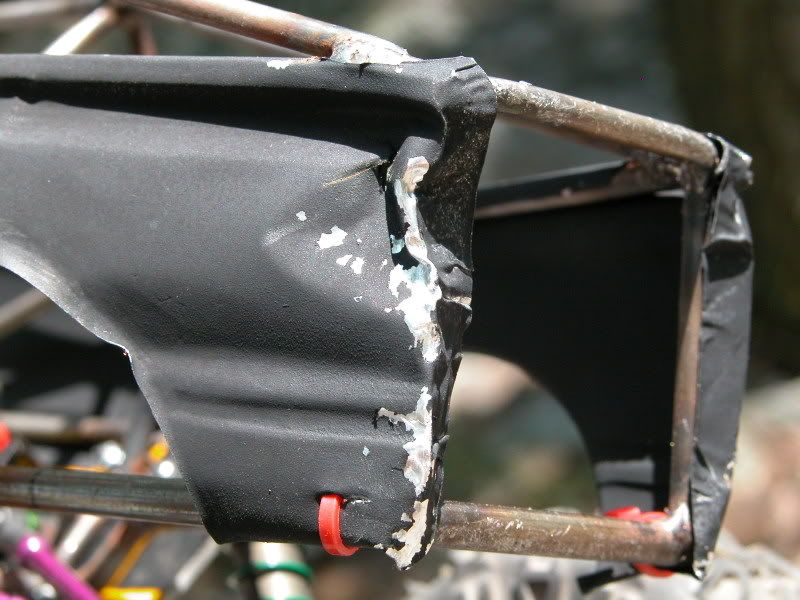 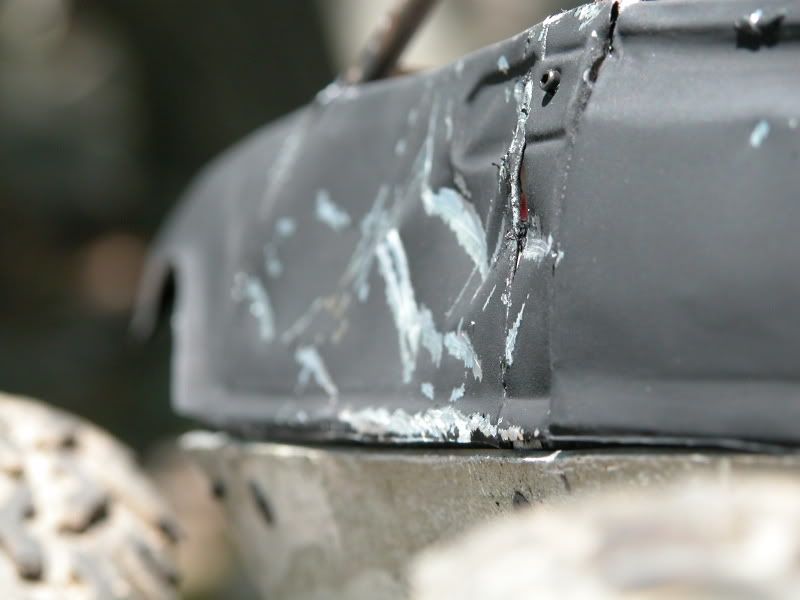 After The comp was over I beat the snot out of the truck trying to wreck the body as much as possible (I'll bet i rolled it 20 times!) but it took it like a man and asked for more! 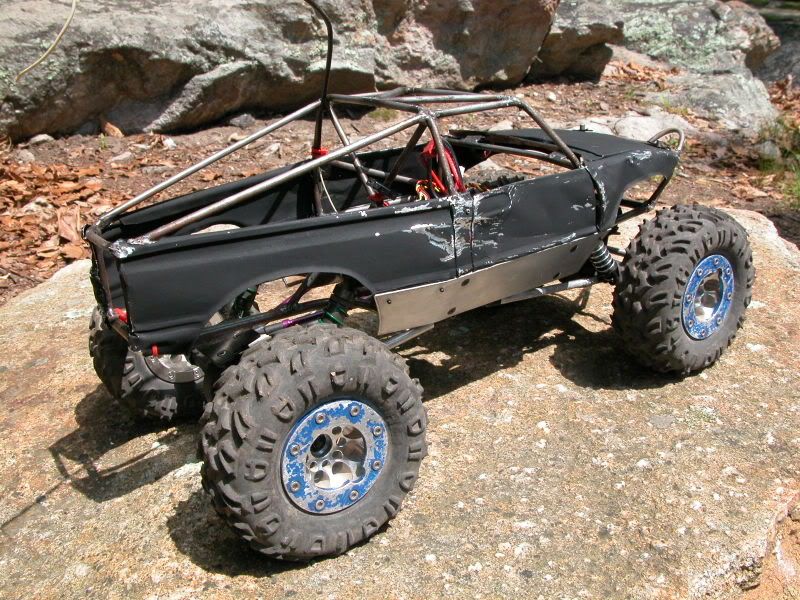  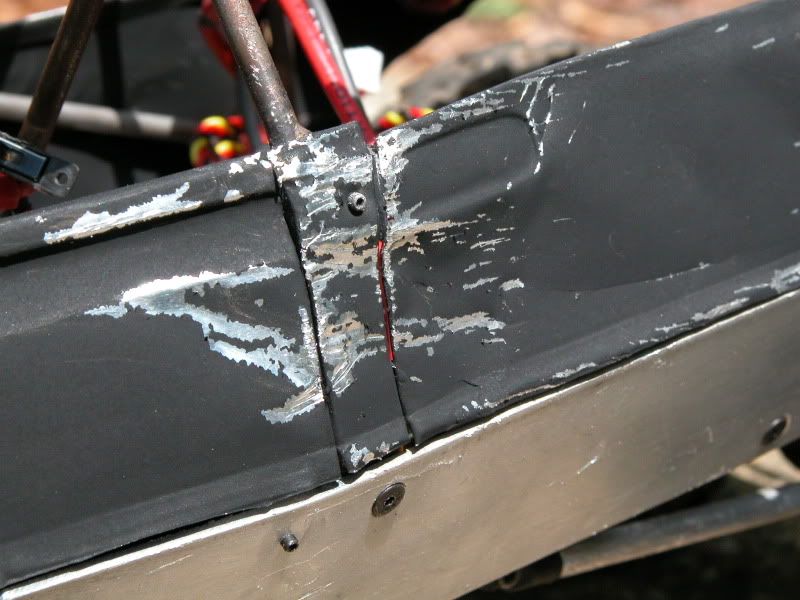 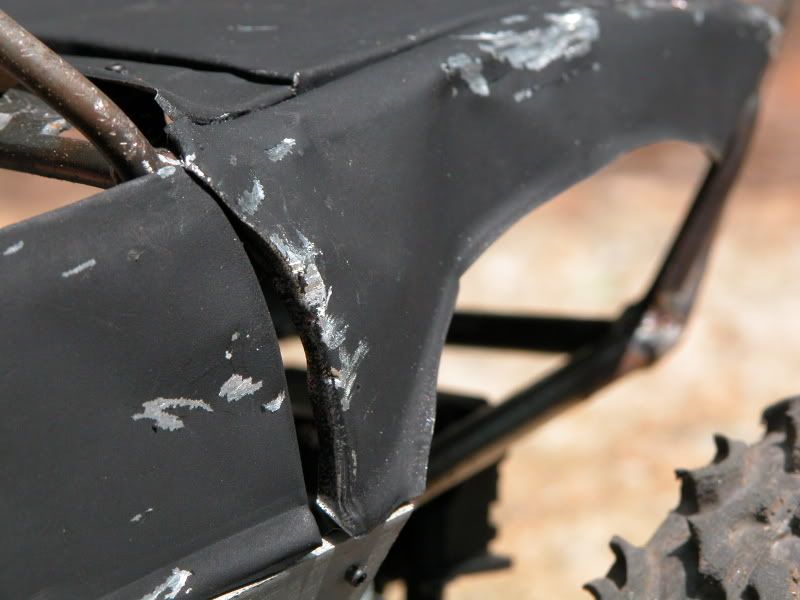 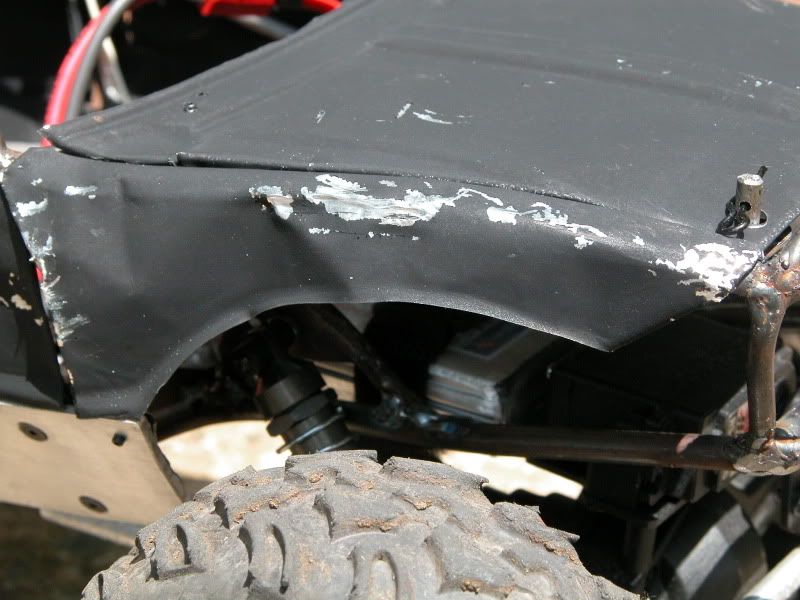 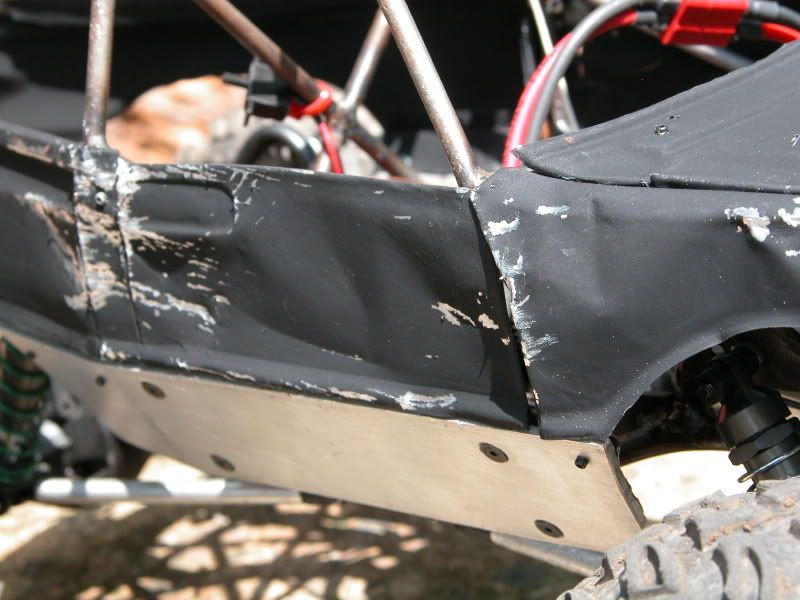 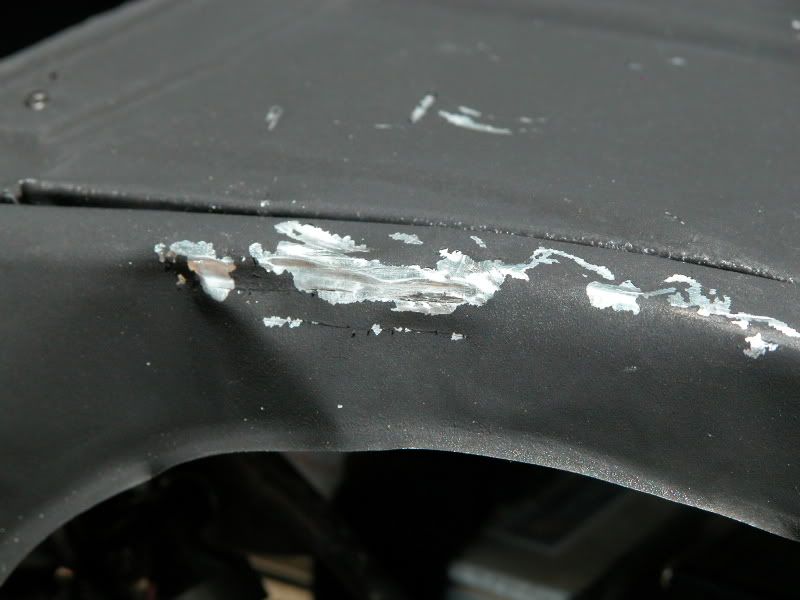 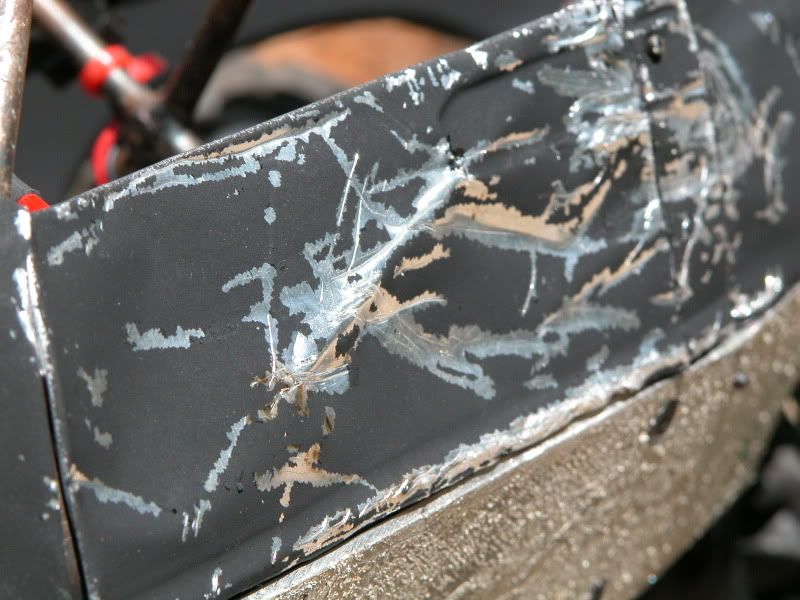  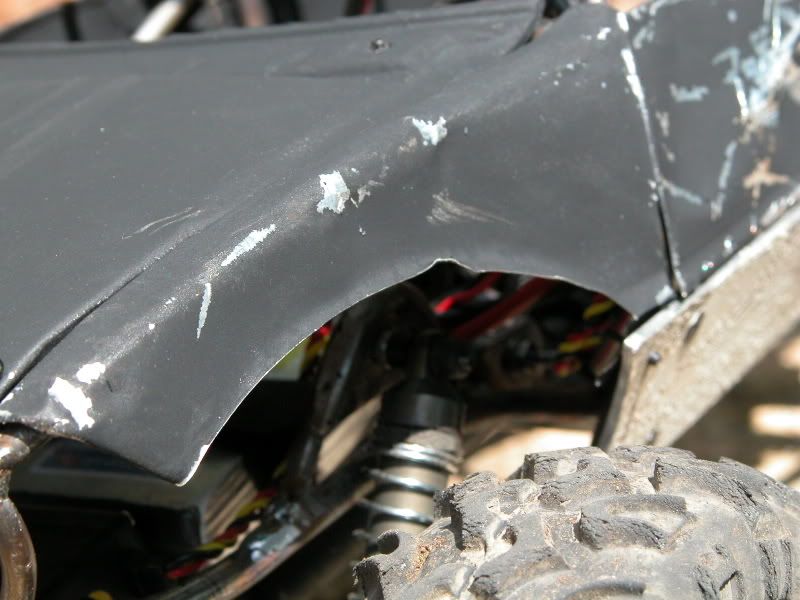 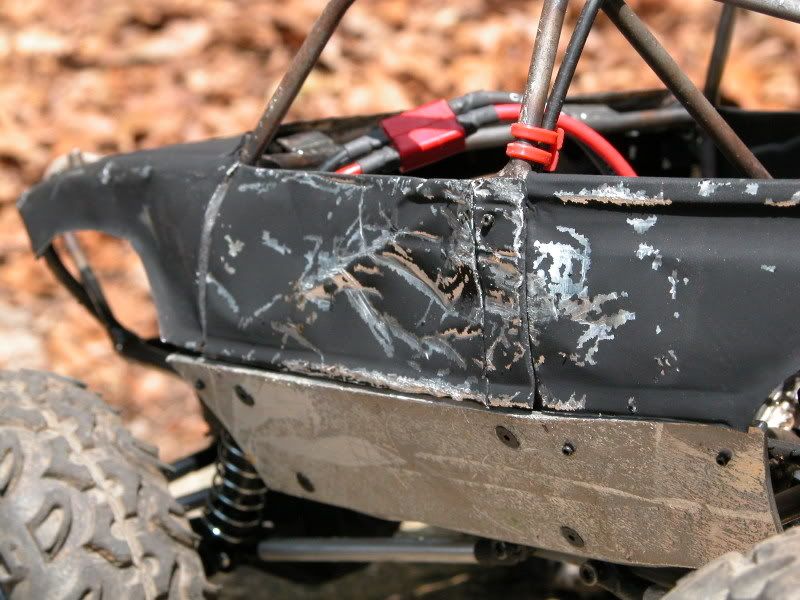 In all I extremely pleased with the truck. Now all that's left is to blow it apart, clean it up, paint it and make another body. This time it'll be shiny! |
|
| |
|
06-25-2008, 07:18 PM
| #36 |
| Newbie Join Date: May 2008 Location: lake odessa
Posts: 30
|
man, i really like that, i wish i had the skill to create aluminum panels ....i think it looks very realistic with the beat up look...
|
|
| |
|
06-25-2008, 07:38 PM
| #37 |
| Quarry Creeper Join Date: Sep 2005 Location: on the rocks
Posts: 477
|
Nice Blake Funny how yota's always look good flat black and wrinkled up |
|
| |
|
08-20-2008, 05:39 AM
| #38 |
| RCC Addict Join Date: Aug 2005 Location: New Oxford PA
Posts: 1,290
|
Well i'm kinda behind on updating this so i figured I should get on it. After my last run with the truck, I was finally satisfied by it's performance so I blew it apart to refine some stuff and paint it. The first thing I did was to make the dig set-up more reliable and easier to install. the lock plate being separate was a pain in the ass to install so I took the plate and welded it to a base 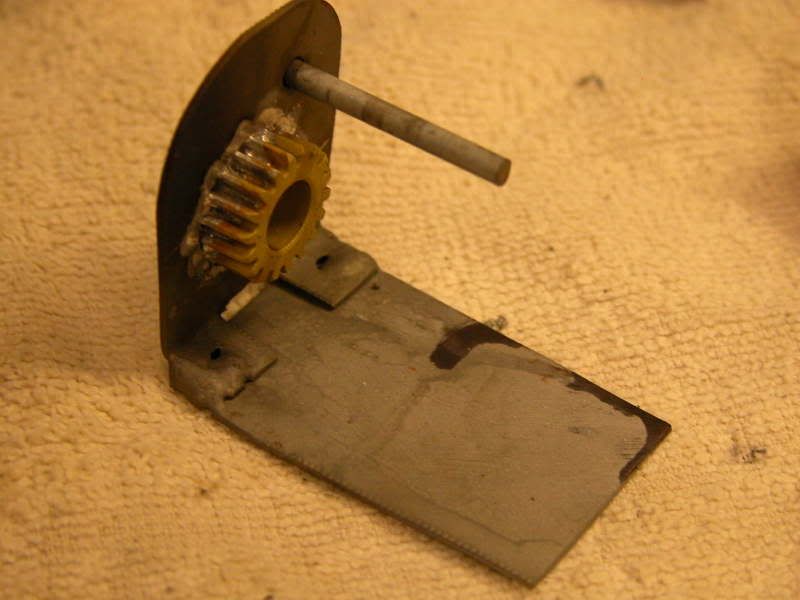 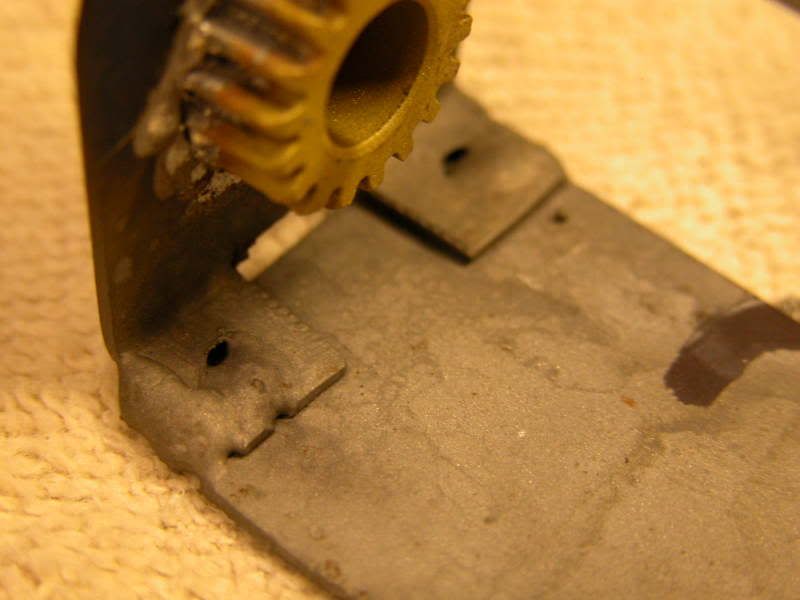 then I drill holes for the tranny screws to go through when it mounted in the truck  now the gear assembly is integrated into the tranny for easier assembly 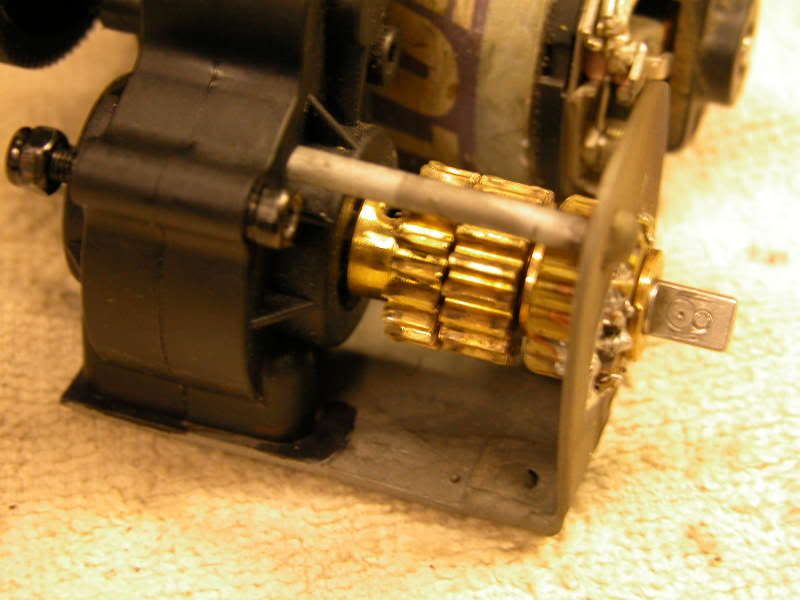 Next I wanted a way to secure the servo to the tranny as well to make the whole thing a single unit so I bent up some sheet metal and tapped some holes 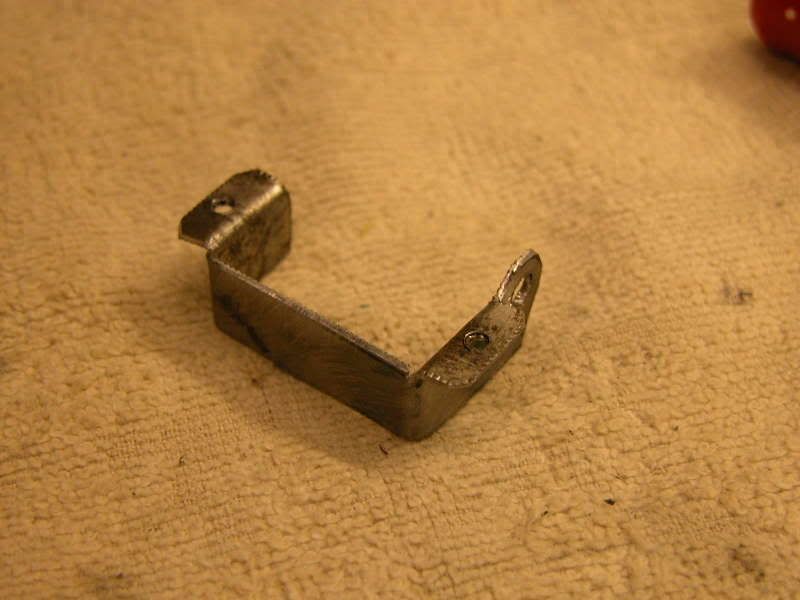 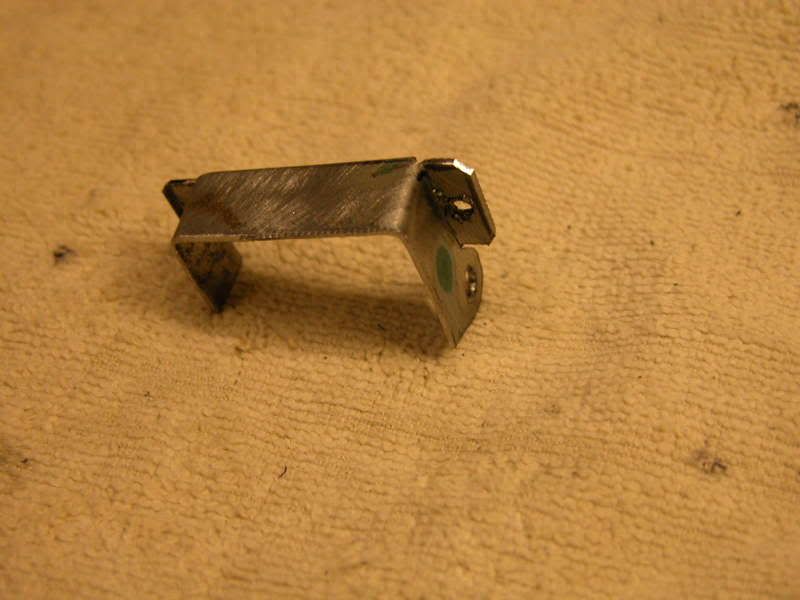 the servo somply attaches to one of the screws in the tranny 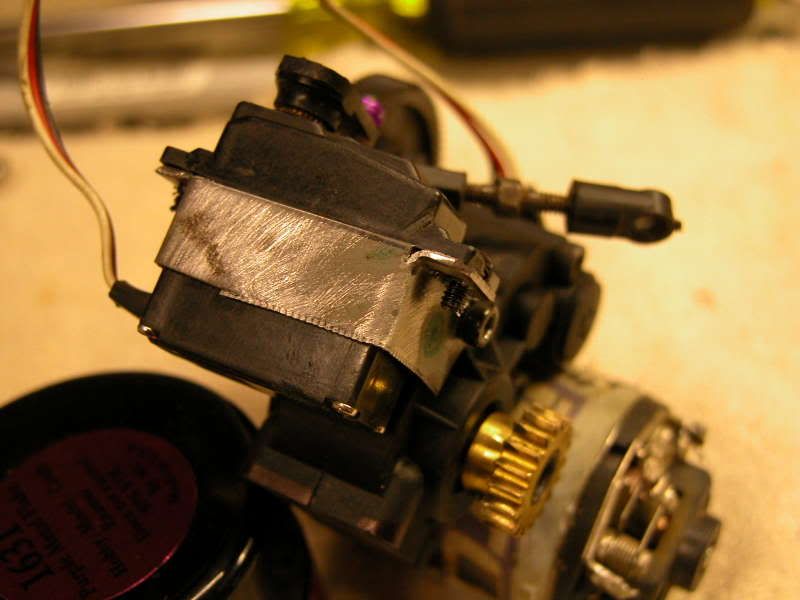 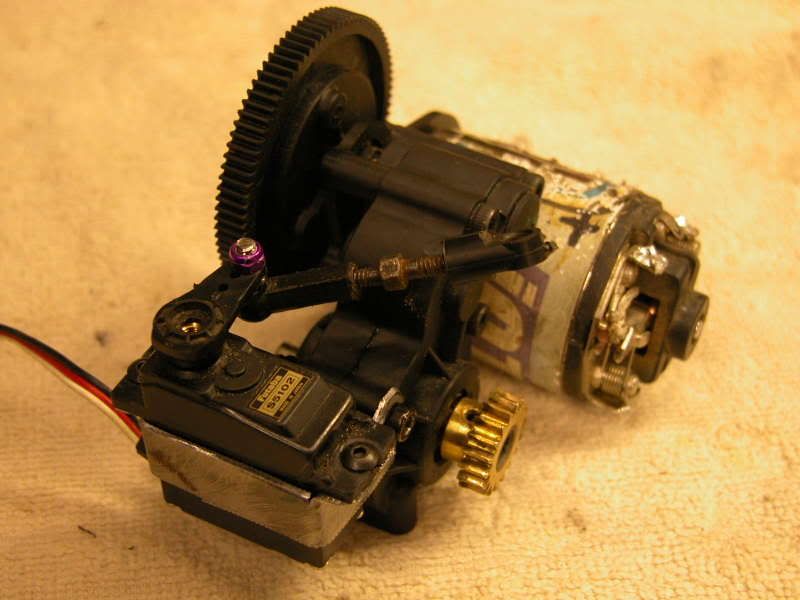 and here is the completed assembly 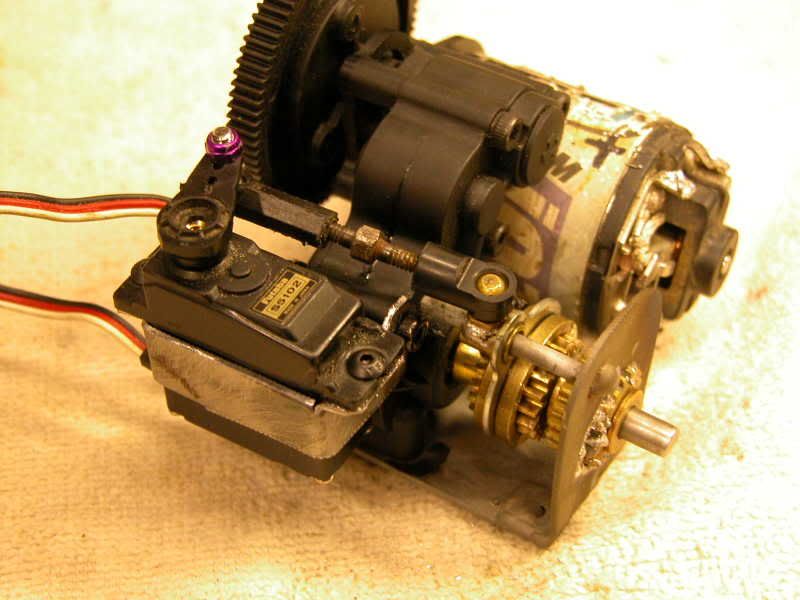 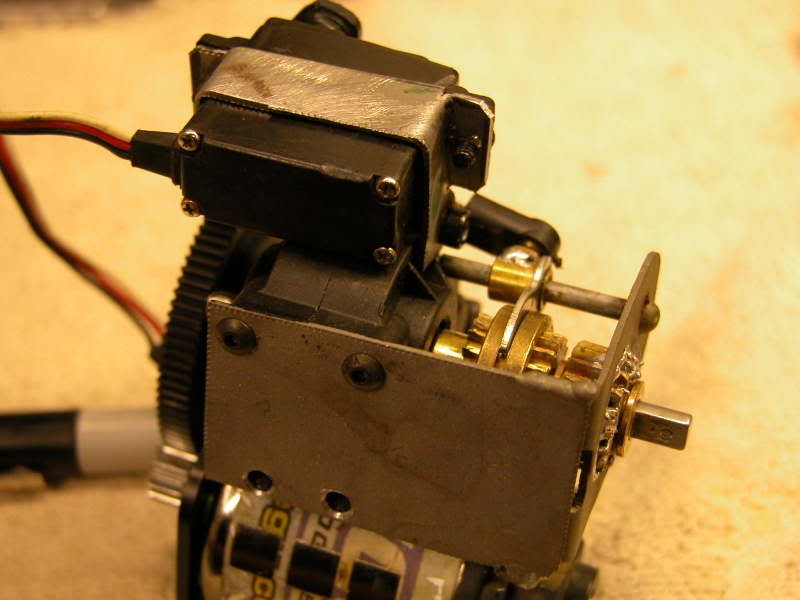 now it's a breeze to install and remove and works much better as well. more later! |
|
| |
|
08-20-2008, 09:47 AM
| #39 |
| I wanna be Dave Join Date: Jun 2005 Location: KENNEWICK, WA
Posts: 2,513
|
Nice job MM. As a fellow YOTA owner I too like the flat black and beat up look. |
|
| |
|
08-20-2008, 03:44 PM
| #40 |
| Newbie Join Date: Feb 2008 Location: tulsa
Posts: 48
|
nice work man, looks like a real life chassis. great scale
|
|
| |
 |
| |


 Linear Mode


