| |
 10-26-2008, 03:27 PM
| #1 |
| Quarry Creeper Join Date: Nov 2007 Location: Fargo
Posts: 301
|
Well Don and Solomon have been hard at it again over at DNA. Thay have decided to revamp the ever popular Slingshot chassis that we all know and love. It has been available in both aluminum and delrin, and is now available in the sweetest material of all, CARBON FIBER. You may ask yourself why carbon fiber, I ask, why not. Not only is carbon fiber super strong and rigid, but it also very light. With people comming up with different ways to mount electronics lower in their rig to help out with a better C of G why not take one of the only major components left and make it lighter. With the new CFX Slingshot you will get a pair of chassis plates, rear upper link mount, front upperlink mout battery/servo tray all made out of carbon fiber. Along with this will be 2 custom plexi electronics shelves. The rear also holds the dig servo. Thats right another weight component that has been lowered. Not only will it lower the dig servo mount it will put the servo in a location for the best mechanical advantage to opperate th dig. On top of this you will get of course the delrin lower link/tranny mount and last but not least bent delrin upper and lower link mounts. If all of this has your interest peeked keep watching this thread as well as the vendor section for DNA. Links to other CFX Slingshot build threads will be posted in there. |

|  |
| Sponsored Links | |
| | |
|
10-26-2008, 03:38 PM
| #2 |
| Quarry Creeper Join Date: Nov 2007 Location: Fargo
Posts: 301
|
Well I suppose I will start with some info on the equipmet I will be using. DNA CFX Slingshot Chassis DNA Dig DNA Motor Plate DNA Snipper Wheels Losi Rock Claw Tires Axial Transmission Axial Axles Castle Creations Sidewinder Speed Control Castle Creations BEC JR 8611a Stering Servo Spectrum DX3R Transmitter Spectrum Reciever Hitec 225mg Dig Servo Integy 35 Turn Lathe Motor Well for me this build starts out at my office at work. I have all my stuff delivered to my work. So at least I can fondel the stuff when it come in so I don't have to wait until I get home. 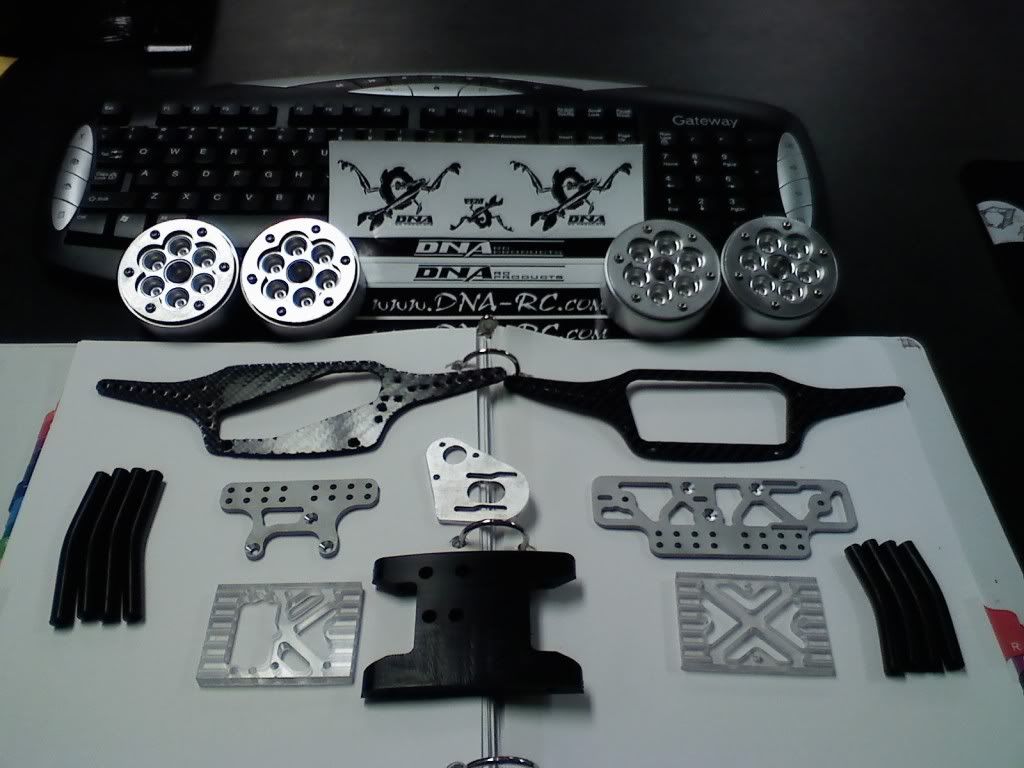 |
|
| |
|
10-26-2008, 03:58 PM
| #3 |
| Quarry Creeper Join Date: Nov 2007 Location: Fargo
Posts: 301
| Now keep in mind this chassis was sent to me as a pre production run, so things may be different in the actual production run when they come out. I will start off this thread by letting every one know that with Carbon Fiber you need to take a few precautions in order for it to give you trouble preformance. Buy this I mean you need to do something with the edges. The edges of the carbon are rough and exposed. What has worked for me in the past with 1/12 scale onroad car with this same type of material for the chassis is to ues some 400 grit sandpaper and wet sand all the edges. Not only will this smoothe out the edges and make it less likely to split, it will leave a nice finish. As for the sanding process goes I definately like to wet sand. Most importantly to keep any carbon dust that may be created from being inhaled. After all the edges have been sanded you can leave things as are or go one step further in keeping the pieces of art in perfect condition. Make sure everything is dry. Then you are going to use some medium thickness CA and glue all the edges to seel them. What I do is run a small bead along the edge then use my finger to smooth it out. You can use a q-tip if you don't want to use your finger. I promise you if you take these steps the carbon will last as long or longer than any aluminum or delrin. 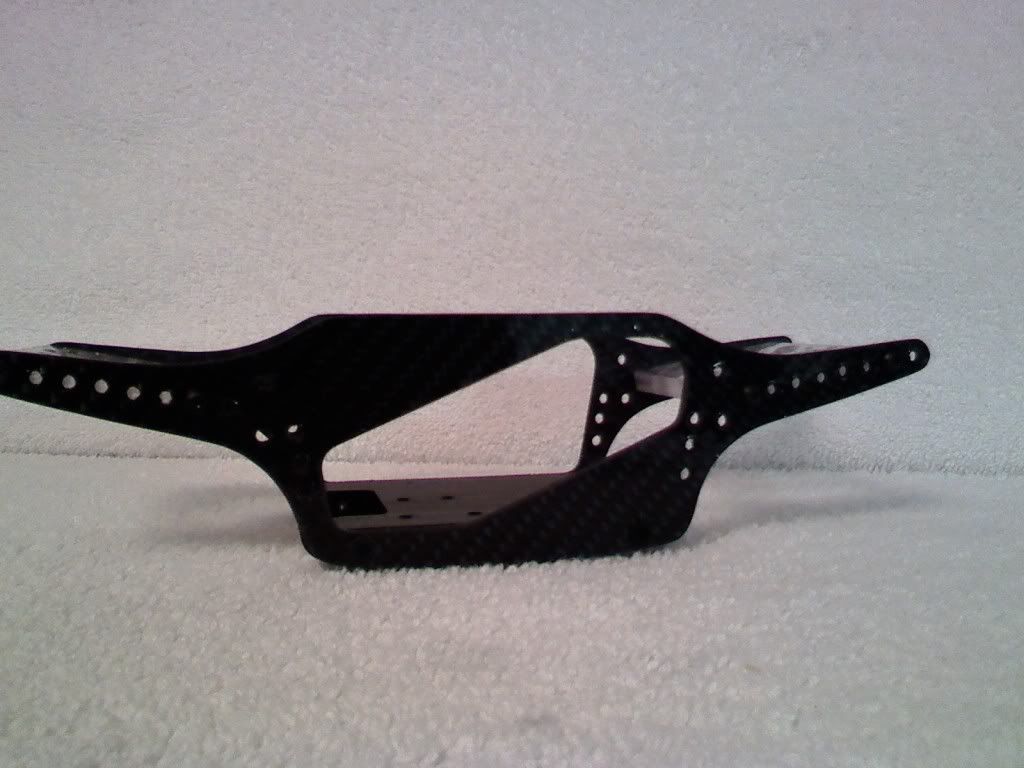 Last edited by tqcookie; 10-26-2008 at 04:20 PM. |
|
| |
|
10-26-2008, 04:09 PM
| #4 |
| Quarry Creeper Join Date: Nov 2007 Location: Fargo
Posts: 301
|
In these next photos I have Assembled the chassis plates, the bottom skid, and the radio trays. Make sure you pay attention to the direction you install the rear radio/digservo tray. The hole for the servo needs to be on the right had(passenger) side of the chassis. In these pictures it is on the wrong side. 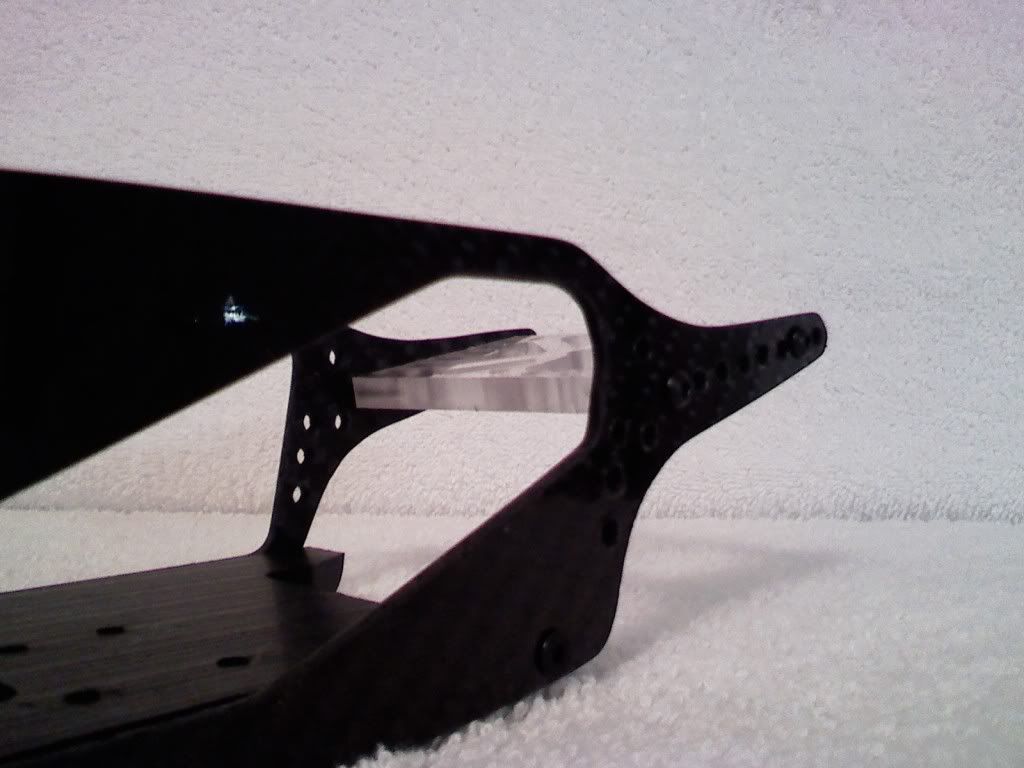 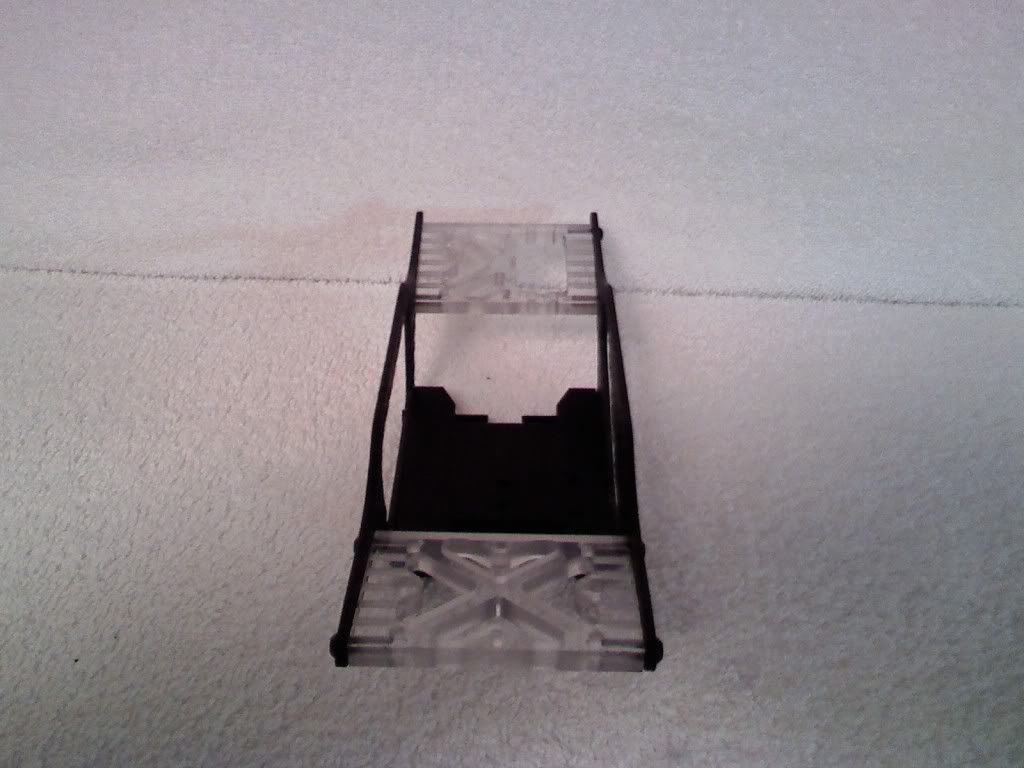  |
|
| |
|
10-26-2008, 04:21 PM
| #5 |
| I wanna be Dave  Join Date: Jun 2005 Location: drillin Holes for the man
Posts: 2,736
|
looks great! They wouldn't happen to make a servo tray for electro dig would they. If not I am sure they would. I need one for an MOA rig I am about to start on.
|
|
| |
|
10-26-2008, 04:40 PM
| #6 |
| Quarry Creeper Join Date: Nov 2007 Location: Fargo
Posts: 301
|
Once I had that done I figured now was a good time to install the transmission with the DNA dig and the dig servo into the new location in the radio tray. Once again remember I have mine on the wrong side in these pictures so make sure you put yours on the correct side. Just in case you are wondering why it is the wrong side, it is because the rear drive shaft comes out the left side and with the dig servo on that side they interfear with one another. By the way I have to add with the dig servo in this location you are pushing and pulling on the dig arm in almost a straight manner. Also the connection point is in much closer on the shaft making for better leverage. For those of you whou had a hard time getting your linkage to work with the servo mounted to the dig case, this will make you feel much better. 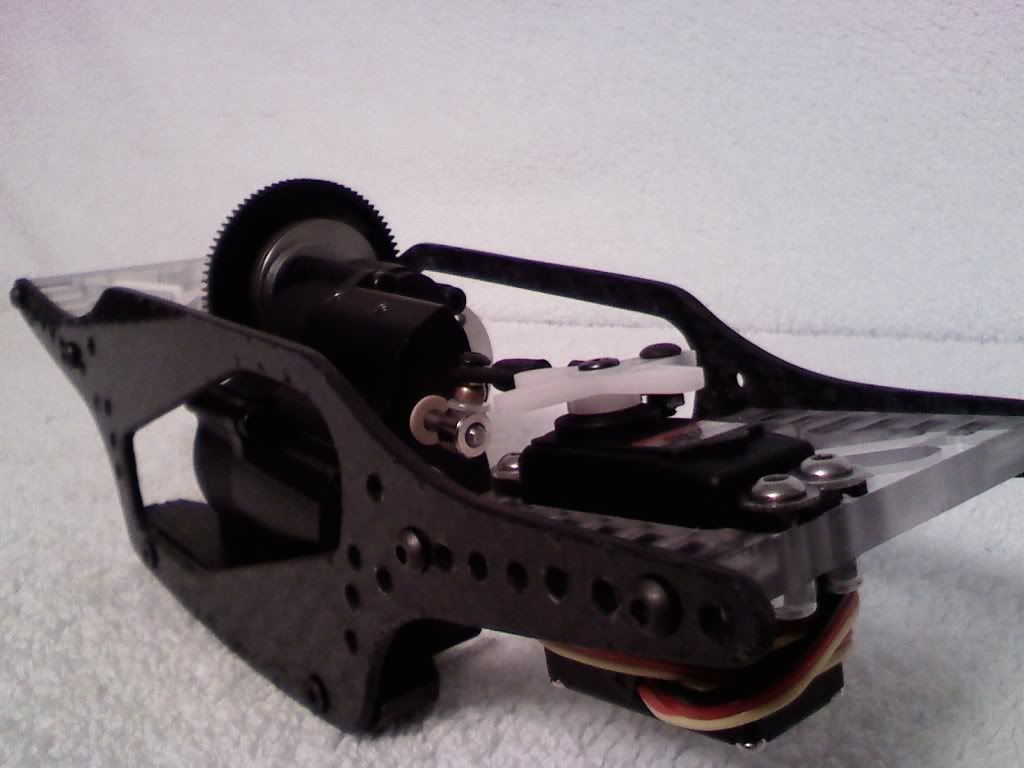 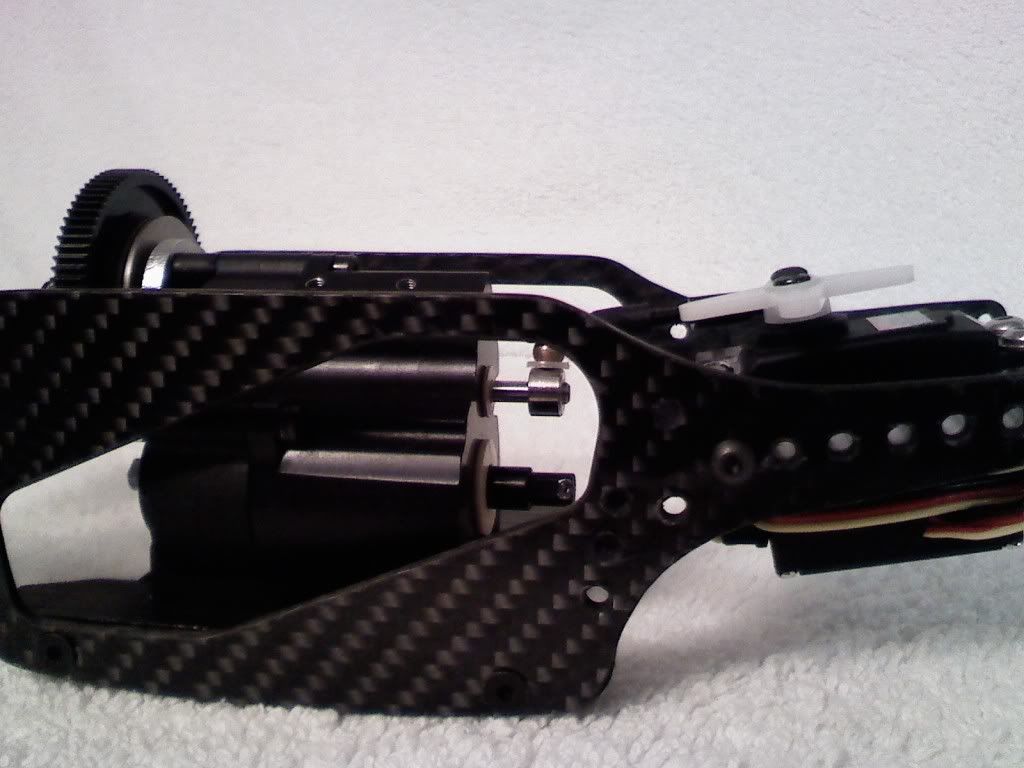 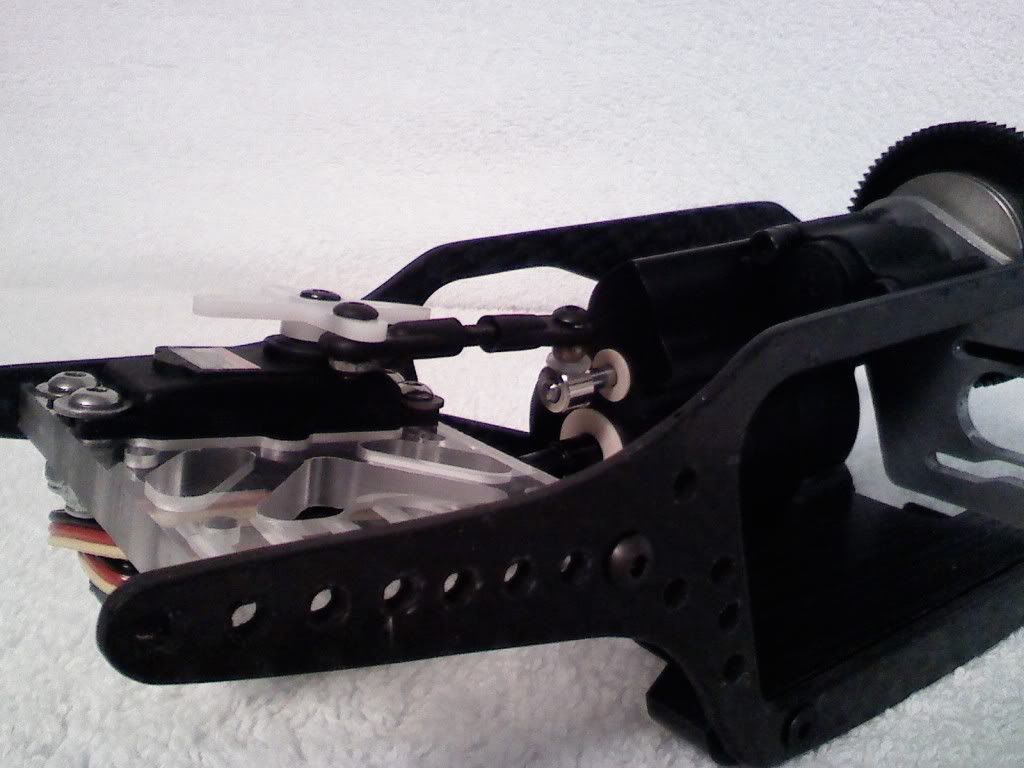 |
|
| |
|
10-26-2008, 04:42 PM
| #7 | |
| Quarry Creeper Join Date: Nov 2007 Location: Fargo
Posts: 301
| Quote:
| |
|
| |
|
10-26-2008, 04:45 PM
| #8 |
| Rock Crawler Join Date: Sep 2008 Location: Portland
Posts: 550
|
When can I expect to be able to purchase this chasis? Also what suspension works better with the design droop or sprung?
|
|
| |
|
10-26-2008, 04:45 PM
| #9 |
| Picky Fab'r/Acetal Junky  Join Date: Jul 2006 Location: Arizona Desert/AJ
Posts: 3,073
|
What your hands on those CF edges. They look pretty banged up and CF splinters are a pain in the butt...or the fingers |
|
| |
|
10-26-2008, 04:55 PM
| #10 | ||
| Quarry Creeper Join Date: Nov 2007 Location: Fargo
Posts: 301
| Quote:
Quote:
It is also likely that the production version may not have rough edges at all | ||
|
| |
|
10-26-2008, 05:05 PM
| #11 |
| Quarry Creeper Join Date: Nov 2007 Location: Fargo
Posts: 301
|
Now onto the next step. For me this was a real nice touch in this kit. I love delrin lower links because of the sliperyness of them. I have used delrin in other builds but I had to drill and tap them myself. The ones supplied from DNA were not only drilled and tapped but they also came with the threaded inserts to use with them. On top of that they were pre bent wick is a nice feature. So after threading all the supplied inserts into the delrin links I installed Traxxas #5347 (large Reve rod ends). Now I have the basic chassis assembly with the lower links. Another nice feature was DNA also supplied the screws and nuts to mount the links to the skidplate. 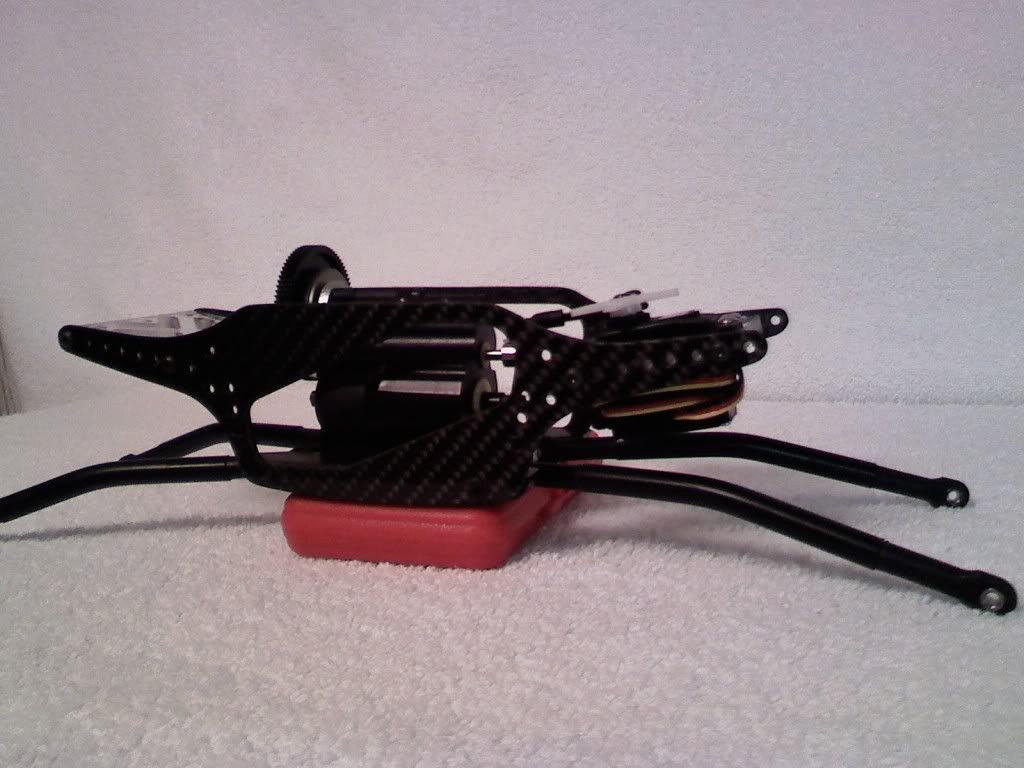 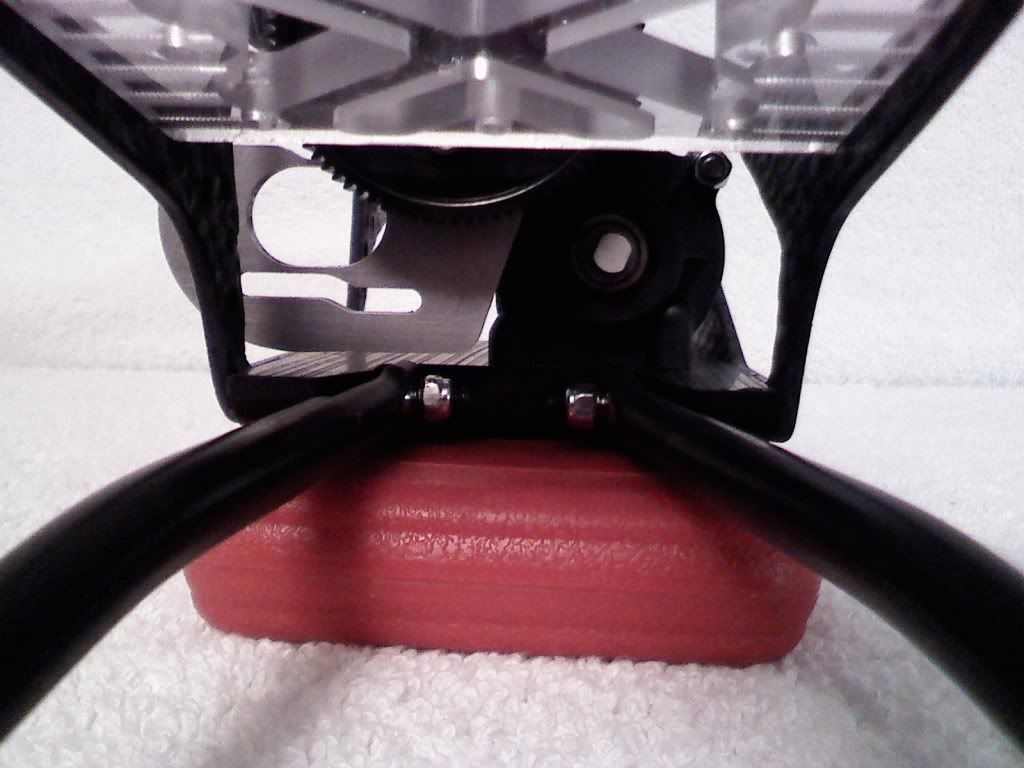  |
|
| |
|
10-26-2008, 05:49 PM
| #12 |
| Rock Stacker Join Date: Mar 2008 Location: cedar park TEXAS
Posts: 62
|
how wide is it?
|
|
| |
|
10-26-2008, 08:50 PM
| #13 |
| I wanna be Dave Join Date: Jun 2007 Location: Earth
Posts: 2,488
|
Just an FYI, the production version CFX kits will come with the edges taken care of. We have a different carbon which just came in this last week that machines MUCH better and makes our cleanup a breeze! Don |
|
| |
|
10-27-2008, 12:22 AM
| #14 | |
| I wanna be Dave Join Date: Jun 2005 Location: drillin Holes for the man
Posts: 2,736
| Quote:
 | |
|
| |
|
10-27-2008, 12:23 AM
| #15 | |
| I wanna be Dave Join Date: Jun 2005 Location: drillin Holes for the man
Posts: 2,736
| Quote:
I love DNA products and want to support them. Especially sence they are from Texas! | |
|
| |
|
10-27-2008, 07:41 AM
| #16 | |
| Picky Fab'r/Acetal Junky Join Date: Jul 2006 Location: Arizona Desert/AJ
Posts: 3,073
| Quote:
| |
|
| |
|
10-27-2008, 08:03 AM
| #17 |
| Quarry Creeper Join Date: Nov 2007 Location: Fargo
Posts: 301
|
Well at this point I found it conveniant to mount the fron and rear upper link plate. These things are a work of art. I can't wait to see the production versions out of the carbon fiber. To mount these is really straight forward. For the rear use the three screws from the stock servo mount and bolt to the standoffs on the pumpkins. Now in the fron it is a little different. In the production run there will be 2 extra standoffs to mount this plate. So you will have 5 attachment points. With the pro production mount being aluminum, witch was very stiff, I only used the three mounts at the pumpkin. 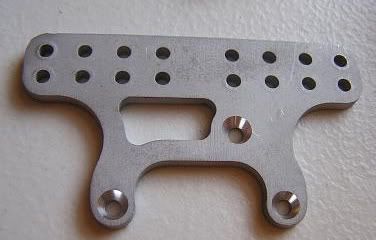 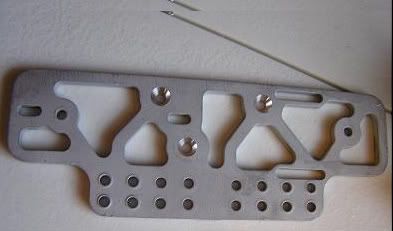 Here you can see the rear upper link mounted. 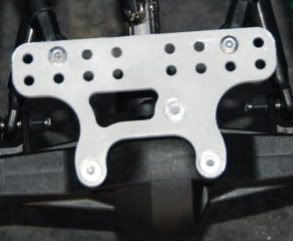 This shot shows the fron upperlink mounted as well. In this picture can also see how the servo mounts. The mount even has slots for velcro straps to mount the battery. 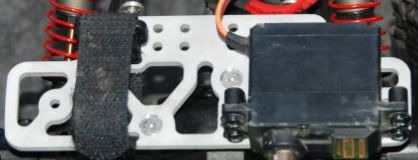 |
|
| |
|
10-27-2008, 08:12 AM
| #18 |
| Quarry Creeper Join Date: Nov 2007 Location: Fargo
Posts: 301
|
After the link mounts are attached to the axles it was time to start hooking up the links. Personally for me this is the stage of the build that gets interesting. Things really start to take shape and you can really get a feel for what the finished product will look like.  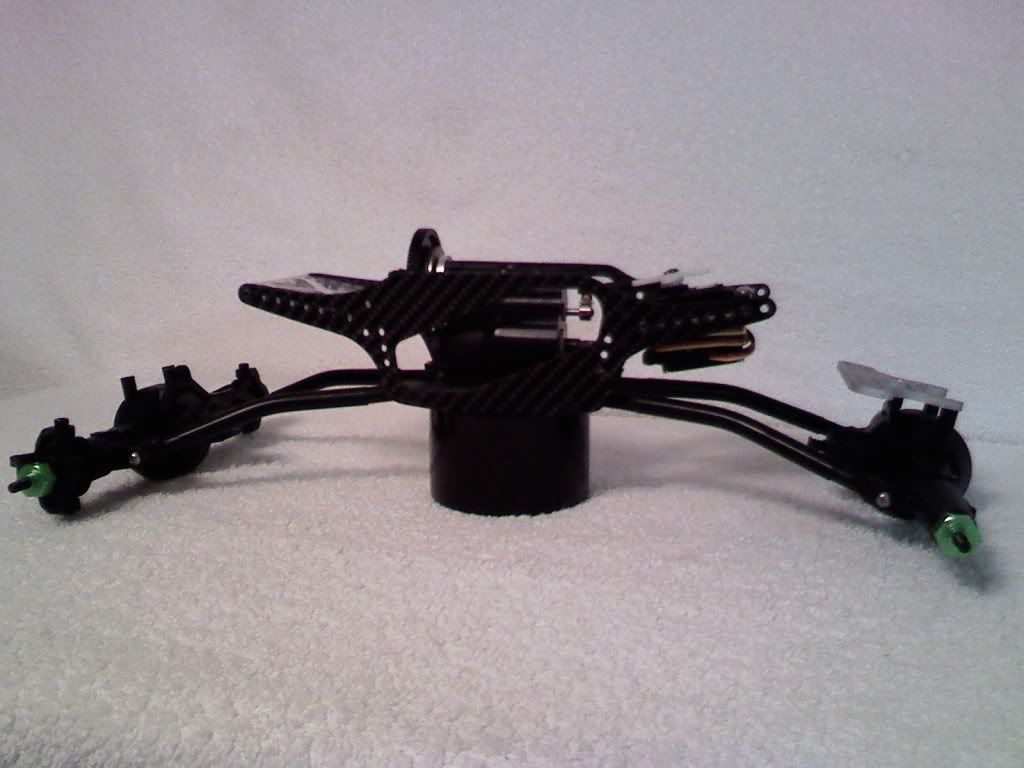 |
|
| |
|
10-27-2008, 08:26 AM
| #19 |
| RCC Addict Join Date: Oct 2007 Location: Commerce Twp.
Posts: 1,773
|
Will DNA be offering the upper link mounts separatly |
|
| |
|
10-27-2008, 08:31 AM
| #20 | |
| I wanna be Dave Join Date: Jun 2007 Location: Earth
Posts: 2,488
| Quote:
Don | |
|
| |
 |
| Thread Tools | |
| Display Modes | |
| |


 Linear Mode


