| |
 06-25-2009, 09:53 AM
| #61 | |
| "HOLLYWOOD"   Join Date: Dec 2008 Location: Miami
Posts: 3,119
| Quote:
| |

|  |
| Sponsored Links | |
| | |
|
06-25-2009, 09:56 AM
| #62 |
| Ex Nor-CalRCRC slave  Join Date: Dec 2008 Location: San Mateo, CA.
Posts: 2,242
|
Yea, just gotta be careful with the little mount behind the axle. I usually remove the 3 link ball, then shave it down to about the middle of the hole where the ball was. Then a 3X8 screw is long enough to hold the plate on. Go too far, and there won't be much material left to hold the screw threads.
|
|
| |
|
06-25-2009, 10:24 AM
| #63 |
| "HOLLYWOOD" Join Date: Dec 2008 Location: Miami
Posts: 3,119
|
Are you talking about the mount behind the axel that was holding the old three link?
|
|
| |
|
06-25-2009, 10:41 AM
| #64 | |
| Ex Nor-CalRCRC slave Join Date: Dec 2008 Location: San Mateo, CA.
Posts: 2,242
| Quote:
 Last edited by gunnar; 06-25-2009 at 10:48 AM. | |
|
| |
|
06-25-2009, 10:59 AM
| #65 |
| "HOLLYWOOD" Join Date: Dec 2008 Location: Miami
Posts: 3,119
|
Oh ok yea you can tell on the right on that it's lower, might just have to try that out, did you notice any benefits alot from doing this?
|
|
| |
|
06-25-2009, 11:21 AM
| #66 |
| Ex Nor-CalRCRC slave Join Date: Dec 2008 Location: San Mateo, CA.
Posts: 2,242
|
When done on the front, it lowers the weight down obviously. If a four link mount is used, it will narrow the upper and lower link separation at the axle, so you will have to lower the upper link at the chassis to restore proper geomerty. When used at the back, you will have to do the same thing, but in my experience, less link seperation is better on the back axle, my rig seems to climb better when the uppers are more parallel, or even higher in the front than in the back. The front axle hooks up better (more tire traction)when the uppers are at less of an angle, meaning more seperation at the front axle, less at the chassis.
Last edited by gunnar; 06-25-2009 at 11:25 AM. |
|
| |
|
06-25-2009, 03:28 PM
| #67 |
| "HOLLYWOOD" Join Date: Dec 2008 Location: Miami
Posts: 3,119
|
So you basically moved your top front and rear links on the chassis up one hole?
|
|
| |
|
06-25-2009, 04:11 PM
| #68 |
| Ex Nor-CalRCRC slave Join Date: Dec 2008 Location: San Mateo, CA.
Posts: 2,242
|
On my SWX, the front uppers on the chassis are on the second hole from the bottom, the rear uppers are on the third hole up. Here is a pic to better explain. The rear uppers are asymetrical, so they look alittle funky: 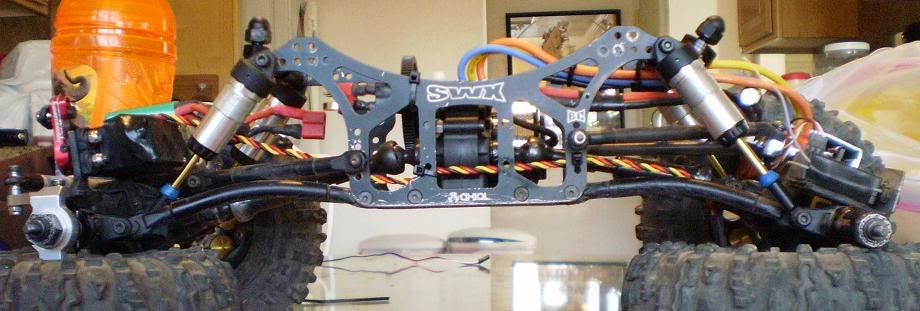 Last edited by gunnar; 06-25-2009 at 07:06 PM. |
|
| |
|
06-26-2009, 06:40 AM
| #69 |
| "HOLLYWOOD" Join Date: Dec 2008 Location: Miami
Posts: 3,119
|
Much better now I got it. The other setup O wanna try is running bent links in the rear lower been noticing that the rear being straight is getting hung up a little and when am climbing tends to hit a little too much to my liking, might just do it all at once. Thanks Gun. |
|
| |
|
06-26-2009, 04:24 PM
| #70 |
| Pebble Pounder Join Date: Apr 2009 Location: Grand Junction
Posts: 153
|
nice build thread.
Last edited by chessmaster; 06-26-2009 at 05:23 PM. |
|
| |
|
08-04-2009, 07:26 AM
| #71 |
| "HOLLYWOOD" Join Date: Dec 2008 Location: Miami
Posts: 3,119
|
Thanks
|
|
| |
|
09-23-2009, 07:21 AM
| #72 |
| "HOLLYWOOD" Join Date: Dec 2008 Location: Miami
Posts: 3,119
|
Just got some goodies in and here they are: Vanquish Hurtz Shifter 3 Position Dig for Axial AX-10 Robinson Racing Hard Aluminum Differential Gear AX10 Robinson Racing Hard Steel Idler Gear AX10 Will have pics up later today of the upgraded build. |
|
| |
|
09-23-2009, 07:29 AM
| #73 |
| Rock Crawler Join Date: Apr 2008 Location: Highlands Ranch, Co.
Posts: 852
|
Done yet?
|
|
| |
|
09-23-2009, 09:58 AM
| #74 |
| I wanna be Dave Join Date: Feb 2009 Location: 20 miles southeeast of downtown Sacramento
Posts: 2,373
|
Just replaced the hid dig for vanquish in my basher - much better  |
|
| |
|
09-23-2009, 10:08 AM
| #75 |
| Rock Crawler Join Date: Dec 2008 Location: Fortuna Calif.
Posts: 997
|
Yes you will like that VP dig,mine locks and unlocks like butter. Iam using an older KO servo with about 110 oz of force it is almost overkill because the dig is so smooth. Mummm, butter |
|
| |
|
09-23-2009, 12:00 PM
| #76 | |
| "HOLLYWOOD" Join Date: Dec 2008 Location: Miami
Posts: 3,119
| Quote:
Not to knock the DNA Dig it worked perfect without a problem, BUT I always kept people talking about there chassis sucking up when engageing there DIG mine never did that with the DNA. But now with the VP DIG holy smoke the rear sucks down like 2 inches it's nutt's. The new gears in the tranny are working great noticed the smoothness right away from the stock ones. Clearence not and issue running a Hitech HS-5645MG which for this DIG you can run a serrvo with 10oz and will move it like noigthing, super, super, super smooth. I will have pics up later today. | |
|
| |
|
09-24-2009, 09:35 AM
| #77 |
| "HOLLYWOOD" Join Date: Dec 2008 Location: Miami
Posts: 3,119
|
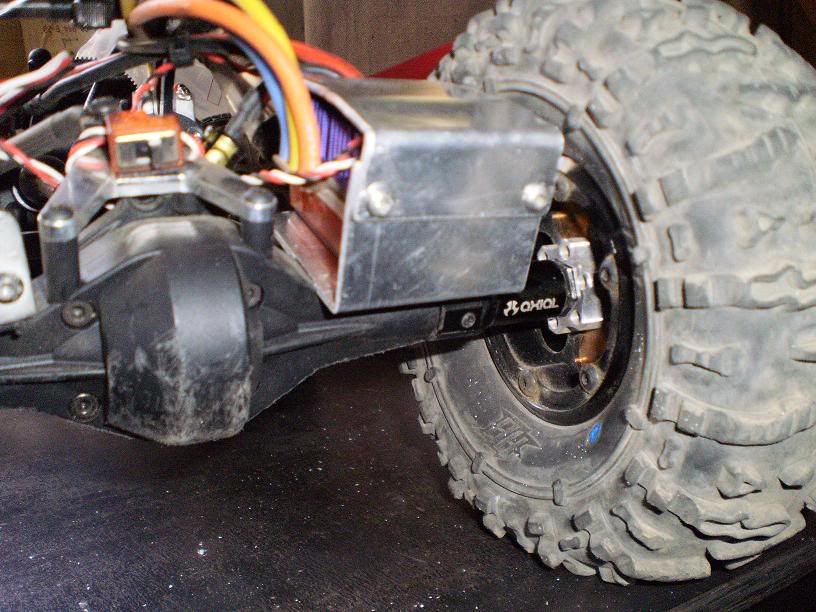
Not gonna bore you with my hand full of grease and the dirty part of the build. So here are is the finish product, by installing the VP DIG and relocating my ESC and Receiver was able to lower my COG and now when I stand the rig on the side I am able to put a pencil or pen under the tire without it tipping over. Like I said in my last post really noticed the smoothness of the trani now and the DIG what I can I say but smooth as butter when it locks it locks and when it free wheel it free's the product is amazing hat's off to VP .Well here are the pics. eNJOY |
|
| |
|
09-24-2009, 10:15 AM
| #78 |
| Ex Nor-CalRCRC slave Join Date: Dec 2008 Location: San Mateo, CA.
Posts: 2,242
|
My, what a large horn you have for your dig servo. Wiring looks good, Mini. I think you could lower the ESC some more, especially since that's a heavy sucka. Maybe fashion a plate to sit above the front d-shaft? It will be a pretty tight fit though. You could make a couple of tiny L-brackets that attach to the two holes above the upper links, and bolt a plastic plate to them, might lower that ESC down about 3/4" or so. Rig's looking great From the SSS: 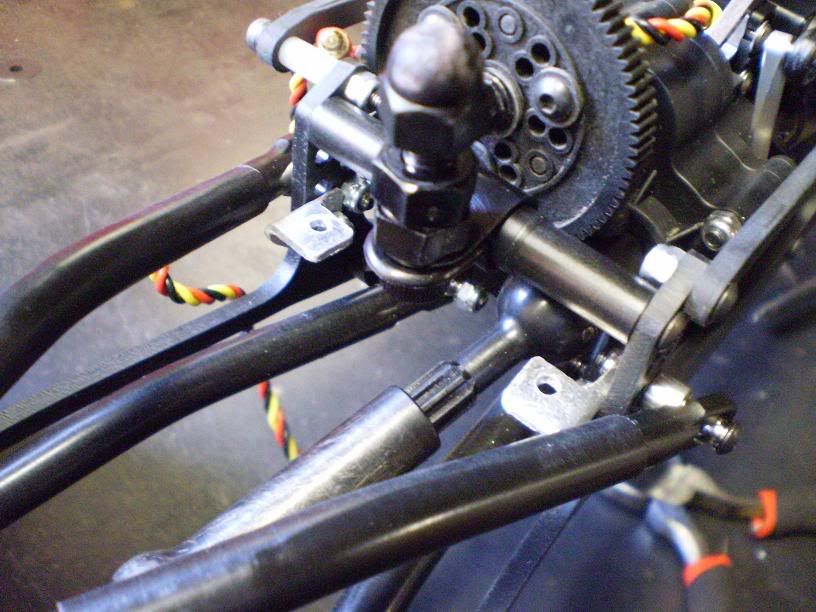 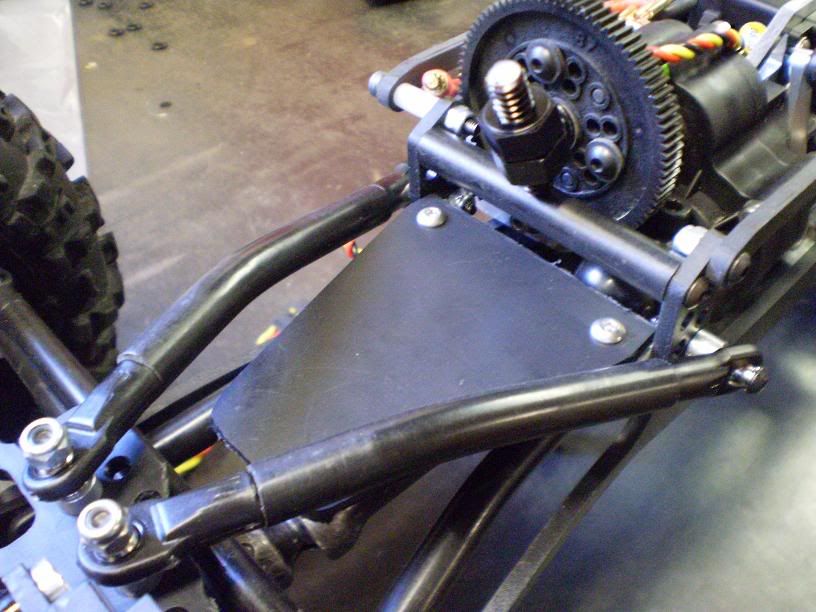 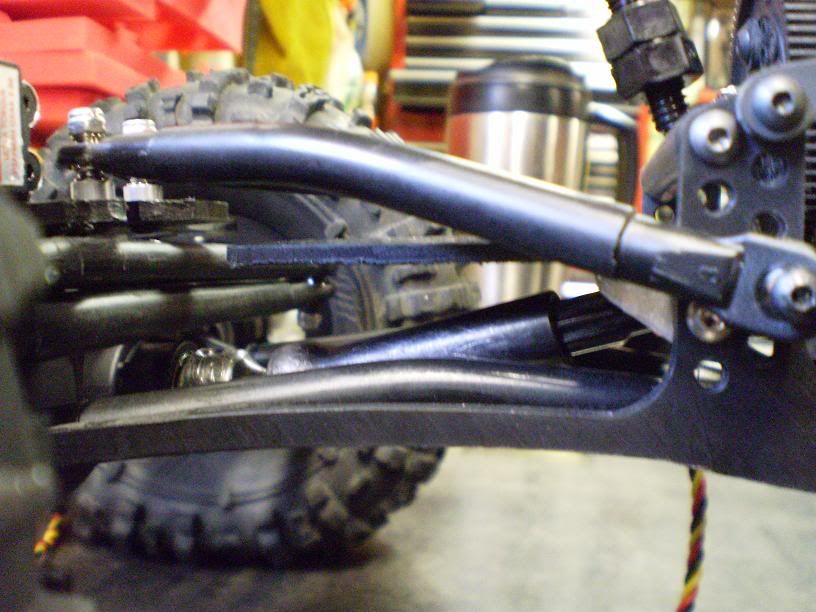 Last edited by gunnar; 09-24-2009 at 10:18 AM. |
|
| |
|
09-24-2009, 12:27 PM
| #79 |
| "HOLLYWOOD" Join Date: Dec 2008 Location: Miami
Posts: 3,119
|
Lol that's what she said hahahha. Thank you sir really happy with the setup now. I acually did have it lower but you said it it's a big sucker, the wires were way to close to the spur and you know these rigs once they flip or drop something always moves so really did not want to risk the wires hitting the spur or worse getting inbetween the pinion and spur. With my old old setup I had the ESC on the front 4 link but it kept hitting the chassis and was just getting in the way. But I really like that setup you have on the SSS. Gonna do some test and tune and see how she does. Thanks
|
|
| |
|
09-25-2009, 08:38 AM
| #80 |
| "HOLLYWOOD" Join Date: Dec 2008 Location: Miami
Posts: 3,119
|
Here's my next upgrade asap |
|
| |
 |
| |


 Linear Mode


