| |
 03-07-2010, 10:53 PM
| #1 |
| Quarry Creeper Join Date: Apr 2005 Location: Malaysia
Posts: 374
|
My wife asked me what I wanted for my birthday. I asked for some wrenching time, so I got some work done on the AX10 finally. Awhile ago, a friend pointed out that LiquidRC was selling these Hot Racing chassis plates for about ten bucks, so I picked up a set. They were longer, beefier, heavier and had more mounting holes than the kit chassis (but in mostly the 'wrong' places).  After test fitting, I decided I needed some new holes and cut up the chassis. The transmission still mounts in the middle of the chassis. A small space was cut out for the motor endbell. Lower link holes were naturally near the bottom corners of the chassis while uppers were as far back as I could get them. Most of the big cuts were done with a hacksaw and a file.  The skid plate. You can see I made a boo boo drilling out one of the mounting holes. No big deal as there were plenty more holes I could mount to on the chassis.  I also made some shorter links to keep the wheelbase under 12.5". Will mount everything up tonight and post more pics. Last edited by sim; 03-07-2010 at 11:07 PM. |

|  |
| Sponsored Links | |
| | |
|
03-07-2010, 11:03 PM
| #2 |
| Ex Nor-CalRCRC slave  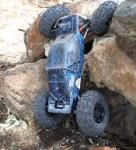 Join Date: Dec 2008 Location: San Mateo, CA.
Posts: 2,242
|
Hope you'll brace that motor plate, looks kinda thin by the "endbell". No room to move tranny forward?
|
|
| |
|
03-07-2010, 11:18 PM
| #3 |
| Quarry Creeper Join Date: Apr 2005 Location: Malaysia
Posts: 374
|
I haven't got a dig yet, so forwards is still the endbell side. There was enough room to move it backwards, but that's sort of in the 'wrong' direction. I noticed that the tranny was mounted dead center on the stock skid plate and was afraid to try something too different as I'm almost famous for mixing up my lefts and rights in the middle of cutting and drilling things, so I mounted it dead center as well. This way, the plates can be swapped around and flipped backwards and forwards and inside out, etc, to make sure everything at least fits. That's my excuses anyway. The real reason was I made a mess of things during test fitting and added that endbell niche at the last minute (luckily before drilling the upper link holes). I will add a rod to brace around that area but might not be motivated enough to make a brace around the top (over the motor) if I run out of time before the weekend. Anyway, this is sort of a prototype. If it works well, but breaks, I'll make a new one with all the same holes, but with beef in all the right spots. |
|
| |
|
03-08-2010, 04:43 AM
| #4 |
| Quarry Creeper Join Date: Dec 2008 Location: Fraggle Rock
Posts: 302
|
Nice work, Looks sweet! Can't wait to see more.  |
|
| |
|
03-08-2010, 09:08 PM
| #5 |
| Quarry Creeper Join Date: Apr 2005 Location: Malaysia
Posts: 374
|  Weighed the plates again before mounting them up. I actually, cut off two more front shock mounting holes after this picture was taken (to try and squeeze the shell lower).  Stock Axial bent link with Traxxas stampede steel ball, for the uppers.  Everything mounts up almost the same before. Didn't even remove the electronics from the old piece of lexan.  3 cross braces. Two between the shocks. One right above the worrisome endbell cutout. Keeping my fingers crossed.  Looks like 2.5 inches. Can get another 1/4 inch by mounting the shocks lower, and more by mounting the rears outwards.  The bottom.  Skid is 50mm wide. I can make it skinnier if I decide not to add a dig. Will try out the flat bottom first and maybe add a slot down the middle later (to see the difference). Hmm, now that I look at it, that motor mount looks like it needs trimming. Last thing I need to figure out are body posts, and then it's the long wait for the weekend. Last edited by sim; 03-08-2010 at 09:20 PM. |
|
| |
|
03-08-2010, 09:51 PM
| #6 |
| Newbie Join Date: Jan 2010 Location: Gilbert AZ
Posts: 42
|
Looks really awesome |
|
| |
|
03-08-2010, 10:28 PM
| #7 |
| Suck it up!   Join Date: Mar 2008 Location: Arkansas
Posts: 11,652
|
Nicely done. The only thing I'd add is another cross brace in front of the spur for some added beef. Grooving the skid helps quite a bit when you're sliding it along a rock. Helps keep it in line and not slide off sideways. |
|
| |
|
03-13-2010, 08:45 AM
| #8 |
| Quarry Creeper Join Date: Apr 2005 Location: Malaysia
Posts: 374
|
Thanks guys. Duuuuuuuude, I added the cross brace as you suggested, so there are 4 now. Took me awhile to figure out what to do for body posts, but in the end, I cut some out of Delrin. I flattened the top of some cross braces and ziptied them there. The zipties sit in a groove around the cross brace (not shown).  Rear post is much simpler... just screwed in from the bottom.  While I was feeling motivated, I thought I had better add the skid groove. I got carried away with the depth and cut into the lower link screw holes slightly. Might try and live with shorter screws or just leave the long ones showing like this.  Before (with the stock chassis)  After  |
|
| |
|
03-13-2010, 09:05 AM
| #9 |
| Quarry Creeper Join Date: Sep 2008 Location: Oakley
Posts: 280
|
Nice! Chassis turned out great.
|
|
| |
 |
| |


 Linear Mode


