| |
| |||||||
 |
| | LinkBack | Thread Tools | Display Modes |
 02-11-2011, 12:33 AM
| #21 |
| Quarry Creeper Join Date: Oct 2010 Location: SLc,UT
Posts: 256
|
Hey no problem. Glad it helped I find so many threads in here that help me out i try to give back what i can. If you want measurements I can get them for you. I also found people talking about it but no pics, I have a couple of sets and went to town and figured it out. -As far as I know most every RC shock leaks sooner or later. The gmade shocks have not top cap the shock body is all one piece so it can only leak from the bottom. I have not had this out hard on the rocks yet(this weekend it will be beaten on like it owes me money though!!) and they don't really leak, yet. ill post up a report on them after i use them for a while. The shocks are buttery smooth and the rod end and top mount are good. The bottom cap is plastic so we will see how it holds up the whole thing looks well made but who knows.. The oil and springs that came with the shocks are too stiff IMO for crawling. I have not used them yet enough to say they are good or bad. easy to build and extra parts in the kit that's not bad. They came from korea and that took close to a month. I knew that before i ordered. The EEM springs in them now are the stiff set and are much softer than gmade but i still want them softer and I have a line on some medium EEM springs. |

|  |
| Sponsored Links | |
| | |
|
02-22-2011, 11:27 PM
| #22 |
| Quarry Creeper Join Date: Oct 2010 Location: SLc,UT
Posts: 256
|
Picked up a Holmes hobby BR-XL esc and a torque master 35T recently. Works so nice and was so easy to set up. A friend has castle link and with that it takes no time at all to set up anything on the ESC. Got rid of the DROOP set up, I understand why it is not so popular. It was taking too much time and effort to set it up and make work like i wanted it to. The droop set up was causing it roll over any time it would get off camber and lift a front tire. Since the spring is set up to bring the piston UP it would pull up on the wrong tire and flip it right over, ever time. When I relized that I gave up on droop, probably I could have messed around with the links and shock placement I would rather drive. made a small section of home made rock just to see what it took. If i have the time i am making a bunch more outside. For now its nice to have for quick set up testing and messing around. 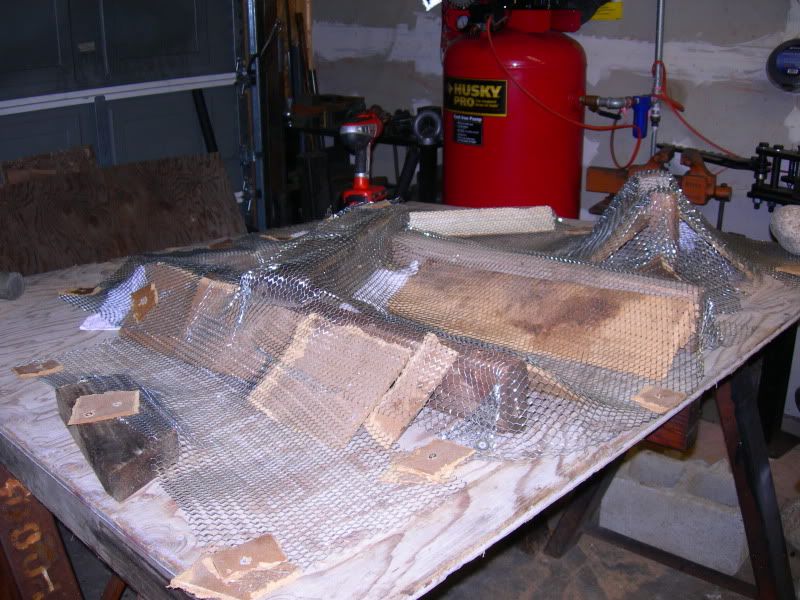 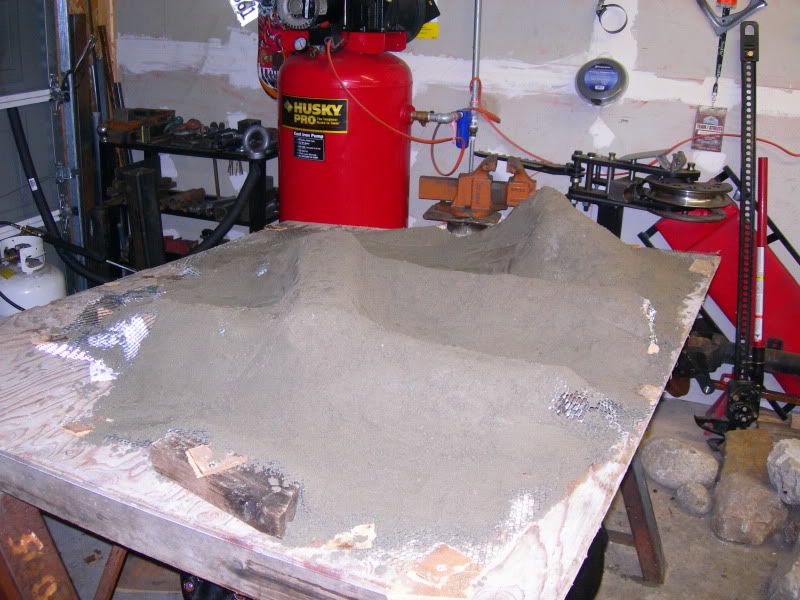 buddies FF4 on it 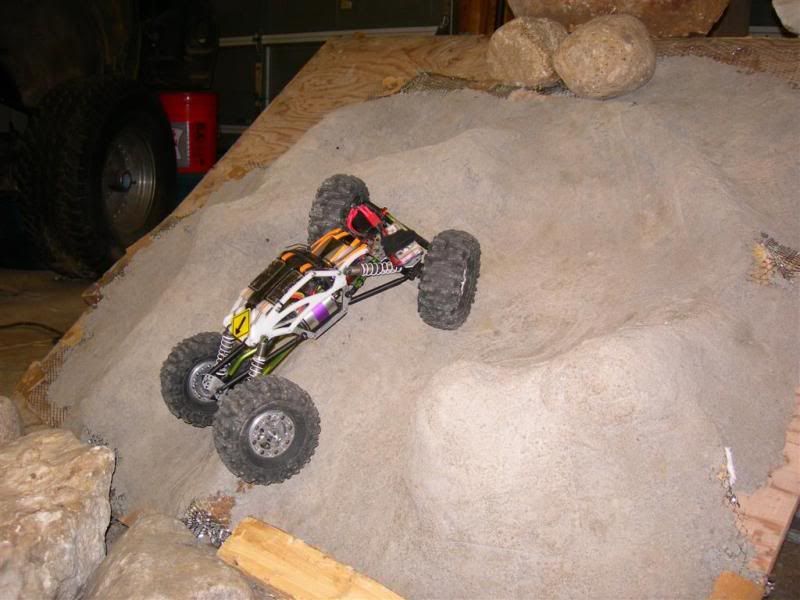 Last edited by durrty; 03-29-2011 at 10:39 PM. |
|
| |
|
02-22-2011, 11:47 PM
| #23 |
| Quarry Creeper Join Date: Oct 2010 Location: SLc,UT
Posts: 256
|
mellow action shots. My daughter ran it for a while too.   This was the last day for the droop set up. 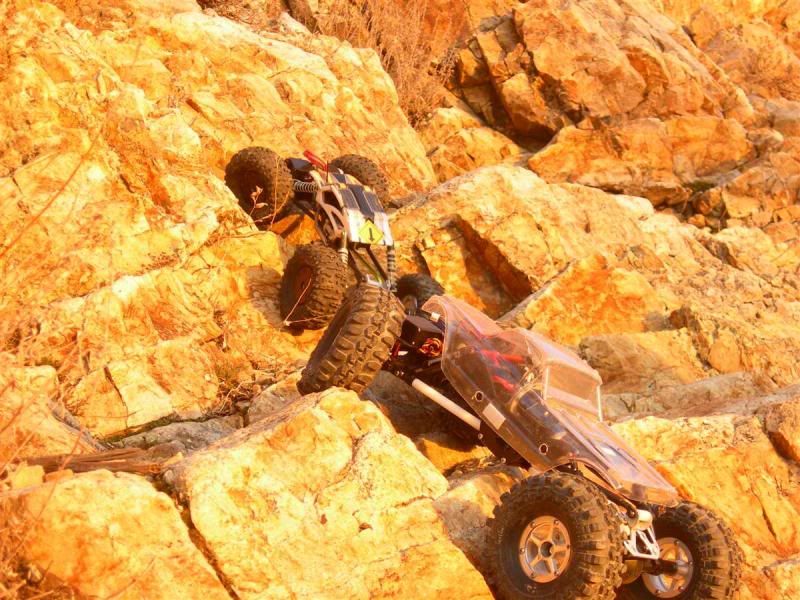 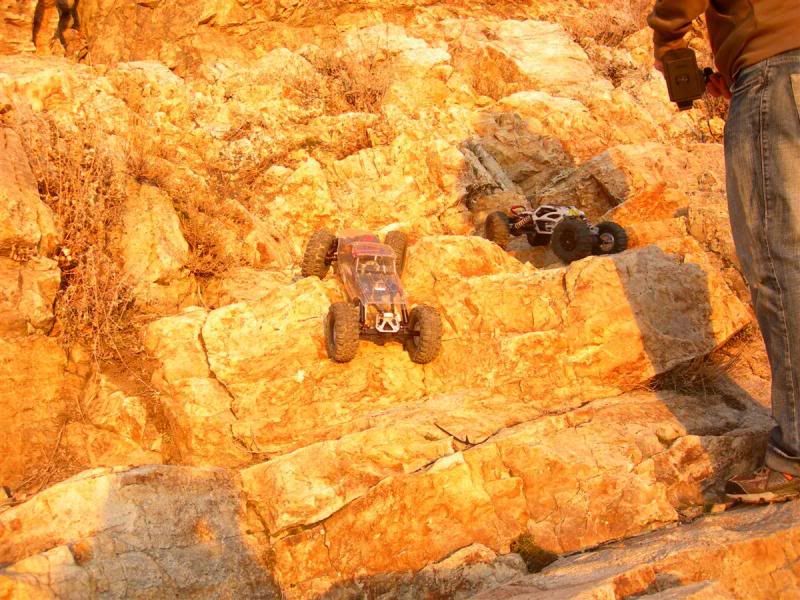 Bunch of new parts too.. set of nova foams showed up. Crawler Innovations runs a good business. I sent an email with a question and was answered that same day, in a matter of hours. Really helpful. I just bought a set of tires and foam from him for my sons rig too. trimmed the foam to fit over the weights. 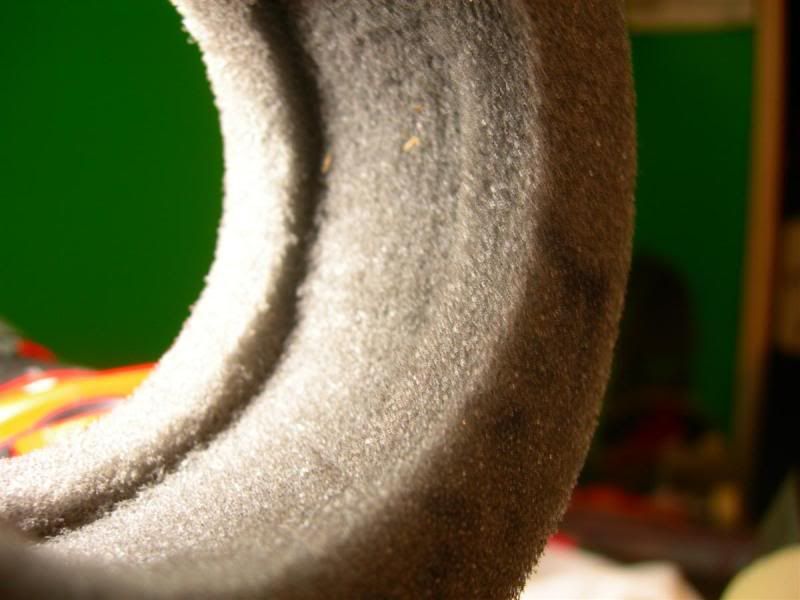 |
|
| |
|
02-22-2011, 11:52 PM
| #24 |
| Quarry Creeper Join Date: Oct 2010 Location: SLc,UT
Posts: 256
|
Forgot to add this. It really shows how much more steering angle I got from trimming the dog bone cup...  I also made a tie rod and steering arm. The axial high steer arms are nice but a little short(maybe? idk) and it jams the tie rod into the axle if its not bent like i did and then also put the steering arm at a really bad angle which bound it up completely. Some bending fixed it up nicely, now I just need a real servo up there!!!! 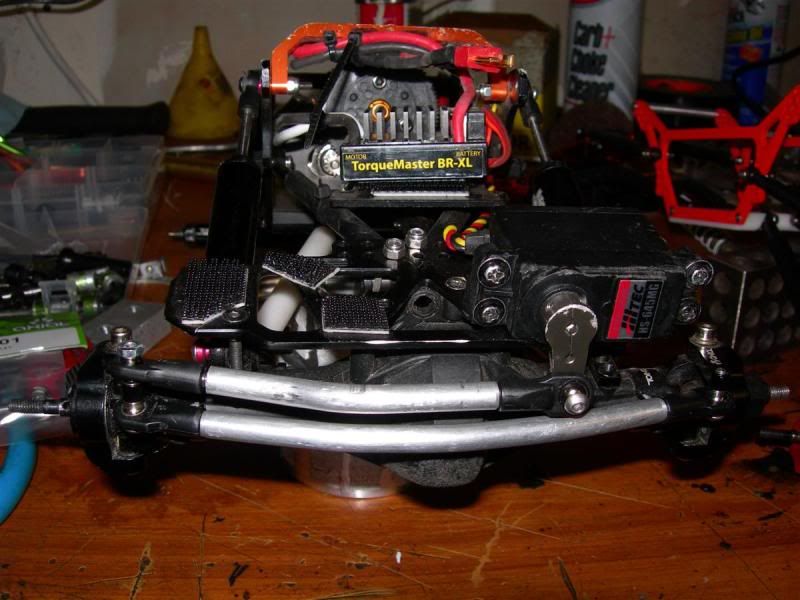 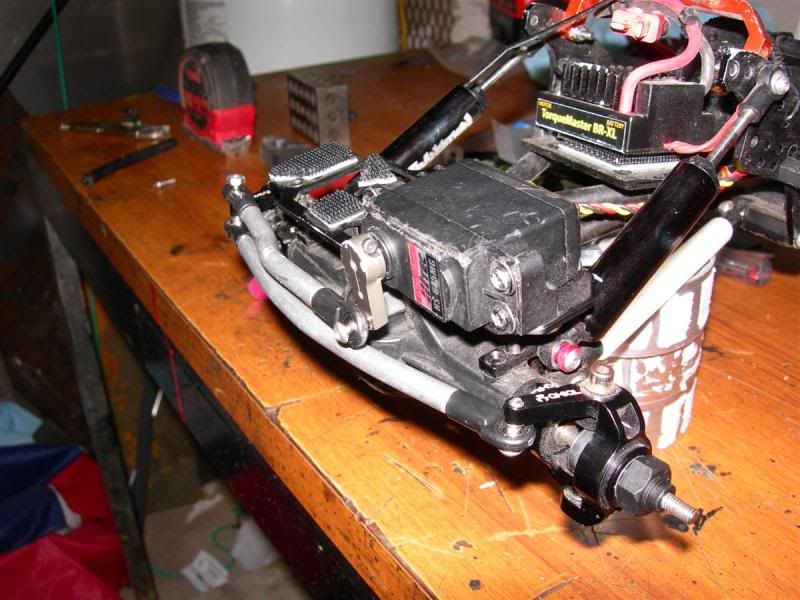 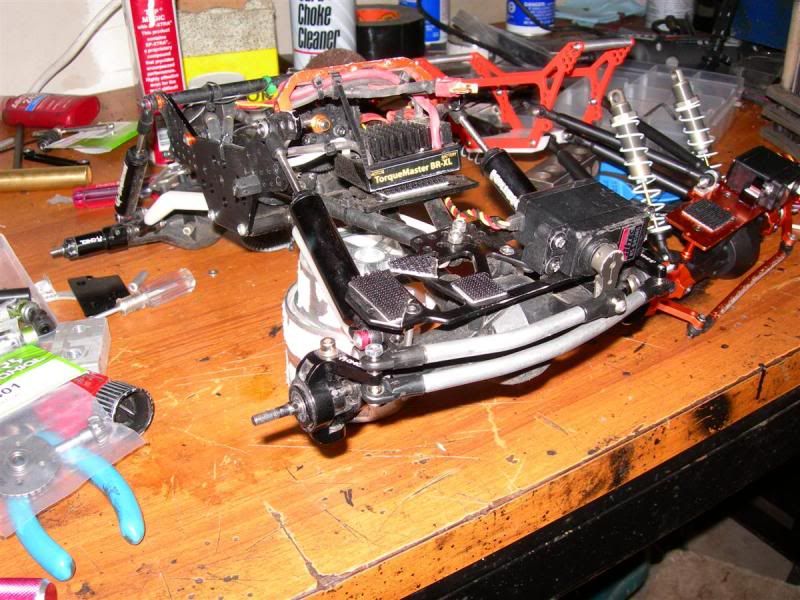 Last edited by durrty; 02-23-2011 at 01:29 AM. |
|
| |
|
03-28-2011, 01:51 AM
| #25 |
| Quarry Creeper Join Date: Oct 2010 Location: SLc,UT
Posts: 256
|
added new parts and broke others Blew out this bearing, twice. 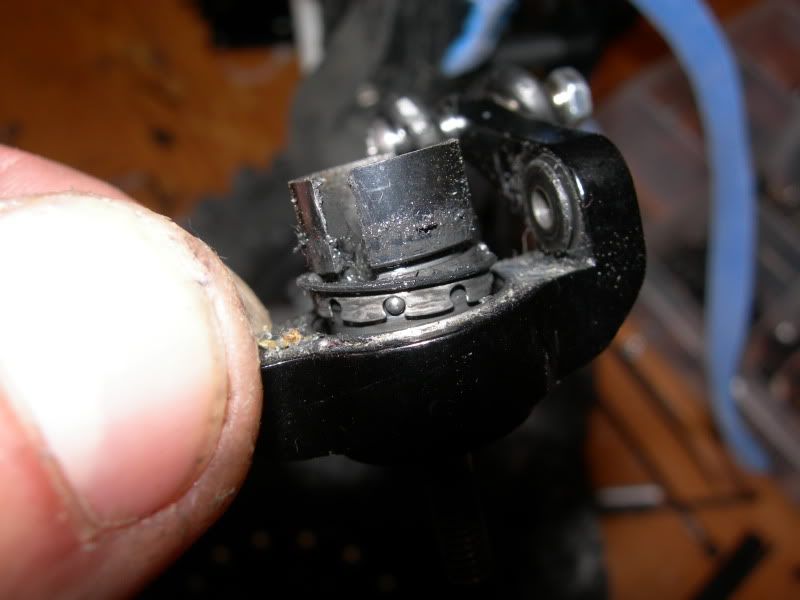 This might be why, but i am not sure............ 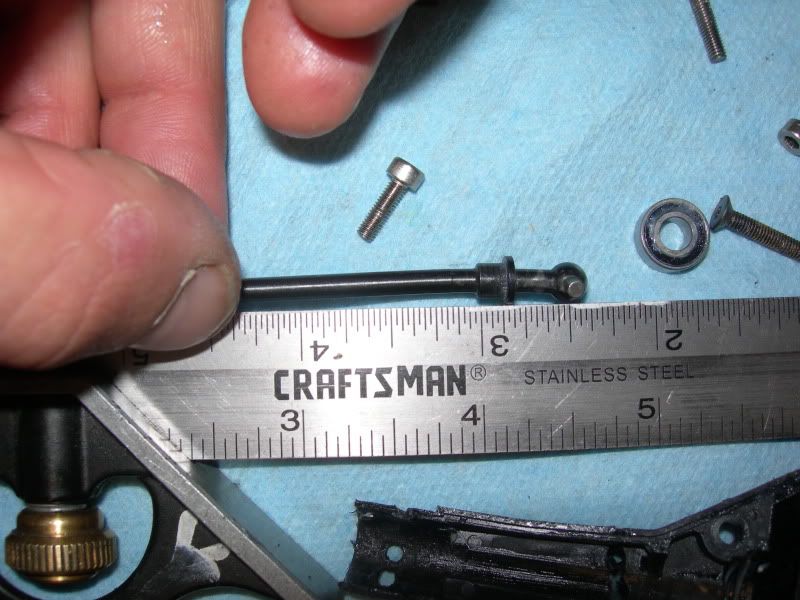 Also picked up a hitech 7950TG which is bad ass.. So bad ass it shredded the weak and weakening parts in my front axle. I did not have my beef toob clock job done properly(my fault not the toooobs fault) and it ripped loose the screw in the axle and that allowed the loose screws in the knuckle to twist and break off the end of the axle housing and blow out the threaded holes in the tooob. I bought a new housing, made my own brass set of weights and made sure I did the job properly. It is not hard, but needs to be done correctly. I decided to drill out the housing and brass at the same time (pork pipes). That way when I put the back together after they get tapped the holes are lined up perfect. blue Locktite and Also now I have 3 screws holding on the Chubs to the axle housing and porkpipe. Brass is soft and I dont want it to work loose. 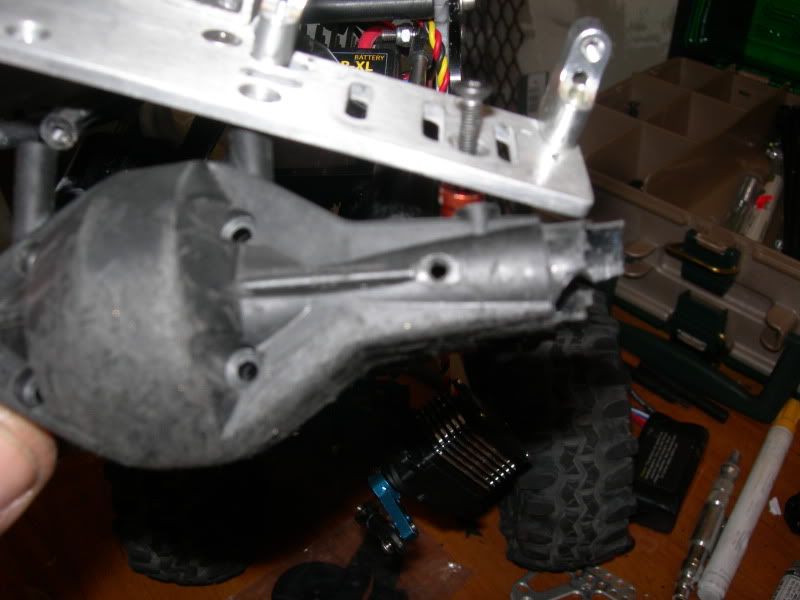 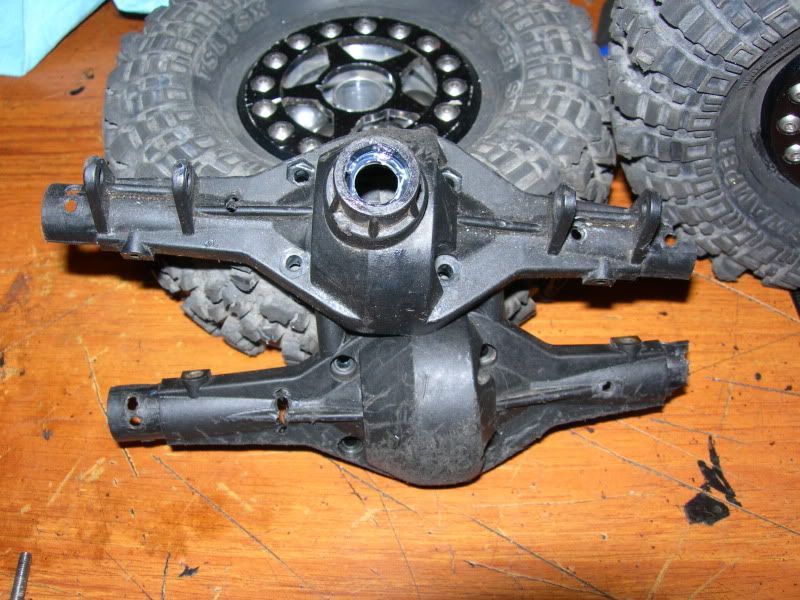 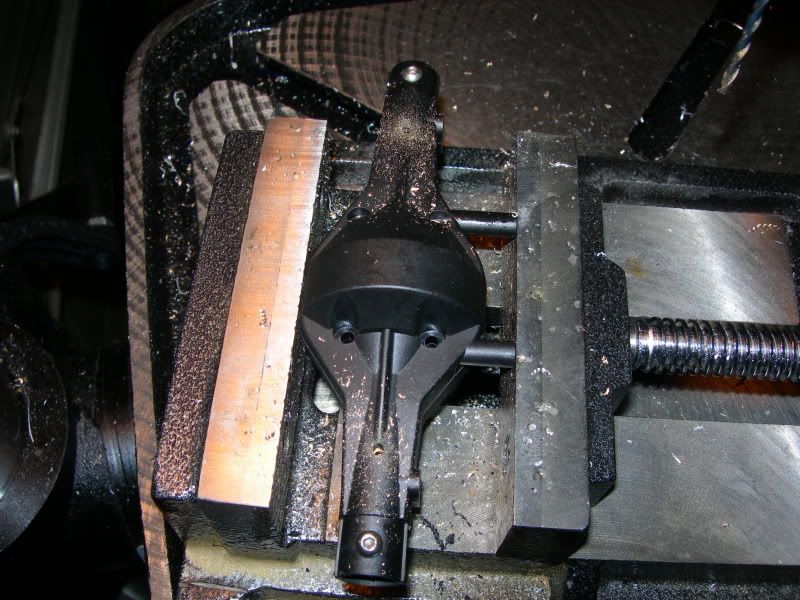 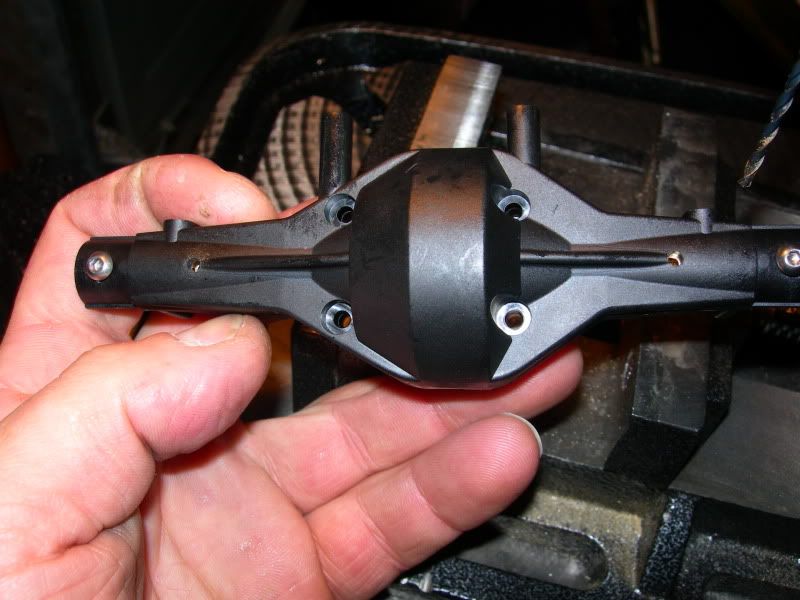 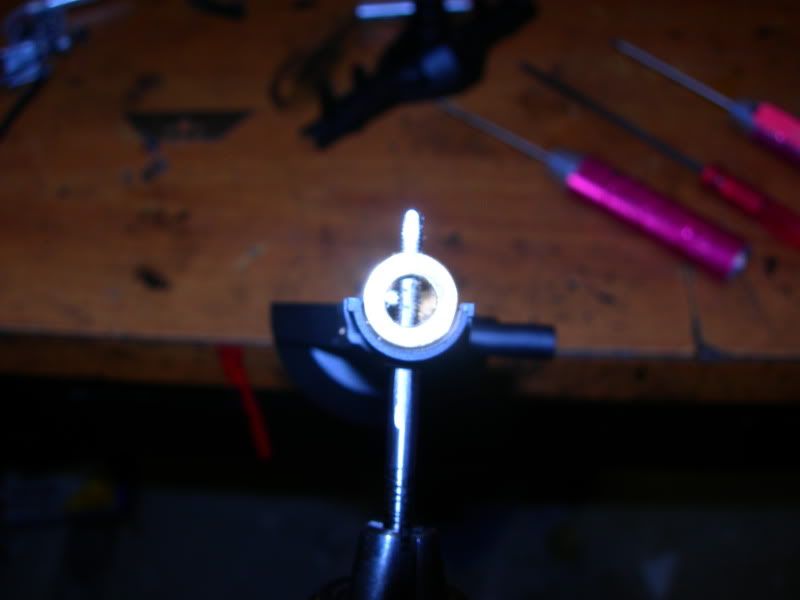 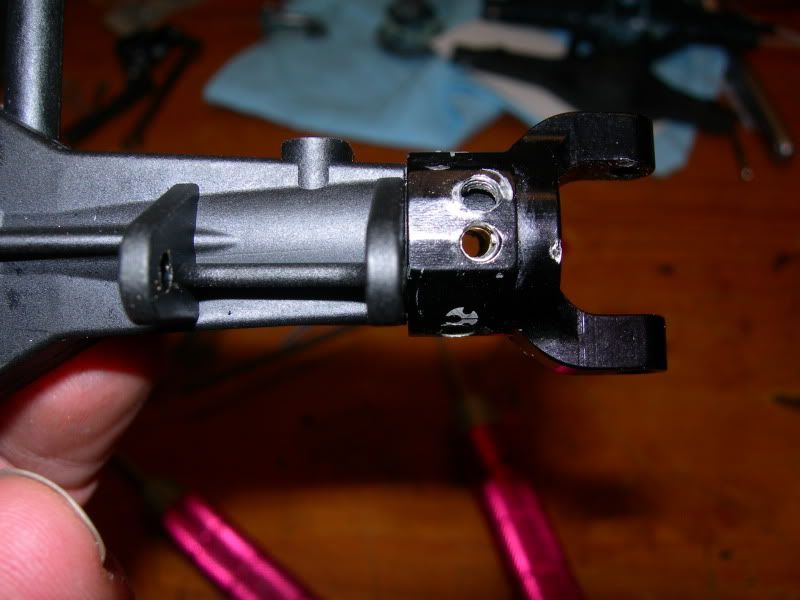 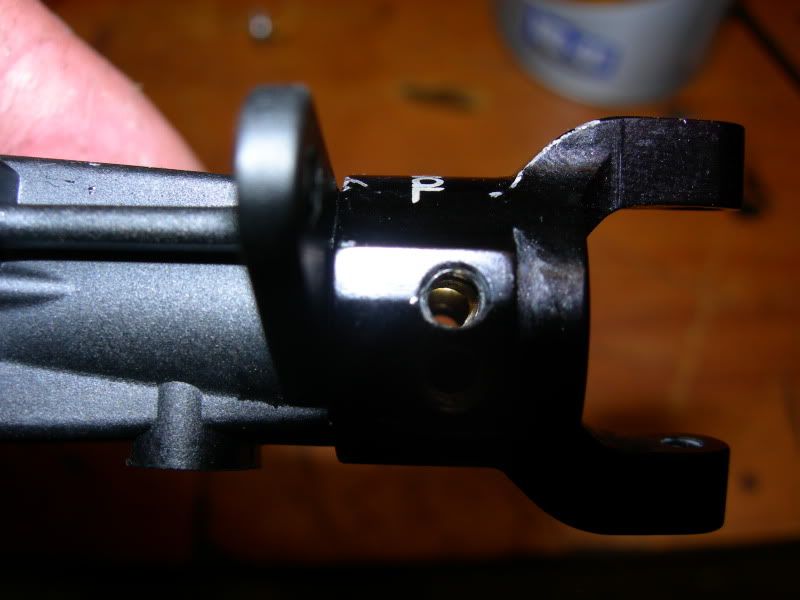 |
|
| |
|
03-28-2011, 01:55 AM
| #26 |
| Quarry Creeper Join Date: Oct 2010 Location: SLc,UT
Posts: 256
|  pork pipes 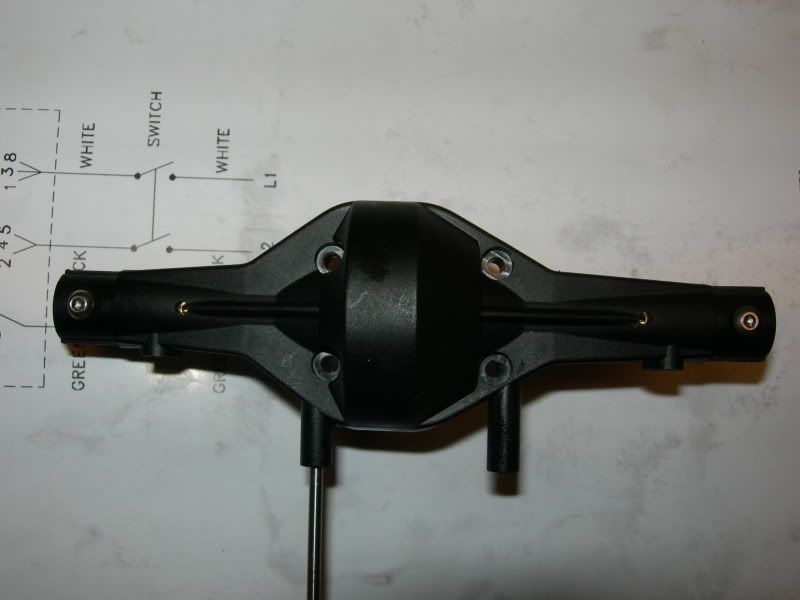 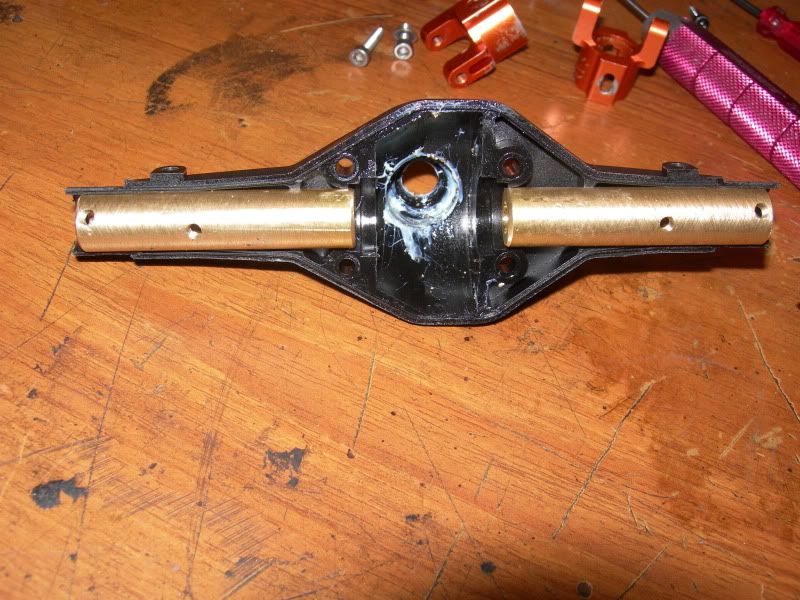 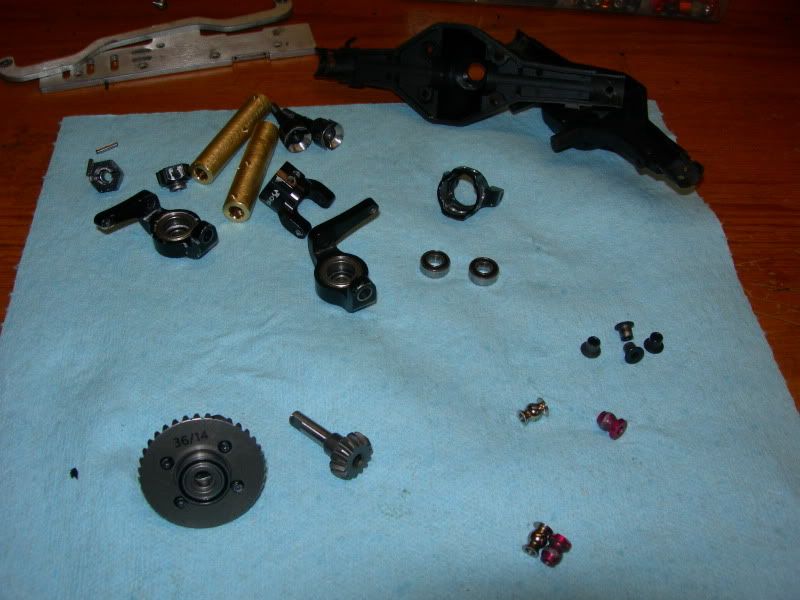 Picked up some new wheels. 2 are ax10 offset and 2 are Mayhem berg offset(naaarrow) 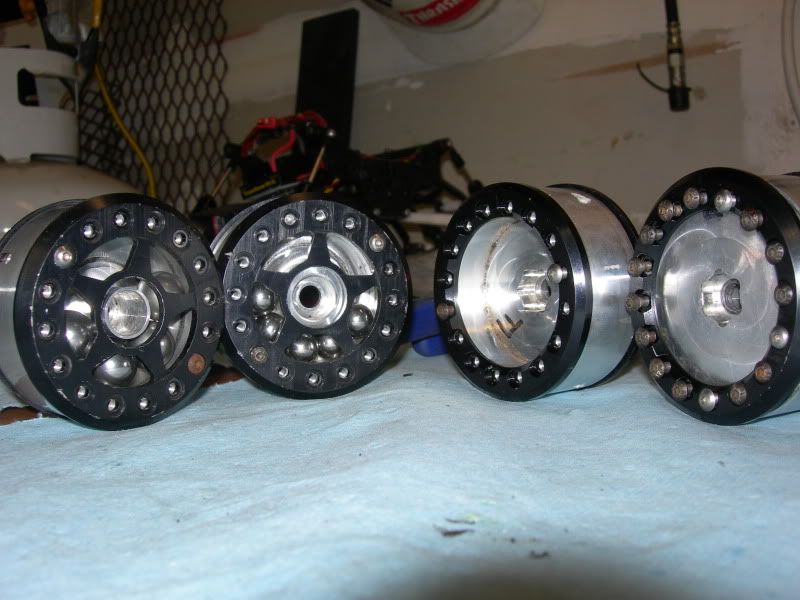 been out a couple times with them and dont know if I love the narrow rear or not yet. 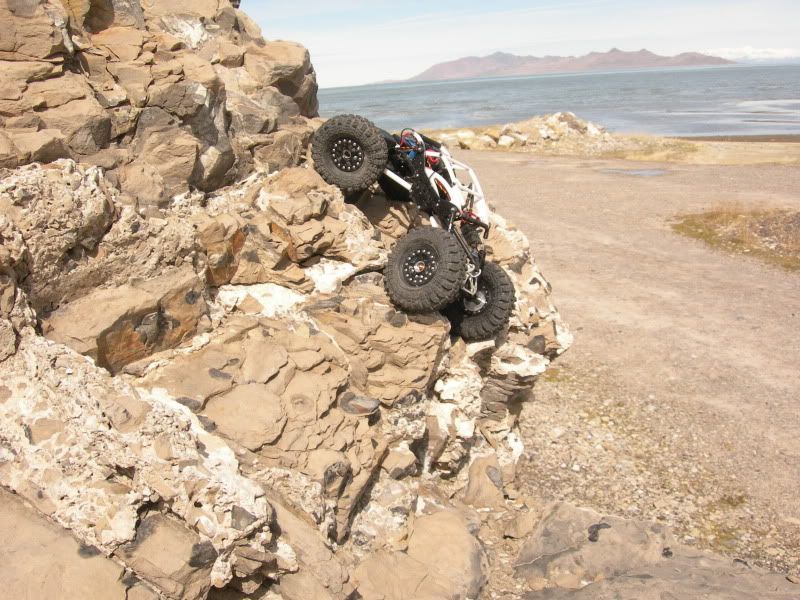 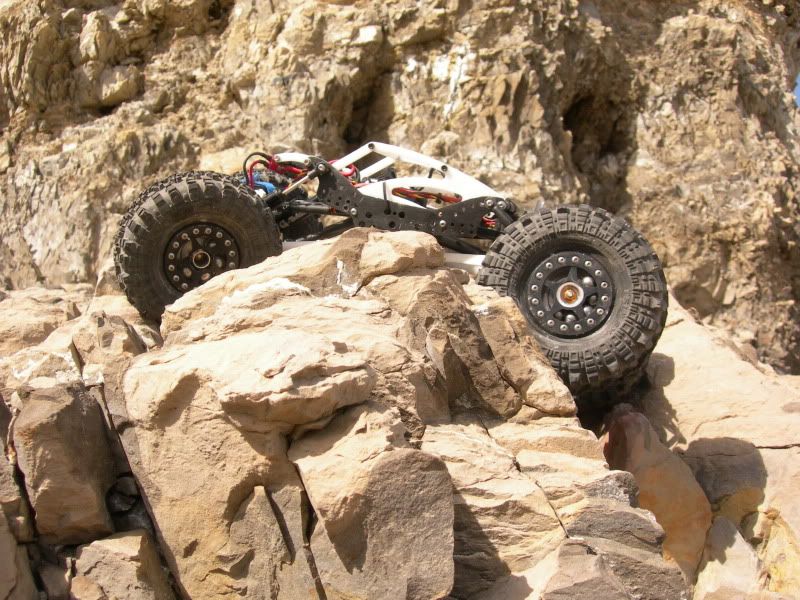 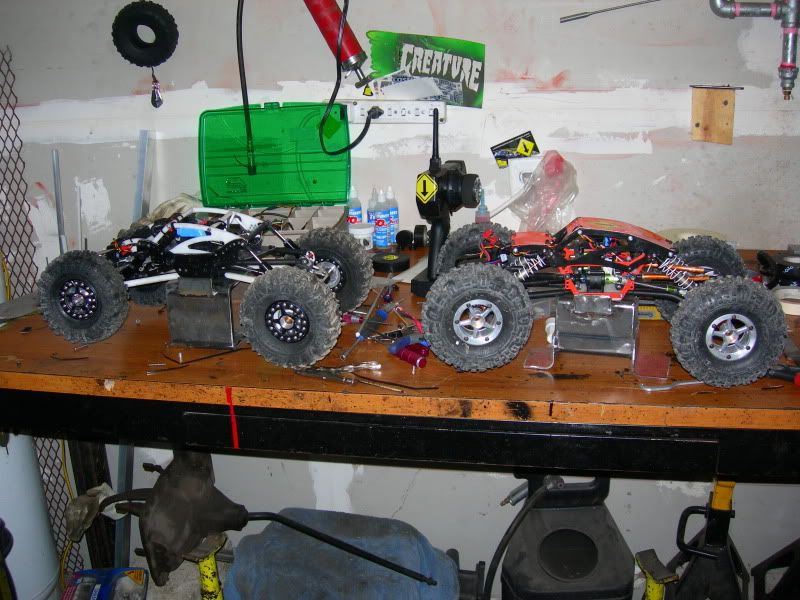 UGC F4/fastback now with longer BEEF TOOBS, any fast back tops still out there??? Last edited by durrty; 03-29-2011 at 02:14 PM. |
|
| |
|
03-29-2011, 02:05 PM
| #27 |
| Quarry Creeper Join Date: Oct 2010 Location: SLc,UT
Posts: 256
|
picked up a 12 and a 13 tooth pinion today. I have been messing with the squat and Anti squat numbers and after too many changes the suspension seems to be reacting like i want it to. Whatever the case it will stay as it is set for a while. |
|
| |
|
03-29-2011, 03:45 PM
| #28 |
| Rock Stacker Join Date: Jan 2011 Location: Carencro
Posts: 50
|
I'm loving the "pork Tubes" LOL. What size hole did you put for the axle shaft to pass thorugh? |
|
| |
|
03-29-2011, 05:36 PM
| #29 |
| Quarry Creeper Join Date: Oct 2010 Location: SLc,UT
Posts: 256
|
I will have to get out to the shop and look at my book or grab one and measure it, I dont remember what it was. This is from my boys rig but mine has the same, it is as thick as I could get it with out rubbing the axle. The clearance is VERY close to the OD of the axle and the ID of the Pork Pipe. 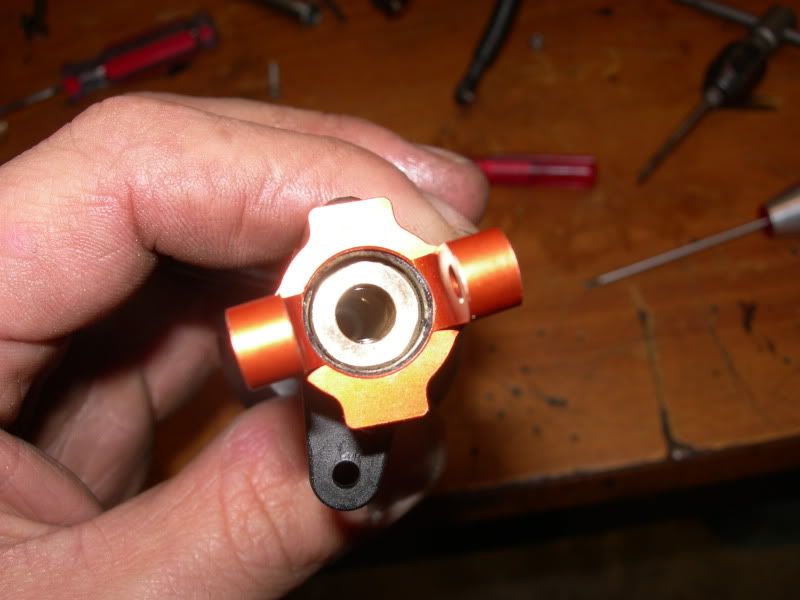 I had them turned on a lathe to get the hole, I started with a 1/2" solid bar of brass and turned the OD and ID. trying to drill a hole, STRAIGHT through with a drill press would be tough and I know my drill press vise is not up to it. The OD of the Pork Pipe is .433(11mm is the diameter of the bearing so that is how i came up with .433 inch) My other rig UGC F4/fastback now with longer BEEF TOOBS, any fast back tops still out there??? Last edited by durrty; 03-29-2011 at 10:40 PM. |
|
| |
|
03-31-2011, 11:57 PM
| #30 |
| Quarry Creeper Join Date: Oct 2010 Location: SLc,UT
Posts: 256
|
A box from Crawler Innovations Showed up yesterday. Got 2 new tires and double duece nova foams to fill them up. Plus some other goodies. I have to say that the service and knowlege from crawler innovations is over the top good. As well as his product.
|
|
| |
|
04-01-2011, 10:05 AM
| #31 |
| Rock Crawler Join Date: Sep 2005 Location: IDK
Posts: 852
|
You shaved too much material off of the cups, now it just jams/binds. That's the parts breaking thing  |
|
| |
|
04-01-2011, 01:51 PM
| #32 | |
| Quarry Creeper Join Date: Oct 2010 Location: SLc,UT
Posts: 256
| Quote:
What caused that to happen two times in a short time was a couple things. The axle tubes I made were a little bit too long on the wheel side. After the hole the C hub screws into. That cause the cups to push and bind on the axke end. The axle was also bent I dont know how long it was bent it could have been that day but I dont know. The cup might be a little short. It did not get jammed up or bound up too bad. It does pop and make noise when powered up at full lock I am sure that does not help the bearings in there. I have not had that happen again though. My boy now has all my dog bone cup parts if he starts shredding bearings ill have to get him some CVDs. I put axial CVDs on recently and they do fine so far they will turn the tires into my links just not as far as the dog bone cup. | |
|
| |
|
04-01-2011, 02:25 PM
| #33 |
| Quarry Creeper Join Date: Jan 2011 Location: 801
Posts: 334
|
I baught the EEM droop chassis for my shafty and I absolutly loved it, very tuff too! But now I have my XR so my EEM chassis is lookin for a new home. But I definatly recomend East End Machining to ANYONE who wonders about them
|
|
| |
|
04-01-2011, 02:39 PM
| #34 |
| I wanna be Dave Join Date: May 2007 Location: Taylors Falls just hanging with the MNRCRC crew.
Posts: 7,843
|
Nice build thread lots of ingenuity at work. I really prefer reading a thread like yours, it reminds me of what I like best about this hobby well done.
|
|
| |
|
04-01-2011, 02:44 PM
| #35 | |
| Quarry Creeper Join Date: Jan 2011 Location: 801
Posts: 334
| Quote:
| |
|
| |
|
04-01-2011, 02:56 PM
| #36 |
| RCC Addict Join Date: Oct 2009 Location: San Francisco
Posts: 1,927
|
Wow that is amazing. I love how you used the Fastback upper on the chassis to make it bodyless, im guessing it is legal |
|
| |
|
04-09-2011, 02:40 PM
| #37 |
| Quarry Creeper Join Date: Oct 2010 Location: SLc,UT
Posts: 256
|
It should be legal with a top and hood. The sides are covered enough. Thanks for the complements on the thread. I get a lot of info off the board and like to give back when I come up with something that works out. Not many of us have a lathe and or a mill to use at will or even use at all. A drill press and hand tools are what i use 90% of the time, I took the brass to a machine shop to get done right I got a good deal on it too. The pork pipes cost about 50 bucks total plus my time and it was enough to have 5 pairs total,a pair each for me and my boys rig, one set to experiment with (IE.. mess up and make scrap) and I have 2 more pairs. One will likely go to a guy I go out and crawl with, and one to lie in wait... The brass is so soft and not very thick to thread into that if you have to remove the screws often it ruins the threads, I drilled one hole out to 4mm after the threads went bad on the trial and error pipes. 4mm is too big to use it only leaves a couple of threads in the pipe. This is the clocking I got and have run like this for a couple outings. 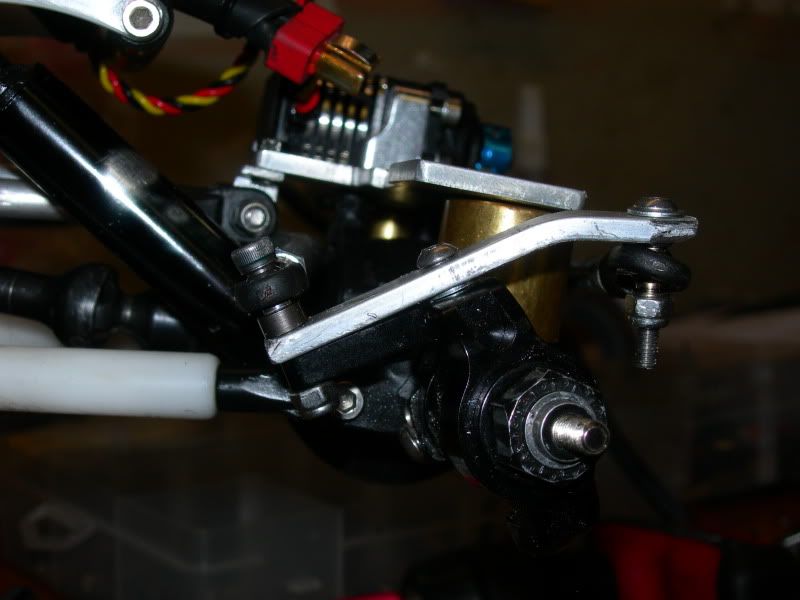  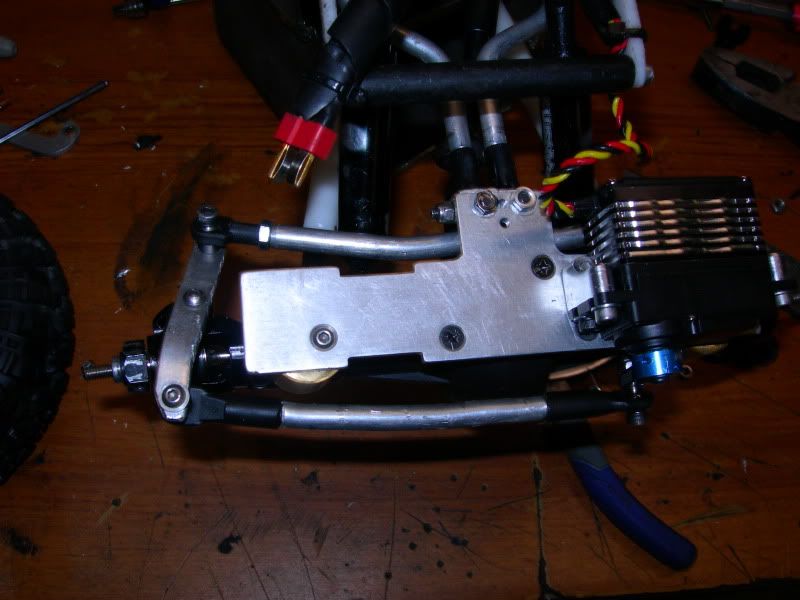 I started with the LD racing BTA set up, I thought i was not building it correctly but now know that the amount of clocking was kicking my ass. So I have it as you see and it has been solid. Ill have to get better pics of the shock mounts and links, you can see how the uppers are bent up like a dogs hind leg but they work. The shocks mount similar to the new UGC set up. with some adjusting and trimming to the uppper link mount and servo tray I can clean that area up some there is some rubbing of the tie rod and plastic (axle) but it is smooth not binding. |
|
| |
|
04-09-2011, 02:41 PM
| #38 | |
| Quarry Creeper Join Date: Oct 2010 Location: SLc,UT
Posts: 256
| Quote:
Ill get this measurement very soon along with some better pics... | |
|
| |
|
06-27-2011, 12:45 AM
| #39 |
| Quarry Creeper Join Date: Oct 2010 Location: SLc,UT
Posts: 256
|
I had it drilled at .225 inches for the center hole. A 15/64" drill would be close that. I retired this chassis and am going to put it up for sale. I did find a used dig for it.(2 months ago now) 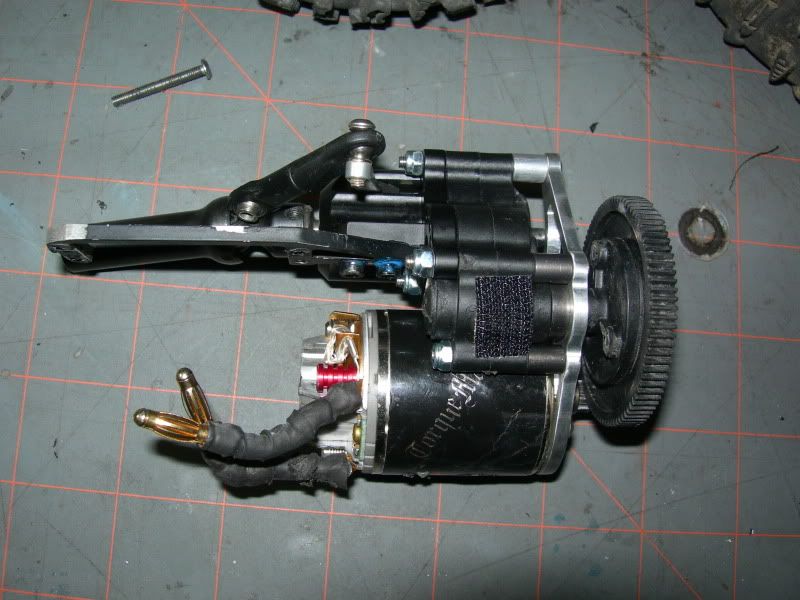 |
|
| |
|
06-27-2011, 11:30 AM
| #40 |
| Rock Stacker Join Date: Jan 2009 Location: Calgary
Posts: 78
|
Sorry, I know this question is going back all the way to the beginning of the thread but what was the Dig unit you had and didn't like? I'm just trying to understand what parts seem to work and which ones don't. |
|
| |
|
| |


 Linear Mode


