| |
 10-02-2010, 01:23 PM
| #1 |
| Pebble Pounder Join Date: Apr 2010 Location: Massachusetts
Posts: 137
|
I have built a home made crawler. It uses axial axles so I figured i'd put it here. Here is how it went together. The chassis will be made out of aluminum plates. Here are the axles I am going to use   Going to use traxxas links for it  Going to make the links out of some threaded rod  I decided to use a traxxas tranny and lock the differential.    after filling it with JB weld bond and letting it set, I have a locked diff.  Now to mock up and cut the chassis            And a quick mock up as it was at that point  Then a little reinforcement  Now to mount the tranny to the chassis       |

|  |
| Sponsored Links | |
| | |
|
10-02-2010, 01:24 PM
| #2 |
| Pebble Pounder Join Date: Apr 2010 Location: Massachusetts
Posts: 137
|
Now for the links     Made the steering rods    Then the uppers     Then did a little work with some tubing to make everything pretty  I think it works pretty good  Now I decided to give it a real low crawl ratio via this  The reduction box itself  Little trimming    I did a test fit with an old motor I had and its tight but fits  |
|
| |
|
10-02-2010, 01:25 PM
| #3 |
| Pebble Pounder Join Date: Apr 2010 Location: Massachusetts
Posts: 137
|
Shocks:  Wheels/Tires:   And The cherokee body:  Without shocks:  Now with:       Next to its big brother:   It sits a bit to high for my liking but it will work. |
|
| |
|
10-02-2010, 01:26 PM
| #4 |
| Pebble Pounder Join Date: Apr 2010 Location: Massachusetts
Posts: 137
|
Now to cut the body up   Needs to be comp cut in the rear and major fender trimming up front  Still need more V V V Better   Now onto the rear  before V V V That's better     Now I just need to go mount it up. Mounting the body It starts here:  Then mounted these:  like so:  made holes in the body:  and there you go.   Need to do more trimming, probably going to comp cut the front too  and need more cutting in the rear  |
|
| |
|
10-02-2010, 01:27 PM
| #5 |
| Pebble Pounder Join Date: Apr 2010 Location: Massachusetts
Posts: 137
|
Some shots of how it looked at this step.                   |
|
| |
|
10-02-2010, 01:27 PM
| #6 |
| No idea what I'm doing Join Date: Oct 2008 Location: Underground, CO
Posts: 4,529
|
Homebrews kick ass  |
|
| |
|
10-02-2010, 01:27 PM
| #7 |
| Pebble Pounder Join Date: Apr 2010 Location: Massachusetts
Posts: 137
|
I painted the body today     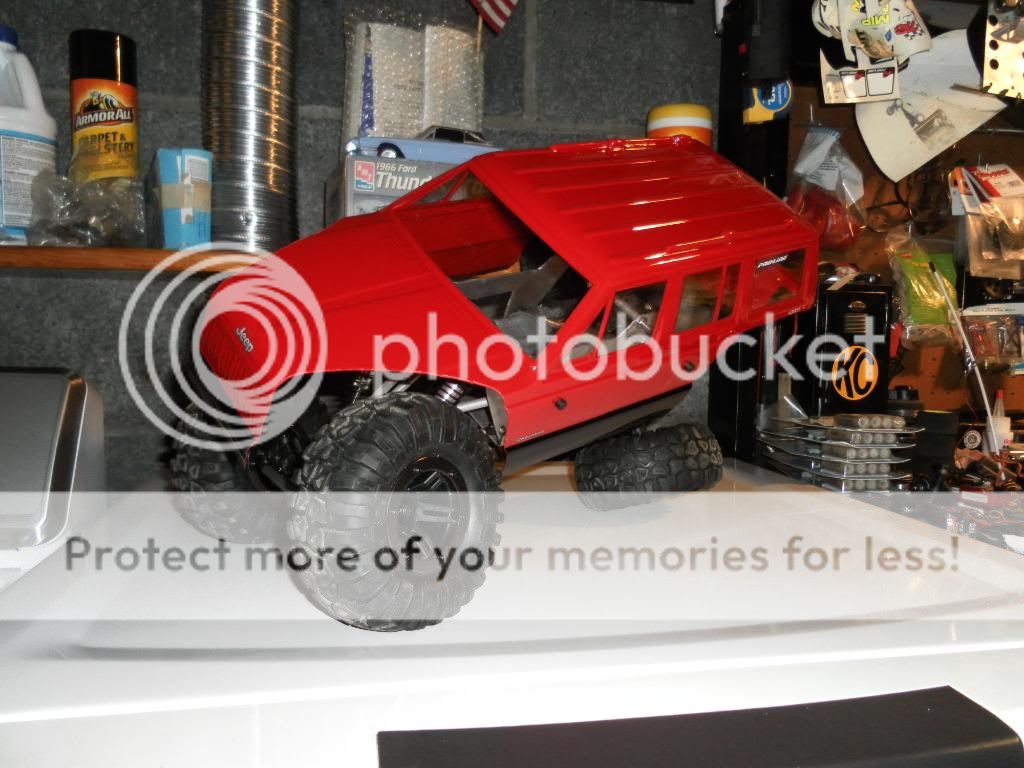 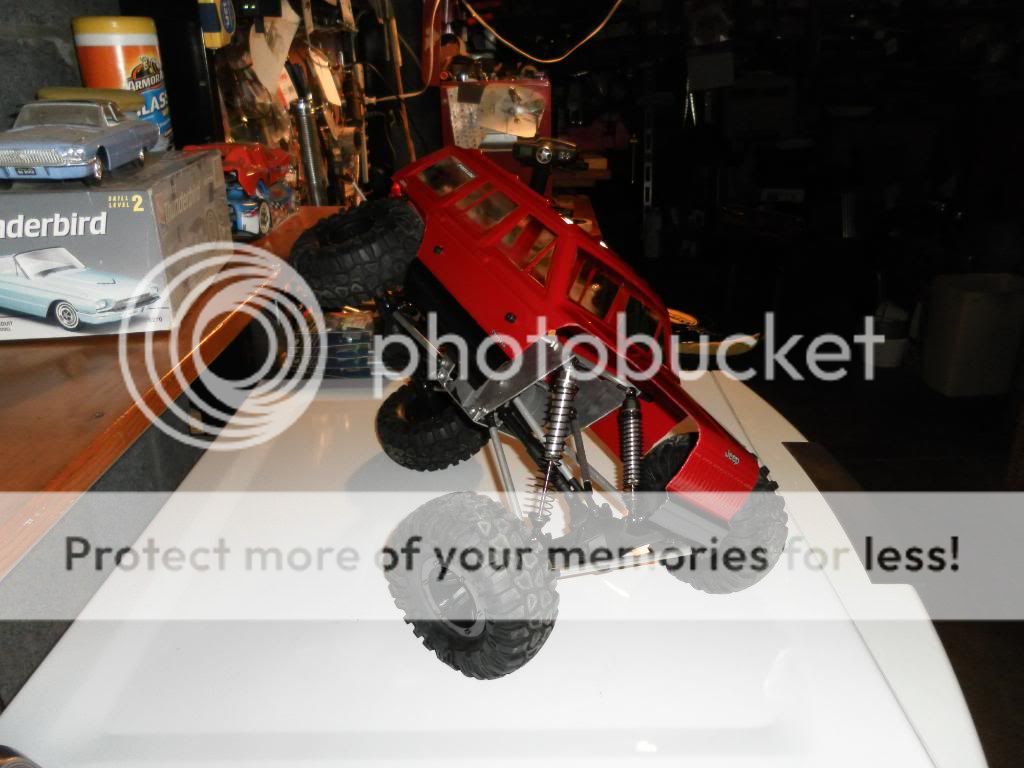   |
|
| |
|
10-02-2010, 01:28 PM
| #8 |
| Pebble Pounder Join Date: Apr 2010 Location: Massachusetts
Posts: 137
|
Did some work started by taking the tranny out  Did some trimming  But realized I trimmed the wrong area at first, so I trimmed the area I needed too.  Then cut some aluminum   Drilled some holes  And here is how it looks now, just need the motor to fill it up.   Here is a mock up with my "test motor"   |
|
| |
|
10-02-2010, 01:29 PM
| #9 |
| Pebble Pounder Join Date: Apr 2010 Location: Massachusetts
Posts: 137
|
Got most of the stuff together.  I needed a spacer to mount the motor against, so I made one out of wood  Here is the motor with the pinion gear on  The gear reduction box   Then soldiered the motor to the ESC   Then went to getting the steering all set up   Then after doing some testing, I found the reduction box was way to much, the tires barley turned with the motor run at full blast. So I just used the tiny pinion gear and it moves at a walking pace.     |
|
| |
|
10-02-2010, 01:32 PM
| #10 | |
| Pebble Pounder Join Date: Apr 2010 Location: Massachusetts
Posts: 137
| Quote:
| |
|
| |
|
10-02-2010, 01:33 PM
| #11 |
| Pebble Pounder Join Date: Apr 2010 Location: Massachusetts
Posts: 137
| |
|
| |
|
10-08-2010, 05:30 PM
| #12 |
| Pebble Pounder Join Date: Apr 2010 Location: Massachusetts
Posts: 137
|
A while ago I had dropped it and broke the upper link connector. Well I finally fixed it.  new 3 link connectors to fix it.  yup  And reinstalled  I had at some point changed to a servo horn instead of a servo saver, I never was able to use it though when I broke the first 3 link connector.  Then took a couple minutes and cut the ends of the shock screws and the sharp corners of the chassis down  |
|
| |
|
10-09-2010, 09:08 PM
| #13 |
| Rock Stacker Join Date: Sep 2010 Location: Denver
Posts: 49
|
This is sweet. I love homebuilds and the drill idea for a reduction was a great idea.
|
|
| |
|
10-10-2010, 08:55 AM
| #14 | |
| Pebble Pounder Join Date: Apr 2010 Location: Massachusetts
Posts: 137
| Quote:
| |
|
| |
|
01-07-2011, 04:06 PM
| #15 |
| Pebble Pounder Join Date: Apr 2010 Location: Massachusetts
Posts: 137
|
I recently made a camera mount for on board video.    simple and it works. here is a short test video. http://www.youtube.com/watch?v=VsysoxXmuUU |
|
| |
|
01-20-2011, 04:00 PM
| #16 |
| Pebble Pounder Join Date: Apr 2010 Location: Massachusetts
Posts: 137
|
I put together an onboard video. Here is a link to the thread. http://www.rccrawler.com/forum/showt...74#post2873774 |
|
| |
 |
| Thread Tools | |
| Display Modes | |
| |


 Linear Mode


