| |
| |||||||
 |
| | LinkBack | Thread Tools | Display Modes |
 09-27-2011, 05:39 PM
| #1 |
| Quarry Creeper Join Date: Jun 2009 Location: Visalia, CA
Posts: 345
|
Well I could not bring myself to expose my Axial based DMG Aluminiti to the harsh environment of the rocks. So I ordered up a Underground Crawlers FB II! I may repurpose the DMG into a FOFF. Anyway, got the FB chassis Monday morning thanks to Juan's fast shippment. I started the build after work. So here is the start: All chassis parts laid out.  All the "other" parts off my DMG.  First part to be installed, the included D Mount for the rear upper links.  The main chassis and skid.  The bodiless topper together minus the front shock mount.  Main chassis, topper, and front shock mount together.  That was all for Monday night, hopefully a little more progress tonight.  |

|  |
| Sponsored Links | |
| | |
|
09-27-2011, 10:39 PM
| #2 |
| Rock Stacker Join Date: Apr 2009 Location: elp
Posts: 55
|
Looks like your off to a good start. Can't tell by the pics but are you going to be running a dig?
|
|
| |
|
09-27-2011, 10:52 PM
| #3 |
| Quarry Creeper Join Date: Jun 2009 Location: Visalia, CA
Posts: 345
|
Thanks. I do plan on dig. I have the VP version. As of now it has the mini mount and servo but it looks like there is going to be clearance issues. Im going to try and put the full size servo mount on her and see if that shifts everything toward the rear so that it will clear.Im working on it now, should have more pics tomorrow |
|
| |
|
09-28-2011, 12:06 AM
| #4 |
| Rock Stacker Join Date: Apr 2009 Location: elp
Posts: 55
|
There's not much space with these bodyless rigs. Looking forward to the updates.
|
|
| |
|
09-28-2011, 06:21 AM
| #5 |
| Rock Crawler Join Date: Apr 2010 Location: Central FL
Posts: 509
|
The VP dig will fit in there, but it's a tight fit for sure. I had to run one of the screws that mounts to the cab portion to the lower frame from the inside out to clear the arm on my dig servo for both the std servo and mini. Mine is the v1 but it shouldn't be that different. Lookin forward to seein where this build goes |
|
| |
|
09-28-2011, 09:29 AM
| #6 |
| No idea what I'm doing Join Date: Oct 2008 Location: Underground, CO
Posts: 4,529
|
I figured Saturday would probably be pushing it, but glad you got it on Monday. I have a VP dig in mine as well....tons of room |
|
| |
|
09-28-2011, 10:42 AM
| #7 | |
| Quarry Creeper Join Date: Jun 2009 Location: Visalia, CA
Posts: 345
| Quote:
| |
|
| |
|
09-28-2011, 10:45 AM
| #8 | |
| Quarry Creeper Join Date: Jun 2009 Location: Visalia, CA
Posts: 345
| Quote:
| |
|
| |
|
09-28-2011, 01:21 PM
| #9 |
| Quarry Creeper Join Date: Jun 2009 Location: Visalia, CA
Posts: 345
|
Well got a little more done Tuesday night. First I got the rear axle and suspension installed.  At this point is where I realized the clearance issue with the dig, but with the help of some fellow RCC members I have a fix I'll get to this tonight hopefully. Now goes the front end. Had issues with my existing EEM delrin lowers being too long so I made up some all thread ones. Ordered a couple of Vanquish Titaniums last night, and they shipped today Going to replace all the uppers also but want to get it running first. The other issue I have is with the shorter front end my MIP driveshafts no longer work, but all I need is a short (dig) male dog bone. If any one has one they would like to trade for the standard AX10 length or sell, PM me. Well, got her on her wheels now. thats it for Tuesday. Wednesday night maybe some disassembly to fix my dig clearance issue.  |
|
| |
|
09-28-2011, 02:45 PM
| #10 |
| Quarry Creeper Join Date: Dec 2010 Location: Gaffney
Posts: 284
|
this is how i had to mount my dig at first. 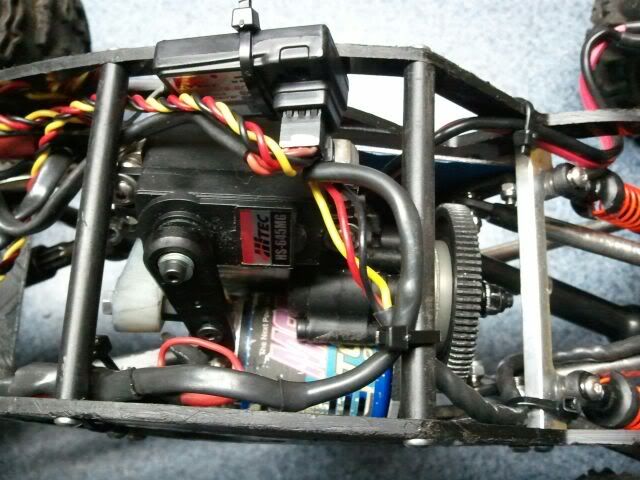 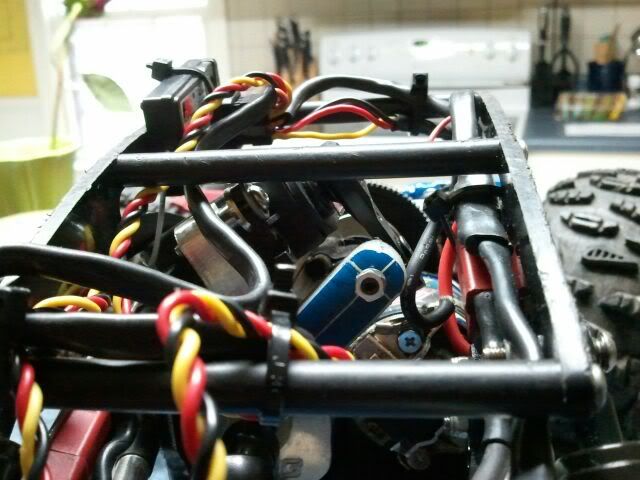 it works but you have to take out the middle topper support. I ended up making a mount to extend the servo 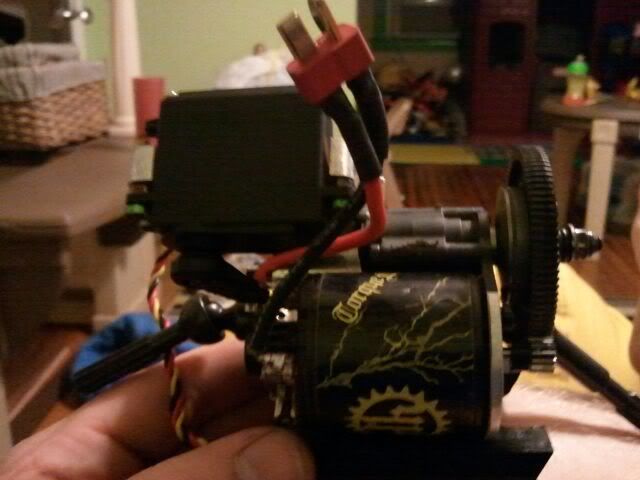 This is how it looks now. 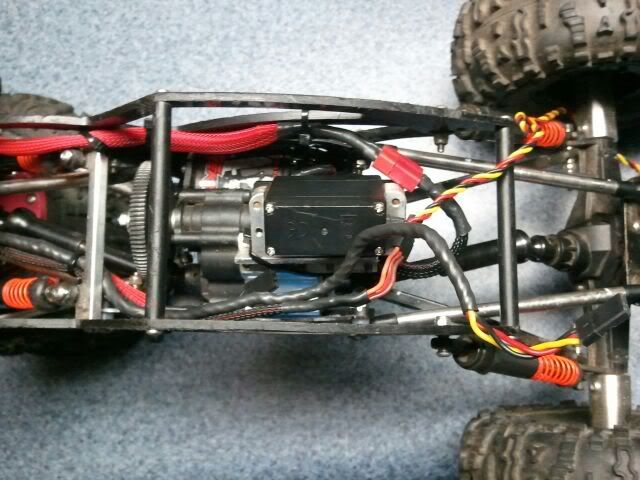 I like the way you are going to mount your dig servo. Please give us some detailed pics of it when you figure out how to mount it. |
|
| |
|
10-03-2011, 04:37 PM
| #11 |
| Quarry Creeper Join Date: Jun 2009 Location: Visalia, CA
Posts: 345
|
Well, not much progress this weekend. I did receive my Vanquish titanium lowers for the front. These things are sweet I think I am going to replace the uppers with them also, I know they are big in diameter but as long as they fit I dont care. Also got a short MIP shaft I needed (thanks 928darwin) Im waiting on a dig servo, should be here tomorrow. Then I can get into the dig clearance issue. Thursdays mail order will include a BWD motor guard and motor plate. Still gotta make body panels and get a servo guard, then the motor ($$$) |
|
| |
|
10-09-2011, 05:52 PM
| #12 |
| Quarry Creeper Join Date: Jun 2009 Location: Visalia, CA
Posts: 345
|
Well, I didnt want to just sit around waiting on parts. Decided to make body panels this weekend. I made them with a horror theme     Now just need to move some wheels and tires to purchase a new Holmes Motor, I have the BWD motor plate and guard on the way. Ill address the dig clearance when I get all the parts. May be a few weeks |
|
| |
|
10-09-2011, 07:56 PM
| #13 |
| Quarry Creeper Join Date: Dec 2010 Location: gastonia
Posts: 295
|
Those skins are sweet man. nice set up so far also. Could you post up in some detail about the clearance issues with the dig when you get to it. Im looking in to trying to fit one in mine and it does not look easy  |
|
| |
|
10-09-2011, 08:09 PM
| #14 |
| I wanna be Dave Join Date: Aug 2011 Location: Burque
Posts: 3,805
|
Hey man those body pannels look pretty cool. Just wondering how you did the splatters though?
|
|
| |
|
10-09-2011, 08:48 PM
| #15 | |
| Quarry Creeper Join Date: Jun 2009 Location: Visalia, CA
Posts: 345
| Quote:
| |
|
| |
|
10-09-2011, 08:51 PM
| #16 | |
| Quarry Creeper Join Date: Jun 2009 Location: Visalia, CA
Posts: 345
| Quote:
| |
|
| |
|
10-09-2011, 09:00 PM
| #17 |
| I wanna be Dave Join Date: Aug 2011 Location: Burque
Posts: 3,805
|
Oh that sounds pretty eazy. I thought that it would have been more complicated. Thanks for responding.
|
|
| |
|
10-09-2011, 09:40 PM
| #18 |
| RCC Addict Join Date: Jan 2010 Location: Dallas
Posts: 1,848
|
Great looking build. I to had a vp dig in my fasty that is now my sons. If I can offer some personal advise I would try as hard as you possibly can to get as much down low as possible. I went nuts trying to do that. I groved the top of the skid to hide wires between the tranny and skid. I would see if you can get that dig servo even lower. I would decase the rx and hide it possibly on the front links. I would even consider using a drimel to drop the front tray, maybe even hide your bec and rx under that. Just a few ideas but the lower cog is so important from my opinion especially when side hilling. I will also be curious to see if you plan to leave your shock tops on the front on the outside of the topper.
|
|
| |
|
10-09-2011, 10:40 PM
| #19 | |
| Quarry Creeper Join Date: Jun 2009 Location: Visalia, CA
Posts: 345
| Quote:
Thanks again. | |
|
| |
|
10-09-2011, 11:12 PM
| #20 |
| www.team3sixrc.com Join Date: Mar 2008 Location: Scalerville
Posts: 4,506
|
Now that looks sweet. Im digging that for sure. Juan does a nice chassis!
|
|
| |
|
| |


 Linear Mode


