| |
 02-07-2011, 09:56 PM
| #81 |
| SCALE PERFORMANCE PARTS   Join Date: Oct 2007 Location: Cedar Park
Posts: 5,453
|
With the release of the new SORRCA scale rules I'm looking at doing some rebuilding. I'm still not sure of the class I want to go in (1 or 2) but I think that will just come with time. It will fit in class 2 now but the tires will be somewhat undersized. In class 1 I'd need to get smaller tires and it may be a bit wide for the class. Anyway, I wanted to post up how I would score my own truck as it sits. Hopefully it will help you guys with some of the rules and help me figure out some direction for the future. As it sits, I see: Body -Hard body: full -8, -Inner fender wells: -1 per pair (total -2) -Bumpers : metal -3 each , plastic -1 each (total -4) -roof rack: plastic -1 -3D interior: 4 seat -4, SUV cargo area -1. -Realistic Scale Human figures: full(knees up) -2 -Chassis mounted steering servo: -5 (front) -Fuel cell, hubs on all wheels, steering stabilizer, mirrors(2), wipers(2), Fire extinguisher -1 each (total -6) -Tow strap, Pull Pal -1 each (total -2) -Headlights(2) and taillights(2) -2 -Winch -2 So it currently comes in at 39 points. I'm hoping to boost that by doing/adding/keeping the following... -Interior cage or exo-cage: (-3 metal -1 Plastic) per row of seats protected. (Will cover 3 rows of seats so -9) -Sliders: (both sides) metal -3 -Integrated tube shock mounts: metal -1 (per pair) (so -2) -Hard body: full -8 -Inner fender wells: -1 per pair (x2) -Bumpers : metal -3 each (x2) -Stinger/grill guard: -1 -Roof rack: metal: -2 -3D interior: 4 seat -4, SUV cargo area -1. -Realistic Scale Human figures: full(knees up) -2 (add second figure so -4) -Chassis mounted steering servo: -5 (front) -Fuel cell, hubs on all wheels, mirrors(2), wipers(2), antenna, license plate, Fire extinguisher, -1 each (total -6) -Tow strap, -D-ring, Pull Pal, -1 each (total -3) -Headlights(2) and taillights(2) -2 -Winch -2 Each (add rear winch total -4) Which should bring me to 61 points and will keep me busy for a while. I'll post updates in here as I make em.  |

|  |
| Sponsored Links | |
| | |
|
02-08-2011, 08:09 AM
| #82 |
| Quarry Creeper Join Date: Jan 2004
Posts: 276
|
I just read this thread from front to back and not being a Hummer person, I gotta say your rig looks great (both bodies). I really like how you did your wires and water proofing........man I would have never thought of that in a million years I think I'm off to Radio Shack for a weekend project!
|
|
| |
|
02-08-2011, 09:07 AM
| #83 |
| Newbie Join Date: Nov 2010 Location: lincolnton
Posts: 23
|
looks way better with the bumper chopped off
|
|
| |
|
03-06-2011, 08:52 PM
| #84 |
| SCALE PERFORMANCE PARTS Join Date: Oct 2007 Location: Cedar Park
Posts: 5,453
|
Got my Heyok controller installed in a new Tower Pro servo. Still need to figure out where I am gonna mount it and all but so far so good.... Last edited by Locked Up; 03-06-2011 at 09:08 PM. |
|
| |
|
03-06-2011, 09:03 PM
| #85 |
| Pebble Pounder Join Date: Feb 2010 Location: riverside
Posts: 163
|
wow that thing is real nice! |
|
| |
|
03-07-2011, 10:52 PM
| #86 |
| SCALE PERFORMANCE PARTS Join Date: Oct 2007 Location: Cedar Park
Posts: 5,453
|
I started messing around with the servo winch tonight and because of the way I have everything situated on the H2 it's going to be a super tight squeeze. I can get it done, but it will mean I always have to run smaller batteries to fit it up front on the tray. I could also rear mount it and feed the line to the front but I'm wondering if it would be worth it. A servo winch is the end all be all but other than 2 tangles and the crappy controller, the 3 racing winch has worked fine. So for now, I'm holding off on the servo winch. The first thing I did tonight was to untangle the 3 Racing and put a washer between the drum and the winch body ... no more tangles. For the controller ... Heyok to the rescue. So ... I'm going to keep the 3 racing winch for now. At least until the motor or gear box dies. Then and only then will I worry about upgrading. The next thing I needed to work on is to swap in my new SV2 Sidewinder ESC. I forgot how tight of a fit it all is in there but I'll get it done. I'm also going to move the connection for the battery to the front of the truck so I can unplug it a little easier. Last edited by Locked Up; 11-13-2013 at 08:19 PM. |
|
| |
|
03-08-2011, 08:07 AM
| #87 |
| RCC Addict Join Date: Dec 2007 Location: Moncton, NB, Canada
Posts: 1,962
|
Looks great, nice to see another H2 on here.
|
|
| |
|
03-08-2011, 08:40 AM
| #88 |
| Quarry Creeper  Join Date: Aug 2009 Location: Snohomish, WA
Posts: 231
|
Awesome build... I love a detailed build post!
|
|
| |
|
03-27-2011, 11:42 PM
| #89 |
| SCALE PERFORMANCE PARTS Join Date: Oct 2007 Location: Cedar Park
Posts: 5,453
|
(Oops ... I missed a post on here) So I decided to try my hand at brazing and it went pretty well. No burns from the brazing but I did drop a hot piece of fresh cut brake line into my hand .... then I remembered I have a mini tube cutter to cut brake line. Anyway, the progress is slow for me because of the interior. I actually am installing a fresh interior that has all the seats still upright. I had cut them out of my original H2 to have the cargo area but now that they aren't counting points for "crap" I can go back to a normal interior. This is good because it will actually weigh less. I had added a bunch of velcro and styrene in the old interior... blah blah blah. The front is going to tuck into/mount to the dash and the center will be attached to the body up top. The middle set of down bars will also have nuts on the end and will be mounted to the floor. I had to reconfigure my rear body mounts and cut some new pieces but they are actually an improvement over the old setup. Tomorrow I'll get the last 2 down bars on, start on the sliders and finalize the interior. Once it's all setup the way I want I'll take it apart and clean it all up. Probably going to do a little painting and I have a second figure to get in there. Oh, on the sliders, I'm thinking about doing some that are more like Jeep sliders that mount to the tub, but I'm going to have a protruding tube step that will run the length of them. Will be great if I can make it work. If not, standard sliders will have to do. My first ever brazed joint: 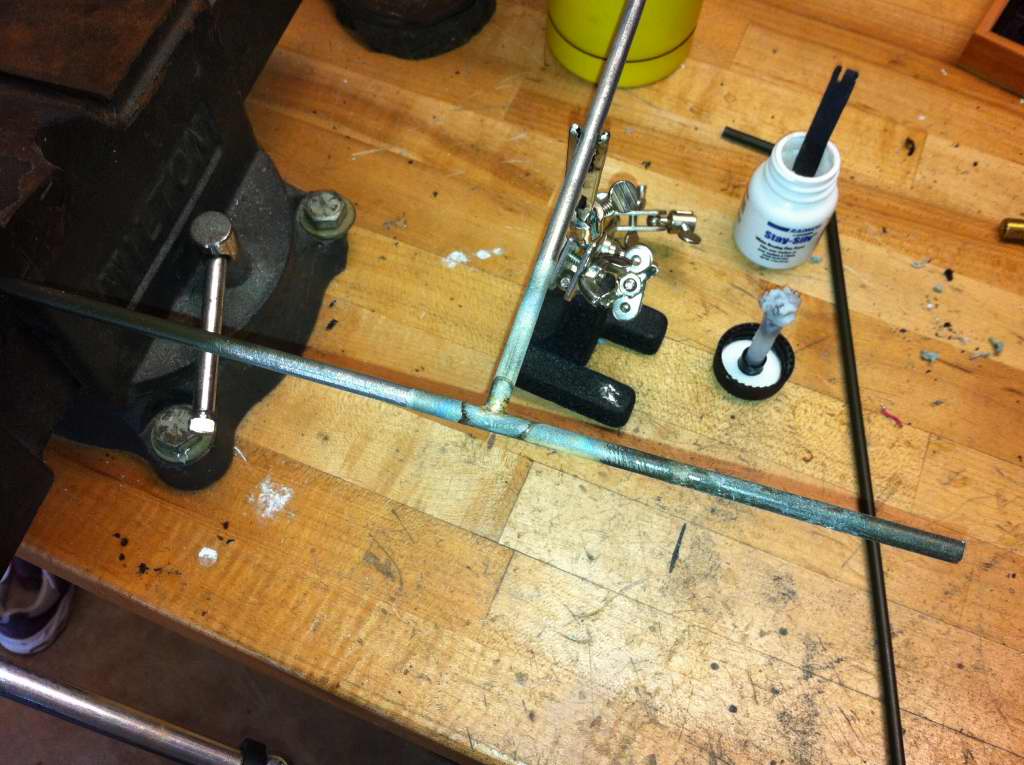 Top of the cage done: 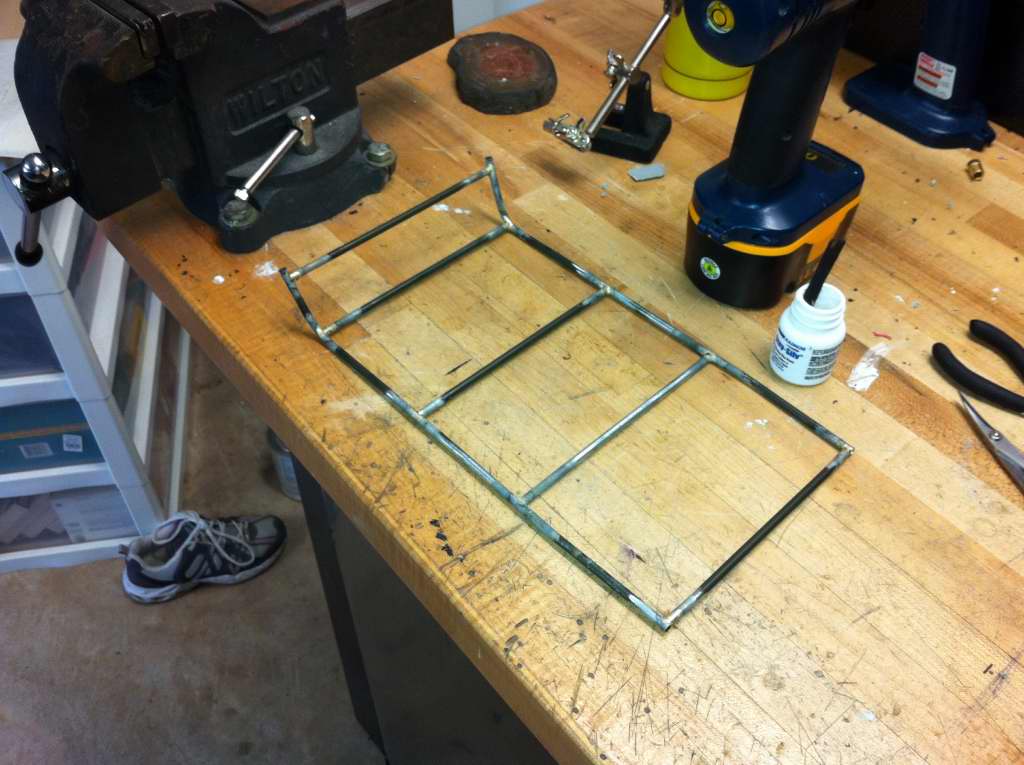 How it fits in: 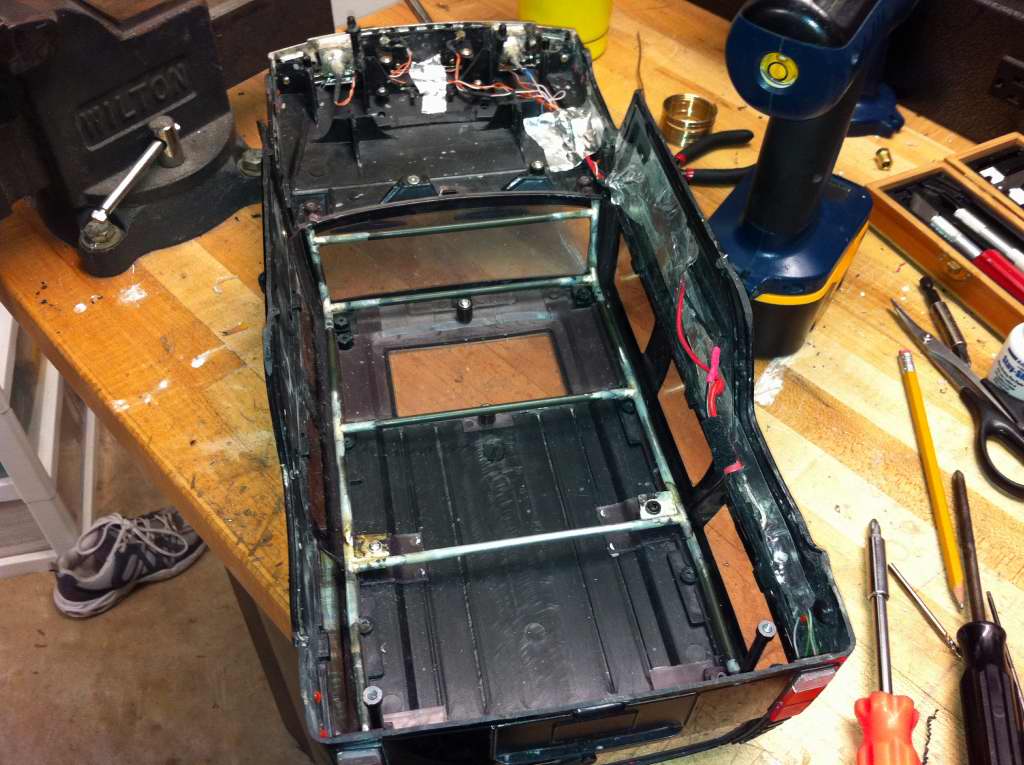 Will have more pics tomorrow. Last edited by Locked Up; 11-13-2013 at 08:20 PM. |
|
| |
|
03-29-2011, 12:03 AM
| #90 |
| SCALE PERFORMANCE PARTS Join Date: Oct 2007 Location: Cedar Park
Posts: 5,453
|
I got the cage finished tonight. It looks pretty good and I'm more than happy with it since it was my first piece. I also started on the sliders. I couldn't find the steel I wanted (1/2" x 3/4" angle) so I cut some 1/2" box in half. Was a PITA. I think they look good but angle wold have been easier. The angle also would have matched up to the flare better so I'll probably redo these at some point or ... add some steel to them so they look more like what I wanted. We'll see. Worst part of this whole project was when I was cutting the tube, felt a bug on the back of my neck, smacked it, realized it was a bee as it stung me, causing me to drop the spinning dremel onto my leg (wearing shorts, so I got cut) which I reacted by batting it with my hand. I had on Mechanix gloves which it cut through and into my thumb.  After careful consideration, I've already decided to modify them. Initially I wanted to have both ends tapered but I couldn't get the bends right. While at Lowes I found some good little rod that I can use to make slugs so I should be able to make both ends taper by doing a join. I think it will be much better and hope to get that finished for tomorrow. Pics so far ... 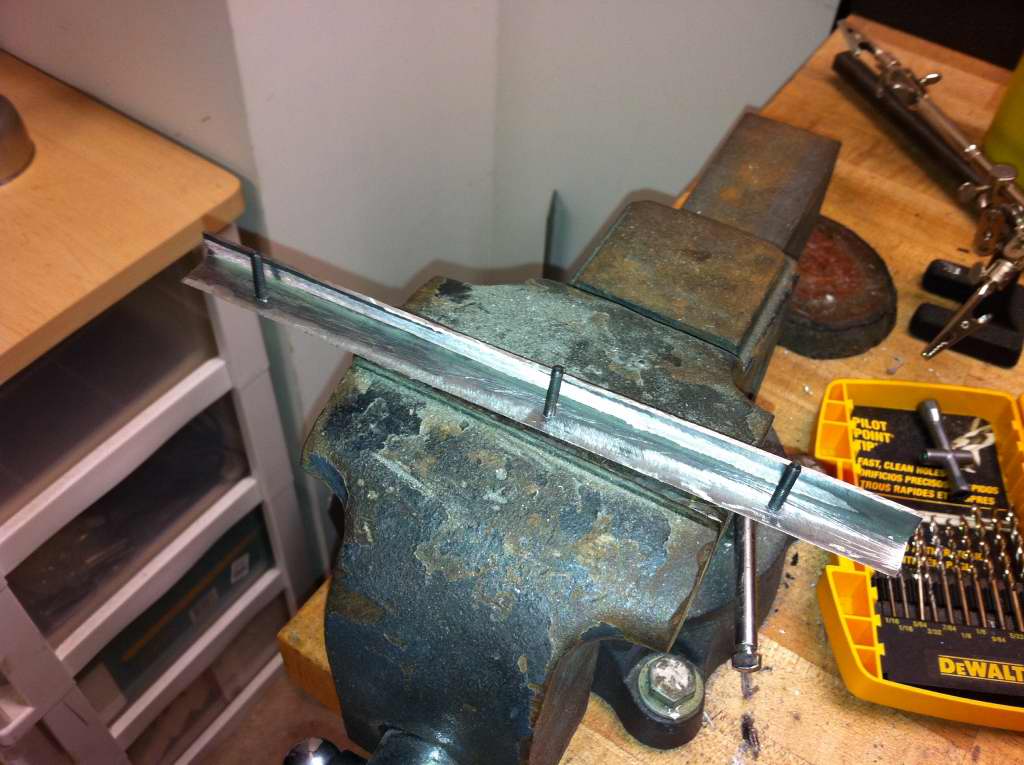 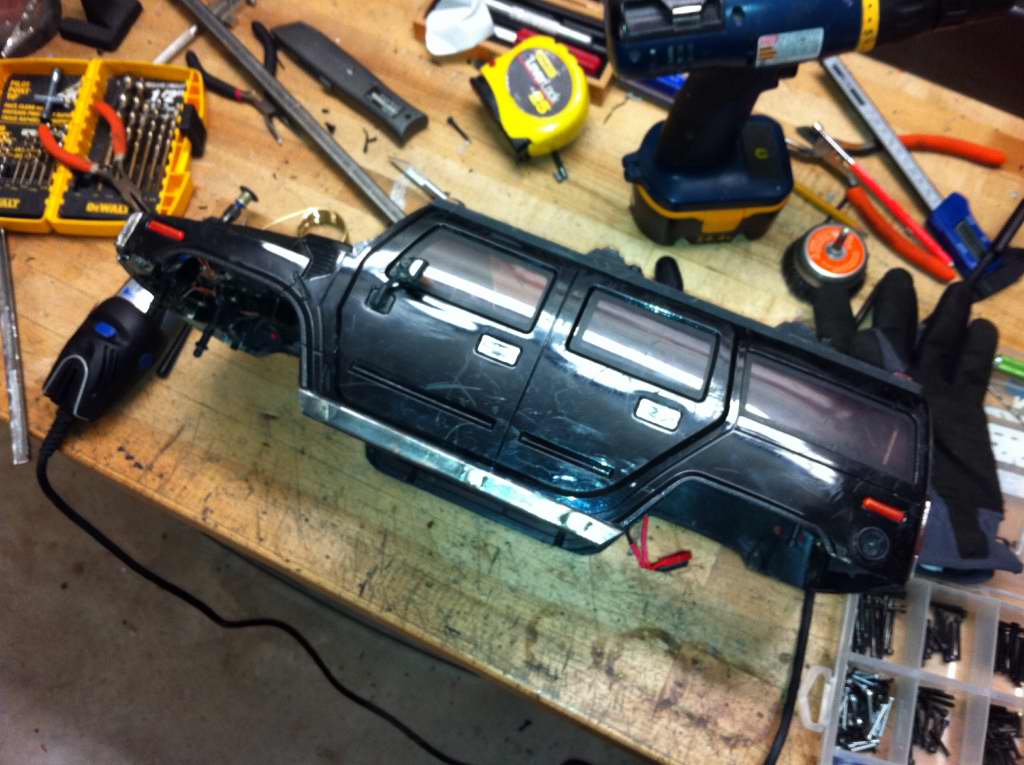 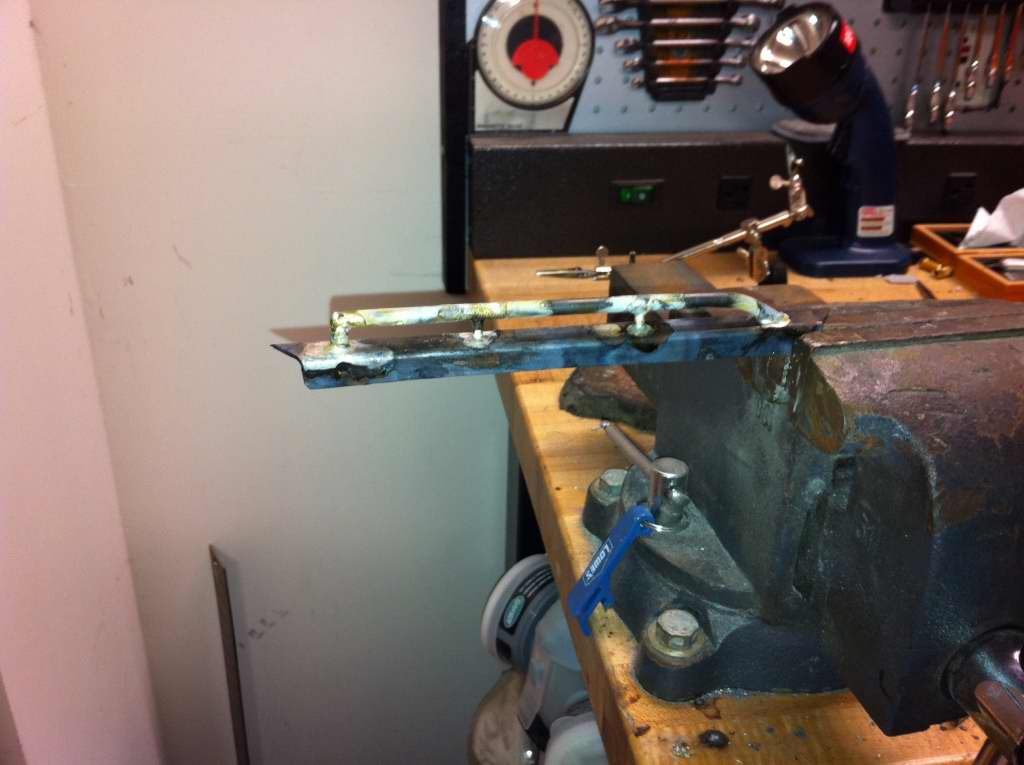 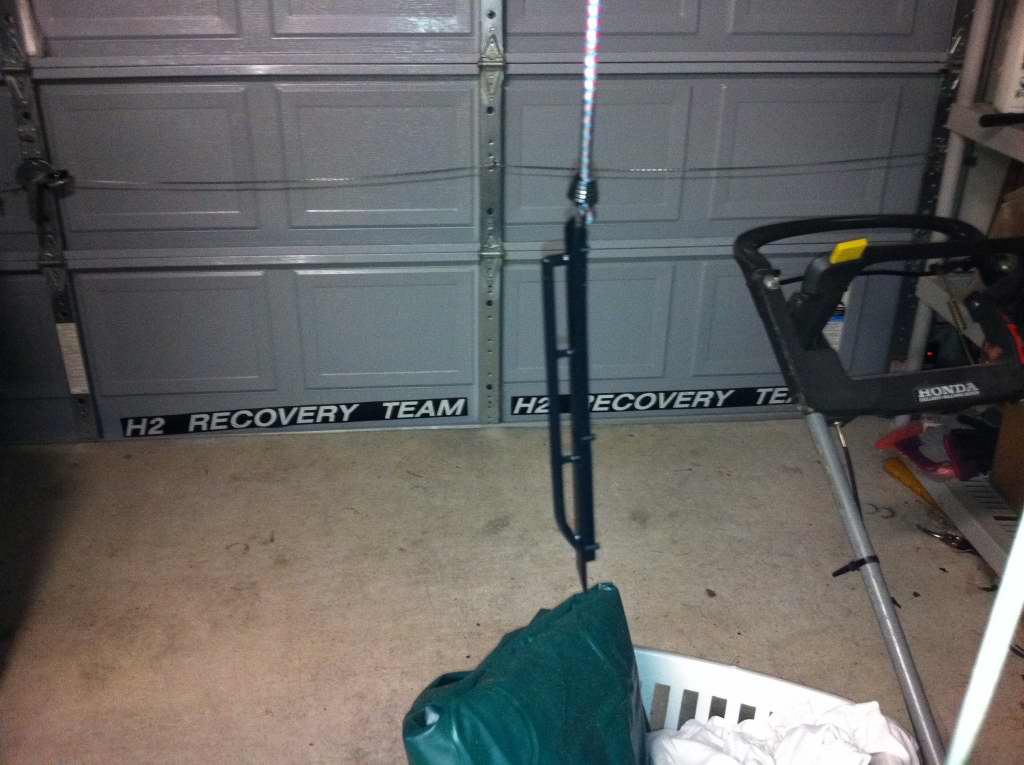 Last edited by Locked Up; 11-13-2013 at 08:22 PM. |
|
| |
|
03-29-2011, 09:59 PM
| #91 |
| SCALE PERFORMANCE PARTS Join Date: Oct 2007 Location: Cedar Park
Posts: 5,453
|
I picked up more tools tonight ...I was close to getting a band saw but settled on more Dremel wheels and some flappers. Holy hell the flappers are about 1000 times better at removing the crap from the brake lines. Anyway, I finished and installed the cage and sliders and am half way done on the new interior. I'm totally stoked with the sliders. They actually look 99% like what I wanted.   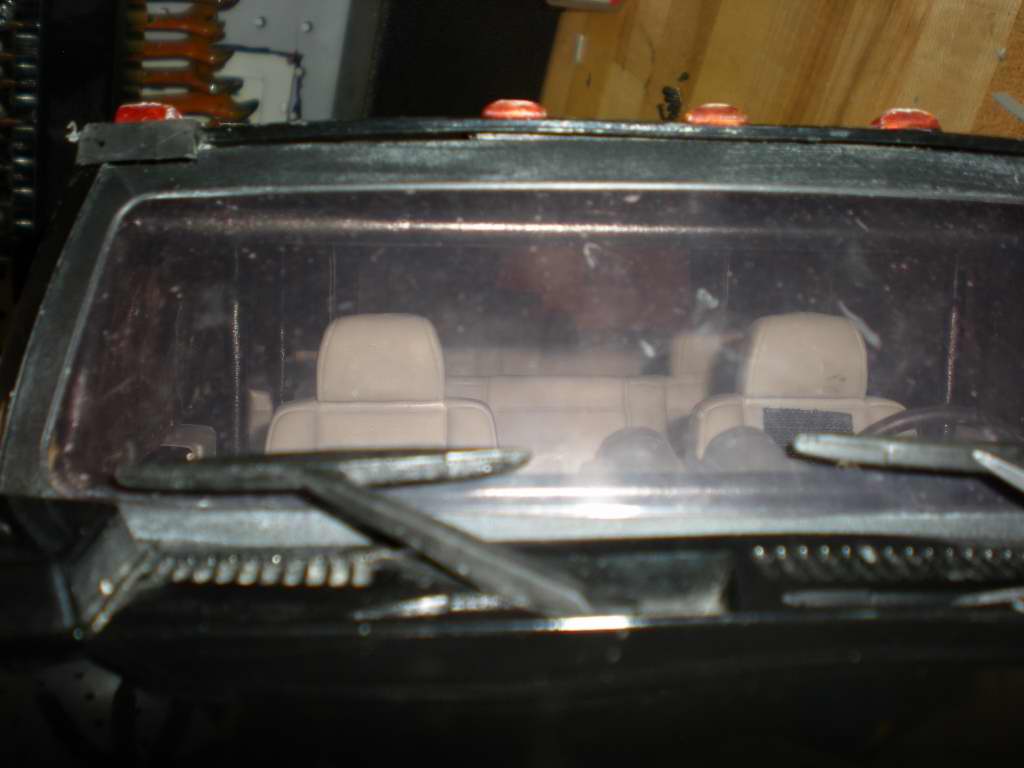  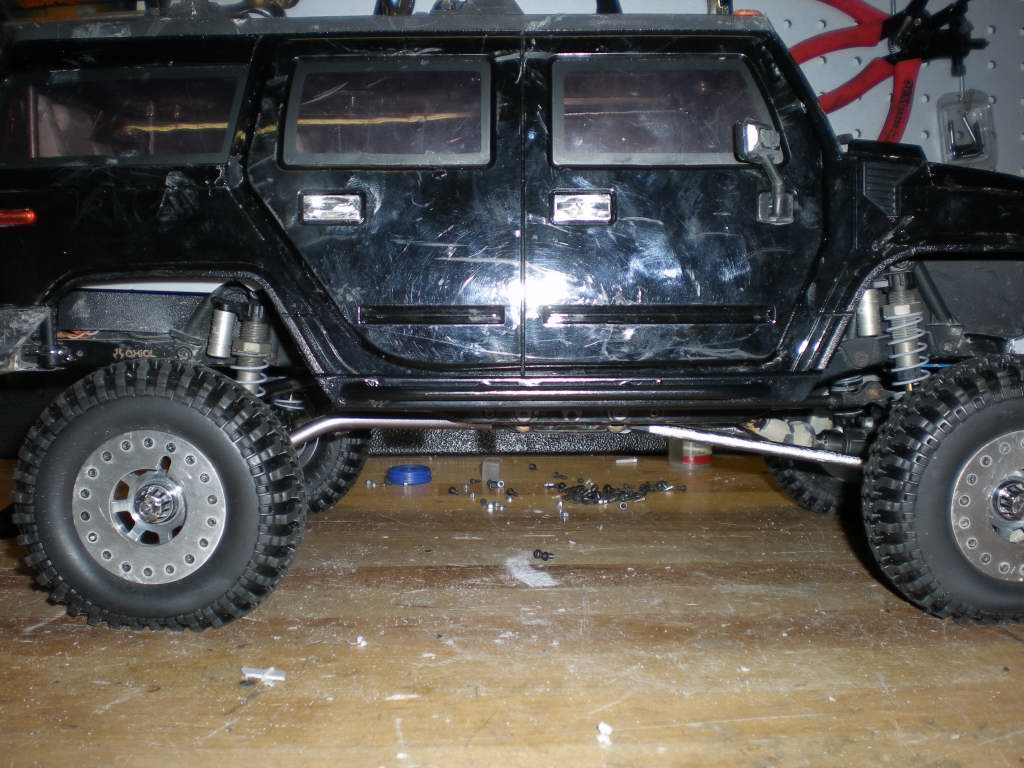 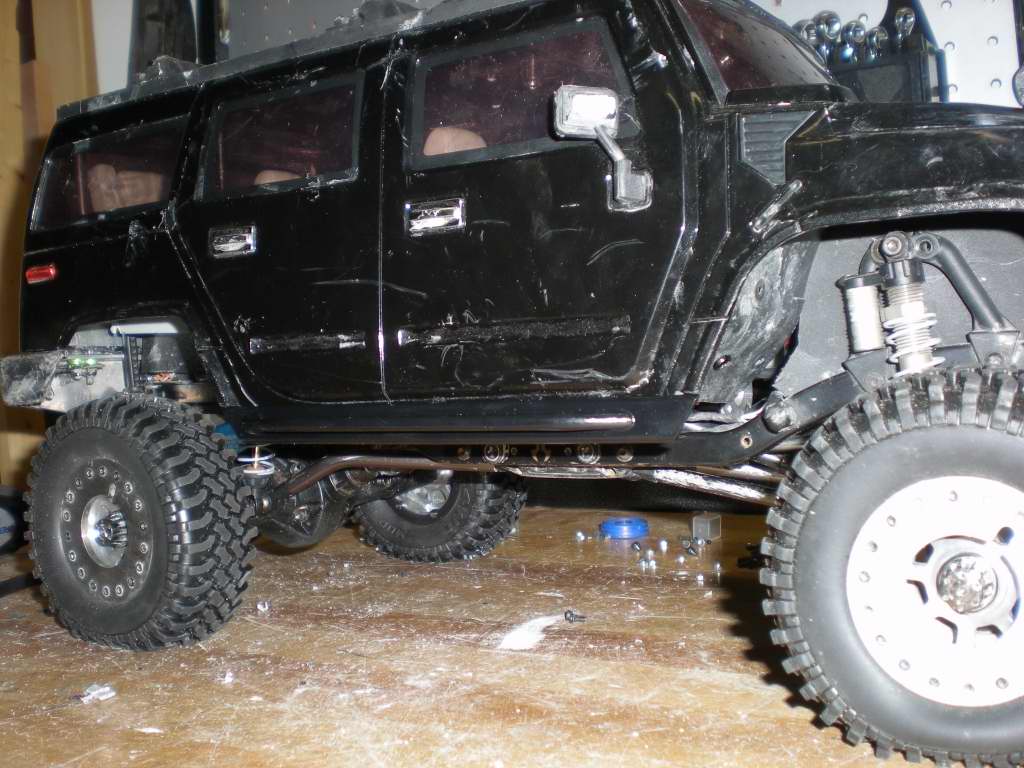   I still have some paint work, a passenger to add, need to waterproof the new electronics box, redo the bumpers and lower/shorten the suspension ....but it's getting there. I'll never get all of that done by Saturday so the new bumpers will probably have to wait. Last edited by Locked Up; 11-13-2013 at 08:23 PM. |
|
| |
|
03-29-2011, 10:02 PM
| #92 |
| I wanna be Dave Join Date: Feb 2009 Location: Cowtown, USA
Posts: 2,780
|
Sweet looking H2, don't see too many. BTW, nice first brazed joint. |
|
| |
|
03-29-2011, 11:42 PM
| #93 |
| Quarry Creeper Join Date: Jan 2009 Location: Lowell Massachusetts
Posts: 223
|
I dont know why more people dont buy these Hummers, They look great and fit the WB nice. I have been thinking of a truggy Hummer, I think you cut it like a bobbed bed and take out the middle.
|
|
| |
|
03-30-2011, 11:25 PM
| #94 |
| SCALE PERFORMANCE PARTS Join Date: Oct 2007 Location: Cedar Park
Posts: 5,453
|
I got the new interior trimmed, painted and installed. Here it is without the dash, just so you can see how close the electronics box is to everything. 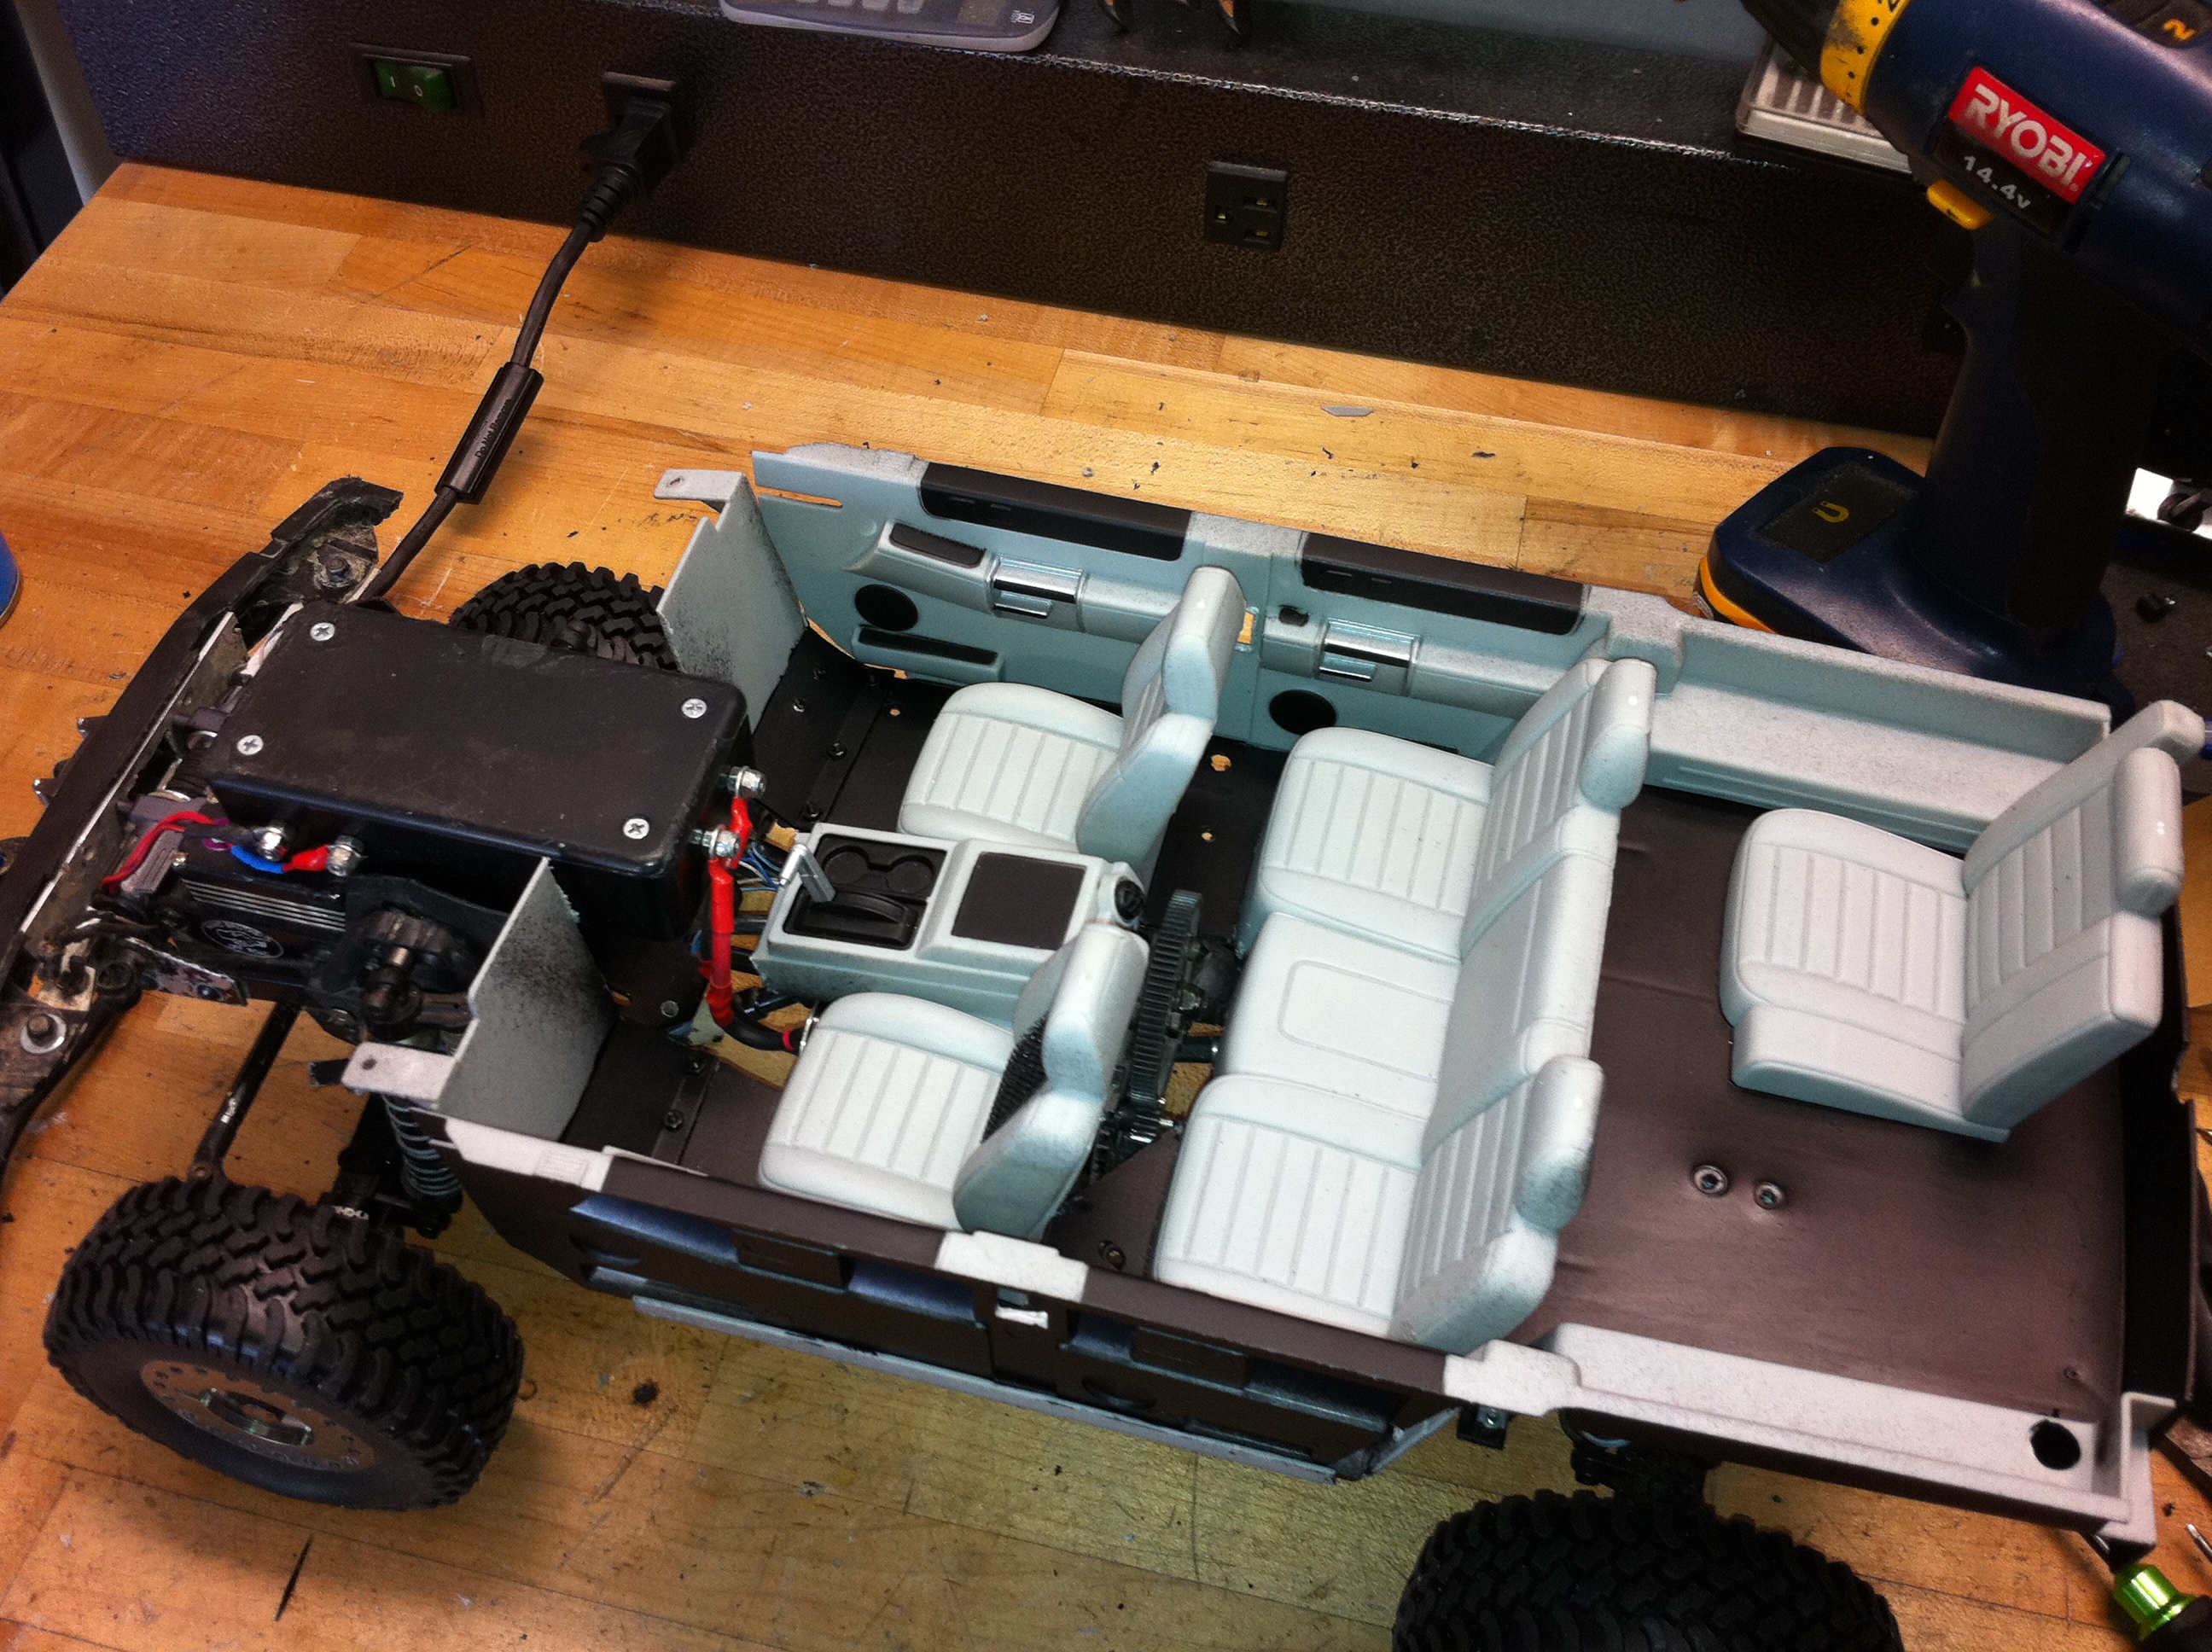 Here is a shot with the dash. 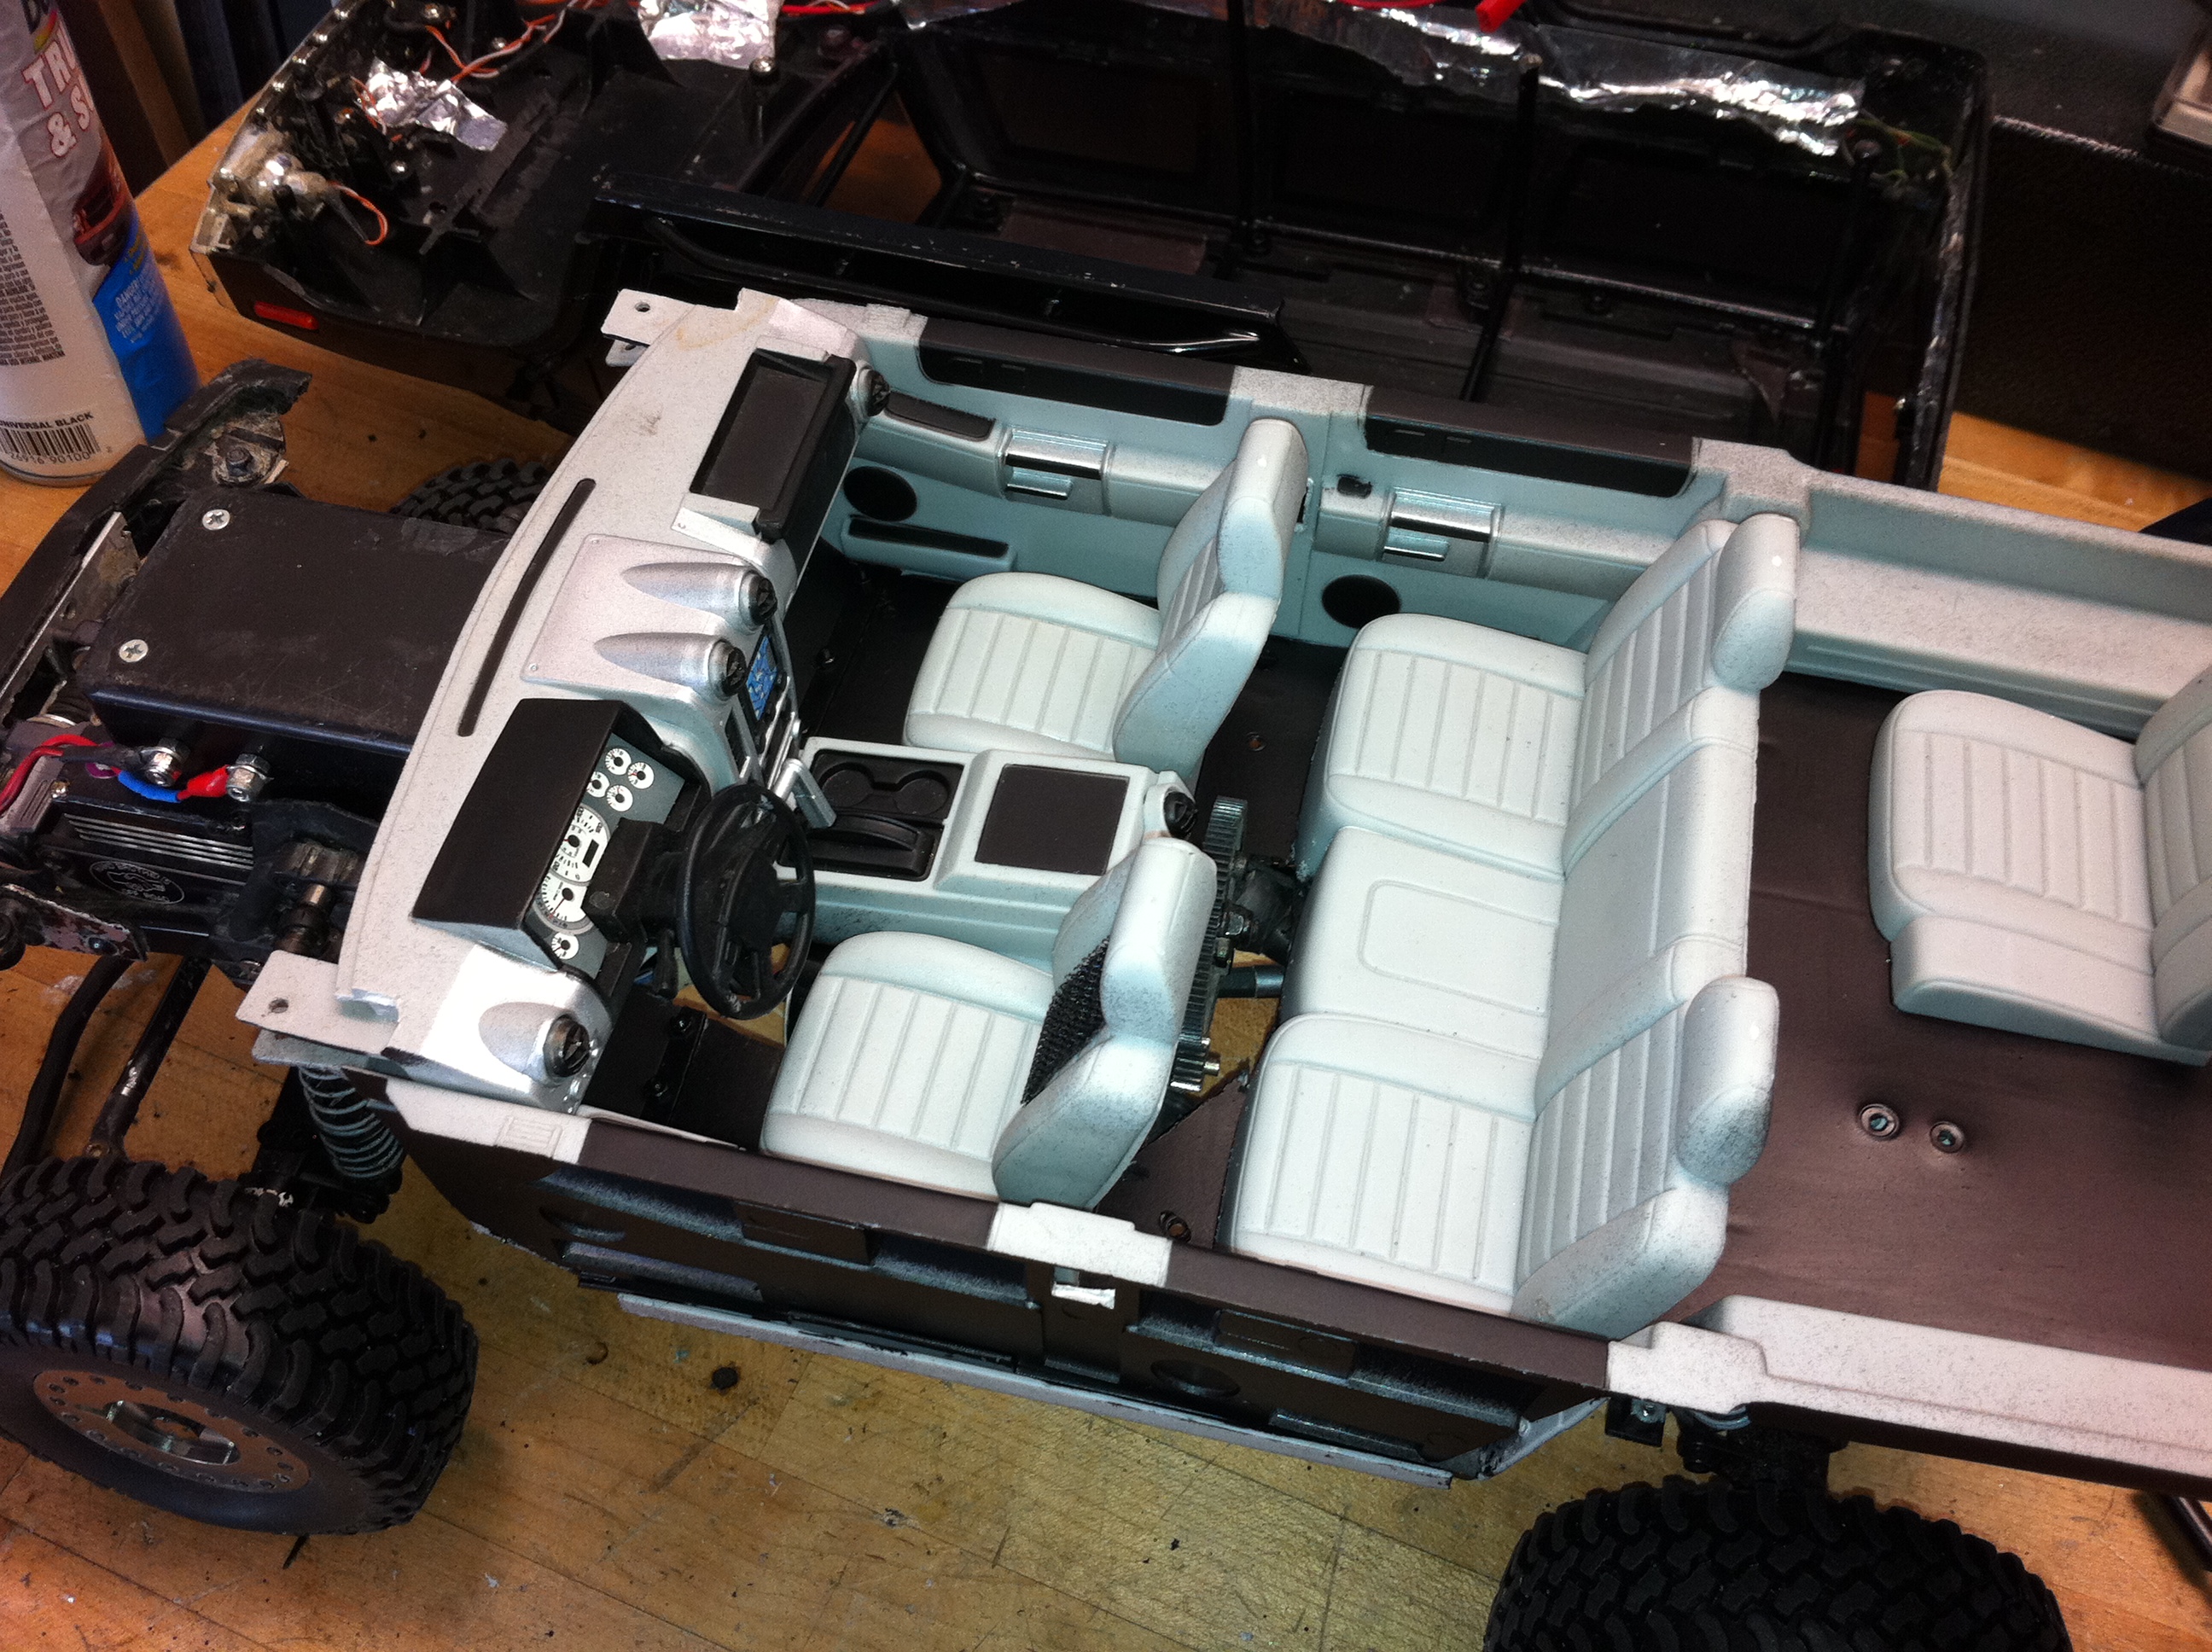 And here is one with the passengers. I had used velcro to hold the driver in before. This time I used some screws and drilled holes in their "bottoms". 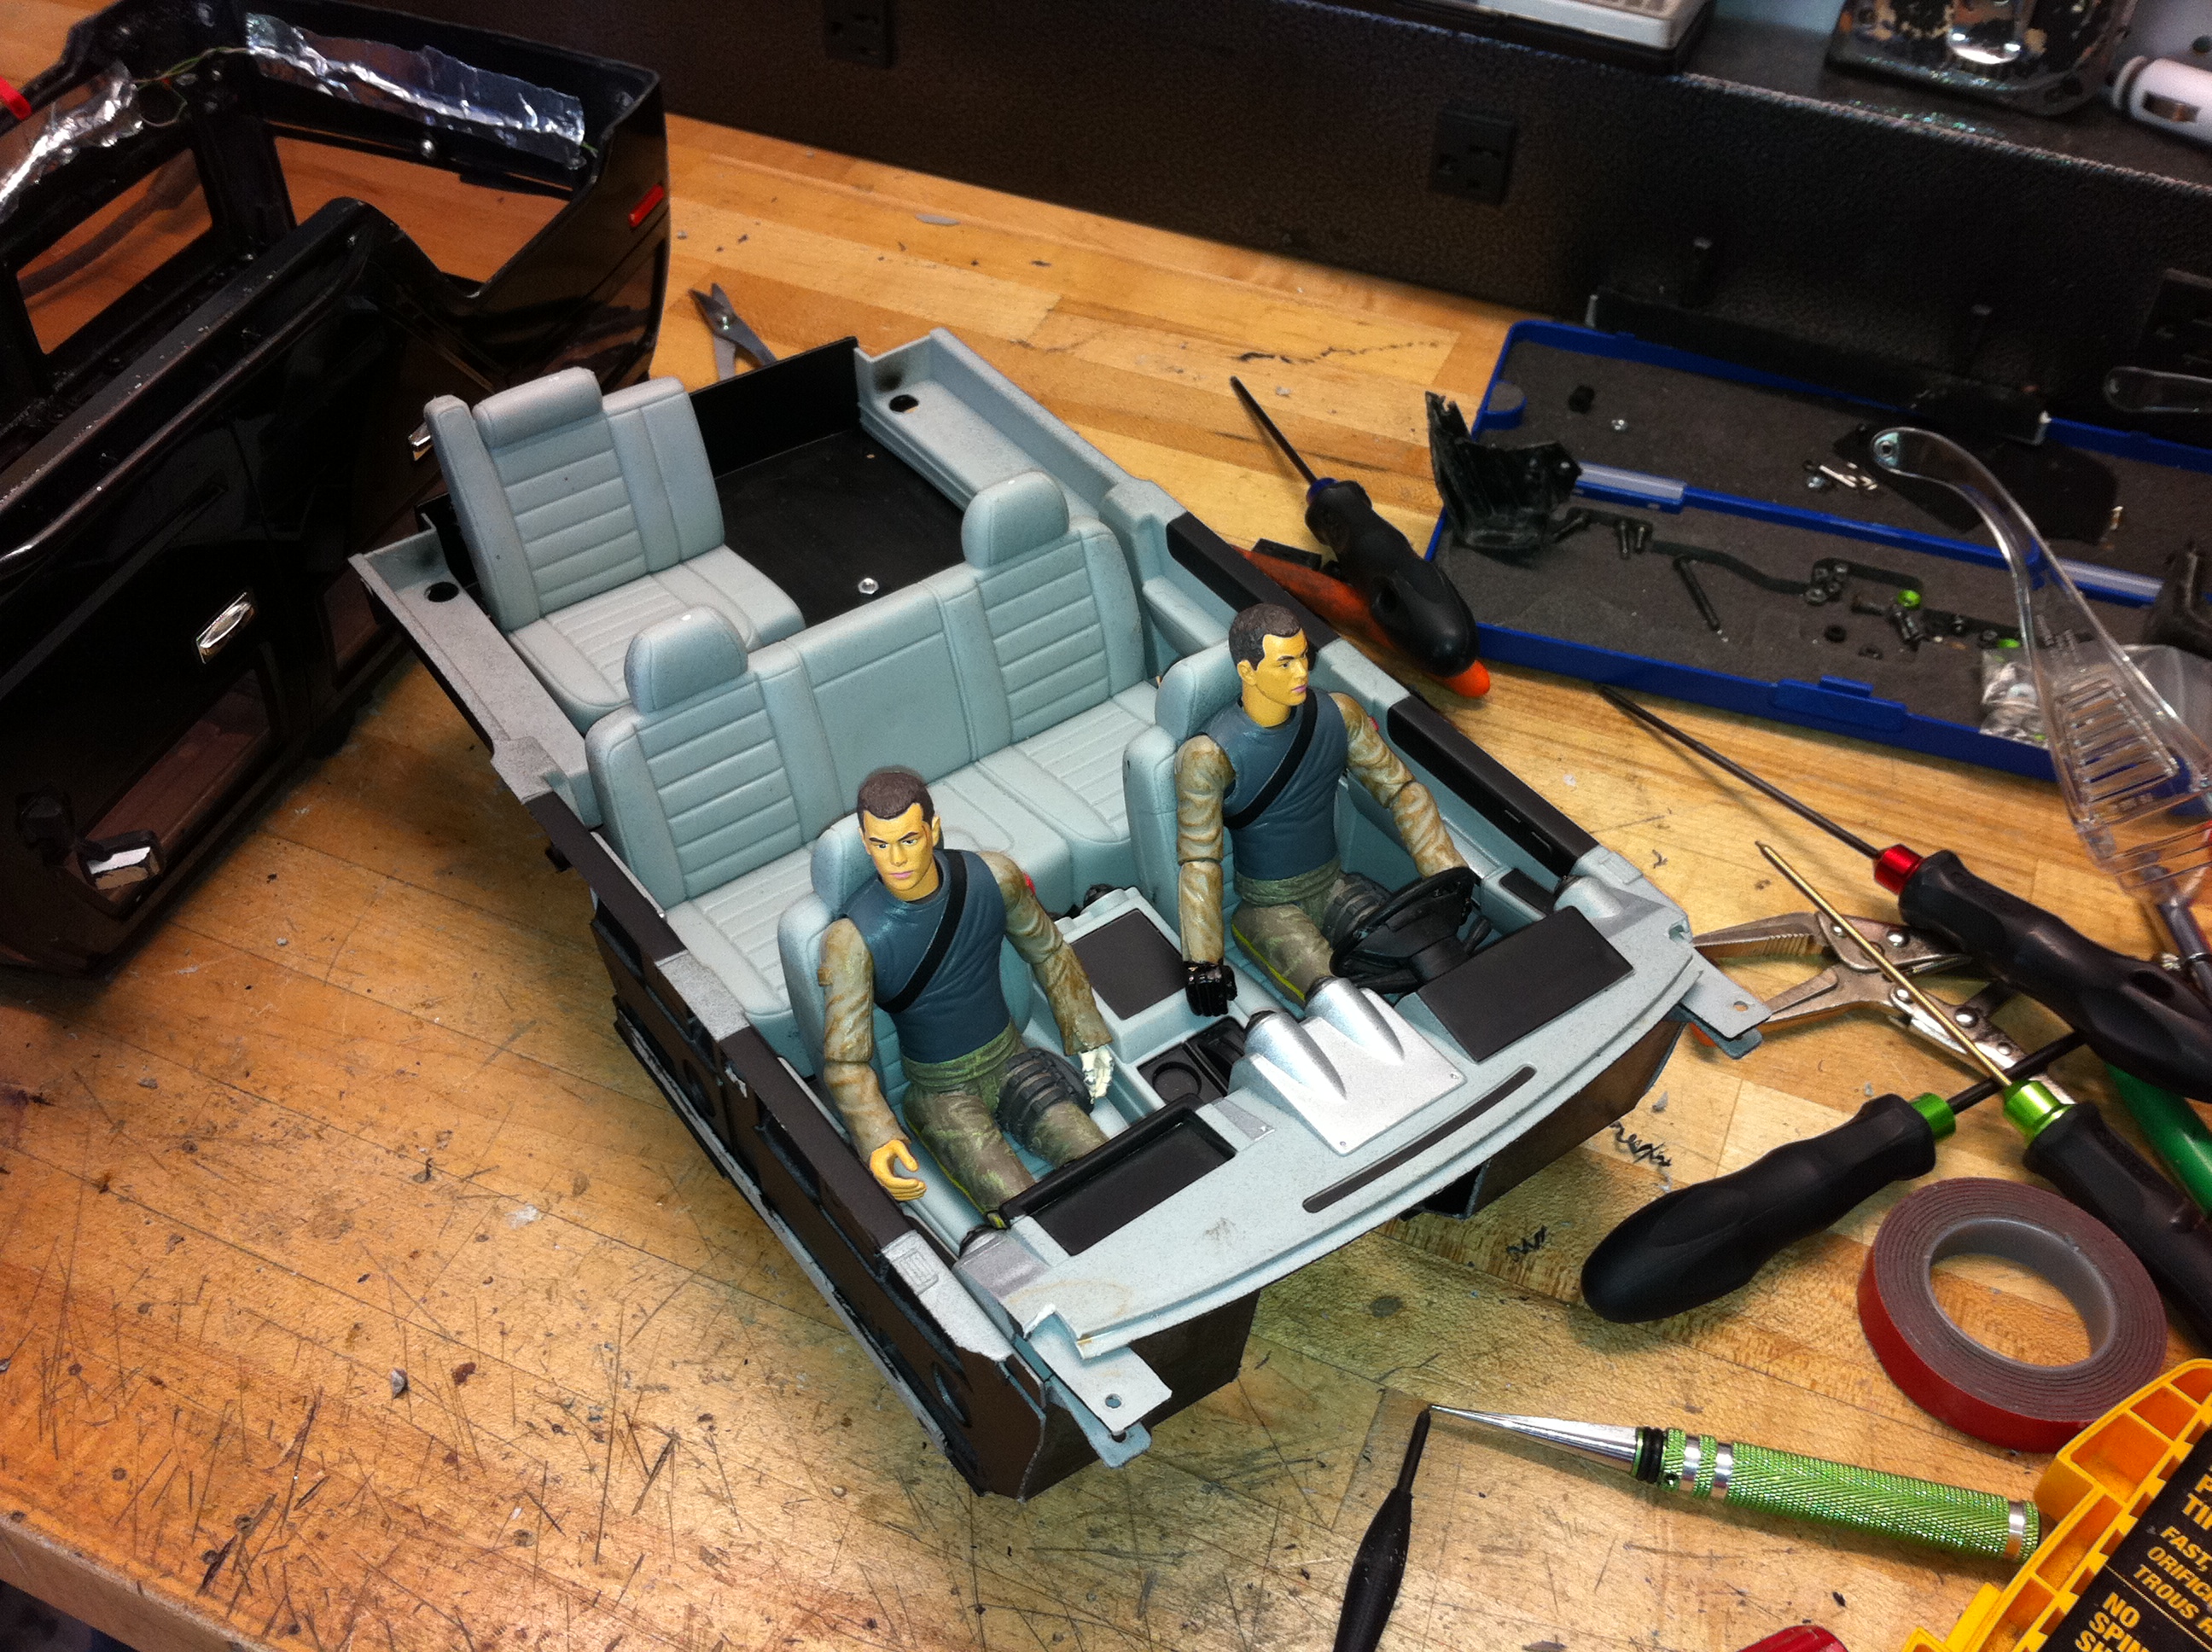 I also reworked the bumper. It's a smaller piece of angle and I moved the mount around a little. I still need to trim the bracket but I like it so far. 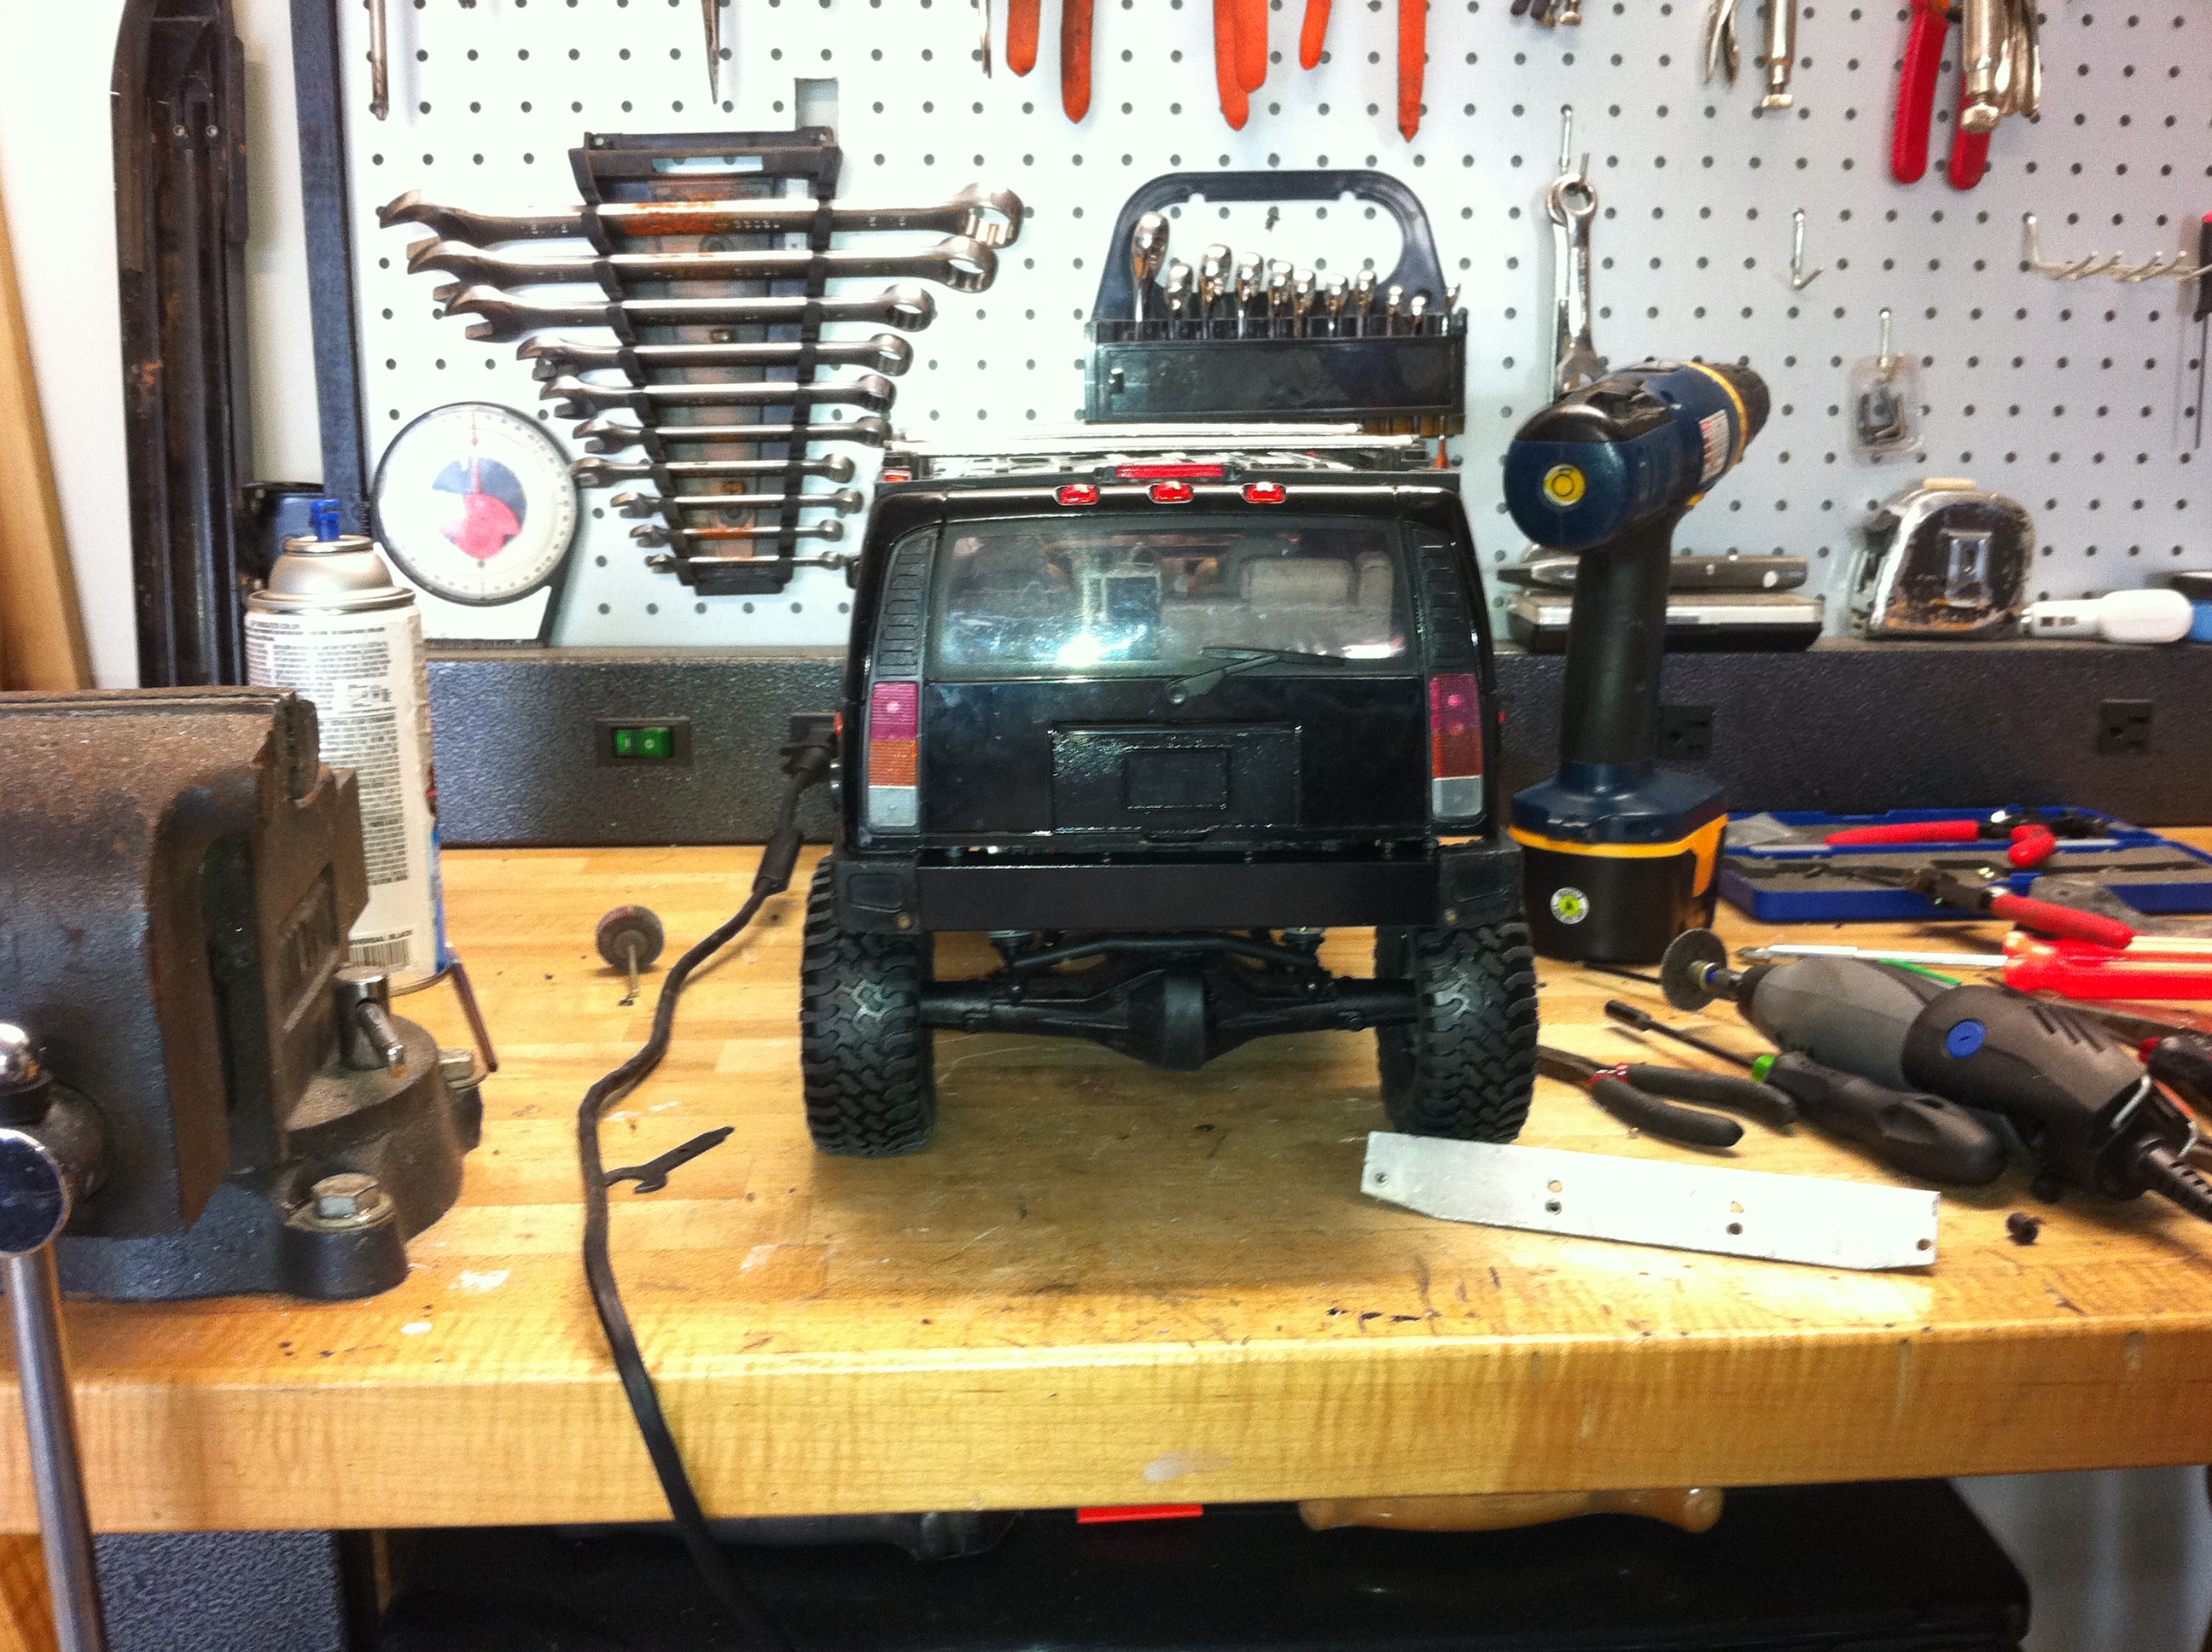 Here you can see the new piece is just a bit shorter. You can also the the bottom of the mount bracket that I need to trim and hit with some flat black. 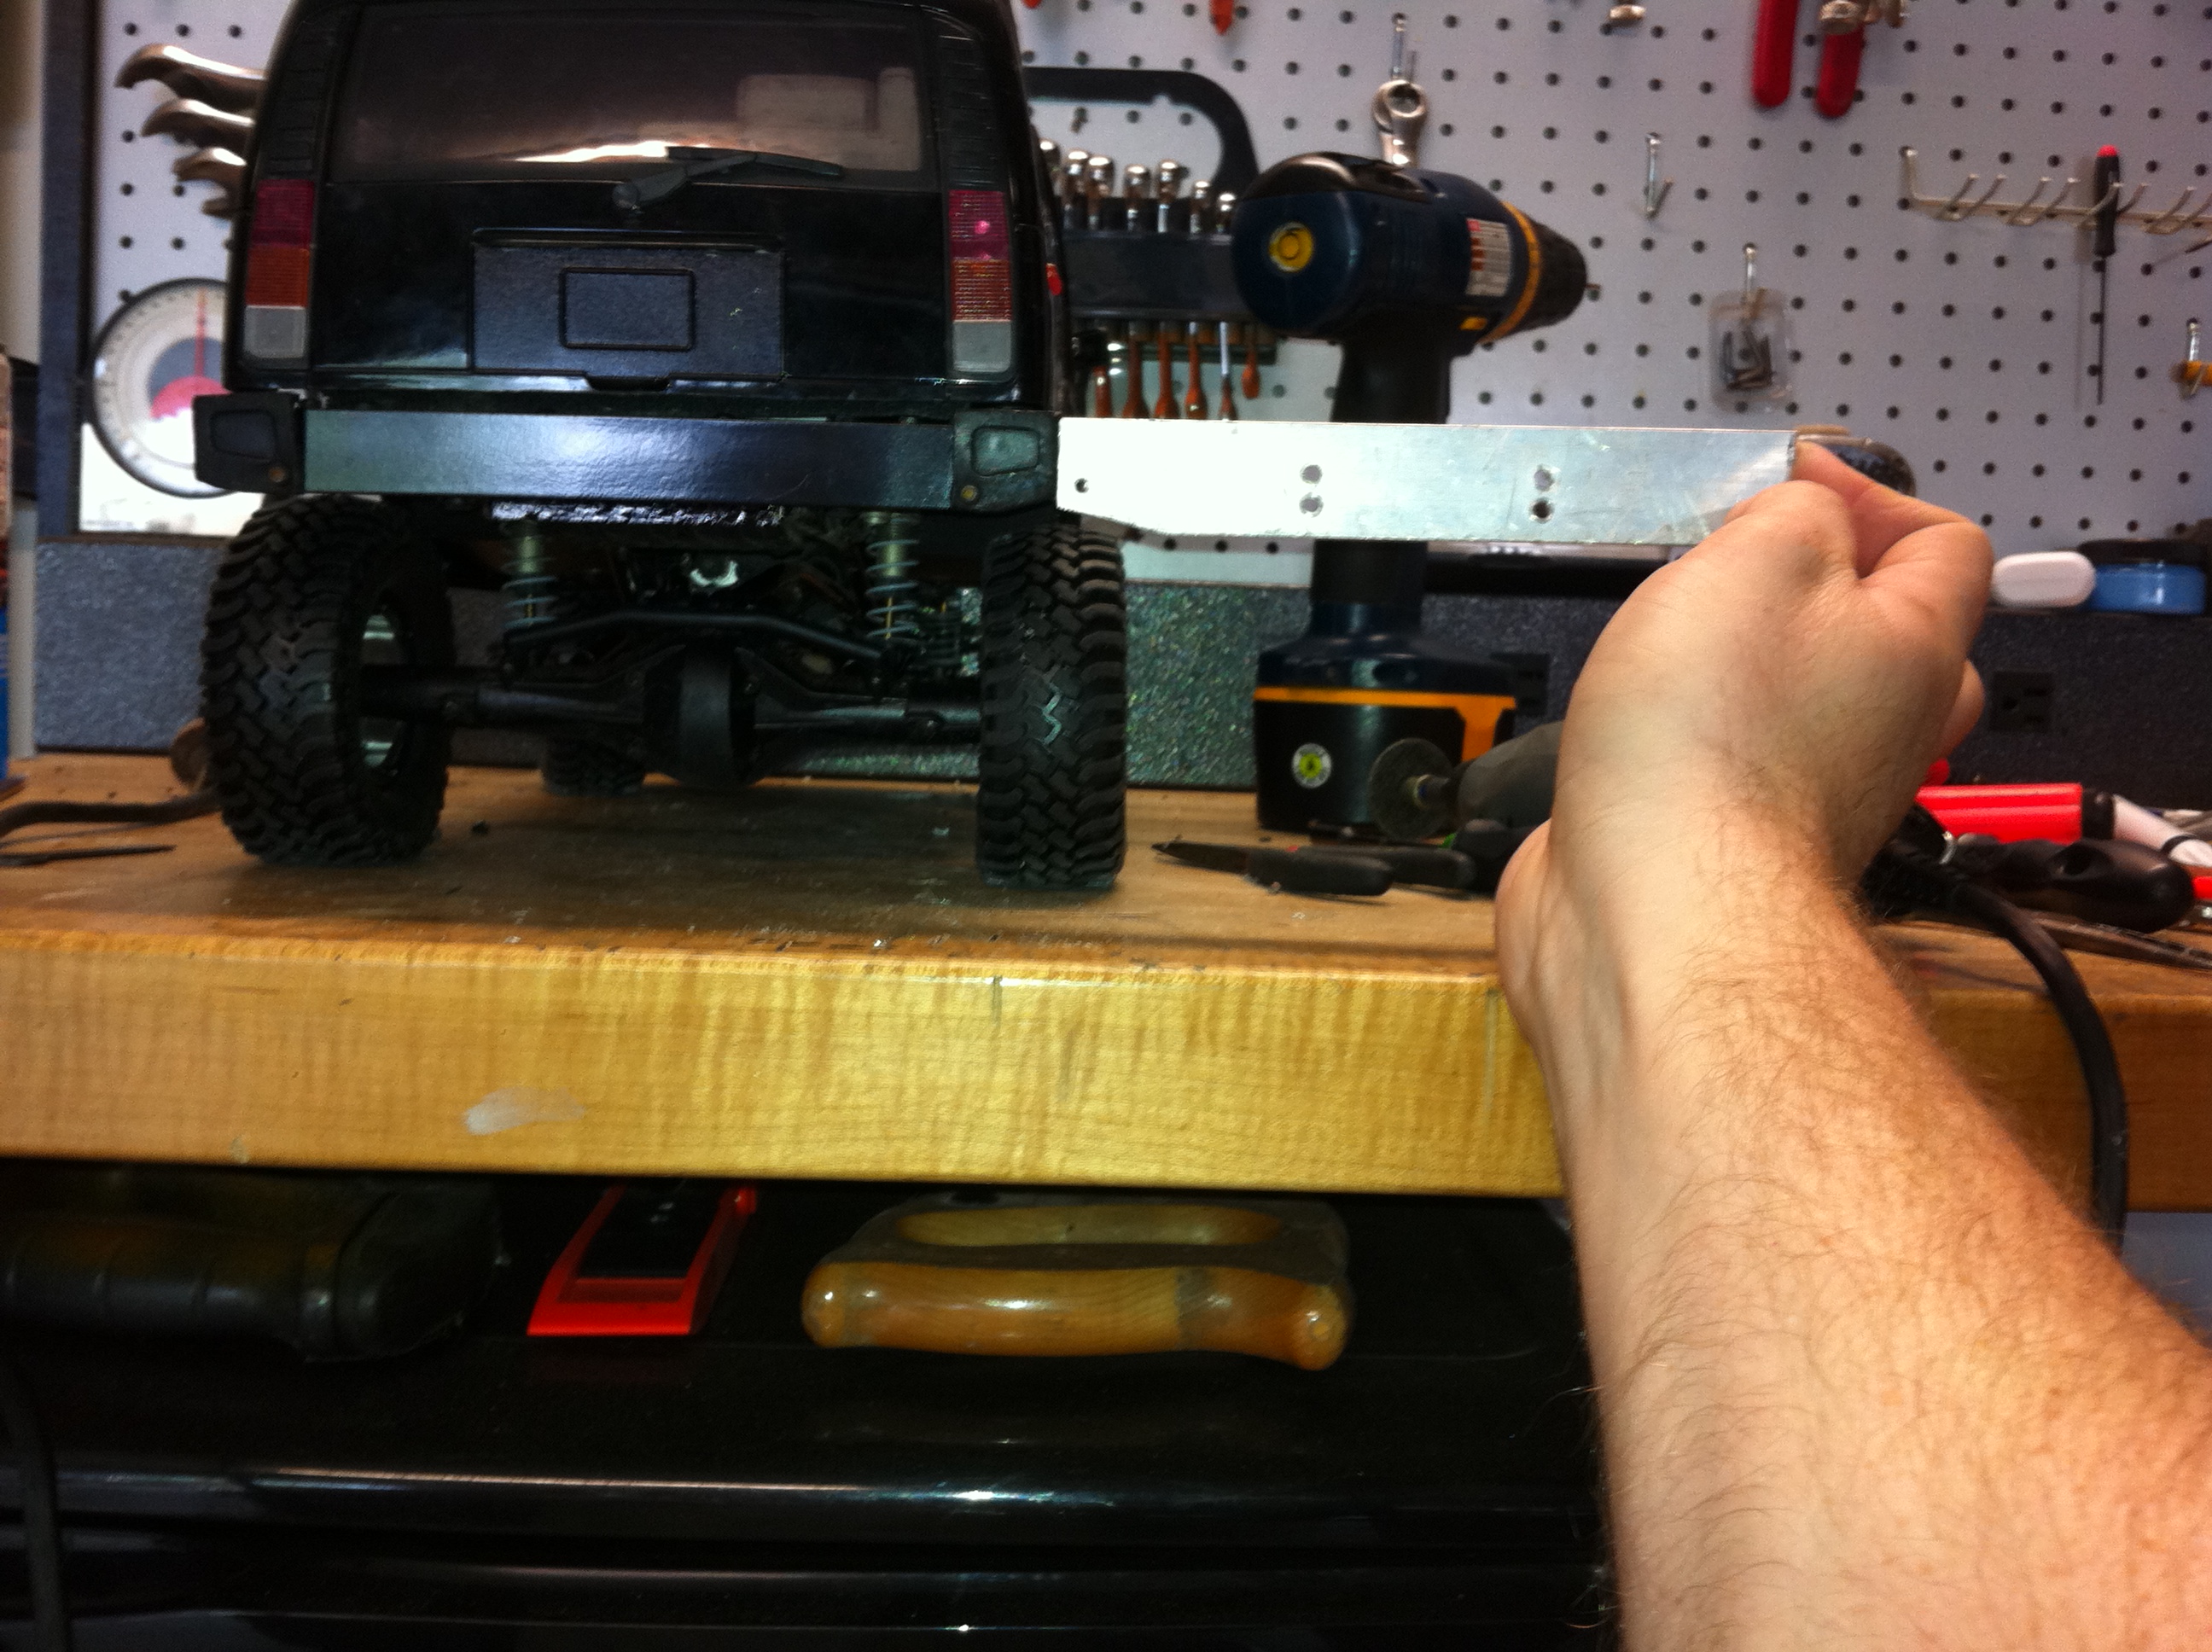 I also redid the undercarriage to help keep things blacked out. 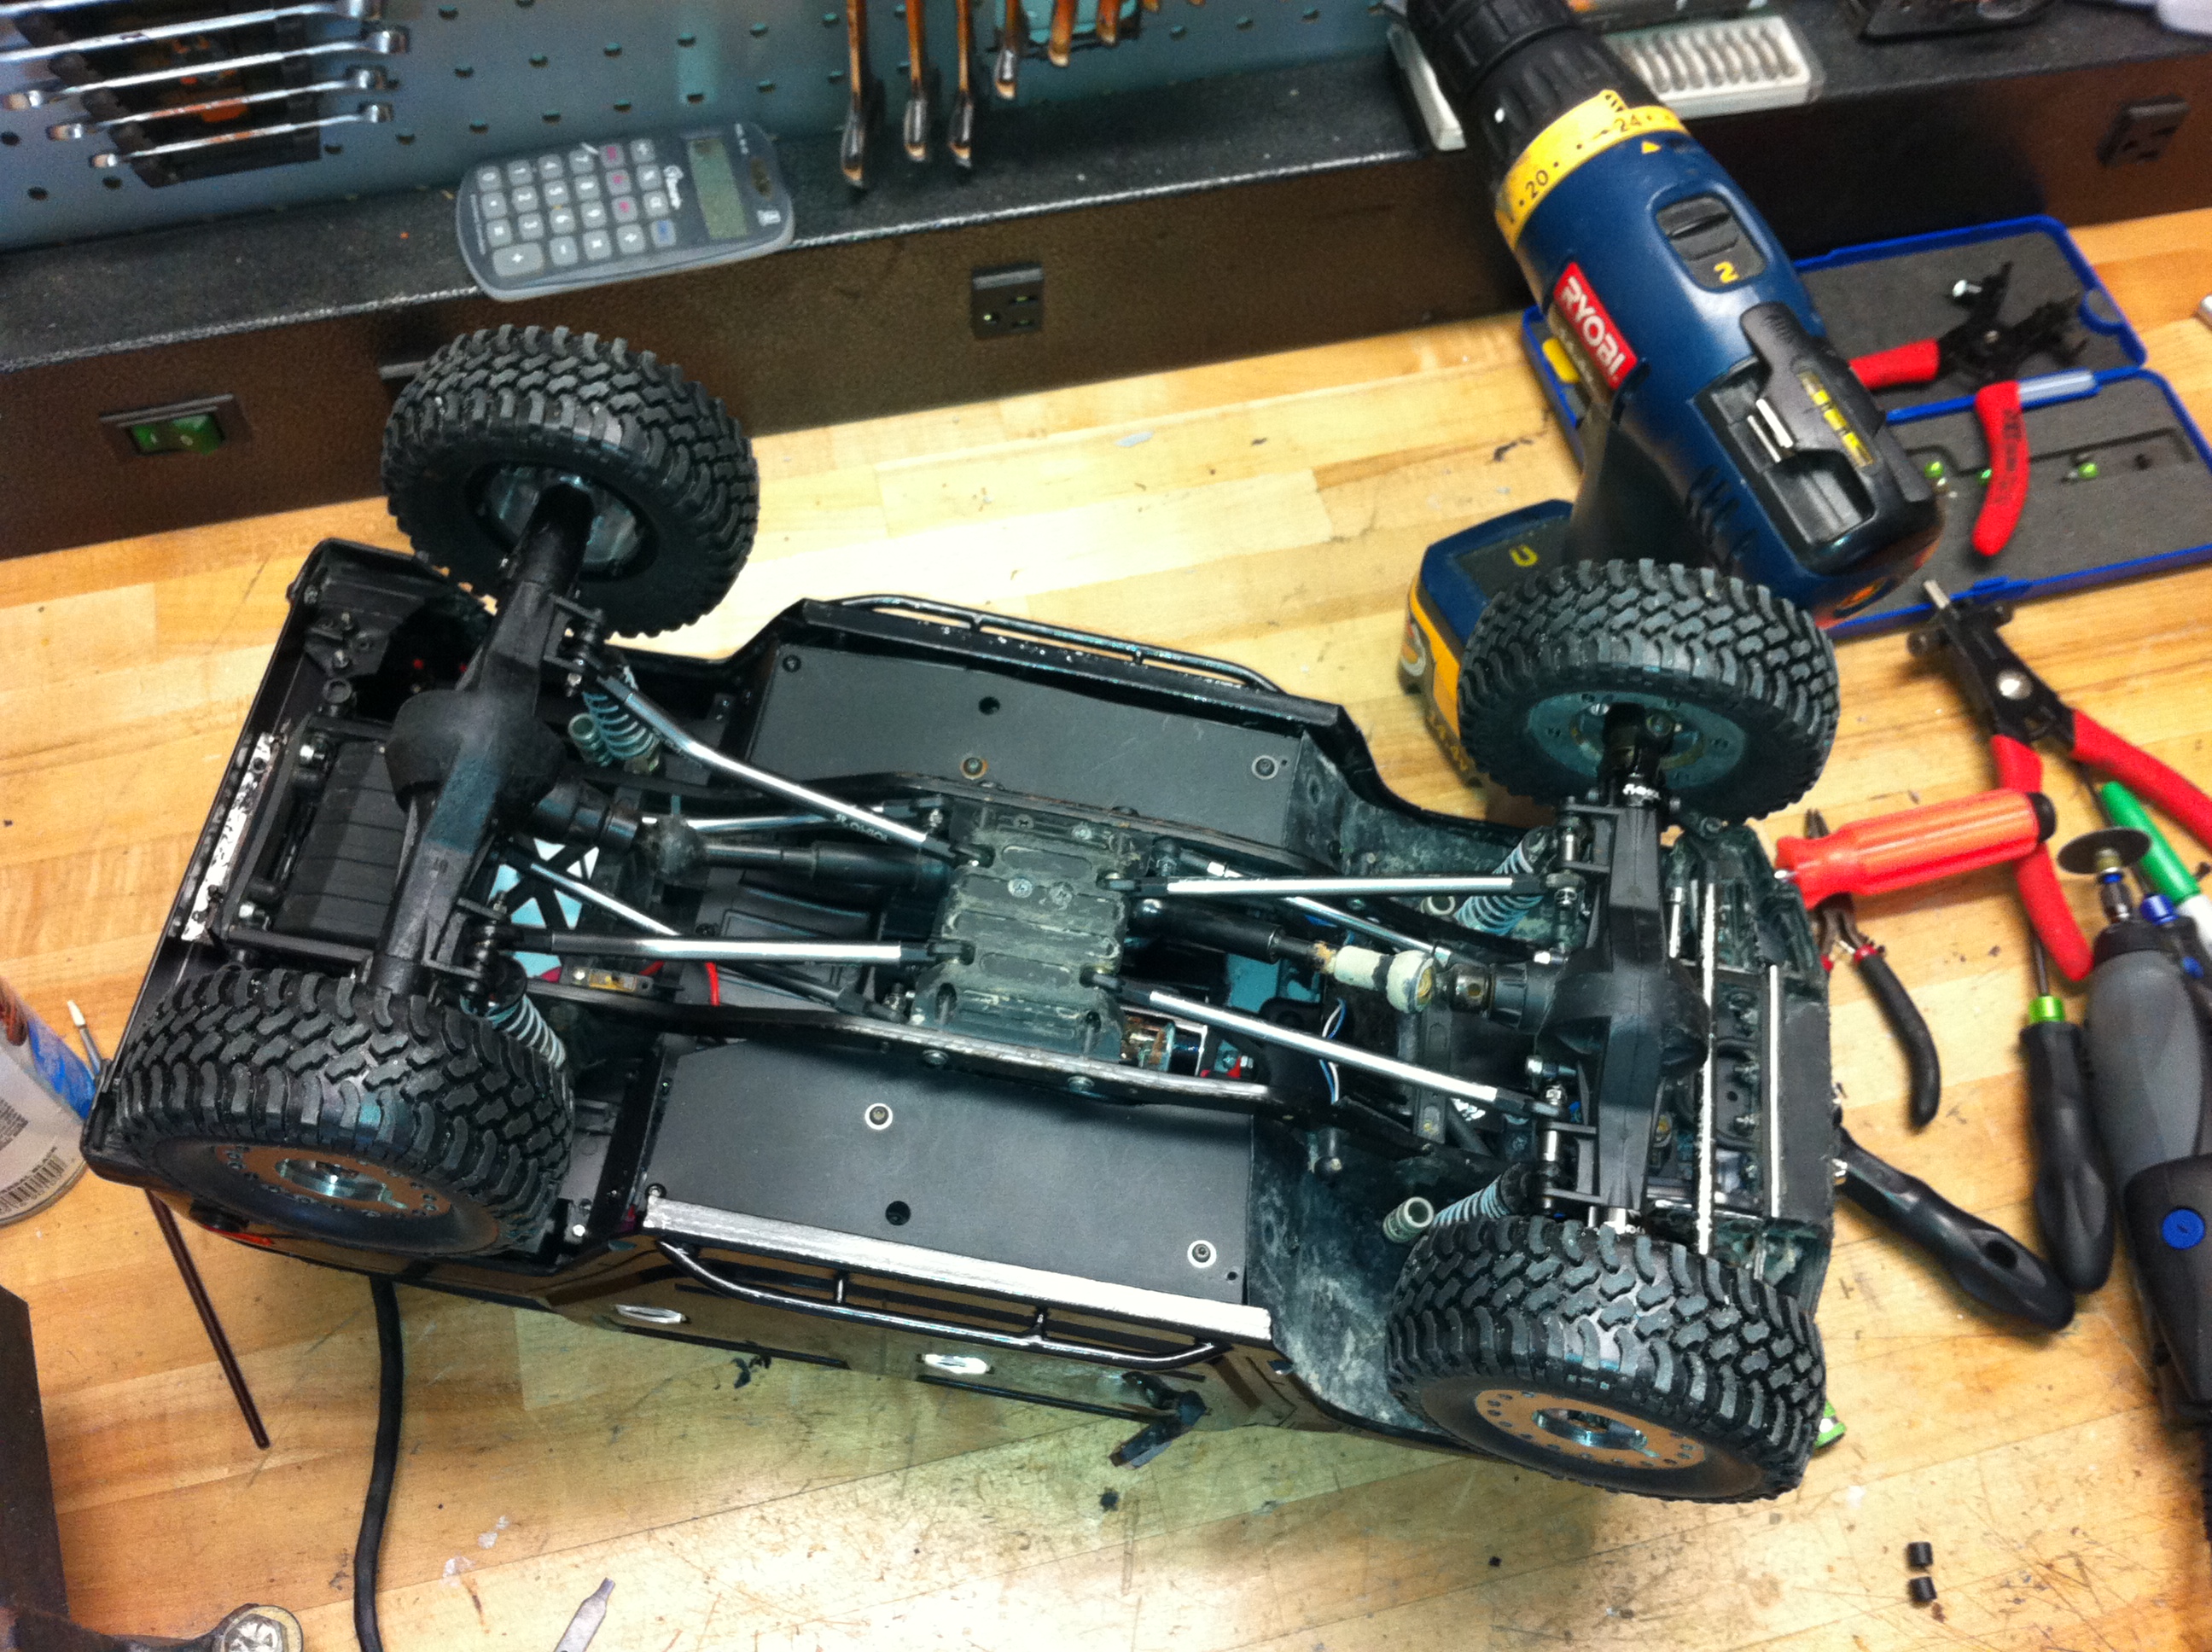 Finally an outside picture. I think once I rework the front bumper it will look "finished". I still need to tweak the suspension and add a few small items but that front bumper will be the last major change. 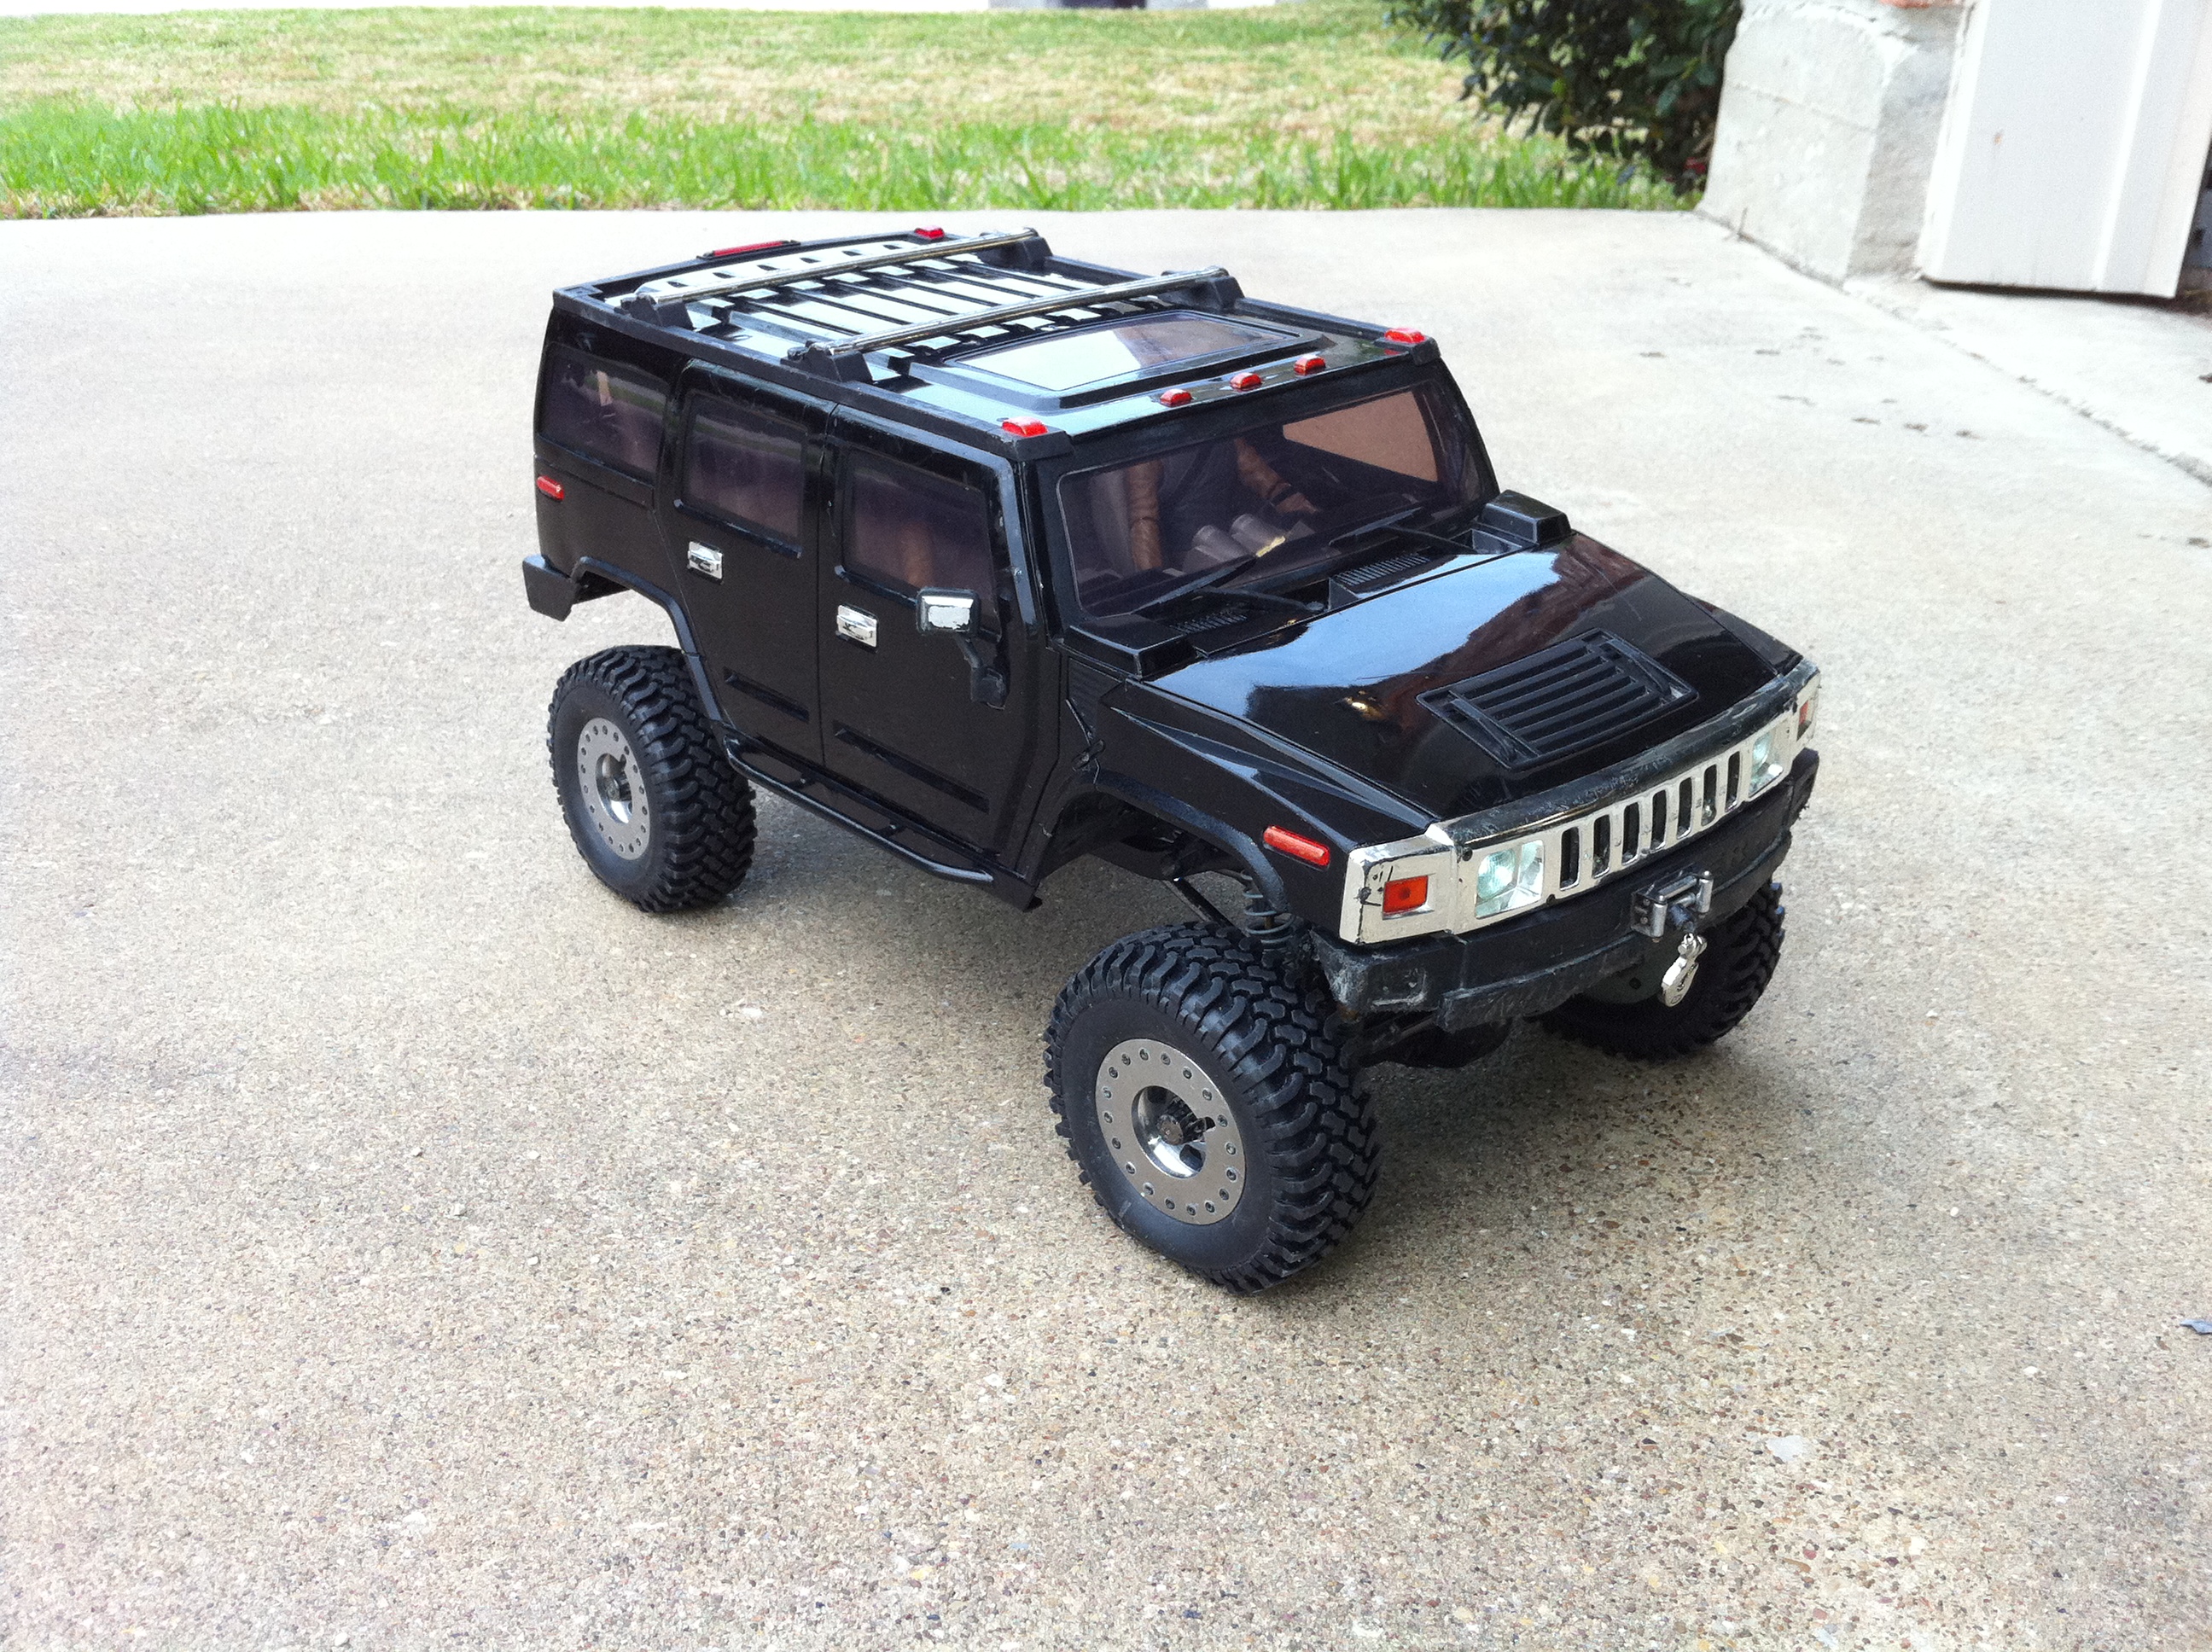 Last edited by Locked Up; 11-13-2013 at 08:23 PM. |
|
| |
|
03-31-2011, 06:50 PM
| #95 |
| Quarry Creeper Join Date: Jun 2008 Location: San Antonio
Posts: 409
|
Looks Awesome Patrick Last edited by SAL45; 04-01-2011 at 07:56 PM. |
|
| |
|
04-01-2011, 12:29 AM
| #96 |
| SCALE PERFORMANCE PARTS Join Date: Oct 2007 Location: Cedar Park
Posts: 5,453
|
Thanks. I got the electronics box sealed up tonight so I'm getting close to being ready for Saturday. Tomorrow night will be battery charging and I may see if I can lower the suspension a hair .... we'll see. |
|
| |
|
04-14-2011, 07:43 PM
| #97 |
| SCALE PERFORMANCE PARTS Join Date: Oct 2007 Location: Cedar Park
Posts: 5,453
|
WOOHOO! Something I have been waiting a long time for. FULL WRITEUP: http://lockeduprc.net/blog/?p=408 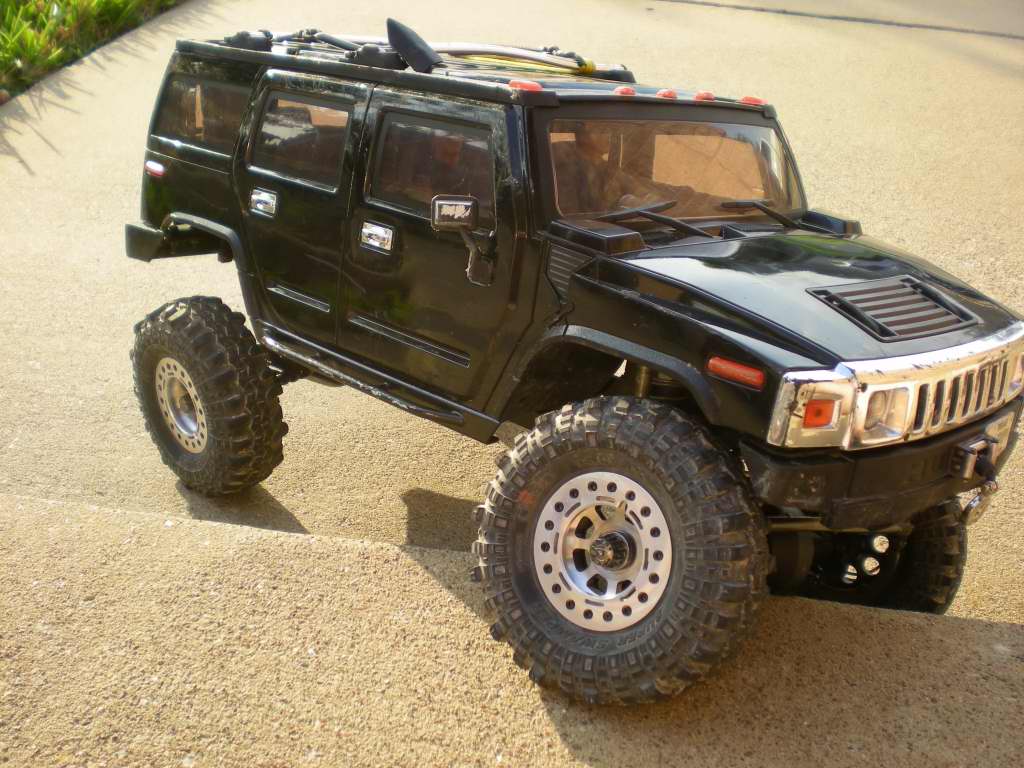 Last edited by Locked Up; 11-13-2013 at 08:25 PM. |
|
| |
|
04-14-2011, 08:00 PM
| #98 |
| RCC Addict Join Date: Oct 2009 Location: In the mancave...
Posts: 1,038
|
damn, this is a nice build.. great job and nice craftsmanship... |
|
| |
|
04-14-2011, 08:20 PM
| #99 |
| Quarry Creeper Join Date: Sep 2010 Location: Big hands, Little tools.......GRRRRR
Posts: 315
|
Your H2 looks BAAAAAAAADDD! I did not realize that you designed the bead locks rings on my 1.9. Nice! |
|
| |
|
04-23-2011, 09:25 PM
| #100 |
| SCALE PERFORMANCE PARTS Join Date: Oct 2007 Location: Cedar Park
Posts: 5,453
|
At our most recent comp I had some issues with the ESC shutting down and because I changed out so many things recently I had a bunch of possible causes.... First suspect is a bad ESC, obviously. The FXR I had in there never had any issues. Maybe the SV2 sidewinder just isn't as happy in the box as the regular sidewinder & FXR were. Up next is the motor. I've put that thing through hell and I keep meaning to rebuild it/clean it but it has never sounded right since the first comp we had at Cibolo where I decided to go mudding. Water is one thing but mud apparently isn't good for a motor. Along with the ESC, I had also gotten some new batteries and switched to the XT60 connectors vs deans. No particular reason other than that's what came on the batteries and I'm lazy. The new lead I have going to the ESC does have a smaller gauge wire on it but it's still 14ga. So that could be upping the resistance. After that I figured there could just be some bind in the drive line somewhere. A bad bearing, a rock jammed in there someplace or something else. So I pulled the motor off the tranny and let it run ... and oh my it sounds awful. It definitely needs a rebuild. I have a spare to try but I kept investigating anyway. With the motor off I figured it should freewheel pretty well. No such luck. So I removed the front driveshaft and spun just the rear by hand it it seems to spin pretty freely. The front had a little bit of bind though. I removed the wheels and tires and started loosening screws. Seems like every screw holding it on made it move smoother when I'd loosen it. Some I could tell were bottoming out on the super 300s (my track bar bracket) so those got shortened. I also noticed my set screws for the bearings cause a little bind, so I backed those out a hair too. Last thing I noticed was that my oversized ring on the inside of my wheel was hitting my knuckle barely. So I did a little more filing for clearance. So now, with everything loose it spins freely. I went ahead and tightened things down and filed and tightened and filed until it spun pretty much drag free. Then I went ahead and put in a new motor .... but it still did a thermal cut off. I also went back to deans connectors. No change. Then I tried one of my old batteries .... same thing. I went ahead and put in an FXR and so far it has not gotten as hot. So apparently the SV2 itself was/is the issue. I'm going to drive the crap out of it tomorrow and try to get it to thermal but so far it has not gotten close, even under heavy load. So I wonder if I got a dud from Castle or what? They have always given me great support in the past so after I try to break this thing tomorrow I'm going to give them a call on Monday and see what they say. I'll keep yall posted. Last edited by Locked Up; 11-13-2013 at 08:25 PM. |
|
| |
 |
| |


 Linear Mode


