| |
 06-16-2010, 03:17 PM
| #1 |
| Rock Crawler Join Date: Jan 2010 Location: Arvada
Posts: 783
|
Hey, i've been doing some looking around and I've found many threads talking about different free/cheap mods that people do to their scx's. So I'm hoping this thread can act as a one stop shop for these mods. So please post up some pics and how too's and share those cool mods that people could benefit from. Everything from scale accessories to performance mods....anything free/cheap really.  I personally don't have any but I found a thread talking about making bungee cords out of stretch hair ties and paper clips. I tried it last night and though I need to work on my skill I think it was a great free mod from stuff here at the house. |

|  |
| Sponsored Links | |
| | |
|
06-16-2010, 07:05 PM
| #2 |
| I wanna be Dave Join Date: Mar 2009 Location: sittin in the sky
Posts: 4,630
|
if you got a honcho, you can lower the battery tray by cuting the spacers that hold up the tray, weight the wheels, take the bump stops out of the shocks, and use the angled up rod ends on lower links
|
|
| |
|
06-17-2010, 04:35 PM
| #3 |
| Rock Crawler Join Date: Oct 2009 Location: Columbia, SC
Posts: 536
|
I just did the inboard rear suspension mod and it made a very noticable difference, for the better, in how the truck performs. It was completely free although I did use a few longer screws and some spacers from my parts bin.
|
|
| |
|
06-17-2010, 04:43 PM
| #4 |
| www.team3sixrc.com Join Date: Mar 2008 Location: Scalerville
Posts: 4,506
|
Well I can tell ya this and if ya dont believe me ask anyone who attended the Axial MSD comp this year. The stock Honcho is fully capable and did excellent in the spec class. It actually did much better thatn a lot of $500+ custom trucks. So the ONLY real help this truck needs to be comp ready is an ESC that can handle a lipo, Hand bros. steering kit, and a winch and it will do the talking. May not be free or cheap mods, but in the long run it is SOOOOO CAPABLE!
|
|
| |
|
06-17-2010, 05:30 PM
| #5 | |
| Pebble Pounder Join Date: May 2010 Location: Scotts Valley
Posts: 116
| Quote:
| |
|
| |
|
06-17-2010, 05:48 PM
| #6 | ||
| Rock Crawler Join Date: Jan 2010 Location: Arvada
Posts: 783
| Quote:
Quote:
I had mine out for the first time yesterday and I was completely blown away at how good it did. Winch and RCBros steering are on the top of my list for upgrades as money allows.I actually at this point am looking more for the cool accent mods that you can make yourself for scale goodies. Sleeping bags, bungee cords, tow ropes.....stuff like that. My hope is also that this may become a sticky thread of sorts and to serve as an easy to find thread for others to see with lots of mods you can do yourself or for minimal cost. | ||
|
| |
|
06-17-2010, 06:10 PM
| #7 |
| www.team3sixrc.com Join Date: Mar 2008 Location: Scalerville
Posts: 4,506
|
or you can just buy that stuf from me see signature below |
|
| |
|
06-17-2010, 08:18 PM
| #8 |
| Rock Crawler Join Date: Oct 2009 Location: Columbia, SC
Posts: 536
|
All I did was measure and drill two small holes through part of the rear chassis brace and attach the shocks with a longer screw, spacer and nut. It seems plenty strong but I will probably replace the brace with a delrin block. On the axle I just attached the shocks by using a longer screw and spacer. Im going to go with more of a truggy/flatbed kind of rear end in place of the bed. Works great and keeps the rear axle a lil more planted. I snapped a couple pics but the camera isnt the greatest.    ......Hope that helped. |
|
| |
|
06-17-2010, 08:25 PM
| #9 |
| Rock Crawler Join Date: Oct 2009 Location: Columbia, SC
Posts: 536
|
Ohh and I used two plastic spacers out of the spare parts from the SCX kit. The best way to describe them is that they look like a tophat with a hole in the top but anything that fits would work. I used them to fill in the void where I detached the shocks from in a stock setup. Same spot the lower links mount to the axle.
|
|
| |
|
06-17-2010, 09:08 PM
| #10 |
| Quarry Creeper Join Date: Jun 2010 Location: Taos, New Mexico
Posts: 216
|
CreepinKing, how much was the ride height changed with your set up?
|
|
| |
|
06-17-2010, 09:25 PM
| #11 |
| Rock Crawler Join Date: Oct 2009 Location: Columbia, SC
Posts: 536
|
Not much at all. Maybe an eighth inch or 3/16 ths higher. I made a bracket at first that mounted to the top of the brace but the shocks were at too extreme of an angle and hung a lil on the chassis. When they are mounted level with the top of the chassis they clear nicely.
|
|
| |
|
06-17-2010, 10:03 PM
| #12 |
| Rock Crawler Join Date: Dec 2009 Location: Ontario Canada
Posts: 511
|
How about relocating the electronics box to the rear...to give the looks of a gas tank? here's my rig...i had to remove the rear LEDs but that wasn't' a problem..I also turned around the rear cross brace so I could use the holes in it to screw in the electronics box. 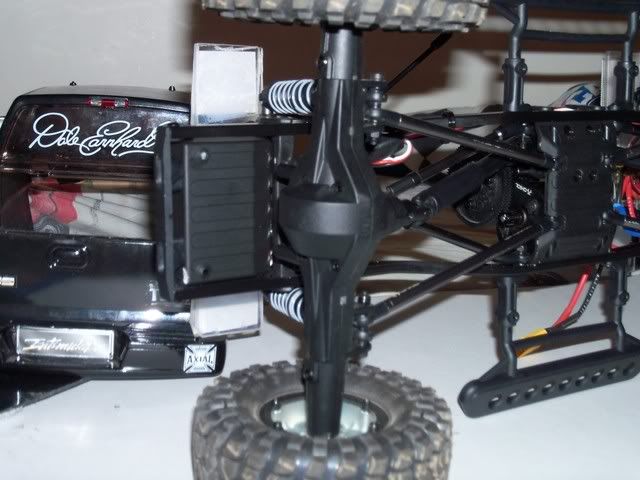 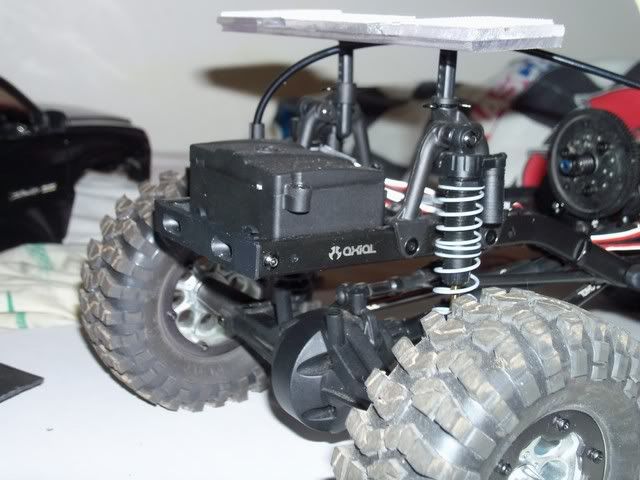 |
|
| |
|
06-18-2010, 12:15 AM
| #13 |
| Quarry Creeper Join Date: Jul 2008 Location: Stuck in Missouri for now.
Posts: 284
|
team3six, was there no coverage of the MSD this year? I know last year there was some great photo from Tamiya's coverage, and I expected to see it again. Otherwise I will check the comp section and see if I can find this year's pics. Last years were outstanding. |
|
| |
|
06-18-2010, 01:47 AM
| #14 | |
| Rock Crawler Join Date: Jan 2010 Location: Arvada
Posts: 783
| Quote:
seriously?????????? pm the guy instead of high jacking a thread....what does this have to do with anything related to this at all....????? | |
|
| |
|
06-18-2010, 09:30 AM
| #15 | |
| Rock Crawler Join Date: Sep 2008 Location: Bakersfield
Posts: 688
| Quote:
now back on subject, i have a great solution to save you the $45 for a chassis mounted servo. All this mod will cost is a little bit of time and maybe a dremel cutoff disc or two. What ive done is copy a mod that my first scx10 had done to it (believe credit goes to WheelinKing) Anyways all you need for this mod is -an axial battery plate and plastic piece -4 screws and nuts -2-3 different size drill bits -dremel w/ cutoff wheel -remove the front chassis brace w/ centered hole -screw down the battery plate assembly to the front member that attaches to the shock towers (dont use spacers, keep it as low as possible) -starting from one of the velcro slot front most corners, cut out a box just big enough to fit your servo -once you have that cut out, cut a small relief slit so that you can get your wires in and out easier -then mout your servo and mark out the mounting holes and drill them i have done this mod on all three of my scx10, only one is running atm but it works awesome. from one of my trucks    some from the clod    and some from the honcho   Last edited by ae racer; 06-18-2010 at 09:53 AM. | |
|
| |
|
06-18-2010, 09:32 AM
| #16 | |
| Pebble Pounder Join Date: May 2010 Location: Scotts Valley
Posts: 116
| Quote:
).I love the creativity from all you tinker'ers. | |
|
| |
|
06-18-2010, 10:06 AM
| #17 |
| Rock Crawler Join Date: Sep 2008 Location: Bakersfield
Posts: 688
|
also forgot that i have the gas tank mod done on my clod also   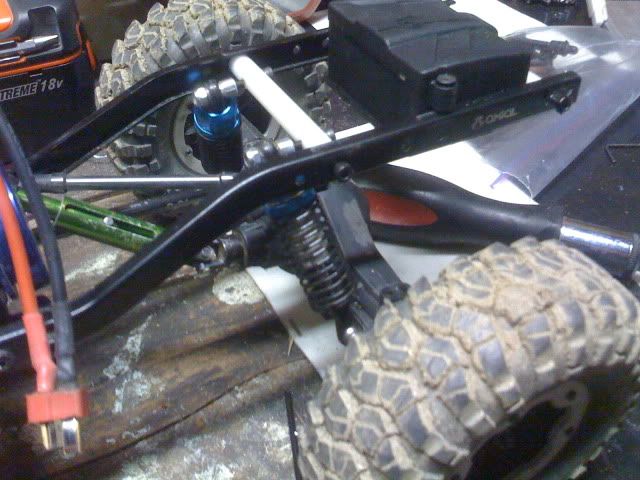 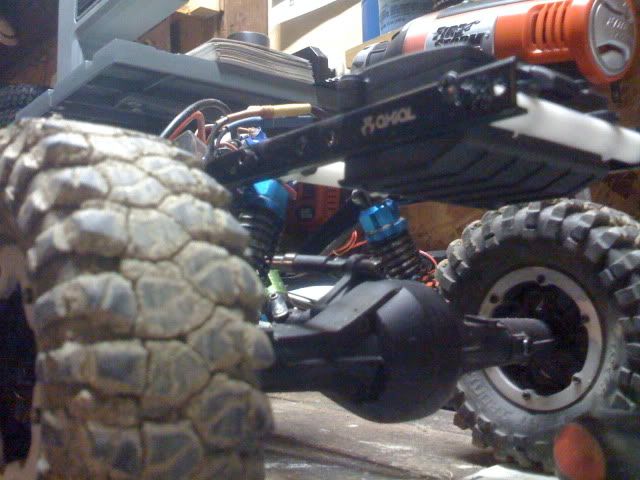 |
|
| |
|
06-18-2010, 10:53 AM
| #18 | |
| Rock Crawler Join Date: Oct 2009 Location: Columbia, SC
Posts: 536
| Quote:
I have no worries at all about the strength of the lower mounts. The longer screw and spacer offer absolutely no play or movement in the mount. The top mount on the chassis brace just didnt quite sit well with me though. I tried everything to get it to break and it wouldnt but I ended up flipping the origional mount that I made over and using it as a mount. Now I know its buttetproof. Heres some pics.    | |
|
| |
|
06-18-2010, 11:42 AM
| #19 |
| RCC Addict Join Date: Oct 2008 Location: Tyler, TX
Posts: 1,619
|
Nice job on that creepinking, the proof is obviously in the pudding. I did the gas tank mod but I am thinkingos setting it below the chassis for a better look, I just hope it doesn't create any rear end hang ups. This is a cool thread and nice idea, hopefully we can get this stickied. |
|
| |
|
06-18-2010, 11:47 AM
| #20 |
| Rock Crawler Join Date: Oct 2009 Location: Columbia, SC
Posts: 536
|
Thx Tex. It almost made the truck seem like it had a lower CG. Although I havnt tried it at our local crawling spot yet it feels a lot less tipsy on the lil course ive got setup out back.
|
|
| |
 |
| |


 Linear Mode


