| |
 01-31-2012, 07:05 AM
| #101 | |
| Rock Crawler Join Date: Oct 2011 Location: Co,Cork..Ireland
Posts: 579
| Quote:
 Mite as well mirror the tranny while your at it.. .. | |

|  |
| Sponsored Links | |
| | |
|
02-19-2012, 10:21 PM
| #102 |
| Rock Stacker Join Date: Dec 2011 Location: Venice
Posts: 89
|
I read through all the tips n' tricks but i didn't see any one mention it. don't cut off the bump stops and take acouple and cut them down and put them on top of the body post mount's to eliminate the side to side "slop". simple and easy. |
|
| |
|
02-22-2012, 02:28 PM
| #103 |
| Newbie Join Date: Feb 2012 Location: Over the Hill
Posts: 10
|
I didn't see it mentioned so... If you don't want to buy new tires for your brand new truck, but the flat irons don't cut it on your trails, cut every other lug off the outside edge. I alternated back and forth. made a world of difference.   |
|
| |
|
02-27-2012, 05:39 PM
| #104 | |
| Pebble Pounder Join Date: May 2011 Location: The Wizzle, MA
Posts: 139
| Quote:
  Each container will make two wells.  | |
|
| |
|
02-28-2012, 06:12 AM
| #105 | |
| Rock Crawler Join Date: Oct 2011 Location: Co,Cork..Ireland
Posts: 579
| Quote:
Thats a great idea... Sean. .. | |
|
| |
|
02-28-2012, 11:00 AM
| #106 | |
| Quarry Creeper Join Date: Apr 2006 Location: SLC, Utah
Posts: 444
| Quote:
| |
|
| |
|
02-28-2012, 04:34 PM
| #107 | |
| Rock Crawler Join Date: Oct 2011 Location: Co,Cork..Ireland
Posts: 579
| Quote:
to see how you've mounted you DIY wheel arches.. Sean. . .. | |
|
| |
|
02-28-2012, 04:58 PM
| #108 | |
| Pebble Pounder Join Date: Jun 2007 Location: La plata
Posts: 144
| Quote:
| |
|
| |
|
02-28-2012, 05:17 PM
| #109 |
| Quarry Creeper Join Date: Dec 2011 Location: The land of snow
Posts: 312
|
hahaha 2 winches, 2spd trans, dig and steering im guessing? really like the sandwich container idea, i had the same problem with my CD case attempts. |
|
| |
|
02-28-2012, 05:52 PM
| #110 | ||
| Pebble Pounder Join Date: May 2011 Location: The Wizzle, MA
Posts: 139
| Quote:
Quote:
 It's attached at the shock hoop screw holes. I just swapped the stock flat heads out for buttonheads a couple mm longer. The wells fit this body so tight I almost don't need body pins. Fitting tips: DON'T PAINT until it's trimmed and do one corner at a time with the BODY MOUNTED. Unscrew the top screw from the shock, cut the container in half, and stuff it up into the wheel well location. Slide it back and forth and up and down until you find a good fit that suits the body and wheel location. Use a sharpie to mark the location of both screws at the bottom of the shock hoop. Drill the holes and mount it, then you can trace along the frame rail and mark where you want to cut the back edge so it doesn't show under your body/bumper. You might have to cut a big hole at the top to clear the shock, or you might just need one hole to pass the screw through. I first painted with Tamiya paint for lexan, but it didn't bond with the plastic. Krylon Fusion seems to be working better. | ||
|
| |
|
02-29-2012, 04:36 AM
| #111 | |
| Rock Crawler Join Date: Oct 2011 Location: Co,Cork..Ireland
Posts: 579
| Quote:
| |
|
| |
|
03-03-2012, 06:50 PM
| #112 |
| Rock Crawler Join Date: Sep 2008 Location: You will never find a more wretched hive of scum and villainy
Posts: 901
|
i jumped on the xj bandwagon and with the 1.9 ripsaw's it just didn't sit high enough with the stock scx10 shocks. i used the long shock eyelets from the wraith kit AX30092, gave me almost 1/4 inch lift. hope this helps Axial Racing 10mm Shock Cap Parts Tree 1 #AX80033*-*Axial AX-10 Scorpion Spare Parts (ARTR, RTR, RTC, SCX-10)*-*-Spare Parts*-*The Crawlers Store LLC |
|
| |
|
03-08-2012, 09:43 AM
| #113 |
| Newbie Join Date: Oct 2011 Location: Portland
Posts: 45
|
I just picked up my SCX10 last night from the hobby shop. I'm brand new with this truck so this has been a great thread but I did find one thing I loved right away. I hate having loose body clips and I found a location on the rear cage with 4 small holes. They work perfect for stashing your body clips when you take them off so you don't lose them. I plan on doing the hinge mod and may leave some clips there as spares in case I lose one of the front ones. Here is a picture to show you what I mean (not my image, thank you Google images, I added the arrows):  |
|
| |
|
03-10-2012, 05:31 AM
| #114 |
| Newbie Join Date: Mar 2012 Location: Bloomington
Posts: 4
|
Cut V notches in my tire foam then added 4 oz of BB's in each tire. BB's are always rolling staying in the bottom of the tire keeping the center of gravity as low to the ground as possible!!
|
|
| |
|
03-13-2012, 12:43 AM
| #115 | |
| RCC Addict   Join Date: May 2011 Location: Utah County
Posts: 1,802
| Quote:
Sent from my ADR6400L using Tapatalk | |
|
| |
|
03-15-2012, 05:56 AM
| #116 |
| Rock Stacker Join Date: Oct 2011 Location: Portugal
Posts: 57
|
Great tips around here...;)
|
|
| |
|
03-15-2012, 02:37 PM
| #117 |
| Quarry Creeper Join Date: Dec 2008 Location: NW ATL
Posts: 387
|
The following two tips might help someone - I waited until these were tested and proven to work well before I shared them (wish everyone would do that also - ha). #1 - Receiver and ESC tray. I liked the way this turned out and will use the same technique when building my second SCX-10. Take the plastic lid from a tall peanut plastic container, a few zip ties and two balloons. Works superb and easy to access while providing great protection from water. 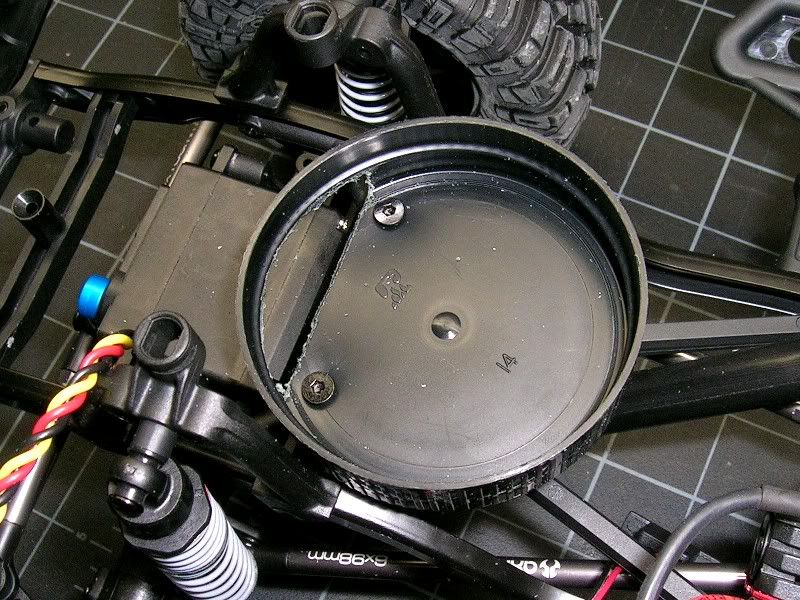 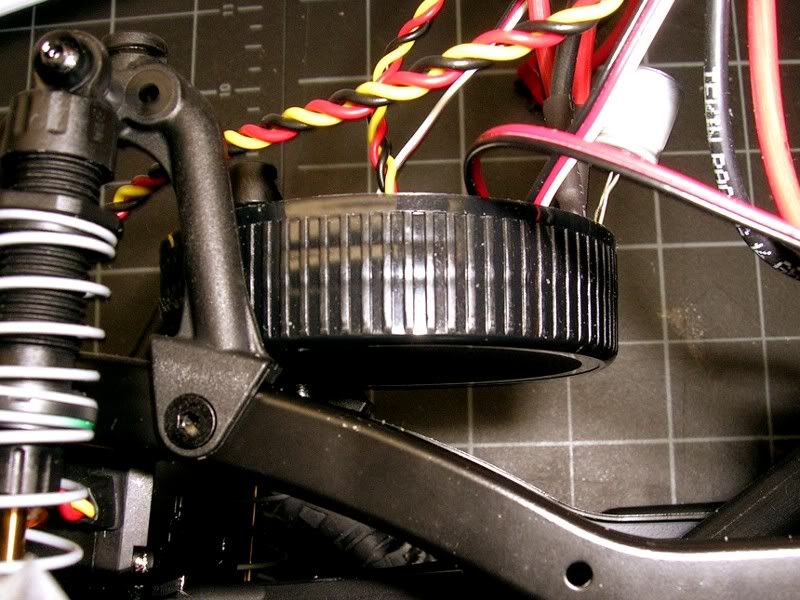 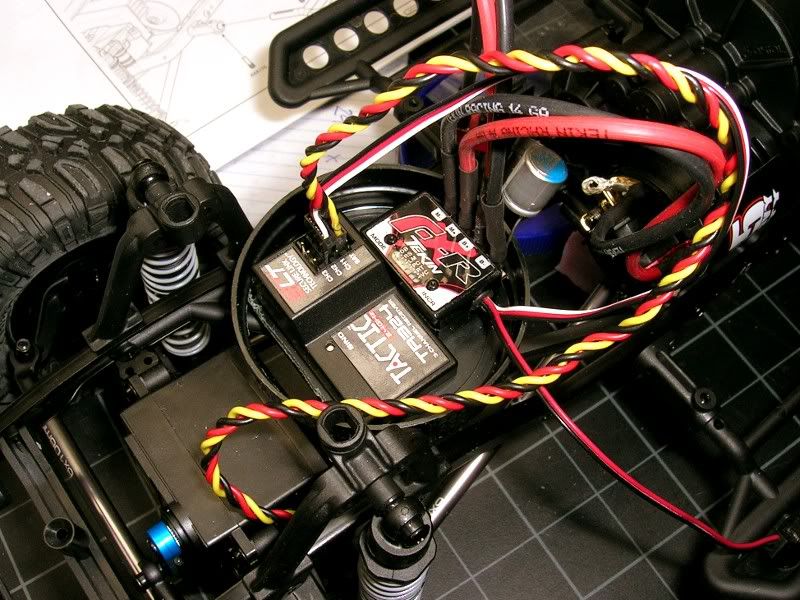  #2 - Battery placement. I use only 3S 2200 mAh batteries which seem to last "forever" and although eventually I would like to put the battery over the front axle and as low as possible, this solution works very well. This is the battery placement using only a piece of foam. Holds extremely secure and installed in "no time."  And some discoveries from my recent kit build (Dingo):
|
|
| |
|
03-15-2012, 02:42 PM
| #118 |
| Newbie Join Date: Oct 2011 Location: Portland
Posts: 45
|
I like that lid idea. If you could find the right size of container, you could probably even route all the wires out the bottom (the hole you made) and then screw on the container. As long as you find a way to seal the wires, it would be a watertight container... Something like this: 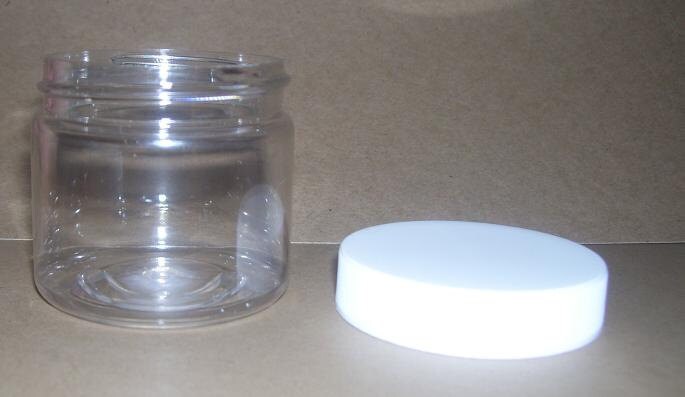 |
|
| |
|
03-15-2012, 08:13 PM
| #119 |
| Newbie Join Date: Mar 2012 Location: Bloomington
Posts: 4
|   V notches in the middle so BB's can roll. Also less foam=softer tires |
|
| |
|
03-16-2012, 12:42 PM
| #120 |
| Newbie Join Date: Mar 2012 Location: Roy
Posts: 6
|
so how do you mirror the transmission exactly. I have only had my scx10 for 2 days now and have loved every second. This truck is a blast
|
|
| |
 |
| |


 Linear Mode


