| |
 07-13-2010, 05:33 PM
| #1 |
| Pebble Pounder Join Date: Mar 2010 Location: Boston
Posts: 131
|
Alright, I think ill try to start an official one. Post your stuff here. I have none at the moment.
|

|  |
| Sponsored Links | |
| | |
|
10-10-2011, 10:40 AM
| #2 |
| Newbie Join Date: Feb 2011 Location: wise
Posts: 39
|
ok here goes my first write up!!!Well on my honcho the bumper stuck out and was to low for my liking..the goal here was to get it alittle higher and back some for better approach angles..so on to the pics 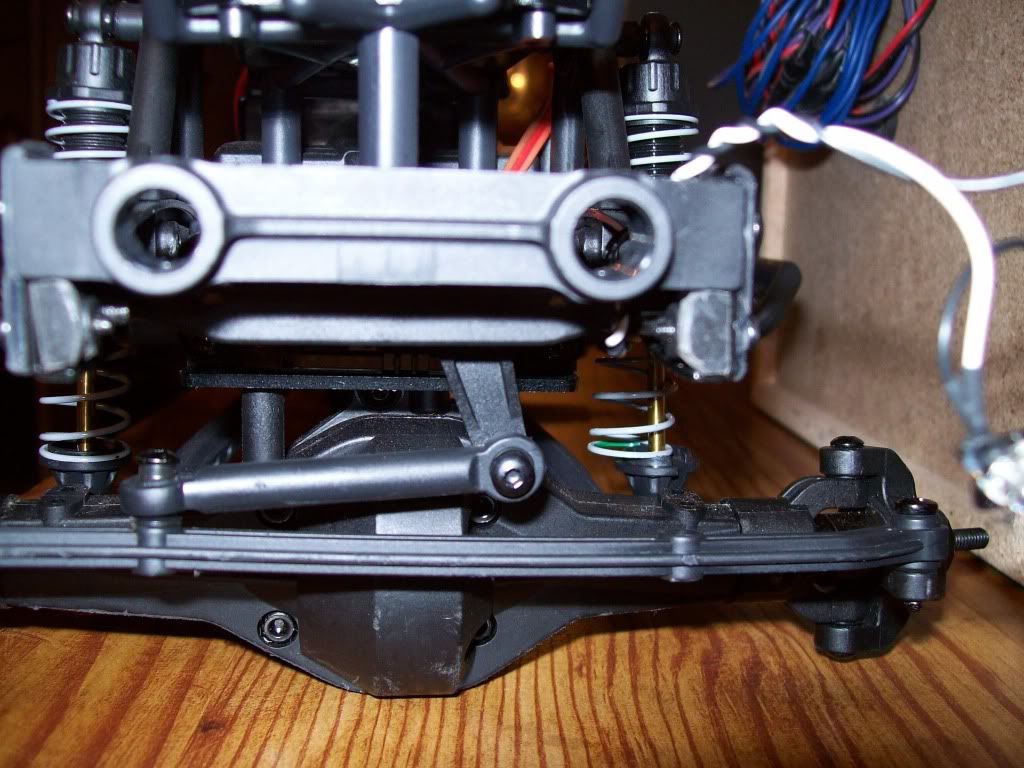 ok once you have the bumper removed you will see the crossmember that holds the bumper.remove the crossmember and then set it on top of the frame,as shown in the pic.now is the time to take your measurments or like me make a pattern with the holes in it for quick tranfer over to your bracket material. 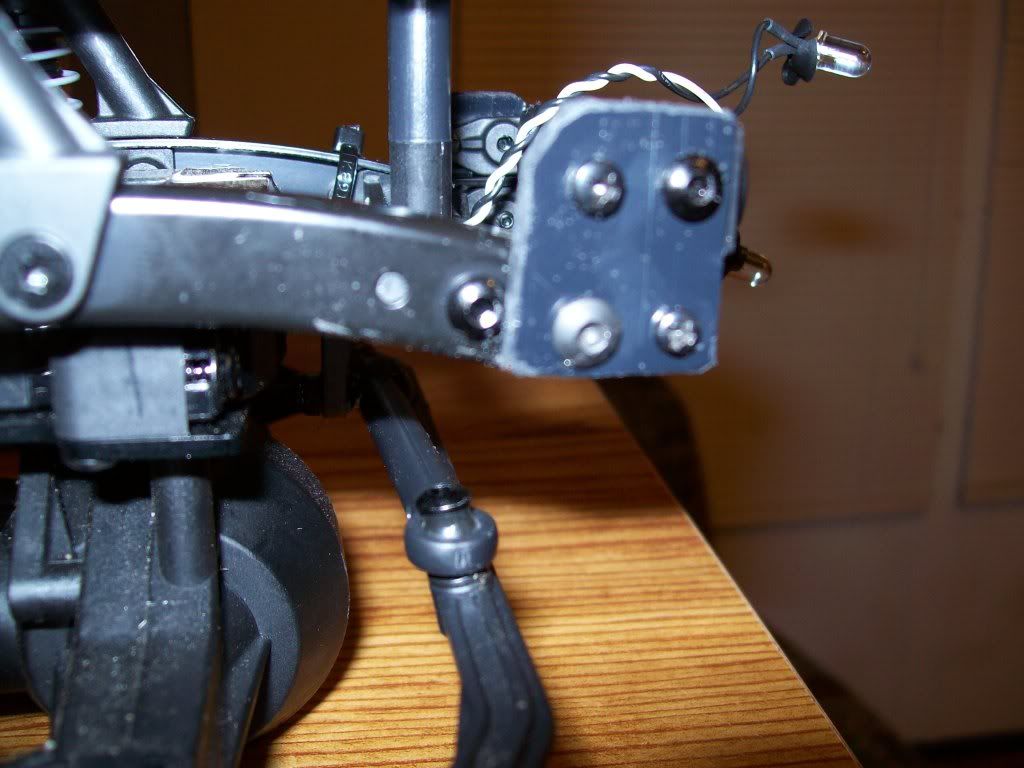 you will notice that the frame has holes already in it for the factory crossmember location.you will use these to screw your bracket into.the top back holes i drilled out once both sides were screwed together.just make sure you cut the small (nipples) lol off of the factory crossmember to make it smooth for your bracket. 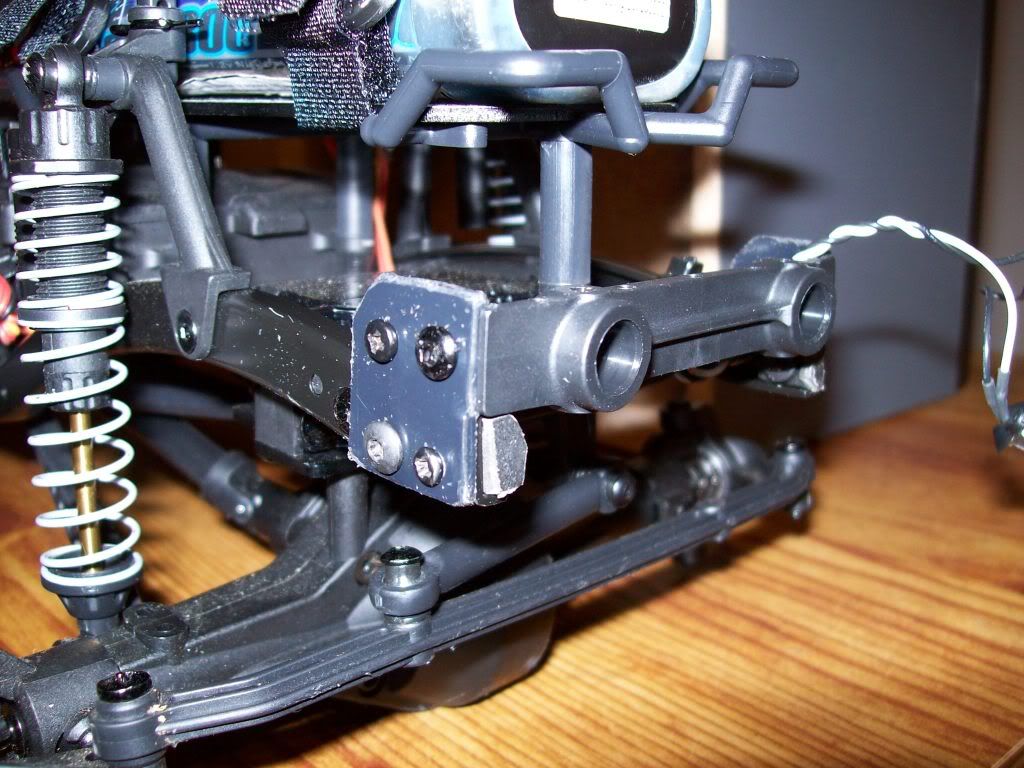 this little bit of moving changes the approach angle enough to have fun not worring about hitting the rocks with the bumper way before the tires get close 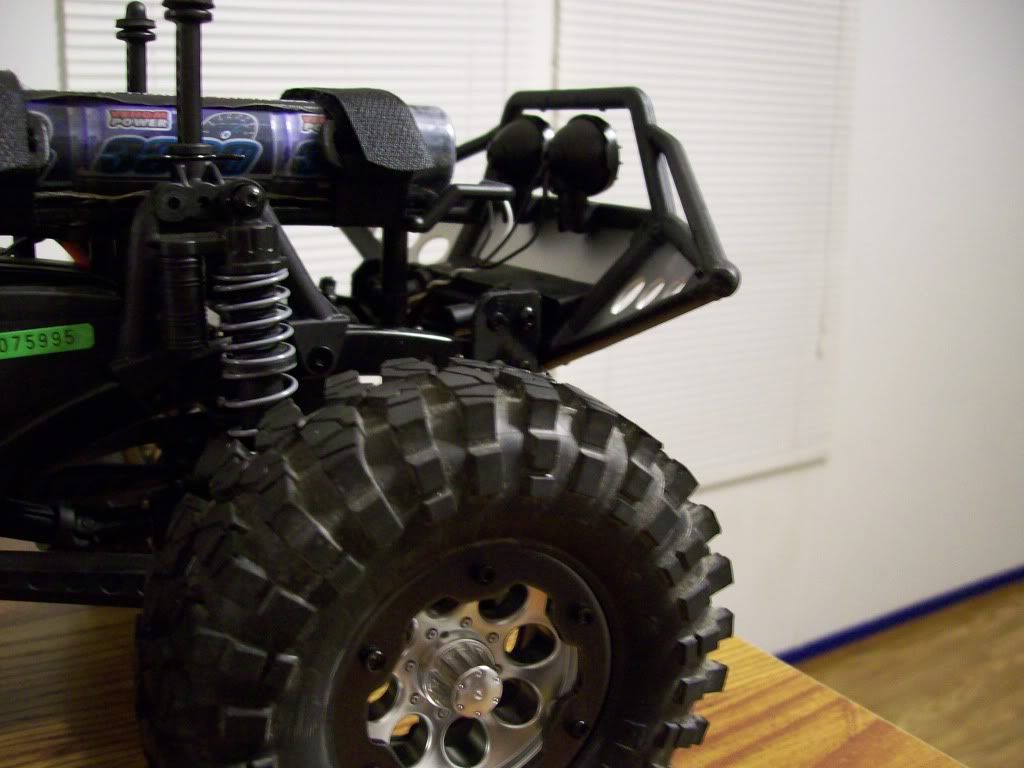 with the bumper mounted you can see the bumper ends are way above the tires 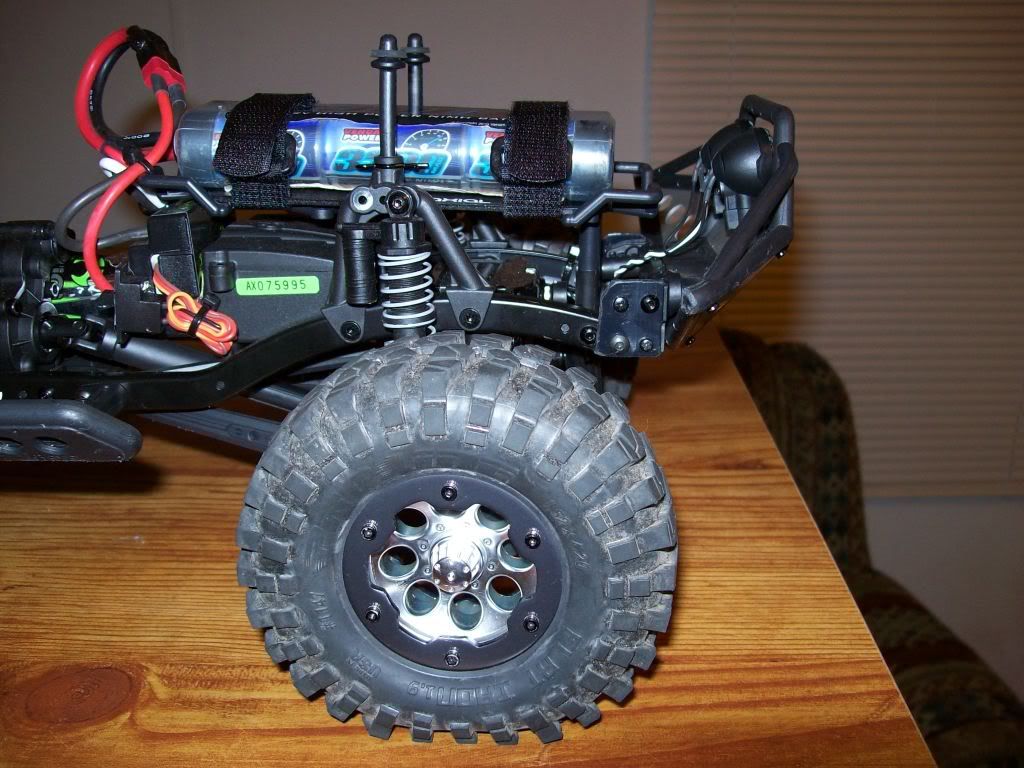 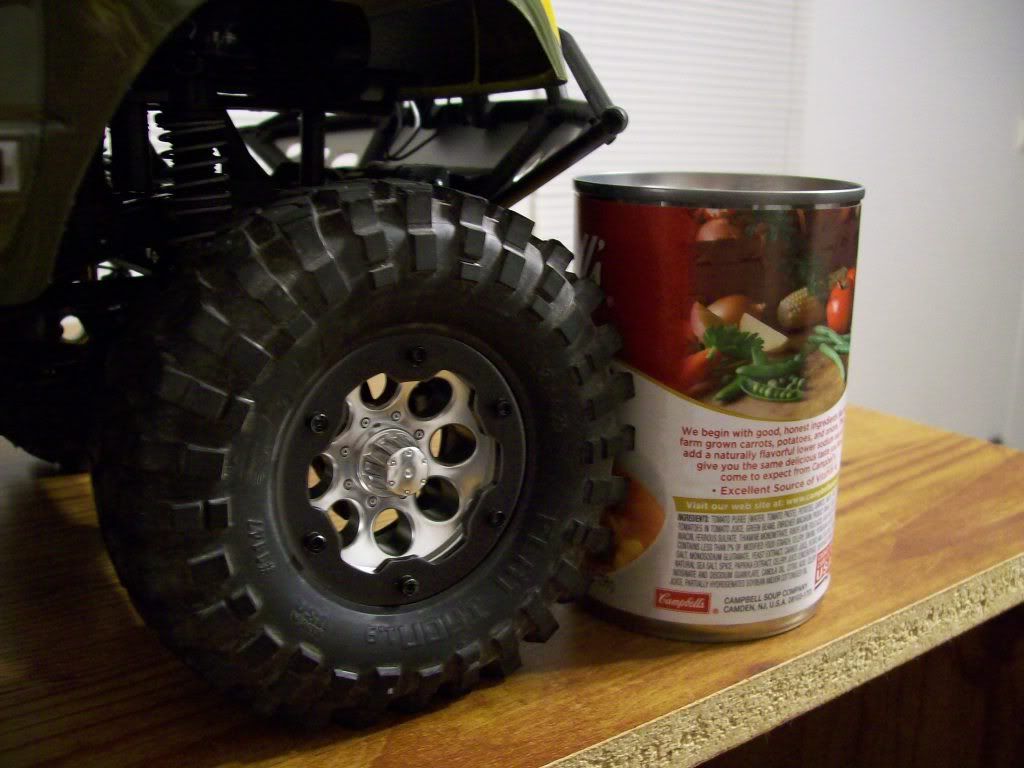 a get campbell soup can worth of clearance with this mod.. 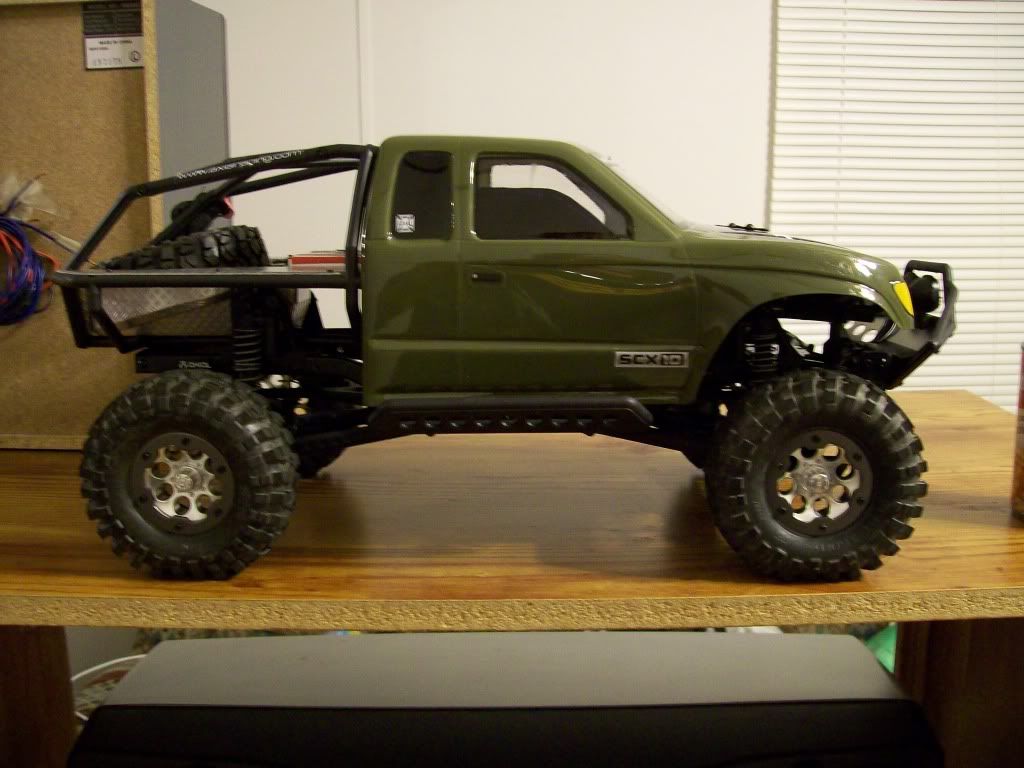 this is the finished project..it pulls the bumper in and up and for crawling this will help... 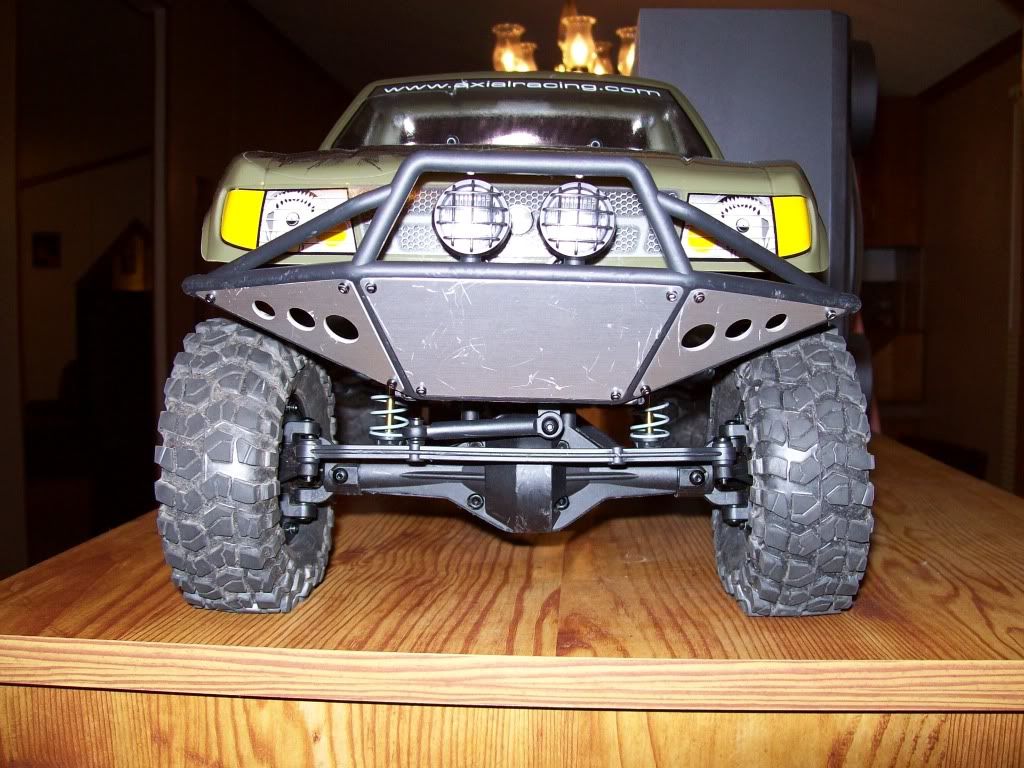 well guys this is my tip hope it helps someone else.i realized i needed to take more pics but next time i will improve..thanks and enjoy |
|
| |
|
10-10-2011, 11:58 AM
| #3 |
| RCC Addict   Join Date: May 2011 Location: Utah County
Posts: 1,802
|
what did you make the bracket out of? would styrene hold up?
|
|
| |
|
10-10-2011, 12:07 PM
| #4 |
| I wanna be Dave Join Date: Mar 2009 Location: sittin in the sky
Posts: 4,630
|
cut the spacers that hold the battery tray up in half so the batt. sits lower.
|
|
| |
|
10-10-2011, 12:36 PM
| #5 | |
| Rock Stacker Join Date: Oct 2011 Location: Beaverton
Posts: 53
| Quote:
| |
|
| |
|
10-10-2011, 12:58 PM
| #6 | |
| Newbie Join Date: Feb 2011 Location: wise
Posts: 39
| Quote:
 hope this helps hope this helps
| |
|
| |
|
10-10-2011, 01:02 PM
| #7 |
| Newbie Join Date: Feb 2011 Location: wise
Posts: 39
|
also you can take the bumpstops off your shocks for more articulation.they are rubber and you can slice them off with a razor blade pretty easy while they are still on the truck..i removed the tires to make it easyto get to.just reach in and pull the spring up from the bottom and slice the rubber and your done.set the spring back down in the spring cup...and your done except putting wheels and tires back on...lol |
|
| |
|
10-10-2011, 02:43 PM
| #8 | |
| RCC Addict Join Date: Jul 2011 Location: Orlando
Posts: 1,153
| Quote:
 | |
|
| |
|
10-10-2011, 02:51 PM
| #9 | |
| I wanna be Dave Join Date: Mar 2009 Location: sittin in the sky
Posts: 4,630
| Quote:
there is also- weighting the wheels 4-linking the rear upper links bump stops taken off (as mentioned) MIP drive shafts CVD front axle shafts alum Knuckles and C-hubs Last edited by 2500hdon37s; 10-10-2011 at 02:54 PM. | |
|
| |
|
10-10-2011, 02:54 PM
| #10 | |
| Rock Stacker Join Date: Oct 2011 Location: Beaverton
Posts: 53
| Quote:
| |
|
| |
|
10-10-2011, 02:59 PM
| #11 | |
| Newbie Join Date: Feb 2011 Location: wise
Posts: 39
| Quote:
| |
|
| |
|
10-10-2011, 03:00 PM
| #12 | |
| I wanna be Dave Join Date: Mar 2009 Location: sittin in the sky
Posts: 4,630
| Quote:
| |
|
| |
|
10-10-2011, 05:09 PM
| #13 |
| Rock Crawler Join Date: Aug 2011 Location: tri cities
Posts: 582
|
I know my post below is not a tip or trick but its stuff to get your scaler kickin good.
Last edited by muddinscx; 10-10-2011 at 05:21 PM. |
|
| |
|
10-10-2011, 05:10 PM
| #14 |
| Rock Crawler Join Date: Aug 2011 Location: tri cities
Posts: 582
|
Mods that help and cost low amout of cash: 1) remove rubber bump stops 2) add sticky weights to inside of rims 3) locate as much weight over the front axle (battery, reciever, esc ect...) 4) remove the reciever box (hits upper links on a 4 link system) 5) for better clearance and aproach angles, take off the bumpers. Doesn't look to bad with dingo body. Mods that cost: 1) get 2.2 tires at about 5.2" tall. They clear decent on the dingo w/out fender flares. Tires will run about $20-60 2)new high torque servo. Anywhere from $30-150 3)brushed waterproof esc from holmes hobby for $108 4)depending on if you want speed or crawlability, the motors gonna be from $30-80 (go holmes or go home) lol 5)if you want brushless you'll have to do your own waterproofing so I'm not goin into that. 6)transmiter...a lot of options but here are some. Spektrum dx3e 3ch (on budget) or the futaba 4pl. They are $100 or $200 but radios run between $30-a shat load 7)dig systems. VP is your best bet for $95 9)new shocks like prolines are about $30-45 a pair 10)robinson racing trans gears.. about $60 for all 3 11)new drive lines mip, junfac, punisher run between $34-60 for both 12)new c hubs and nuckles. Axial high clearance with axial c hub will be your cheapest but nice at about $60 for all 4 items 13)better shaftes for axles. Axial universals are ok for $30 or super 300 which take mods are about $150 14) aluminum links and steering I know I'm missing some stuff but that will get people goin |
|
| |
|
10-10-2011, 06:50 PM
| #15 | |
| RCC Addict Join Date: Jun 2009 Location: Salmon Arm BC
Posts: 1,777
| Quote:
SCX10 shock disassembly.wmv - YouTube then better yet, take the battery and mount it even lower like this by zip tieing the stock battery straps to your shock hoops works pretty good and yes this mod works with 2.2 tires as you see here. with 2.2's  | |
|
| |
|
10-10-2011, 07:07 PM
| #16 |
| Rock Stacker Join Date: Sep 2011 Location: Sacramento
Posts: 51
|
Heres a quick easy one. Turning the motor/tranny center plate 180 degrees. Ive noticed alot less torque twist after doing that. Another cheap on is a BEC ie Castle Creations. Powers up the reciever and servo's from the battery pack. |
|
| |
|
10-10-2011, 07:28 PM
| #17 | |
| RCC Addict Join Date: Jun 2009 Location: Salmon Arm BC
Posts: 1,777
| Quote:
another one is even though its not free but getting an esc with drag brake makes crawling on rocks a helluva lot easier!! | |
|
| |
|
10-12-2011, 12:57 AM
| #18 |
| Rock Crawler Join Date: Sep 2011 Location: Southern Utah
Posts: 778
|
Cost: buy new metal rock rails that won't hang up as much as stock ones. Free: modify the stock ones. I trimmed mine down to the first bar and flipped them over so they sit right at the bottom of my honcho body |
|
| |
|
10-12-2011, 01:04 AM
| #19 |
| Rock Crawler Join Date: Sep 2011 Location: Southern Utah
Posts: 778
|
I also removed the bump stops and was very pleased with the outcome. I live in Utah and my honcho was shipped from California, so when it got here the tires were puffed up like balloons. I let the air out, added weights, and drilled a tiny hole in each rim (backside where you can't see it.) The hole allows air to escape so the tire can form around rocks for better bite. Also keeps your tire pressure from changing with the seasons. |
|
| |
|
10-12-2011, 08:03 AM
| #20 | |
| Quarry Creeper Join Date: Sep 2010 Location: Perth Australia
Posts: 322
| Quote:
| |
|
| |
 |
| |


 Linear Mode


