| |
 04-06-2011, 09:29 PM
| #21 |
| RCC Addict Join Date: Feb 2006 Location: Medford, Oregon
Posts: 1,261
|
Shall I post a couple of pics, or do you want to keep them under wraps til you have them in hand? |

|  |
| Sponsored Links | |
| | |
|
04-07-2011, 08:41 AM
| #22 | |
| Scale Detail Engineering Join Date: Apr 2010 Location: Turtle Island
Posts: 5,573
| Quote:
| |
|
| |
|
04-07-2011, 10:33 AM
| #23 |
| RCC Addict Join Date: Feb 2006 Location: Medford, Oregon
Posts: 1,261
|
Sliders still have a little work, but they're almost there. 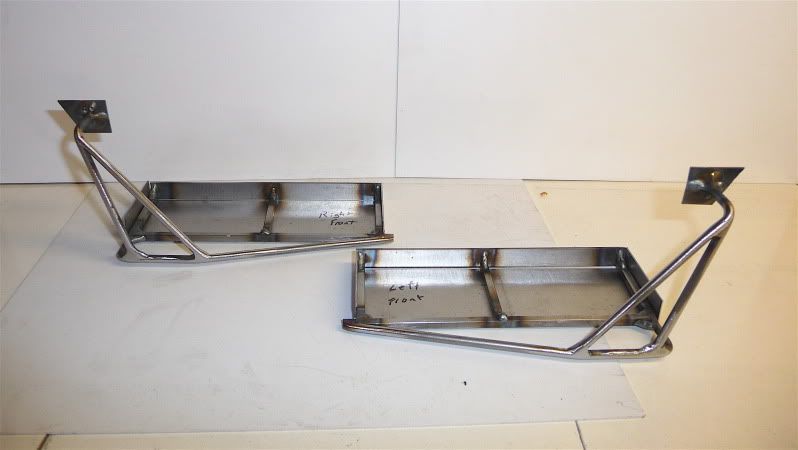 Rear bumper/exhaust is basically done, just need to paint it.  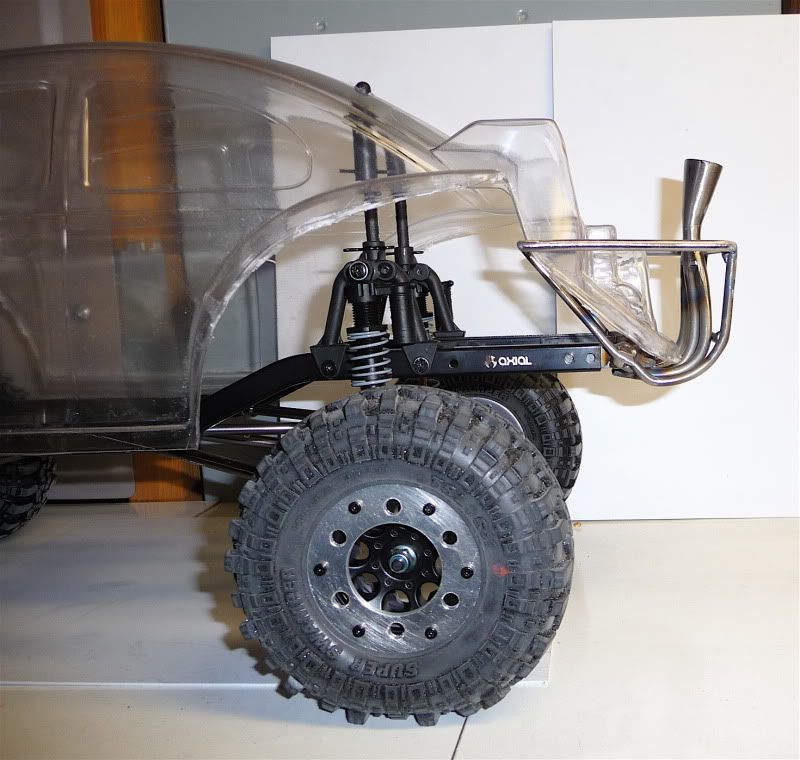 |
|
| |
|
04-07-2011, 10:43 AM
| #24 |
| Rock Crawler Join Date: May 2010 Location: San Antonio, TX
Posts: 901
|
Damn, that exhaust looks awsome!  |
|
| |
|
04-08-2011, 02:14 PM
| #25 |
| Pebble Pounder Join Date: Mar 2011 Location: SLC
Posts: 181
|
I really dig the exhaust. It makes it unique and more scale. I haven't noticed one before...nice work. Man, seeing this, and having grown up around VW bugs my whole life makes me kind of want to build one. |
|
| |
|
05-02-2011, 03:15 PM
| #26 |
| Scale Detail Engineering Join Date: Apr 2010 Location: Turtle Island
Posts: 5,573
|
I'm trying to figgure out my paint job, take a look and let me know what you think. Which color scheme: VW Bug |
|
| |
|
05-09-2011, 01:55 PM
| #27 |
| Scale Detail Engineering Join Date: Apr 2010 Location: Turtle Island
Posts: 5,573
|
I'm really enjoying this rig. I went out with my buddy yesterday. He has an scx 10 w/the Dinky Summit Cradle. He striped out a wheel hex and I broke my steering link so we didn't get to run them very long. I wanted to do some real comparisons but... What I/we did get to see before the damage set in: COG - Now that I'm running 2 heavy batteries on the skidz that @tw!ll made, it's fairly stable through the turns. I thought his truck with the Dinky mount and 1.9 Flat Irons would be much more stable then mine but they seemd about the same to me. He actually felt that mine was more stable. I think that's because of shocks though. I'm running stock shocks with a lot of preload, I wanted them stiff! He's running some long travel RC4WD shocks and his rig was kind of bouncy. Ground Clearance - Obviously I have him beat with ground clearance but we tried a few rocks for the heck of it. The Dinky mount did bottom out on every tall ledge and tree root. Stuff that I could literally drive right over, he had to really bump jump over... but he got over. So, for the most part, with the terrain we were on, the loss of ground clearence didn't make that much of a difference. However, if we were in a rockier area, I think he would've really suffered. On to my truck. @tw!ll did an amazing job on these parts. They look great and are pretty beefy. I had a bad tumble and bent the front Hilux bumper but the rear and sides (thicker rod) were fairly undamaged. I love the battery mounts, they really help to balance this rig. I'm sure if my batts were located up on the frame, I would not like it near as much as I do. I screwed up the paint job, it was my first ever lexon attempt. I learned a lot form doing it had had fun through most of it... once the window tint started bleeding into the orange paint, it wasn't so much fun any more. I need to mount the sliders a little more forward. The weight is rear biased and I want to try and move it forward some. A 2nd body is on the way that I'm going to use all the scale stuff on. This one will be the basher body. Sorry for the really bad pics. After I'm completely done, I'll bring it into work to get some real photos. Last edited by johnnyh66; 05-24-2011 at 09:15 AM. |
|
| |
|
05-09-2011, 03:13 PM
| #28 |
| RCC Addict Join Date: Feb 2006 Location: Medford, Oregon
Posts: 1,261
|
Rig is looking sweet John! Love to see some outdoor pics |
|
| |
|
05-09-2011, 04:41 PM
| #29 |
| Rock Crawler Join Date: Oct 2010 Location: Abbotsford BC
Posts: 522
|
Bug looks great. For the paint you could always use some dot4 brake fluid to strip the paint and try again. Here's my AX10 in bug trim:  Last edited by Mud Puppy; 05-09-2011 at 04:43 PM. |
|
| |
|
05-10-2011, 12:31 PM
| #30 |
| Scale Detail Engineering Join Date: Apr 2010 Location: Turtle Island
Posts: 5,573
|
I was reading about the brake fluid. Do you know if it leaves a residue or does it strip clean? A couple of slightly better pics: 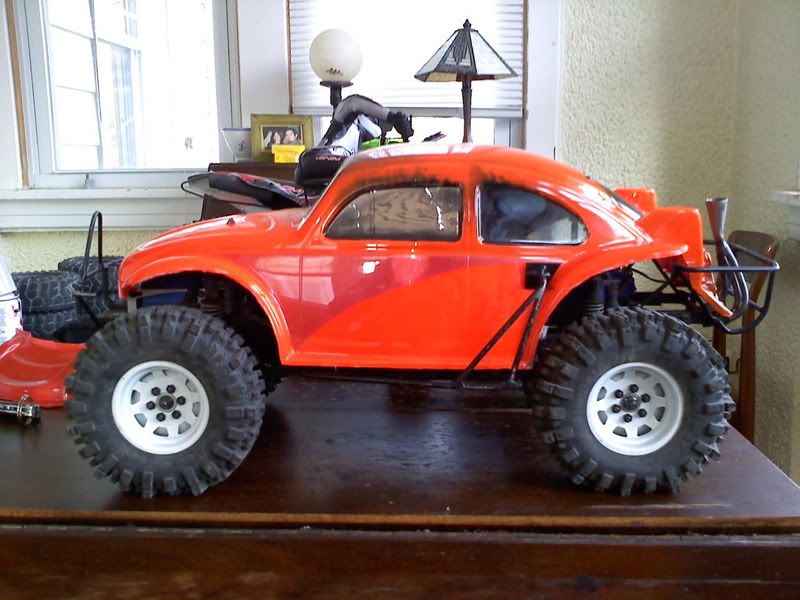 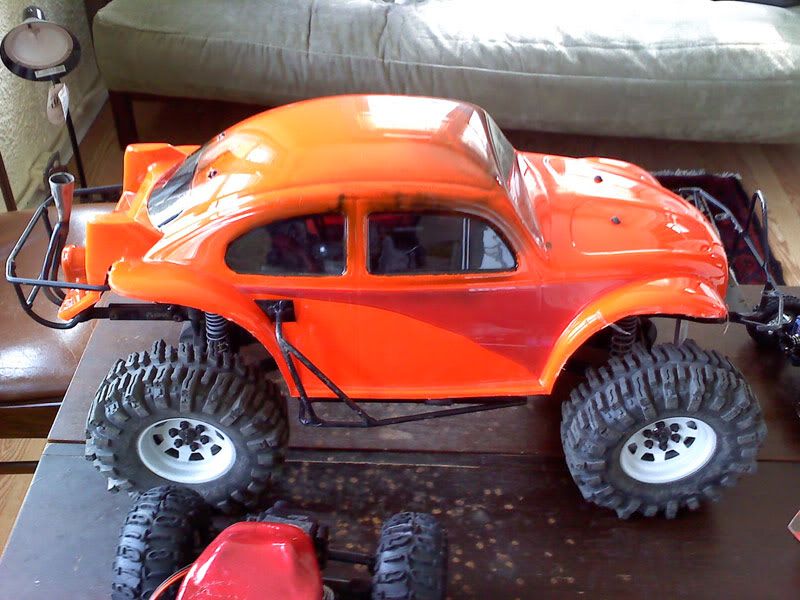 My broken steering 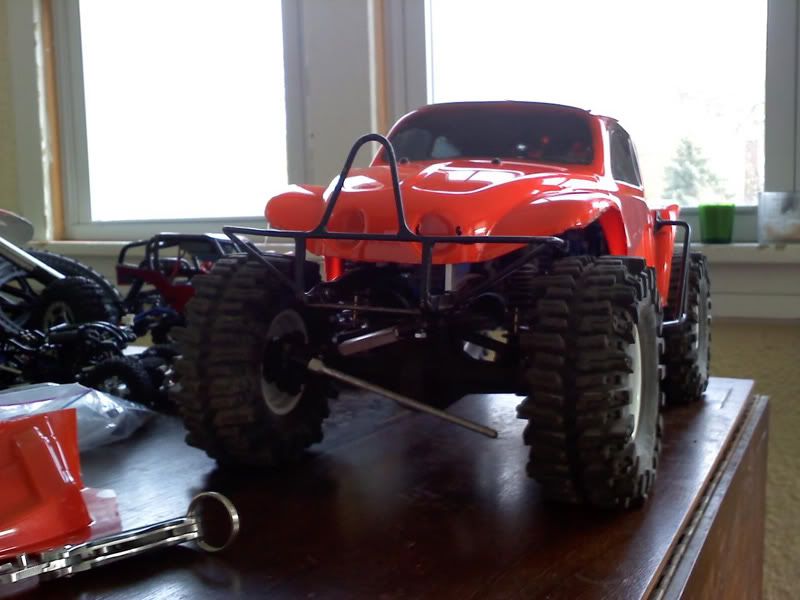 The Dude and Walter... future drivers: 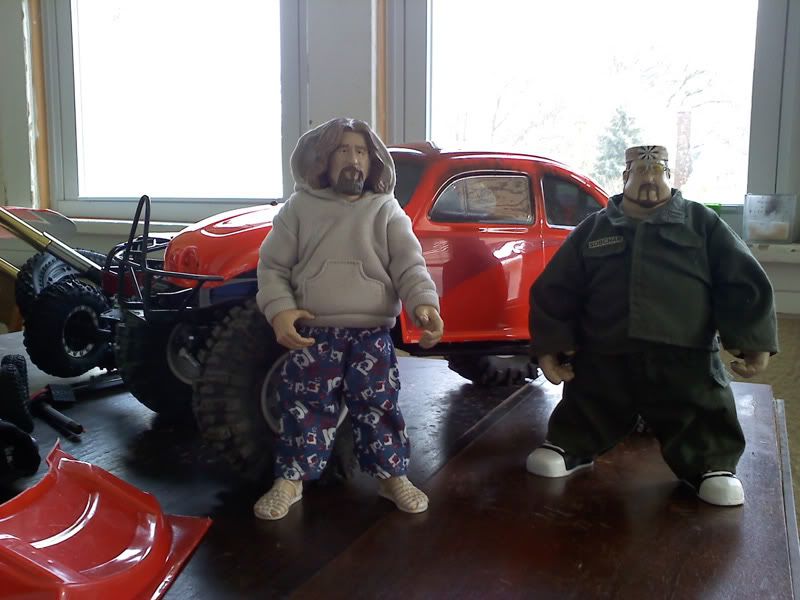 |
|
| |
|
05-10-2011, 02:52 PM
| #31 |
| Rock Crawler Join Date: Oct 2010 Location: Abbotsford BC
Posts: 522
|
With enough patience it strips clean. Wipe it onto the paint, let sit 1/2 hour, wipe off, re-apply. Every time a bit of paint comes off. if you have deep details an old toothbrush helps get into the edges. Do it 5-6 times (depending on paint thickness) and you are left with just some light gooey residue, which you wash off. Use a plastic safe degreaser (or RC motor cleaner if it's all you have), sand lightly and repaint. http://www.youtube.com/UltimateRCnet.../0/085nJyj4TBM |
|
| |
|
05-13-2011, 11:52 AM
| #32 |
| Scale Detail Engineering Join Date: Apr 2010 Location: Turtle Island
Posts: 5,573
|
Thanks Mud Puppy, I'm going to give it a try. I did get another body off ebay, it was half price. I cam up with a new paint scheme, I don't think I'll have time to mock it up today though. Here's a pic of my kick ass sliders & battery tray combo. and a pic of my new plastic steering link |
|
| |
|
05-13-2011, 12:00 PM
| #33 |
| Rock Crawler Join Date: Jan 2007 Location: Tuscaloosa
Posts: 855
|
I really like it. Nice job! The rear cage and exhaust send it over the edge on realism. I wonder how something like that would perfom with open diffs as a basher.
|
|
| |
|
05-23-2011, 10:50 AM
| #34 |
| Scale Detail Engineering Join Date: Apr 2010 Location: Turtle Island
Posts: 5,573
|
Update: I put a lot of time and some more money into it this weekend. I want to enter a TTC next weekend. I have a used rc4wd winch, a pull pal and a 4 link truss coming from R2J... I still need to water proof, hook up a servo to the 2 speed trans and get a stronger steering servo. I think I'm going to bite the bullet and buy a Futuba 4PL. Here's what I did over the weekend, I was up till 5am Sat night cutting links: Traxxas Revo Rod ends 8-32 threaded rod Stainless Steel sleeves for lower links and steering Aluminum sleeves for upper links I made new Maxx Shafts for the front. 2 x True RC 3s 4000MAH Lipo's Metal Servo Horn Servo Wire Extender (didn't work) New paint Decals Brake Fluid to remove old paint (Not sure if this is going to strip the paint or not. It's currently soaking in the basement) And then I stole a bunch of stuff from my Bastard Jr. build: Over/Under gears (it turns much sharper) MIP CVD's Axial High Steer Knuckles Axial Aluminum C's Axial Aluminum Rear Lockout's I think my next upgrade is going to be Gunner Beef Tubes 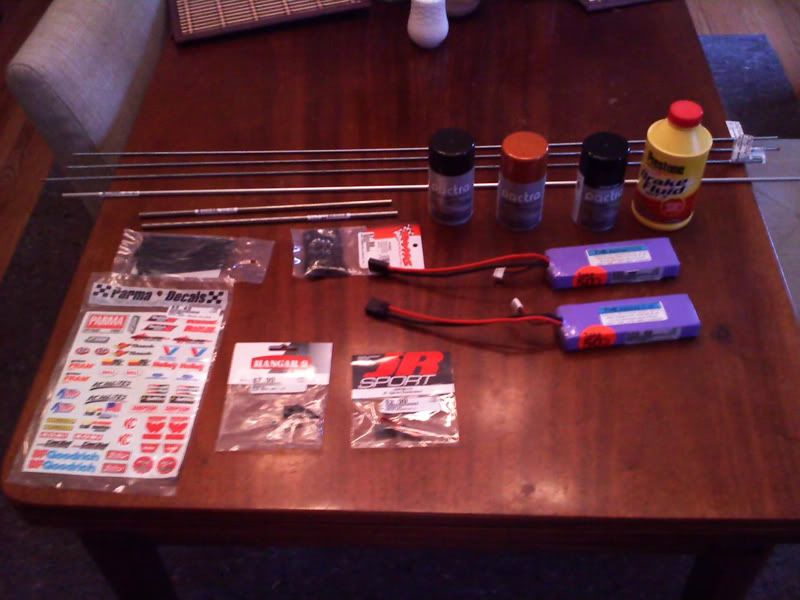 Beefy 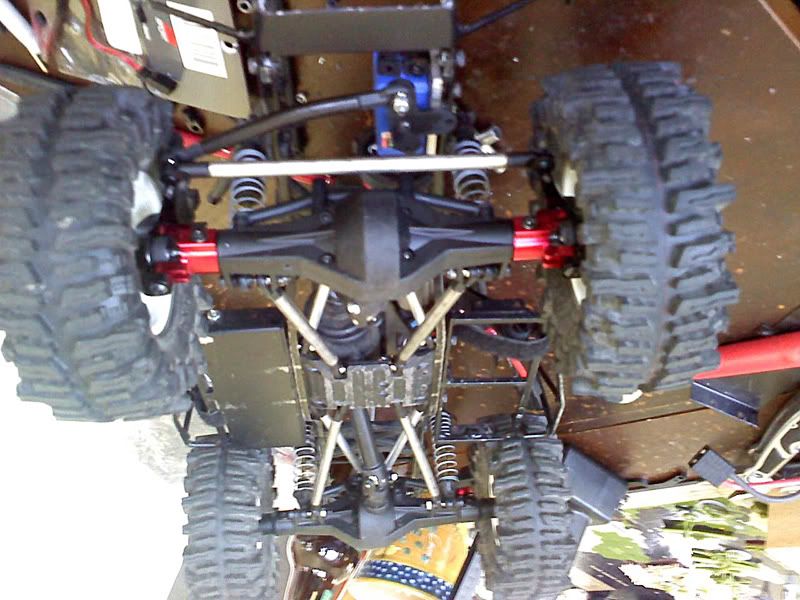 I already changed up the drag link. 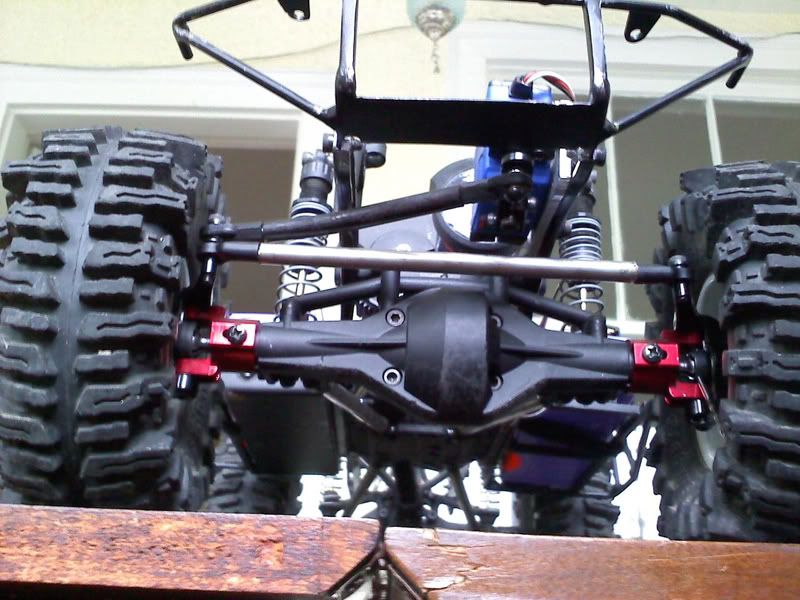 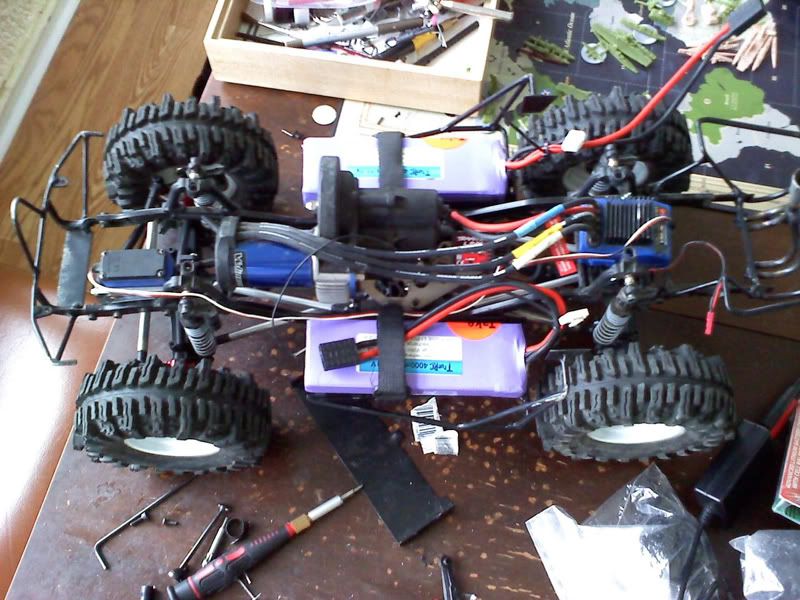 I bought these upgraded axles, used, a while back. They had shrink wrap tubing around the CVD's. After 1 run, I noticed the steering was real jerky at full left or right. I thought maybe the shrink tube was catching or binding so I removed it. It turns out the previous owner just had shrink tubing holding the CVD pins in, no grub screws... one worked it's way out and got all twisted up in the CVD. I removed it and currently have a drill bit fit into the hole. I tried a few other CVD pins I have but none fit. 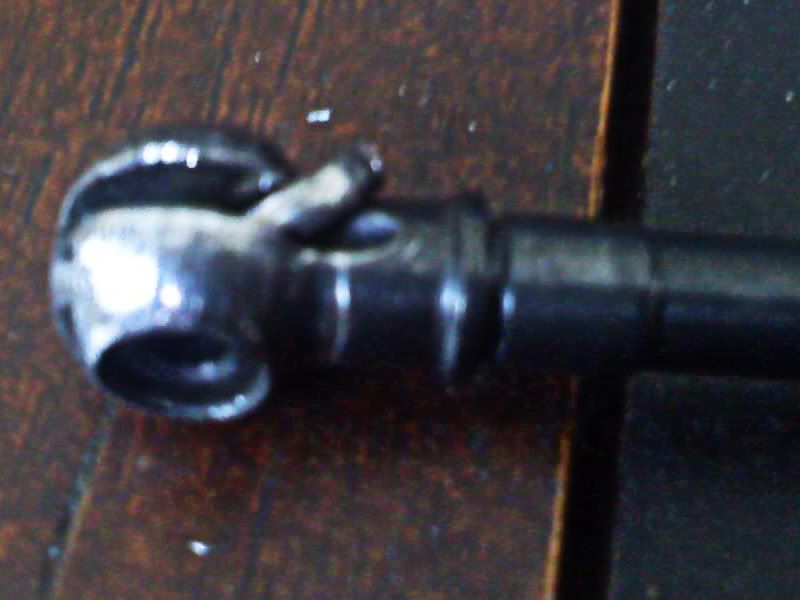 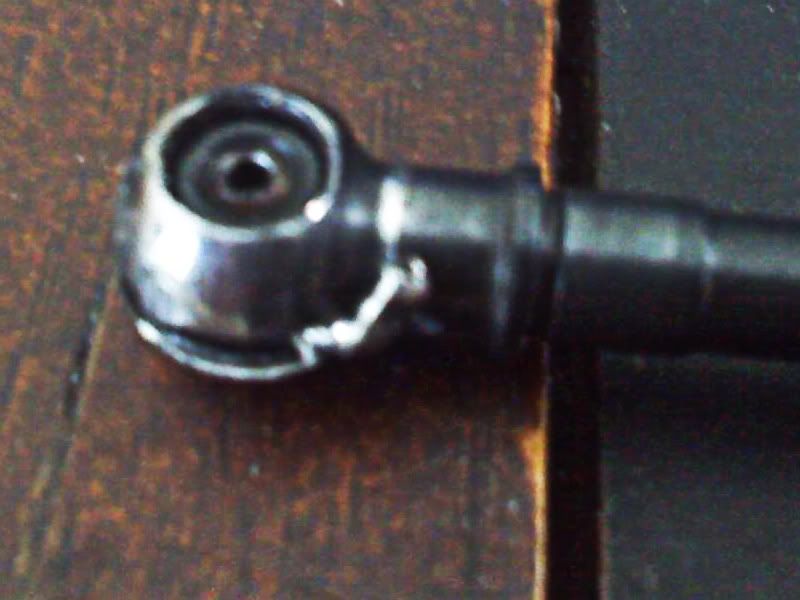 When I was testing the CVD's, I still had the short servo horn on. The wheels were really jerky at full L/R. I'm not sure if that's just the MIP CVD's or I wasn't getting enough servo throw or I just need a stronger servo. Hopefully tonight I'll get my drill bit cut down and can continue testing. I bought 2 sizes of hobby box's from Radio Shack for the electronics, one was too small and the other was too big I'm going to look into Zip Lock containers on the way home from work today. Last edited by johnnyh66; 05-23-2011 at 11:09 AM. |
|
| |
|
05-23-2011, 03:46 PM
| #36 |
| Scale Detail Engineering Join Date: Apr 2010 Location: Turtle Island
Posts: 5,573
|
I just bought pactra fiery orange, pactra metallic black and pactra backing black. If I have the Backing Black, do I need the cover coat paint? Should I paint: 1. Metallic Black strip 2. Fiery Orange (90% of the body) 3. Backing black 4. Window Tint |
|
| |
|
05-23-2011, 04:20 PM
| #37 |
| Pebble Pounder Join Date: Dec 2010 Location: Gallatin
Posts: 115
|
I have not used the backing black before, I do not know if will bleed though or not, I always use the white covercoat. I would call a hobbyshop and ask them. I would paint the black first and than the orange. I hope this helps.
|
|
| |
|
05-23-2011, 05:55 PM
| #38 |
| Quarry Creeper Join Date: Nov 2010 Location: Montreal
Posts: 308
|
what I would do is put a coat of silver between the orange and the backing black...I'm pretty sure the black will bleed with the orange...
|
|
| |
|
05-23-2011, 10:05 PM
| #39 |
| Scale Detail Engineering Join Date: Apr 2010 Location: Turtle Island
Posts: 5,573
|
The fiery orange is a "2 part metallic laquer paint", it says, "must use backing black to bring out true color". There's a few builds here that have used the b black for dark orange and b silver for bright orange. My current neon orange has been enough bright orange to last a lifetime! maybe 1 coat silver then 1 black... But, once 4 coats of orange/2 backing black are laid down, if dried, will the window tint still bleed? |
|
| |
|
05-26-2011, 03:15 PM
| #40 |
| Scale Detail Engineering Join Date: Apr 2010 Location: Turtle Island
Posts: 5,573
|
Walter checking out the new used winch from R2J. I also got a pulpal and 4 link truss from R2J. 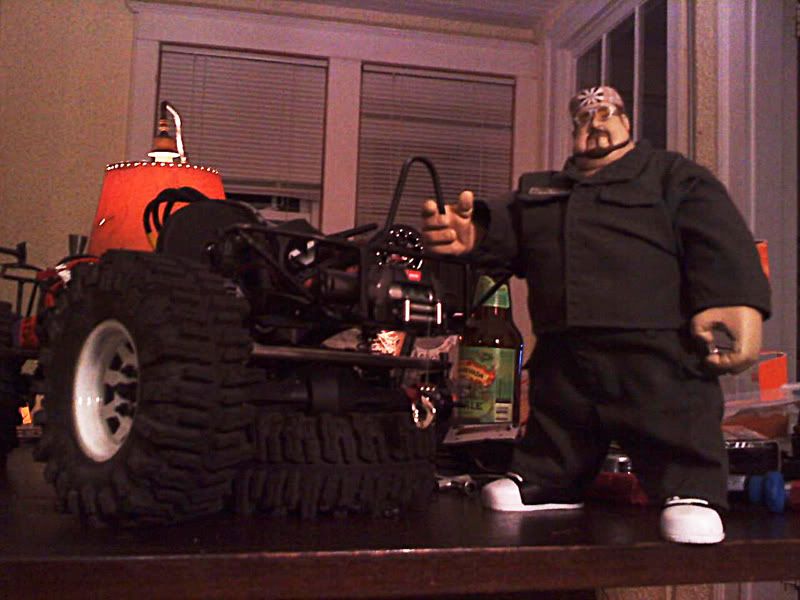 Walter installing the new Savox SC-1268SG servo (6.0v/208.3oz - 7.4v/361oz) 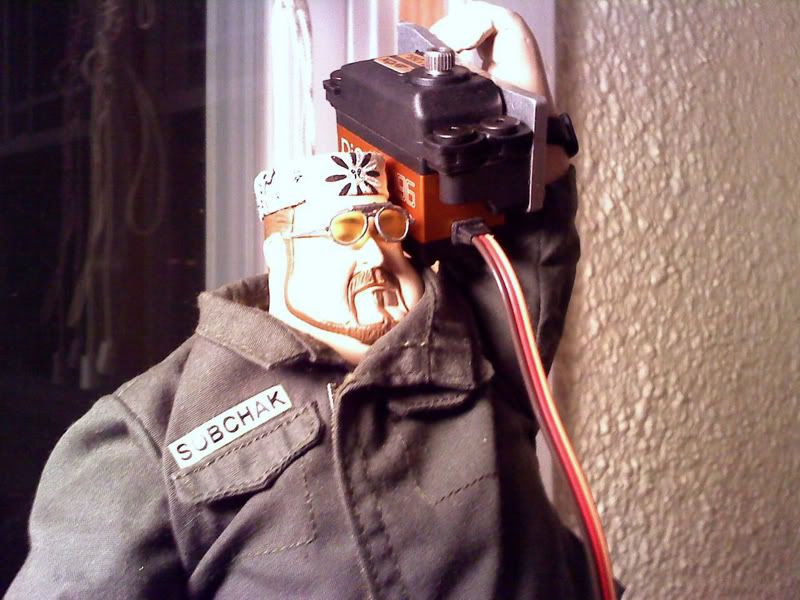 I also picked up a Futuba 4PL! |
|
| |
 |
| Tags |
| beetle, bug, proline vw bug |
 Buxom Melons: Class 2 VW Beetle - Similar Threads
 | ||||
| Thread | Thread Starter | Forum | Replies | Last Post |
| "The Scale Beetle" Class 3 TTC Rig | avanord | 2.2 Scale Rigs | 169 | 08-20-2014 06:31 AM |
| Buxom Melons: Class 2 run (as C3) | johnnyh66 | Scale Videos! | 0 | 11-06-2012 02:05 PM |
| Buxom Melons Class 2 run: 6-17-12 | johnnyh66 | Scale Videos! | 2 | 06-28-2012 01:15 PM |
| Class 5-1600 Baja Beetle Desert Racer | STANG KILLA SS | Non Crawler RC's | 70 | 12-23-2010 08:54 AM |
| Yep, another Beetle Juice. The Beetle Bully | Motorhead | RC4WD Bully | 14 | 11-04-2010 09:21 AM |
| |


 Linear Mode


