| |
| |||||||
 |
| | LinkBack | Thread Tools | Display Modes |
 07-04-2011, 09:25 PM
| #1 |
| I wanna be Dave  Join Date: Jan 2006 Location: Corruptifornia
Posts: 12,107
|
As my truck sits now! Red outside paint, drywall tape, lexan scraps and SHoeGoo fixed all the cracks.   Sun's getting low...great day of crawling!  These CI foams sidehill very nicely, a big improvement over the stock Ripsaw foams that would roll under almost until the rim hit the rocks in this same spot.  ~~~~~~~~~~~~~~~~~~~~~~~~~~~~~~~~~~~~~~~~~~~~~~~~~~ ~~~~~~~ Bought my kit awhile ago and been taken too long to get her up and crawling. Need to crawl soon!  I'm building for scalish crawler with good function, durability and still looking good. Build specs: UPDATE: Crawler Innovations (CI) Double Deuce Foams (soft front, medium rear), have another set of mediums, a set of firms, and a prototype pair of Deuce's Wild single stage waterproof foams for testing. http://www.crawlerinnovations.com/ UPDATE: Now I know why people are so non-excited about the same old Axial plastic beadlocks, metal beadlocks just looks soooo good! Bought new wheels to go with new Ripsaw tires and sweet Crawler Innovations foams, Hot Racing (HR) 1.9 Black Steel H Wheel Hex Drive, scuff sanded, sprayed with dark grey Krylon paint and baked in toaster oven at 200F for one hour to give them a nice look and make the paint really durable! Ended up drilling out all the mounting hex bolt holes and upgrading to RC4WD 2.5mm hardware kit because the stock 2mm hardware stripped a couple screws and didn't look as good. http://www.hot-racing.com/index.cgi?...LW19HS01;c=456 45T Integy brushed motor with 20/87 gearing to start, Losi steel pinion gear (runs smooth and last forever, left over from racing) may go with 65T brushed (new and just broken in leftover from another build). The 45T has been run alot and is kinda tired...might cut the com and throw new brushes in it or...may need to buy larger pinion and/or smaller spur gear if I go with 65T motor. UPDATE: 20/87 gearing and 45 turn Integy lathe motor has been working great with low crawling speed/torque and good top end speed on 3S lipo! Traxxas 21 turn Titan (550 motor) going in next! I need more speed and still retain crawling ability, this will pair with 13/56 32 pitch gears. East End Machining motor plate, nice thick sweet motor plate that shouldn't flex like the stockers do: http://www.eastendmachining.com/hedumoplfora.html Trimmed down some longer screws to make use of the thicker EEM motor plate's longer threaded holes. Replaced all self-tapping screws in the kit with high quality black oxide coated machine screws. Stock plastic sliders and no bumper for now, started fab on some sweet brakeline tubing sliders with help from a friend. I had never silver soldered before, pretty easy once you see how...most of the time is in the tubing cutting, bending, notching and sanding. UPDATE: Narrowed stock plastic sliders, they are cheap, work great and flex when it goes tumbling 20 feet down the rocks which helps prevent breakage. Tekin FXR Turnigy 3s 1300mah LiPos with forward battery tray Four link rear 4 link front (including panhard) and frame mounted servo, found that axle mounted servo gets more steering travel with less fuss and is easier with less parts to get wacked by rocks, so that's what I went with in the end. Modded stock shocks without bumpstops. Rebuilt my stock Axial shocks using Traxxas #7062 shock rebuild kit o-rings in place of the Axial black plastic spacer (between the two existing red o-rings), filled with fresh oil and crawled all afternoon, no more leaks! UPDATE: The Traxxas o-ring mod leaked too, but the added stiction of the tighter o-rings still act like they have oil in them. After lots of shock leaking, repairing and reading, I'm upgrading to Pro-Line Power Stroke Scaler Shocks (90mm-95mm) 6060-00 http://prolineracing.com/performance...cks-90mm-95mm/ Stock driveshafts with rings for now, need to upgrade but don't like the weight of MIPs. Aluminum C Hub Carrier - Black p/n AX30495 http://www.axialracing.com/products/ax30495 Axial Hi-clearance Knuckles p/n AX30533 No link on Axial's website...discontinued??? I hope not! Axial CVDs in front axle p/n AX30464 http://www.axialracing.com/products/ax30464 Blue Monkey RC titanium High Steer Kit with Axial aluminum C-Hubs and High Steer Knuckles. http://www.bluemonkeyrc.com/catalog/ New servo UPDATE: Hi-Tec HS7955TG steering servo http://hitecrcd.com/products/servos/...-servo/product CC BEC http://www.castlecreations.com/products/ccbec.html Spectrum DX3C DX3C DSM 3-Channel Surface Radio (SPM3300): Spektrum - The Leader in Spread Spectrum Technology Body mounted at the rear (hinged) and then a single body mount post up front. Need some ideas how to hinge the rear, all mine have not worked out well. Was going to bend up a piece of aluminum, screwed to the bottom of the rollcage with four 3mm screws (2 of them the forward spare tire mount screws and then 2 near the rear of the cage). It would pivot on the two rear crossmember screws which would be longer machine screws with locknuts. Kinda complicated and I didn't want to drill holes in the cage. Next was two nylon wire loom clamps around the cage and then screwed to the rear crosssmember...simple, strong and light. The 1/4" diameter are too small and next size up (3/8") is a lot too big. Hmmm...maybe shim it? Black Nylon Cable Clamps - Bag of 10 Cable Clamps for Securing Electrical Wiring | WiringProducts.com Pics coming...I have no good fireworks to light... EDIT: Pics are up....more coming. Test fitting stuff. Paint is Tamiya PS-48 Semi-Gloss Silver Aluminum Polycarbonate spray paint, this stuff looks great just like the name says and goes on nice, thin just like an airbrush. I've never used it before being a Pactra fan and the Tamiya was $14.50 per can!!! wtf? Well it did the bed great, but the cab was kinda thin, uneven, and patchy. Backed it with Pactra Sprint White and then black, well it didn't come out quite like I wanted after like eight coats and it was too late after backing it with white so now it looks a lot like oxidized silver paint...so still scale...lol. I like it, but next time will use twice as many coats before backing it with any other color! 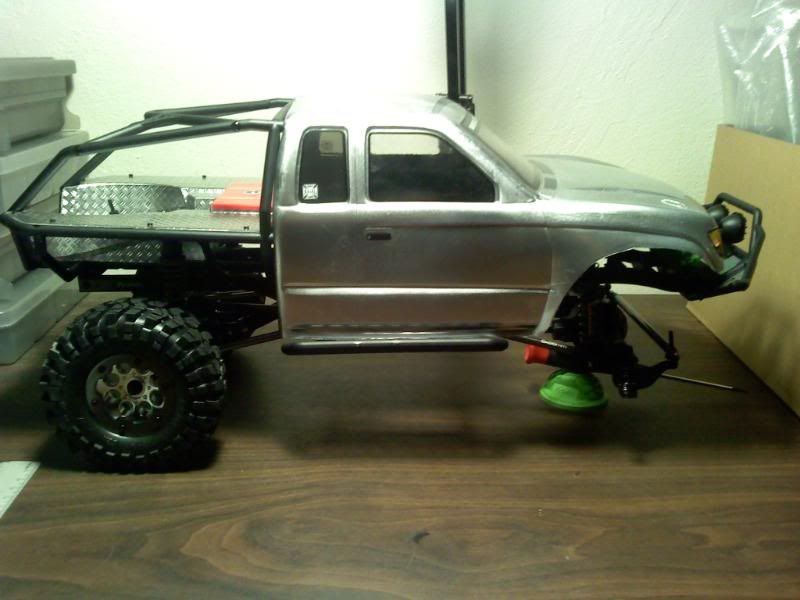 Servo mount plate mockup (lines scribed and holes marked...nothing drilled or cut yet): 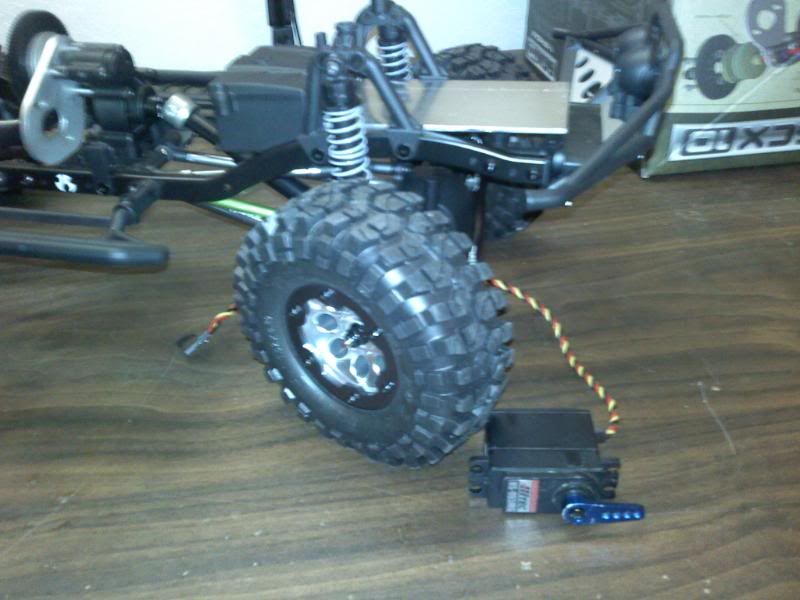 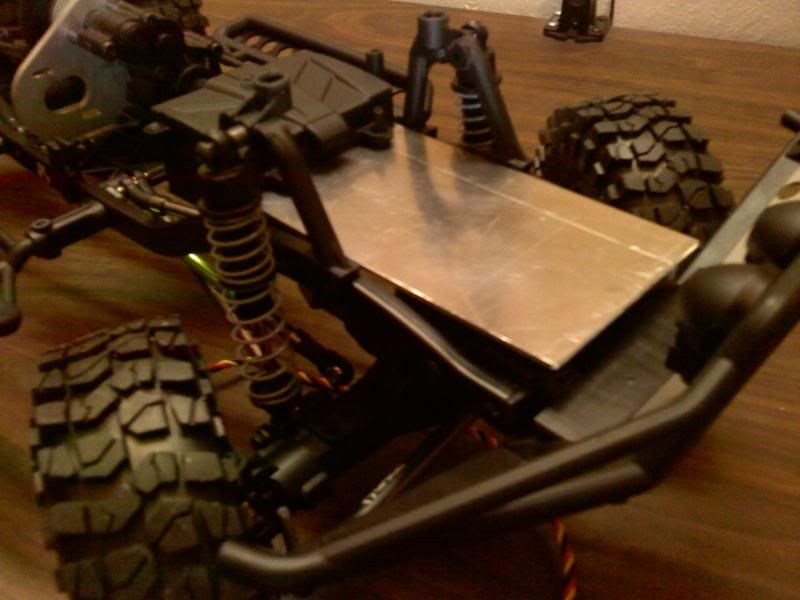 Servo mounted: 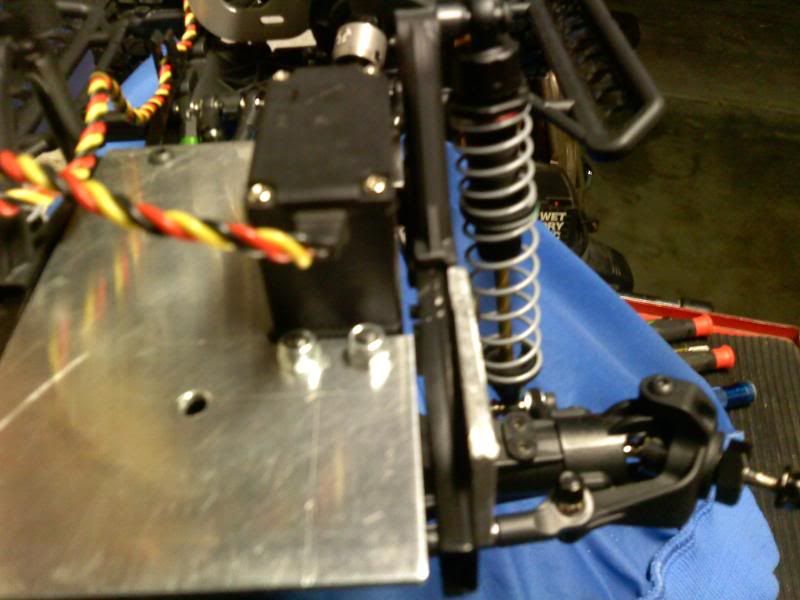 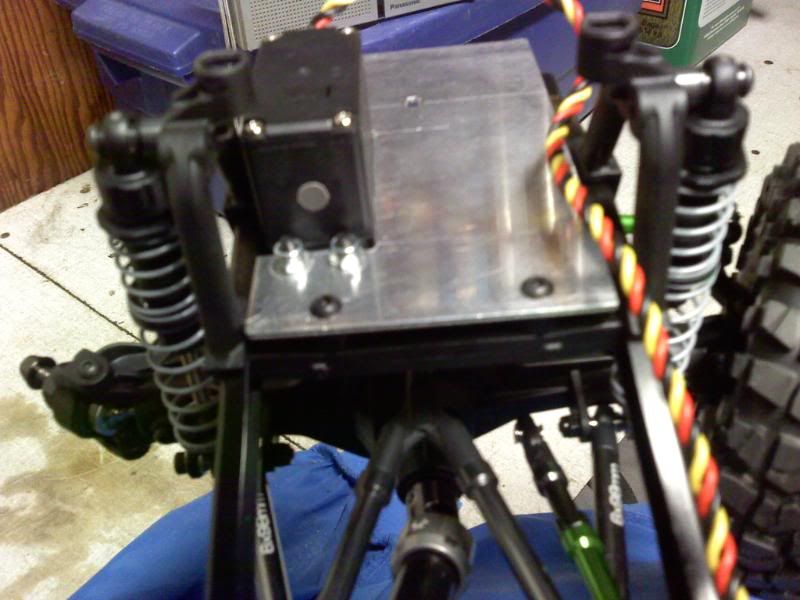 Start of panhard bar frame mount: 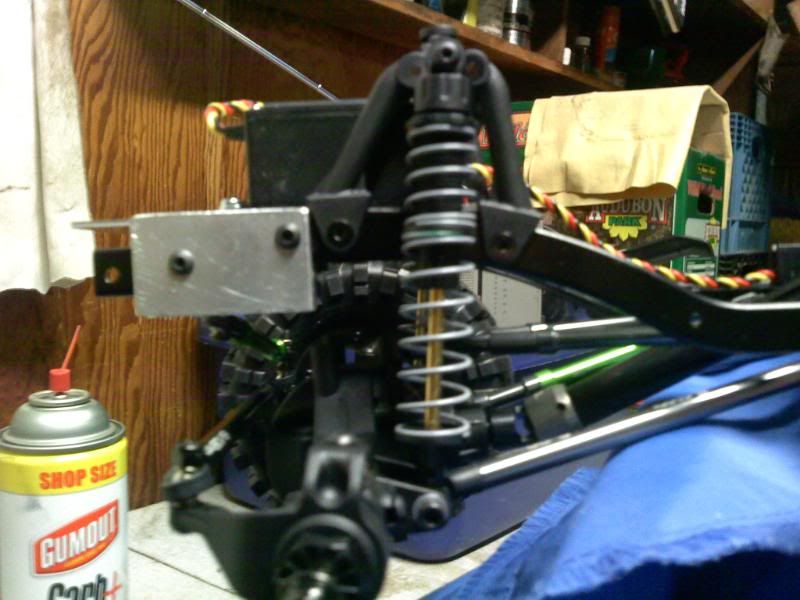 Last edited by Natedog; 11-06-2019 at 05:39 PM. |

|  |
| Sponsored Links | |
| | |
|
07-05-2011, 01:57 AM
| #2 |
| I wanna be Dave Join Date: Jan 2006 Location: Corruptifornia
Posts: 12,107
|
Finished frame mount for panhard bar (used one existing hole in frame rail and drilled the rear hole): 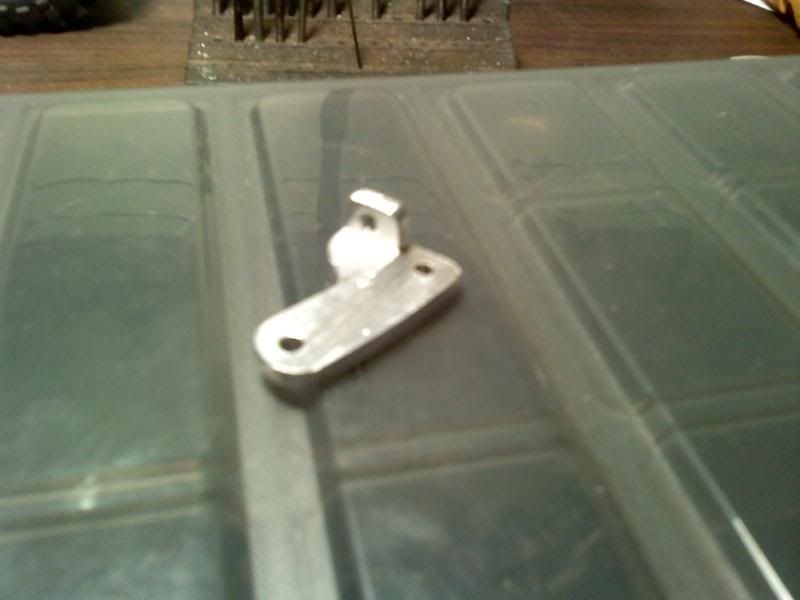 Frame mount for panhard bar (different angle):  Front axle link mount plate laid out: 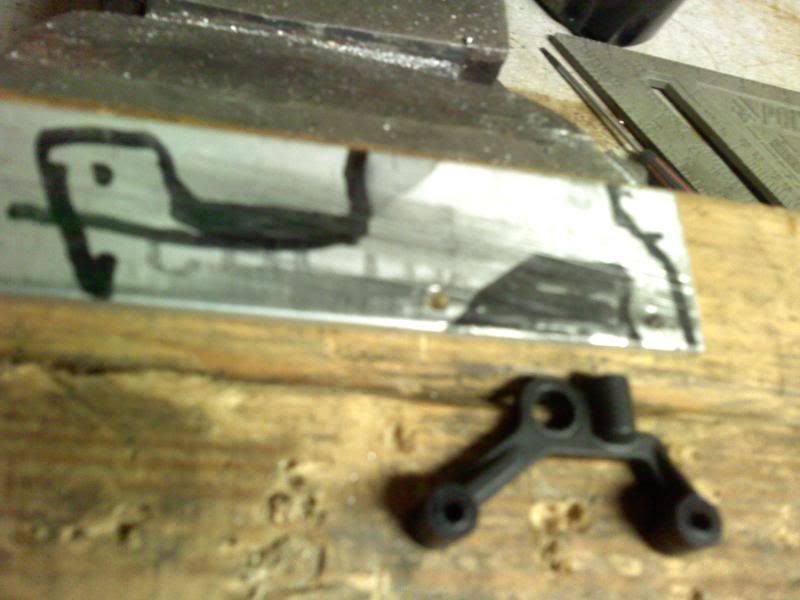 Cuttin started; 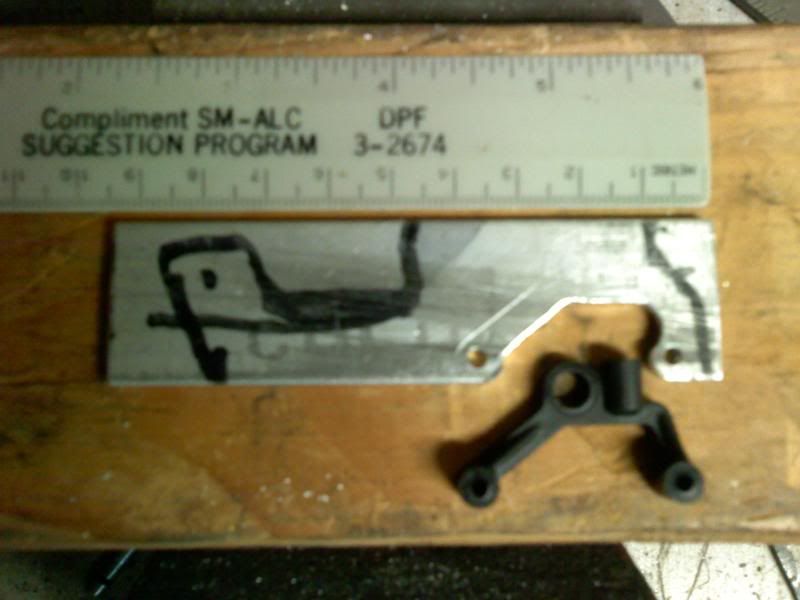 Taking shape and test mount on axle: 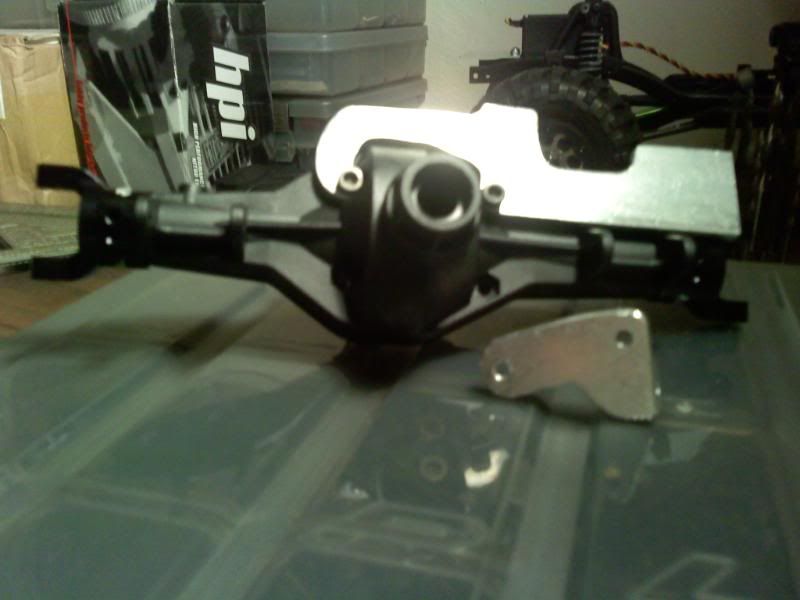 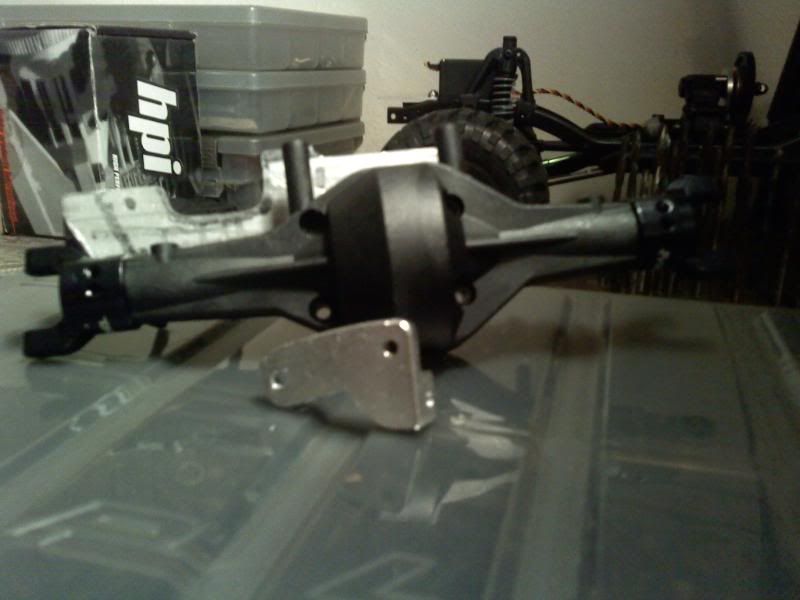 Double chekcing my panhard axle link mount: 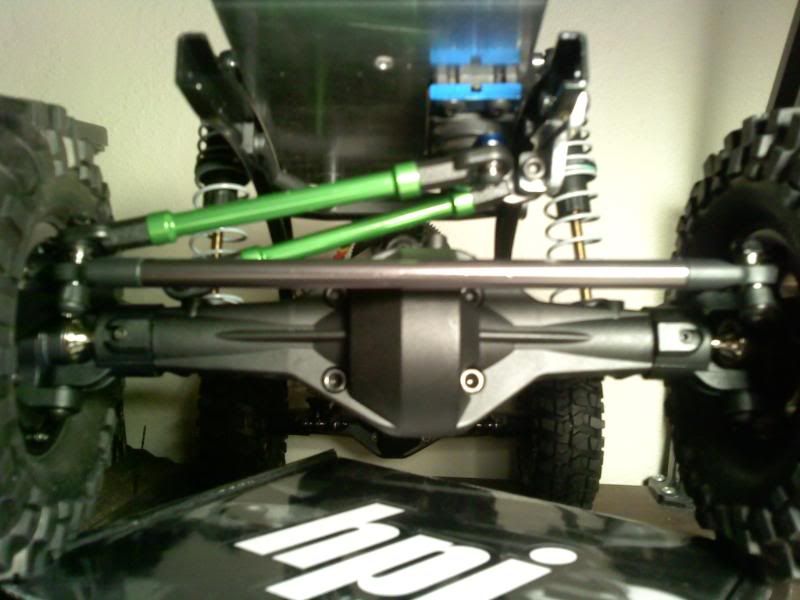 Last edited by Natedog; 07-05-2011 at 02:01 AM. |
|
| |
|
07-05-2011, 02:06 AM
| #3 |
| I wanna be Dave Join Date: Jan 2006 Location: Corruptifornia
Posts: 12,107
|
Battery plate mount to get CG lower. Brackets mounted to frame: 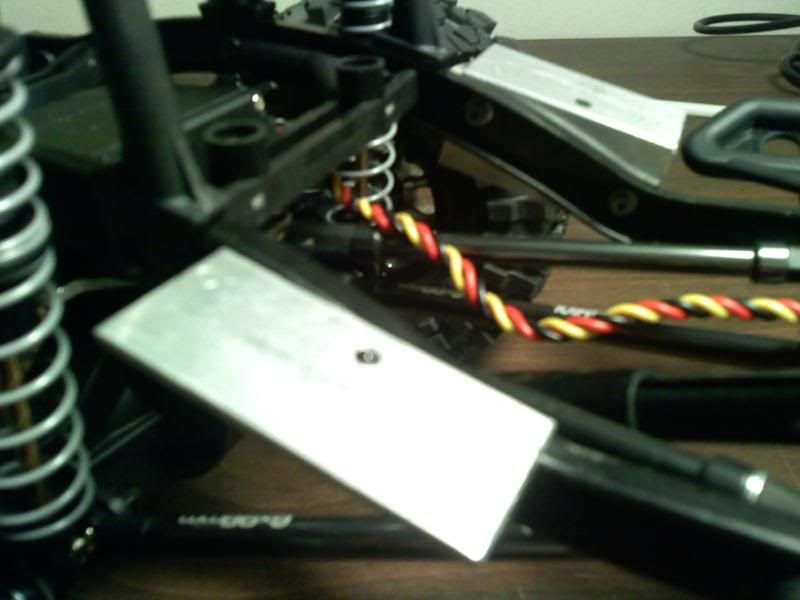 Marking holes for plate to brackets:  Plate installed, left a little extra room between front driveshaft and plate in case I go larger diameter shaft and/or tilt my front axle up more. Right now I have it tilted back for lots of caster (a little more than my GC-3A). Links and all clear the plate and crossmembers during full compression:  Battery plate mounted and screws trimmed flush with nuts: 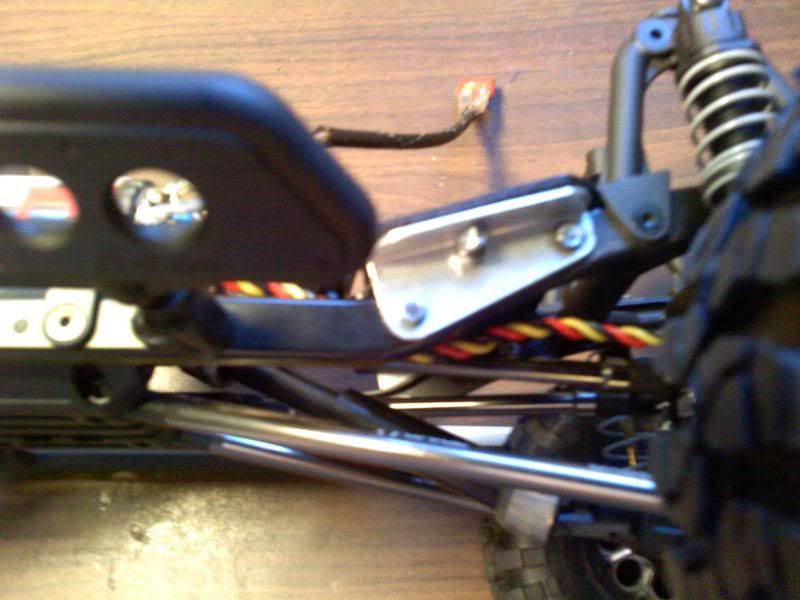 Bottom shot: 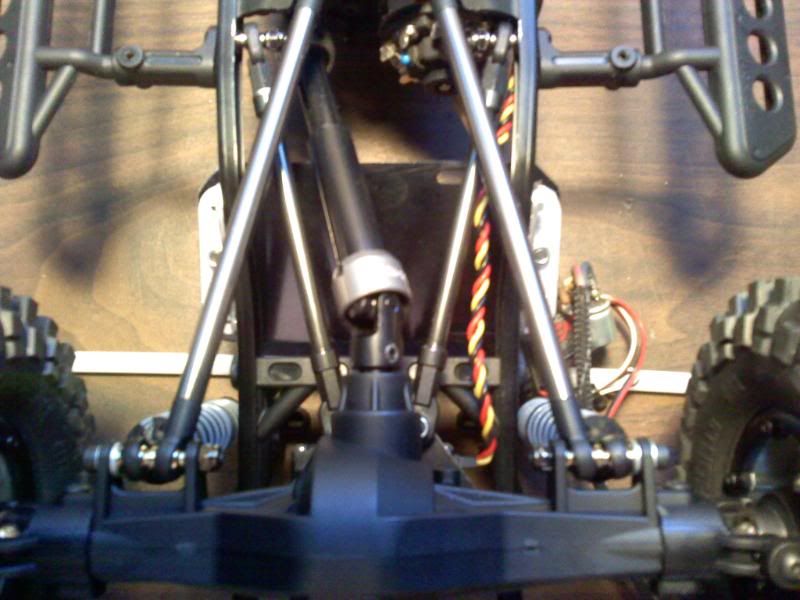 Top side: 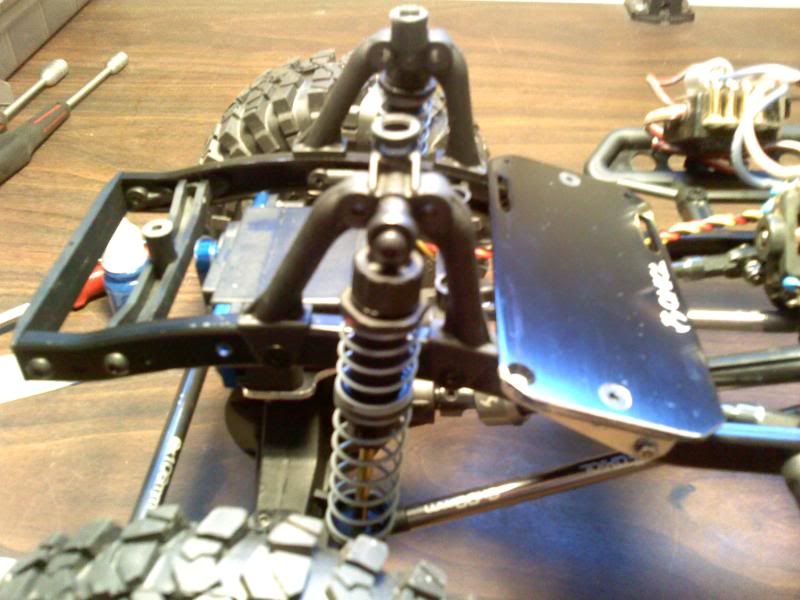 That's all for tonight, Happy Independence Day! Last edited by Natedog; 07-05-2011 at 02:18 AM. |
|
| |
|
07-05-2011, 09:57 AM
| #4 |
| Pebble Pounder Join Date: May 2011 Location: Bettendorf, IA
Posts: 199
|
Great custom work! You mentioned 4, link front end AND panhard bar? Everything I've seen is that panhards are only needed for a 3 link setup with frame mounted servo to mitigate bump-steer. Have I misunderstood?
|
|
| |
|
07-05-2011, 12:41 PM
| #5 |
| Quarry Creeper Join Date: Feb 2009 Location: Rockaway
Posts: 489
|
Nate nice fabrication so far. Really liking that battery mount setup.
|
|
| |
|
07-06-2011, 10:53 AM
| #6 | ||
| I wanna be Dave Join Date: Jan 2006 Location: Corruptifornia
Posts: 12,107
| Quote:
Quote:
| ||
|
| |
|
07-06-2011, 12:32 PM
| #7 | |
| Rock Crawler Join Date: Mar 2010 Location: NRV
Posts: 958
| Quote:
| |
|
| |
|
07-06-2011, 01:23 PM
| #8 |
| I wanna be Dave Join Date: Nov 2009 Location: Chico now
Posts: 2,384
|
You have some creative ideas, nice work.  |
|
| |
|
07-06-2011, 05:25 PM
| #9 |
| Quarry Creeper Join Date: Jun 2011 Location: IE
Posts: 407
|
Great job on the fab for your honcho.
|
|
| |
|
07-09-2011, 07:41 PM
| #10 | |||
| I wanna be Dave Join Date: Jan 2006 Location: Corruptifornia
Posts: 12,107
| Quote:
Quote:
Quote:
Pic updates: Rear body tilt mount brackets mounted for test fit and more cutting: 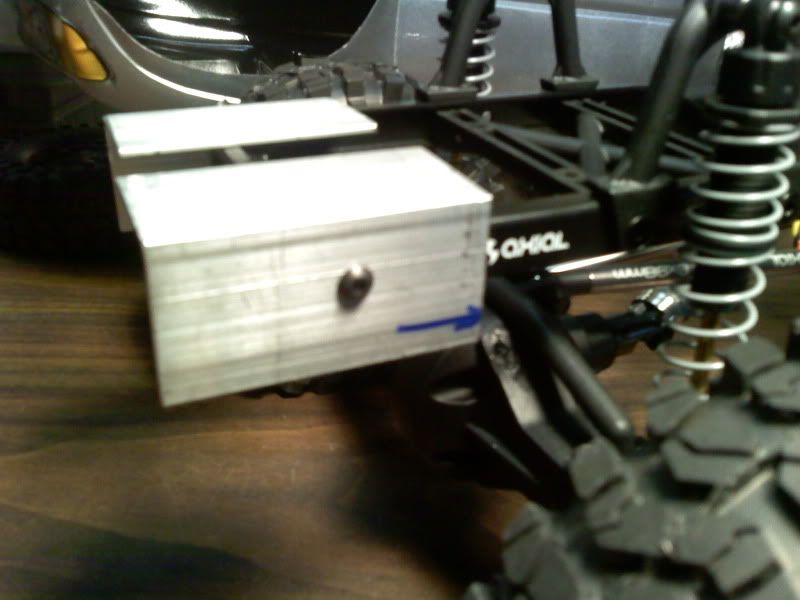 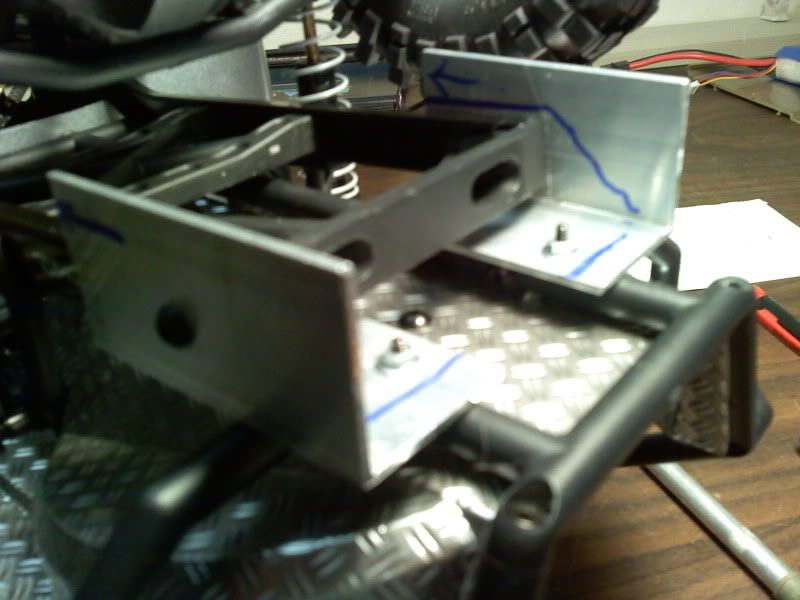 Brackets cut, drilled and trimmed. Shown with the steel flat washers I used for setup and the rubber sheet (with woven nylon reinforcement molded into the rubber sheet) cut out with sharp scissors and then leather punch for center hole. These washers will allow some movement, stop rattles and keep the body from just flopping open or closed. 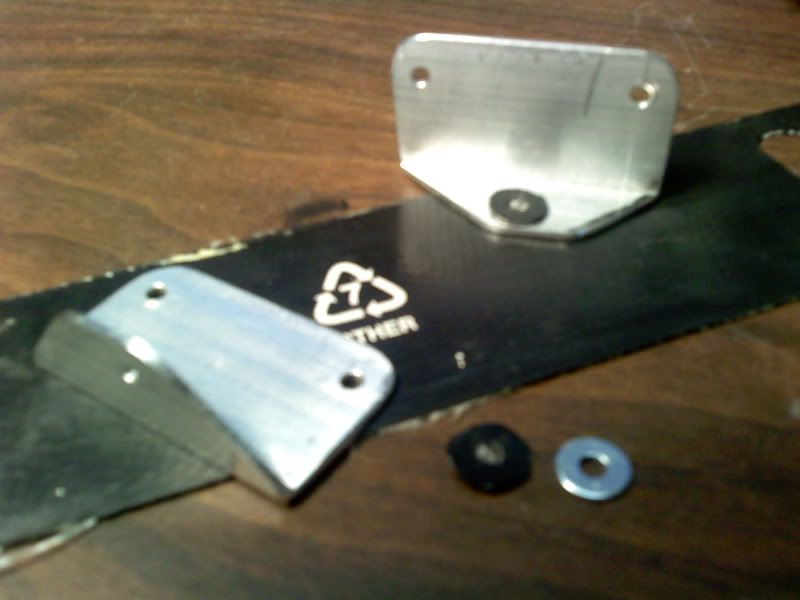 Forward two screws go into the stock cage to spare tire mount holes using longer 3mm button heard machine screws. Rear two screws are drilled and then use 2mm socket head machine screws (they didn't have any buttonheads, I'll order some later), 2.5mm flat washers top and bottom with 2mm locknuts under the bed. Used the smaller screws so I wouldn't weaken the plastic cage by drilling bigger holes through it. The 2mm are plenty strong anyways. 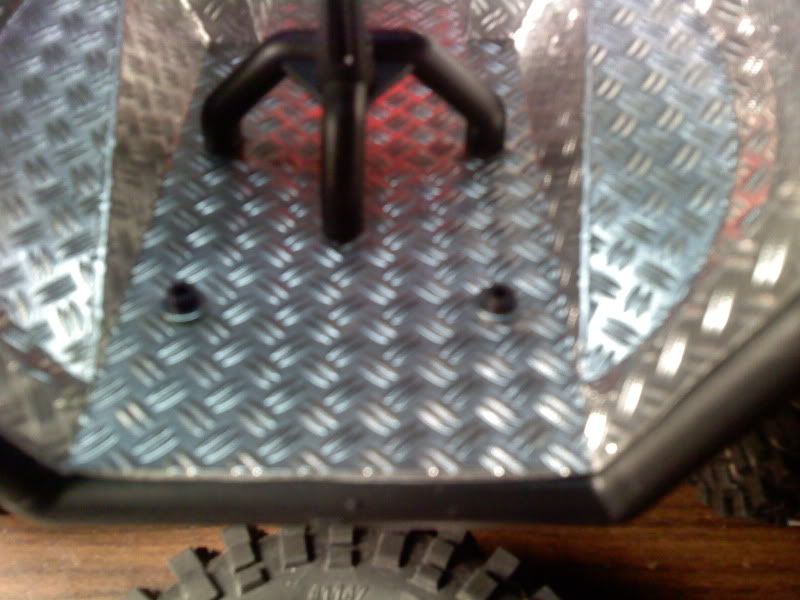 Last edited by Natedog; 08-11-2011 at 04:32 PM. | |||
|
| |
|
07-09-2011, 08:00 PM
| #11 |
| I wanna be Dave Join Date: Jan 2006 Location: Corruptifornia
Posts: 12,107
|
Brackets cut and trimmed to final shape and installed. I may trim them down even more but they are light weight and I want to be able to drill another set of holes (and/or flip the brackets) to move the bed/body fore/aft if I want to for tire clearance or whatever. 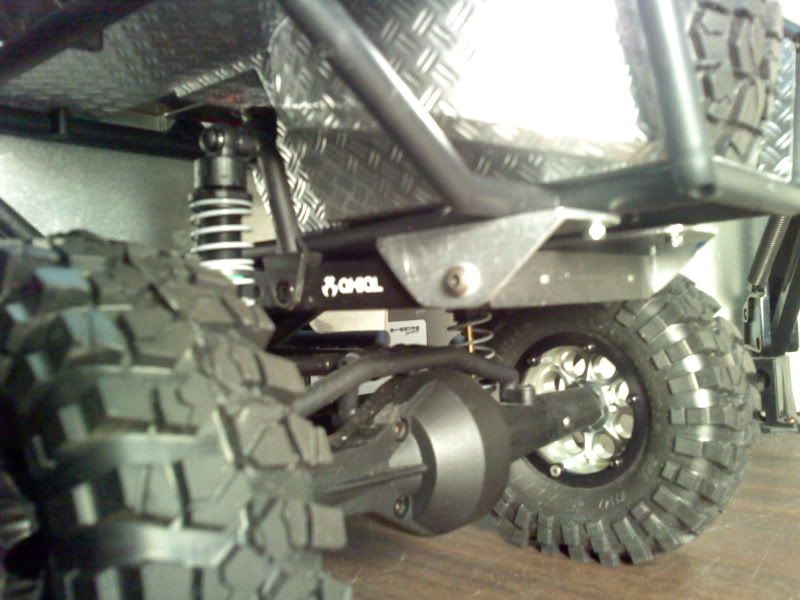 I used longer 3mm machine screws and locknuts so that they won't back out. Installed the mounts to chassis, set the screw/washer preload equal on both hinges, then mounted the bed. Used the kit included other rear frame crossmember without the light buckets for now because I don't have lights (yet) and it's easier to get my big fingers in there to tighten the nuts.  Body tilted open for maintenance or battery change: 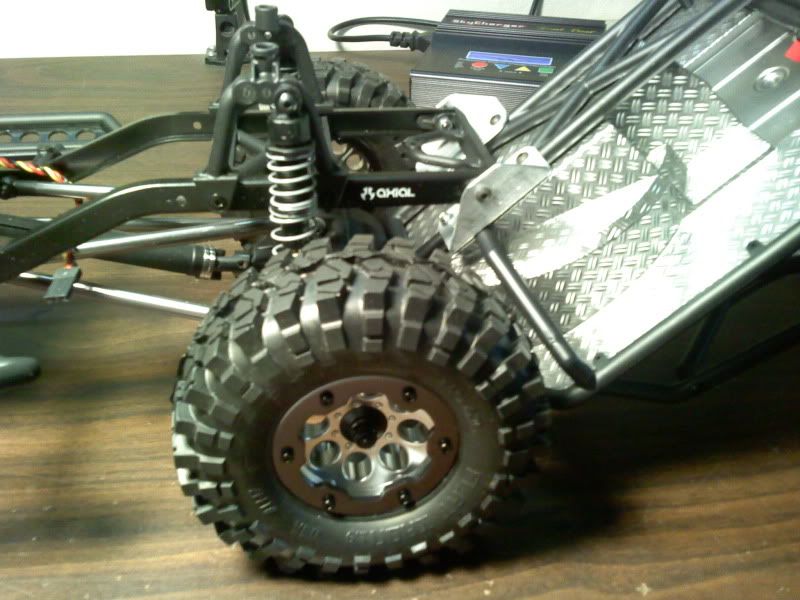 Body open chassis shot....the old AM radio and hap-hazzard wiring is temporary just for test crawl. Just went with stock front body mounts for now, they are light weight, simple and work. Plus they are already there....but they may stay. 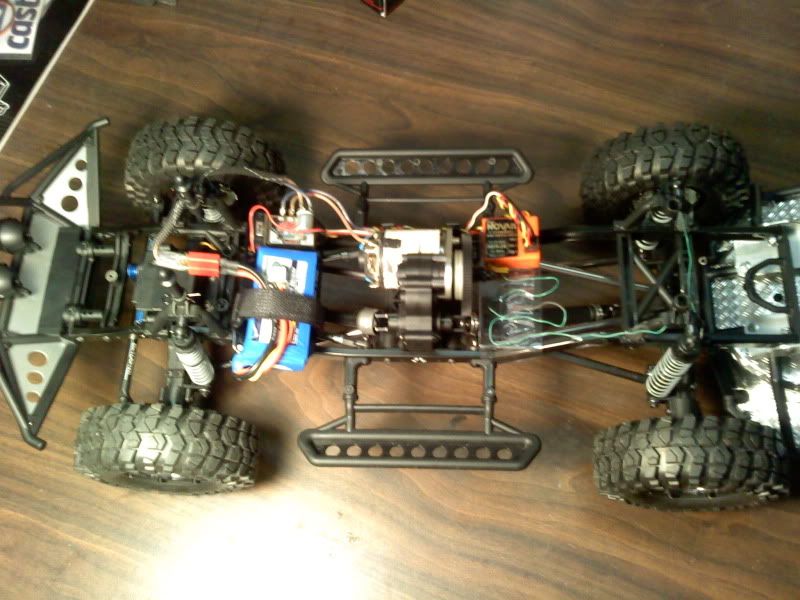 Test crawl...maiden voyage. 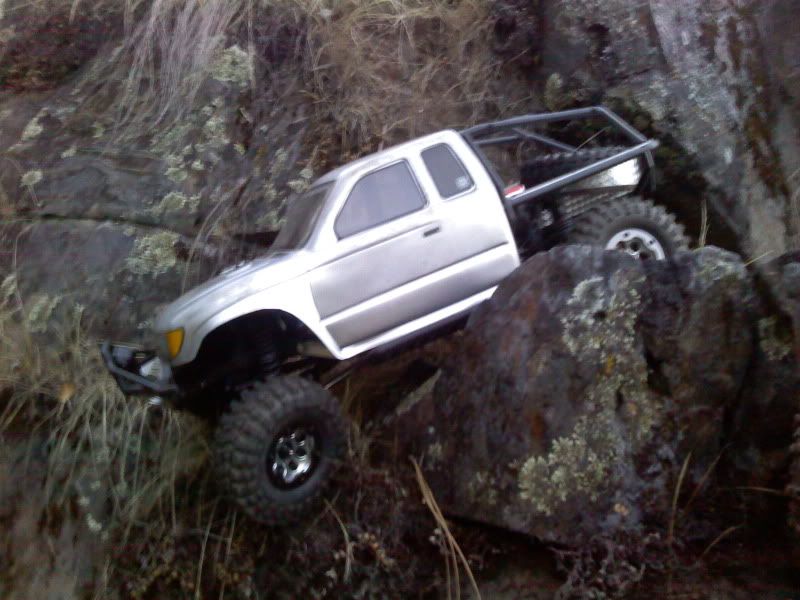 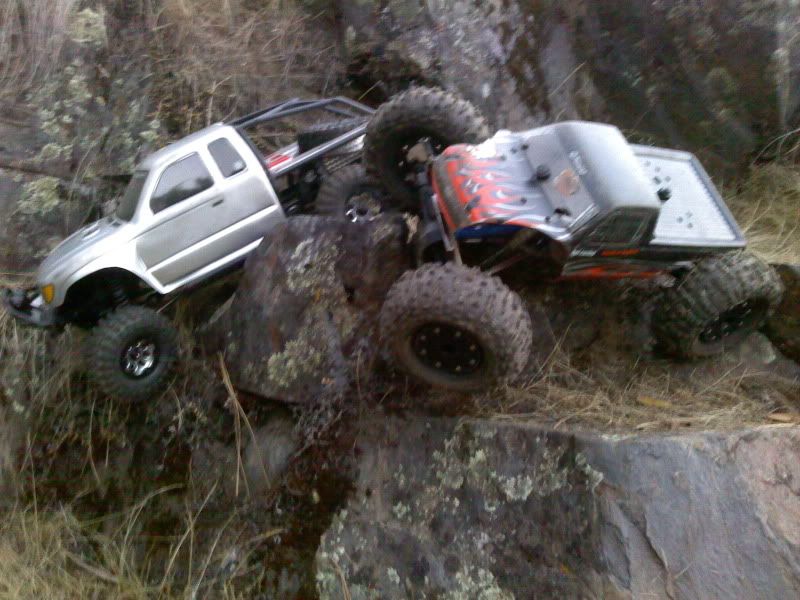 This thing crawls great and I don't have any weight in the wheels yet! Got a roll of 3/16" solid core lead wire fishing weight, going to put prolly 2 oz per wheel, all four....I like to keep it balanced front to rear. 2s1p 1300mah lipo was great with 20/87 48 pitch gearing....but I want more wheel speed and power..........so buying some 3s 2200mah lipos for it. Forgot to say that I had my chassis mounted servo, panhard etc. almost done, but it was limiting travel too much for me no matter how I set it up. So...I cut up a servo plate, mounted steering servo on front axle housing, and made a four link. It wheels great and I'm very happy with it. Might put the frame mounted steering on someday. Last edited by Natedog; 11-06-2019 at 05:40 PM. |
|
| |
|
07-11-2011, 01:28 PM
| #12 |
| I wanna be Dave Join Date: Jan 2006 Location: Corruptifornia
Posts: 12,107
|
Went crawling yesterday again and this truck is FUN to drive! The 1.9 Flat-Irons in the kit work well, but need more grip on the smooth rock. The way my truck is setup the rear tires have full flex and clear the bed and cage by about 1/16"...the front rubs a little bit occasionally, nothing to worry about or trim the body about. EDIT: Been lookin at the 1.9 Scale Tire Chart here: Scale Tire Size Charts... Proline Interco TSL SX Super Swamper 1.9" G8 Rock Terrain Truck Tires (2) w/Memory Foams are supposedly same size as stock tires and look good. How's the grip and sidewall compare to Flat Irons? Do they fold under on sidehills while turning or? http://prolineracing.com/tires/inter...r-swamper-1.9/ RC$WD Interco IROK 1.9 Scale Tires look great but are kinda big: http://store.rc4wd.com/Interco-IROK-...re_p_1423.html RC4WD Rok Lox 1.9 Comp Tires look good and from what I've seen at comps work well, but they seem to wear out really fast: http://store.rc4wd.com/Rok-Lox-19-Comp-Tires_p_696.html What do you all suggest for a good replacement tire that is the same size as the Flat Irons? Last edited by Natedog; 07-11-2011 at 04:49 PM. |
|
| |
|
07-11-2011, 05:26 PM
| #13 |
| I wanna be Dave Join Date: Nov 2009 Location: Chico now
Posts: 2,384
|
If you want performance, get P.L. TSL/SX |
|
| |
|
07-12-2011, 10:24 AM
| #14 | |
| I wanna be Dave Join Date: Jan 2006 Location: Corruptifornia
Posts: 12,107
| Quote:
Last edited by Natedog; 07-17-2011 at 12:13 PM. | |
|
| |
|
07-12-2011, 09:21 PM
| #15 |
| Rock Stacker  Join Date: Jun 2011 Location: Kaneohe, Hawaii
Posts: 87
|
Nice build you got going on Natedog! |
|
| |
|
07-15-2011, 11:44 PM
| #16 |
| Pebble Pounder Join Date: Jun 2011 Location: CA
Posts: 121
|
Nice work! I like the battery mount. Your flippin body is pretty slick.
|
|
| |
|
07-17-2011, 12:31 PM
| #17 | ||
| I wanna be Dave Join Date: Jan 2006 Location: Corruptifornia
Posts: 12,107
| Quote:
Quote:
Weighed it last week and it is just a hair over 5 lbs with the battery ready to crawl. Still no weight in the wheels and it crawls pretty dang well. EDIT: Forgot to mention that one assembled wheel, stock Flat Iron tire, beadlock rings, and all 12 screws weighs 4.2 ounces. 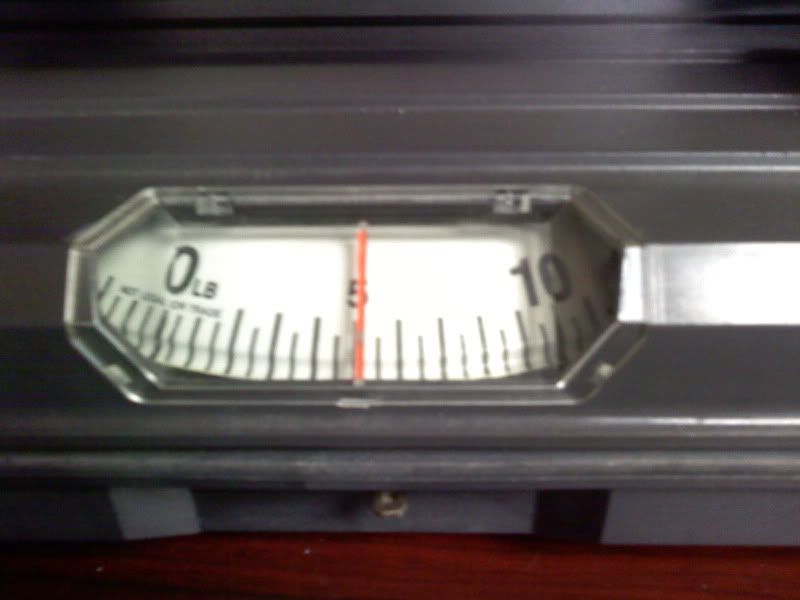 New motor wires: 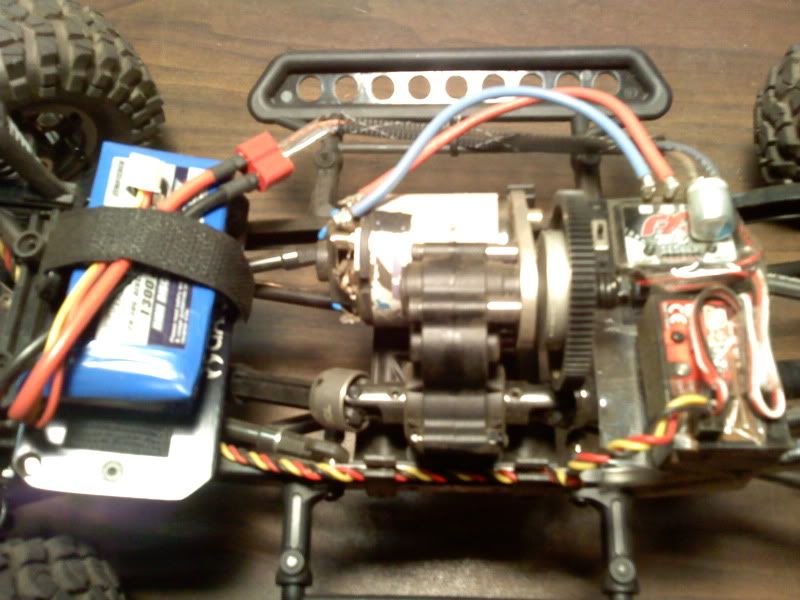 Cleaned up wiring overview: 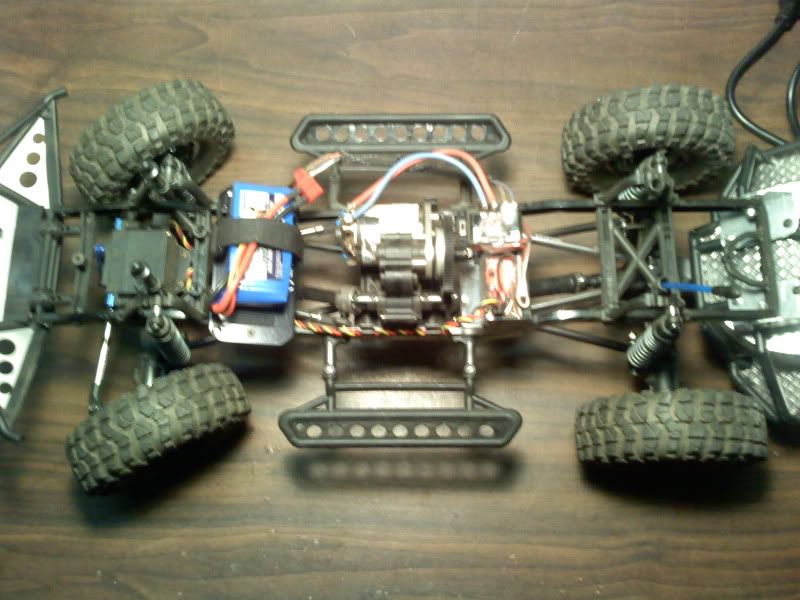 Next....got a couple spare rx too... Little fun at Hillbilly Hideaway, Thanks for the invitation and nice meeting you all! Kinda dark late in the evening under the trees for my camera phone, shoulda turned the flash on.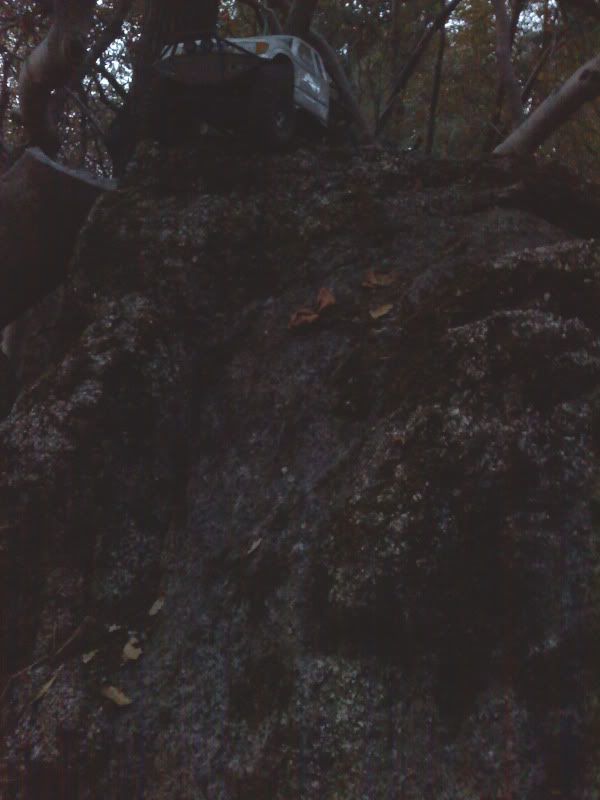 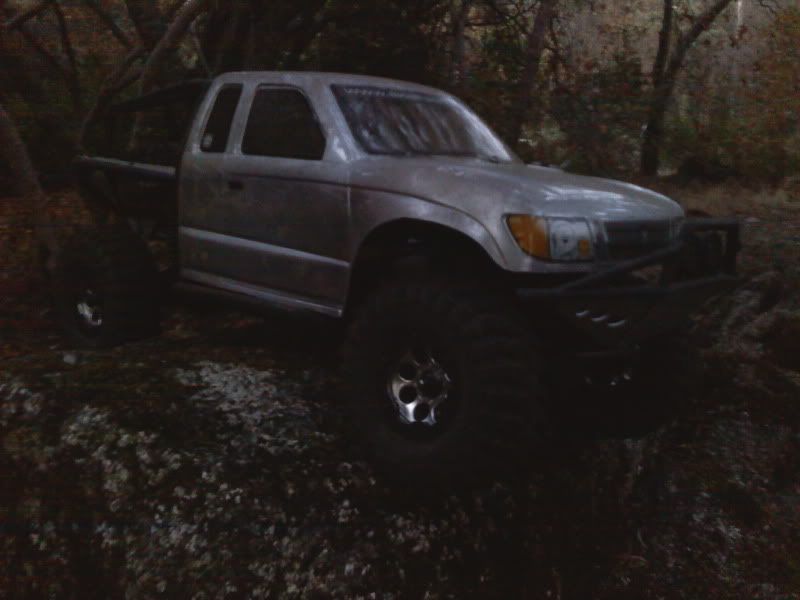 Did a little sumthin late last night too..... Last edited by Natedog; 11-06-2019 at 05:42 PM. | ||
|
| |
|
07-17-2011, 12:46 PM
| #18 |
| I wanna be Dave Join Date: Jan 2006 Location: Corruptifornia
Posts: 12,107
|
I debated on this for awhile because once it's cut you can't go back. So last night I used my cutters and a good sharp X-Acto knife to clean up the front of the truck. Front bumper trimmed. 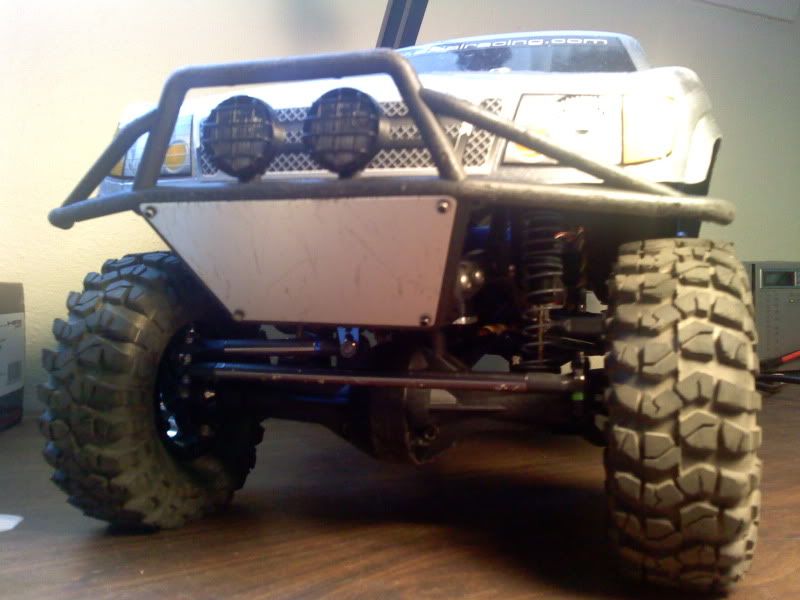 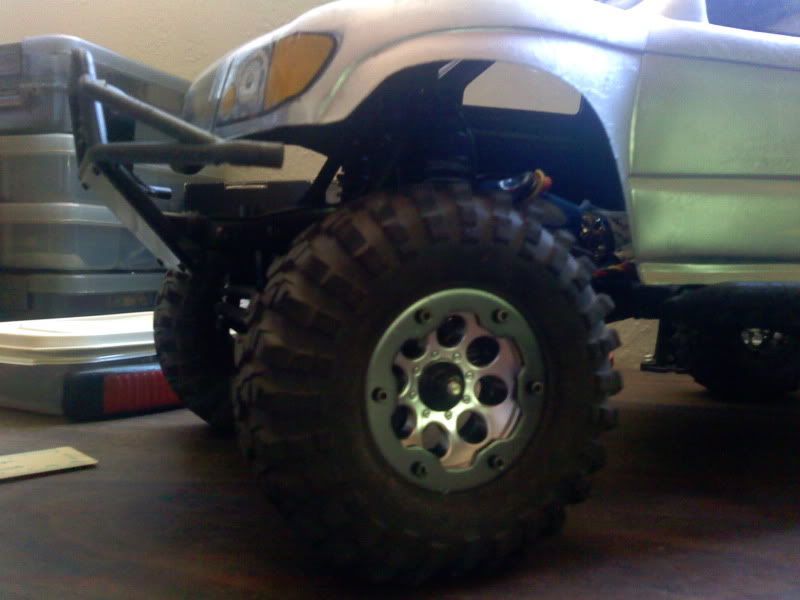 I like it, looks better now and moves some of the flex to the ends of the bumper instead of just at the mount. The plastic should last longer before it breaks. My body (cab) is getting kinda stretched out where the cage bolts to it from some hard falls and rolls down the rocks. Those little plastic washers and o-rings stock setup are not enough. I need to reinforce this on the inside, thinkin a second sheet of lexan or a piece of styrene sheet, what do you all think? Last edited by Natedog; 07-17-2011 at 12:50 PM. |
|
| |
|
07-17-2011, 03:37 PM
| #19 |
| Pebble Pounder Join Date: Jun 2011 Location: CA
Posts: 121
|
Might use some lexan and a heat gun to preform something for the inside of the upper cab corners. I saw a post where they used a piece of lexan and shoe glue to beef up the back of the cab (lower). |
|
| |
|
07-17-2011, 04:07 PM
| #20 |
| Pebble Pounder Join Date: May 2010 Location: Ringgold GA USA
Posts: 141
|
I used some lexan welding lenses tey were just the right size and very tuff.
|
|
| |
|
| Thread Tools | |
| Display Modes | |
| |


 Linear Mode


