| |
| |||||||
 |
| | LinkBack | Thread Tools | Display Modes |
 08-21-2012, 07:40 PM
| #1 |
| Quarry Creeper Join Date: Dec 2011 Location: Colfax, NC
Posts: 396
|
This is officially my first ever build thread. I've been on here reading and studying a lot. I'm open to any input you might have. Dual Dingos, Will be using FUTABA 4PL RADIO back up is 3PL I would also like to say, KC HOBBY, Archdale North Carolina is a great store. They beat just about everybody's online prices. They are very friendly and helpful. *** UPDATE *** I've decided to make grill and lamp bezels for both rigs. Bought a bunch of 5mm LED's to install. Also decided to make wheel/fender wells out of styrene for both rigs. First build 1.9 flat irons Axial 1.9 chrome beadlocks 35t RC4WD motor Tekin fxr Hitec servo 5995 robot servo Castle BEC set at 6v Robinson racing gears in tranny Axial alum CHUBS and KNUCKLES Axial driveshaft rings Cotter key shackles (found here forgot whose idea) Stick batteries 1800 nihms 2 ea Second build 1.9 flat irons Axial 1.9 black beadlocks 35t RC4WD motor Tekin fxr Hitec servo 5645 Castle BEC set at 6v Robinson racing gears in tranny Axial driveshaft rings Cotter key shackles (found here forgot whose idea) Stick batteries 1800 nihms 2 ea This build will have wheel wells and fancy wiring Here's first pic to start off the dual build 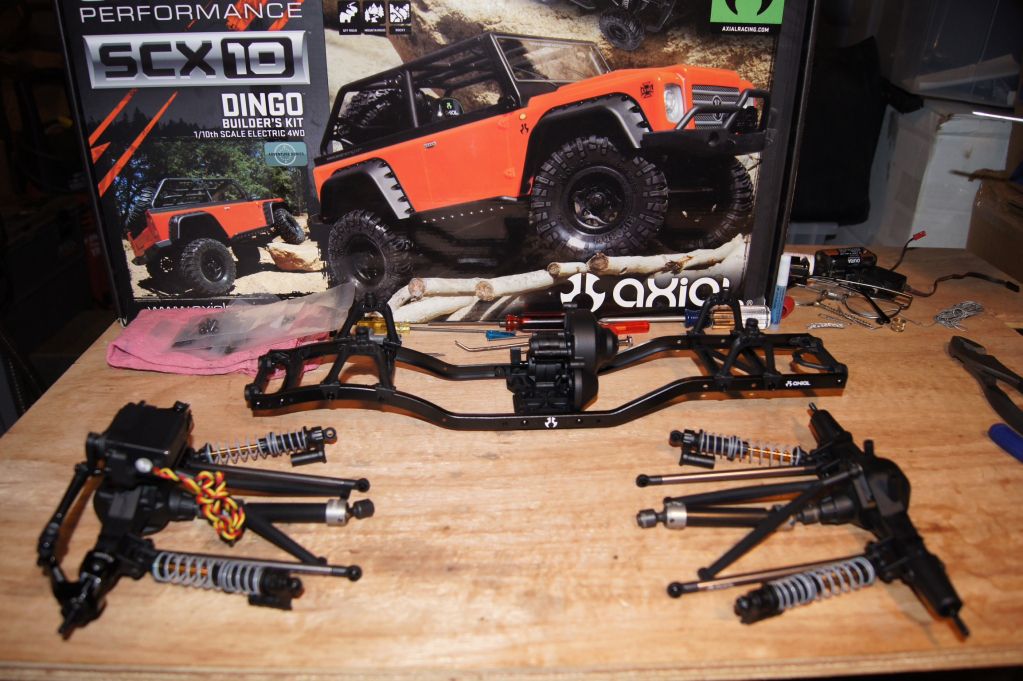 Last edited by juswin24; 01-23-2013 at 09:11 PM. Reason: Update info on wheel wells |

|  |
| Sponsored Links | |
| | |
|
08-21-2012, 07:52 PM
| #2 |
| Quarry Creeper Join Date: Dec 2011 Location: Colfax, NC
Posts: 396
|
Took me two or three evenings to build the axles. I should say, I have arthritis and some thumb pain which slows me down. I first installed Axials servo arm because I didn't want to drill out the alum one that came with the servo. I later found out it was a terrible fit. Screw wouldn't stay tight when testing. Also was not a tight fit. 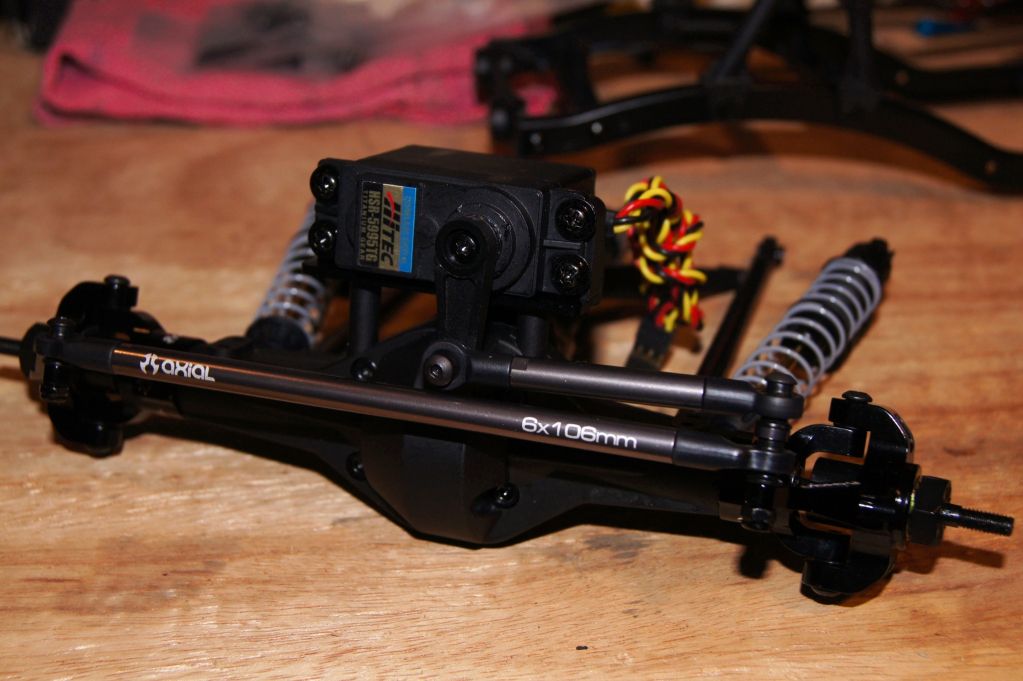 |
|
| |
|
08-21-2012, 08:14 PM
| #3 |
| Quarry Creeper Join Date: Dec 2011 Location: Colfax, NC
Posts: 396
|
Here's the rear axle. I started out with the three link set up. I've installed Axial rings and found that the one near the spur gear cover rubs real bad. I later change to stock rings at the tranny connections. I really don't think they were needed up there. 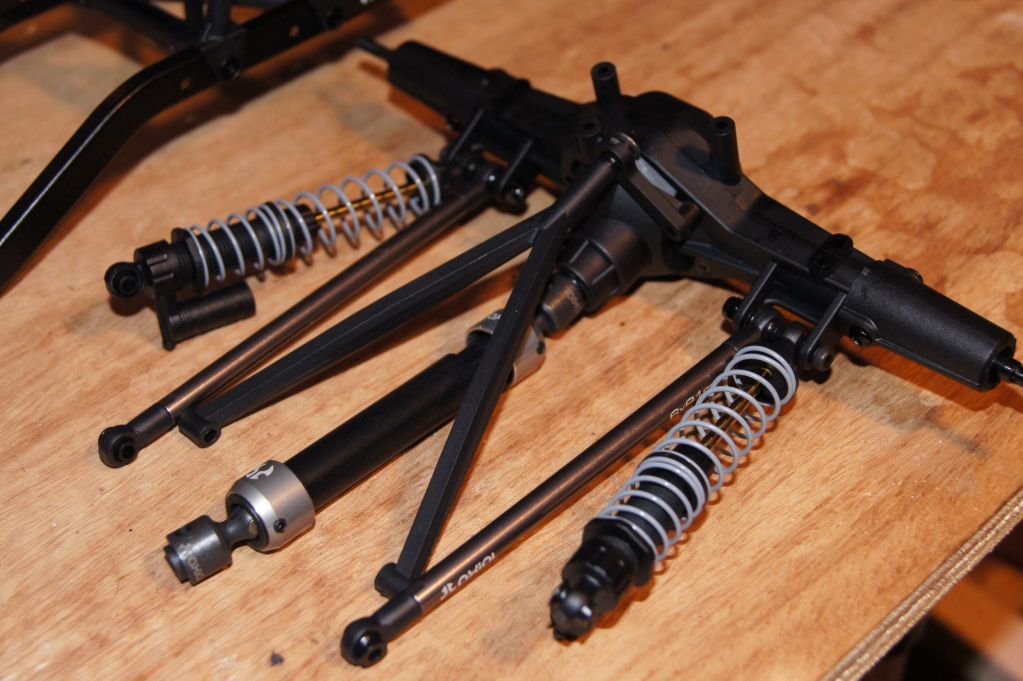 |
|
| |
|
08-21-2012, 08:30 PM
| #4 |
| Quarry Creeper Join Date: Feb 2012 Location: Texas - just outside of Austin
Posts: 276
|
Are you building the two for different purposes or will they be twins?
|
|
| |
|
08-21-2012, 09:57 PM
| #5 |
| Quarry Creeper  Join Date: Jul 2009 Location: Buffalo area
Posts: 400
|
Cool! Glad to see you started a build thread. I am looking forward to watching your progress. OH, and I think it was BubbaEinstein's post were you saw the shackle idea. I just read a post you put up in one of his threads  |
|
| |
|
08-22-2012, 05:05 AM
| #6 | |
| Quarry Creeper Join Date: Dec 2011 Location: Colfax, NC
Posts: 396
| Quote:
Last edited by juswin24; 08-22-2012 at 06:10 PM. | |
|
| |
|
08-22-2012, 05:16 AM
| #7 |
| Quarry Creeper Join Date: Dec 2011 Location: Colfax, NC
Posts: 396
|
Here's a shot os the Aluminum Chubs and knuckles. I found out the hard way that these Axial parts do not come with screws to mount these. I had to order some screws which I got from Tony's screws. He really has good prices. If you run across this I had to order 3 mm x 10 mm metric hex button head. I haven't waterproofed yet. You can see there are two holes on the axle body that needs to be plugged if you stay with the three link set up. I'll be switching to 4 link after running it some. I want to see the differene. I didn't pack the axles, but I did use marine grease. 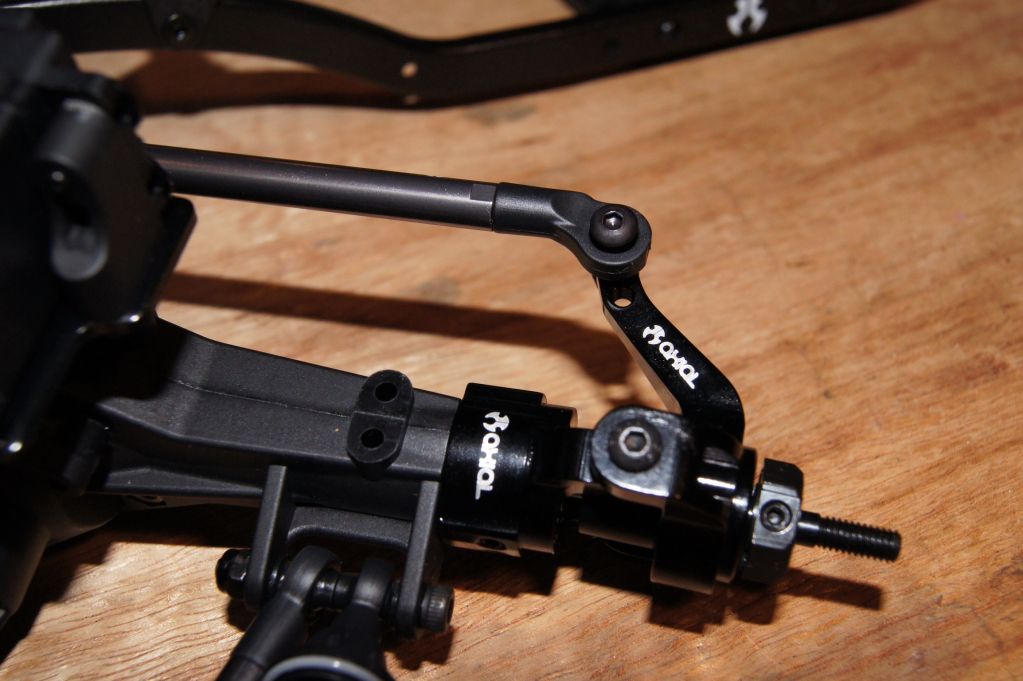 |
|
| |
|
08-22-2012, 05:19 AM
| #8 |
| Quarry Creeper Join Date: Dec 2011 Location: Colfax, NC
Posts: 396
|
I first installed the oversize Axail rings and found the one near tranny is too large and rubs the spur gear cover. 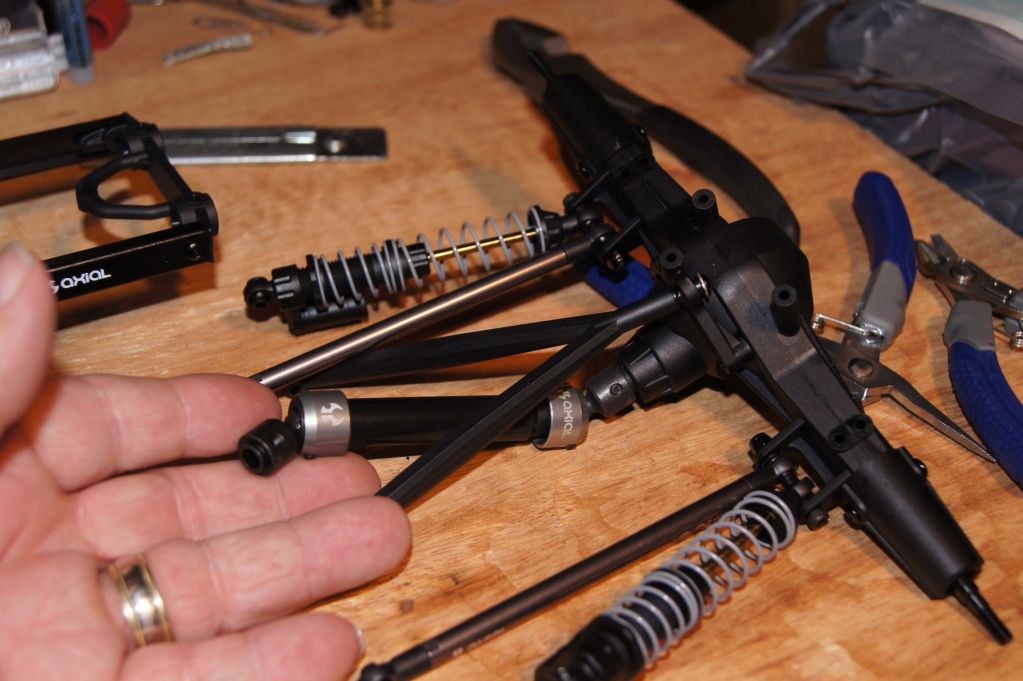 |
|
| |
|
08-22-2012, 05:38 AM
| #9 |
| Quarry Creeper Join Date: Dec 2011 Location: Colfax, NC
Posts: 396
|
Dingo Body mount: I did a lot research on body mounting and I found people didn't like body showing on top of the body in the front. The rear clips where a pain to use. Velcro mounting didn't seem to hold well in roll overs. I've seen rock crawlers where the body mounts are on the side of the body's. My batteries will be the rails. I have new Tamiya hummer that I've been modifying and saw someone on here that mounted the body mounts out back. Got me thinking of how I could do this. This was first attempt. I found the 90 degree mounts on the parts trees. I ran the screws through the bumper posts. I liked the looks but found that they moved to easily so I added wire to keep straight. I've been advised to add strength around the mounts on the body so it doesn't tear. Will be doing. 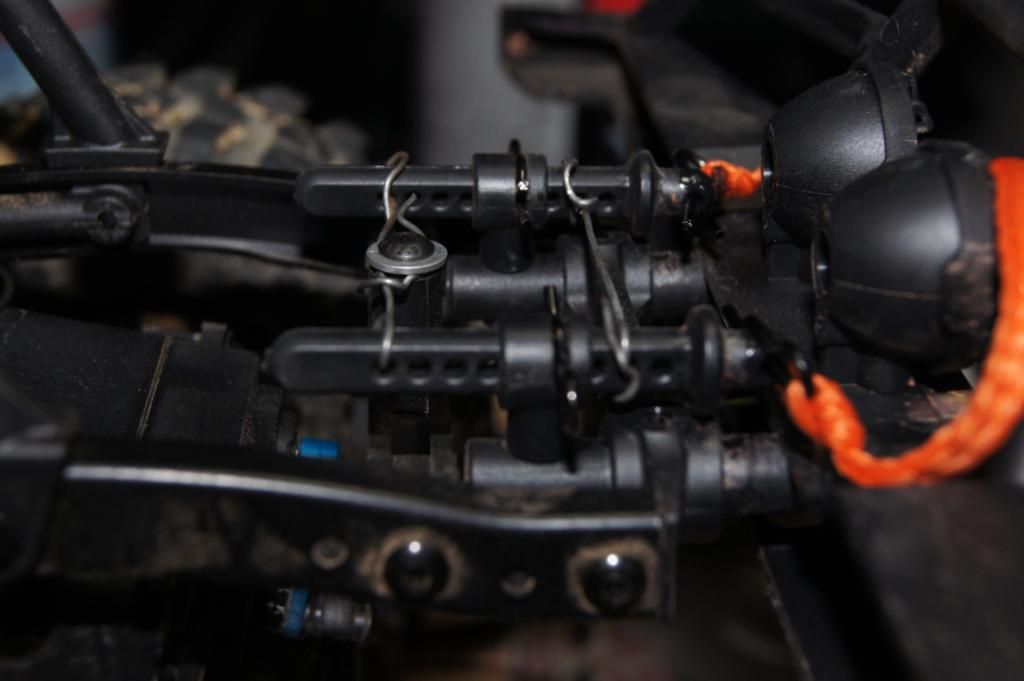 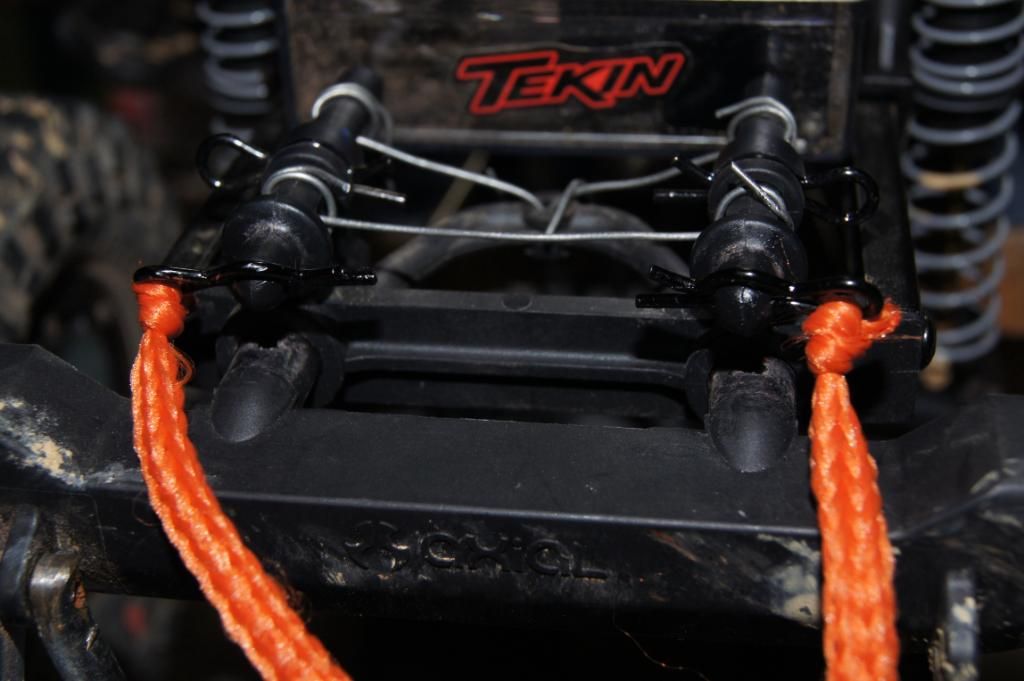 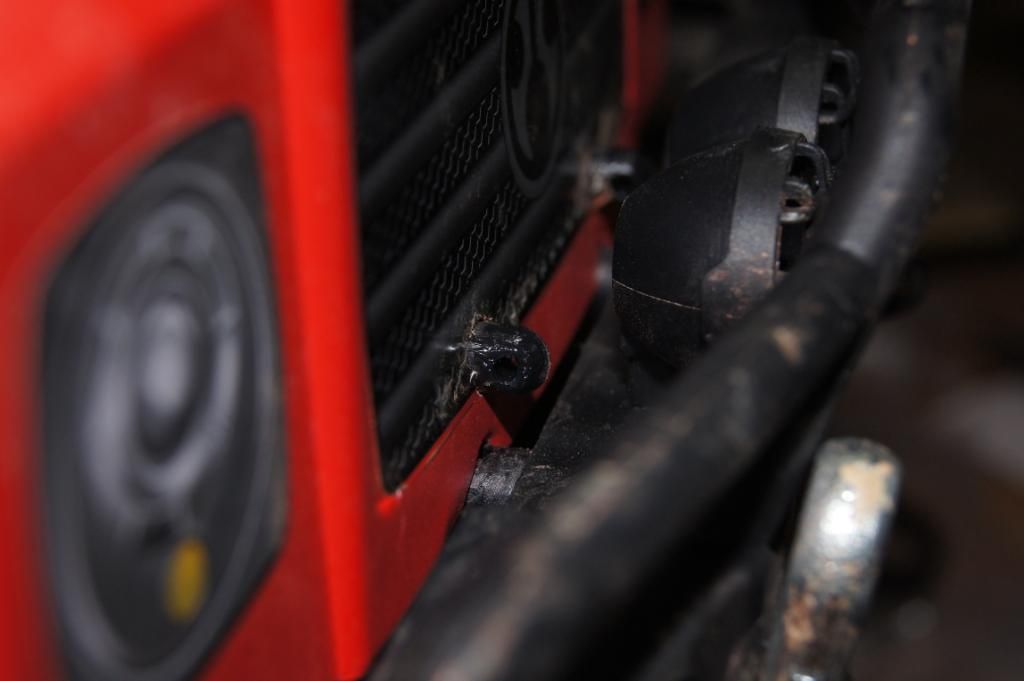 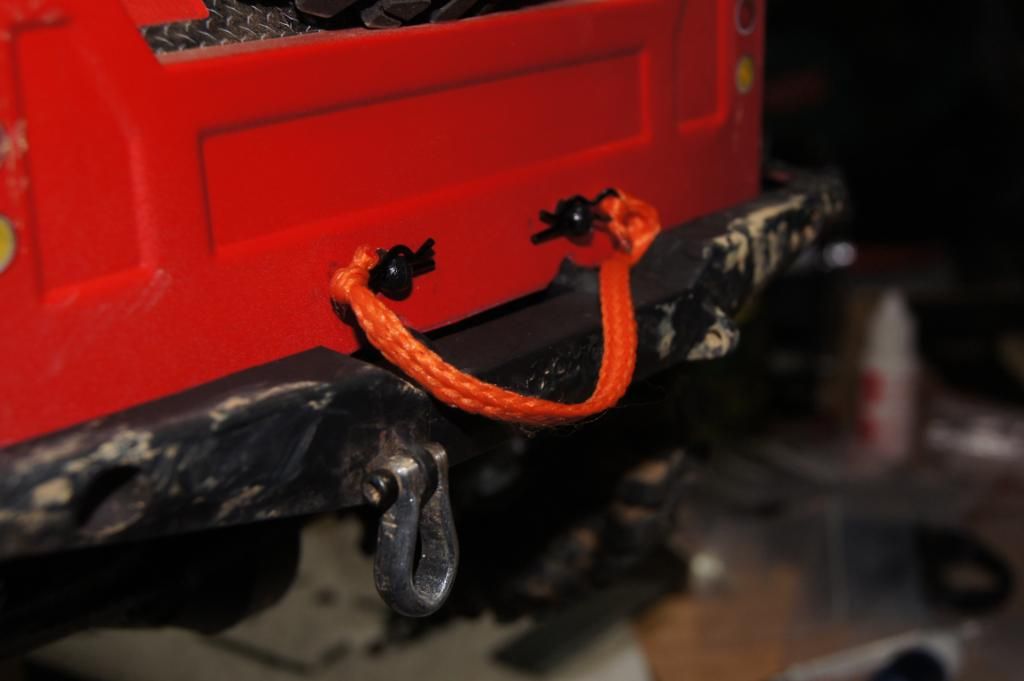 Last edited by juswin24; 11-05-2012 at 07:14 PM. |
|
| |
|
08-22-2012, 06:53 AM
| #10 |
| Newbie Join Date: Jun 2012 Location: Singapore
Posts: 4
|
I like the way you had mount the body..
|
|
| |
|
08-22-2012, 07:18 AM
| #11 | |
| Quarry Creeper Join Date: Dec 2011 Location: Colfax, NC
Posts: 396
| Quote:
Last edited by juswin24; 08-22-2012 at 09:18 AM. | |
|
| |
|
08-22-2012, 10:14 AM
| #12 |
| Rock Stacker Join Date: Jul 2012 Location: Nebraska
Posts: 76
|
Lookin' good so far. I like your detailed pics.
|
|
| |
|
08-22-2012, 05:04 PM
| #13 |
| Quarry Creeper Join Date: Dec 2011 Location: Colfax, NC
Posts: 396
|
This is my second revision on the front body mount. I used some light weight aluminum sheet. This allowed me two use two screws to keep body from moving. It also has the clips vertical which I liked because it's easier to put in or remove. The Sheetmetal works but I didn't have away to put in the proper bend. I don't like the rounded corners. I'm going to see if I can make them out of styrene. 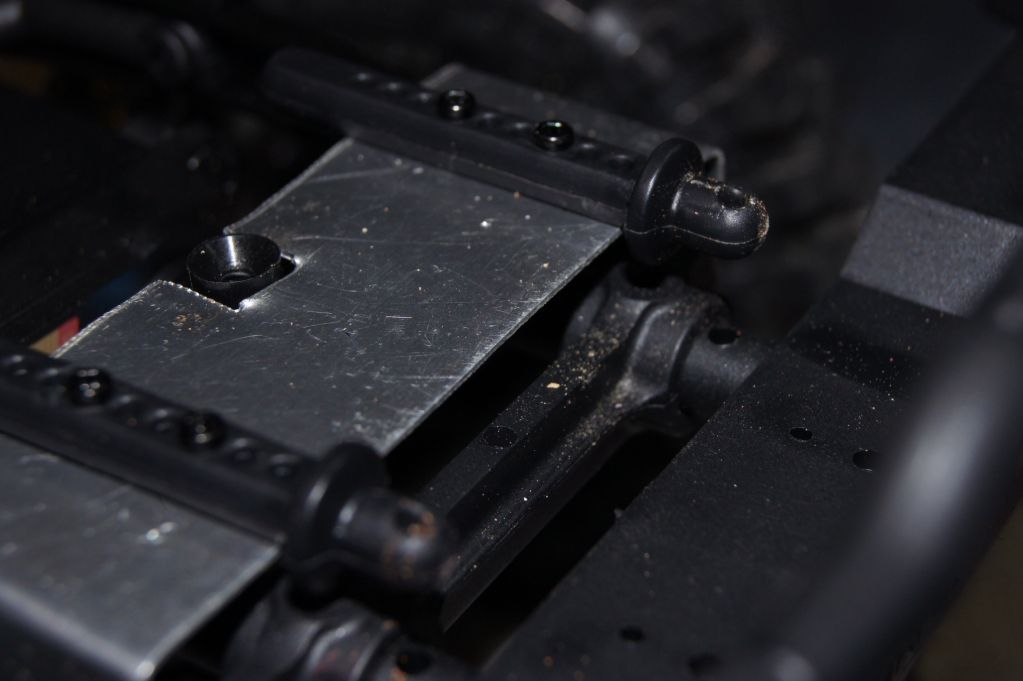 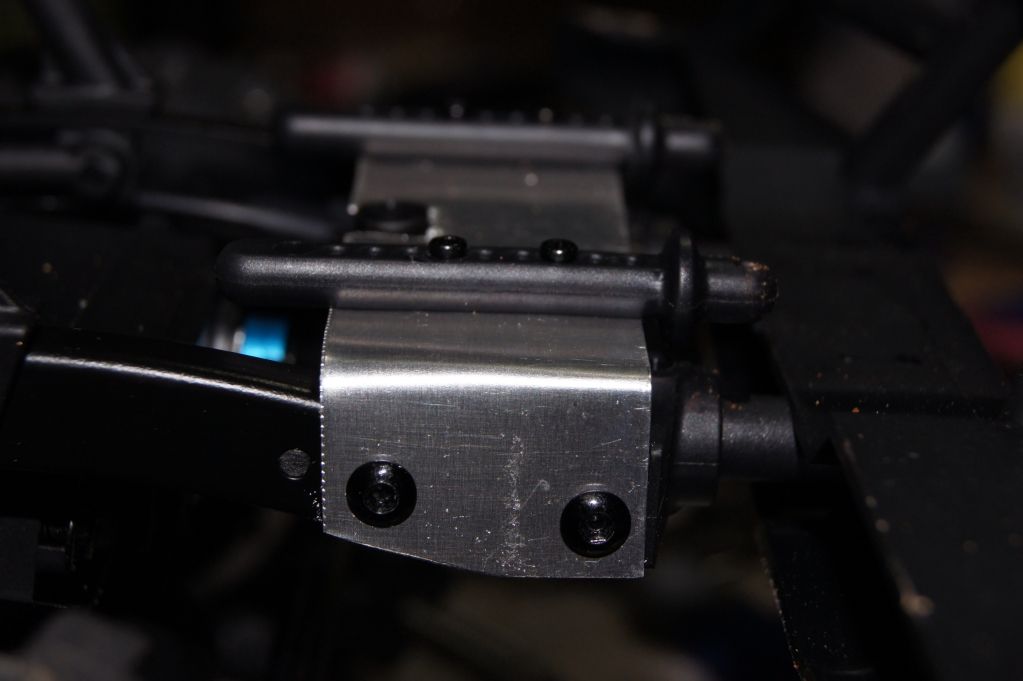 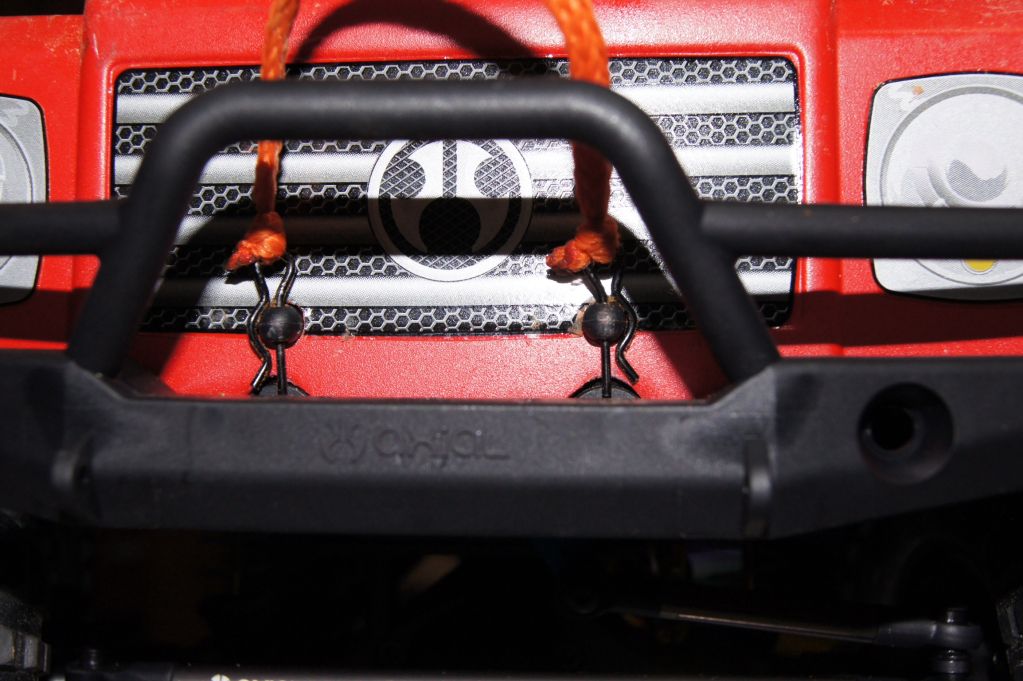 Last edited by juswin24; 08-23-2012 at 06:00 PM. |
|
| |
|
08-22-2012, 06:05 PM
| #14 |
| Quarry Creeper Join Date: Dec 2011 Location: Colfax, NC
Posts: 396
|
For both Dingos I've mounted the batteries on the rock rails. I drilled and counter sunk new holes to line up with the rail screws location. I bought extra Axial battery trays to do this. I used the no slip pad for tool chest drawers. I only use one strap with the pad and nothing moves. 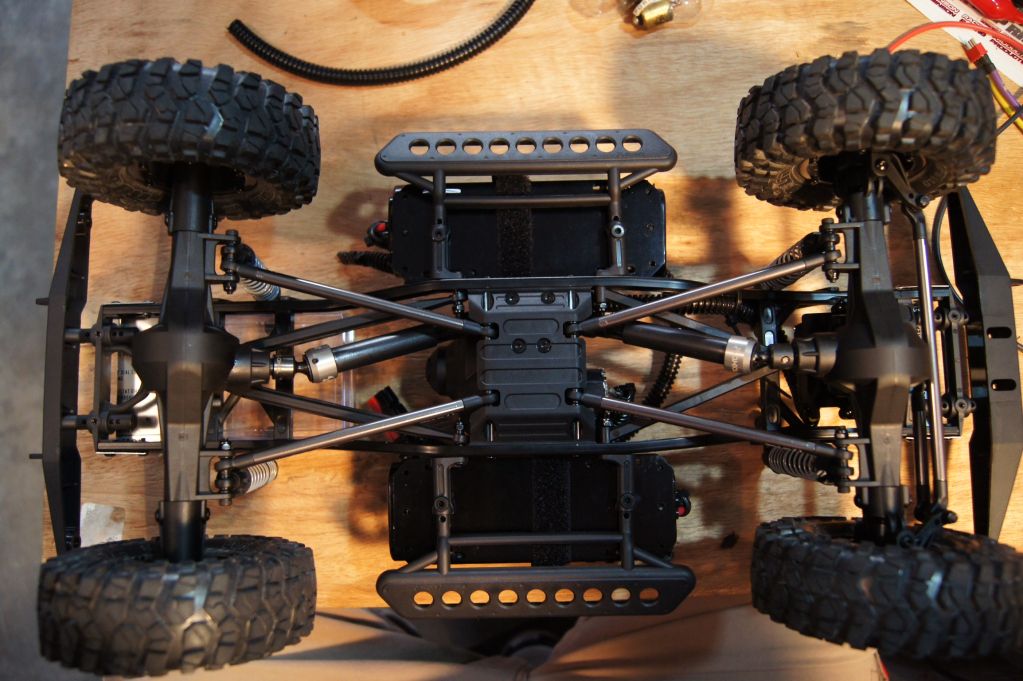 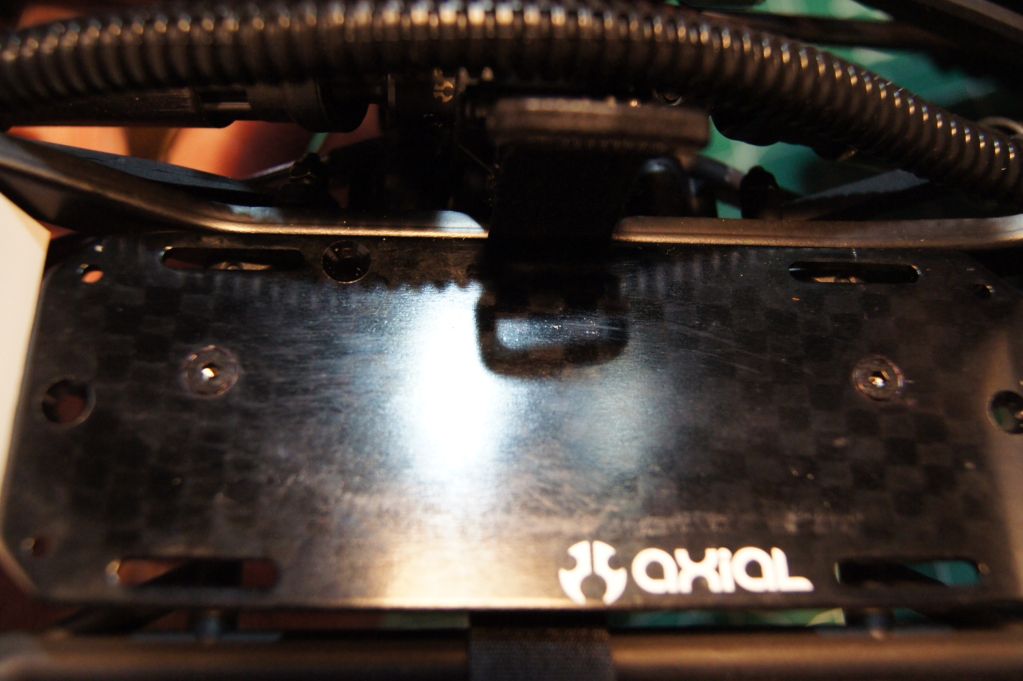  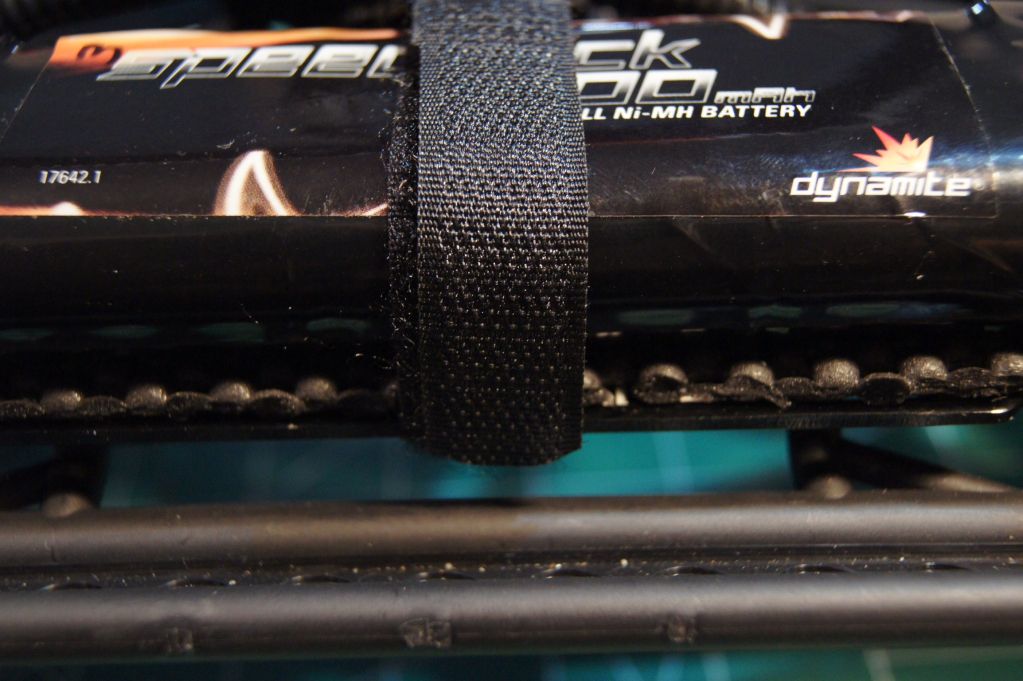 Last edited by juswin24; 08-23-2012 at 05:33 PM. Reason: Added picture battery tray |
|
| |
|
08-22-2012, 06:21 PM
| #15 | |
| Quarry Creeper Join Date: Dec 2011 Location: Colfax, NC
Posts: 396
| Quote:
| |
|
| |
|
08-22-2012, 06:25 PM
| #16 |
| Status...ADDICTED!  Join Date: Jun 2011 Location: Cardboard Box
Posts: 497
|
Gonna have to use that body mount technique in the future...great idea |
|
| |
|
08-23-2012, 05:38 AM
| #17 |
| Newbie Join Date: Jun 2012 Location: Singapore
Posts: 4
|
Very good improvment on the mounting, its now strong to hold the body.. I like it. Thanks for the idea.
|
|
| |
|
08-23-2012, 05:42 AM
| #18 |
| Quarry Creeper Join Date: Dec 2011 Location: Colfax, NC
Posts: 396
|
The electronics are being mounted in the rear between shock towers. I'm using plastic box that futaba receivers came in. Perfect fit and big enough for ESC and receiver. I've added a servo extension cord from receiver to outside of box. Once sealed up I can still remove truck. I want the box to be removable because I have a Tamiya Clod Buster and Hummer that I can move the electronics box to. Since the 4pl and 3pl have model memory it works great and saved me some money for now. The wire was to keep shock towers pinched against the box. I need to make a brace to fit there instead of wire. I found a left over parts tree that will work for this. I'll being making soon and will post. 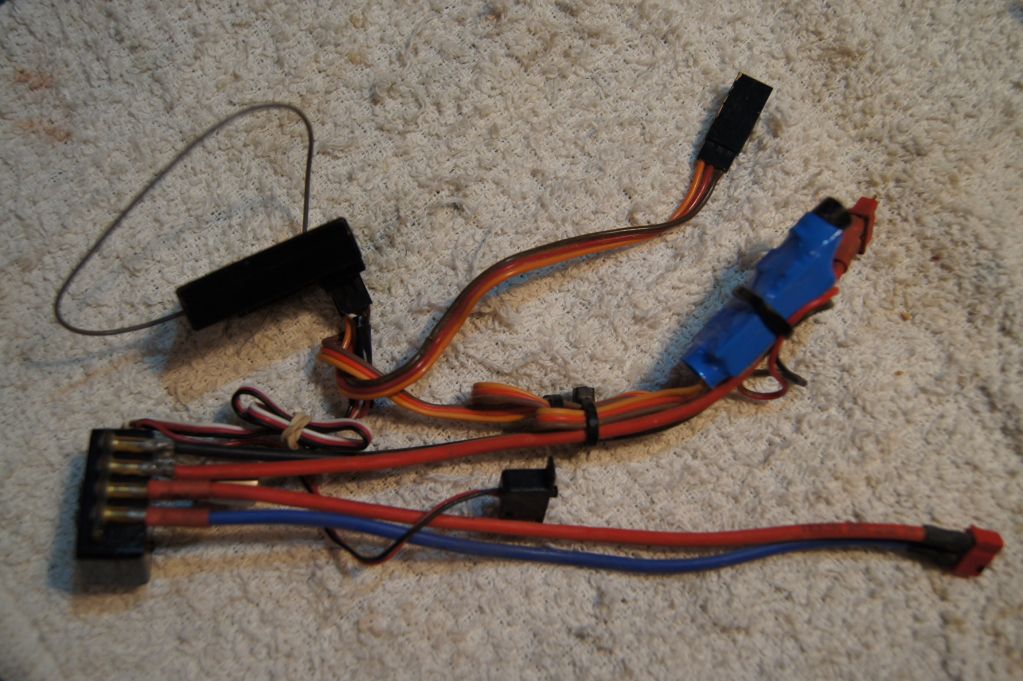 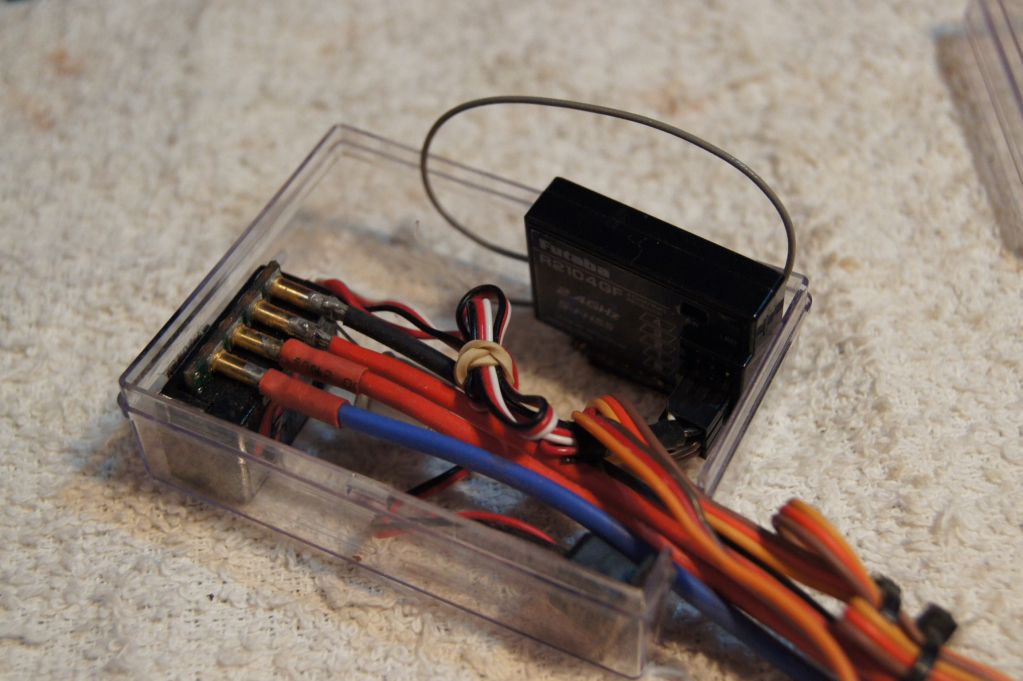 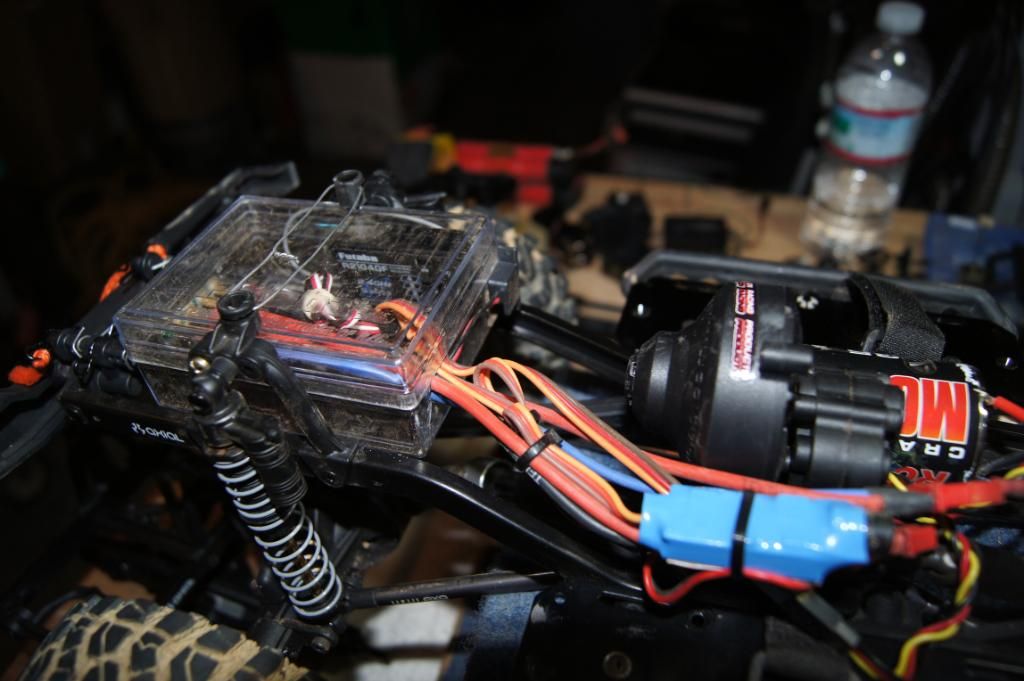 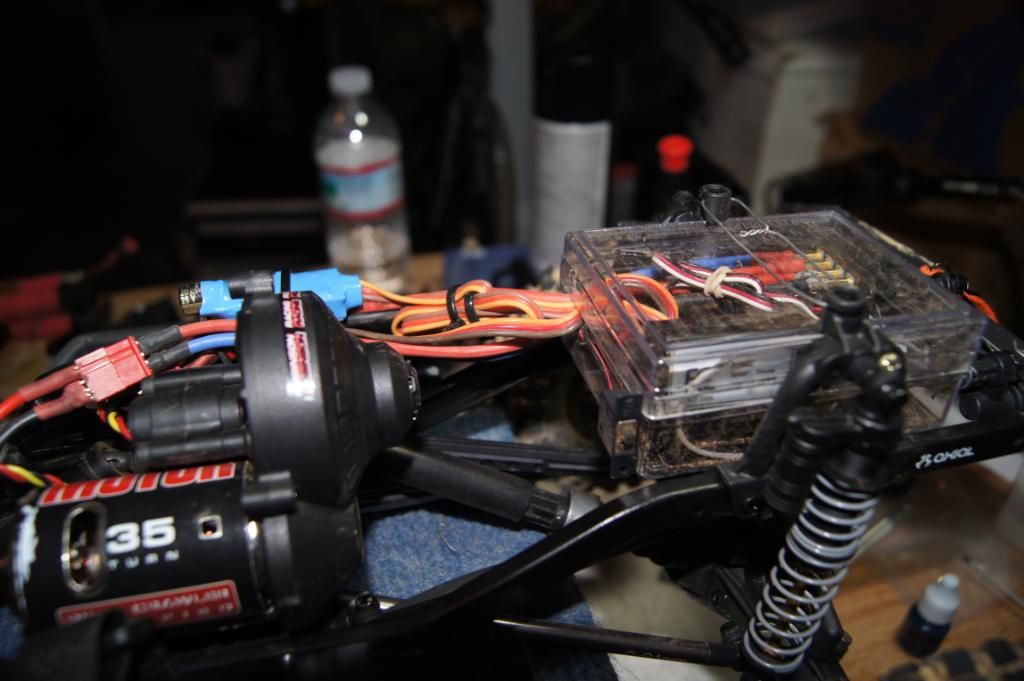 Last edited by juswin24; 08-23-2012 at 05:28 PM. Reason: added pics |
|
| |
|
08-23-2012, 05:46 AM
| #19 |
| Quarry Creeper Join Date: Dec 2011 Location: Colfax, NC
Posts: 396
|
You can see I've been running this Dingo for a couple weeks now. That's why the NC red dirt. I found that I don't ever use the switch on the ESC. No need to cut off, but I will put it in the box. I'm thinking of painting the bottom half of the box black and leaving the lid clear.
|
|
| |
|
08-23-2012, 08:29 AM
| #20 |
| Rock Stacker Join Date: Jul 2012 Location: Nebraska
Posts: 76
|
How come there are no pictures of the whole rig with the body on?
|
|
| |
|
 LinkBacks (?)
LinkBack to this Thread: http://www.rccrawler.com/forum/axial-scx-10/398956-dual-dingo-build-thread-my-first-build-thread.html | ||||
| Posted By | For | Type | Date | |
| I don't want to grow-up, 'caus if I did... DINGO Build - RC Rock Crawlers & Scalers @ URC Forums | This thread | Refback | 03-06-2013 09:58 AM | |
|
Dual Dingo build thread-My first build thread - Similar Threads | ||||
| Thread | Thread Starter | Forum | Replies | Last Post |
| Dual dually project thread... | truckerbuddy2 | 1.9 Scale Rigs | 20 | 07-10-2013 11:38 AM |
| Axial scx10 dingos in the sun | crazycrawler94 | Videos! | 3 | 04-10-2012 02:03 AM |
| Axial scx10 dingos in the sun | crazycrawler94 | Scale Videos! | 0 | 04-01-2012 03:26 PM |
| Axial Dingos with GOPRO Hero2 | crazycrawler94 | Scale Videos! | 4 | 01-28-2012 09:40 PM |
| Axial dingos having some fun! | crazycrawler94 | Videos! | 9 | 01-18-2012 12:41 PM |
| |


 Linear Mode


