| |
 03-05-2013, 05:12 AM
| #1 |
| Quarry Creeper Join Date: Apr 2012 Location: Lansford
Posts: 432
|
I got bored with my Jeep Comanche SCX-10 so I decided to make it a little more capable and an fj40. LOL. I ordered up some RC4wd 1.55 Baja Claw TTC tires. The mud slingers are a bit narrow for my liking on this body and their performance was not that great. I like the Iroks, but I already have them on my other fj and wanted this different. So I swapped out the honcho links for the extra links that came with it, maybe for the dingo? This is the Pro-Line Bushwacker body and it's a little longer than the Tamiya so the dingo links worked great. Wheelbase is about 1 - 1.5" longer than the other with the Tamiya body. I also made a .5" lift for the suspension. This should allow the bigger claws to not rub. I still have some trimming to do on the body too. I modified the battery location a little. It is lower and I turned it around so it's more centered. This gives me room for the body to be properly placed and should help with crawling a bit. This has a Traxxas Titan 550 rewound to 35T running on 3s. I am using a BEC with the stock ESC. I will need to braze up some aluminum sliders and bumpers. I'm going to try to keep this one relatively light and won't have a spare, roof carrier, or roof lights. I do plan to do headlights, taillights, and a couple offroad lights. I'm thinking maybe 2 on the bumper and 2 by the windshield pillars. Haven't decided on a color yet either, but I still have some work before I spray it anyways. Thinking maybe yellow, orange, or a dark silver like my Comanche. I will also make some inner fenders and quick interior for this and the other fj too. Help make it look a little better. I am also thinking mount the steering servo to the frame too. It's very visible on this body that has no front overhang.      Last edited by makaveliks; 05-04-2014 at 09:12 PM. |

|  |
| Sponsored Links | |
| | |
|
03-05-2013, 05:21 AM
| #2 |
| Rock Stacker Join Date: Jan 2013 Location: Ohio
Posts: 85
|
Looks great! I love the Bushwacker body's. Unfortunately, they were discontinued long before I got started in the hobby. I look forward to watching this project.
|
|
| |
|
03-05-2013, 05:59 AM
| #3 |
| Quarry Creeper Join Date: Apr 2012 Location: Lansford
Posts: 432
|
Thanks! Ya, I lucked out and found one in a for sale section of scale4x4 a few months back and bought it just because I knew I'd never one for sale again! LOL. There still out there, just incredibly hard to find.
|
|
| |
|
03-05-2013, 06:34 AM
| #4 |
| Rock Stacker Join Date: Jan 2013 Location: Ohio
Posts: 85
|
Yeah, I've seen them on eBay too. For the time being I'll just be jealous.
|
|
| |
|
03-11-2013, 06:17 AM
| #5 |
| Quarry Creeper Join Date: Apr 2012 Location: Lansford
Posts: 432
|
Not much progress, have only had a couple hours to mess with this. I got the body trimmed, the M/T Claws got mounted up, mounted up a Tamiya FJ40 grill using headlight lenses cut out of a bronco body, and started painting the body. I got the black painted, now just need to do the main color and backing. I'm thinking I'll mix up some flourescent yellow and pearlized green and see what I can come up with for a color. I'll back that with white to keep it sorta bright, and then black to make it opaque and keep light from shining through. This first bit I did by hand, now I'll need to mask the windows. The grill will be black, along with the bumpers I plan on making.     |
|
| |
|
03-11-2013, 03:18 PM
| #6 |
| Quarry Creeper Join Date: Apr 2012 Location: Lansford
Posts: 432
|
I could only sleep a few hours today before work... I think I was too excited to get some color on this! I mixed some Createx Pearlized Green, Flourescent Yellow, and Pearlized Silver to get a green that I liked. After spraying it was brighter than I expected and thought it would look with black behind it. It does! I also painted the grill, added some grills for the headlights, cut up the SCX10 bumper and chopped the front of the chassis off and redrilled bumper holes further back. I like this bumper on here now that it's cut up and shortened. I'll still need to make brackets to mount lights on the windshield pillars, sliders, rear bumper, fender wells, and whatever I decide to do for the interior. I think it's looking pretty good now!      Last edited by makaveliks; 03-11-2013 at 03:23 PM. |
|
| |
|
03-16-2013, 05:47 AM
| #7 |
| Quarry Creeper Join Date: Apr 2012 Location: Lansford
Posts: 432
|
Today I finally had another day off! And I have this weekend off! I 'm hoping to get a bunch done. Tonight I took a little time to watch some TV and make some small parts. I made some little brackets to mount the windshield lights and bolted them up. The light buckets came in the packaging with the Honcho. Now with them bolted on I can remove to add LED's later. I also took the snorkel off the brown FJ to make one for this. They are different though so a copy of the brown FJ's snorkel would not fit. So I used some clay and made an "extension" and then made a mold of this and poured a new one! This Alumalite from Hobby Lobby is very handy to have around! After that I put the original modified Hilux snorkel back on the brown FJ.    |
|
| |
|
03-16-2013, 08:56 AM
| #8 |
| Quarry Creeper Join Date: Apr 2012 Location: Lansford
Posts: 432
|
I had some more time before my day got started so I made a new cross member to mount my steering servo on the frame and made up some links using traxxas stuff I had lying around. Now it looks much better and next time I get a chance I can braze up my nice stinger bumper. I no longer need that big skidplate to hide the servo!     |
|
| |
|
03-18-2013, 12:16 AM
| #9 |
| Quarry Creeper Join Date: Apr 2012 Location: Lansford
Posts: 432
|
Today I brazed up my front stinger bumper. Nice and narrow and I didn't want a pointy one so I left a straight in the nose. I made the top long and wide enough to fit a winch. I just need someplace to get some in stock! I'm HOPING to get a Bulldog 9300XT wireless black winch, but there out of stock everywhere! I also bent up some high clearance links to replace the plastic links. I used more random Traxxas parts for this. I clocked the axles a little with my new links so that the driveshafts are still sort of protected. Now if you look from the side everything is tucked up nicely. Last I put some screen in the grill. Still got a bunch to do, but it'll have to wait another day.    |
|
| |
|
03-18-2013, 05:43 AM
| #10 |
| Rock Stacker Join Date: Jan 2013 Location: Ohio
Posts: 85
|
I really like how this is turning out!
|
|
| |
|
03-21-2013, 04:23 AM
| #11 |
| Quarry Creeper Join Date: Apr 2012 Location: Lansford
Posts: 432
|
I can't seem to stay focused on one project! I decided now that I have the green FJ40, I didn't like this one as much. So I decided to make it different. It is now undergoing the conversion process to become an FJ45. I already cut the body and shrunk it down. I also then stretched the chassis by 3.5 inches using aluminum C channel bolted over the frame rails. The last thing I've done now is to stretch a Junfac shaft. I cut the female side and inserted a solid 1/4" aluminum rod in between the 2 sections. I then drilled a hole in each side where the female shaft overlaps this and hammered a steel pin in to keep the shaft together. Seems to be pretty solid, but I guess only time will tell! Next I need to Re-mount the electronics and make the bed which like my chevy will house the battery. With the longer wheelbase and motor /gearbox so far forward I can now afford to do this and not have the truck flip over backwards all the time! LOL. 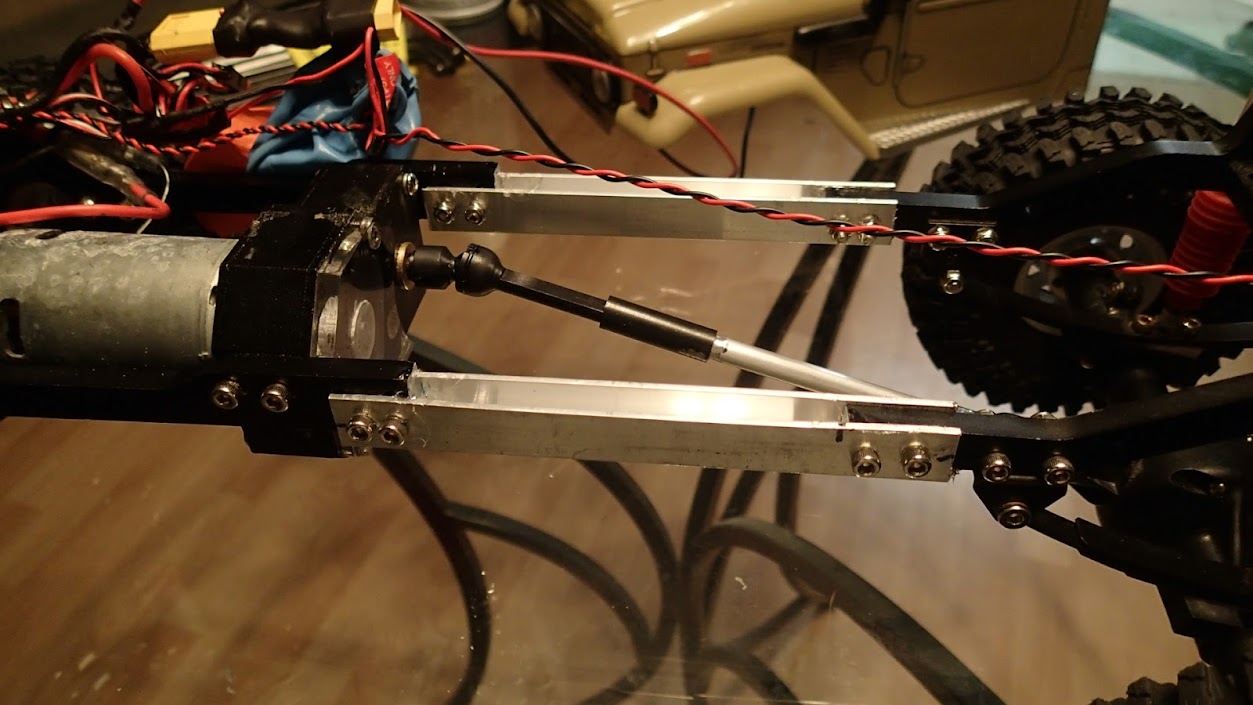    |
|
| |
|
03-21-2013, 07:41 PM
| #12 |
| Quarry Creeper Join Date: Apr 2012 Location: Lansford
Posts: 432
|
So for the bed first thing I wanted to do was make room for the battery to sit nice and low. So I cut out a piece of the original Trailfinder chassis battery mount.   Once I had the room made I began the bed floor and battery holder. Now my 3S 5000MAH lipo can site between the frame rails with the top of the battery level with the top of the chassis.   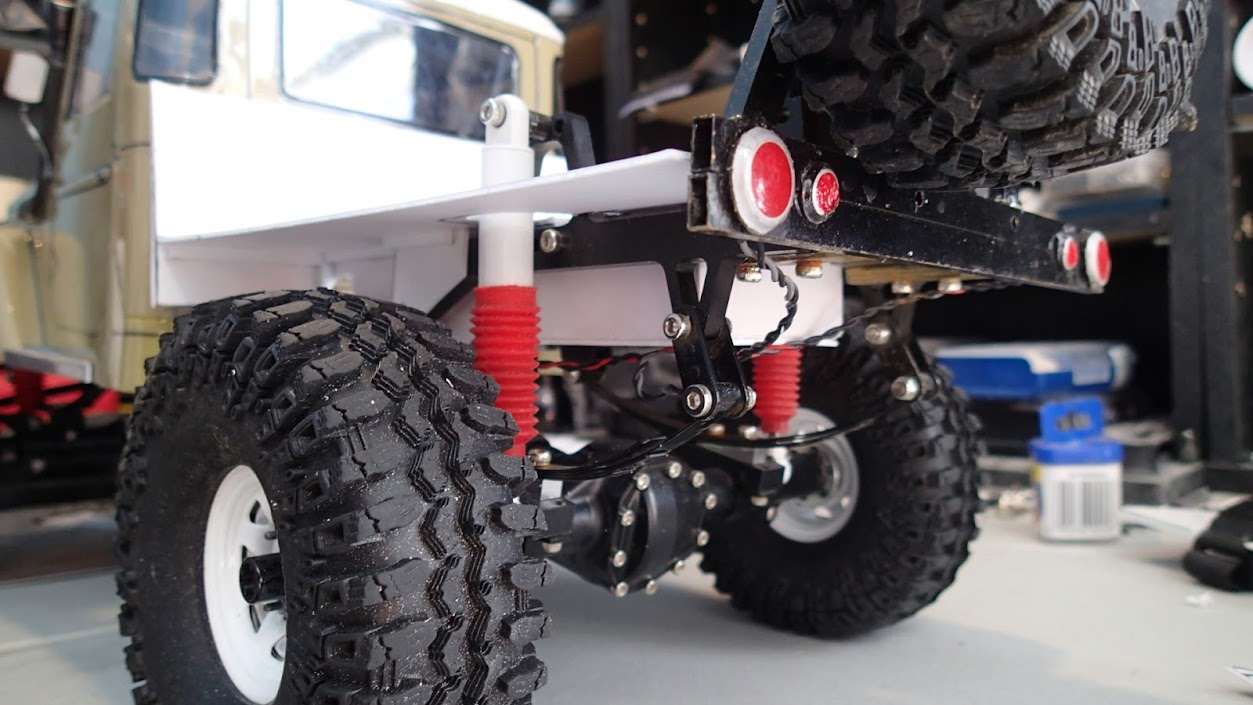 Next since I had the main bed and mounts made I did the bedsides. I build them up using flat styrene and some different size square rod.  Then glued them onto the bed.   I made the tailgate the same way then slapped some paint on and bolted it all together! Next I'll need to do the bed floor/battery cover. I figured it will be easier to put the inner fenders on the removable bed floor/battery cover instead of on the bed and cutting the removable floor to fit around it like I did on the chevy. I'm thinking I'll keep the rear bumper as is with the spare on it. I have seen some real FJ45s in pictures with the spare on the back, plus it'll be different. Why not. 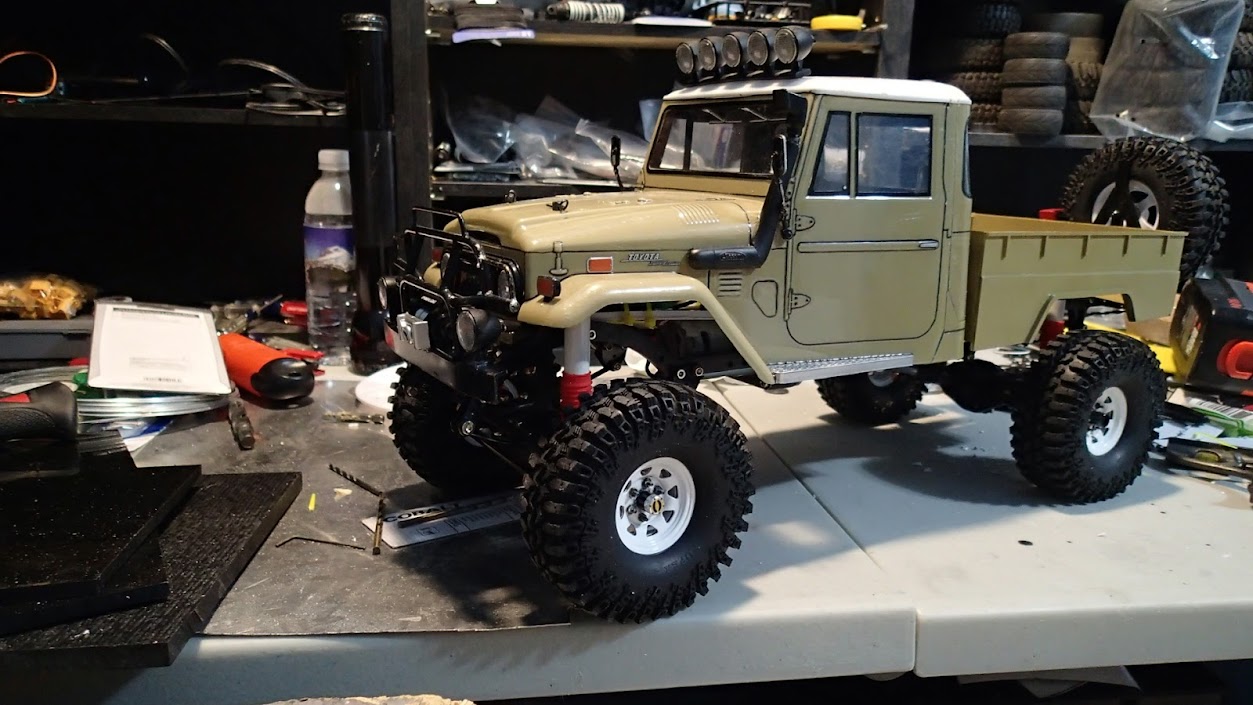    Here's the 2 together. Can't wait for this snow to melt and get them out in the dirt!   You can see this 45 is not much longer than the Bushwacker 40. It looks a lot longer with the bed on the back, but it's not! 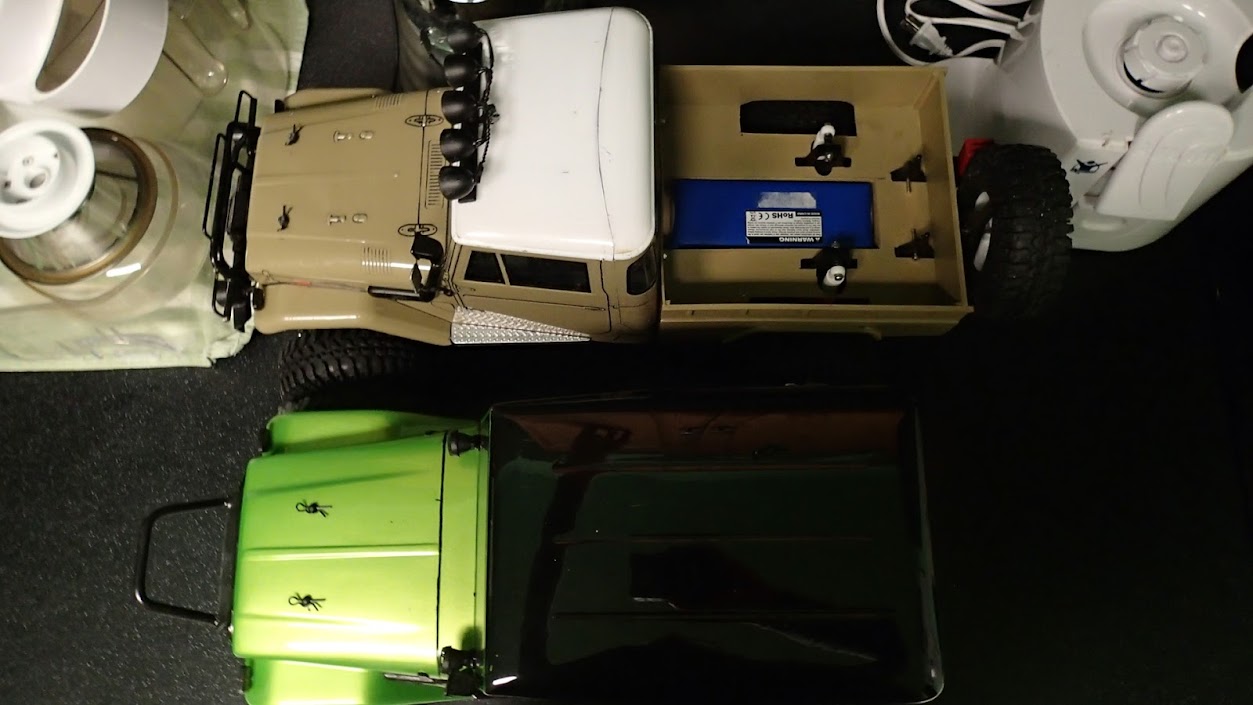  |
|
| |
|
03-21-2013, 11:47 PM
| #13 |
| Pebble Pounder Join Date: Jan 2013 Location: Oklahoma City
Posts: 107
|
That's some amazing work you have there man,details are endless on these rigs,I'm new to scale rc crawlers but this,this is somethin different for sure.Great work man!! I'll be checking for more updates.
|
|
| |
|
03-22-2013, 12:49 AM
| #14 |
| Rock Crawler Join Date: Feb 2013 Location: Casper
Posts: 505
|
Great build. Where can i get the styrene at? Also is it easy to work with?, cut? glue or melt it together. I see more and more ppl custom making there own stuff with this styrene. J. |
|
| |
|
03-22-2013, 05:50 AM
| #15 |
| Quarry Creeper Join Date: Apr 2012 Location: Lansford
Posts: 432
|
I get my styrene at US Plastic. They sell it in 4 x 8 sheets and I usually get a sheet of .060" for 20$. Then the square rod and other shapes Evergreen makes. I get that at my LHS whenever they have something I like in stock. That specialty stuff is more expensive though. I cut it with scissors, snips, exacto, or dremil. Whichever I feel like doing for a specific cut... LOL. I use Plastruct Bondene to glue it together. It also bonds to ABS with the Bondene. I order that at Tower hobbies. It's a chemical that essentially melts the 2 pieces together. It's really thin and you just brush it on. Styrene also sands very easy, and with the help of a heat gun or lighter you can bend it and it will hold the shape if you heated it enough.
|
|
| |
|
03-25-2013, 07:07 PM
| #16 |
| Quarry Creeper Join Date: Apr 2012 Location: Lansford
Posts: 432
|
Today I got a couple things done. I finished up the bed interior, and brazed up an aluminum front bumper/grill guard. The old bumper was the plastic one that came with the CC01 and I had a brass brush guard on it. The brass kept breaking and needed work all the time, so I wanted a stronger one that won't break and can be used for a working winch. The base is bent up from .070 aluminum and brazed to an aluminum C channel for the bumper. Then I used 1/4 solid rod for the brush guard and some square 1/4 rod for the 2 front supports. This one looks better and is solid. I'm not sure if an RC4WD winch will fit on it. I made the base big enough, but I have to check overall measurements. I think the motor will hit the brush guard on the side. I found a chinese one on E-bay that looks narrower I might try out. I got enough done one this for now... Think I'm gonna move over to a different project for a while before I finish this.  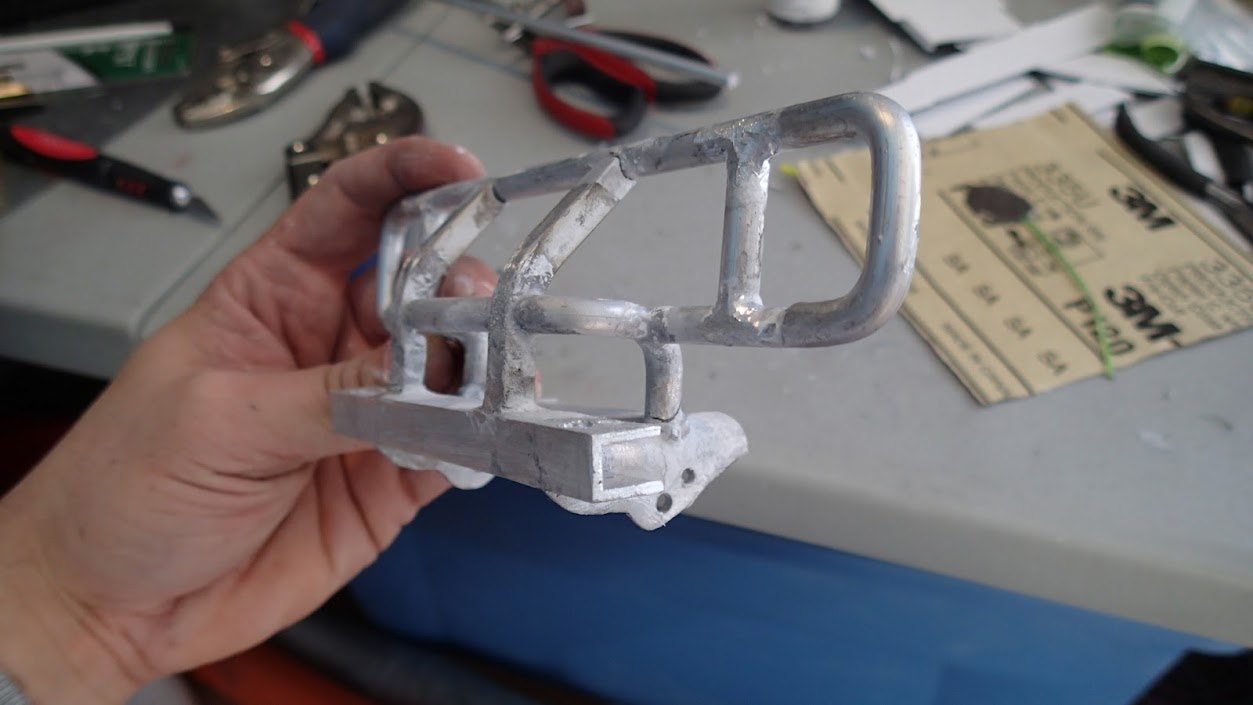  Here's a comparison between new and old    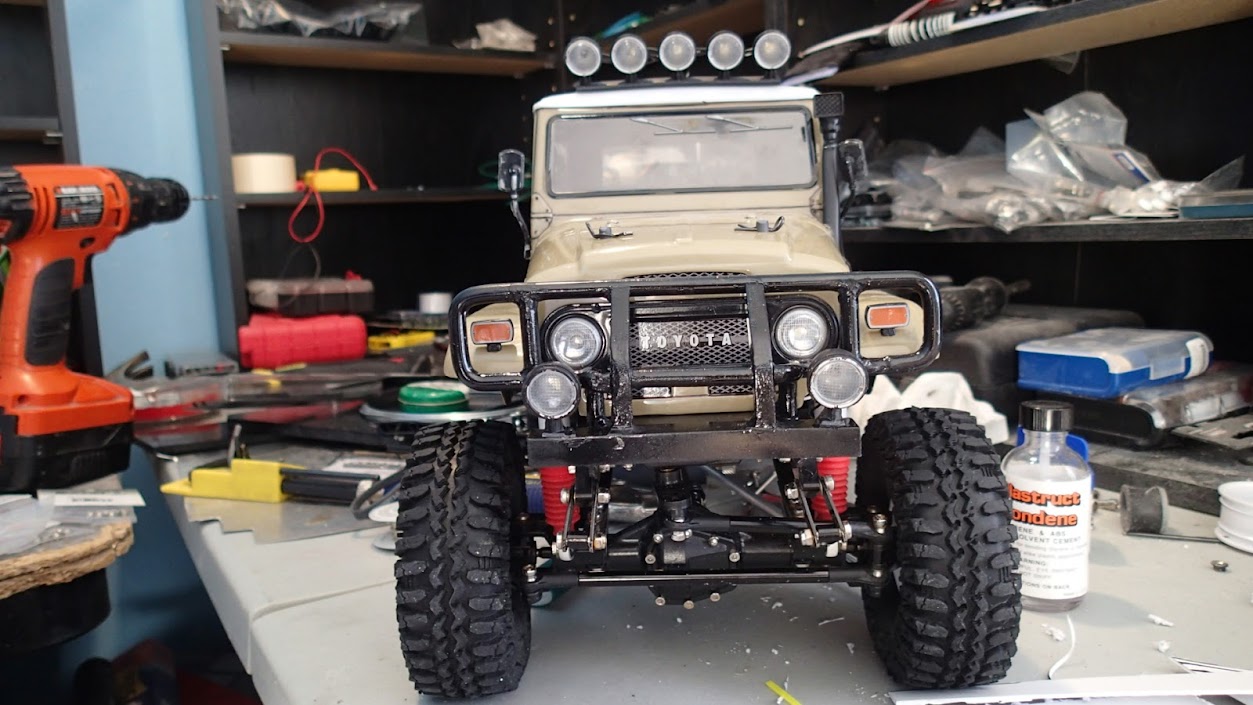   |
|
| |
|
03-26-2013, 02:24 AM
| #17 |
| Quarry Creeper Join Date: Apr 2012 Location: Lansford
Posts: 432
|
After doing a little on the FJ45, I felt like getting this up to speed. I have my rear bumper made now. My RC4WD tow shackles came in so I wanted to get them mounted. I used aluminum U-channel and cut it down into L's and then bolted them on the bumper as T's. LOL. I put one centered on the front bumper and one on each end of the rear bumper. I also did my wiring for the lights. My back bronco lights are glued in and working and the front lights work now too. I hate wiring. Last thing I did I did not take pictures of. I made an aluminum battery tray to hold my battery in the back. This lets it sit between the frame rails for lower COG. I left the original battery tray and my ESC and BEC are velcro'ed down to the aft strap and then when I get my winch it's tiny battery and rx/controller will be velcro'ed to the front.  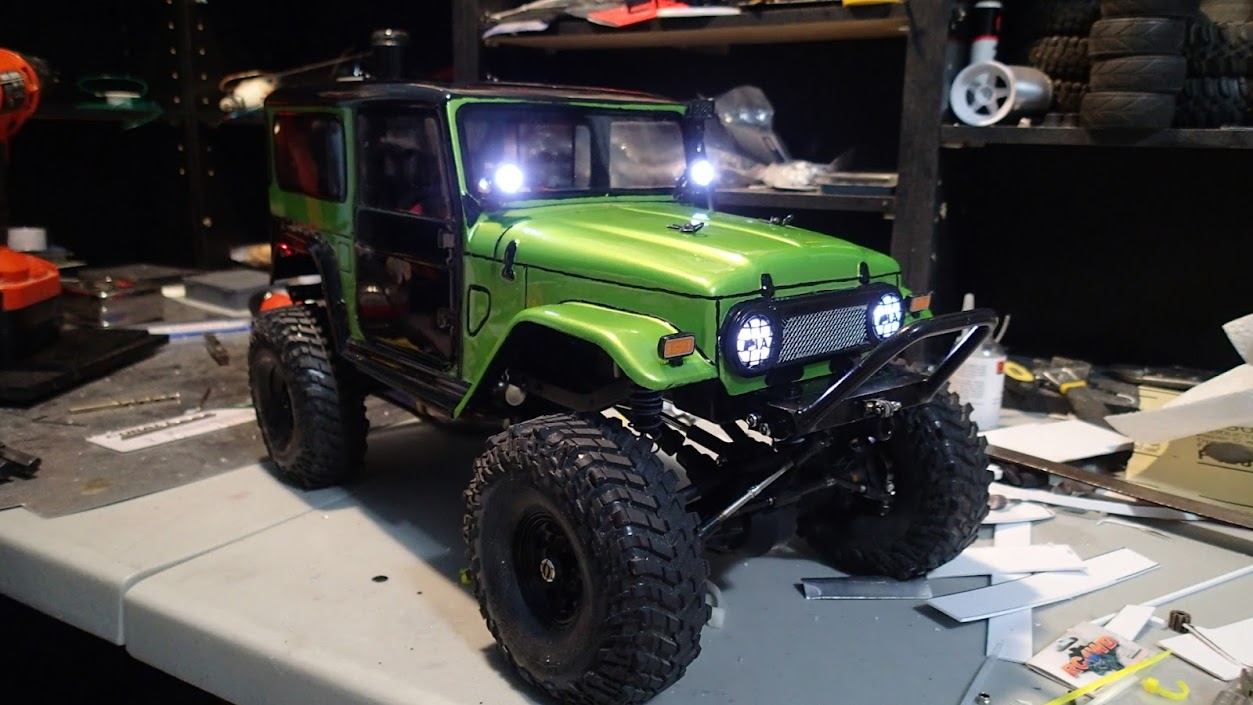    |
|
| |
|
04-21-2013, 12:26 AM
| #18 |
| Quarry Creeper Join Date: Apr 2012 Location: Lansford
Posts: 432
|
Since my last post on this I've been pretty busy. I did a lot of work on my house. I also bought a plane!  And I built an ugly little plane to try and learn flying!  While working a lot, and trying to make a lexan body not look so lexan-ey!  So now, back on track with a small update. LOL Visually, not much different. Added an RC4wd winch and began weathering the truck. By weathering I mean using. No tricks here, just rocks and throttle!   And even though you can't really see them, some RC4wd scale bolts were used to mount the winch.  Then I began collecting parts for a 6x6. Some of the used axles I got came with some nice upgrades that I decided would be better put use on this truck! All the upgrades are on the front axle though. It ended up getting overdrive gears, VP high steer knuckles, axial aluminum C-hubs, and some universal CVD's(not sure what brand).  With the VP high steer knuckles my steering geometry is waaay better. the steering link is nearly level and bump steer has been greatly reduced. 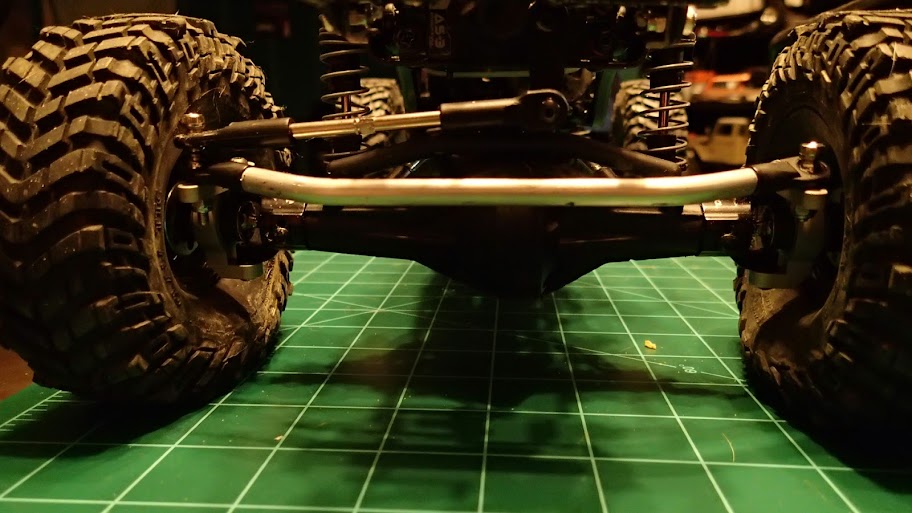 And it can turn pretty good too.    Also did some minor changes to try and help performance a little bit. I removed the Axial radio box. It was useless and taking up way too much space for what it is. I then made a thin aluminum tray to zip tie everything on. This tray is made to be as low as possible without interfering with suspension links and drive shafts. Now everything can fit in the area that radio box was taking up, and I added a wireless winch controller. I'm not one to be neat with wiring and electronics though. I hate wiring and electronics but they are now mounted lower.  And I got a smaller 3S battery. My old one was too big and heavy. This is now a 2650mah 3S. It also has a 850mah 2s riding piggy back to power the winch. It did not want to run off the BEC. So separate battery is the only option.  And that sums it up! Hopefully on it's next outing it can turn right when up on the rocks! |
|
| |
|
04-21-2013, 12:06 PM
| #19 |
| Quarry Creeper Join Date: Jan 2013 Location: Vancouver, B.C.
Posts: 321
|
your one busy guy... lol, lots of cool stuff you've been doing.
|
|
| |
|
05-04-2014, 09:10 PM
| #20 |
| Quarry Creeper Join Date: Apr 2012 Location: Lansford
Posts: 432
|
Well I finally got around to making this a bit more realistic. Yesterday I decided I started hacking it! First I cut and shut the body to convert it into a FJ45 cab. Then I had to push the rear axle back 2 inches by moving the link attach points to the frame rails further back to have the correct wheelbase. Once I had that built I started the bed. I used styrene and formed, cut, and bonded away until it was done. I used 1/4" styrene tube for the roll bar. The lights from the FJ40 were removed and then mounted to the rear of the bed after extending the wires. Now I knew how long it needed to be so I made frame extensions to mount the rear bumper I had already made for the FJ40. After the exterior was done I built a quick interior. Just enough to keep it from being see through. It's a flat piece of styrene just below the window line with a guy glued on it holding the top part of a steering wheel. I also build inner fenders to hide the electronics and then finished it off with some Krylon gloss black spray paint. Now it's no longer just a hollow lexan shell and can hang out with my FJ45LV and not look so cheesy and the longer wheelbase allows it to climb some really steep inclines. I did keep the body clips and also put 2 in the middle of the bed. I still wanted quick easy access to the electronics since this one is like my beater and one I let my friends use so I have someone to trail with. LOL. The wheelbase is the same as my FJ45LV and overall length is almost identical as well. All together the new mods/fabrication/paint took about a day and a half. I was actually pacing myself too so I didn't get burnt out before I finished. LOL. 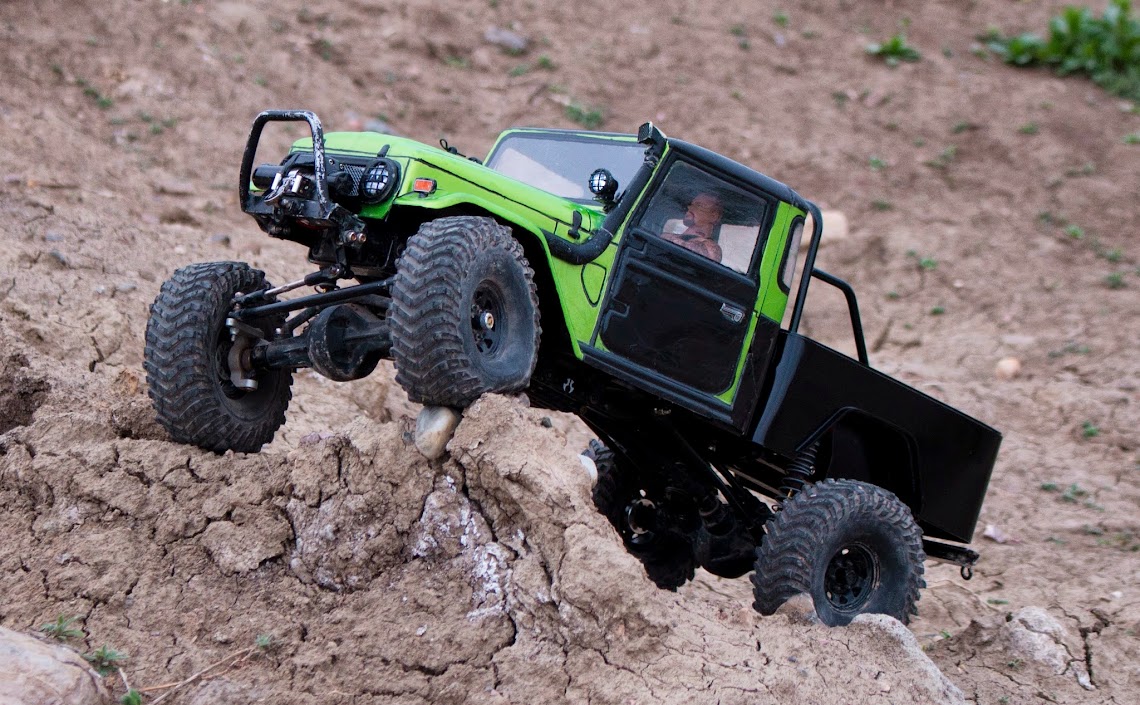     |
|
| |
 |
 Bushwacker Baby! - Similar Threads
 | ||||
| Thread | Thread Starter | Forum | Replies | Last Post |
| My new Bushwacker. | cembom | Paint and Body | 1 | 12-19-2007 08:16 PM |
| bushwacker | al3x_34 | Paint and Body | 4 | 11-06-2007 12:55 AM |
| My bushwacker | drc323 | Paint and Body | 5 | 08-30-2007 07:47 PM |
| my bushwacker | zumzum5150 | Paint and Body | 20 | 07-29-2007 04:01 AM |
| bushwacker on the k2-3l? | TOYUTAH | General Crawlers | 4 | 03-15-2007 10:04 AM |
| |


 Linear Mode


