| | #101 |
| RCC Addict Join Date: Dec 2006 Location: Flatwoods
Posts: 1,036
|
Thanks and thanks for the recommendation on the tires, will keep those in mind.  |
| |  |
| Sponsored Links | |
| | #102 |
| Newbie Join Date: Sep 2014 Location: Troy
Posts: 5
|
Great Thread!
|
| |  |
| | #103 |
| I wanna be Dave Join Date: Oct 2010 Location: Caldwell ID.
Posts: 4,328
| Prolines g8 compound does well. I have had sucess with both flatirons and Tsl's. They seem to do better on wet rock than rc4wds compounds. Axial ripsaws work equaly well. I suspect Axial's R35 compound is the same compound as Prolines g8
|
| |  |
| | #104 | |
| RCC Addict Join Date: Dec 2006 Location: Flatwoods
Posts: 1,036
| Quote:
Speaking of axles I noticed what looks like the start of a stress crack in one of the chubs so I just ordered up a set of aluminum ones. The wife talked me into getting a set of green ones, guess it is time to add some bling. | |
| |  |
| | #105 |
| RCC Addict Join Date: Dec 2006 Location: Flatwoods
Posts: 1,036
|
Got a set of chubs on the Deadbolt now. I had noticed that one of the stock chubs was starting to crack so decided it was a perfect time to swap out the stockers for some aluminum chubs. I went with the GPM CHubs cause they were cheap and green. I paid $11 for them shipped, figured for that price I would give them a try. 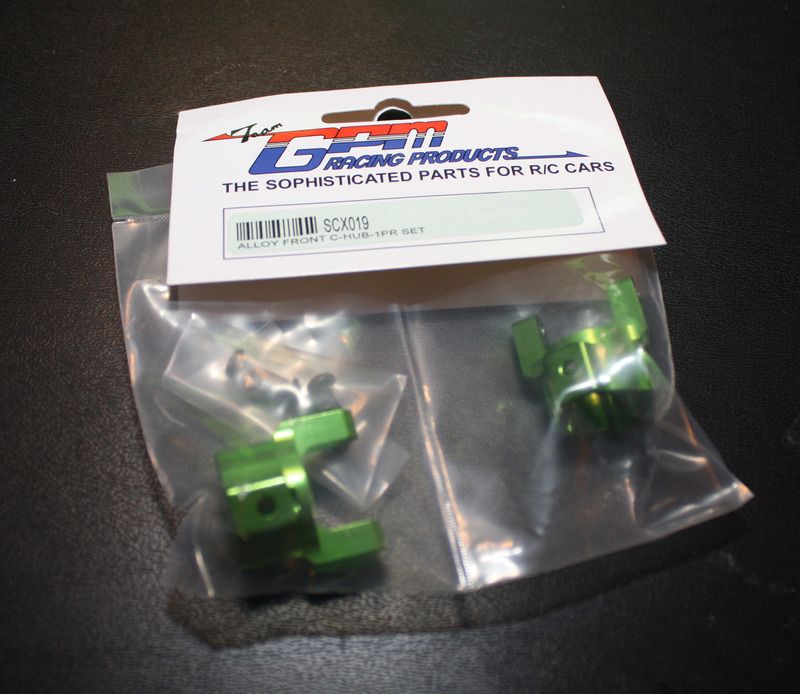 They are nicely anodized and appear suitably beefy. 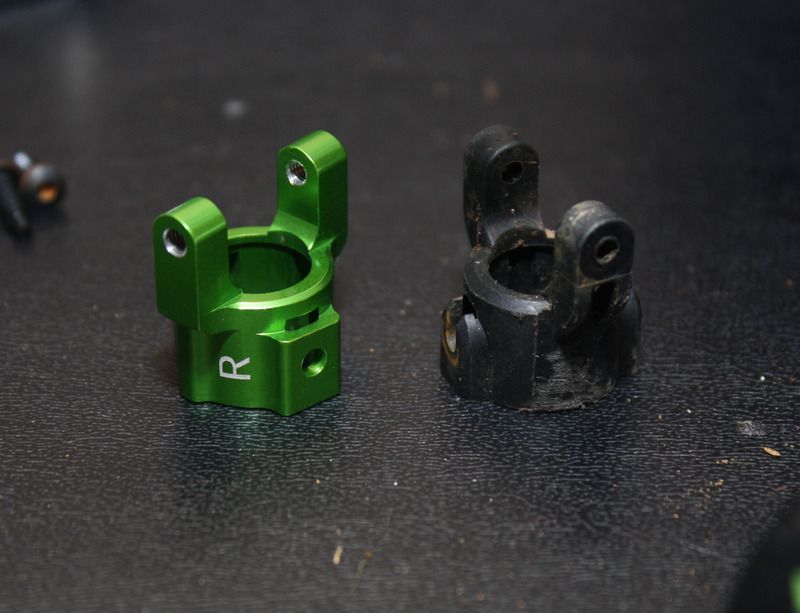 They fit perfect and do the job. Guess we will see how well they hold up in the long run. 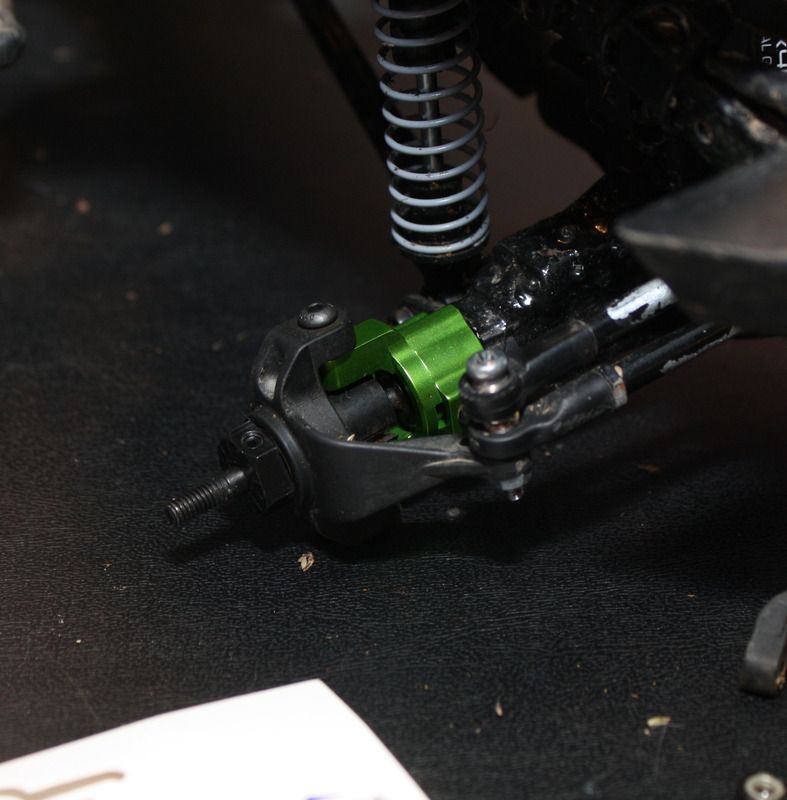 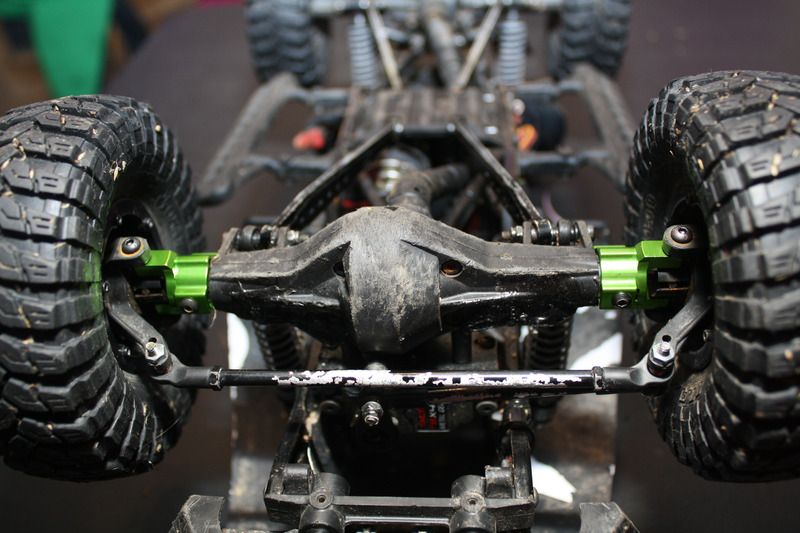 I have decided to make a few vids every now and then just for fun and giggles. These are nowhere as good as Harley's, Medic's or any of those guys but is still fun to play with. Feel free to take a look, maybe I will include more in the future. Thanks for looking. Next up will be a new chassis. Stay tuned for more, Project: Cheapbolt is far from being finished. -Prime- |
| |  |
| | #106 |
| Newbie Join Date: Nov 2015 Location: Arvilla
Posts: 2
|
Very helpful and fun. I can't wait to start my own.
|
| |  |
| | #107 |
| RCC Addict Join Date: Dec 2006 Location: Flatwoods
Posts: 1,036
| Thanks.  |
| |  |
| | #108 |
| RCC Addict Join Date: Dec 2006 Location: Flatwoods
Posts: 1,036
| |
| |  |
| | #109 |
| RCC Addict Join Date: Dec 2006 Location: Flatwoods
Posts: 1,036
|
Now my Deadbolt has been framed. Here is how it came out of the mailing tube. It came packed very well and also came with two decals and a CC license plate. 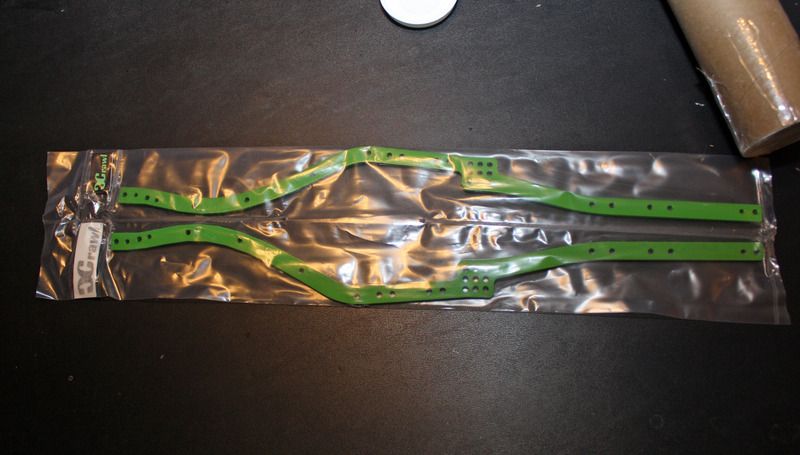 Out of the packaging you can see why I went with this chassis. It has and angled skid, better axle clearance, and multiple rear link mounting points. Also it is stronger than the factory chassis. 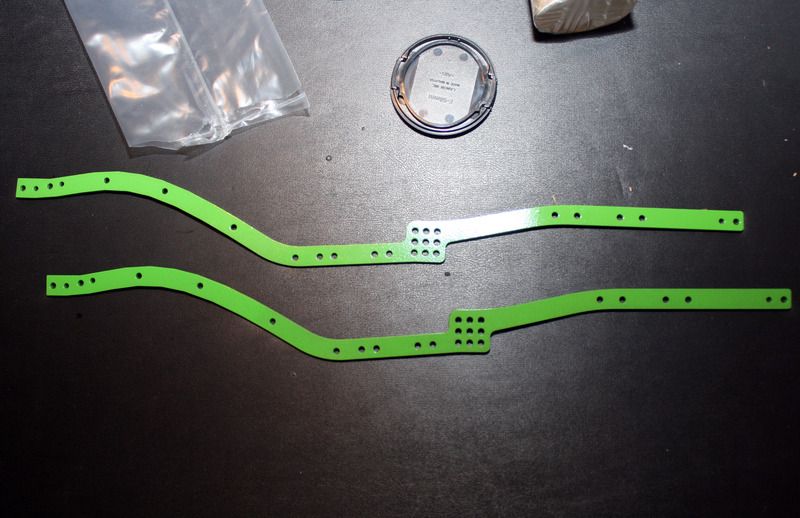 And installed in the Deadbolt. 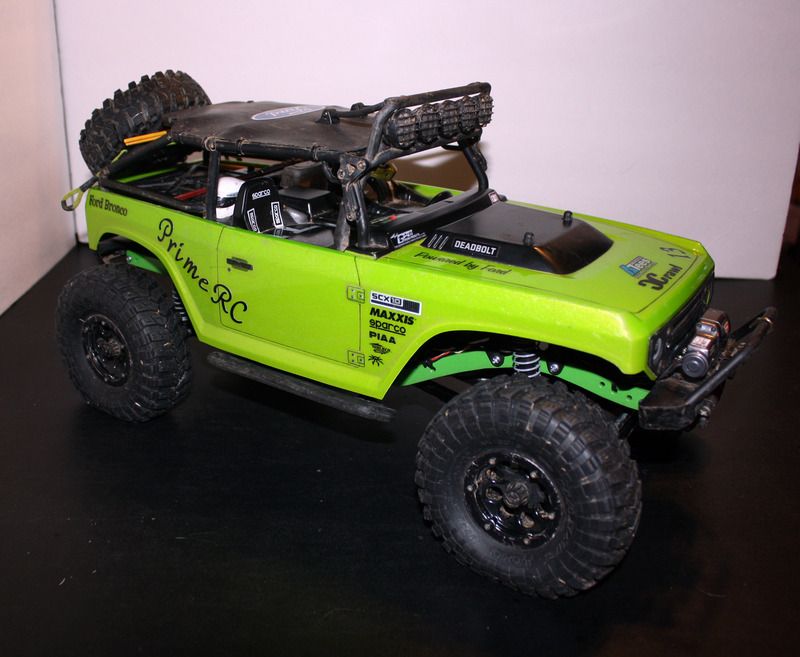 The install went very smoothly, every thing lined up nicely. Only thing was that since the chassis is a touch thicker than the stocker I needed longer hardware to mount the cross members. Sadly was out of hex hardware so had to use screw heads for now. Using the stock shock towers and body posts moves the body back just a touch, bout 2-3mm max. 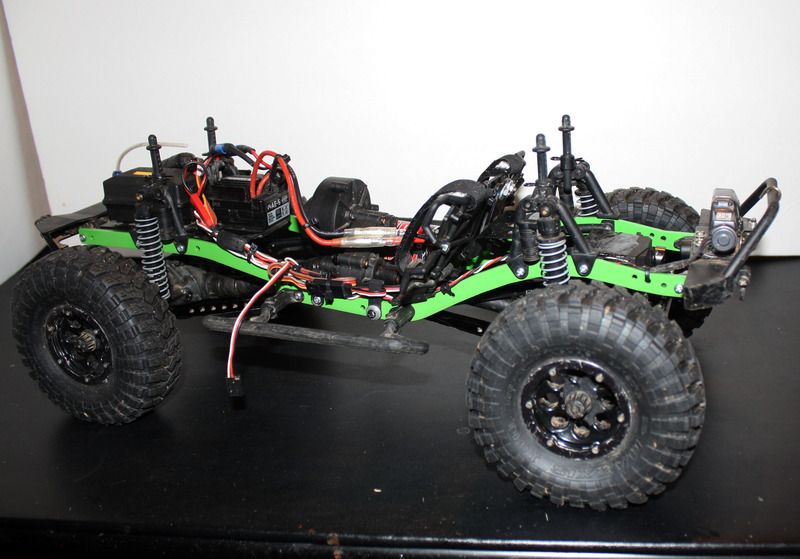 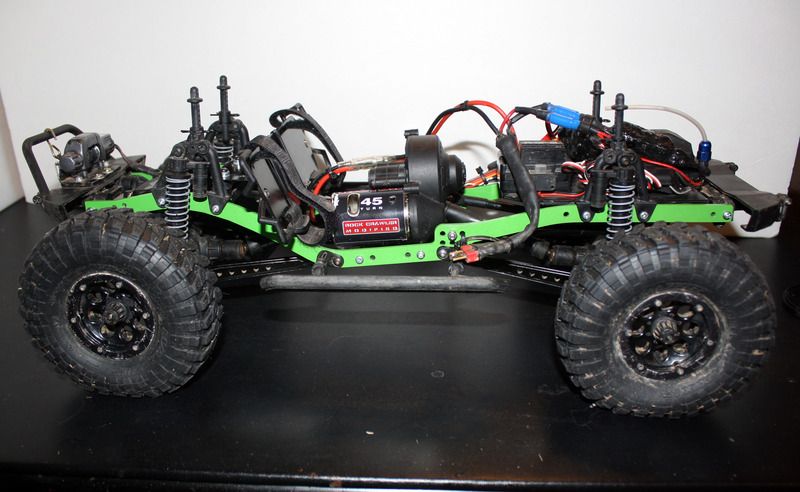 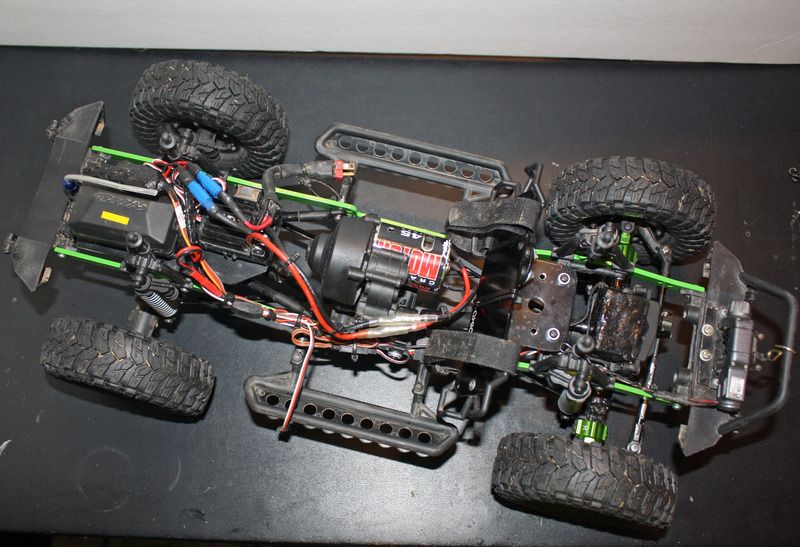 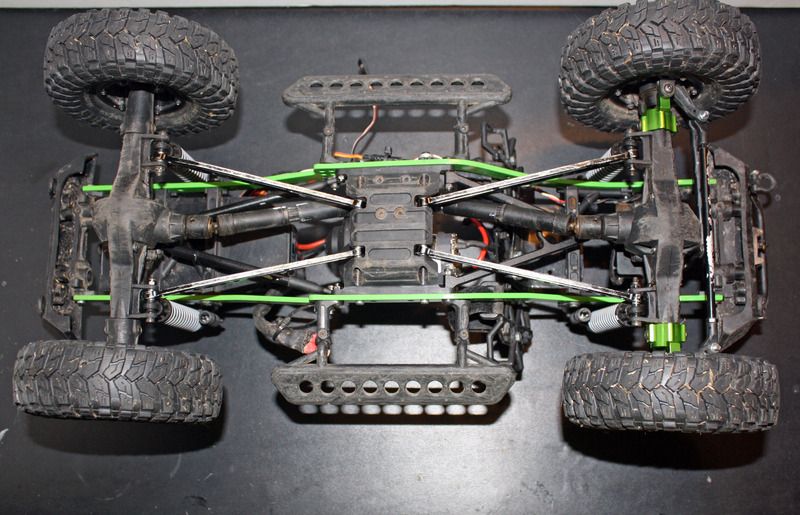 Over all I am very very pleased with this chassis. The quality is top notch. In the future I will probably add CustomCrawl's shock towers to the Deadbolt. If you want to see more here my video review of the chassis. Thanks for looking, much more to come in the future. Stay tuned for more! -Prime-  Last edited by Prime; 11-20-2015 at 08:43 AM. |
| |  |
| | #110 |
| RCC Addict Join Date: Dec 2006 Location: Flatwoods
Posts: 1,036
|
I ran in to a very slight issue with this chassis. I took it out for a run on the rocks and at full lock with the suspension compressed the tire rubbed the bumper very badly. It is just a result of bringing the bumper back for a better approach angle. It was easily remedied. I trimmed it quickly in the field and cleaned it up after I got home. Looks good and no more rubbing. Maybe I can use this as a excuse to get a skinner front bumper. ;) Pics of the trim. 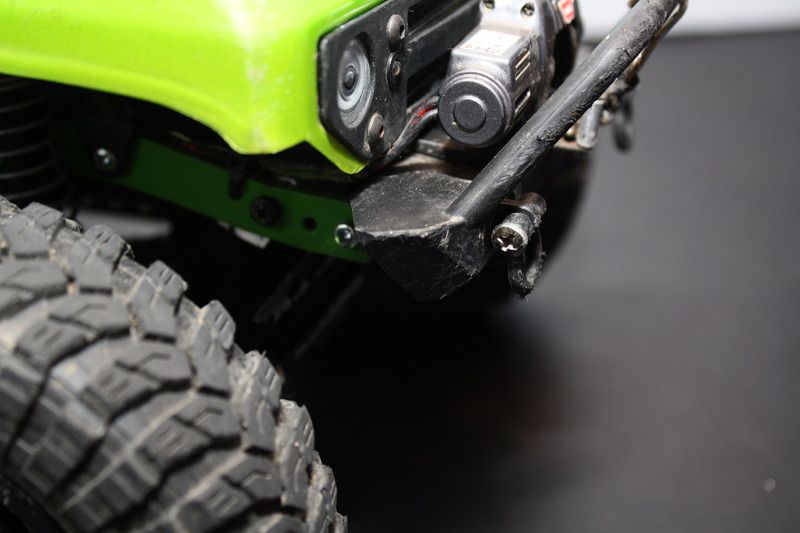 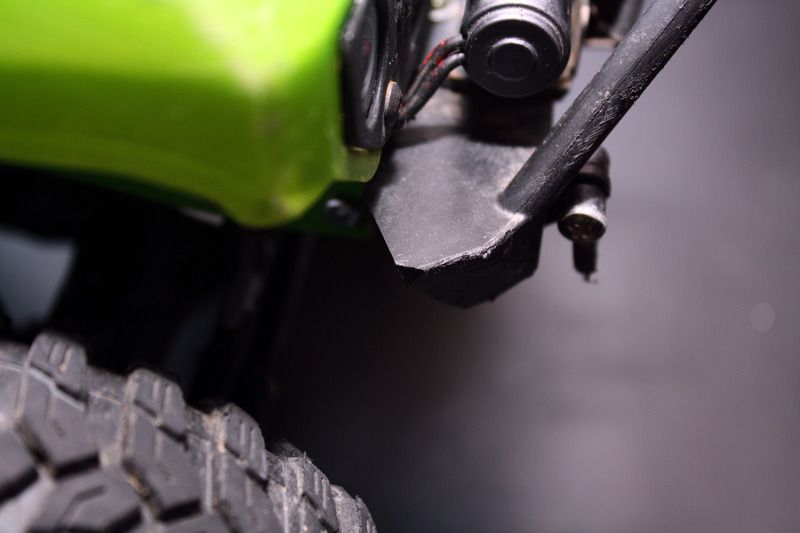 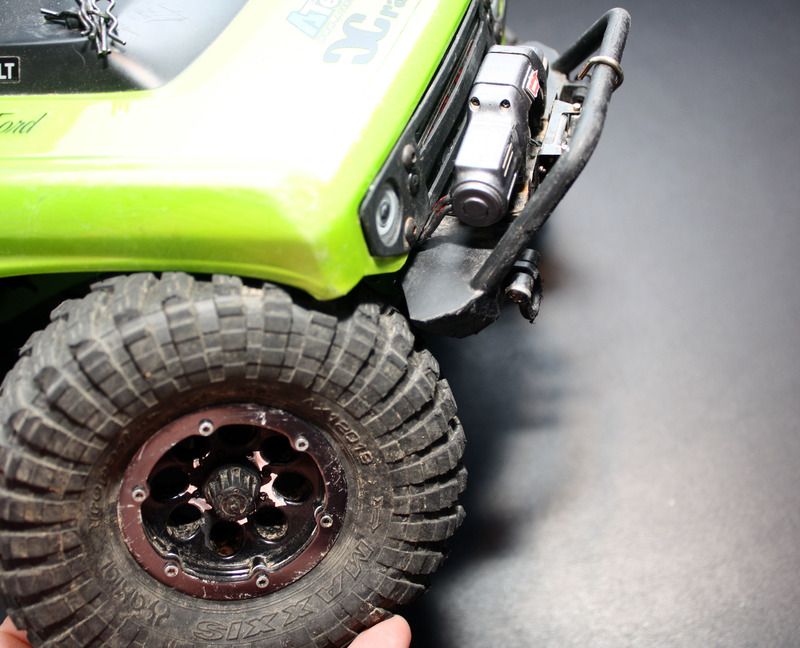 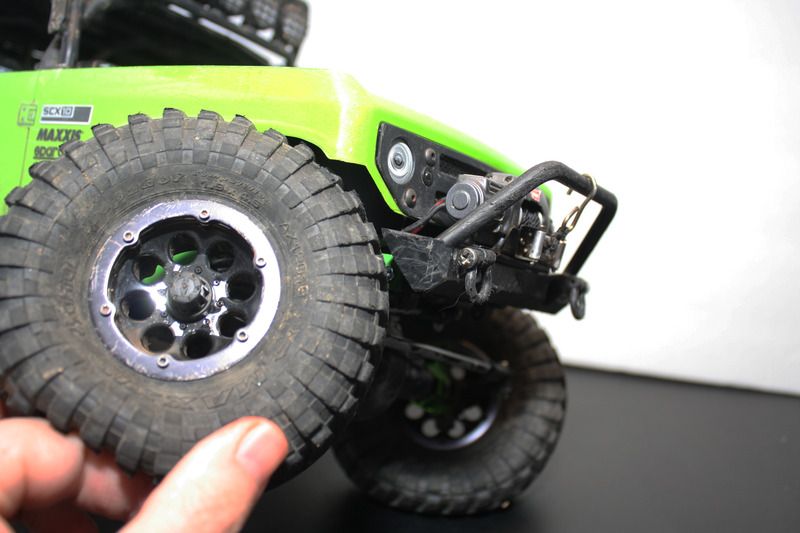 |
| |  |
| | #111 |
| RCC Addict Join Date: Dec 2006 Location: Flatwoods
Posts: 1,036
|
Oops, in the previous post I should have mentioned how the chassis performed. It did very well out on the rocks. The truck climbed much better, going to try a different mounting point for the rear uppers and see if it does even better. It also slid over rocks and steep drops much better than it did before. Gotta say I am quite happy with this chassis. They have a version 2 coming out that fixes the very small issues I have with the chassis and it may just find it's way under my wife's new SCX.
|
| |  |
| | #112 |
| RCC Addict Join Date: Dec 2006 Location: Flatwoods
Posts: 1,036
|
I see people are still checking out this thread and I am still building on the Deadbolt so here is another update. It is time to add a set of hubs to the truck and as luck would have it RPM has brought out their SCX steering knuckles. Yes they are plastic but they are RPM and their plastic parts have always taken a beating on my Maxx trucks so I figured I would give them a try. They have a limited lifetime warranty against breakage, that is a bonus. Plus at $12.95 retail they are definitely in staying with the Cheapbolt theme. I know a lot of people haven't seen the RPM knuckles yet so I have included some side by side comparison pictures. In these pictures you can see all the extra material that has been added to the hubs on the steering arms, mounting ears, and added around the bearings. Also can see where the inner tie rod hole has been removed as well. 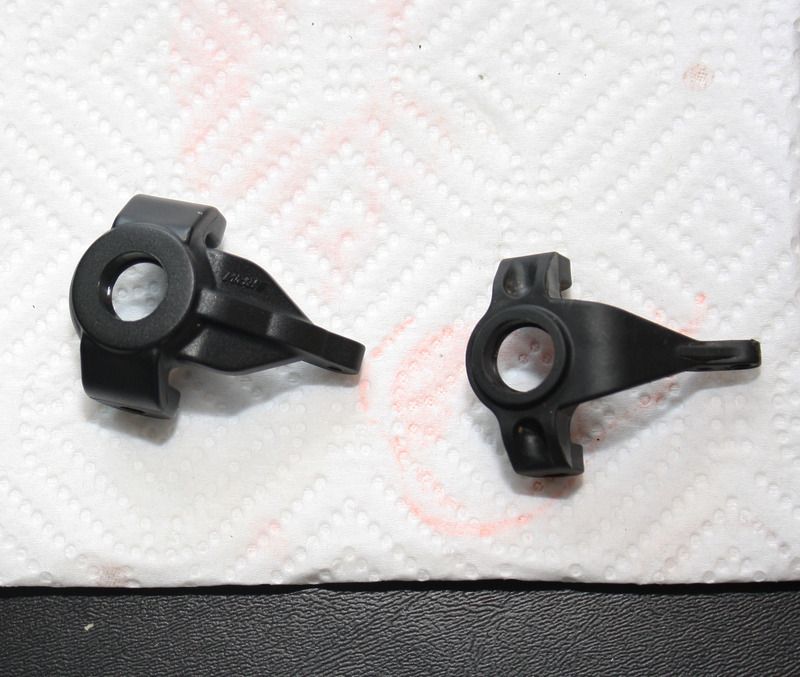 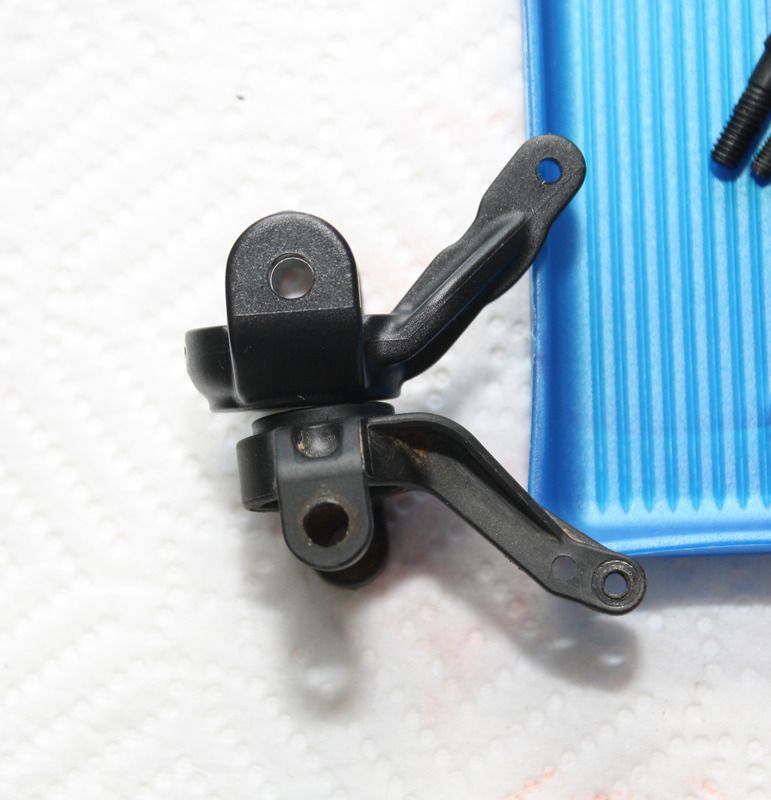 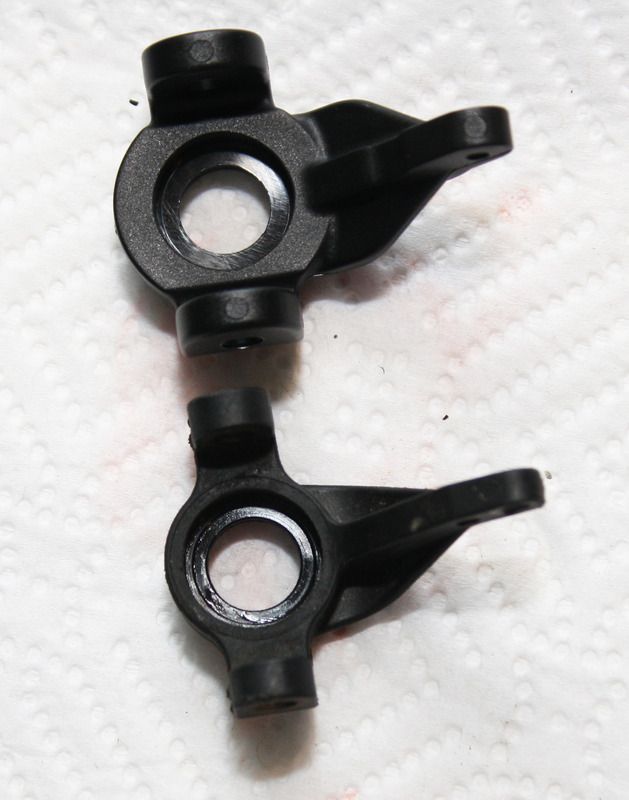 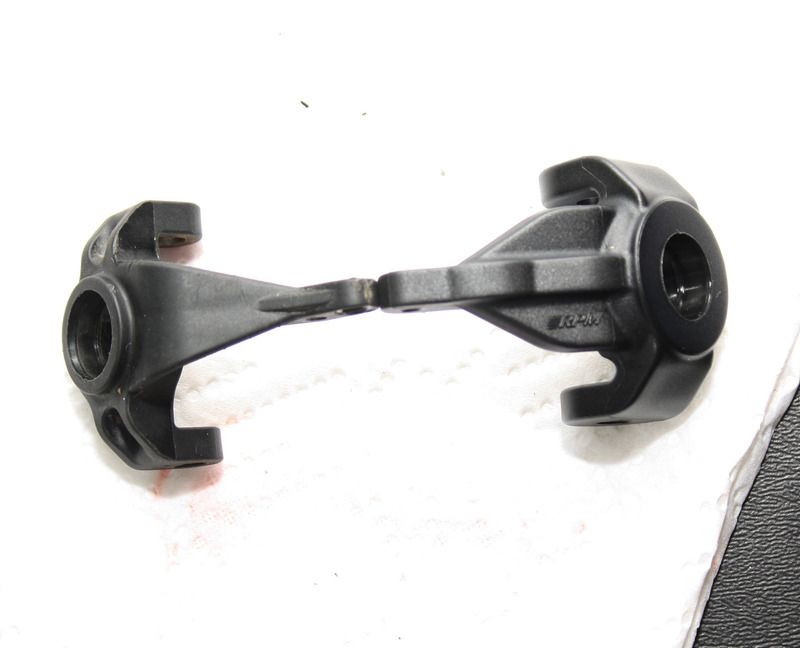 And here it is all reassembled using stock SCX parts. 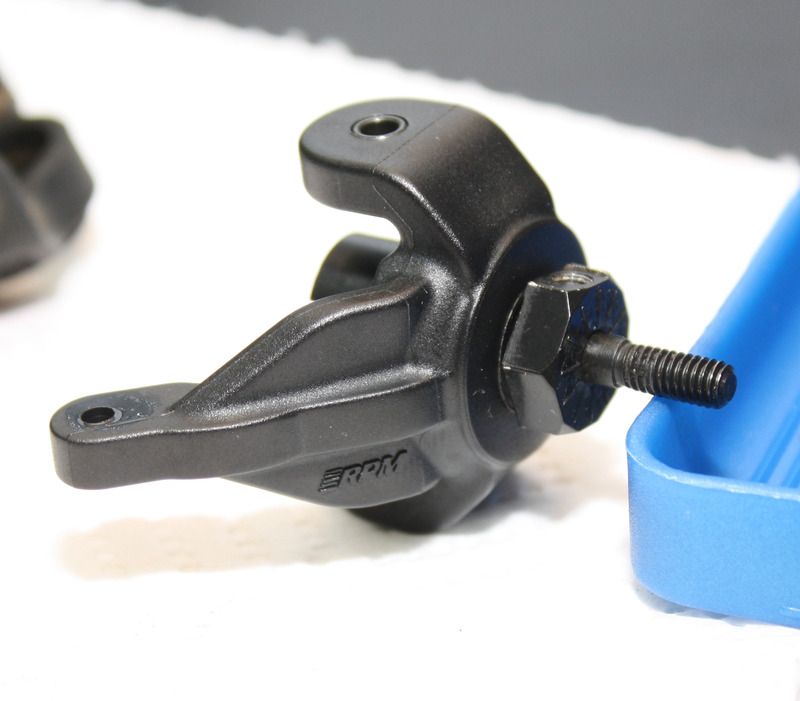 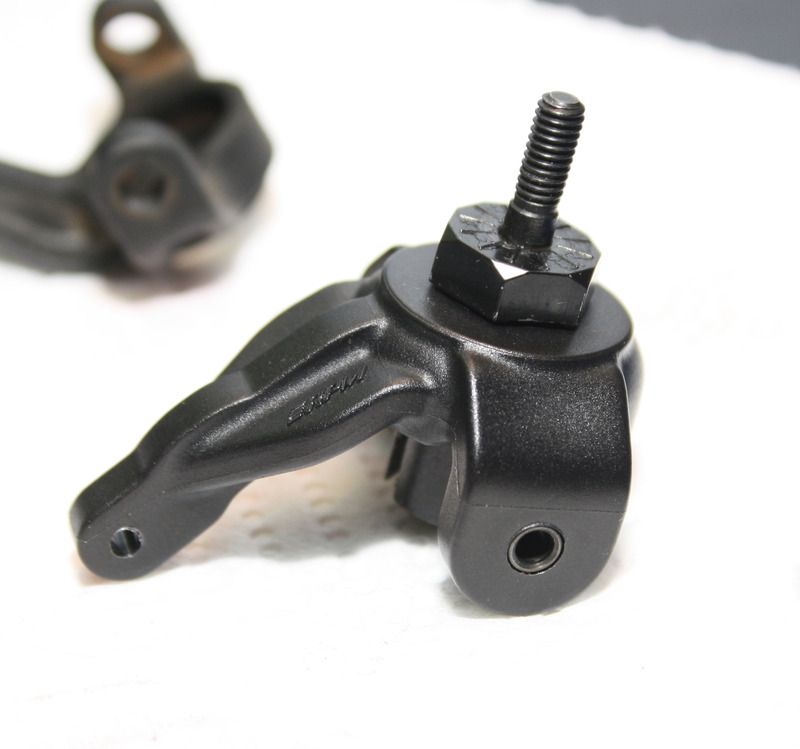 Only "problem" was that they fit really snug onto the chubs as you can see in the pic. You have to "spread" them a bit to get them on but the fit is very good and allows for no slop. 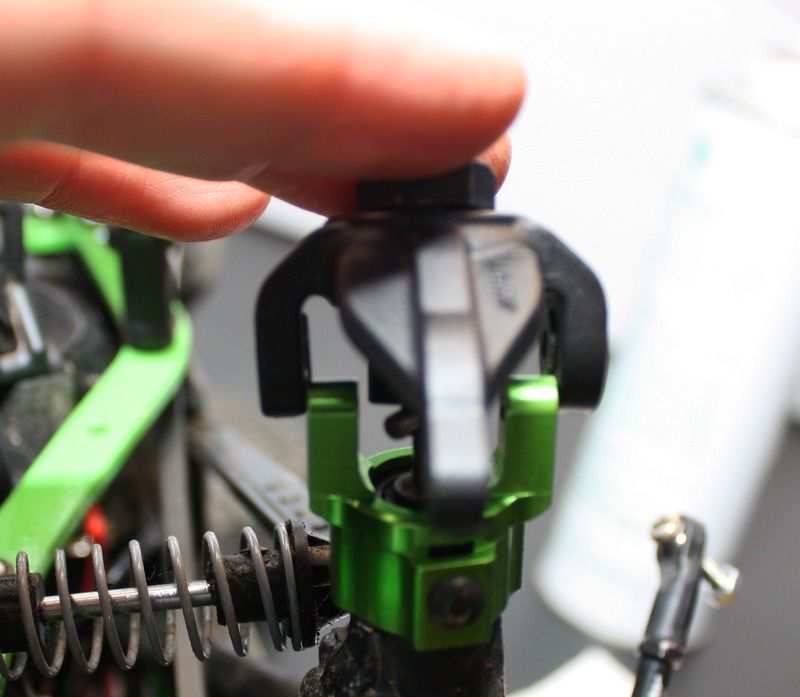 And here they are installed and ready to go. 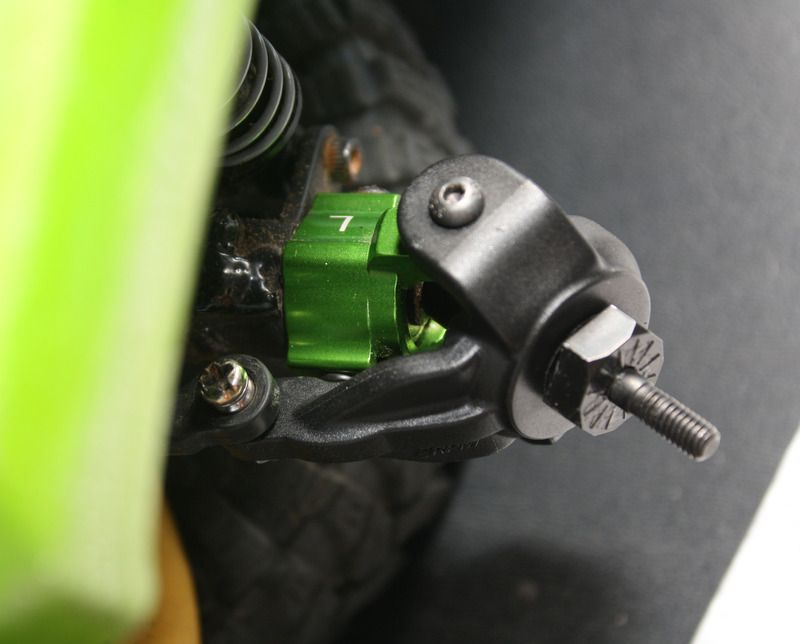 For those who would like a closer look I have included a video. I am very happy with these hubs. They look good and are a real improvement over the stockers at a great price. I highly recommend them. Next up? Not sure, maybe time for new inner fenders. Thank you for looking. Any feedback or suggestions are welcome and appreciated. -Prime- . |
| |  |
| | #113 |
| I wanna be Dave  Join Date: Nov 2014 Location: West Texas
Posts: 2,654
|
I have loads of rpm products and enjoy them. Very good value. Thanks for the heads up
Last edited by snapon boy; 11-30-2015 at 09:42 PM. |
| |  |
| | #114 |
| Newbie Join Date: Mar 2013 Location: Layton, UT
Posts: 23
|
I had literally the exact same issue with the bumper rubbing on mine, and I honestly think the bumper looks better a little shaved down.
|
| |  |
| | #115 | |
| RCC Addict Join Date: Dec 2006 Location: Flatwoods
Posts: 1,036
| Quote:
 I have to agree, I like the look alot better with the bumper shaved down as well. I saw on thier facebook page that they have a V2 coming out that levels the sliders and keeps the bumpers in the stock locations. May have to give that version a try on my next build. | |
| |  |
| | #116 |
| RCC Addict Join Date: Dec 2006 Location: Flatwoods
Posts: 1,036
|
So I am back with an update to the good old Deadbolt, it now once again has inner fenders! The new chassis gave me an excuse to ditch the old ones, I just never was happy with them, the large wheel well openings of the Deadbolt just needed slightly longer inners. So for these ones I am using Blue Bunny Ice Cream containers. Their oval size will fit the truck better. 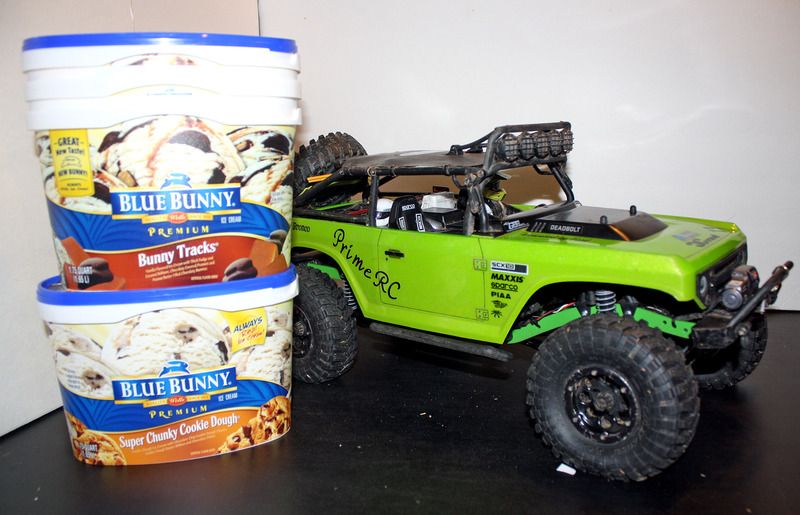 Made some rough templates. 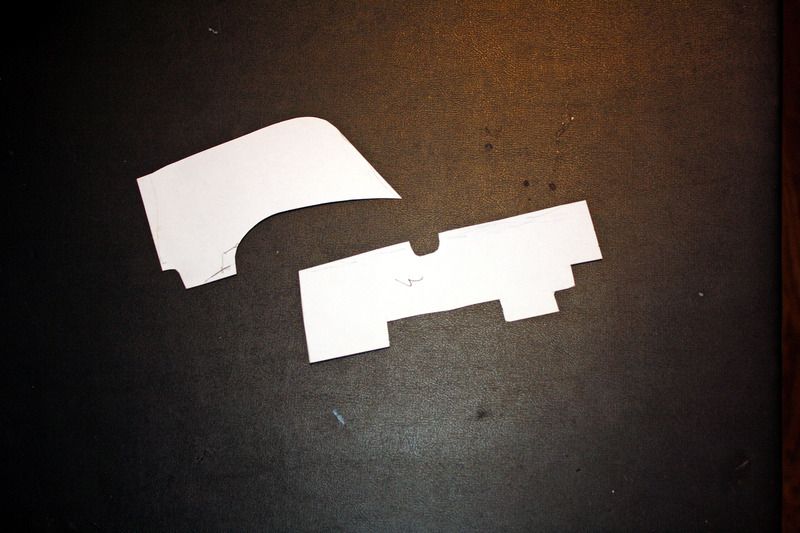 Got one made. 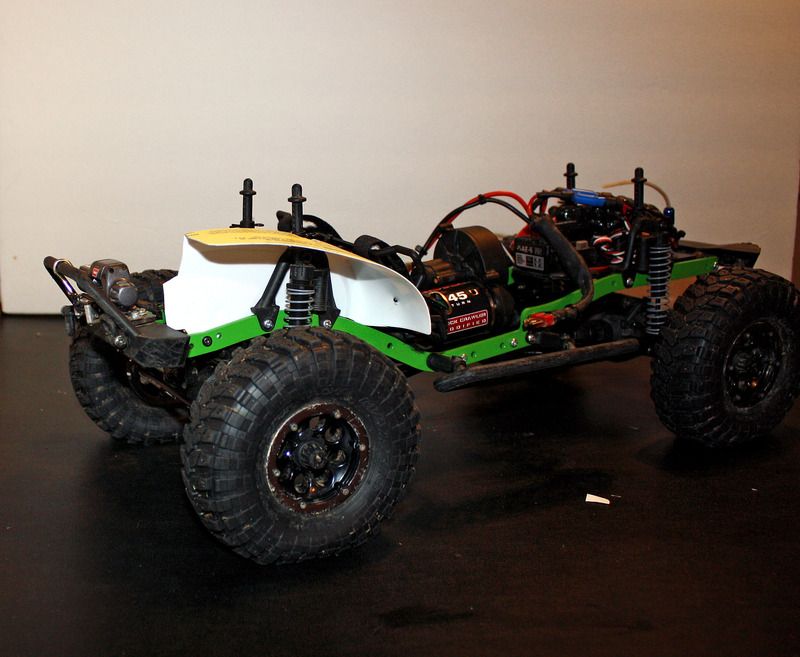 And traced it on to another container. 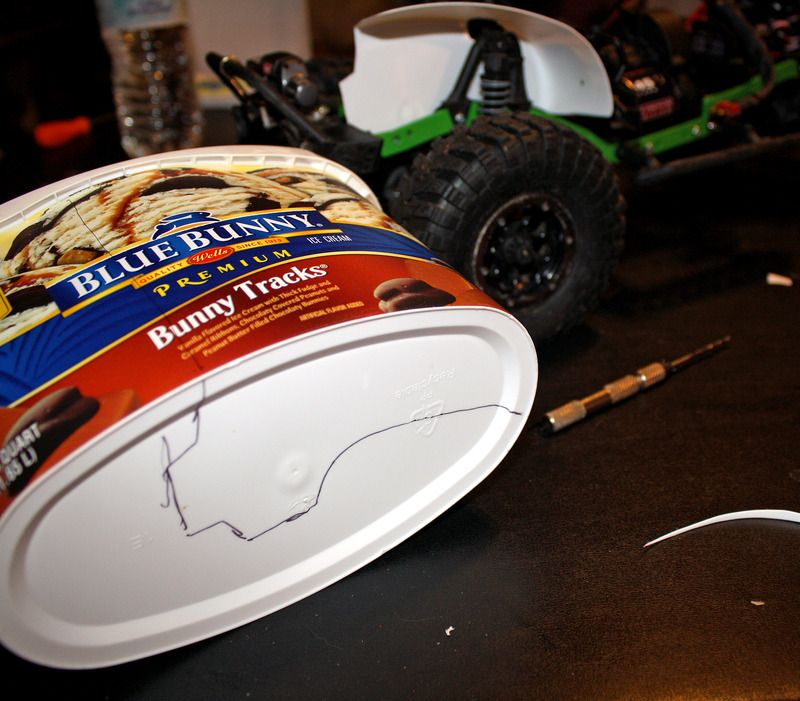 All four are completed. 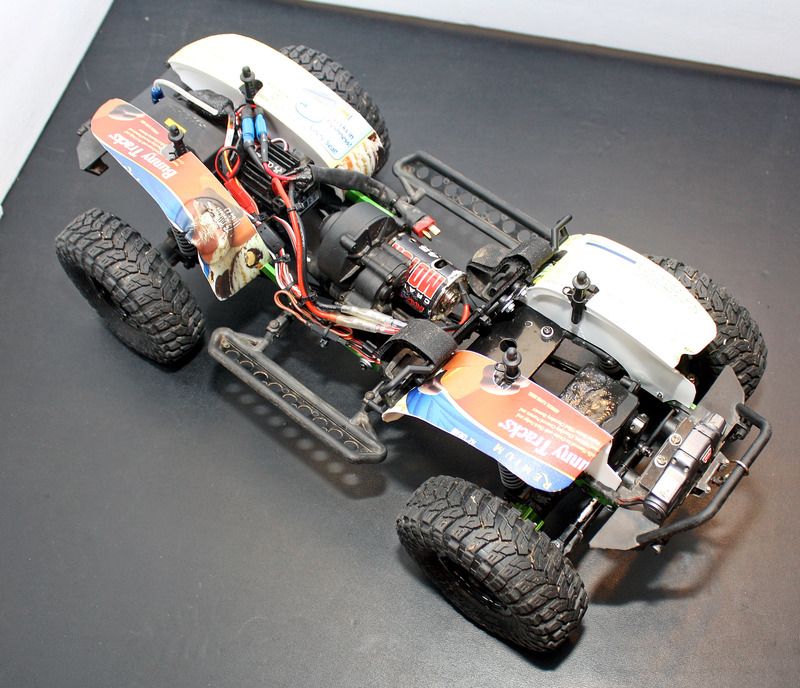 Perfect fit. 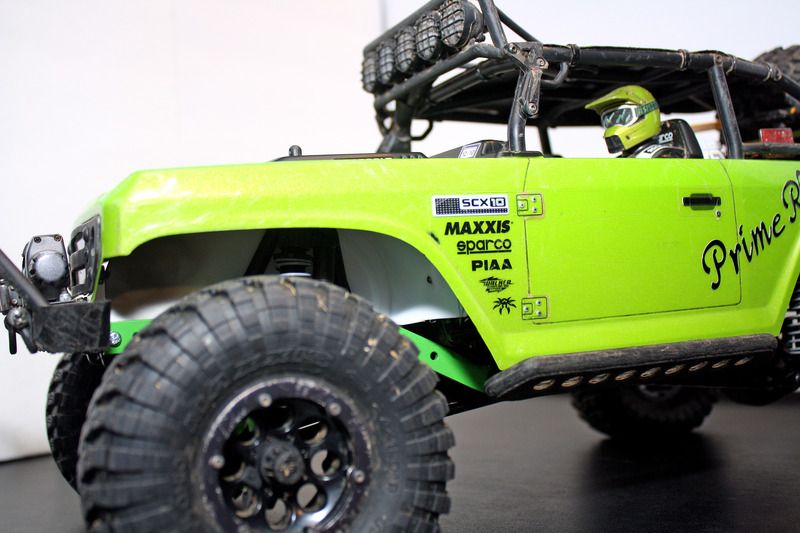 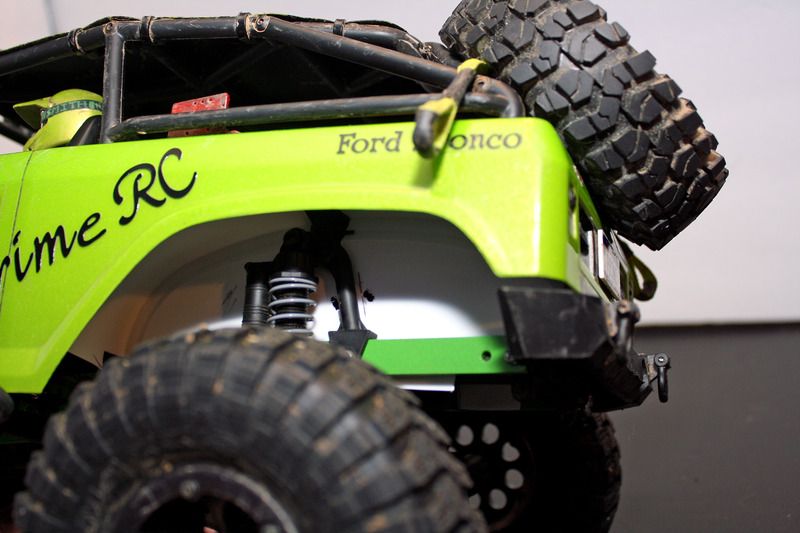 All painted up 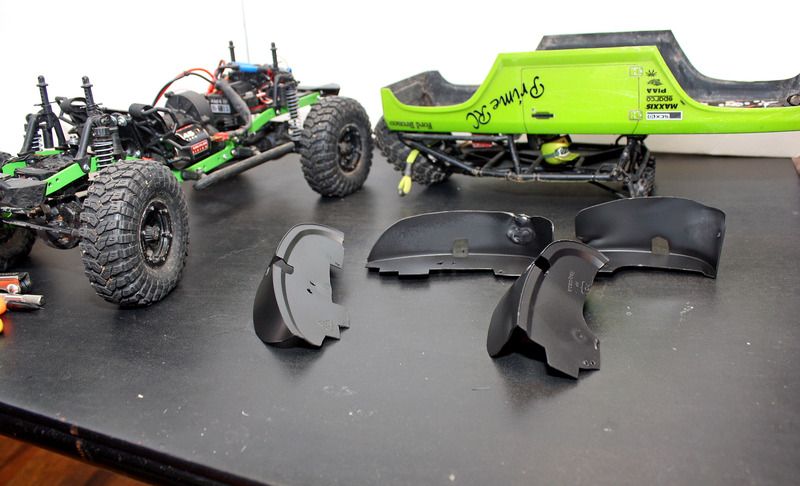 and installed. 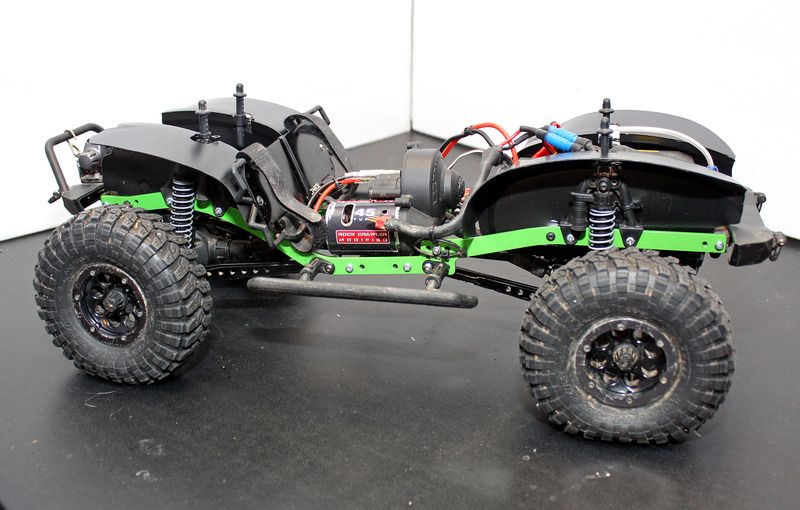 It is amazing the improvement this makes in the appearance of this truck. A nice simple, cheap mod that anyone can do. I made a short video about the inners but it is pretty much the same as the post, though it does show the mounting a bit better. You can check it out in the You Tube link in my sig if you wish. Thanks for looking. Not sure what is next for the little truck, but I can assure you that I am not done yet.  Any comments or suggests are always welcomed. Any comments or suggests are always welcomed.Prime . |
| |  |
| | #117 |
| RCC Addict Join Date: Dec 2006 Location: Flatwoods
Posts: 1,036
|
Just wanted to drop in and say this project is not dead, but has just been in kind of a holding pattern while working on other projects. Good news is that I did get out once again to my favorite rock pile for some crawling. Also my wife got me a GoPro for my birthday so I thought I would give it a try and see how well it worked mounted to my controller. Turned out ok, learned a lot. Next time the vid will be better. Next update to the Deadbolt will be a set of sliders or a servo upgrade. Thanks for looking, -Prime- |
| |  |
| | #118 |
| I wanna be Dave  Join Date: Nov 2014 Location: West Texas
Posts: 2,654
|
Prime I may have missed it but how did you mount the spare tire Sent from my SM-T350 using Tapatalk |
| |  |
| | #119 | |
| RCC Addict Join Date: Dec 2006 Location: Flatwoods
Posts: 1,036
| Quote:
Start of a new Deadbolt project. Lets call it Project: Cheapbolt Since then I have changed it a bit. I remade the mount wider so the spare would sit lower. Anymore question please feel free to ask. I will do my best to answer them. -Prime- | |
| |  |
| | #120 |
| RCC Addict Join Date: Dec 2006 Location: Flatwoods
Posts: 1,036
|
The Deadbolt has a new set of sliders. I know a lot of people go for metal sliders, and usually I do too, but on this rig with it's plastic bumpers I decided to stick with the plastic theme. RPM has started making parts for the SCX and one of the items they are offering is a pretty sweet looking set of sliders. Here they are next to one of the stockers. The whole piece is beefer overall and a lot more rigid than the Axial pieces. Also are longer and the kick out is a nice touch. 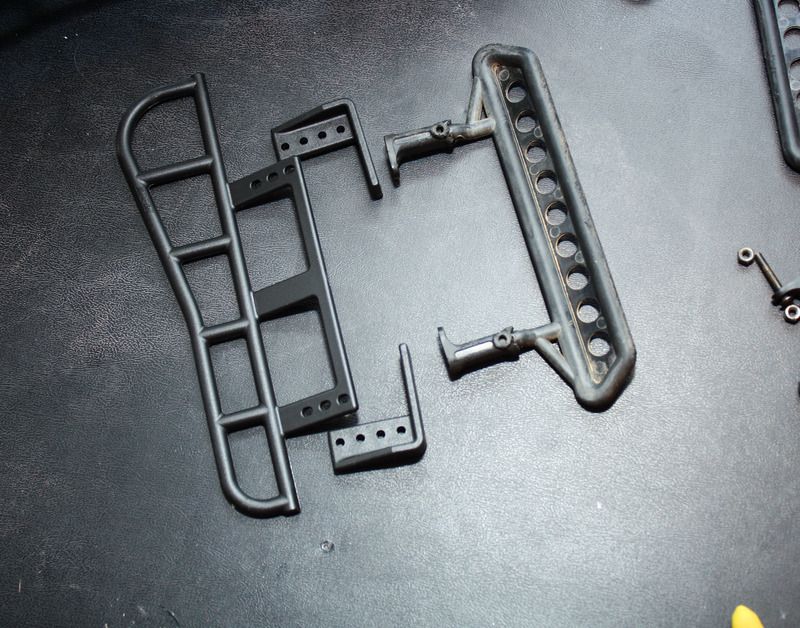 Here is how they mount. Normally it would mount to either the top or bottom of the mount but since I have an angled skid I have to mount the fronts over top the mount and the rear to the bottom. That's what makes that slight warp on the inside of the sider but does not effect the actual slider at all. On a flat skid truck you would not have this. 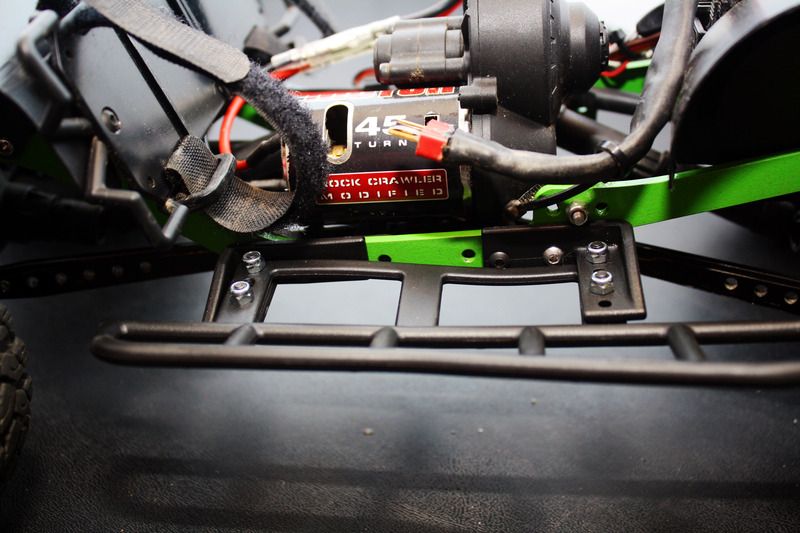 Here is the kick out on the rear and how close it comes to the rear tire. They say this will help to keep the truck from getting hung up on rocks with the rear tire. looks like it will work, can't wait to test it. 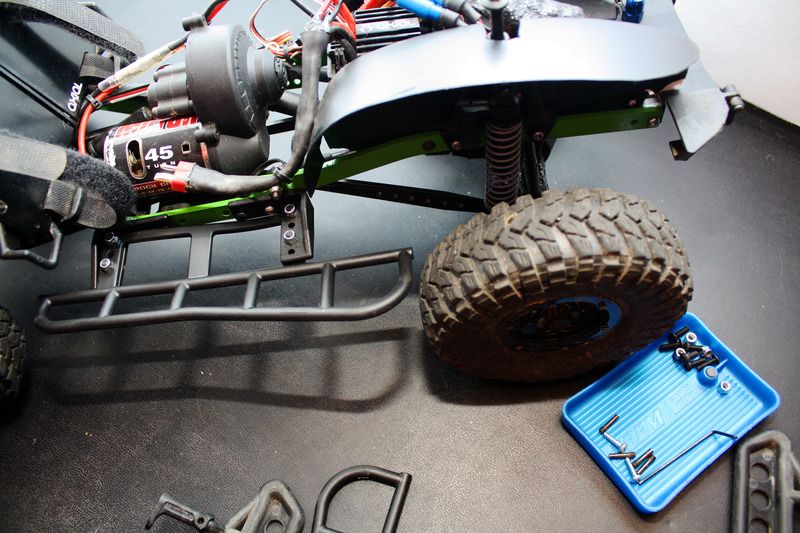 And here are some pics mounted up on the truck with the body installed. 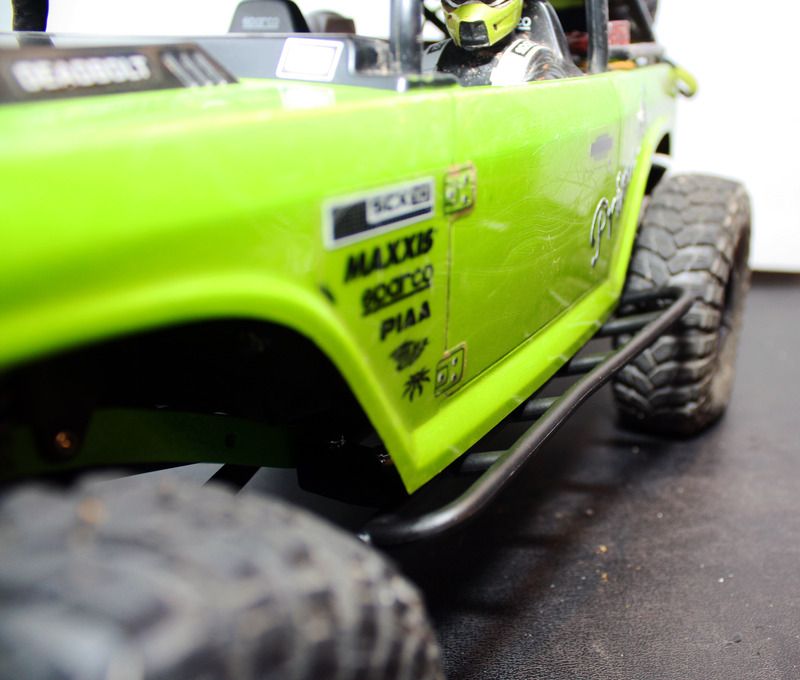 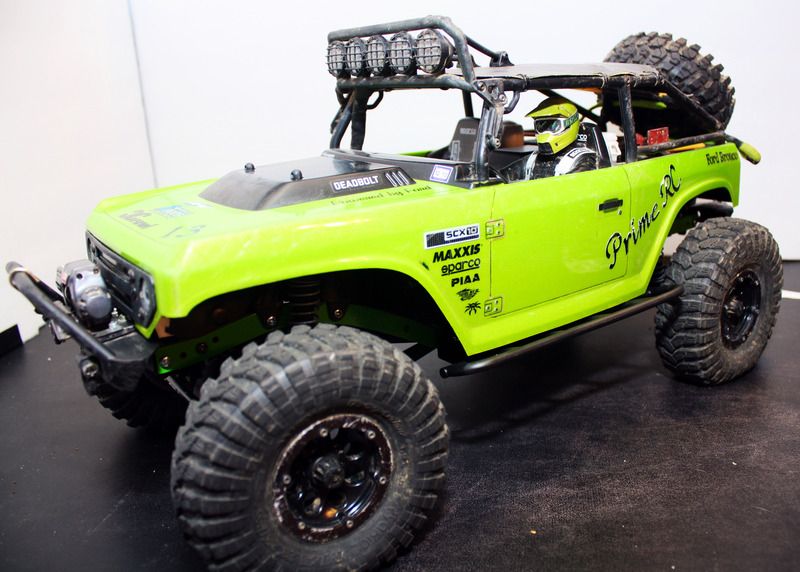 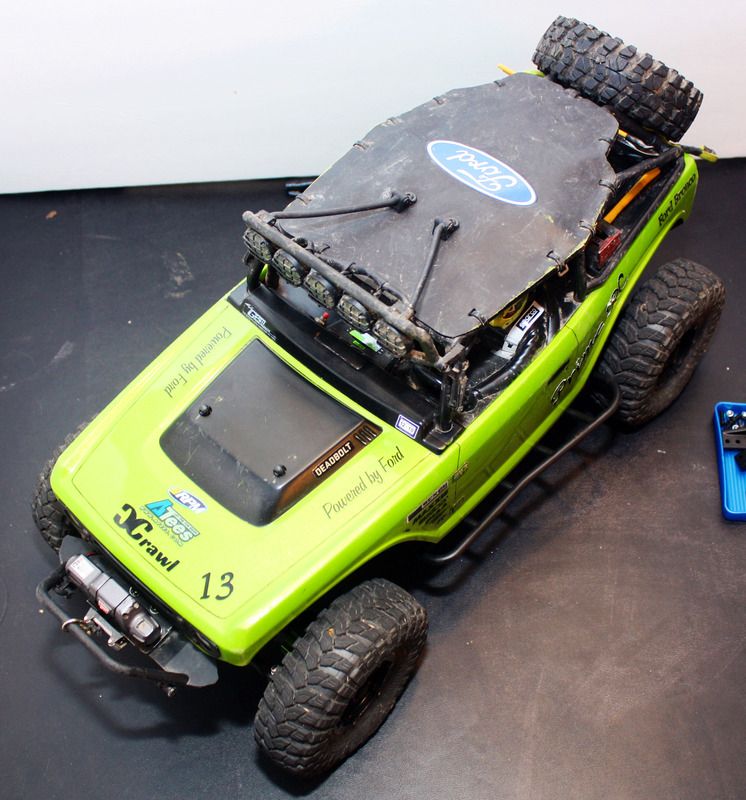 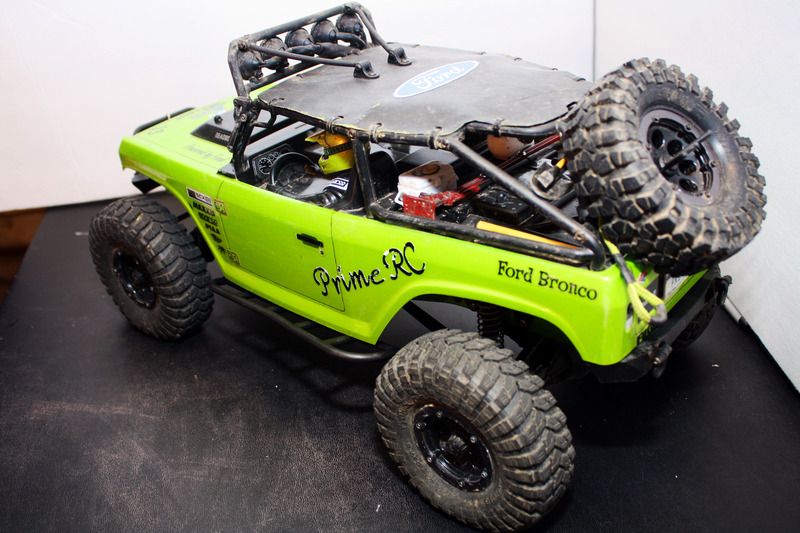 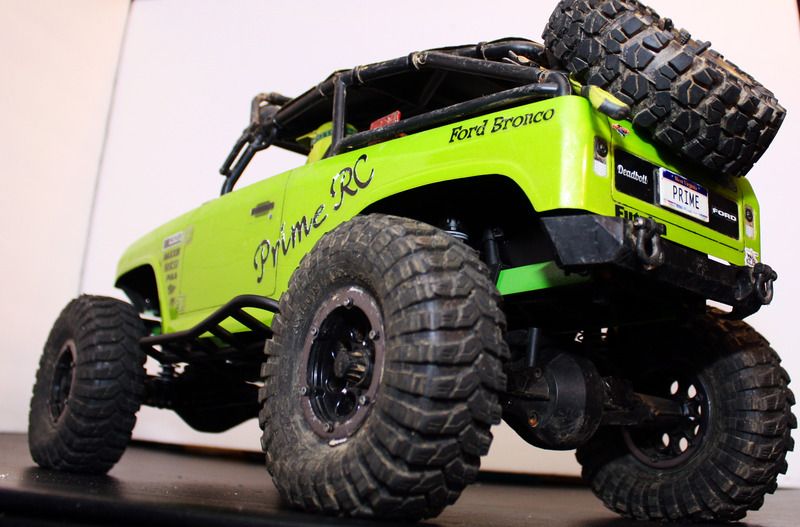 And from the bottom. 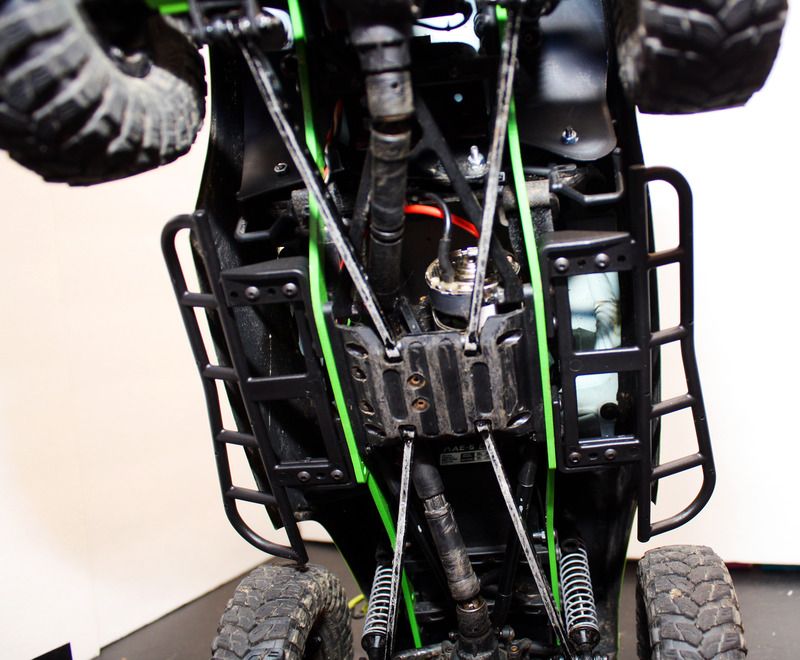 And incase you are interested, here is my video review of these. I am quite happy with these sliders, well worth the price I think. Thanks for looking. Not sure what is up next but I know for sure that this truck is far from finished. -Prime- Last edited by Prime; 01-24-2016 at 07:13 PM. |
| |  |
 |
| Tags |
| deadbolt, scx10 deadbolt |
 Start of a new Deadbolt project. Lets call it Project: Cheapbolt - Similar Threads
 | ||||
| Thread | Thread Starter | Forum | Replies | Last Post |
| LCG deadbolt crawler project | 1JEEPNICK1 | Axial AX10 2nd-gen | 9 | 02-10-2015 05:18 PM |
| Deadbolt aka project joker | BigCountry11 | Axial SCX-10 | 2 | 11-25-2014 11:48 AM |
| I think I'll call it project aggression... | Blue buggy | Axial Wraith | 6 | 05-08-2014 02:40 PM |
| The i'm not sure what to call it project. | motoxkfx | 2.2 Scale Rigs | 6 | 08-30-2013 07:58 AM |
| Start of my project | bluto | 2.2 Scale Rigs | 2 | 04-02-2008 08:59 PM |
| Thread Tools | |
| Display Modes | |
| |