| |
| |||||||
 |
| | LinkBack | Thread Tools | Display Modes |
 04-05-2015, 10:22 PM
| #1 |
| Newbie Join Date: Jun 2013 Location: canada
Posts: 3
|
Hey everyone, Welcome to my build tread (hopefully by creating a tread it would keep me motivated enough to finish the project) I started brainstorming what i wanted from this unimog which were 1. must have space for full interior and engine bay 2. doors and hood must open 4. it must look as realistic as possible 5. all mounting systems must be hidden from view 6. must hold full size battery pack after blocking out the initial shape in a cad software i realized i had major issues: 1. dingo wheel base is too short 2. the cab needs to move forward to give motor space. 3. the battery and electronics needs to be re arranged if full interior space was to be achieved. so before even starting on the body i had to create: 1. a bracket to relocate servo to chassis for realism, yet be low profile enough to have full engine bay and interior space. 2. with the above cms i will require a pan hard system to remove bump steer. 3. the battery and electronics will need to be hidden but not compromise space from engine bay and interior. after looking online to see what others have done for cms + panhard i came up with this, its not original concepts but its heavily modified to over come 3D printing weaknesses and limitations and pan hard tweaked for 0% bump steer and positive camber. it currently has the same amount of flex as a rtr scx10 in the front. heres a picture of the cms + panhard 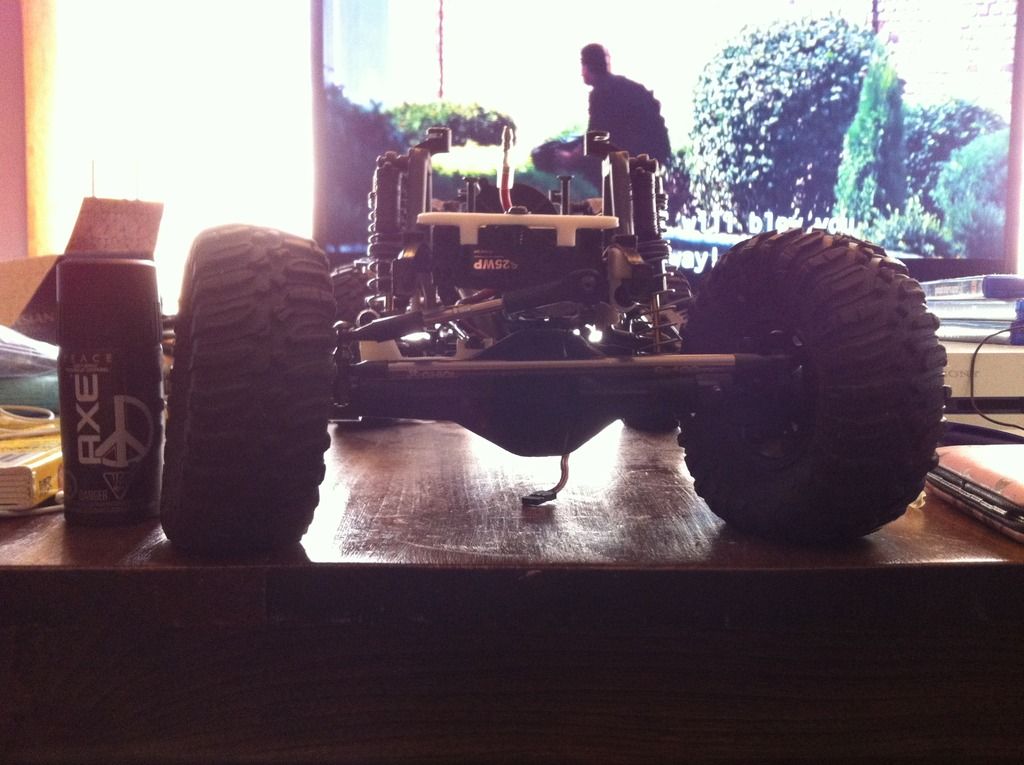 and heres a link to the video IMG_1121_zps0jcpssiv.mp4 Video by Jacz_Loewen_Yang | Photobucket hmm this post is taking to long =/ ill just show pics of where im at with this project. interior area  engine bay area + body mounts 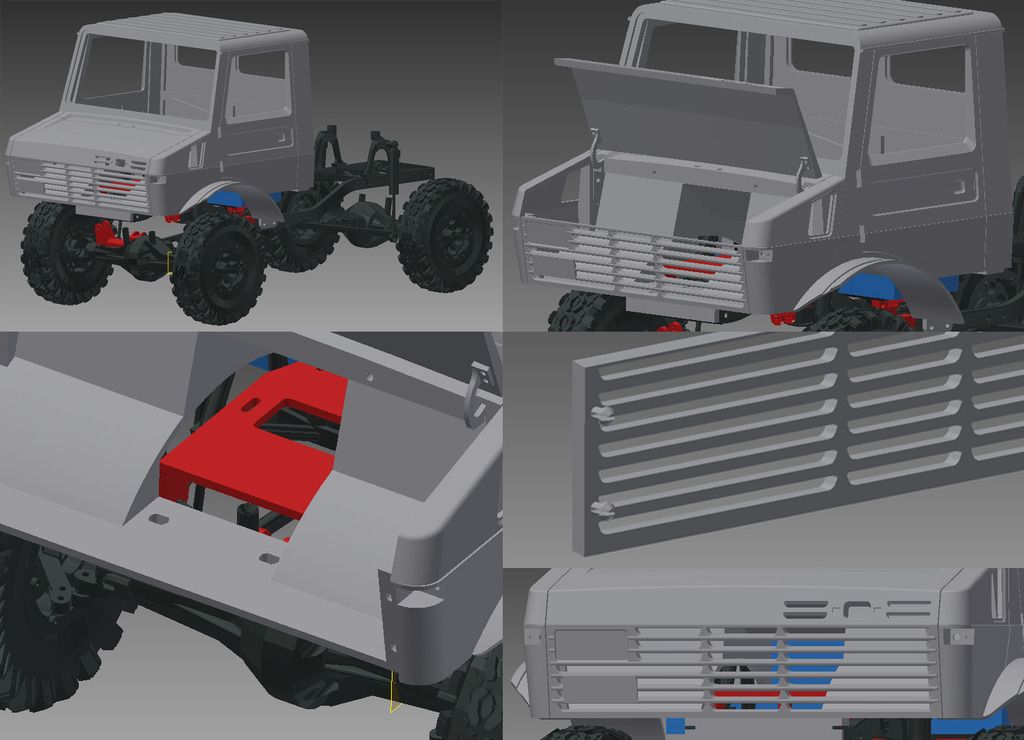 body mount bracket test 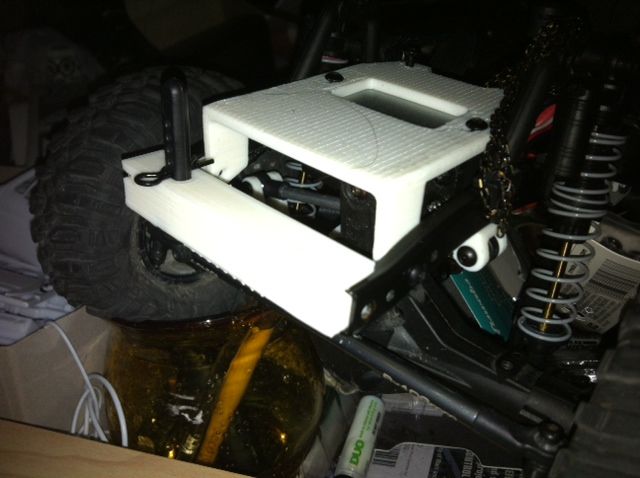 all structural parts done ready for test print. 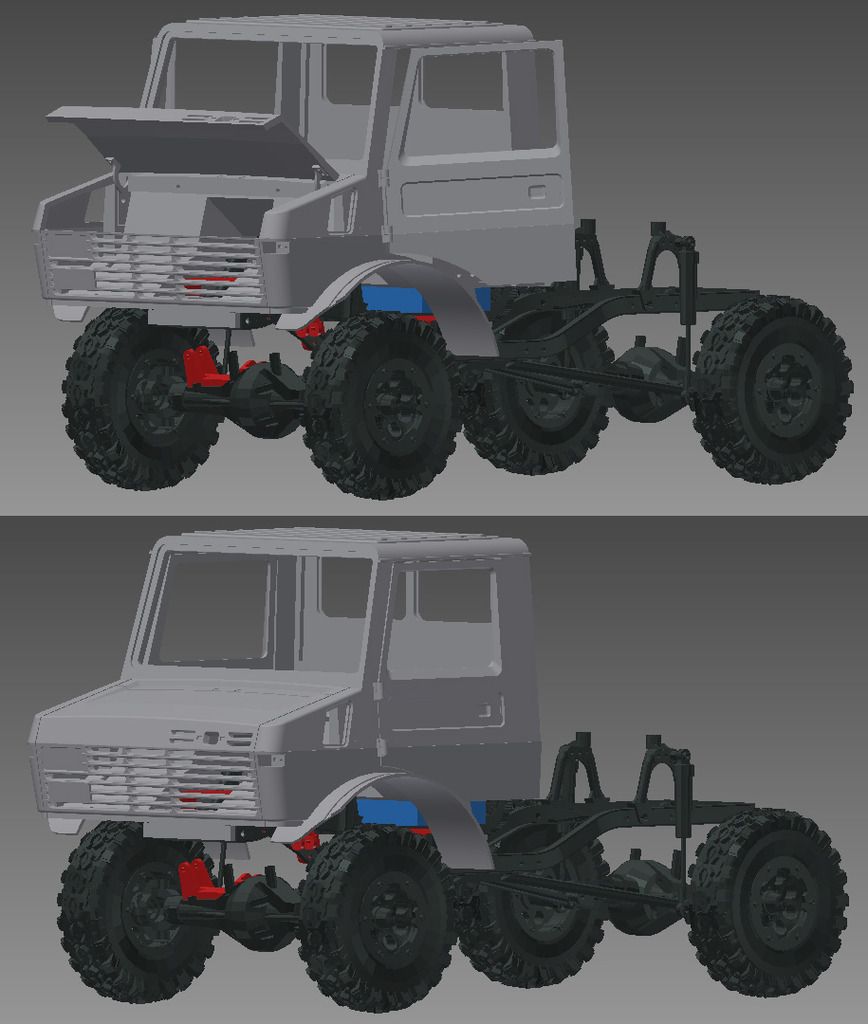 first piece printed and fitted 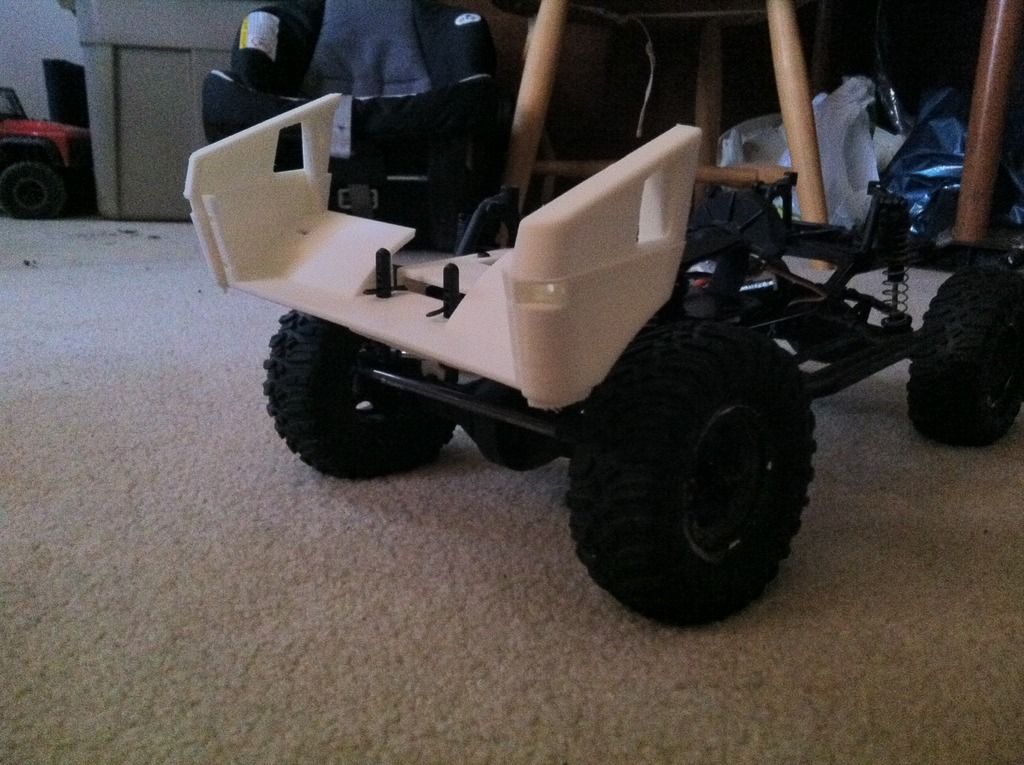  let me know what you guys think =] |

|  |
| Sponsored Links | |
| | |
|
04-06-2015, 09:57 AM
| #2 |
| Newbie Join Date: Jan 2015 Location: Colorado Springs
Posts: 1
|
Looks like its gona be pretty sweet. Keep the posts coming! Sent from my iPhone using Tapatalk |
|
| |
|
04-06-2015, 10:01 AM
| #3 |
| Pebble Pounder Join Date: Jun 2014 Location: South Ontario, Canuckistan
Posts: 117
|
Really creative idea and super cool! hope to see more posts!  |
|
| |
|
04-06-2015, 10:20 AM
| #4 |
| Rock Crawler Join Date: Nov 2004 Location: Lost in Florida
Posts: 934
|
this should be sick when you complete it !
|
|
| |
|
04-07-2015, 07:56 PM
| #5 |
| Newbie Join Date: Apr 2015 Location: Calgary
Posts: 1
|
Ever consider making the U1350, which I believe is a 4 door version? Might help to hide the eng/trans and give you a bit more room with electronics. My name is Mud! |
|
| |
|
04-10-2015, 10:45 PM
| #6 | |
| Newbie Join Date: Jun 2013 Location: canada
Posts: 3
|
thanks for the support guys its been a while because... well each part was around 10 hours to print. and some parts barely fit the print bed and actually drooped off the print surface... so heres the update. i have good news and bad news. the good everything seems to work okay. positioning, mounting points, screw holes etc they all line up even when the parts themselves warped during print. so the design works. the bad - manufacturing 1. in order to fit the limitations of my printer the cab floor and firewall had to be turned into 2 pieces which lowers the structural integrity and adds a ugly seam where it doesn't exist on the 1:1. the 4 screw method to bolt these 2 pieces together seems solid. 2. the ABS plastic i used warped heavily which just really ruins appearance and fitment. i will research and order some alternative thermoplastics to see if it will print with out warping. 3. the 3d slicer software to turn the CAD model into something the printer understand seems crappy. like my printer had a .4mm nozzle so if i want solid beads my measurements has to be a multiple of .4 so 2mm wall thickness should be 5 beads of plastic. in some areas it would only print 3-4 beads and leave a gap. and this usually happen around high stress areas. 4. the roof. i think the only way to really add strength to this piece is to have 4 holes in each corner and use a screw to screw into the 4 pillars. simply gluing the piece on i dont think it will survive a roll over. which adds ugliness to the appearance, maybe some filler will be needed to cover the screw after assembly. heres some pictures 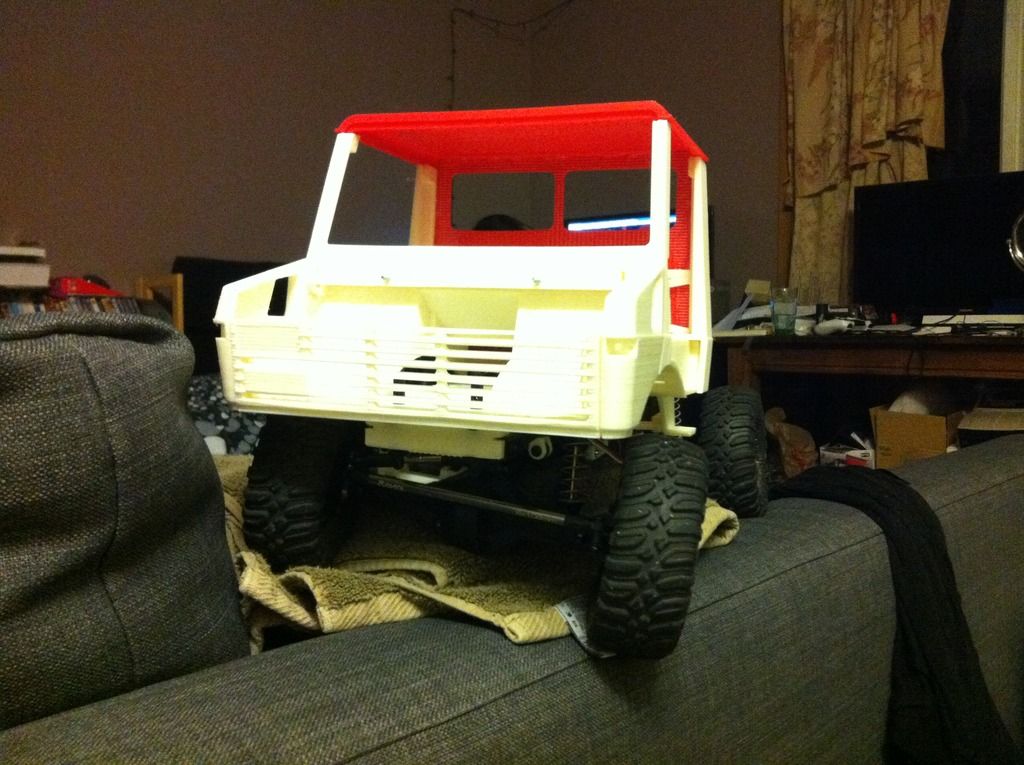 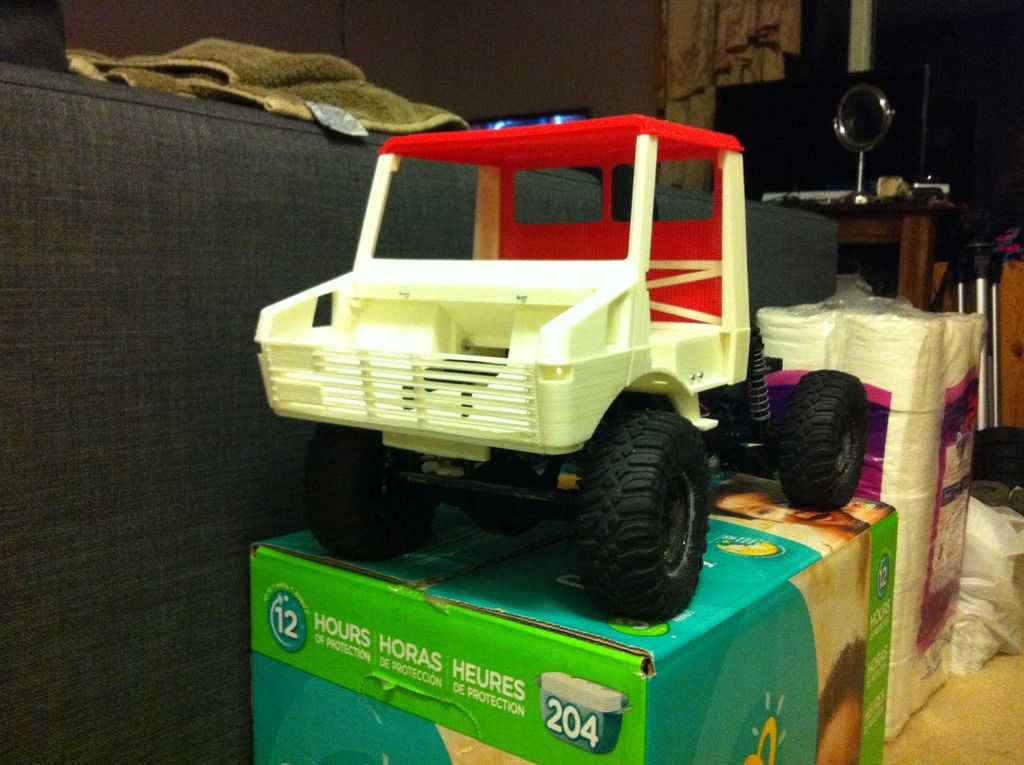 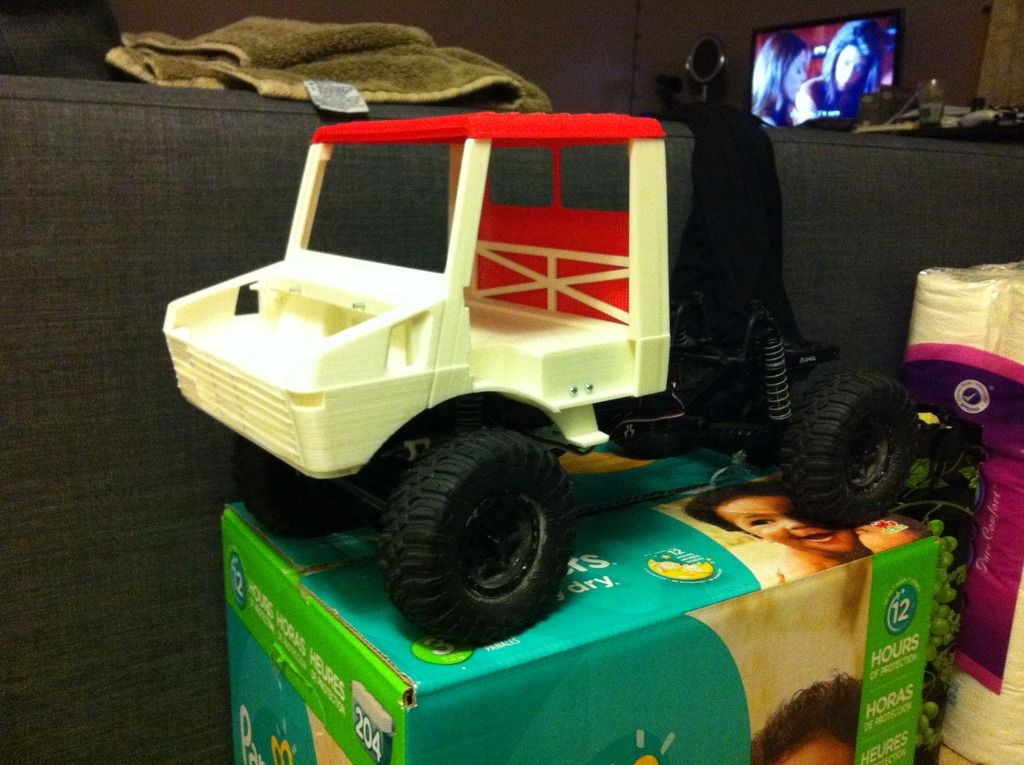 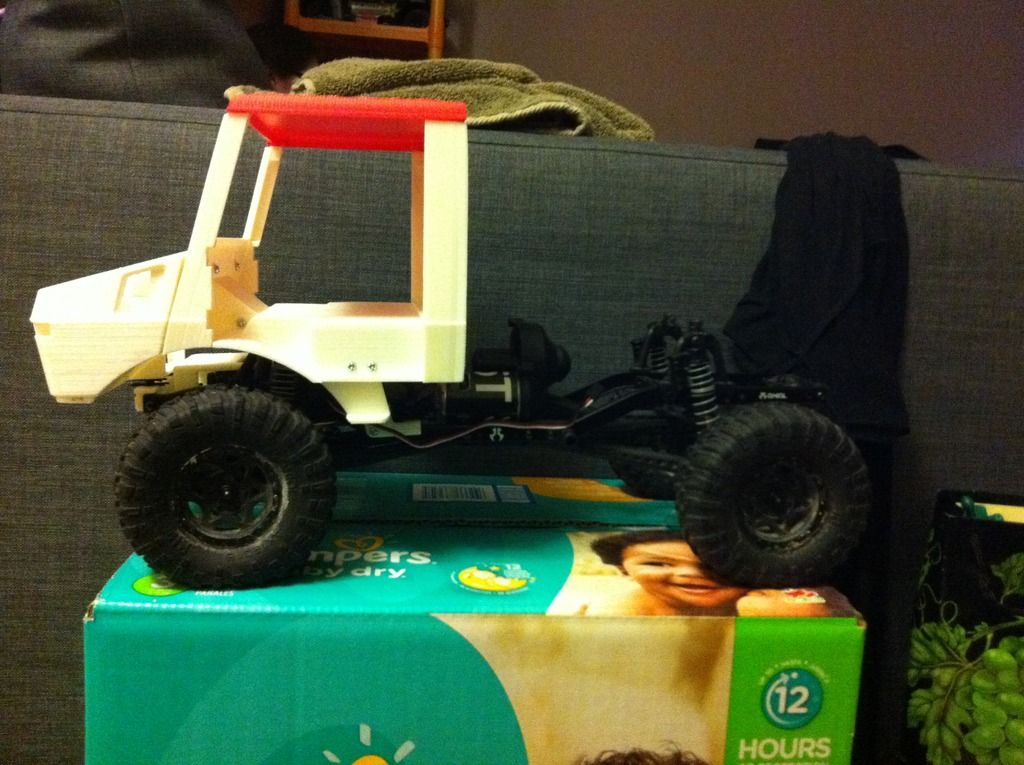 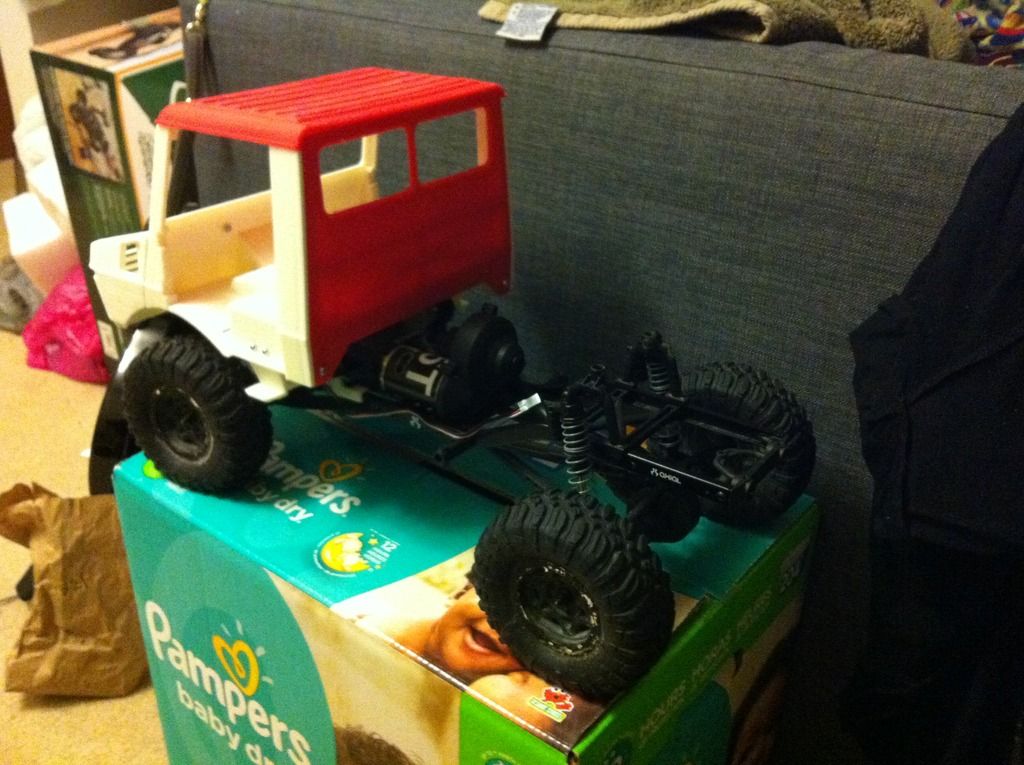 so the to do list 1. research new 3D slicer software or buy a better printer... 2. research ABS plastic alternatives will order some PLA to try. weaker but wont warp. 3. now that i know there is plenty of clearance between the cab and motor ill edit the back plate to have that arch at the bottom. then ill try printing it all again =] Quote:
even if i have to print the roof and floor as 2 peices to extend the cab thats no problem the problem i have is making new chassis rails etc. the electrics is no problem for me. i have a couple of options 1. wire it into the engine bay and print some engine looking part and have everything hidden in there. 2. since a fxr esc and flysky reciver is tiny. i could have 2 gas tank looking parts and hang one off each side. | |
|
| |
|
04-29-2015, 05:33 AM
| #7 |
| Pebble Pounder  Join Date: Jan 2014 Location: Chester, WV
Posts: 188
|
Great job dude! 3D printing is great but there are always issues to deal with we have an Objet printer $250,000.00 and pieces warp sometimes. i don't run the printer but the guy who does works for me and he says UV light has a lot to do with the warpage. we always weight things down until we use them. i work for a major china manufacture so our parts are obviously different but, if your parts are warping after you print try painting them rather quickly after print maybe this will decrease the UV warp. im sure the type of printer matters the most but most people cant drop 250,000 on one...lol if i remember later i will add a picture to this post of a battery tray i had done for a 2.2 shafty rig i built...keep up the good work. SORRY DAMN PICTURE IS UPSIDE DOWN Last edited by GEISSE-RC; 04-29-2015 at 07:16 PM. |
|
| |
|
04-30-2015, 09:01 PM
| #8 |
| I wanna be Dave Join Date: Jul 2014 Location: Deep South
Posts: 3,444
|
Print the roof corners thicker and counter sink some tapered head screws into it to be flush. Side tanks are a good idea, too. For a little inspiration. I saw this at my hotel one stay while in Mexico.  |
|
| |
|
| Tags |
| 3d printed, axial, hard body, scx10, unimog |
 3d printed Unimog U1300L Hard body project - Similar Threads
 | ||||
| Thread | Thread Starter | Forum | Replies | Last Post |
| The DSPro Unimog U1300L Class 2, Milex Cab announcement! | rbgerrish | 1.9 Scale Rigs | 99 | 03-20-2023 09:06 PM |
| H2Micr0's Unimog U1300L | H2Micr0 | 1.9 Scale Rigs | 29 | 05-15-2017 12:47 AM |
| First build: Unimog U1300l Camper | b8point6 | 1.9 Scale Rigs | 10 | 02-09-2015 09:56 PM |
| |


 Linear Mode


