| |
| |||||||
 |
| | LinkBack | Thread Tools | Display Modes |
 01-12-2017, 07:58 AM
| #21 |
| Rock Crawler Join Date: May 2014 Location: Cluj-Napoca,Romania
Posts: 650
|
Waiting for that.I was quite surprised seeing a plastic bushing there
|

|  |
| Sponsored Links | |
| | |
|
01-12-2017, 08:26 PM
| #22 |
| I wanna be Dave Join Date: Sep 2012 Location: Victoria, BC
Posts: 2,257
|
Confirmed...10x5x4mm bearing.  |
|
| |
|
01-12-2017, 08:28 PM
| #23 |
| I wanna be Dave Join Date: Sep 2012 Location: Victoria, BC
Posts: 2,257
|
Ordered on Sunday evening from RPP...in my hands in four days with regular USPS shipping including the time CBSA takes to charge the Canadian taxes! Shout out to Canada Post too. 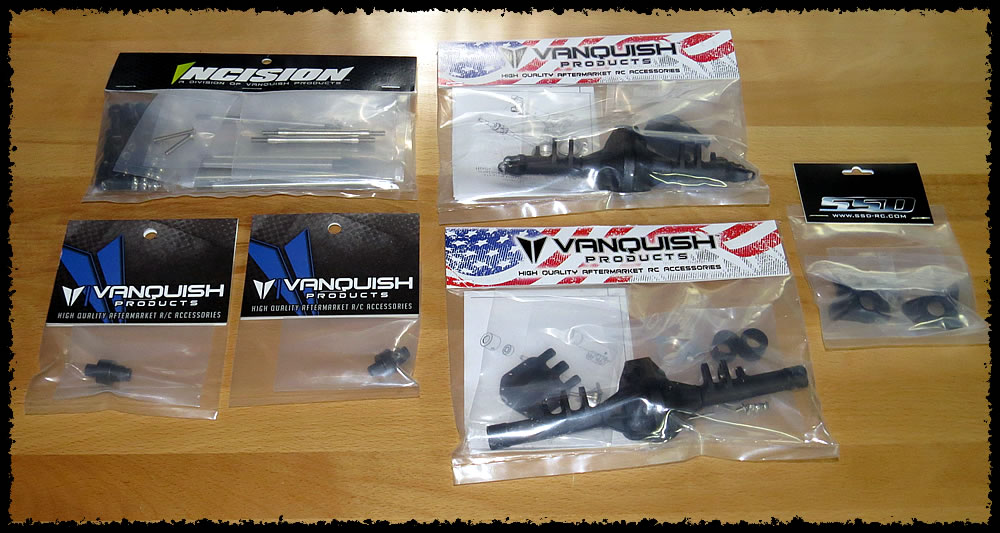 Last edited by bilinvic; 08-17-2017 at 09:12 PM. |
|
| |
|
01-12-2017, 10:29 PM
| #24 |
| Rock Stacker Join Date: Jul 2016 Location: Amherstburg, Ontario, Canada
Posts: 95
|
Lots of nice doodads going into this build. That's some nice quick shipping for sure considering time lost passing thru customs. I've had good luck over here in Ontario too when ordering from RPP. |
|
| |
|
01-12-2017, 11:37 PM
| #25 |
| I wanna be Dave Join Date: Sep 2012 Location: Victoria, BC
Posts: 2,257
|
Some progress this evening; The frame/chassis is mostly assembled except for the front and rear bumper/frame braces because I don't know what I will be using yet. I did use a STRC black aluminum chassis H-brace because they are nice and clean looking and have pre-threaded holes for mounting anything in the future. The difference between the Incision locker and the Axial locker is substantial when using the Axial axles (front & rear). With the Axial locker and rear axle, I can hear metal clinking when checking for slop and with the Incision locker, the rear axle had to be inserted with a slight bit of force and there is zero slop. In fact, I had to slightly file one of the front Axial universal axles tangs to get it to fully seat in the Incision locker. The SSD knuckles fit perfectly on the integrated VP Currie 10.2 C-hubs. I did change the hardware to stainless though. I couldn't over-tighten the knuckle screws because the knuckles would bind and I tried both the Axial shoulder bolts and the SSD screws with the supplied brass sleeves; I used a touch of red Loctite on these four screws so they won't loosen. I will keep an eye on them for the first couple of runs. As mentioned in my v.1 10.2 build, a Traxxas shim (TRX1985) was put on the pinion output shaft (external) sandwiched between the outer bearing and driveshaft. This results in a perfect gear lash without any binding in both directions. I was eager to check the VP Method wheel fitment using the VP .350 SLW hubs with the Exile RC SLW hub weights because I was worried about the clearance between the weight and the knuckle...but that worry was short lived, there's plenty of room to my relief. I'm wanting to use the narrow SLW offset to keep a somewhat scale track width appearance with the SR5 body. Regarding the gap some folks are reporting with the VP 10.2 Currie diff cover, I actually experienced a slight gap too. I replaced the supplied hardware for the bearing retainers with button head SS hardware and this has eliminated the gap...the cap head bolts are too tall and do not allow the diff cover to fully seat properly. I love the look of the new VP 10.2 Rockjock axles along with the SSD 10.2 knuckles. The SS Incision tie rod adds some nice forward weight compared to the light aluminum kit parts. 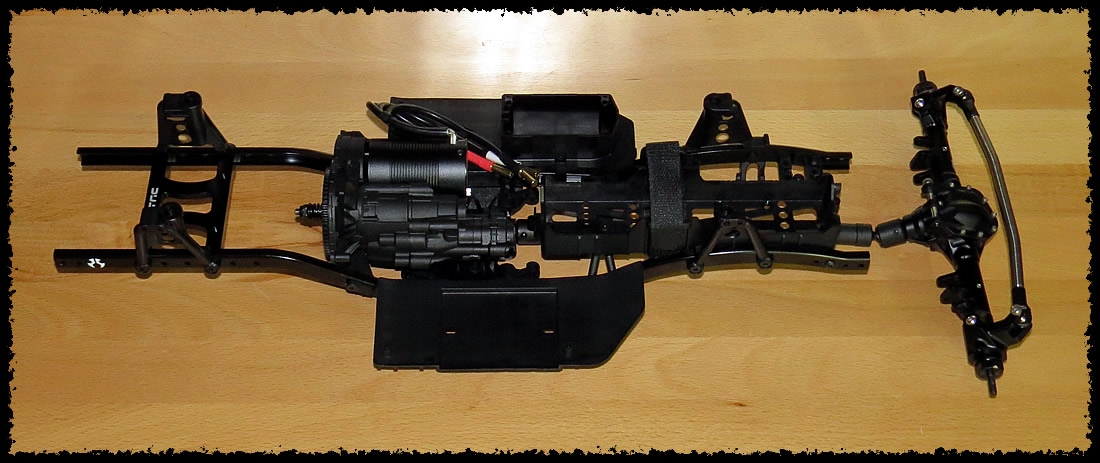 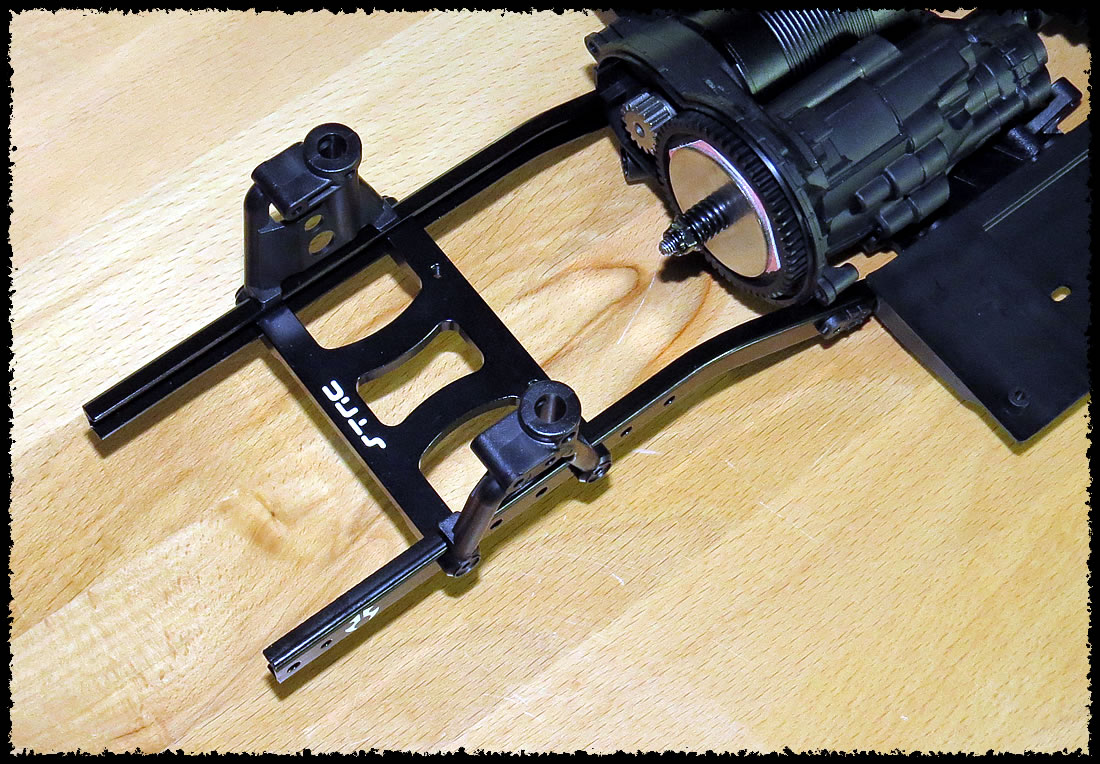 Incision locker (top) vs. the stock Axial locker (bottom) 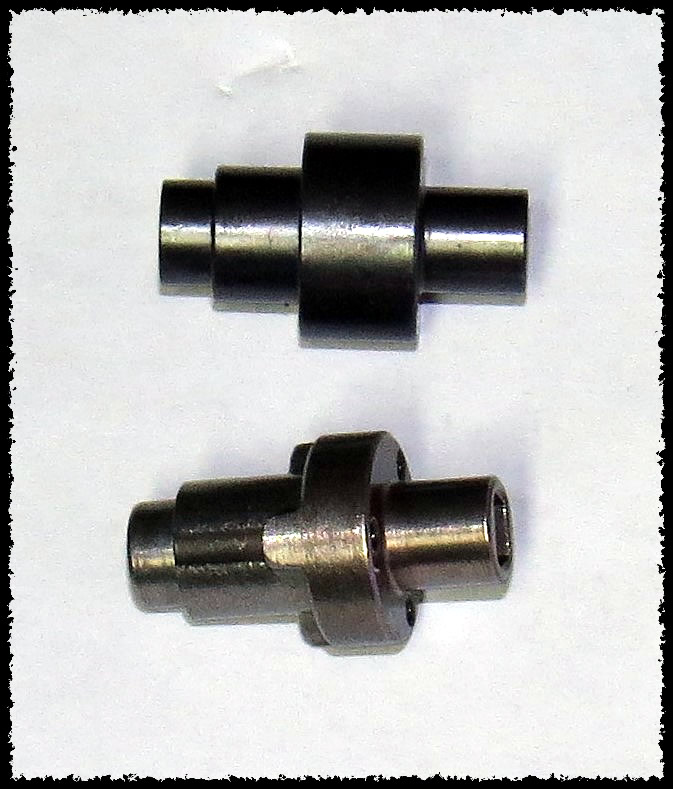 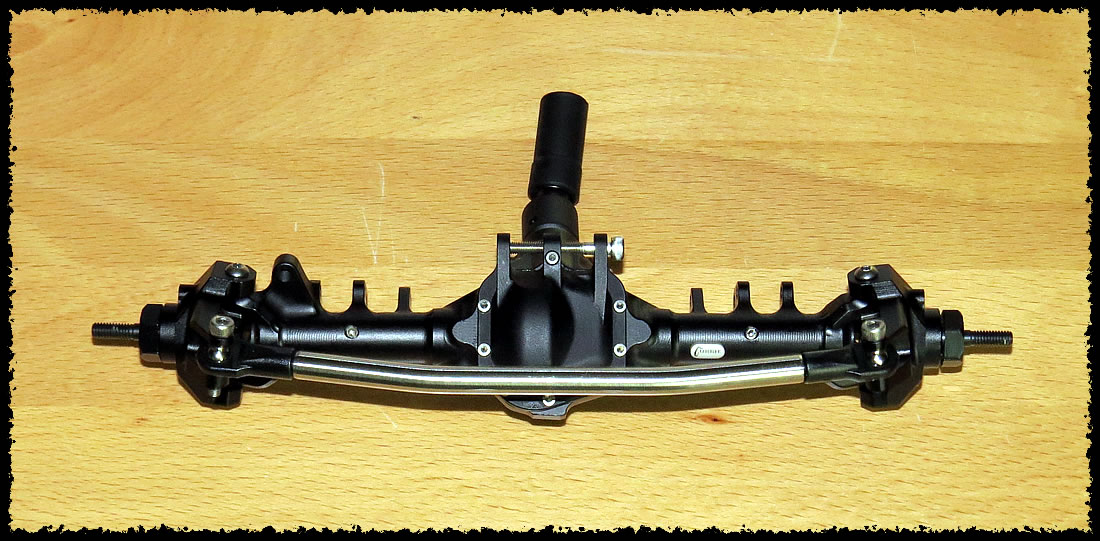 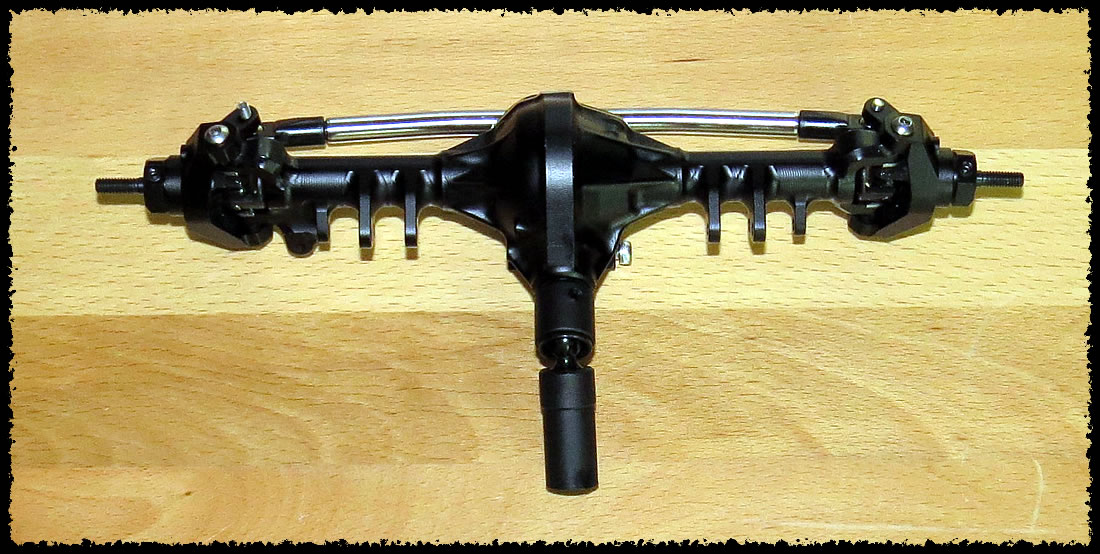 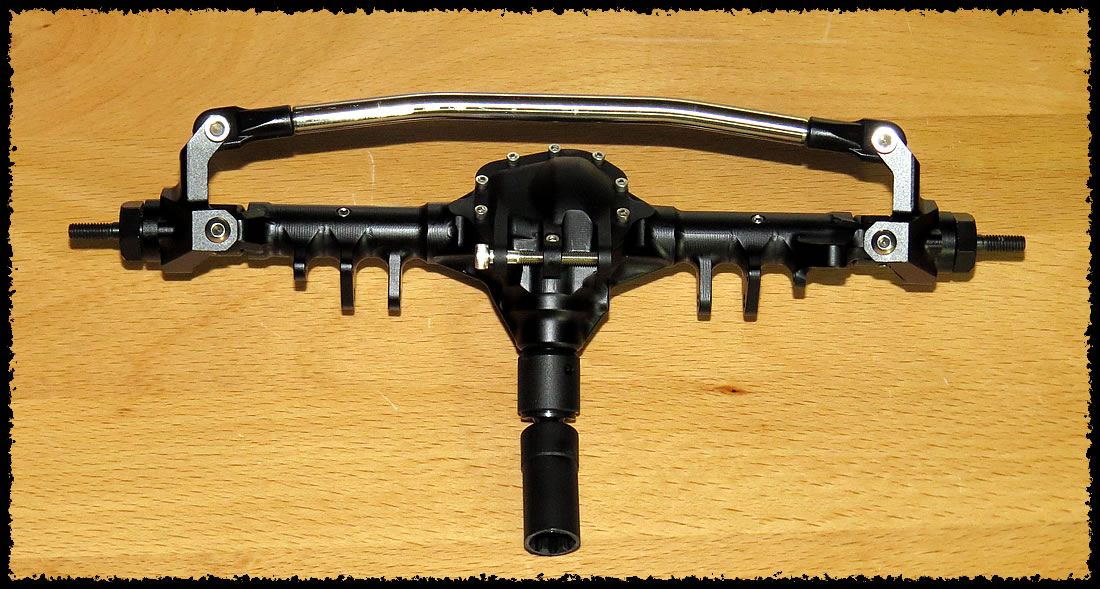  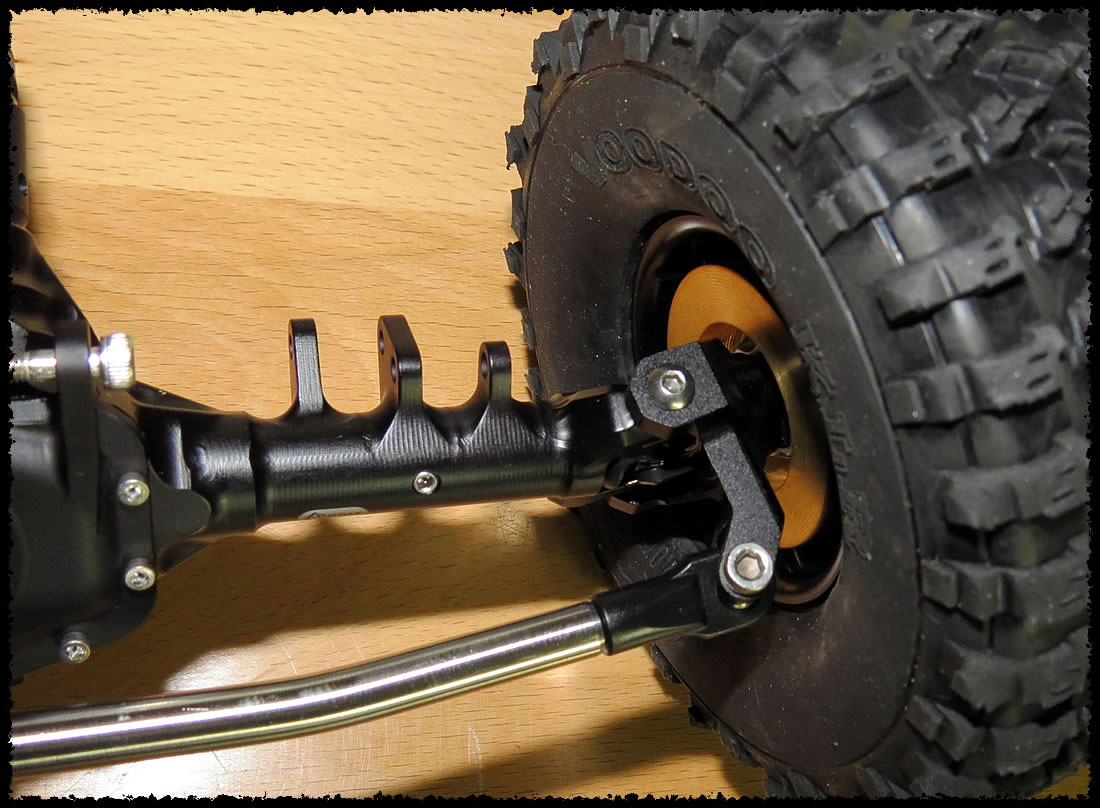 Last edited by bilinvic; 08-17-2017 at 09:15 PM. |
|
| |
|
01-13-2017, 03:24 AM
| #26 | |
| Rock Crawler Join Date: Jun 2009 Location: UK
Posts: 617
| Quote:
Are you going to have to cut the back out of the cab for the kit transmission to fit in, or are you going to use the SCX10 V1 transmission? Last edited by neilus; 01-13-2017 at 05:01 AM. | |
|
| |
|
01-13-2017, 05:21 AM
| #27 | |
| Rock Crawler Join Date: May 2014 Location: Cluj-Napoca,Romania
Posts: 650
| Quote:
| |
|
| |
|
01-13-2017, 06:06 AM
| #28 |
| Rock Crawler Join Date: Jun 2011 Location: Tifton
Posts: 590
|
Damn button head cap screws. Why do Vanquish use them so much? |
|
| |
|
01-13-2017, 06:12 AM
| #29 |
| Rock Crawler Join Date: May 2014 Location: Cluj-Napoca,Romania
Posts: 650
|
Probably because they are clean looking?
|
|
| |
|
01-13-2017, 07:38 AM
| #30 | |
| I wanna be Dave Join Date: Sep 2012 Location: Victoria, BC
Posts: 2,257
| Quote:
| |
|
| |
|
01-13-2017, 06:25 PM
| #31 |
| Pebble Pounder Join Date: Mar 2016 Location: Pacifica
Posts: 118
|
Bill, i love the way you build sir. All the best, ~D |
|
| |
|
01-13-2017, 07:05 PM
| #32 |
| RcBros Hobbies   Join Date: Nov 2005 Location: Oregon
Posts: 4,646
|
Clean build, thanks for sharing.
|
|
| |
|
01-14-2017, 12:15 AM
| #33 | |
| Newbie Join Date: Jul 2016 Location: Sweden
Posts: 23
| Quote:
| |
|
| |
|
01-14-2017, 03:46 AM
| #34 |
| Pebble Pounder Join Date: Mar 2016 Location: Pacifica
Posts: 118
|
Hey Kronblom, Go to page 20 step 22 part AX31027 is the plastic bushing you want to replace with the 5x11x4mm ball bearing that goes in the center of the spur gear. ~D |
|
| |
|
01-14-2017, 08:09 AM
| #35 | |
| Newbie Join Date: Jul 2016 Location: Sweden
Posts: 23
| Quote:
Thanks! | |
|
| |
|
01-15-2017, 10:07 AM
| #36 |
| I wanna be Dave Join Date: Sep 2012 Location: Victoria, BC
Posts: 2,257
|
For now I'm using the stock shocks, they perform really well on my v.1 10.2 and continue to be leak free. I can see myself getting the new Gmade RSD Piggyback Shock Absorber (90mm) when they come in stock at RPP though. Factory Team 35w was used for the front shocks along with the white stripe springs, 60w for the rears with the yellow stripe springs. To keep the shocks from leaking, I used a Traxxas shock rebuild kit (TRX2362) that comes with four blue x-rings; enough to build all four Axial Icon shocks. It takes some work to manipulate the x-ring into the Icon shock body opening. Lot's of Green Slime makes this task easier. I then cut a piece of Teflon plumber's tape, fold in half and wrap the top of the shock body.  Last edited by bilinvic; 08-17-2017 at 09:16 PM. |
|
| |
|
01-15-2017, 10:34 AM
| #37 |
| I wanna be Dave Join Date: Sep 2012 Location: Victoria, BC
Posts: 2,257
|
The build continues...I am at mock-up "roller status". The wheelbase has been lengthened to 326mm (12.83") compared to 313mm (12.3") in stock form. I accomplished this by replacing the Revo link ends with longer Traxxas Jato (TRA5525) link ends on the rear Incision stainless steel links. The front end was lengthened as well, but not as much as the rear so that the steering geometry and clearances were not drastically altered. I used modified Jato link ends on the skid plate end of the three front links; I trimmed 1/8" off of each Jato link end. Of course, lengthening the wheelbase results in the driveshafts having to be lengthened as well. Luckily I had new WB driveshafts from my Bomber sitting in my parts drawers. On the rear driveshaft I swapped the shorter female section for a long section and the same for the front. I was thinking of going with some Junfac driveshafts because they withstand some big power on my 2.2 rigs and look scale, but the Axial WB driveshafts are extremely dependable and lightweight. If I ever break one, maybe I'll make the change. The VP high pinion Currie diffs put the driveshafts way up high and out of harms way. I'm going to have to trim the back of the cab to fit over the transmission, it will be hidden because of the rear truggy section. As the body sits now, the wheel wells have been trimmed to the factory line; I will have trim them more to provide better clearance for the tires. I want the body to sit as low as possible in order to keep the CoG down low! The integrated front bumper may have to be trimmed off too, but I will wait until I figure out what front bumper I will be using. 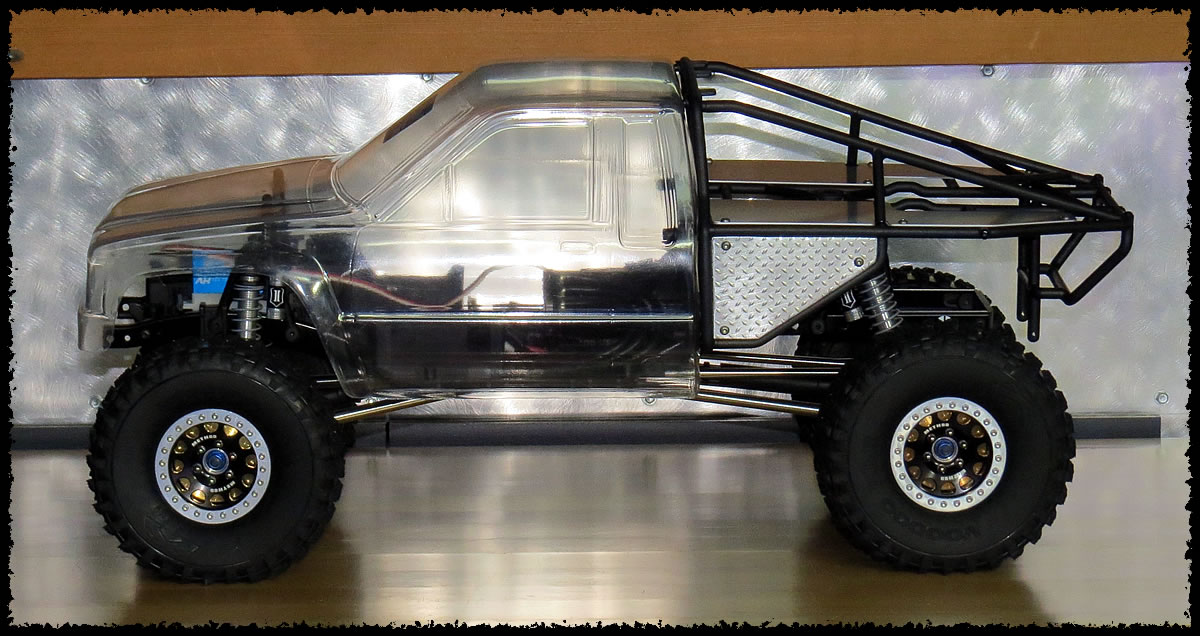 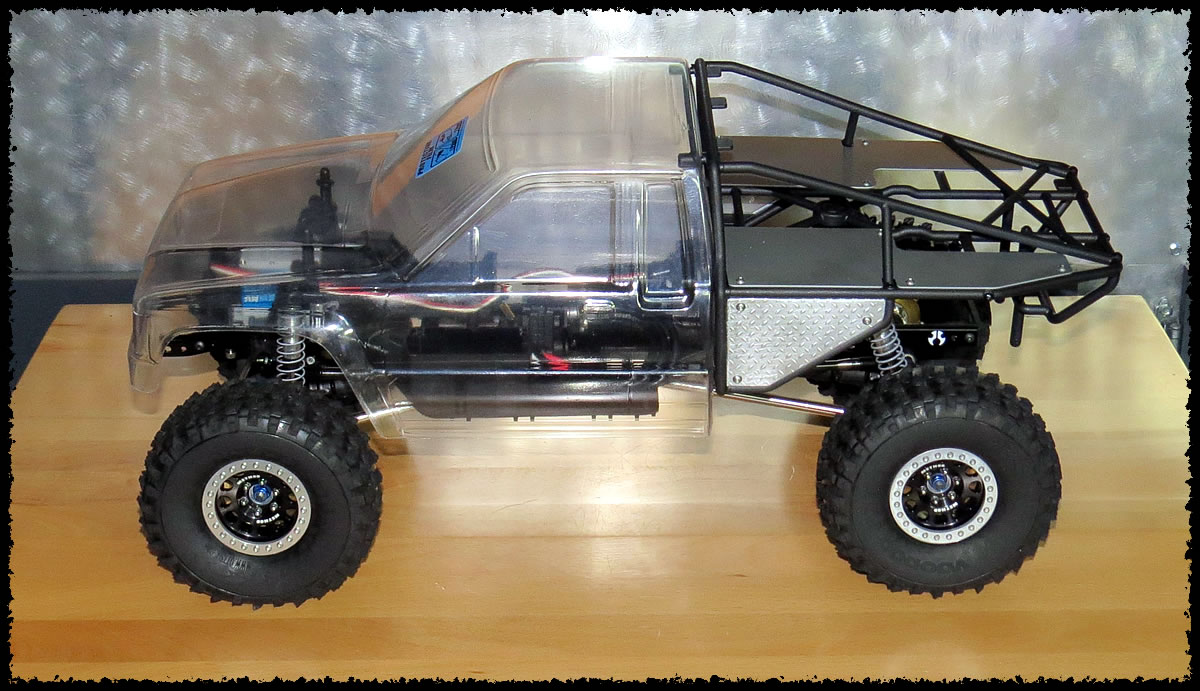 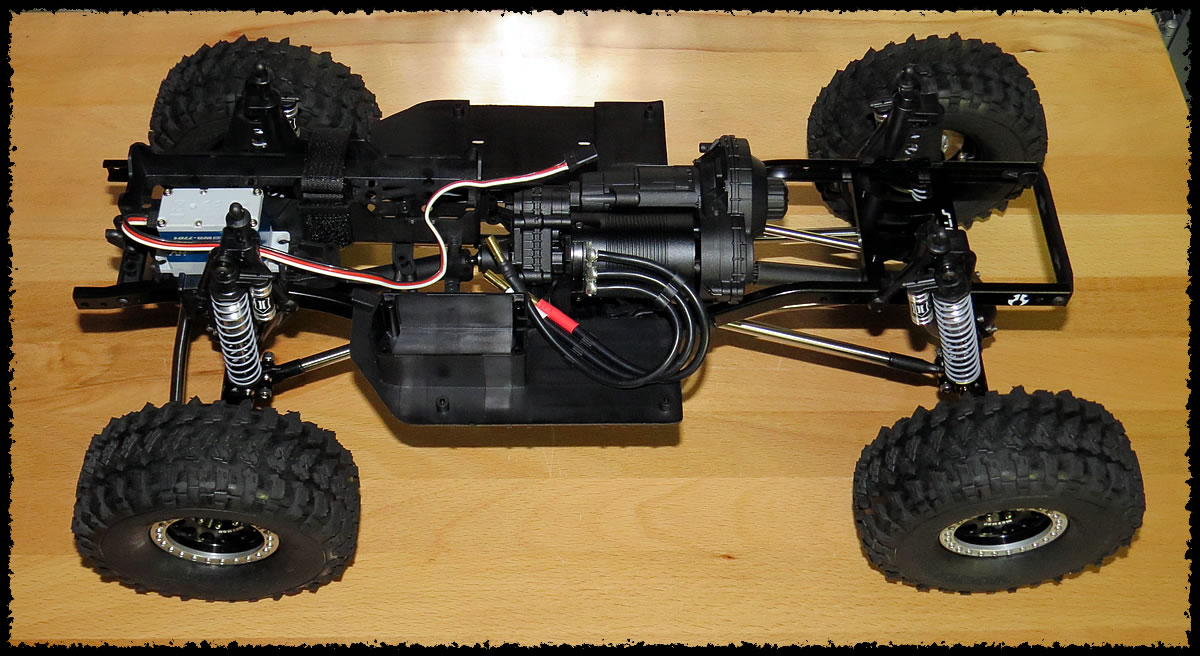 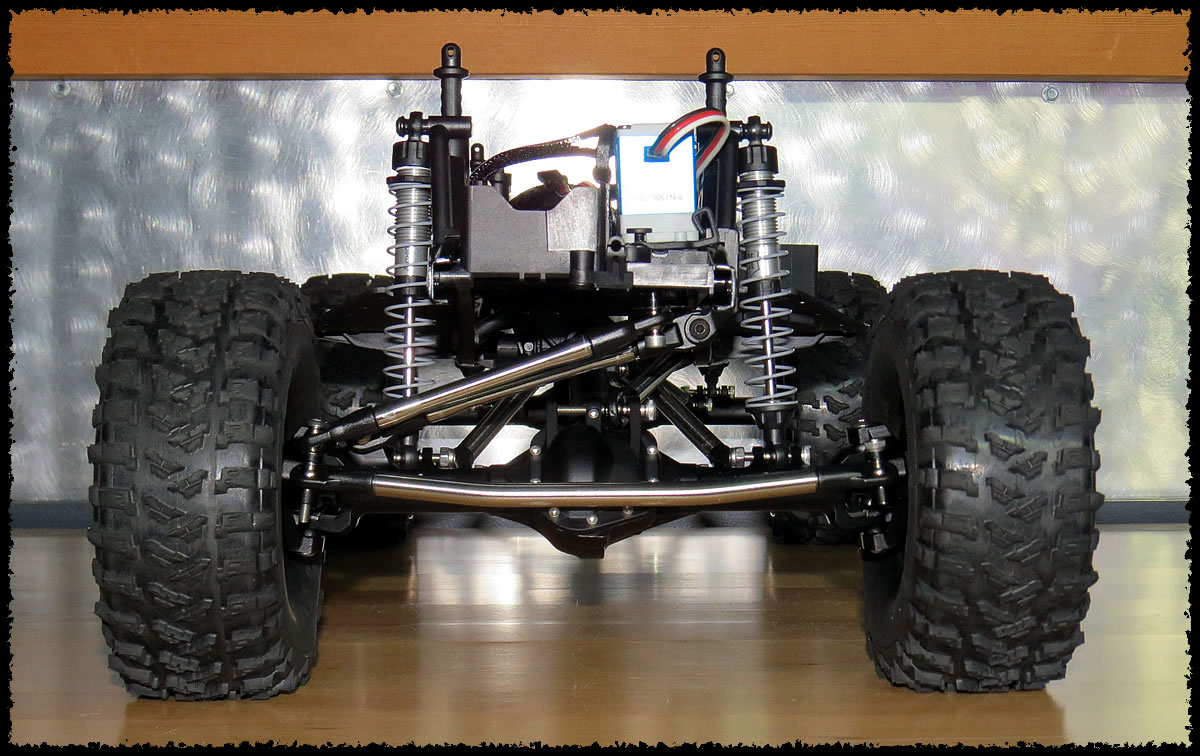 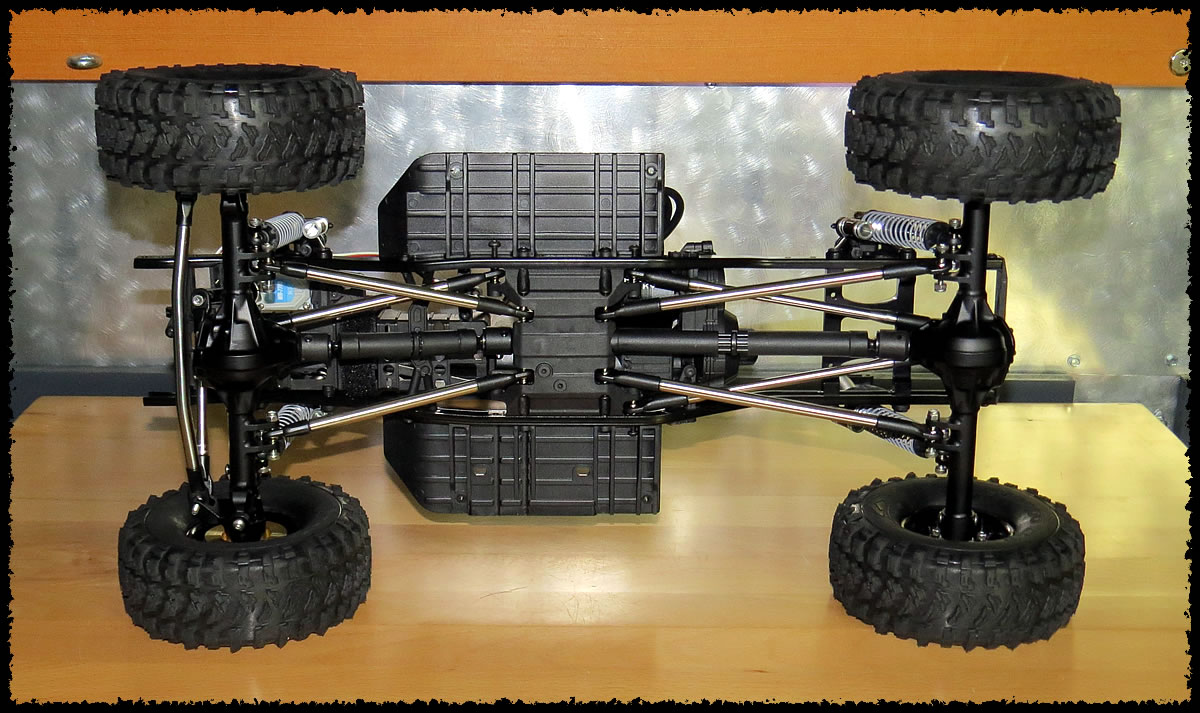 Last edited by bilinvic; 08-17-2017 at 09:17 PM. |
|
| |
|
01-15-2017, 10:52 AM
| #38 |
| Quarry Creeper Join Date: Dec 2015 Location: ossipee
Posts: 200
|
Why did you put weights in the rear to?
|
|
| |
|
01-15-2017, 11:04 AM
| #39 |
| I wanna be Dave Join Date: Sep 2012 Location: Victoria, BC
Posts: 2,257
|
The rear brass SLW "weight" is a dummy! It's thin and is there to simply add the correct backspacing to match the front.   Last edited by bilinvic; 08-17-2017 at 09:18 PM. |
|
| |
|
01-15-2017, 02:19 PM
| #40 |
| I wanna be Dave  Join Date: May 2015 Location: Moving
Posts: 2,580
|
The build looks fantastic, Bil. I love how you went big power with that standard Puller Pro instead of a stubby. You gotta try that truck on 4s at least once. |
|
| |
|
 bilinvic's SCX10.2 Build Ver. 2 - Similar Threads
 | ||||
| Thread | Thread Starter | Forum | Replies | Last Post |
| bilinvic's RR10 Bomber Build | bilinvic | Axial RR10 Bomber | 712 | 04-25-2020 08:09 AM |
| bilinvic's SCX10 II | bilinvic | Axial SCX10 II | 215 | 05-08-2018 11:06 AM |
| bilinvic's R1 Build | bilinvic | G-Made Crawlers | 82 | 03-14-2018 07:52 PM |
| bilinvic's Ultimate SCX10 '73 Bronco Build | bilinvic | Axial SCX-10 | 24 | 05-03-2015 05:55 PM |
| bilinvic's Second Wraith Build | bilinvic | Axial Wraith | 11 | 10-14-2014 05:39 AM |
| Thread Tools | |
| Display Modes | |
| |


 Linear Mode


