| |
 01-15-2017, 02:46 PM
| #41 |
| I wanna be Dave Join Date: Sep 2012 Location: Victoria, BC
Posts: 2,257
|
Thanxs Brian. Hopefully the finished version will be as nice as I envision it!!!! I have the ROC412 1800kV motor powered by 3S on my other 10.2 and I wanted just a bit more oomph and I figured the HH PP 2200kV motor would be right where I want it with 3S. I have been eyeballing the Wertymade bumpers, but there's very few photos of them mounted up and it's very important to me that whatever bumper I do go with is that it's tucked up close to the body.
|

|  |
| Sponsored Links | |
| | |
|
01-15-2017, 06:08 PM
| #42 |
| I wanna be Dave Join Date: Sep 2012 Location: Victoria, BC
Posts: 2,257
|
Electronics are in. Brief recap: MMP HH Puller Pro 2200kV Standard Castle 10a BEC Spektrum SR201 RX Xpert HV WR-7701 Brushless Servo The BEC is in the integrated rx box and is connected to the ESC power leads with a mini JST connector. From initial bench testing with 3S power, the HH PP 2200kV motor has plenty of get-up-and-go (gearing is stock 15t / 56t).  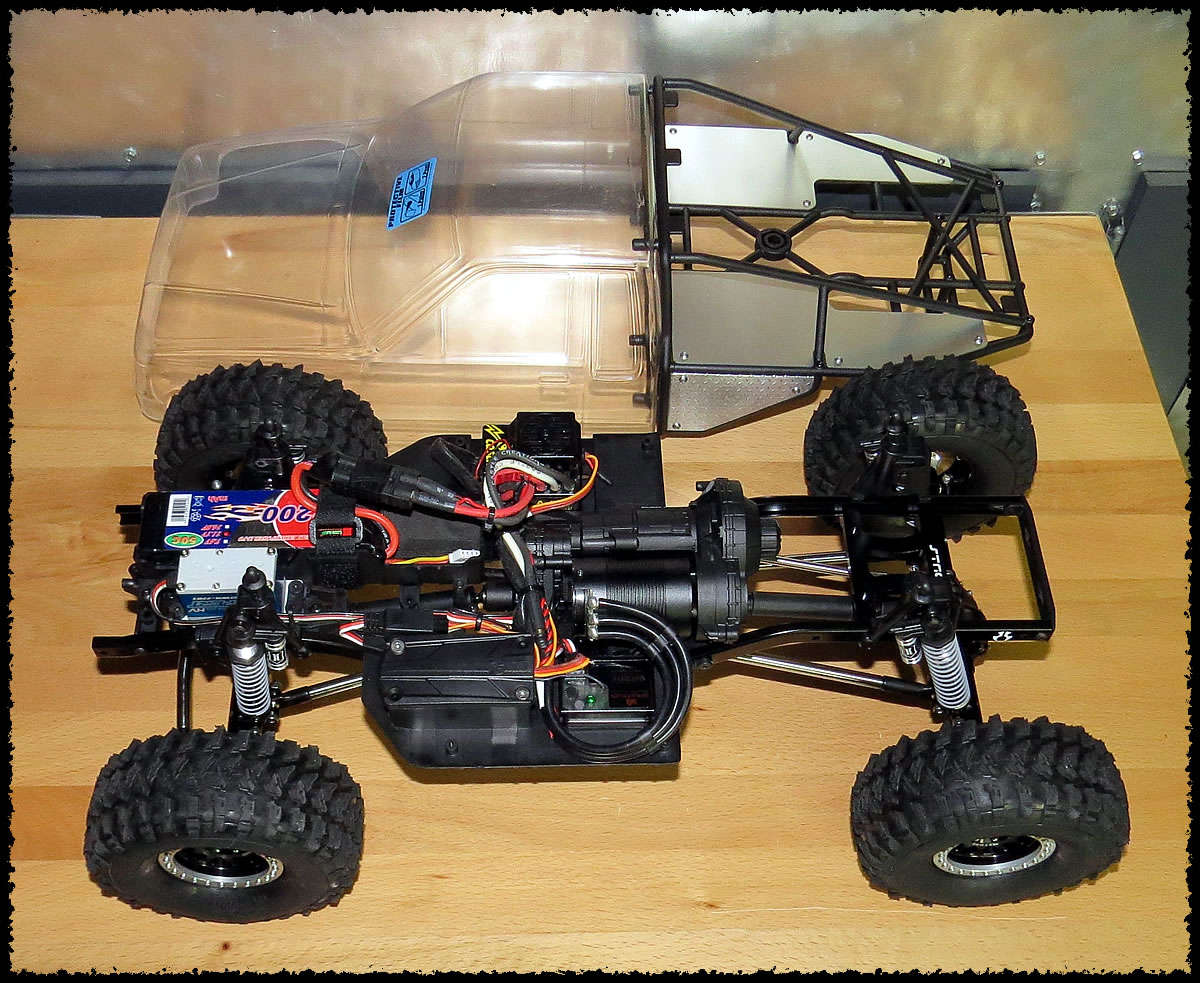 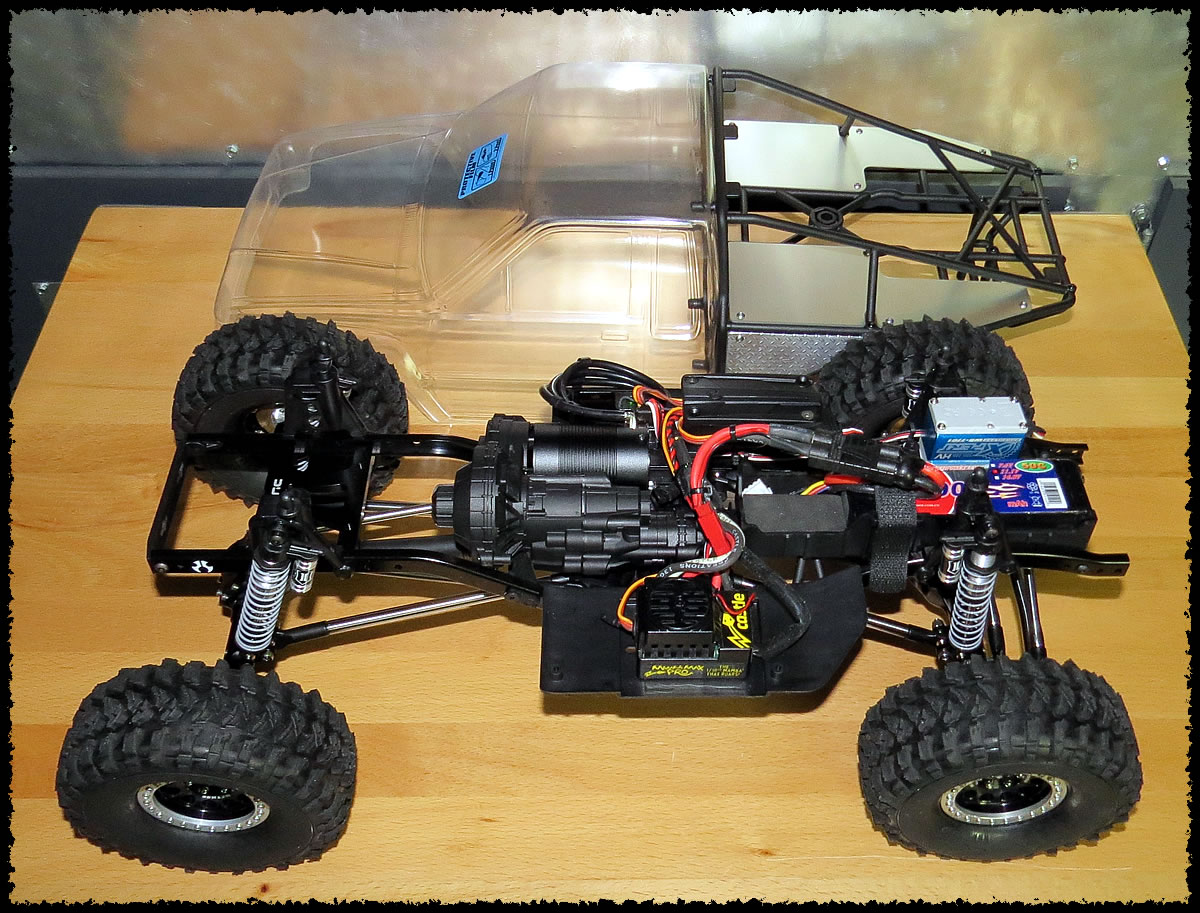 Last edited by bilinvic; 08-17-2017 at 09:26 PM. |
|
| |
|
01-19-2017, 05:34 PM
| #43 |
| I wanna be Dave Join Date: Sep 2012 Location: Victoria, BC
Posts: 2,257
|
Not much to report for updates yet, although I did receive the Freqeskinz wrap. This is the first one I have ordered and I'm very impressed with what I see; I'm looking forward to getting it applied to the SR5 cab. I'm waiting on a Wertymade SCX10 II Stubby Flattop Stinger front bumper to arrive before I ream the body post holes and paint the underside of the cab so I can ensure everything is going to fit and line up properly.
|
|
| |
|
01-20-2017, 04:35 AM
| #44 | |
| Pebble Pounder Join Date: Mar 2016 Location: Pacifica
Posts: 118
| Quote:
Also in your post #37 picture #4 of the front end, what did you use to attach the panhard link to the frame rail? because it's not stock. ~D | |
|
| |
|
01-20-2017, 06:09 AM
| #45 | |
| Pebble Pounder Join Date: Sep 2016 Location: Conowingo
Posts: 144
| Quote:
Last edited by fortyeightjake; 01-20-2017 at 06:11 AM. | |
|
| |
|
01-20-2017, 07:57 AM
| #46 | ||
| I wanna be Dave Join Date: Sep 2012 Location: Victoria, BC
Posts: 2,257
| Quote:
Quote:
| ||
|
| |
|
01-20-2017, 07:43 PM
| #47 |
| Newbie Join Date: Dec 2009 Location: salina
Posts: 16
|
I really like your build, can't wait to see it painted.
|
|
| |
|
01-26-2017, 09:18 PM
| #48 |
| I wanna be Dave Join Date: Sep 2012 Location: Victoria, BC
Posts: 2,257
|
I received the Wertmade bumper; looks to be a very nice and sturdy bumper...hopefully it will withstand some punishment!!! The only downside is that the 3 holes per side don't align with the frame holes on the 10.2 frame. If I used the rearmost holes on the bumper that the battery carrier also utilizes, the bumper would be tilted too far forward which would not be very favorable with the approach angle. When using the forward 2 holes I can get the bumper aligned in a much more upright position but the battery bolt holes cannot be used because the holes do not line up (not even close either). Out came the Dremel cut-off wheel and I cut the rearmost holes off so I can use the forward bolt holes as well as the middle elongated bolt holes and then I can get the battery bolts back in. Not a big deal, but I hate having to modify a brand metal part that's been powder-coated. When all is said and done, the bumper is exactly what I wanted and looks great. With the bumper mounted, I could finally get the body aligned and the body mount holes reamed. I added some custom "links" to the truggy frame so that the body can be tilted up for quick and easy battery changes out on the rocks. I only have to use two body clips on the hood. The rear mount holes in the bed's aluminum plate are simply for ensuring the body stays aligned. It's a very slick design if I don't say so myself!!! I also mounted a RC4WD fuel cell between the chassis rails. Now it's finally time to get the body painted black on the inside and get the Freqeskinz wrap applied. Hopefully this weekend. 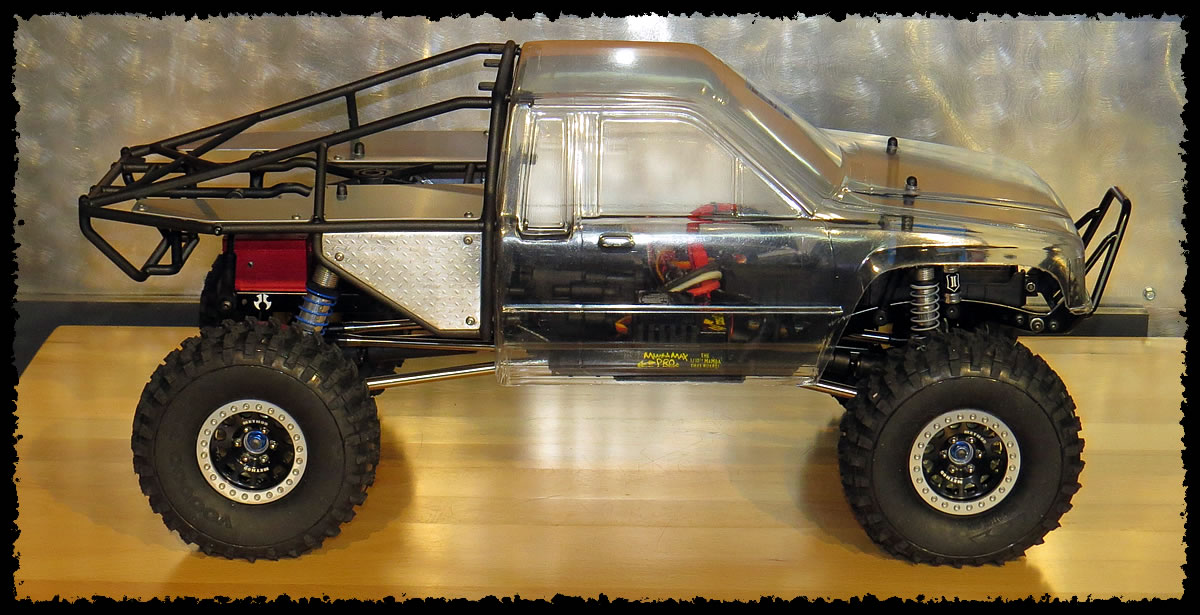 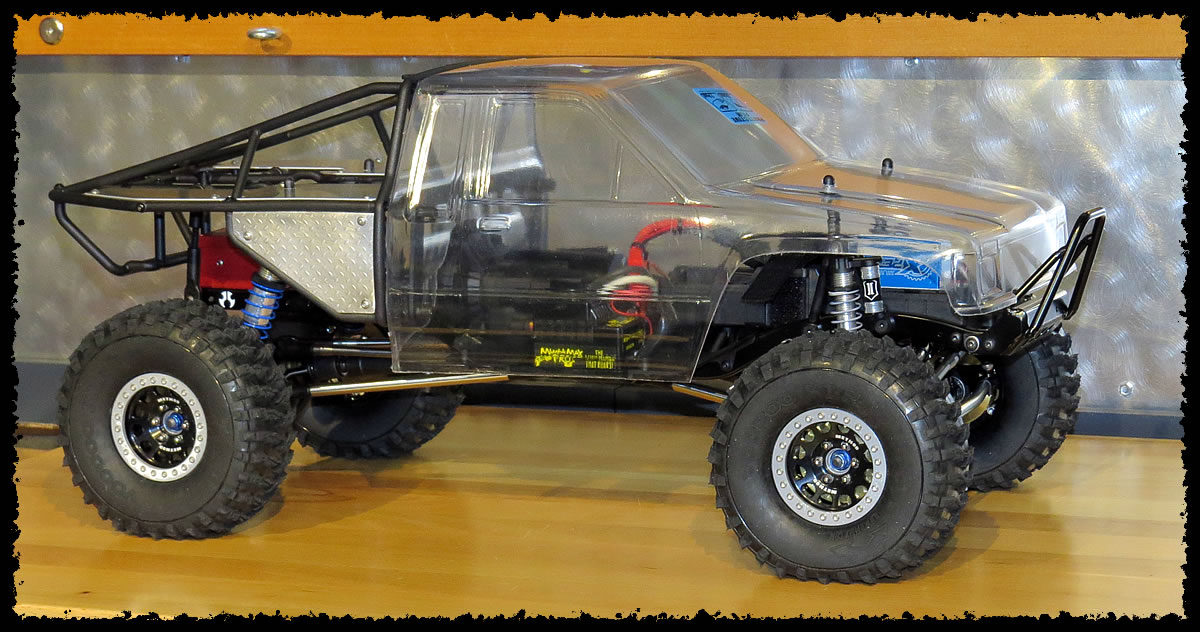 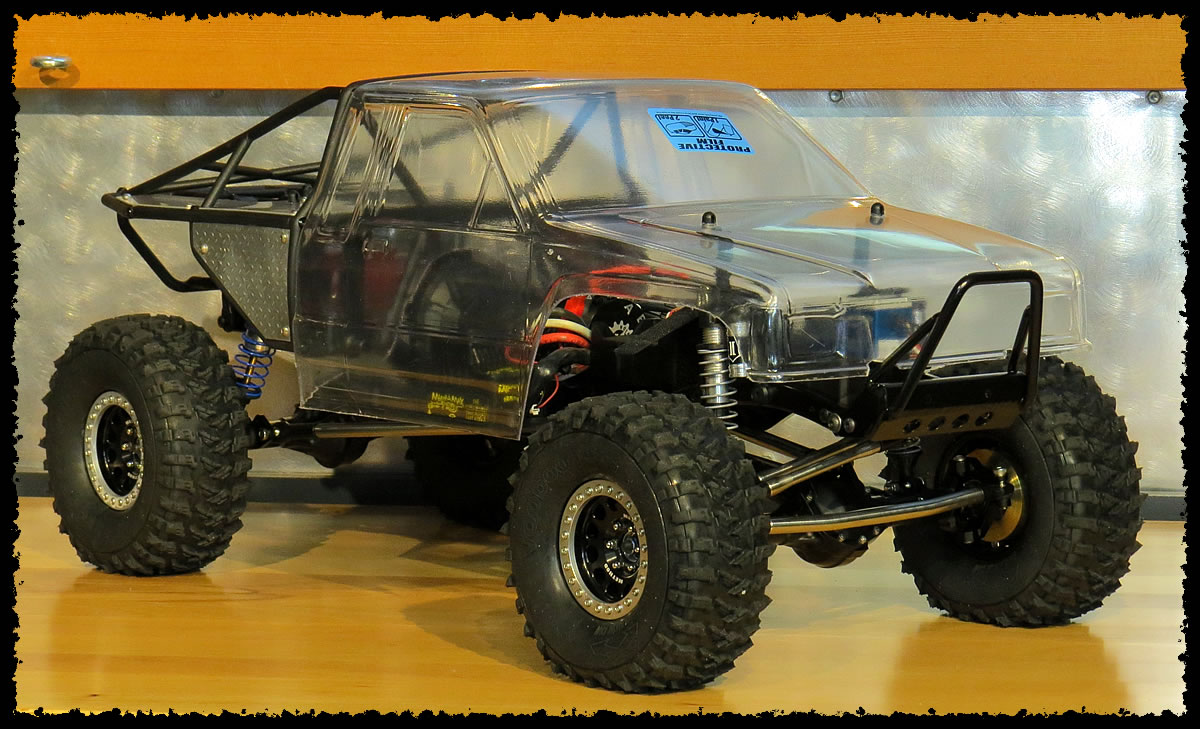 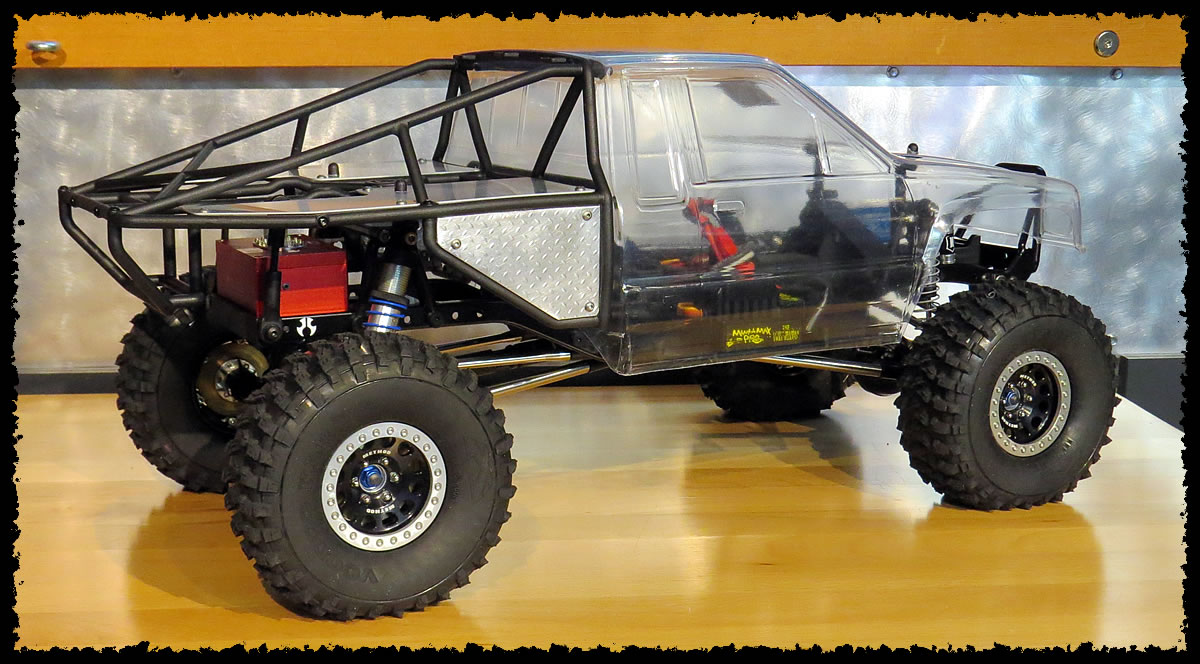 Last edited by bilinvic; 08-17-2017 at 09:27 PM. |
|
| |
|
01-26-2017, 11:08 PM
| #49 |
| Pebble Pounder  Join Date: Aug 2015 Location: Newfoundland
Posts: 118
|
Looking good Bil!!!! Sent from my iPad using Tapatalk |
|
| |
|
01-27-2017, 12:41 AM
| #50 |
| RCC Addict Join Date: Feb 2005 Location: Vancouver Island B.C.
Posts: 999
|
I see you are using jato ends to cheat out the WB in the rear, Ive done the same in the past and it works but Ive broken 3-4 of them over the years. Might want to keep a spare with you when out crawling. Truck looks great like all your builds |
|
| |
|
01-27-2017, 05:31 AM
| #51 |
| Quarry Creeper Join Date: Dec 2010 Location: Hanford
Posts: 318
|
Wow great job. I'm in the final stages of my v2 Chevy honcho build and this is inspiring me to finish.
|
|
| |
|
01-27-2017, 07:45 AM
| #52 | |
| I wanna be Dave Join Date: Sep 2012 Location: Victoria, BC
Posts: 2,257
| Quote:
| |
|
| |
|
01-27-2017, 05:12 PM
| #53 | |
| RCC Addict Join Date: Feb 2005 Location: Vancouver Island B.C.
Posts: 999
| Quote:
| |
|
| |
|
01-28-2017, 01:18 PM
| #54 |
| I wanna be Dave Join Date: Sep 2012 Location: Victoria, BC
Posts: 2,257
|
The interior of the cab is now painted black (Tamiya PS-5). I'm hoping to get started on the wrap later today. 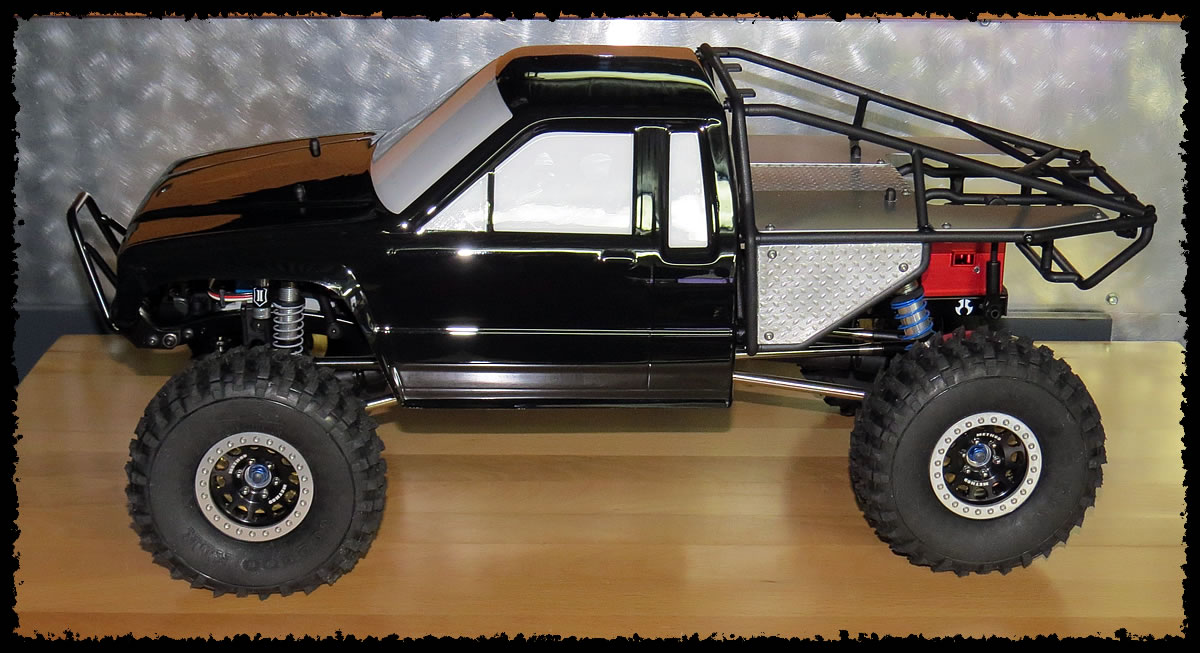 Last edited by bilinvic; 08-17-2017 at 09:28 PM. |
|
| |
|
01-28-2017, 05:13 PM
| #55 |
| I wanna be Dave Join Date: Sep 2012 Location: Victoria, BC
Posts: 2,257
|
WHOA!!! Applying a full body wrap when you are OCD aka perfectionist, is a very testing procedure....just sayin'!
|
|
| |
|
01-28-2017, 07:08 PM
| #56 |
| I wanna be Dave Join Date: Sep 2012 Location: Victoria, BC
Posts: 2,257
|
I can finally reveal which Freqeskinz wrap I bought.....SR5 Rust Bucket series, medium blue with silver stripes. I'm loving how it came out. 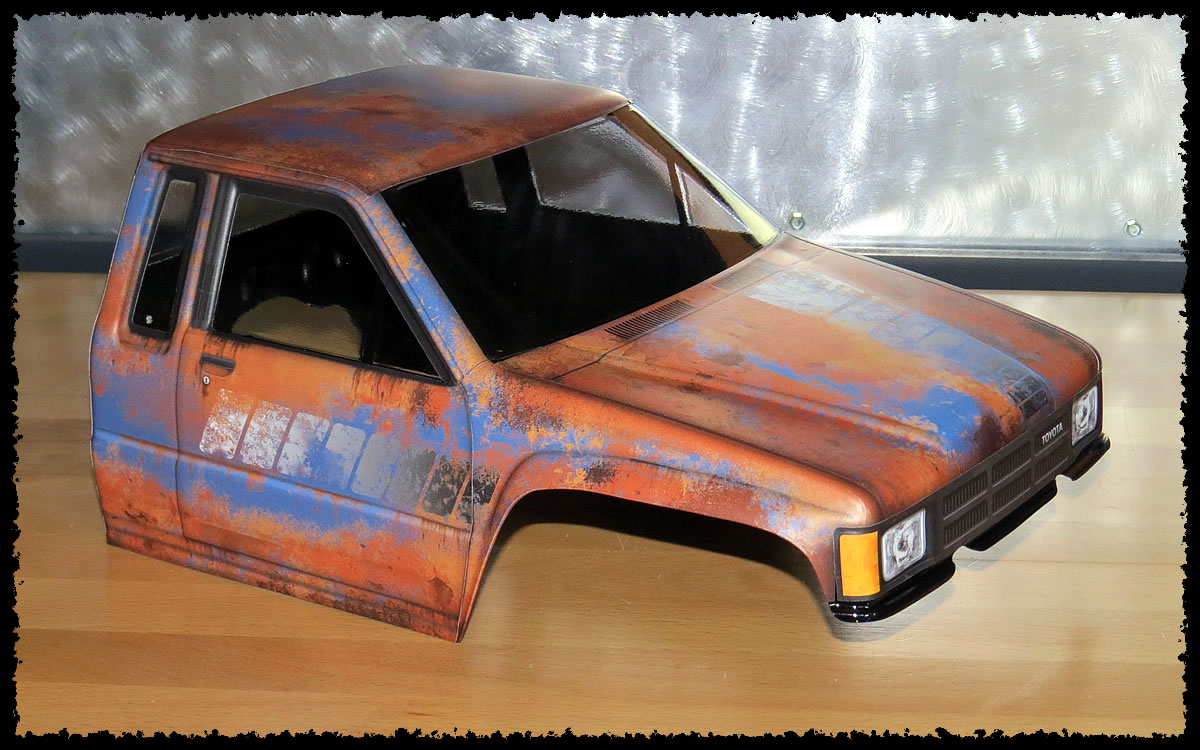 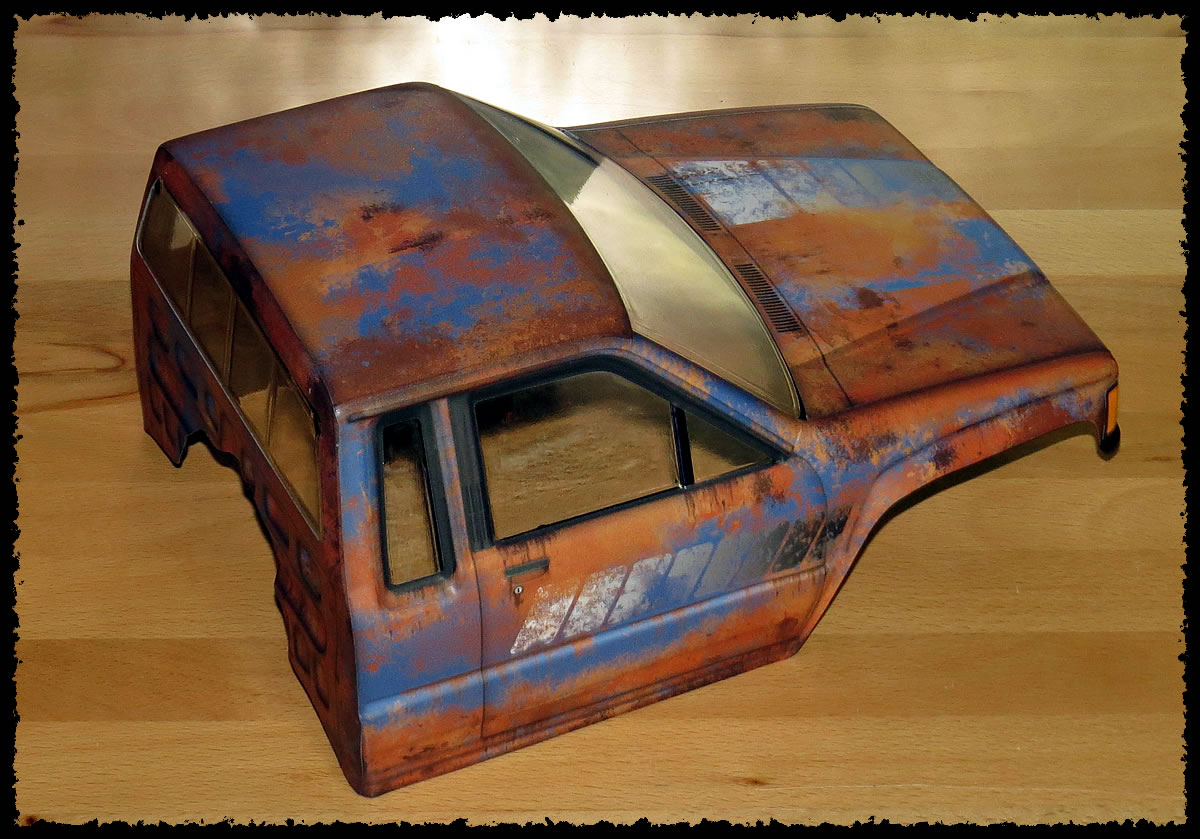 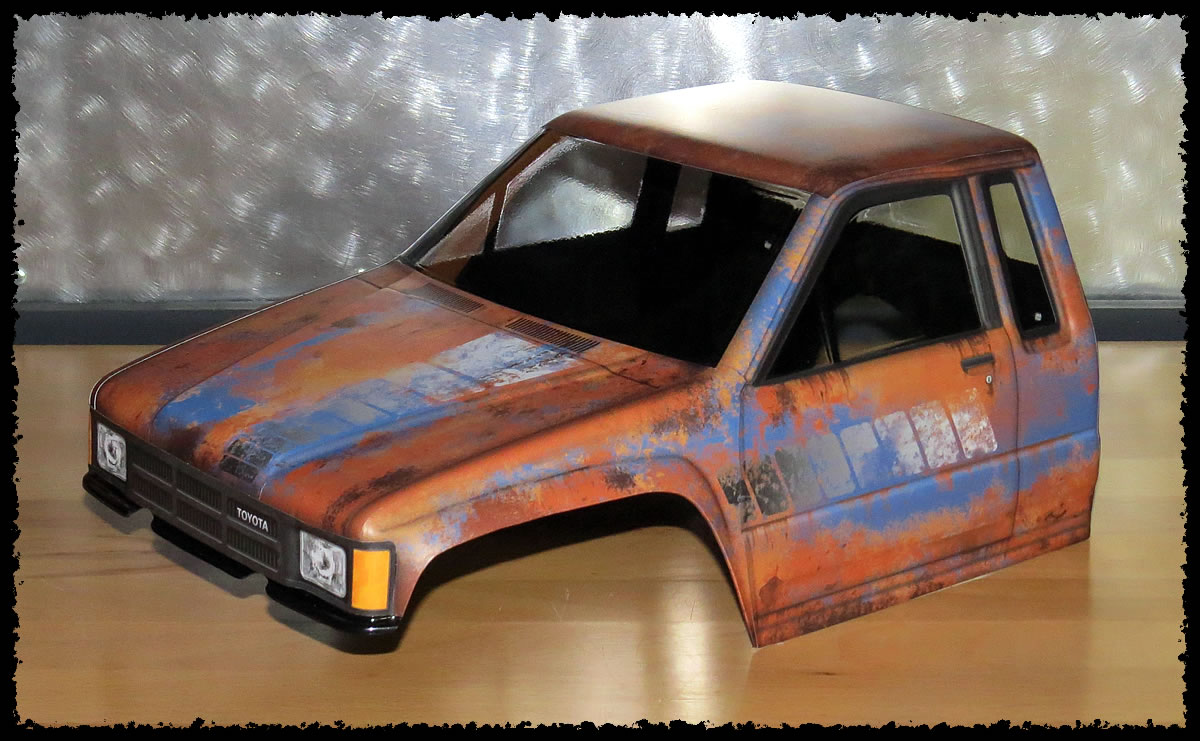 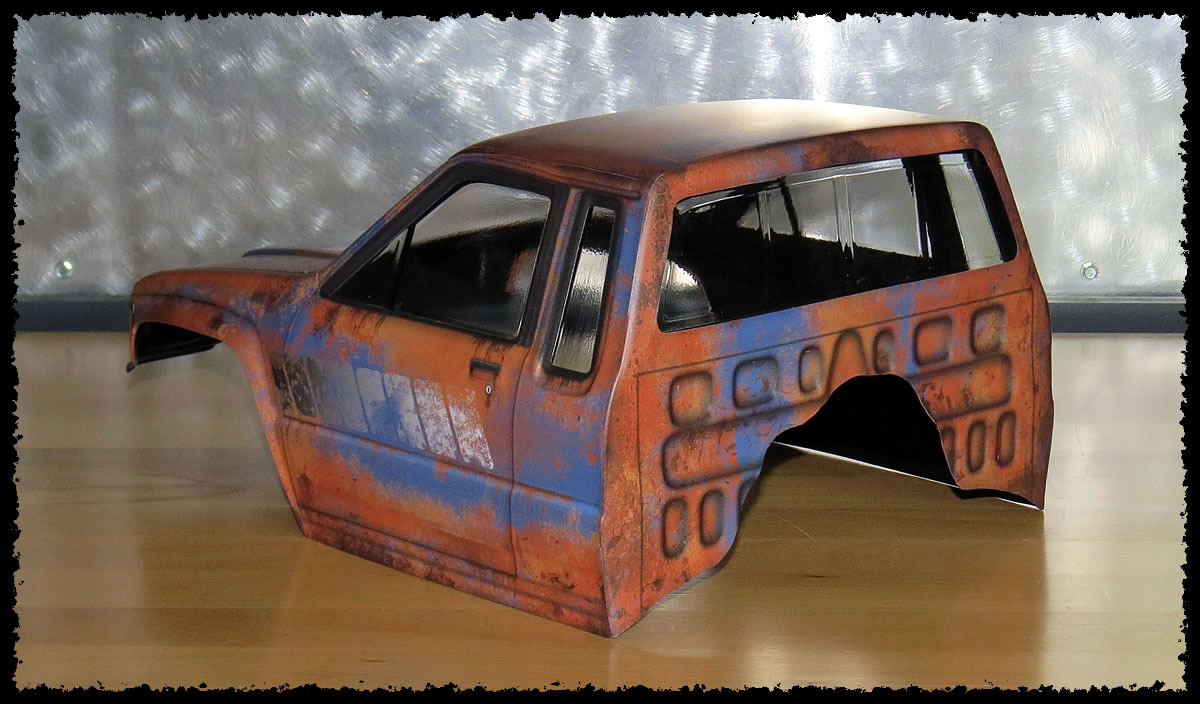 Last edited by bilinvic; 08-17-2017 at 09:29 PM. |
|
| |
|
01-28-2017, 07:16 PM
| #57 |
| RCC Addict Join Date: Aug 2008 Location: Paulina
Posts: 1,213
|
Glad to see you pulled thru and got the wrap applied. Looks great!!
|
|
| |
|
01-28-2017, 07:38 PM
| #58 |
| Rock Crawler Join Date: Jun 2011 Location: Tifton
Posts: 590
|
I want to do a wrap so bad. I just dont have the patience to do it properly. |
|
| |
|
01-28-2017, 08:45 PM
| #59 |
| I wanna be Dave Join Date: Aug 2005 Location: NE Ohio
Posts: 8,817
|
Looks great
|
|
| |
|
01-28-2017, 09:24 PM
| #60 |
| I wanna be Dave Join Date: Sep 2012 Location: Victoria, BC
Posts: 2,257
|
Getting closer to the first test run.... I currently have .350 SLW hubs on the Method wheels and I have some .225 on order to see if I like the stance better or not. 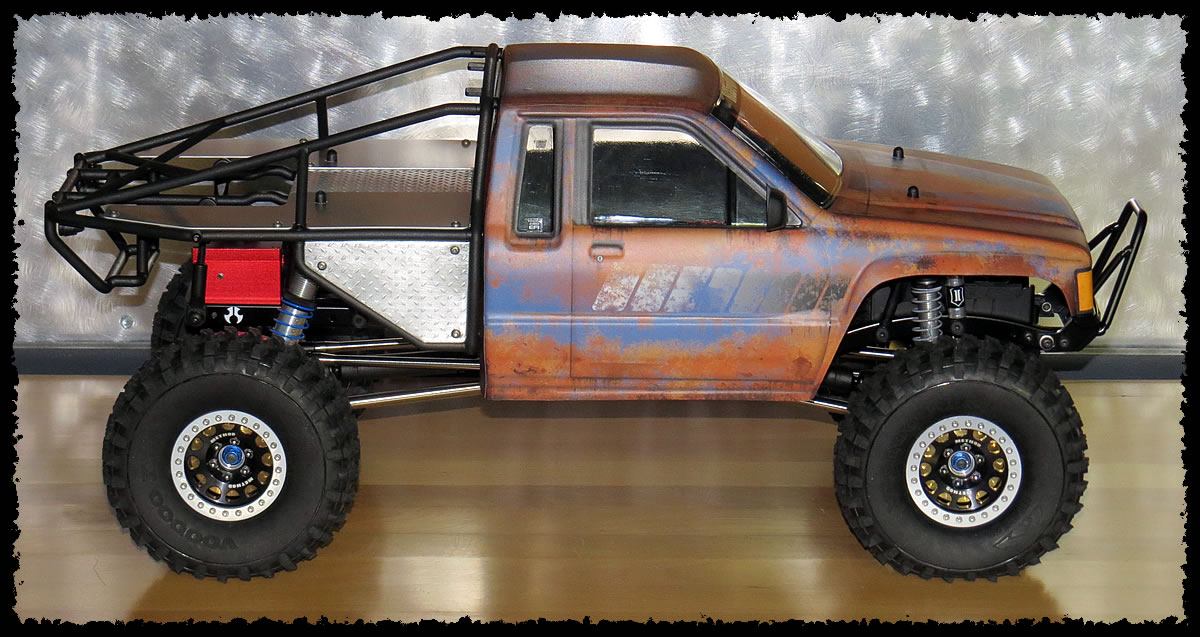 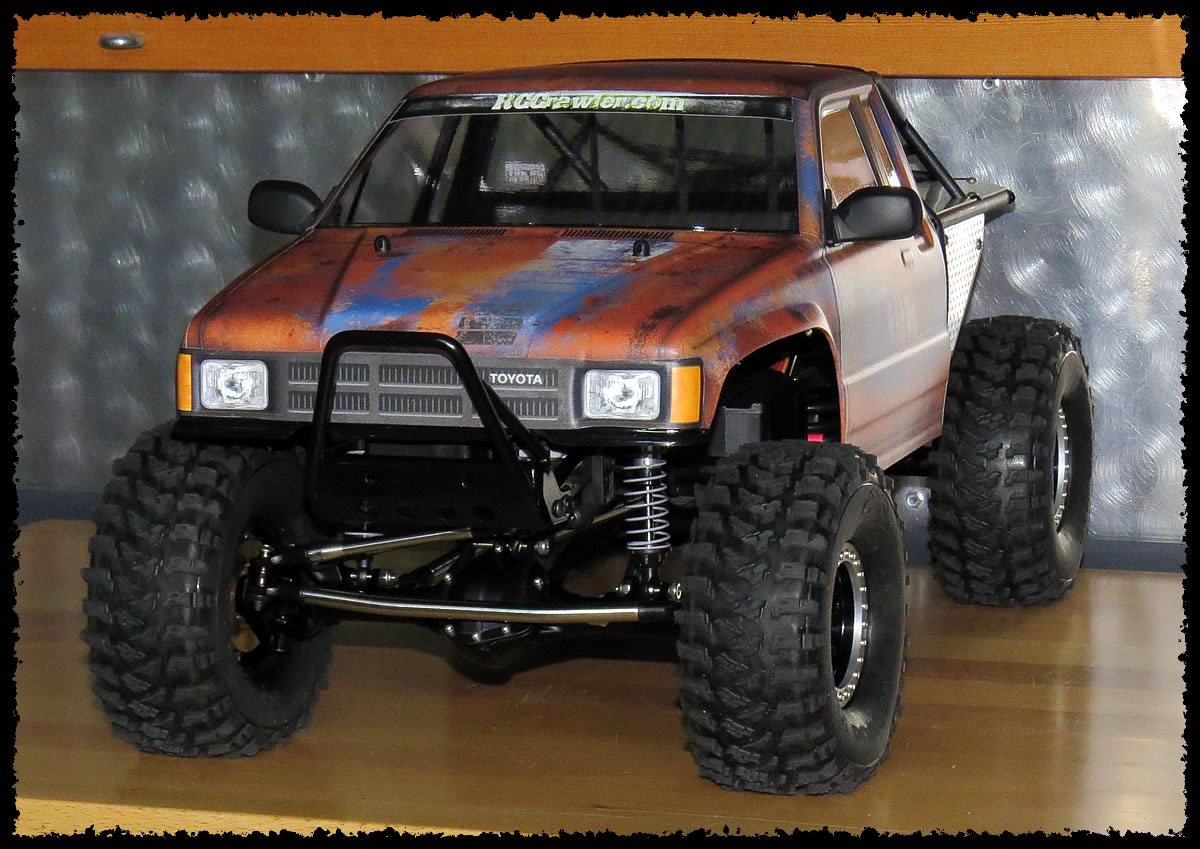 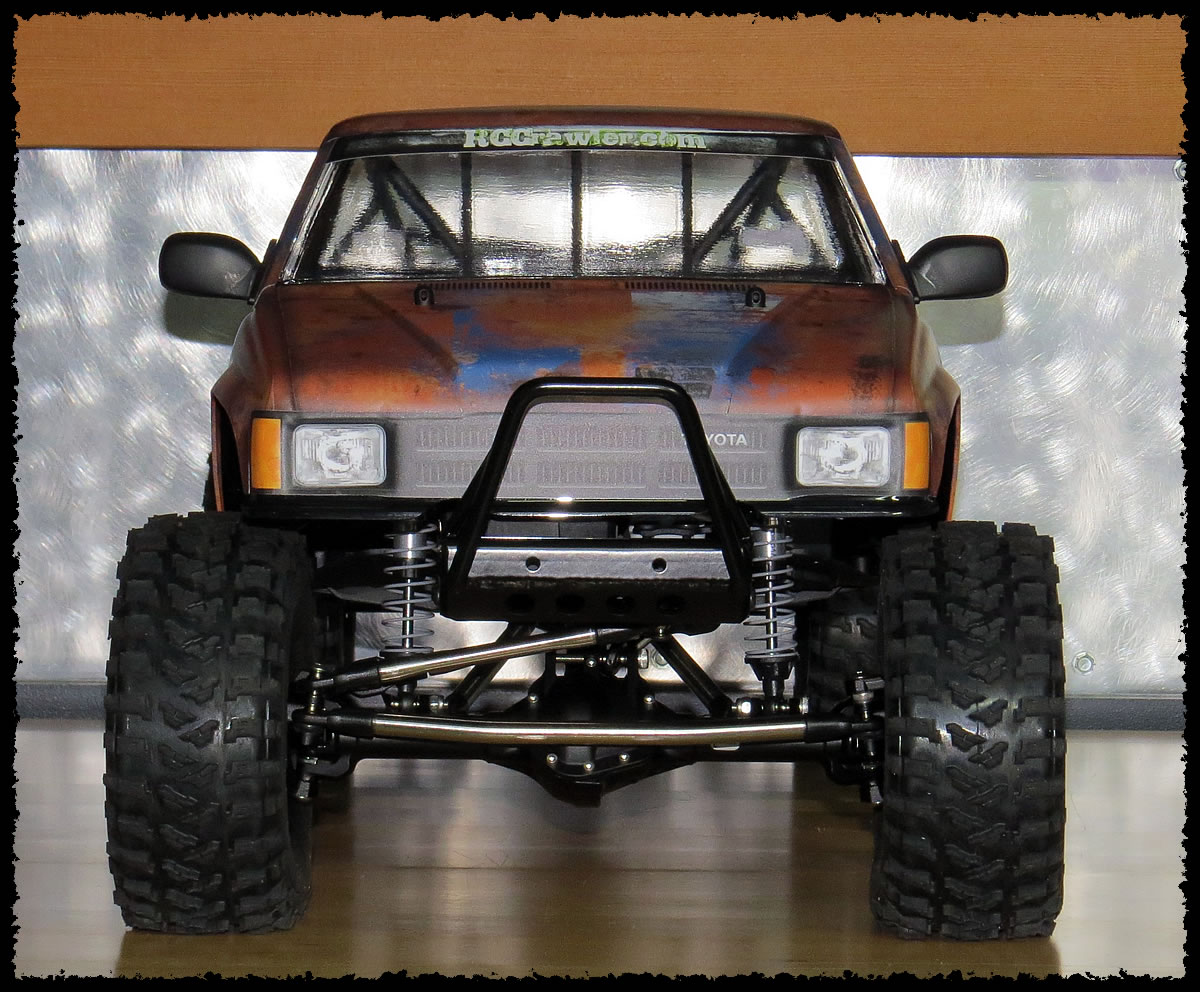 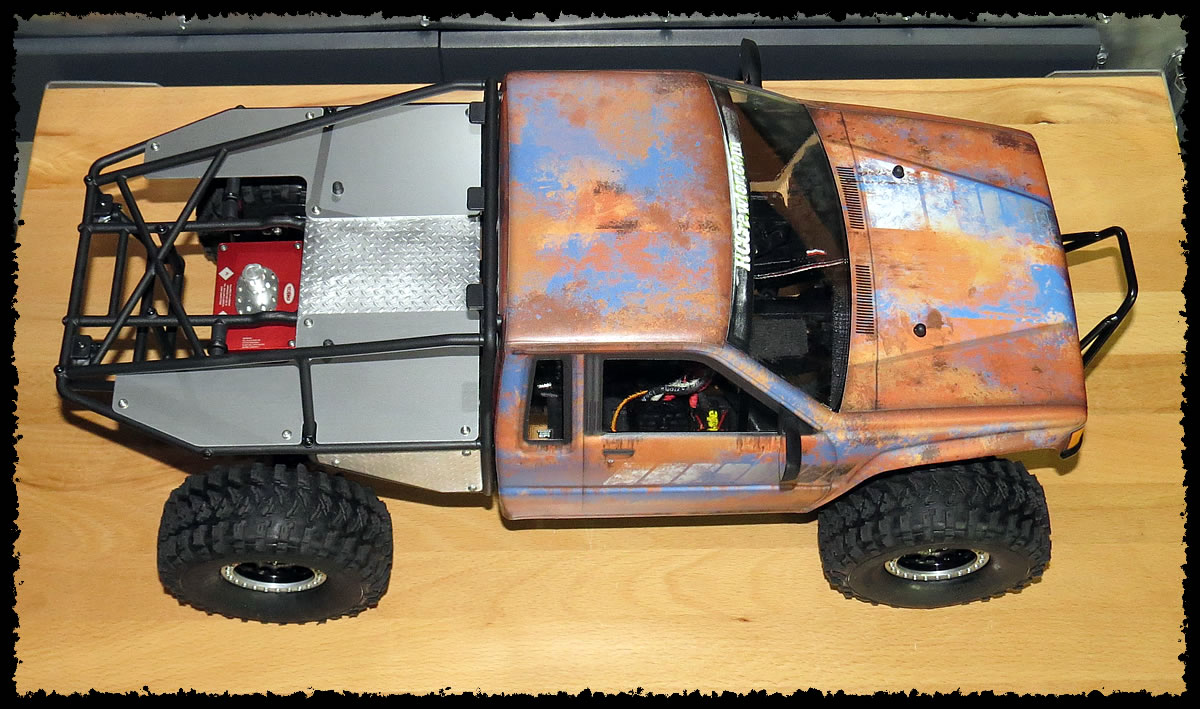  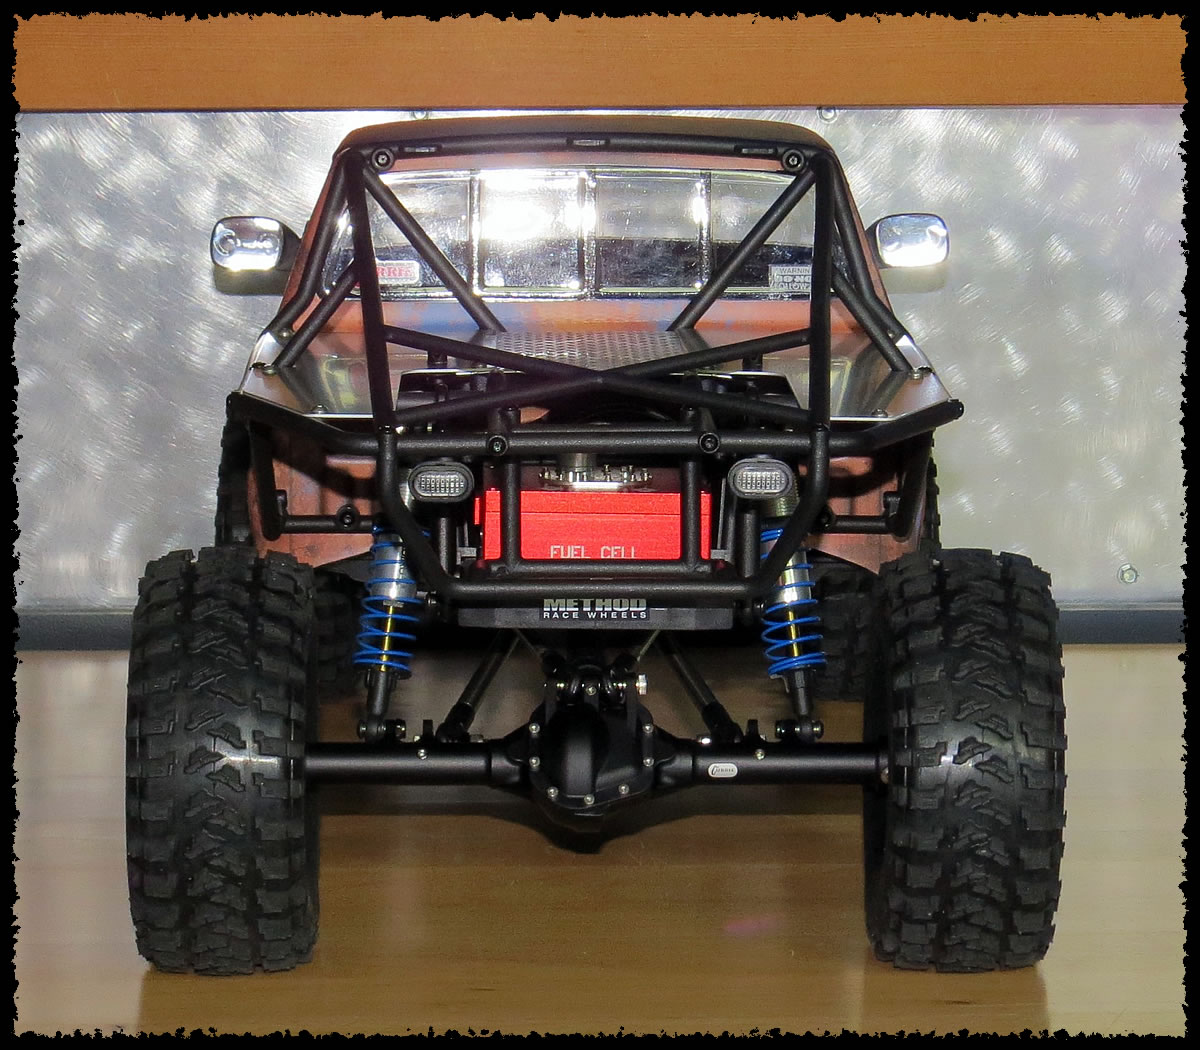  Last edited by bilinvic; 08-17-2017 at 09:31 PM. |
|
| |
 |
 bilinvic's SCX10.2 Build Ver. 2 - Similar Threads
 | ||||
| Thread | Thread Starter | Forum | Replies | Last Post |
| bilinvic's RR10 Bomber Build | bilinvic | Axial RR10 Bomber | 712 | 04-25-2020 08:09 AM |
| bilinvic's SCX10 II | bilinvic | Axial SCX10 II | 215 | 05-08-2018 11:06 AM |
| bilinvic's R1 Build | bilinvic | G-Made Crawlers | 82 | 03-14-2018 07:52 PM |
| bilinvic's Ultimate SCX10 '73 Bronco Build | bilinvic | Axial SCX-10 | 24 | 05-03-2015 05:55 PM |
| bilinvic's Second Wraith Build | bilinvic | Axial Wraith | 11 | 10-14-2014 05:39 AM |
| |


 Linear Mode


