| |
| |||||||
 |
| | LinkBack | Thread Tools | Display Modes |
 07-22-2012, 07:46 PM
| #1 |
| I wanna be Dave Join Date: Jan 2012 Location: CANADA
Posts: 2,648
|
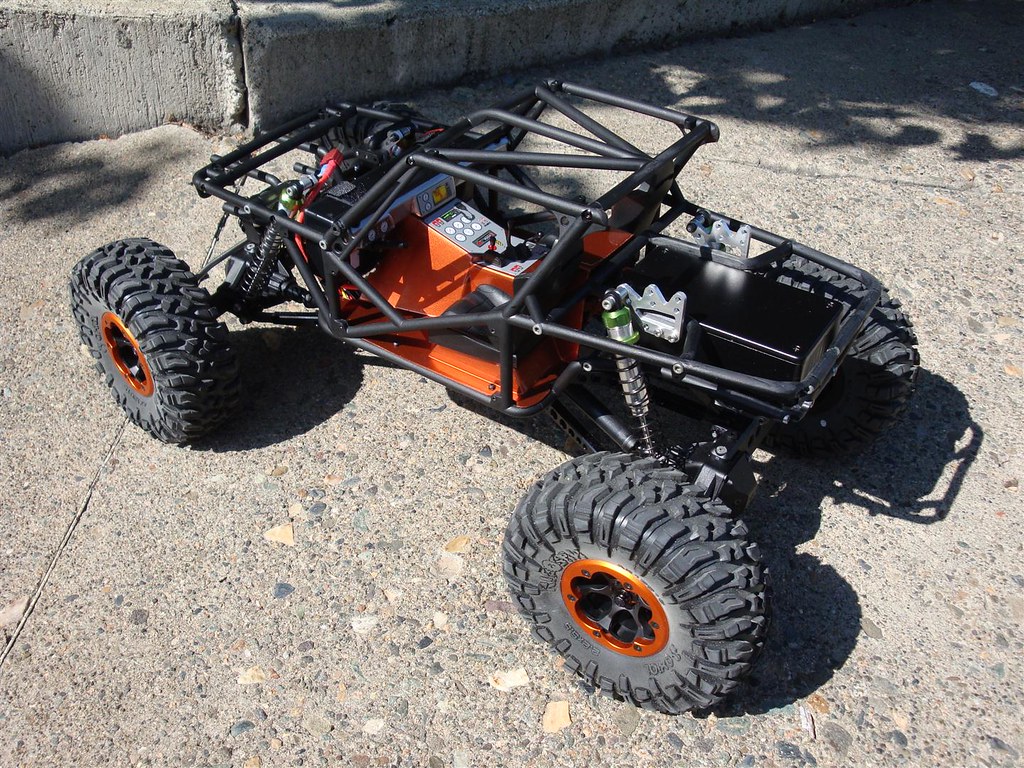
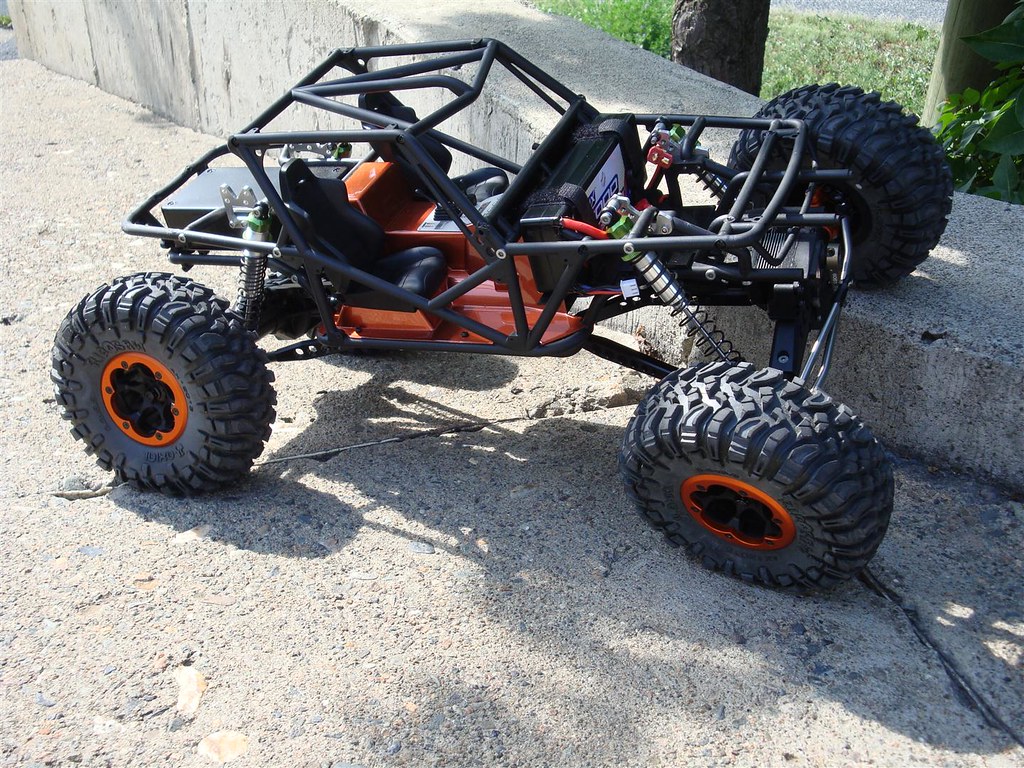
This is my step father's Wraith. I have been working hard on the body and fitting all the parts together. The rear axles are factory wobbled so new ones are on order from ToadzRC. Comments are welcome. I am painting this one Tamiya Copper and black. I had to make it a flat-fender because of tire rub at full articulation. It looks cool so far but many hours into it!! I am going crazy!! LOL 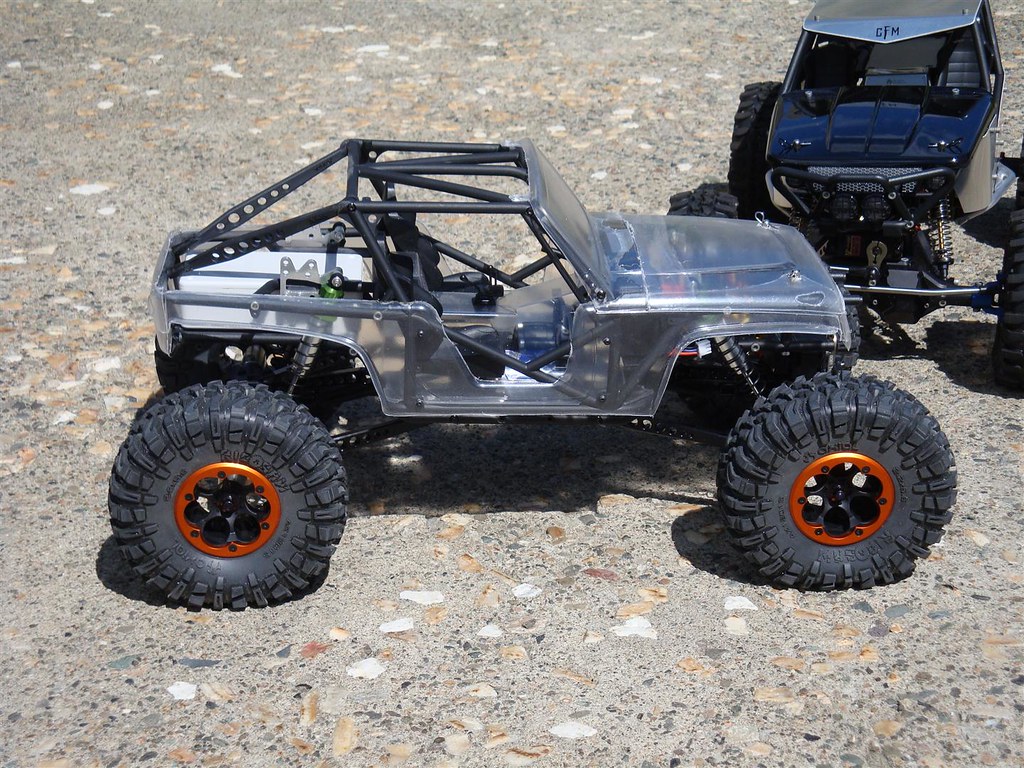 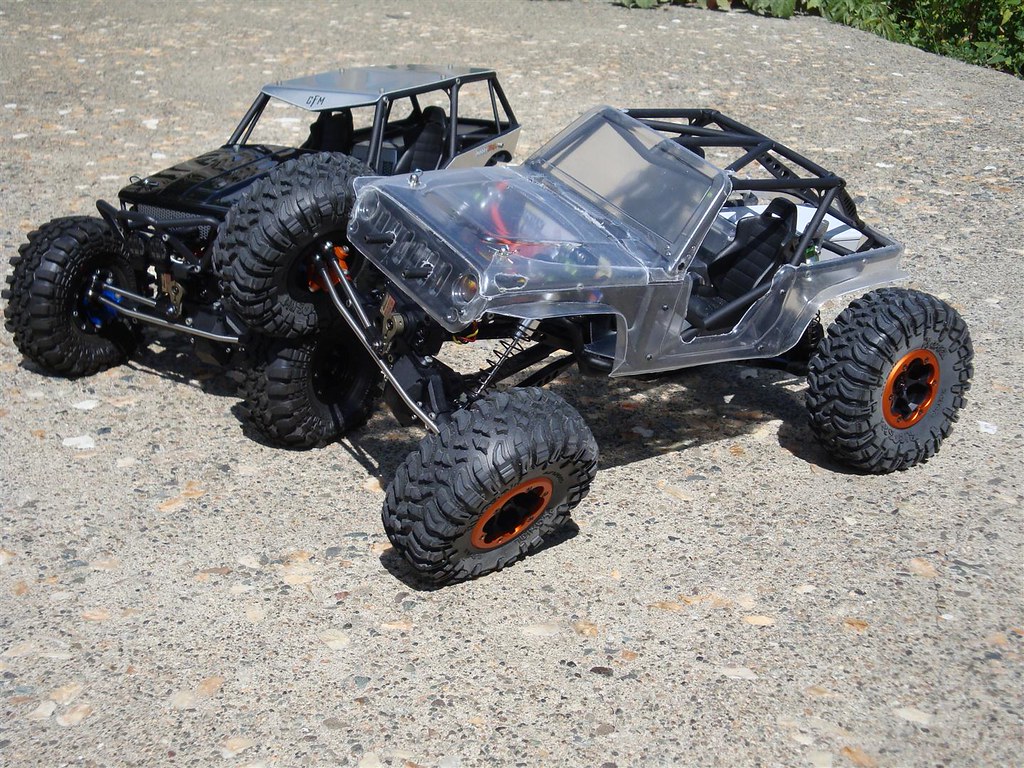 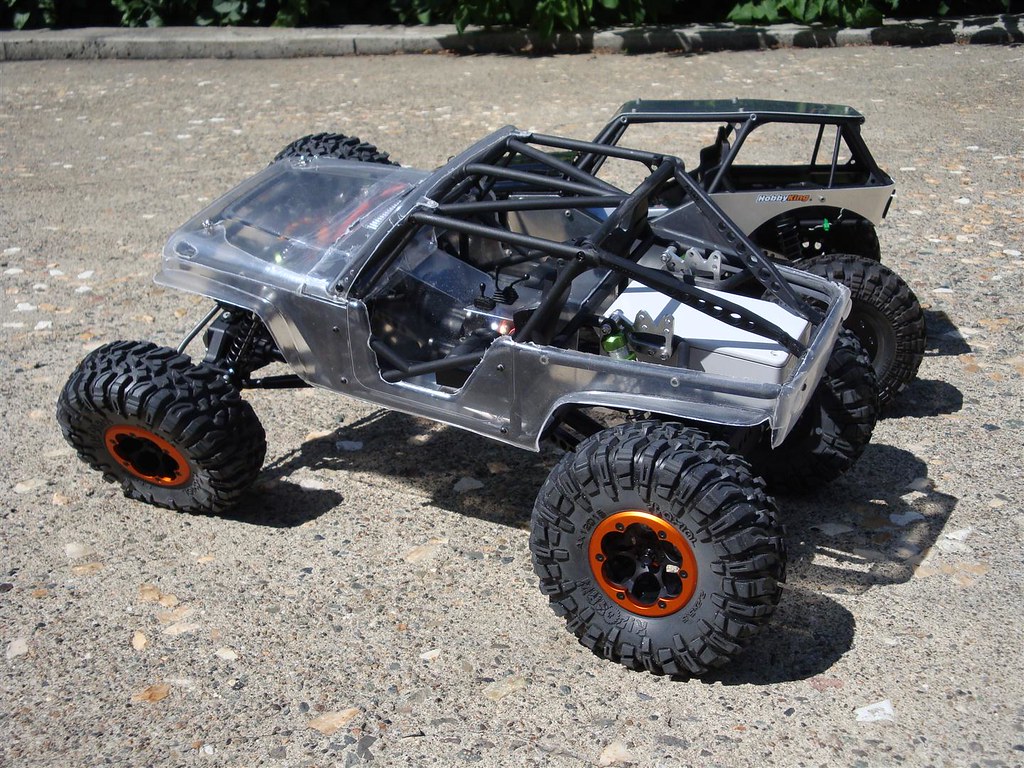 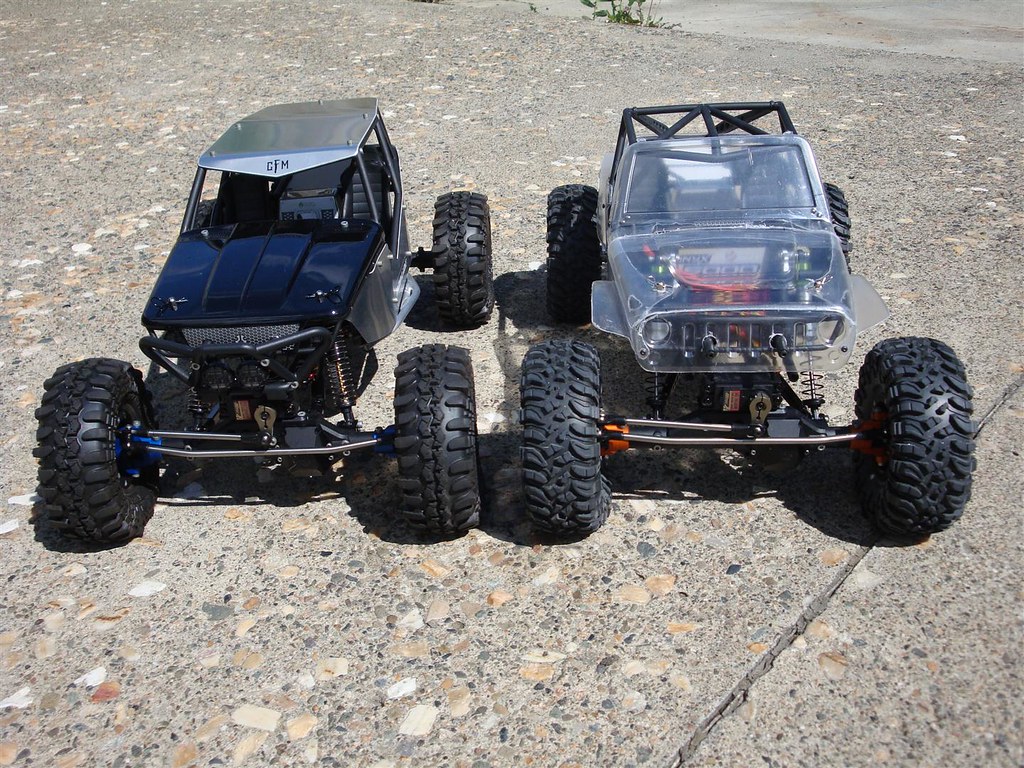 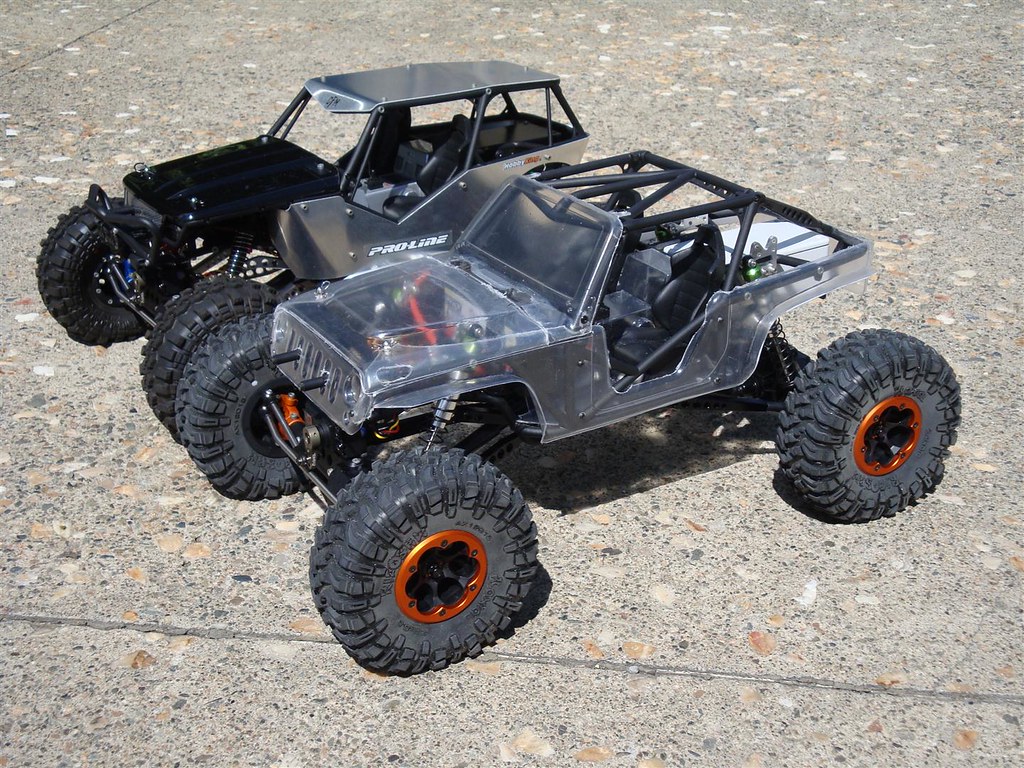 Last edited by ZippoMan; 11-03-2012 at 06:32 PM. |

|  |
| Sponsored Links | |
| | |
|
07-22-2012, 10:09 PM
| #2 |
| Quarry Creeper Join Date: Oct 2010 Location: Montreal, QC
Posts: 213
|
Looking good!!!! Now how about some scratches on those mint looking Wraith's!!!! Quick question though, why not take Dynamic Concepts Rubi body? Or is it? |
|
| |
|
07-22-2012, 10:43 PM
| #3 | |
| I wanna be Dave Join Date: Jan 2012 Location: CANADA
Posts: 2,648
| Quote:
It is Dynamic Concepts Rubi body! Does it look different? Well it is kind of...I flattied the fenders and was having one heck of a time getting the hood opening and fitting the way I wanted. Kurt at DC is great with helping fix my errors!! He is a great guy!  | |
|
| |
|
07-23-2012, 08:39 PM
| #4 |
| Quarry Creeper Join Date: Oct 2010 Location: Montreal, QC
Posts: 213
|
I'll be getting mine pretty soon too... so i'm subscribed to this thread!!! Post more pic if you have any. Help a fellow north of the border |
|
| |
|
07-28-2012, 08:12 PM
| #5 |
| I wanna be Dave Join Date: Jan 2012 Location: CANADA
Posts: 2,648
|
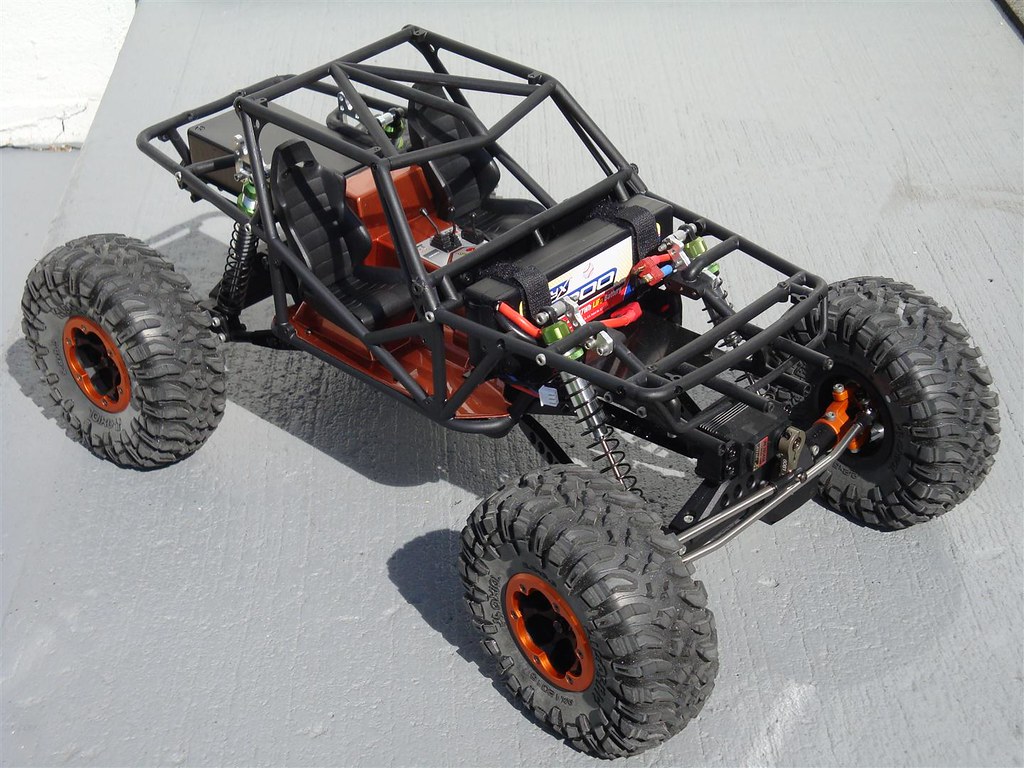
Update: This is the color I painted the interior....both pieces were then backed with Pactra Outlaw Black. I used Tamiya Copper and Tamiya silver is the dash. I am doing the Jeep body Copper with black fenders and around the door openings. I am trying for that old Jeep CJ rootbeer brown look. Oilcanman had a Jeep Scrambler back in about 1983 so he wants this look too. Depending on the light the copper color changes so it was hard to shoot indoors with my old camera.  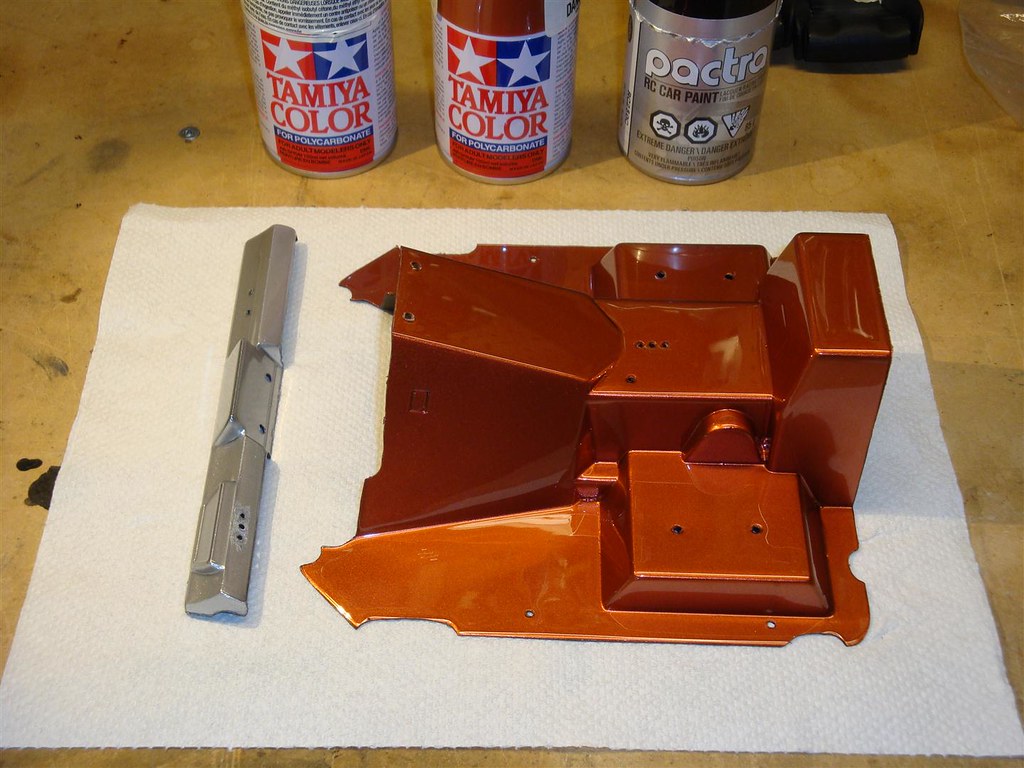 |
|
| |
|
07-29-2012, 08:15 AM
| #6 | |
| Quarry Creeper Join Date: Feb 2011 Location: Badger State
Posts: 290
| Quote:
I started working on a Rubi trimming and assembly tutorial, but got side-tracked with the Wraith EB project..... The flares do rub under full stuff. This was done for a more scale look, with the option of trimming them back. Another option some take is adding wheel spacers. | |
|
| |
|
07-29-2012, 02:16 PM
| #7 | |
| I wanna be Dave Join Date: Jan 2012 Location: CANADA
Posts: 2,648
| Quote:
Thanks again Kurt you are lots of help. I appreciate it big time. | |
|
| |
|
07-30-2012, 05:27 PM
| #8 |
| I wanna be Dave Join Date: Jan 2012 Location: CANADA
Posts: 2,648
|       |
|
| |
|
07-30-2012, 10:50 PM
| #9 | |
| Quarry Creeper Join Date: Oct 2010 Location: Montreal, QC
Posts: 213
| Quote:
Looking real good ZippoMan, following this one very closely... | |
|
| |
|
08-04-2012, 04:25 PM
| #10 |
| I wanna be Dave Join Date: Jan 2012 Location: CANADA
Posts: 2,648
|
I just need to paint the hood and cowl and then glue the hood hinges on with CA. It is looking not too bad for rattle can rookie here! I am totally new to painting and customizing bodies. I can honestly say it is not my cup of tea...lol. Hope you guys like it! Thanks for looking. 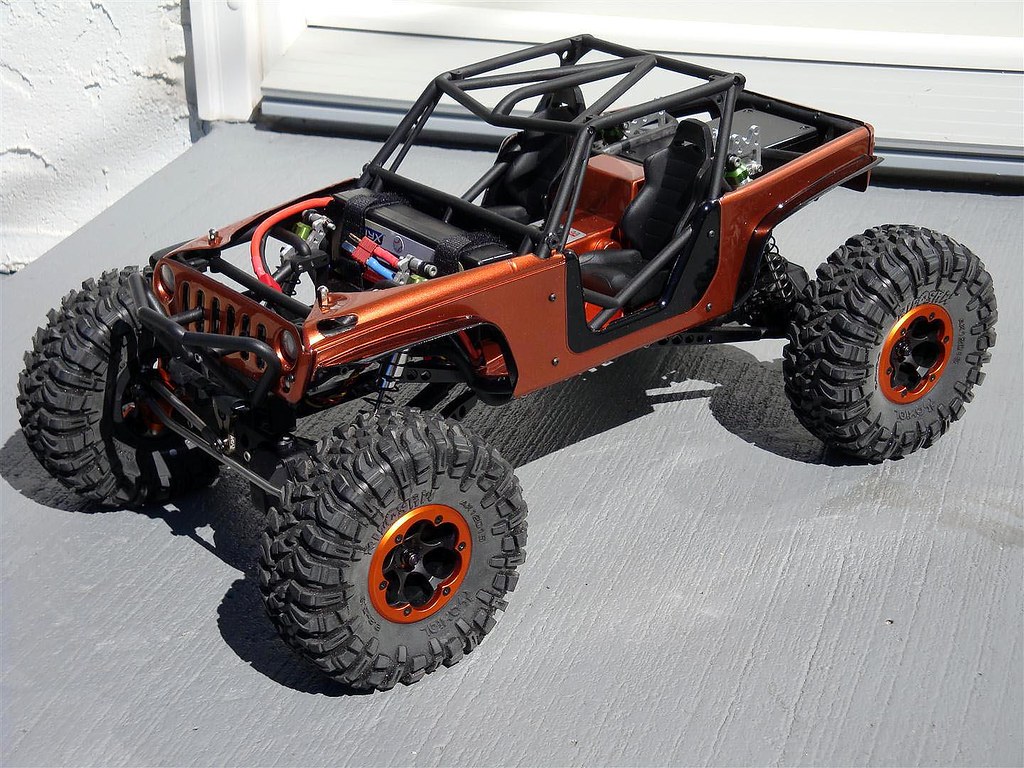 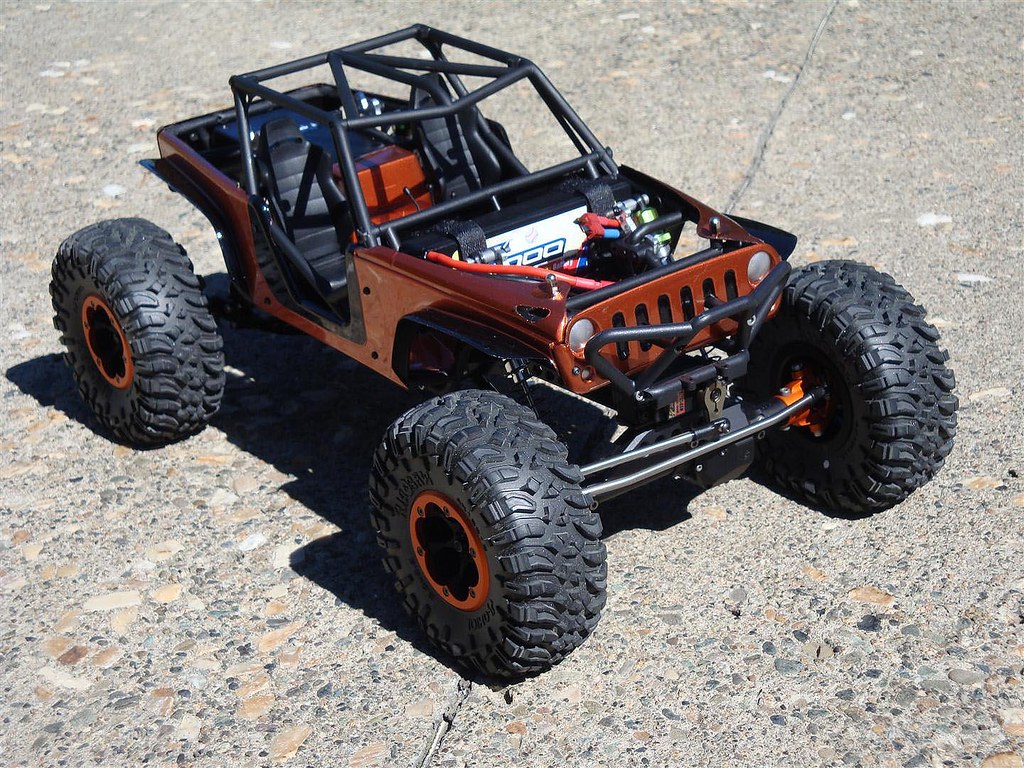 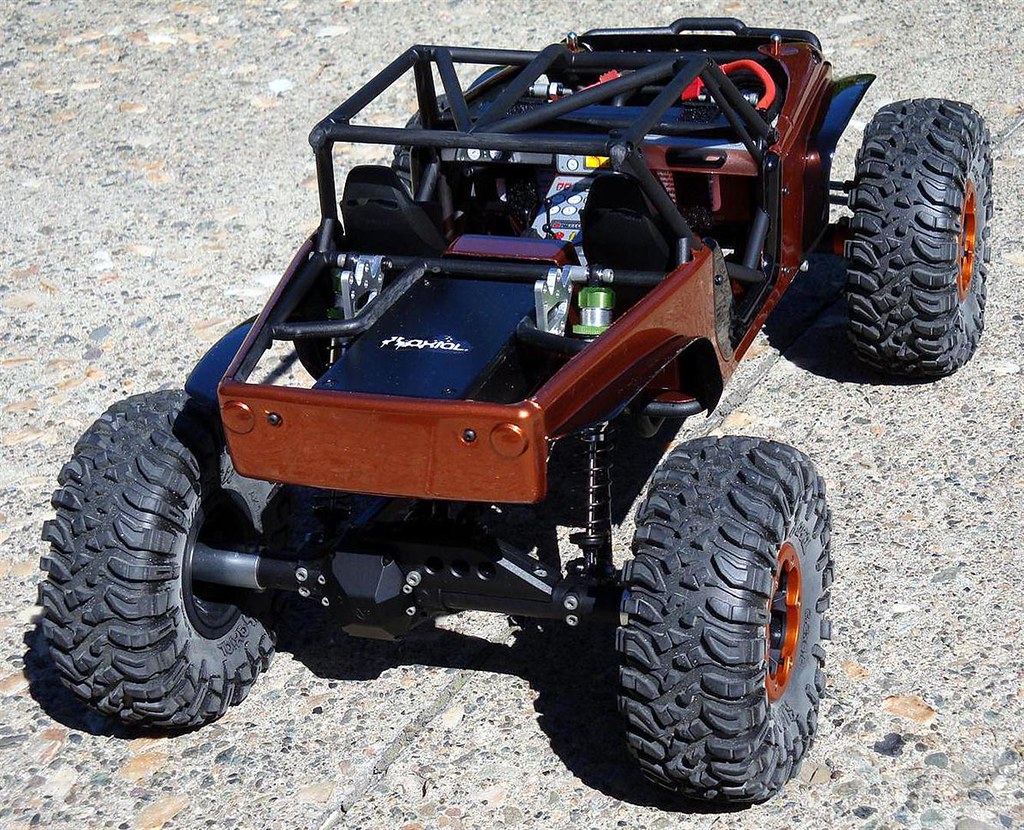  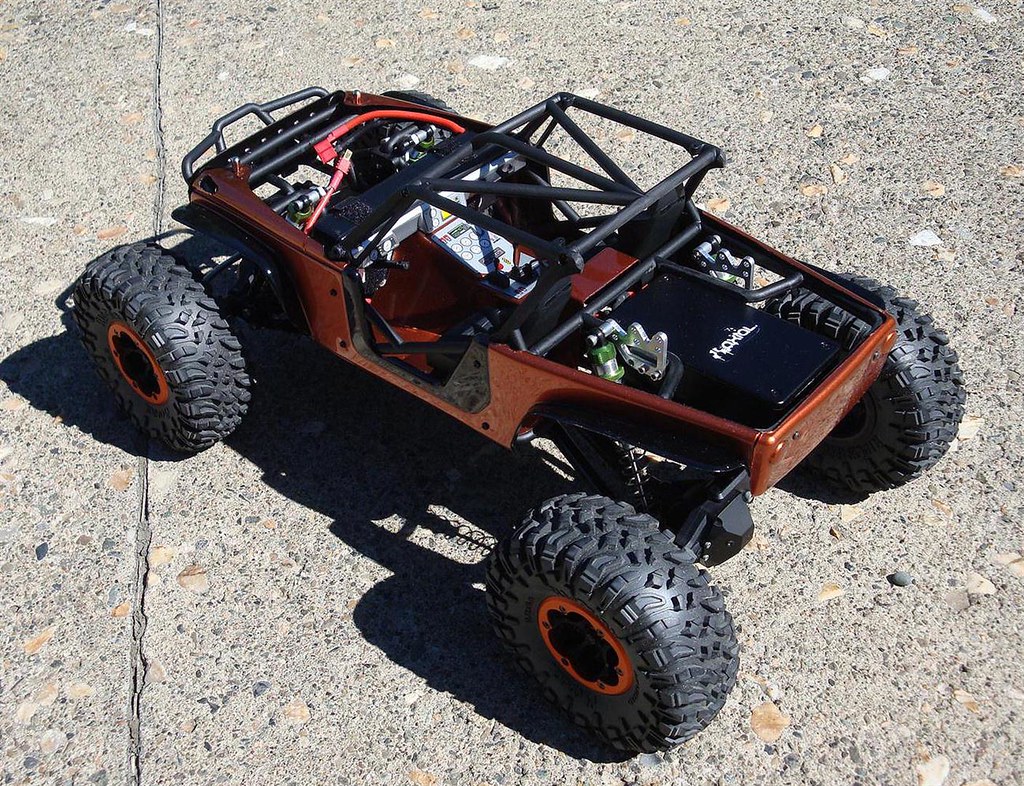  |
|
| |
|
08-04-2012, 06:08 PM
| #11 |
| Rock Crawler Join Date: Apr 2012 Location: Chattanooga
Posts: 639
|
Love the copper, I did mine in kryptonite gold (lt green w/slight color change) with tan interior. That rubicon body isn't the easiest body to get right. Check my build out. Overhaulin the wraith, DC Rubicon, mmp waterproof |
|
| |
|
08-05-2012, 12:12 PM
| #12 |
| Quarry Creeper Join Date: Oct 2010 Location: Montreal, QC
Posts: 213
|
Really turned out great... Good job |
|
| |
|
08-05-2012, 12:16 PM
| #13 |
| Quarry Creeper Join Date: Jan 2011 Location: Kingston NH
Posts: 313
|
Wow thats turning out real nic.... way to go
|
|
| |
|
08-05-2012, 12:21 PM
| #14 |
| I wanna be Dave Join Date: Jan 2012 Location: CANADA
Posts: 2,648
|
Thanks guys for the comments. I appreciate them. I just have to get the hood hinges on the hood and mount the hood to the cowl today or soon. I think CA glue should be the best bet for the little plastic hinges?
|
|
| |
|
08-05-2012, 12:49 PM
| #15 |
| Quarry Creeper Join Date: Oct 2010 Location: Montreal, QC
Posts: 213
|
Only thing with CA is if you have to move them once positionned.... You usually don't have that much time.... I wanted to hinge mine and would've used Shoe Goo on the Dubro hinges..
|
|
| |
|
08-05-2012, 12:55 PM
| #16 |
| I wanna be Dave Join Date: Jan 2012 Location: CANADA
Posts: 2,648
|
Oh I have shoe goo so maybe I should go that route? I just wanted a very strong bond that won't break off if the Wraith rolls over. I like the idea of shoe goo because like you said time to move hinges if needed. My CA is the 5 second set stuff!! Super fast cure. Yikes!!
|
|
| |
|
08-05-2012, 05:04 PM
| #17 |
| I wanna be Dave Join Date: Jan 2012 Location: CANADA
Posts: 2,648
|
Okay so the shoe goo is working!! I am done the hinges on the hood side, now to let it dry good before I put the hood on and do the cowl side. More pics tomorrow, i hope!! Then Oilcanman can almost use his new beast!!
|
|
| |
|
08-05-2012, 05:41 PM
| #18 |
| RCC Addict  Join Date: Oct 2011 Location: British Columbia
Posts: 1,487
|
Lookin' good, Clay. You can paint my stuff anytime. Can I make a suggestion for finishing off the back end where you've cut out the cage? Supposed to be a perfect fit, from what I've read. http://www.amainhobbies.com/product_...0-Angle-Grey-2 |
|
| |
|
08-05-2012, 06:11 PM
| #19 |
| I wanna be Dave Join Date: Jan 2012 Location: CANADA
Posts: 2,648
|
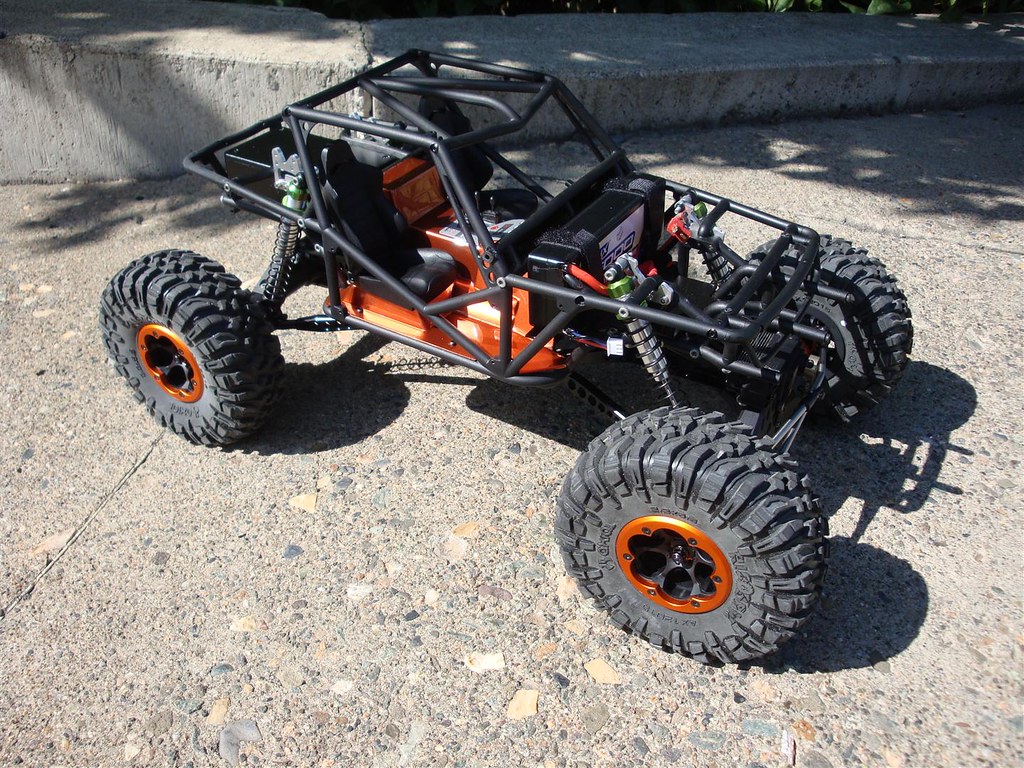
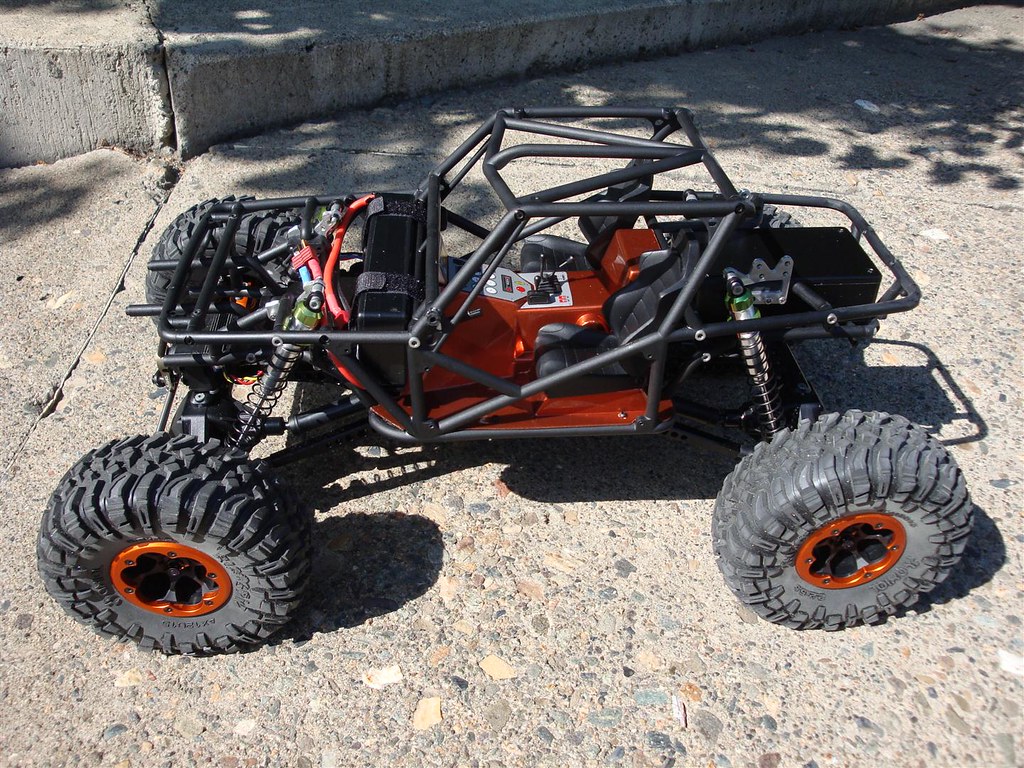
Solitaire I am not done the cage yet. I have down bars made up and will install soon. Look at the clear body at the beginning of the thread. Thanks for the compliments and here is how it looks right now!! I am pleased with it so far. It has taken me so long. I am sloooooooooow. 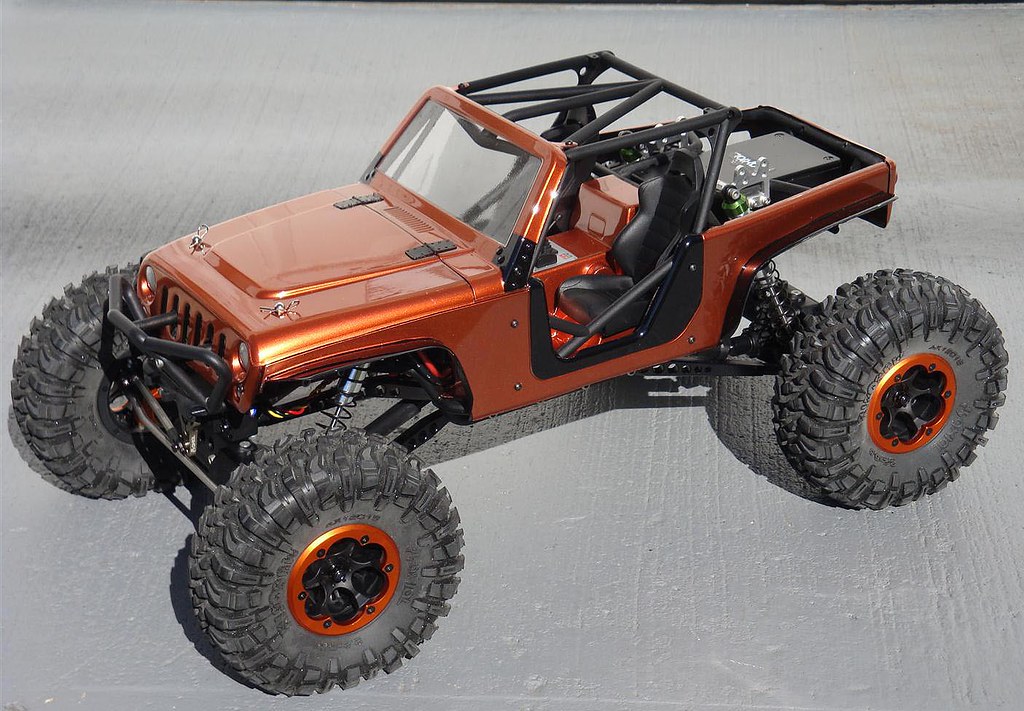 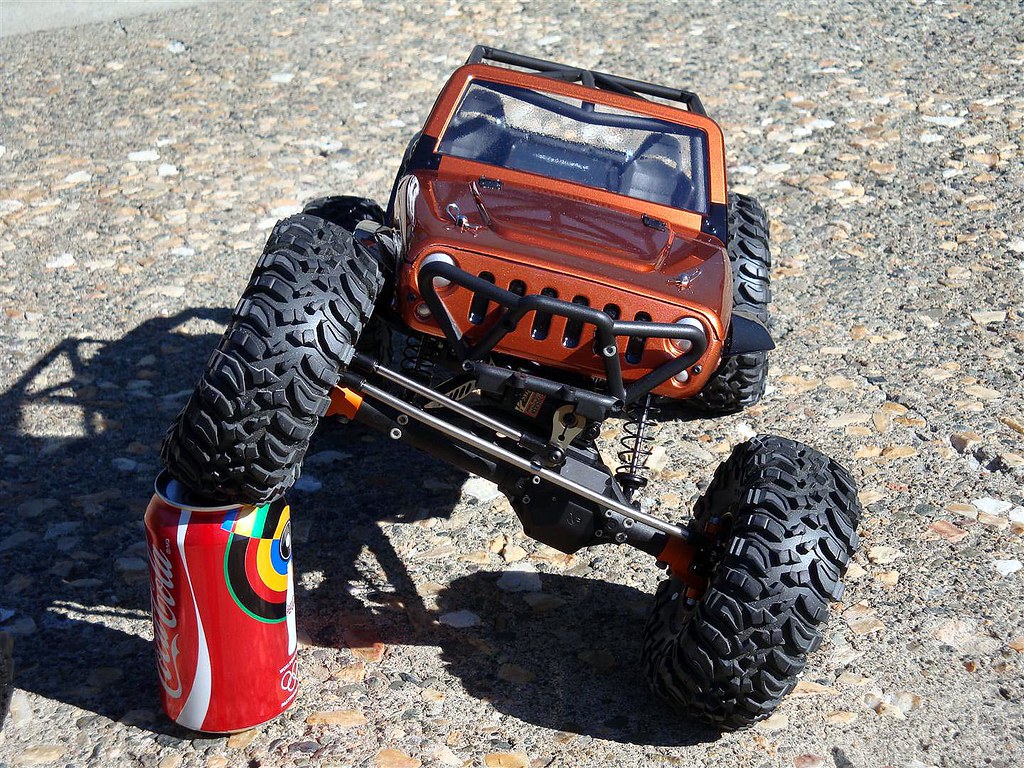 Mine and Oilcanman's together!! Play time soon!! 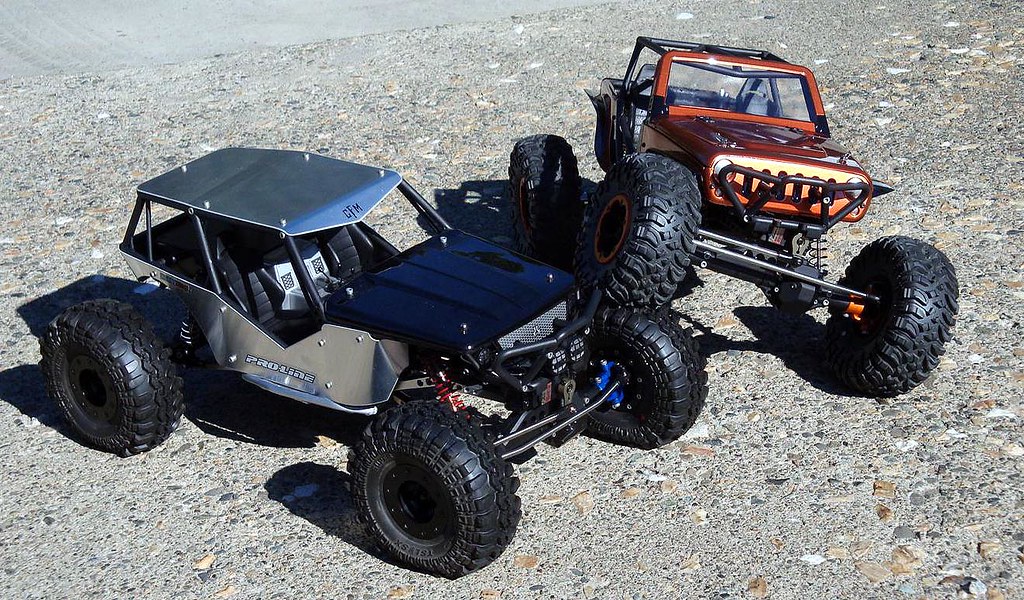 Last edited by ZippoMan; 08-05-2012 at 06:24 PM. |
|
| |
|
08-05-2012, 06:35 PM
| #20 |
| Quarry Creeper Join Date: Oct 2010 Location: Montreal, QC
Posts: 213
|
I used threaed rod and brake lines to do mine with the spare part i had. Works great, and for the same amount of money, you can do alot more than 2 roll cage bars! Turned out awesome Zippoman!!! |
|
| |
|
 Project Oilcanman's Wraith....by ZippoMan - Similar Threads
 | ||||
| Thread | Thread Starter | Forum | Replies | Last Post |
| Deven's Wraith Project | devenaberger | Axial Wraith | 3 | 10-20-2012 09:43 PM |
| |


 Linear Mode


