| |
| |||||||
 |
| | LinkBack | Thread Tools | Display Modes |
 03-20-2016, 11:35 PM
| #1 |
| Rock Crawler  Join Date: Aug 2015 Location: Big Island
Posts: 863
|
I bought the Roland Rock Shop 2015 Axialfest U4 build Mattzilla chassis to be assimilated by my Wraith (Vera) to create VERAZILLA. This will be my scale G6/U4 tank and the old Wraith chassis will be used for Levior. It may have been bad timing to undertake this project with only two weeks before the Oregon RECON G6, but I'm on vacation this week and some motivation always helps speed things along. I made a ton of progress in just the past couple of days and was able to test drive the beast a bit today. It definitely needs tuning! The front axle was a straight bolt-in. The ESC needed a support bracket but this end was easy.  The rear got trailing arms and dual shocks. I'm still working on finding the sweet spot for the dual shocks with limiting straps but it's looking awesome. An un-anticipated but very cools feature is the ability to rotate the shock mount bracket to change the relative compression of the two shocks. This is great for tuning and I'll lock it down once I find the best position. The Krawler shocks are a bit sticky so I need to tear them down and see what's going on.   This is where things got real interesting...I opted for a Bomber skid to take advantage of the trailing arm mounts and additional link mounting options. Three of the four mounting holes on each side line up so it bolts right in.  To accommodate my AX2 transmission a little modification was required. I drilled new holes to match the Wraith skid and cut away a section of the skid 'hump'.   I also created a spacer so the transmission would have a full contact area rather than resting on a few of the skid ribs. 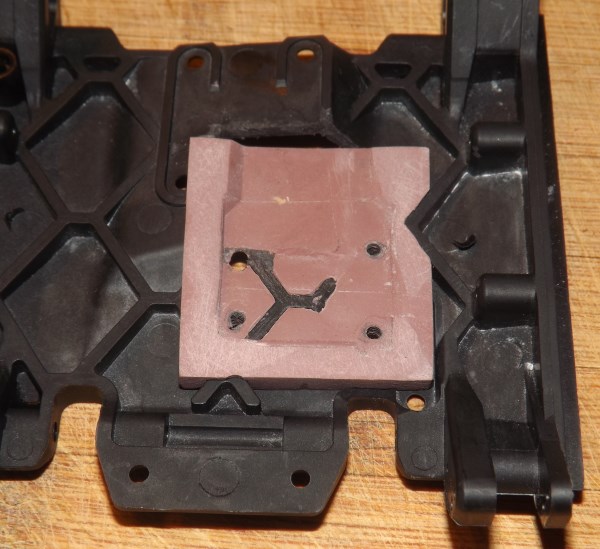 I still need to decide what to do with the big hole but for now it works. Only time will tell if it lasts   Items I still need to figure out before the RECON G6:
|

|  |
| Sponsored Links | |
| | |
|
03-21-2016, 02:38 PM
| #2 |
| Rock Stacker Join Date: Oct 2015 Location: Kingston, WA
Posts: 94
|
what type of material is that spacer you made? Like the way you're going with this truck! |
|
| |
|
03-21-2016, 02:53 PM
| #3 |
| Rock Crawler Join Date: Aug 2015 Location: Big Island
Posts: 863
|
It's Sculpey polymer clay I stole from my wife. I pressed it into the skid and baked the whole thing (skid included) at 250° for about 10 minutes. After that it was rigid enough to remove and bake by itself for another 20 minutes at 285°. Once cooled it is surprisingly strong and can be drilled, sanded or cut.
|
|
| |
|
03-23-2016, 09:20 PM
| #4 |
| Rock Crawler Join Date: Aug 2015 Location: Big Island
Posts: 863
|
I got my electronics box installed today and am just buttoning up the wiring. There was a break in the rain so I took it out for a test drive. At speed it handles soooo much better than stock thanks to the lower COG. That also improves the crawling ability although it does hang up a tiny bit more than before. Next up - lights and body panels. It's getting close now  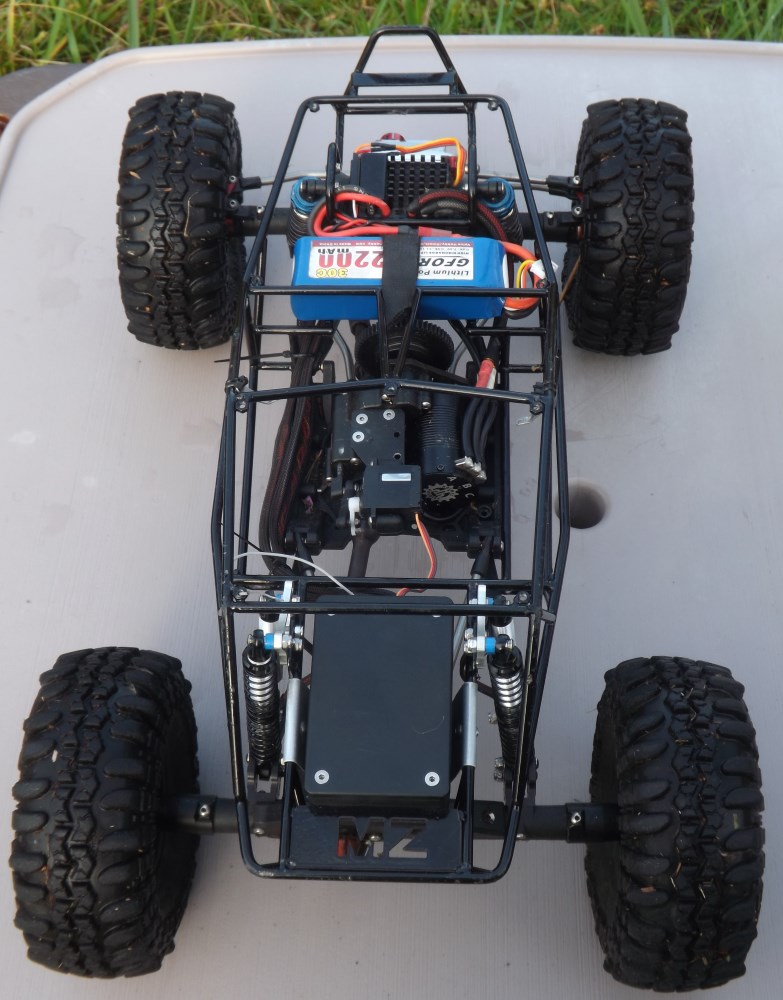  |
|
| |
|
03-24-2016, 08:33 PM
| #5 |
| Rock Crawler Join Date: Aug 2015 Location: Big Island
Posts: 863
|
If the G6 was tomorrow I'd be ready! But since I still have a week I'll keep tweaking and testing. Here's what I have so far... 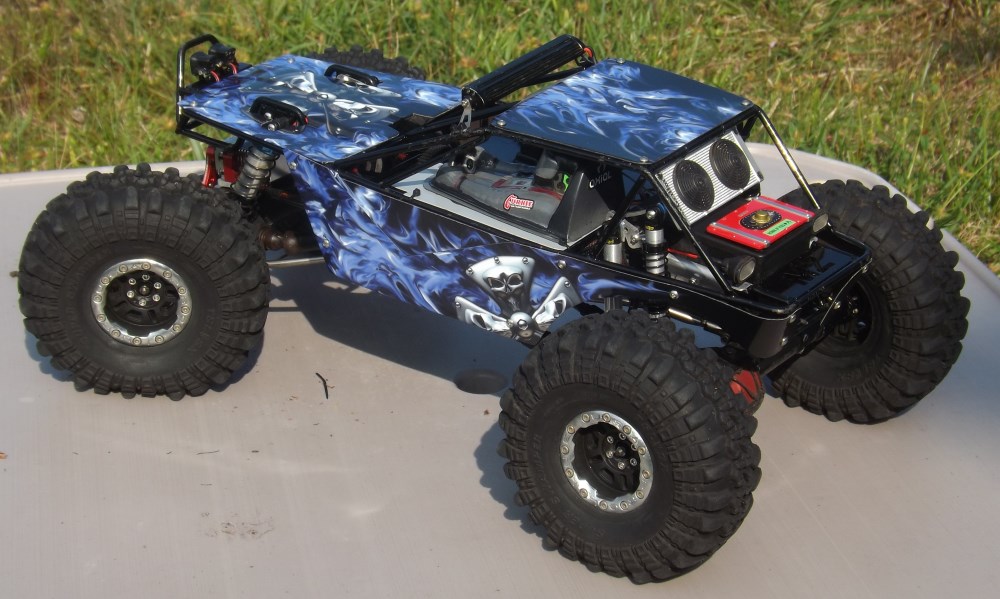     |
|
| |
|
03-24-2016, 08:54 PM
| #6 |
| I wanna be Dave Join Date: Sep 2012 Location: Victoria, BC
Posts: 2,257
|
Really nice work you have done with that chassis.
|
|
| |
|
03-24-2016, 11:50 PM
| #7 |
| Newbie Join Date: Mar 2016 Location: Kauai
Posts: 9
|
R those tires 2.2 Xl? Sent from my iPhone using Tapatalk |
|
| |
|
03-25-2016, 12:42 AM
| #8 | |
| Rock Crawler Join Date: Aug 2015 Location: Big Island
Posts: 863
| Quote:
| |
|
| |
|
03-25-2016, 10:30 AM
| #9 |
| Rock Stacker Join Date: Oct 2015 Location: Kingston, WA
Posts: 94
|
Really like what you've done with this. Everything looks super clean.
|
|
| |
|
03-25-2016, 12:08 PM
| #10 |
| Rock Crawler Join Date: Aug 2015 Location: Big Island
Posts: 863
|
Thanks! My dirty little secret is to just hide it all. Now I know where my kids get their room 'cleaning' skills     |
|
| |
|
03-25-2016, 01:05 PM
| #11 |
| Quarry Creeper Join Date: Dec 2015 Location: ossipee
Posts: 200
|
What did you use to mount the lite bar
|
|
| |
|
03-25-2016, 01:32 PM
| #12 | |
| Rock Crawler Join Date: Aug 2015 Location: Big Island
Posts: 863
| Quote:
  | |
|
| |
|
03-26-2016, 07:22 AM
| #13 |
| Rock Crawler Join Date: Nov 2012 Location: Charlotte
Posts: 931
|
Man this rig is sick! Really well done my man. Very clean, low and mean.
|
|
| |
|
03-28-2016, 01:10 PM
| #14 |
| Newbie Join Date: Dec 2015 Location: HI and AK
Posts: 7
|
Alright! Killer build. Competion I'm drawn from the guava now and I brought a tig welder and vac form table hahahaha you might regreat this Mike!
|
|
| |
|
03-28-2016, 02:19 PM
| #15 |
| Quarry Creeper Join Date: Dec 2015 Location: ossipee
Posts: 200
|
Thanks for the tip with the light bar. wraith looks great!!
|
|
| |
|
06-01-2016, 05:47 PM
| #16 |
| Rock Crawler Join Date: Aug 2015 Location: Big Island
Posts: 863
|
Thanks for the compliment! I haven't updated this thread in a while either. This is the rig I took to the April Fowl RECON G6 in Oregon a couple months ago. Aside from blowing out my plastic spur it did great, including earning me 2.2 Driver of the Day honors The copper pan clock is Parker's way of trying to be funny and implying it's 'time' to graduate from 2.2 and move on to 1.9 class.  My mangled plastic spur. I was able to finish the day on this but clicked the entire time.  |
|
| |
|
08-10-2016, 11:10 AM
| #17 |
| Pebble Pounder Join Date: Aug 2014 Location: Dunkirk, NY
Posts: 197
|
Where did you get that box in the rear for the receiver and BEC?
|
|
| |
|
08-10-2016, 03:37 PM
| #18 |
| Quarry Creeper Join Date: Dec 2014 Location: The Angels
Posts: 433
|
I found mine at RadioShack. Most electronic parts stores should carry em. They come in different sizes...
|
|
| |
|
08-11-2016, 12:22 AM
| #19 | |
| Rock Crawler Join Date: Aug 2015 Location: Big Island
Posts: 863
| Quote:
It's mounted with a single piece of aluminum bent into a cradle and around the frame secured with screws. | |
|
| |
|
08-15-2016, 05:54 PM
| #20 | |
| Pebble Pounder Join Date: Aug 2014 Location: Dunkirk, NY
Posts: 197
| Quote:
| |
|
| |
|
| Thread Tools | |
| Display Modes | |
| |


 Linear Mode


