| | #1 |
| Quarry Creeper Join Date: Oct 2016 Location: Hanover
Posts: 304
|
Hey guys, I posted a couple Axial Bomber Builds I did with the B1B and B2B in the Bomber forum, and wanted to post my Wraith build. This is actually my 6yr old sons Wraith. Got him this for Xmas 2016 as a kit and we spent a lot of time putting it together, mainly because he is a kid and he is slow IMO, the Bomber Kit is head and shoulders above in every way, even down to the plastic strength of the cage. The Wraith Plastic cage feels flimsy and too flexible and can snap easily. However, the Wraith has a good base to it, with its shorter WB and I do like the 4 link suspension better than TAs. There is some torque twist to it, but it’s not as bad as the Bomber without it’s sway bar. It is currently lightly modified to include: Battery relocation to front mod VP Stage 1 Kit Axial HD UD Gears rear and HD Standard front Bombproof tranny Castle Monster X Holmes PP BLE 3500KV Runs on 3S Lipo But the issue is this – I have 3 Bombers. 2 are highly modified to go fast, (B1B and B2B). One of them is built like this Wraith here, but as you know, Bombers are made to handle higher speeds better than a Standard Wraith. So my son is trying to keep up when we’re zipping around and drifting corners, etc -meanwhile he is doing cartwheels attempting the same stuff. Even though his Wraith is turned down to 60% power on the radio. I know he’s only 6 and doesn’t have the dexterity yet to handle the rig effectively, but I’m on a mission to try and build this thing to be able to handle the high speeds better, while maintaining its decent crawability. My plan is to lower the COG with shorter shocks Lower some COG with a Dlux Truss/Servo mount Widen it with wider axles/hubs Stiffen the cage with a DMG Stiffy New Wheels/Tires New Body/Paint I know these mods will improve its high speed handling, but I’m very curious to see if it can still out crawl the Bombers. Pics: 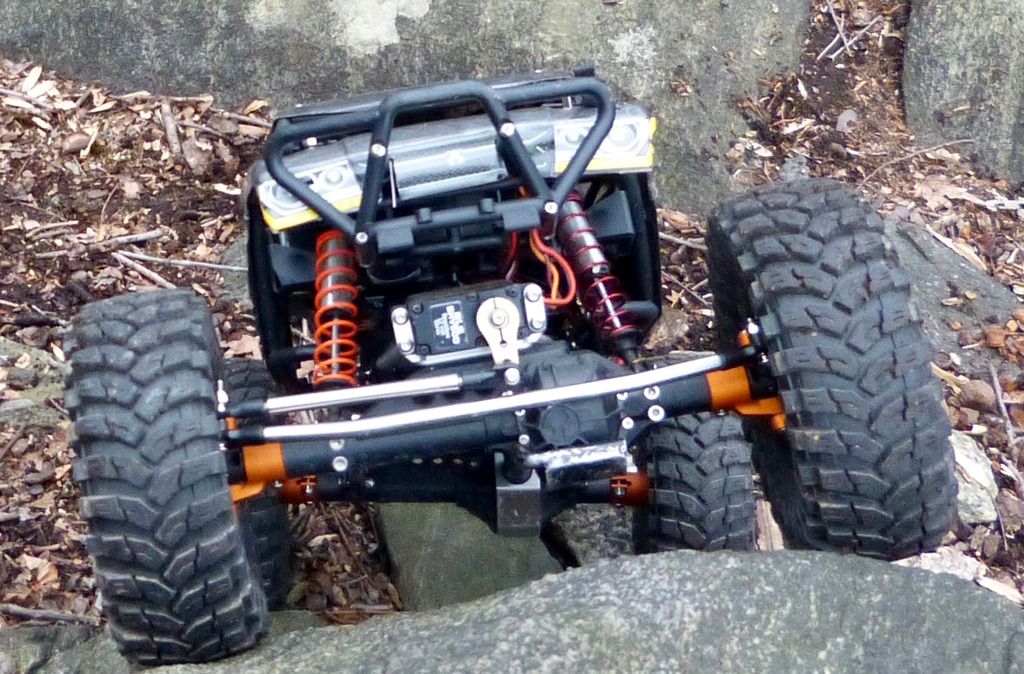 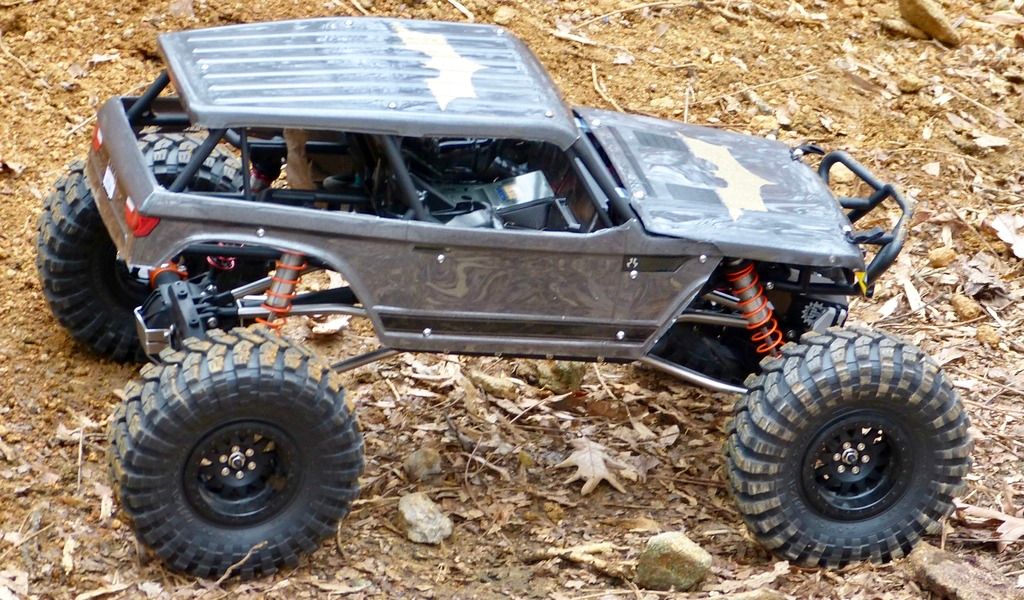 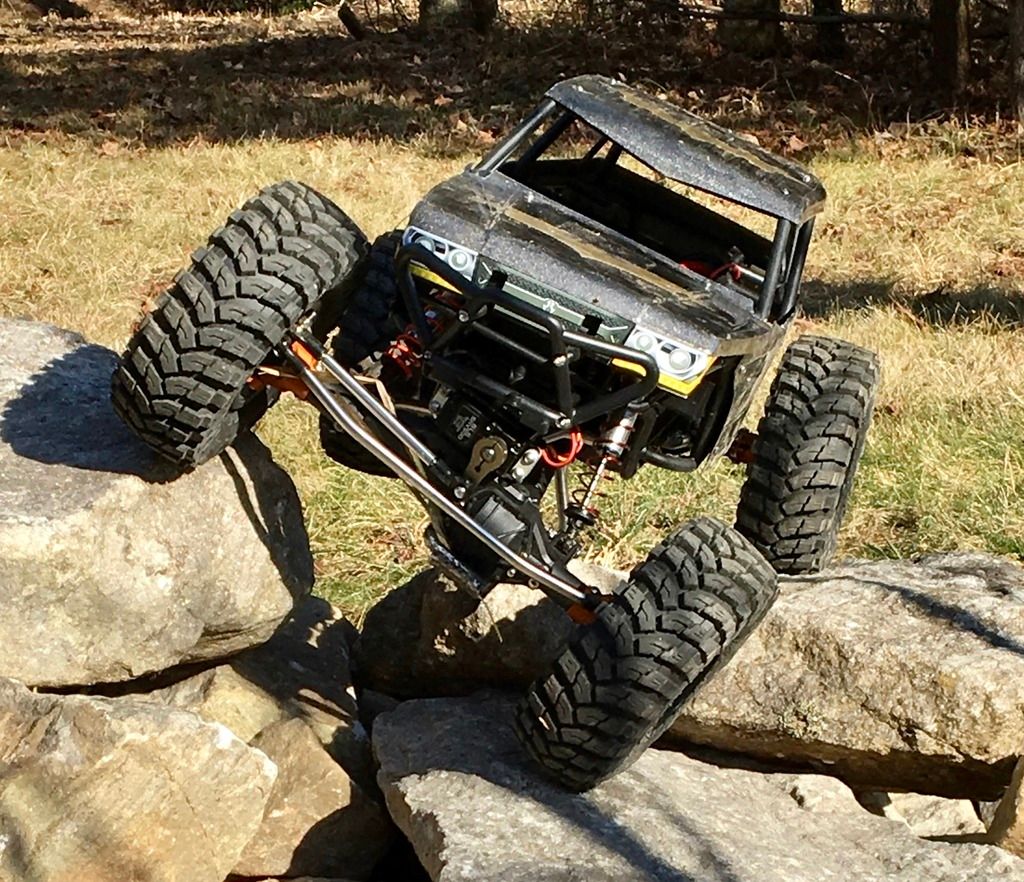 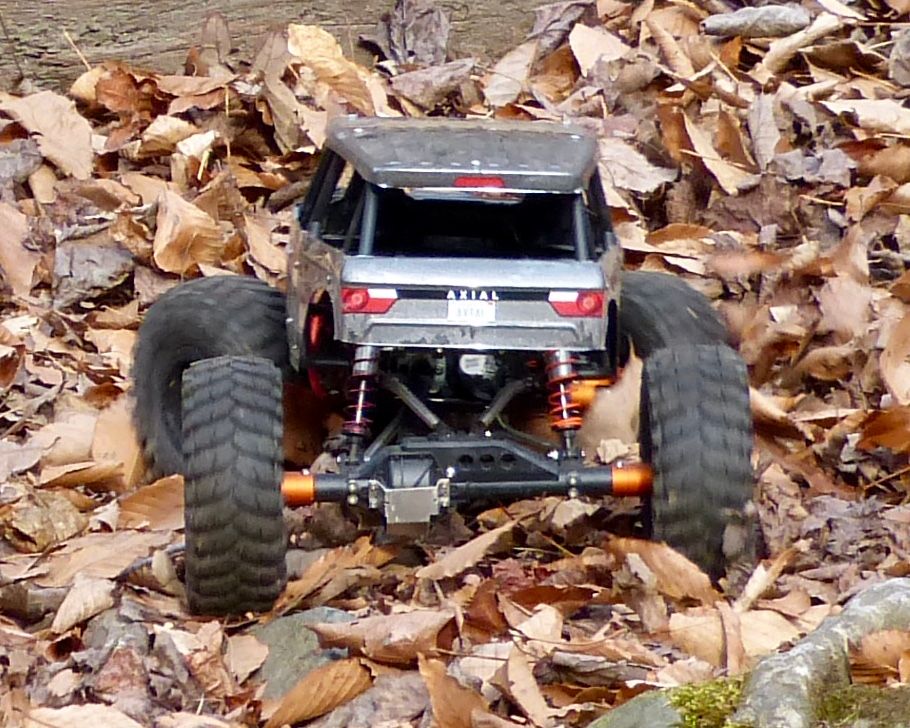 |
| |  |
| Sponsored Links | |
| | #2 |
| I wanna be Dave Join Date: Jun 2016 Location: Deep in the Everglades
Posts: 5,818
|
No mention of a sway bar front or back or both. It made a huge difference on mine, which is close to yours.  I ran bars at both ends, I pulled the rear off, for crawling leaving the front on for speed and crawling. I have tall shocks for travel Hang up and Drive |
| |  |
| | #3 |
| Quarry Creeper Join Date: Oct 2016 Location: Hanover
Posts: 304
|
So the first mod is the DLux truss up front. This will allow me to move the servo down behind the axle, which lowers the COG. The Dlux Truss was very easy to put together and is just a thing of beaut.  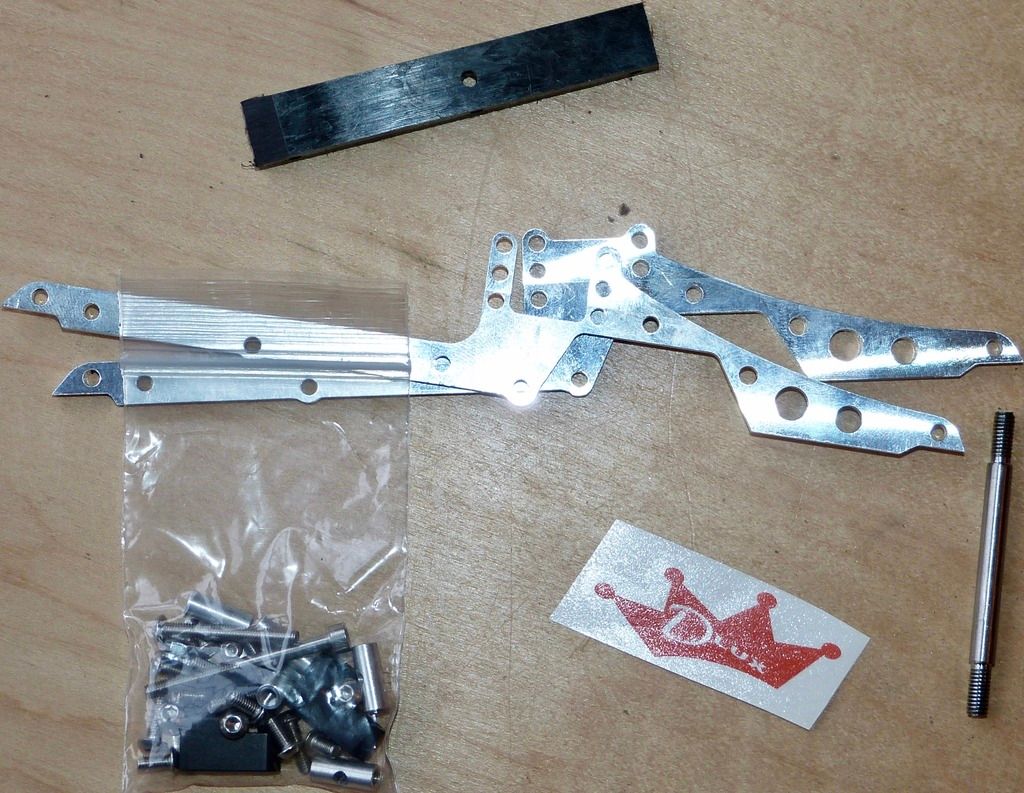 Another reason for this mod is with the stock servo mounting area, the Servo horn kept hitting the chassis. I even flipped the servo mount to move it further back, and it would clear, however the horn would hit the diff gear cover. 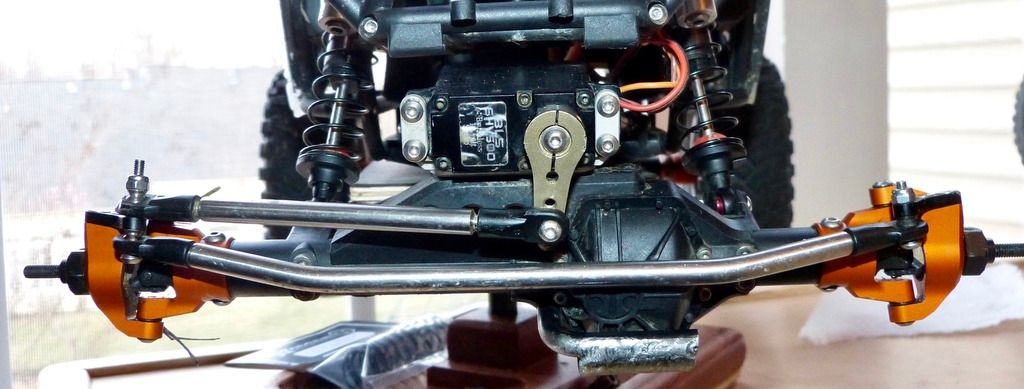 Also, with the way the drag link and servo is oriented, it puts the tie rod down low and in harms way. He bent an incision 1/4" SS tie rod before. 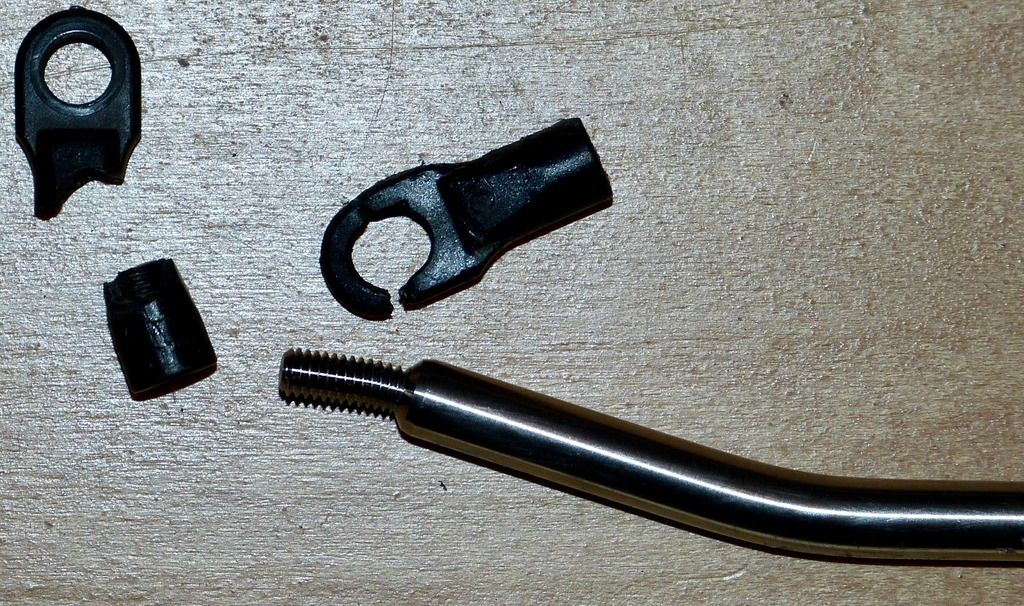 Just wanted to hit on a couple pointers. The supplied screws that came with the kit for the top of the Chubs didn't get enough bite, so I swapped them out for 12mm. 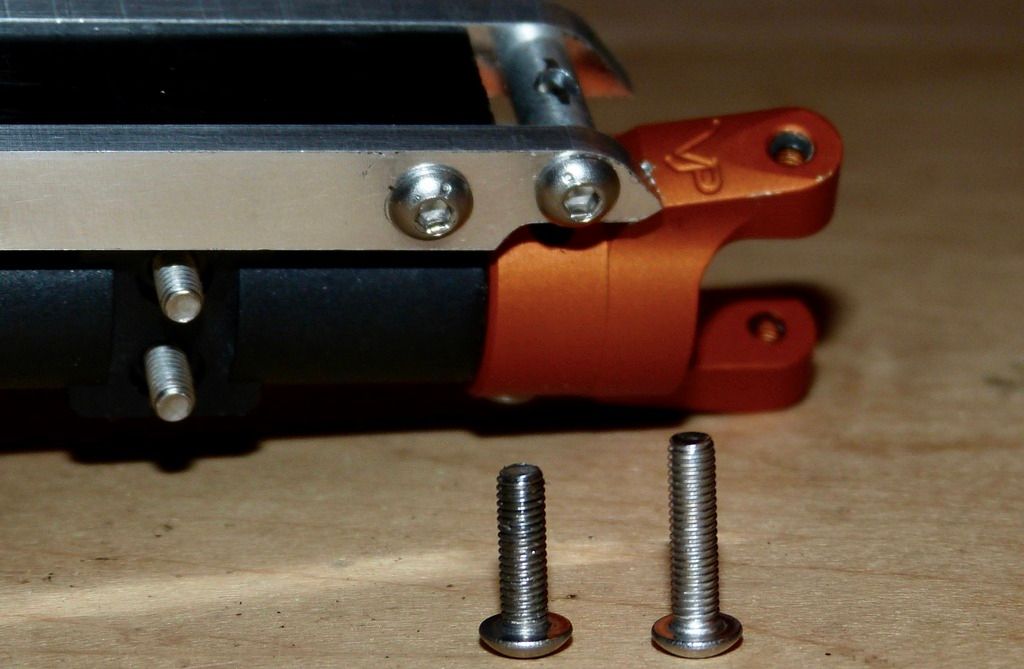 Same with the grub screw for one of the servo mounts. I swapped it out for 20mm.   You'll need to supply your own Traxxas rod ball to use as a spacer for the top links. 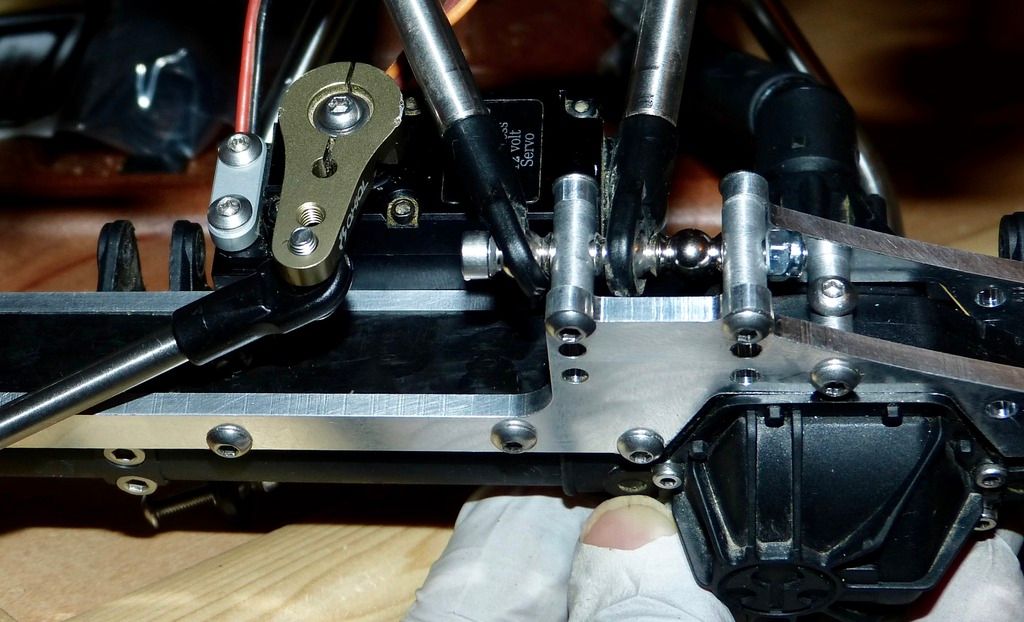 I also had to run Jato Rod ends on one end of the top links to get the pinion angle right. 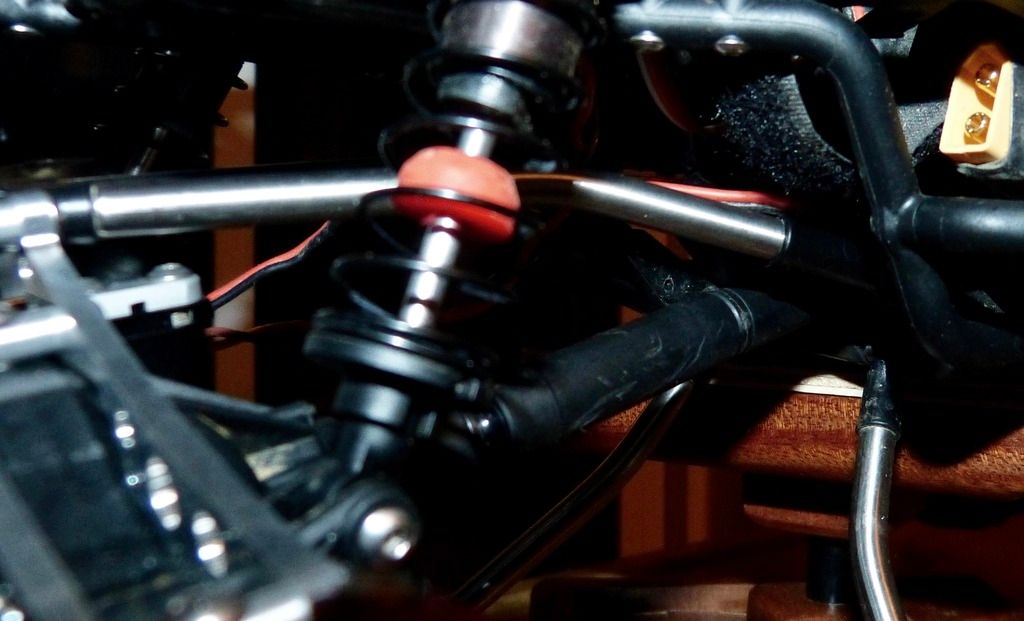 The finished product. You can see how the tie rod is angled nice and high, out of harms way. Also, the tie rod and drag link ends just barely clears the stock wheel with the stock hubs. A little too close for comfort, but we'll be swapping the wheels and increasing wheel hub, so no big deal here. 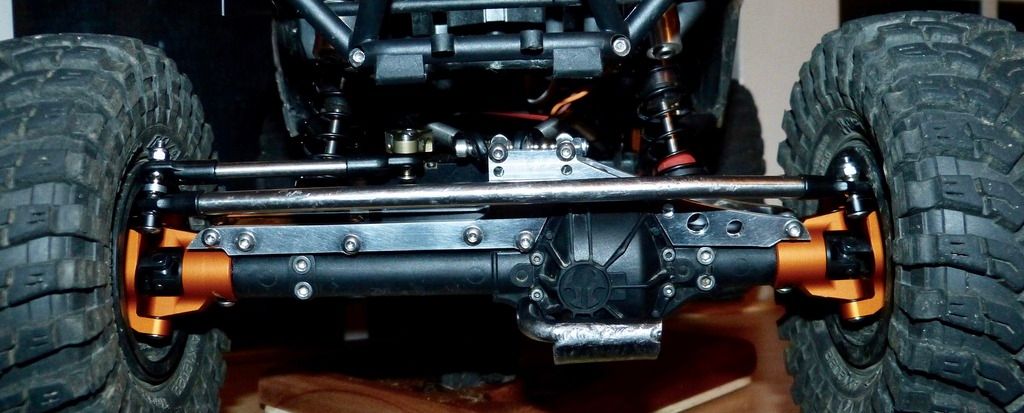 The servo horn still hits the chassis, but not as quickly as before. 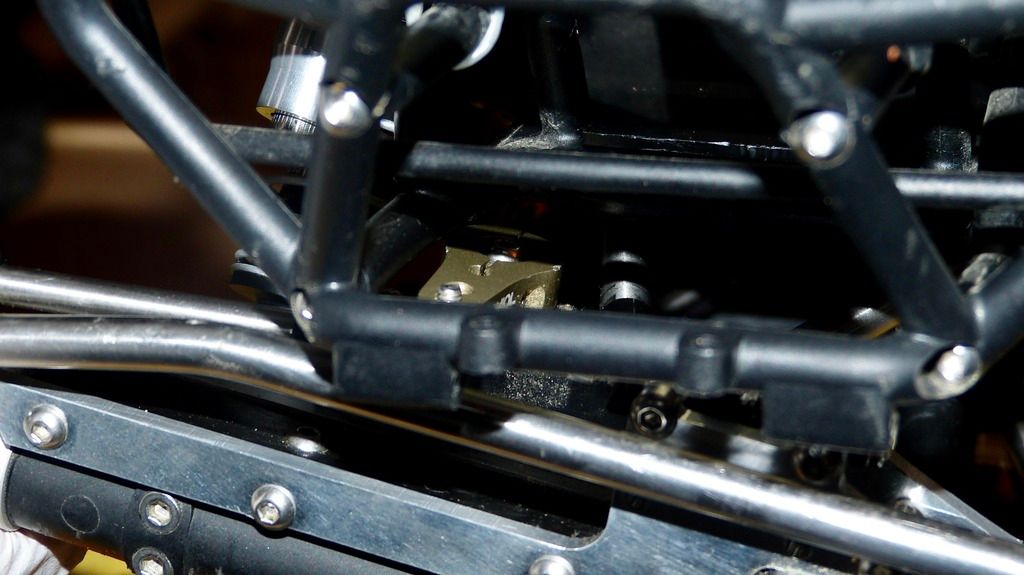 A quick pic on the servo clearance on the bottom. It's just above flush. 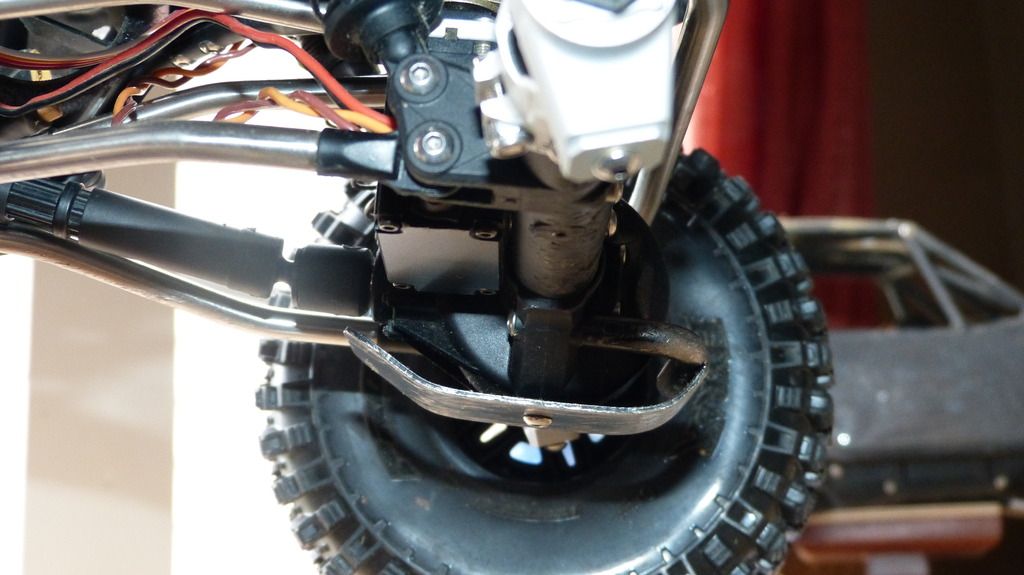 Last edited by *Old*; 05-25-2017 at 02:03 PM. |
| |  |
| | #4 |
| RCC Addict Join Date: Feb 2016 Location: Santa Maria, CA
Posts: 1,751
|
I think we're after a similar goal. I've been contemplating stretching the wheelbase just a touch by swapping out the revo rod ends for jato's. If you do that just at one end of the rear links, you'll gain about 10mm of wheelbase, and the driveshaft should still work. A side affect is that you'll lose a couple mm's of ride height in the process due to the angle of the rear shocks. If you haven't already done so, you can flip your axle's link mounts upside down too. Again, you'll gain a couple mm's wheelbase at each end, and lose a couple mm's ride height. I found that the servo tucked into the chassis better after that, but like you, the plan is to go with a Dlux U4 truss to move the servo down. In the rear you can unbolt the entire shock mounting piece and install it upside down. That will lower the back at least 10mm's. A 55mm post fits perfectly between the shock mounts to stiffen the back of the cage up a bit. I agree with mikemcE about adding only one swaybar, but I personally prefer only a rear swaybar as it seems to upset the chassis less at speed. |
| |  |
| | #5 | |
| Quarry Creeper Join Date: Oct 2016 Location: Hanover
Posts: 304
| Quote:
 Have you driven it without the swaybars? How did it handle at high speed? I wasn't planning on running a sway. I do have the HR sway as well, but I'm hoping I can avoid it. I don't think it will fit the front with the Dlux Truss on there though. I'll be running much shorter shocks as well. My assumption is with the way the axle mounted shocks, it doesn't need a sway. We shall see soon enough On a side note, with my Bombers, the solid axle and B1B, I'm now able to run them without a sway with some various mods I've done. | |
| |  |
| | #6 |
| RCC Addict Join Date: Feb 2016 Location: Santa Maria, CA
Posts: 1,751
|
D'oh! I was typing while you were posting... carry on.
|
| |  |
| | #7 |
| I wanna be Dave Join Date: Jun 2016 Location: Deep in the Everglades
Posts: 5,818
|
Even running Ruptures with DD foams it was great at speed.... both sway bars are a must and with my shocks adjusted it really is a fun truck, on the rocks even better w/o sway bar, I run the front for steering stability. I am running SSD diamonds at both ends  Hang up and Drive |
| |  |
| | #8 |
| Quarry Creeper  Join Date: Jun 2013 Location: San Francisco
Posts: 260
|
Just from quick observation, it looks as though your axles are rotated slightly off of horizontal. While the rear end does benefit from a straighter pinion/driveshaft angle, as does the front driveline, the front steering geometry is thrown off. By rotating the axle forward (in the case of the front axle) it pushes the caster angle more towards vertical. This makes the wheel want to flop on its side under hard turning. With the axle in it's correct position, the caster angle is kicked back a few degrees, and allows the steering geometry to work for, instead of against you. Think of it as though you're riding a bike. One bike has a 90º head tube, and one has a 72º (average HT angle of most road bikes). The 72º will feel much more stable, since you have an effective steering center that is slightly behind the axle. The 90º will feel squirrely & twitchy, and will want to snap over on you when you turn. You might be able to clock the c-hubs back a few degrees, if the drillings still line up. Or, you could easily correct the issue with slightly longer lower, or shorter upper links. Last edited by turbodan13; 05-24-2017 at 02:55 PM. |
| |  |
| | #9 |
| I wanna be Dave Join Date: Jun 2016 Location: Deep in the Everglades
Posts: 5,818
|
Reread things, you said he was cartwheeling. When, after hitting the brake ? Mine is very stable, but the drag break is tight.... 25 or 30% tops, start power on high, 30% punch. Hang up and Drive |
| |  |
| | #10 | |||
| Quarry Creeper Join Date: Oct 2016 Location: Hanover
Posts: 304
| Quote:
 Never thought of that! Never thought of that! I'm really hoping I can get away with not having to run a swaybar. We'll see... Quote:
As I'm looking at the Chub/knuckle, I have it clocked with the top knuckle angling back towards the rear as max as it will go. I guess I might have to run some Jatos on one end of the lower links to keep that angle. I did just put new Chubs/Knuckles in, which I will post below, and it will have a pic of the angle it's at. When you see it, let me know if that is adequate. Thank you Quote:
The Wraith has the MMX with the HH PP3500kv, same motor as yours I believe. We have the MMX Aux set to Drag on/off (or whatever that new setting is called), so the drag is off during high speed runs. I believe the punch is set at 90%, and start speed at low. Got to keep the power down some for the kid. | |||
| |  |
| | #11 |
| Quarry Creeper Join Date: Oct 2016 Location: Hanover
Posts: 304
|
So I want to widen the track width to help with stability. I originally tried just running wider hubs front and rear. Used the 4 wider hubs in the Axial AX31074 set. It helped a little, but one time during a hard tumble, the added leverage bent one of the VP steering arms. Good thing those are cheap replacements, but it got me searching for a stronger knuckle. I found that VP offers their "Scale" version that is a one piece with a double sheer steering arm. Definately a stronger construction, so I'm hoping these will hold up. Got the scale Chubs b/c of the clamping feature. In case anyone cares, the new scale combo does save .1oz in total weight Will use .600 SLW Hubs from VP for the front.  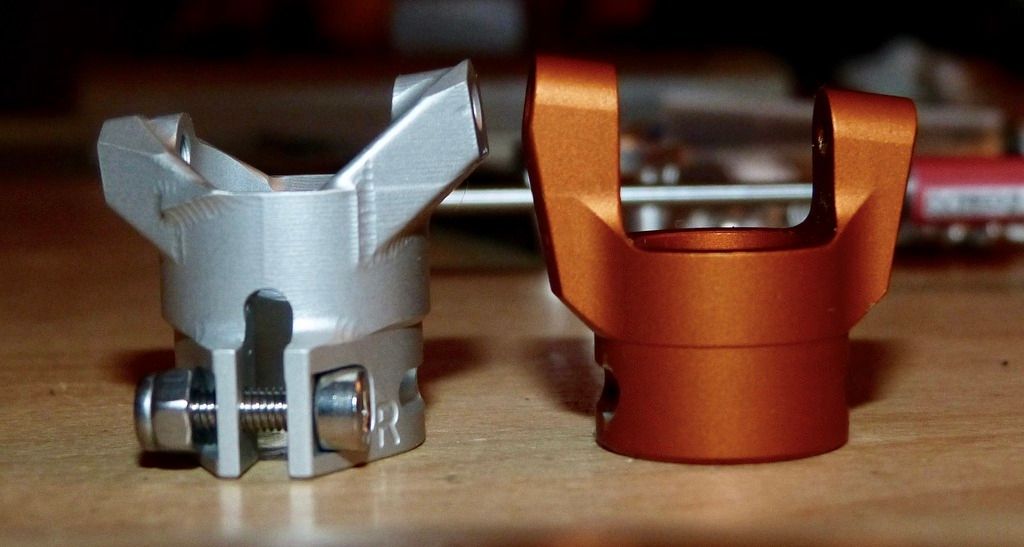 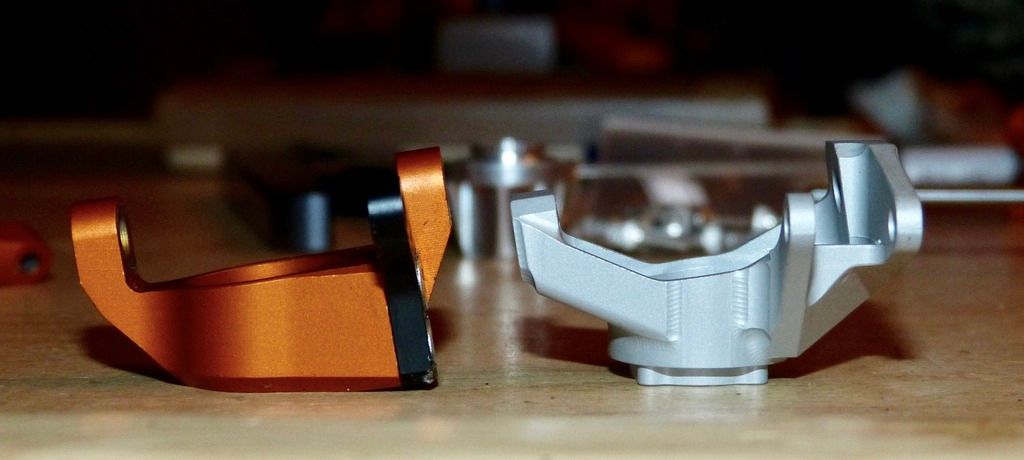 I added brass bushings from LockedUp RC for the knuckles. I had to sand it down to fit, but after putting them in, with zero play, I noticed it was really difficult to turn the arms. Probably need to sand it down more, but the SHV500 servo was too weak to turn it to the right. Can turn left only. Wierd. So I took it off and put the stock ones back in for now. 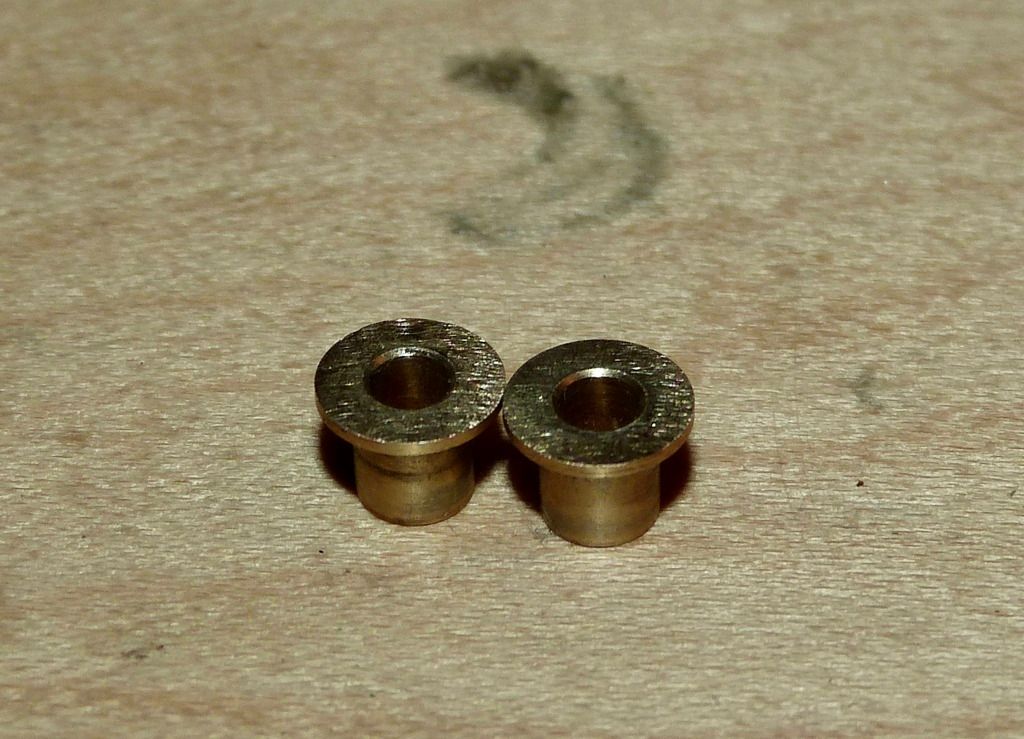 With the new knuckles, the Incision tie rod is a tad too short, so had to extend it by exposing a thread or two on each side - no big deal. Still has some toe-in, which is what I prefer.  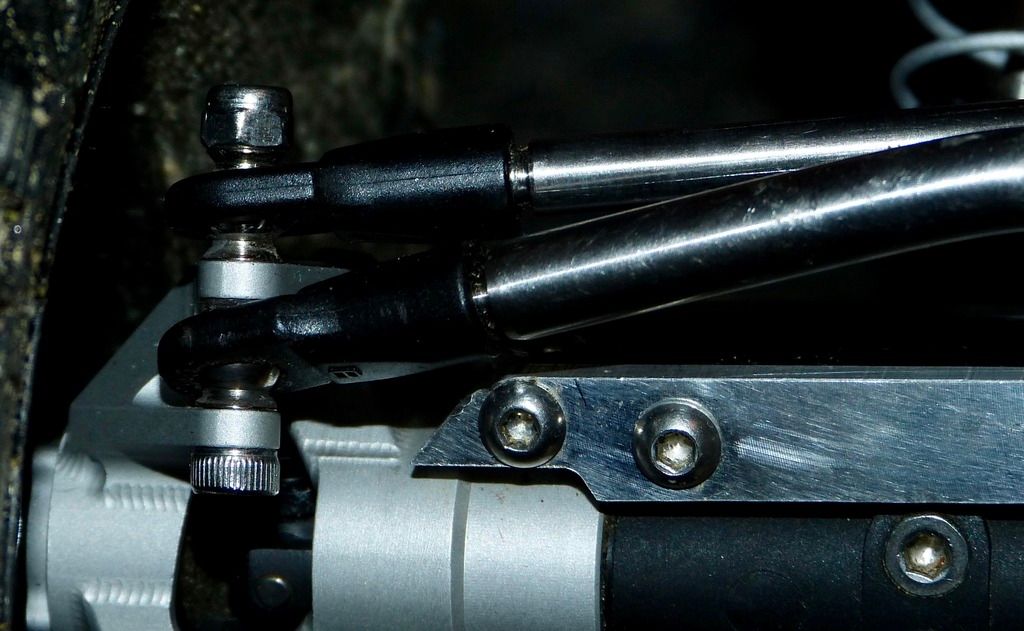 Also, since I had an extra Axial stock Bomber diff cover laying around, I put that in instead of the Wraith version. The Bomber version feels thicker and stronger. 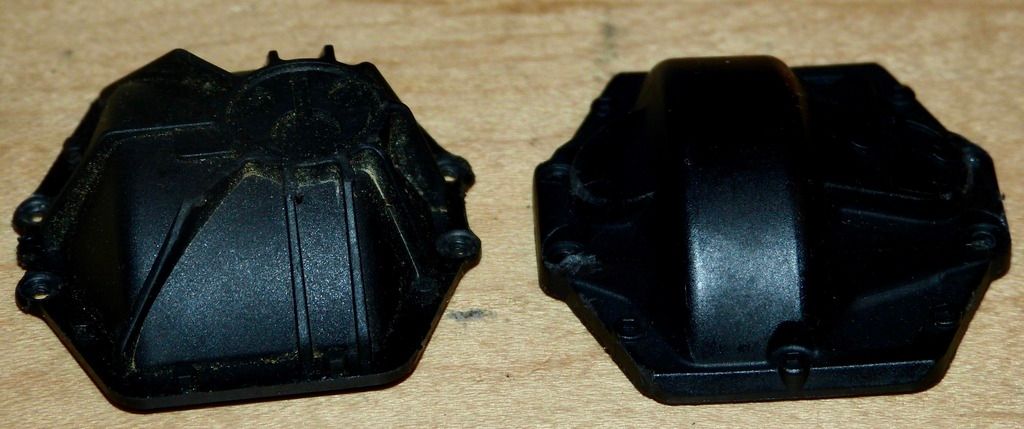 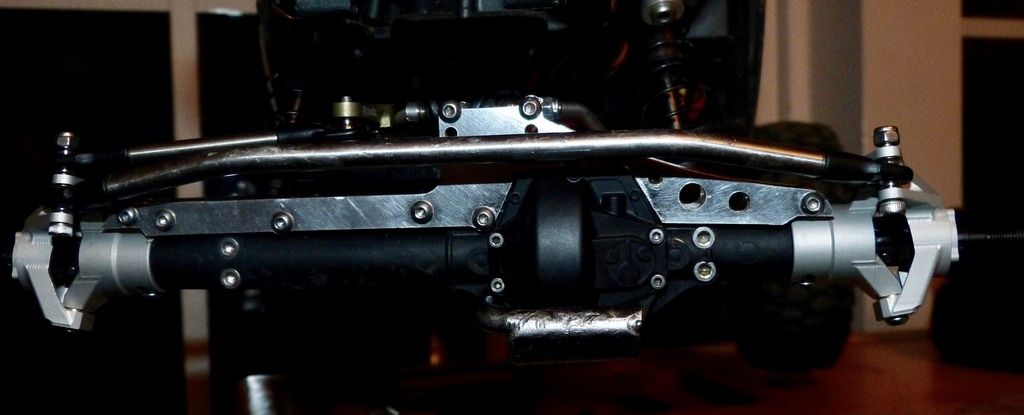 Here's the tierod clearance. Also, turbodan13, if you're reading this thread, how is this for the knuckle angle? 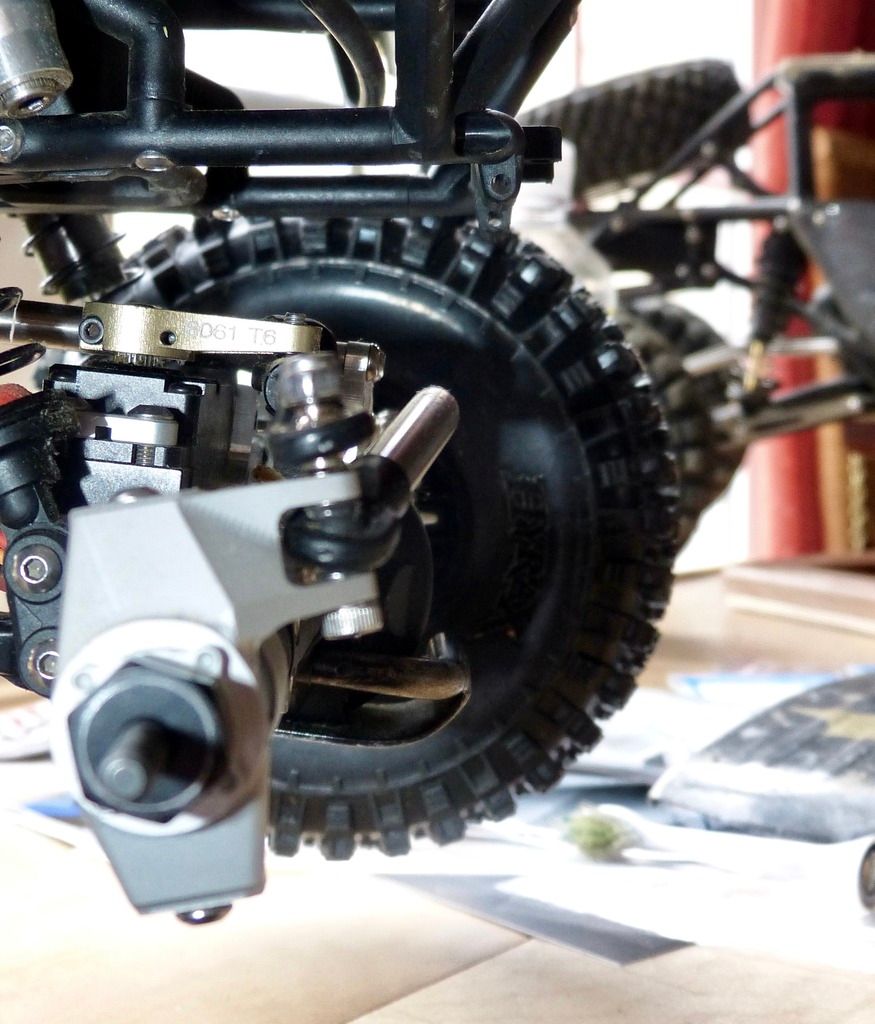 |
| |  |
| | #12 |
| Quarry Creeper Join Date: Oct 2016 Location: Hanover
Posts: 304
|
Onto the rear end. Rather than running .600 wide hubs on the rear to match the front, I decided to run SSD centered Yeti Wide along with .225 SLW hubs. I run this on the B1B and have had good luck with it. Did bend the HD axles before, but it didn't shear off, so I'm OK with that. Initially I was afraid the Wraith would look really goofy with the wider axle, but we'll see I guess. Here is the SSD Yeti wide rear in all it's glory  They measure exactly 1" wider than the stock AR60s. So it adds 1/2" on each side. The .225 hubs is about .125" shorter than the stock hub on each side, so I guess I'll be adding 3/8" on each side with this axle.  Shock mounts don't come with these. These are the stock Axial shock mounts for the Bomber. Also, added the SSD delrin skid. These should've came with it as I feel they are a must!  Here are the hub width comparison. From L to R: .600 for the front. The middle is the stock Axial width, and then the right is the .225. 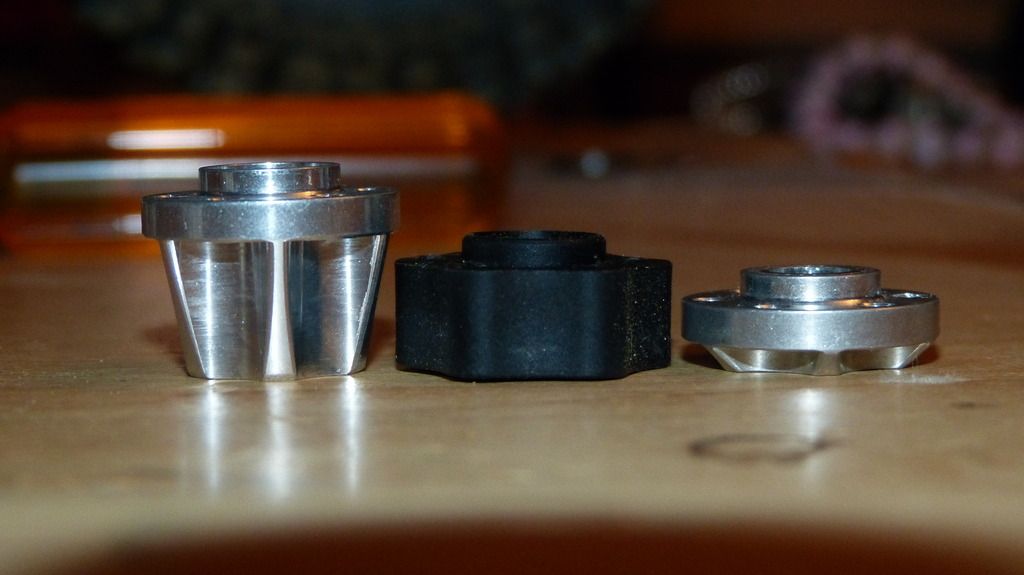 On the left is the included metal bearings. For whatever reason, I cannot get these to press in easily. On my B1B, I had use a brass punch to get them in. To avoid that, I used the rubber sealed bearings from Fast Eddy and it was a firm press fit.  Just wanted to point something out - We went with the LockedUP RC FI spool for the front and rear lockers. We purchased these back in Nov or Dec. 2016. The issue we experienced with these are they did not machine in a ridge for the Axial axle tangs to sit on. This caused a lot of play in the rear axle. Here is the FI spool - 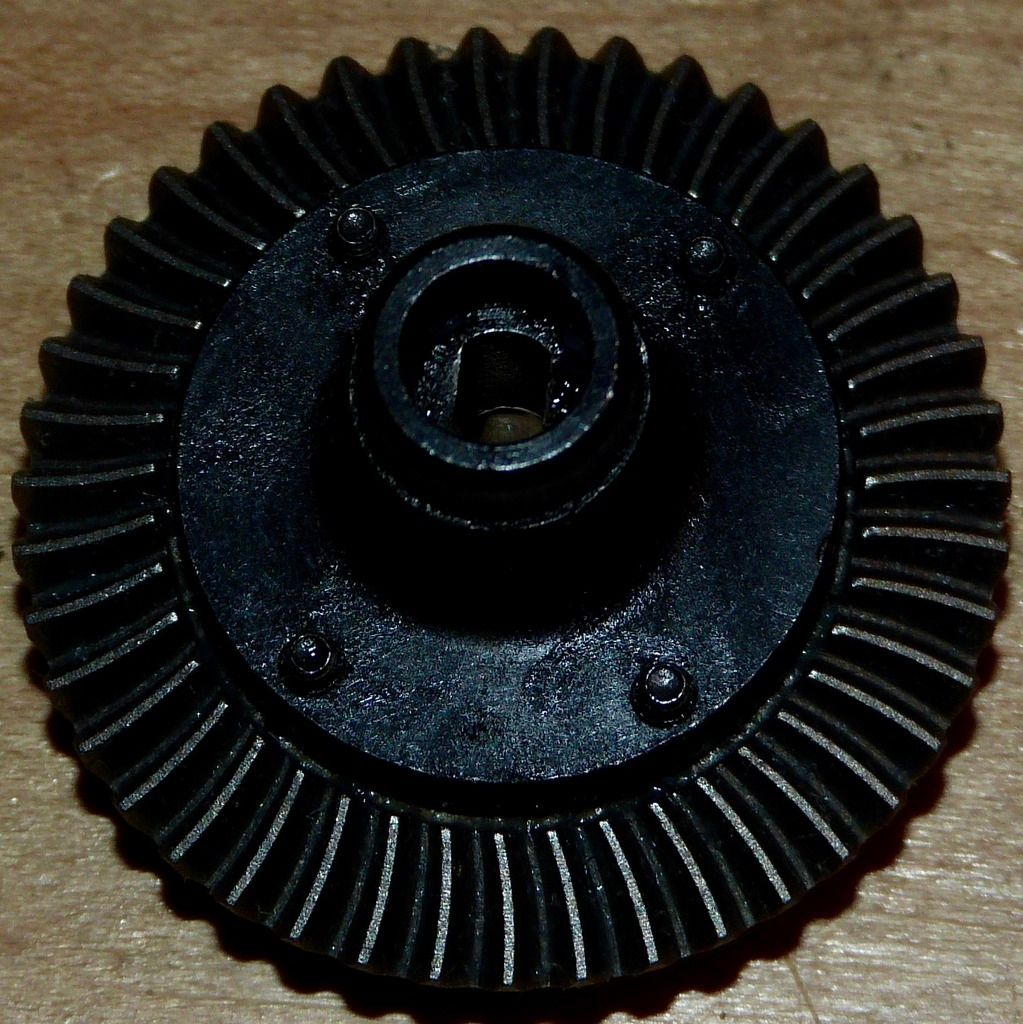 Here is how the axle needs to sit 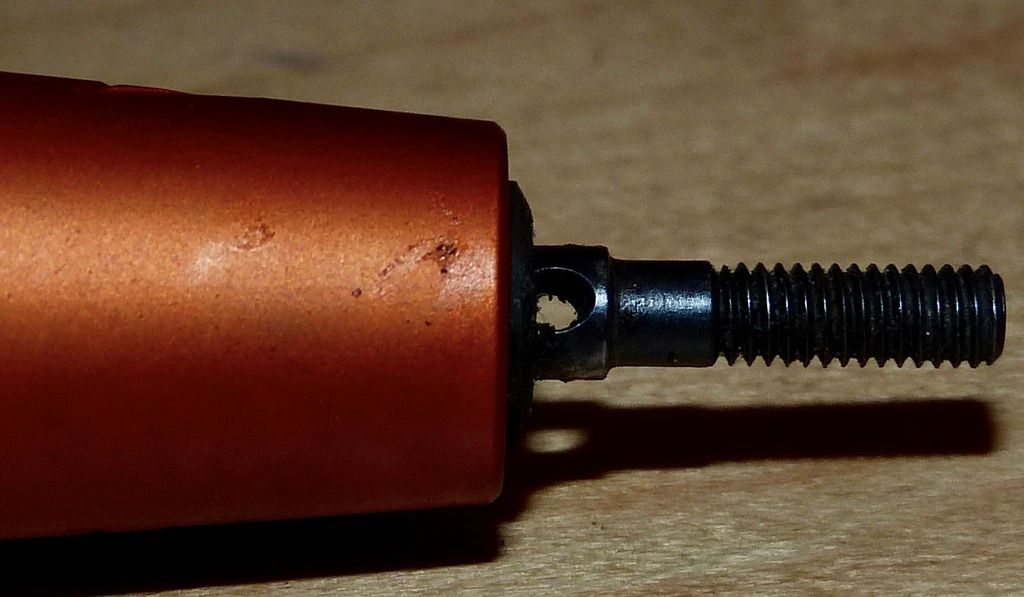 But you can move it all the way in like this. You can't even see the pin hole anymore 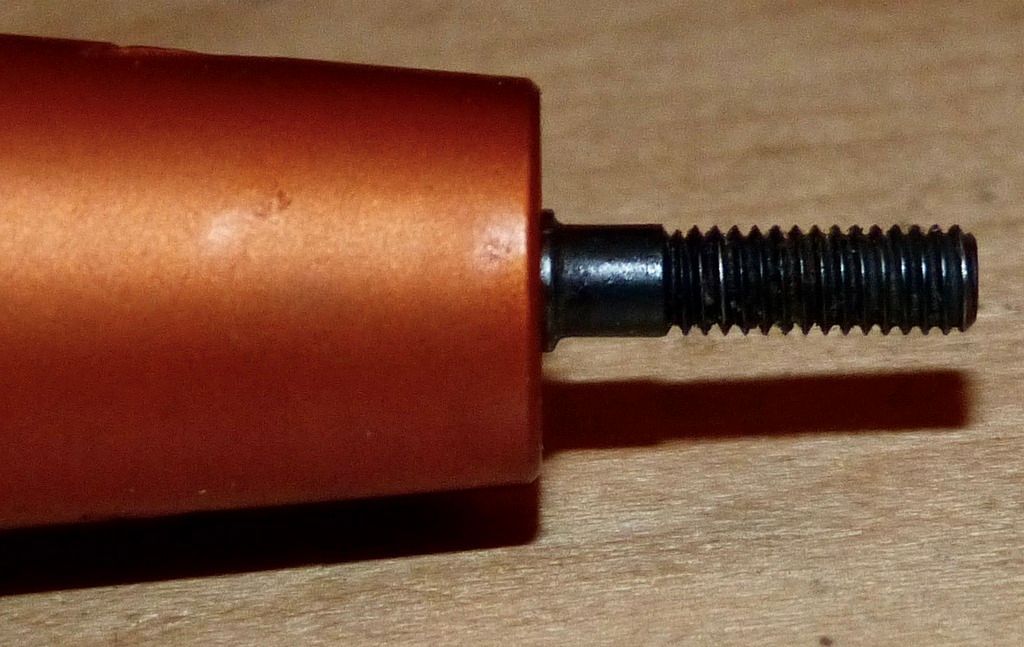 The nice thing is, LockedUP RC service is excellent. It took them awhile, but they able to machine this ring to press fit into the spool. This will keep the axle from sliding in and out 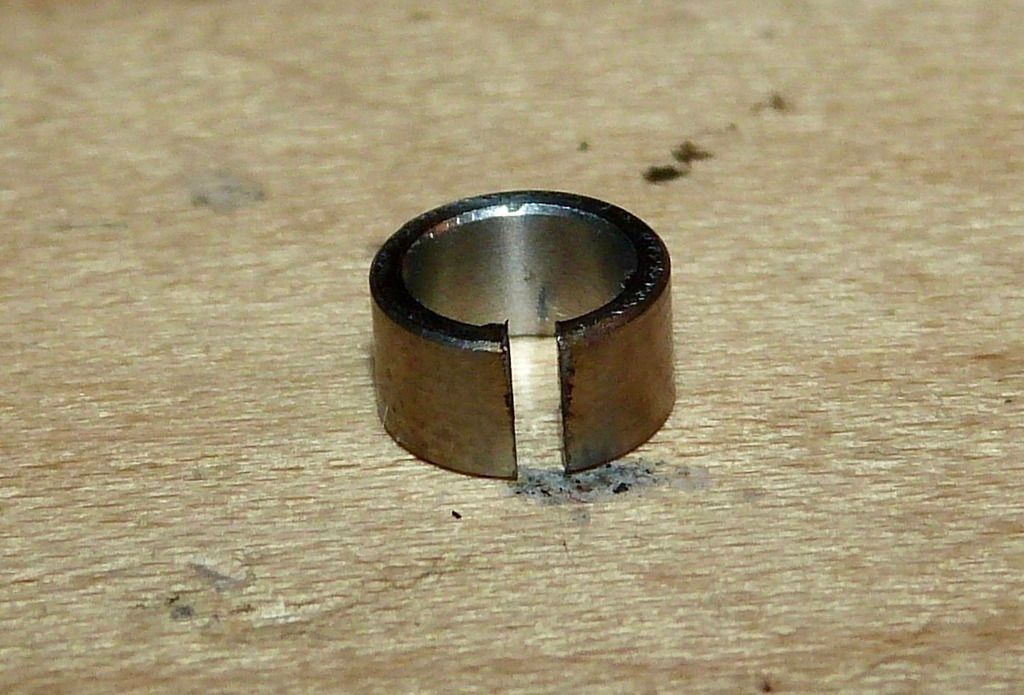 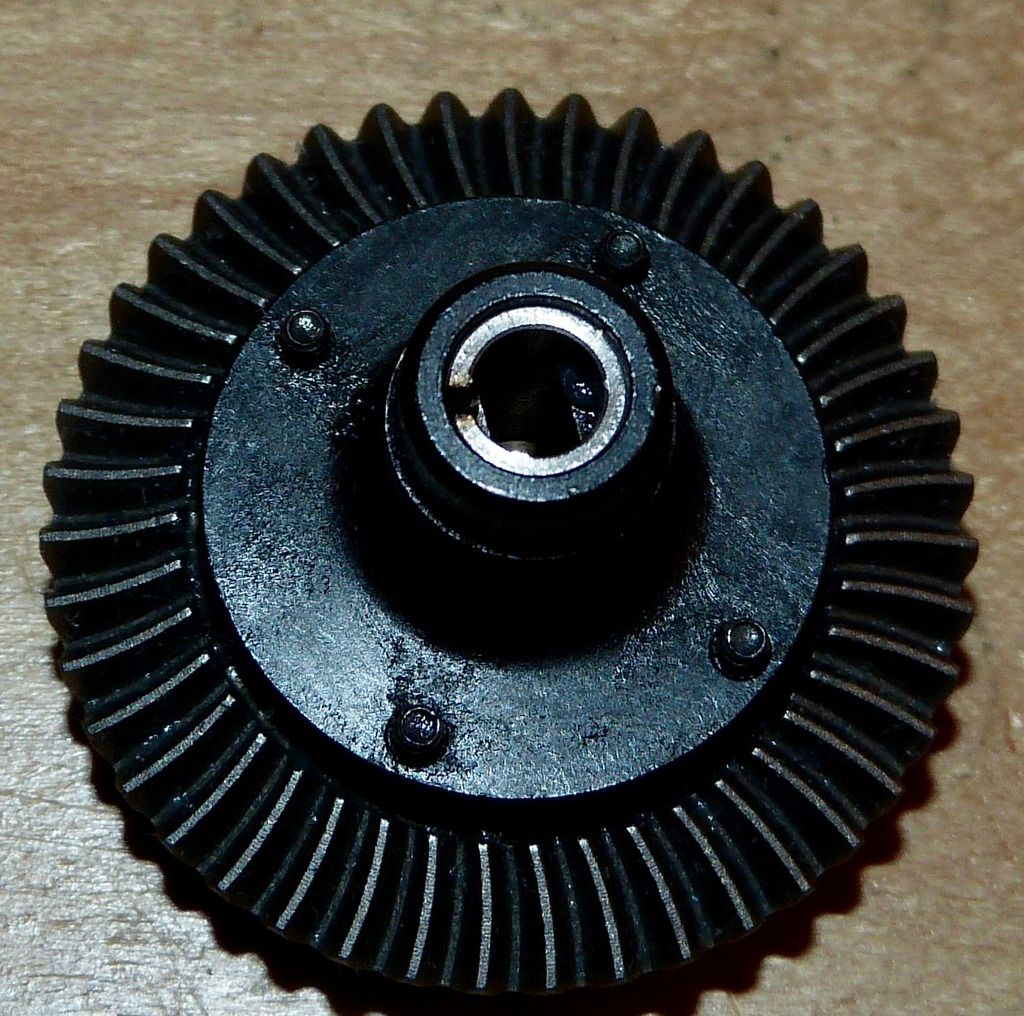 This pic does make it look really wide in the back there. 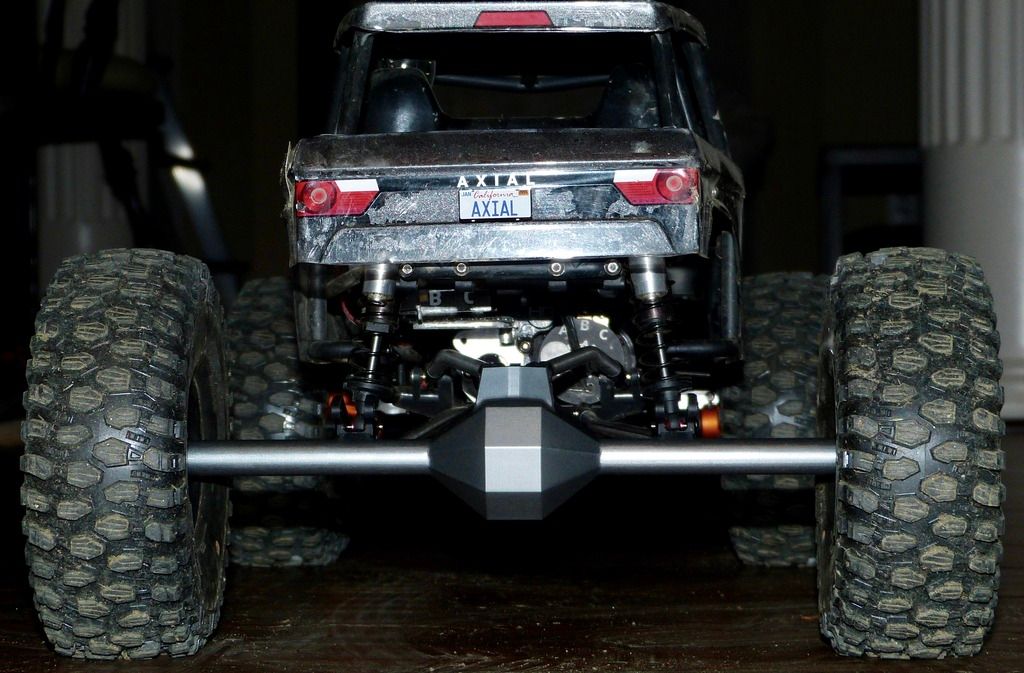 Not too bad at this angle though. 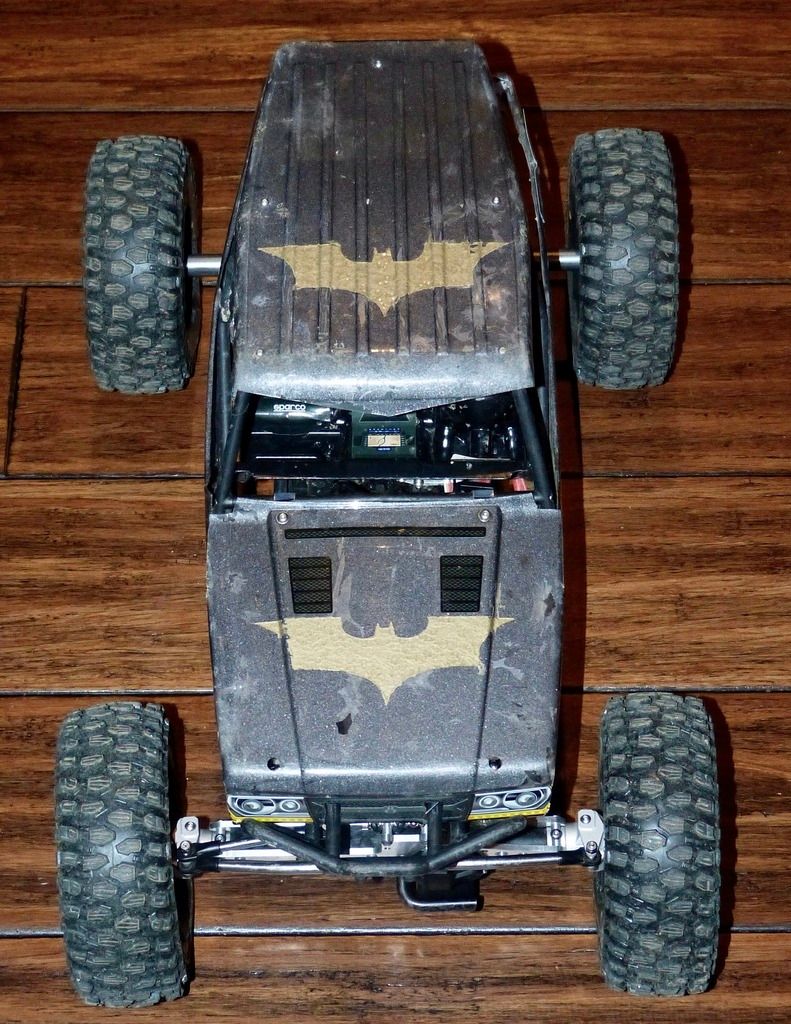 |
| |  |
| | #13 |
| Quarry Creeper Join Date: Oct 2016 Location: Hanover
Posts: 304
|
To lower the COG, I decided to go with the Gmade Piggyback XDs in 93mm flavor in all 4 corners. Using 25wt silicon on all 4. Did the usual Xring mod with the green slime to keep it from leaking. 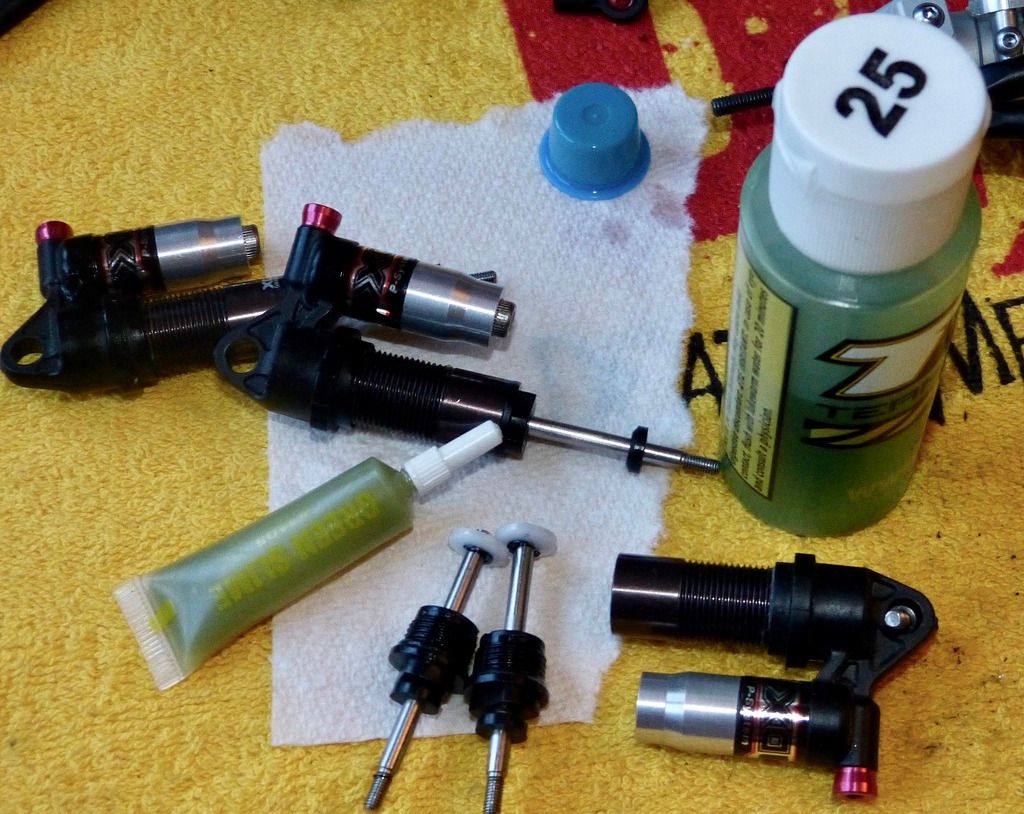 Also replaced the Gmades shock bushing with the LockedUp RC silicon spacers. This will give some added articulation. 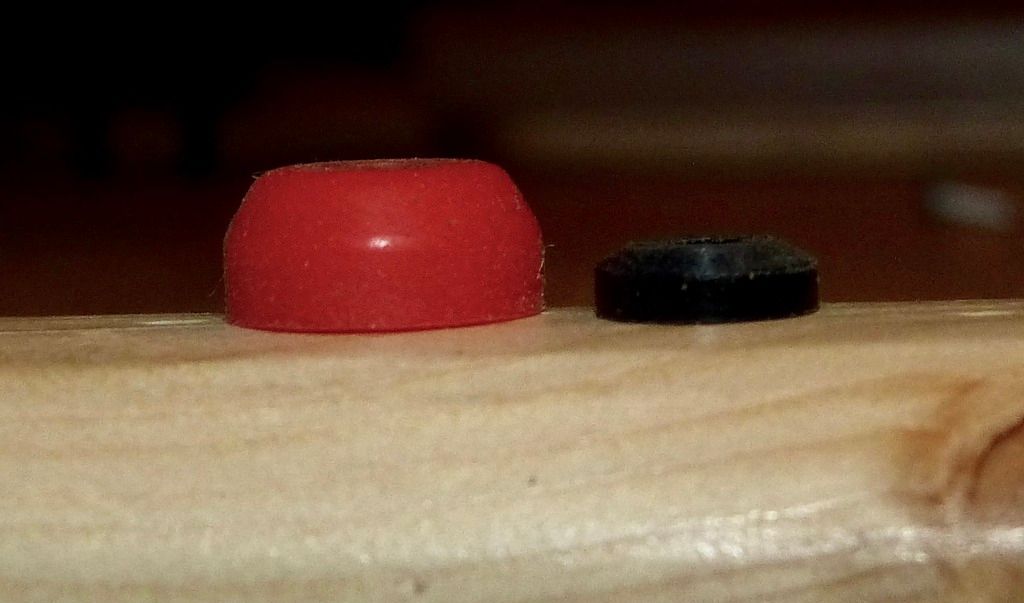 Using the soft Green springs for the rear. 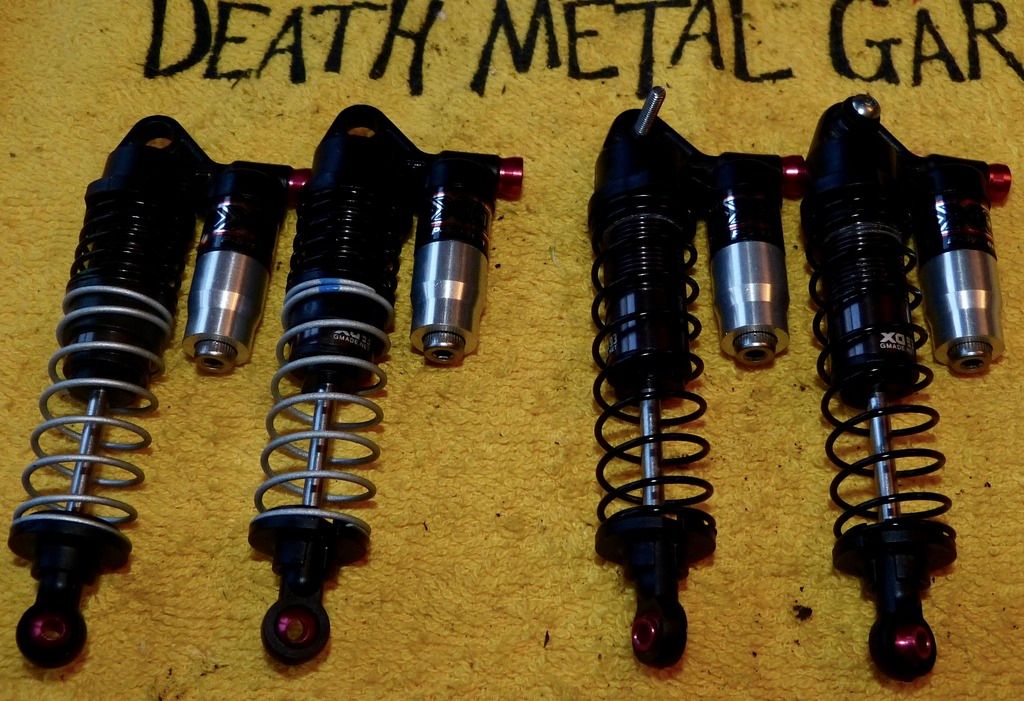 For the fronts, I swapped out the Gmade springs and am using the Proline powerstroke springs. Did this mod on my other rigs and was such as noticeable improvement.  Went with the softest Blue for the main spring and the soft Green top. Went with the softest Blue for the main spring and the soft Green top.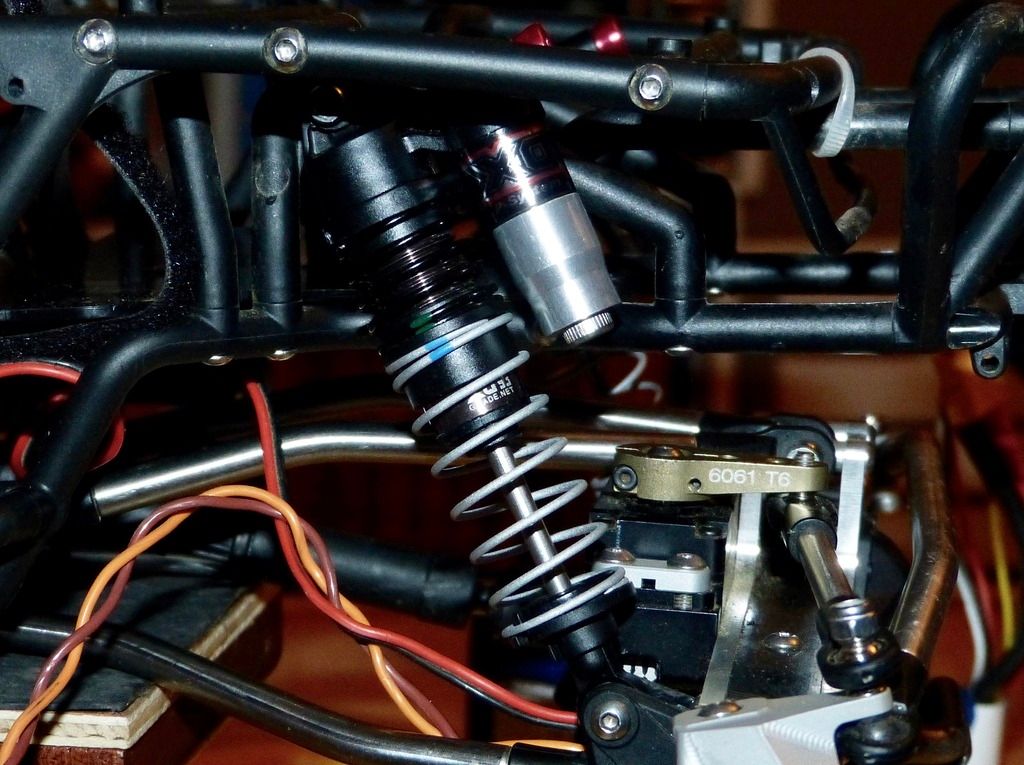 Was able to get 5.5" articulation with these. Not bad  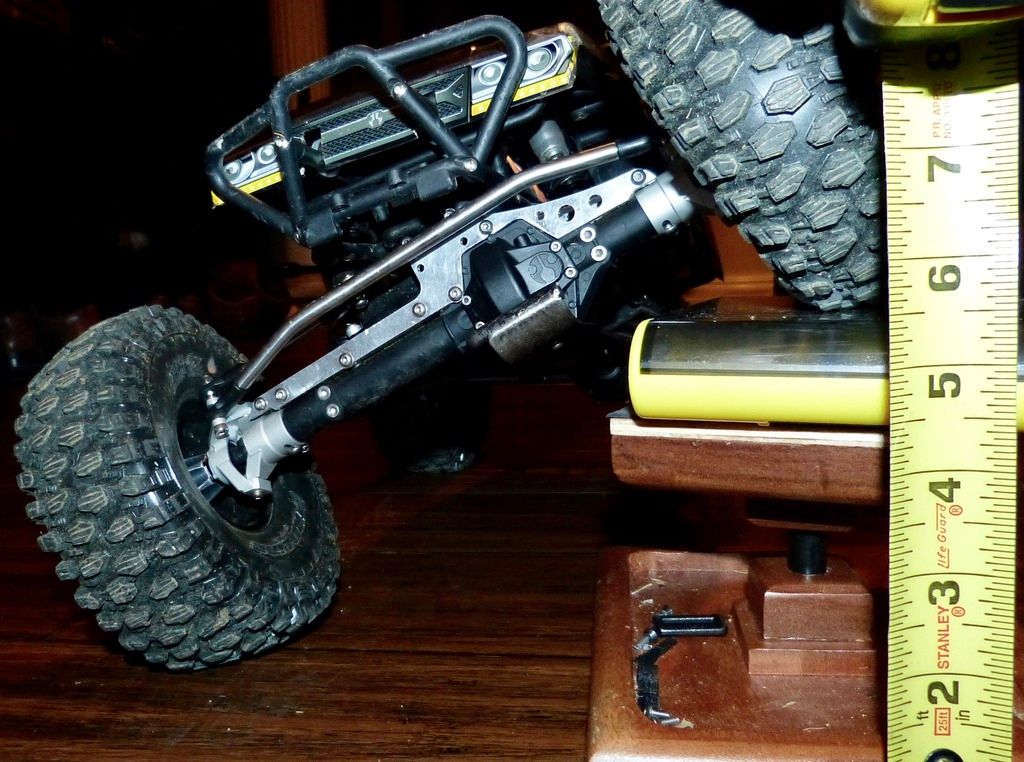 |
| |  |
| | #14 |
| Quarry Creeper Join Date: Oct 2016 Location: Hanover
Posts: 304
|
And last update for the day.... The Wraith is in dire need of a new body. My son painted and did some trimming on the original Spawn body. Did not do a very good job. It's also held together by duct tape in certain areas from various cracks. When we painted this, we were rookies and used the wrong type of paint. We used Rustoleum for Plastic, metal, etc, and didn't realize we needed to use paint for polycarbonate. Anyway, massive chipping ensued. 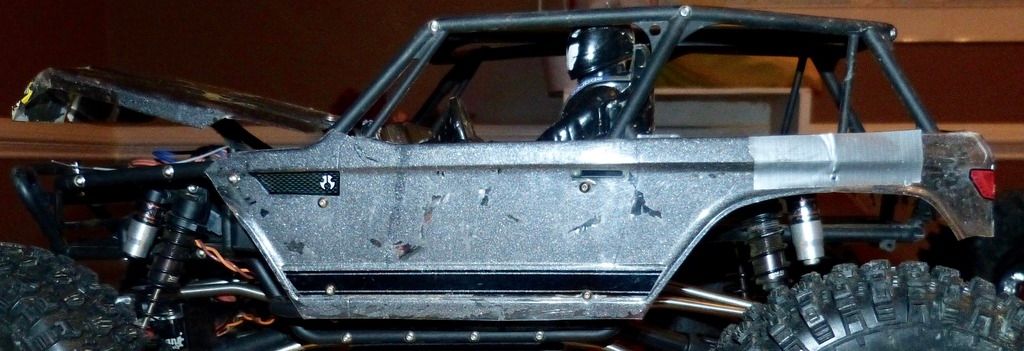 But for the new body, I'm going with the Axial AX04027. I really like the look of the Wraith with this body. I like how the hood is already separate for easy access to the front battery mod. 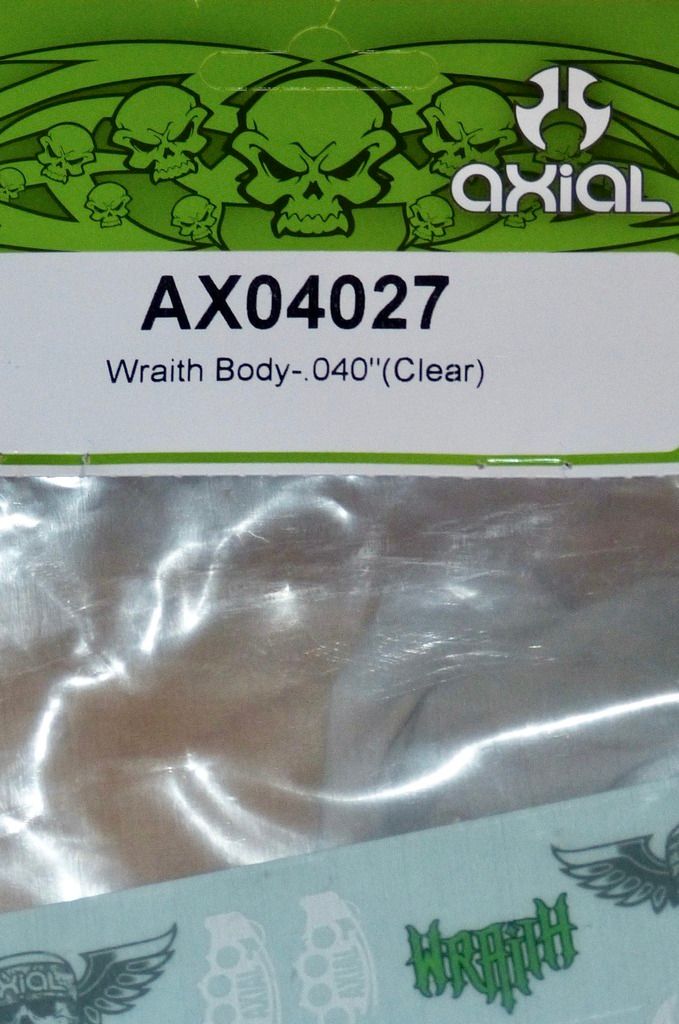 So it's taped up and off to the paint shop 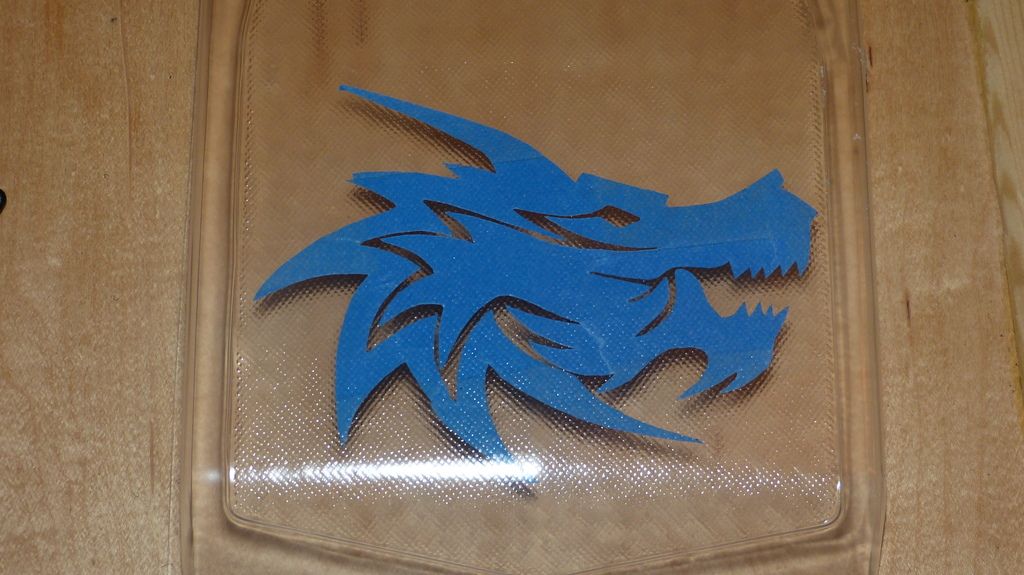 Last edited by *Old*; 05-26-2017 at 09:02 AM. |
| |  |
| | #15 |
| Quarry Creeper Join Date: Oct 2016 Location: Hanover
Posts: 304
|
Ok, originally did the Battery forward mod. Basically used the stock battery holder and cut it in half and screwed it onto the electronics box mount. I also shifted the electronics box mount forward to make room for the battery. This setup is OK, cheap and easy, but my issue with it was the we had to drill a hole on top of the box for the wires to run out. There was not room behind it with the battery. We run in some dusty areas and some with water, so I really would prefer if the box was completely sealed from the elements. 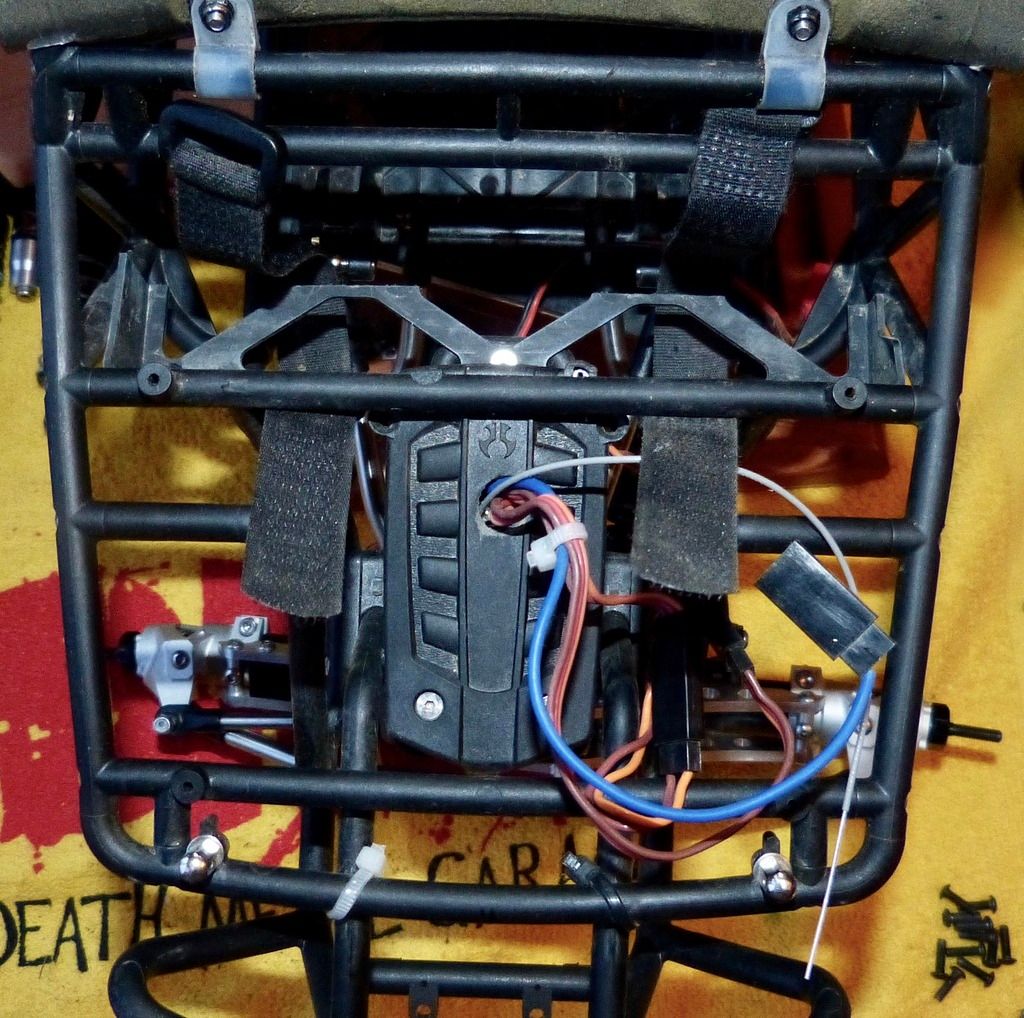 So searching around I found this cheap electronics battery tray from Crawler Innovations. It's cheap for a reason though What I found odd with it: 1. None of the holes lined up right, so I had to drill new ones, 2. Had to clearance it for the spur cover 3. No loop for the battery strap? Did they expect us to just drop the battery in and hope it stayed in place? So this requires some modification to make it work right, but in the end, it all worked out  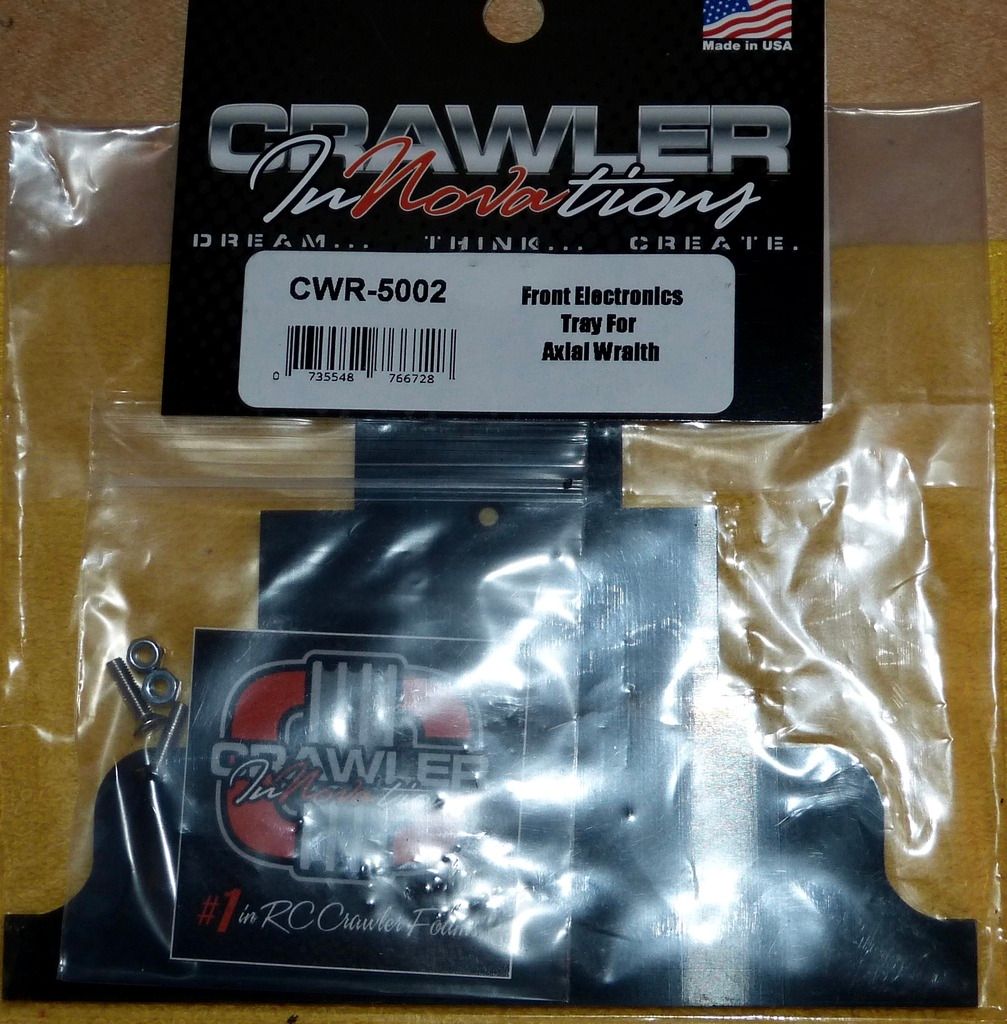 I used a dremel to cut the the hole for the velcro straps 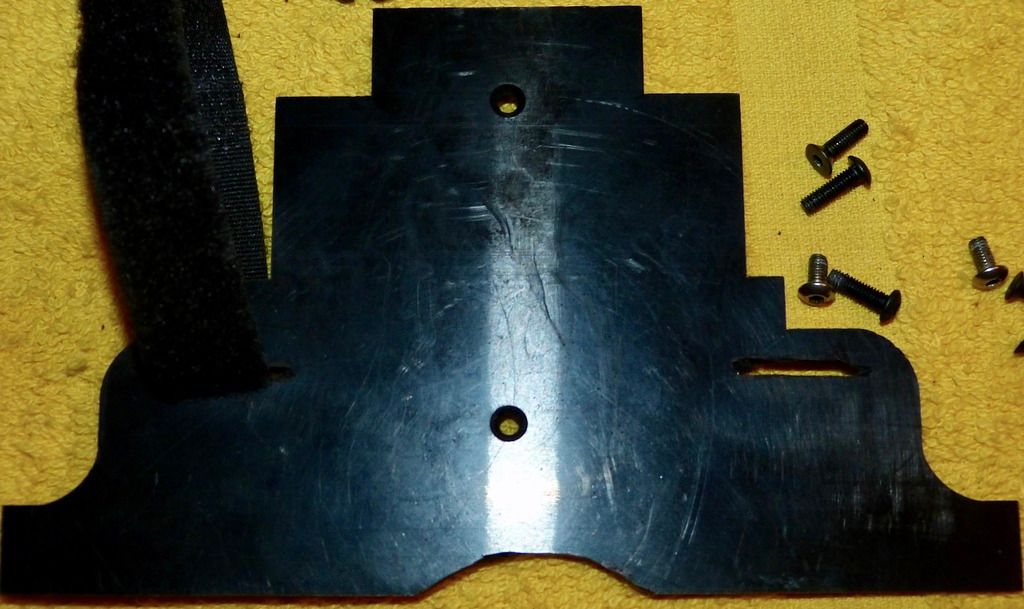 Cut out the half circle for the spur cover to clear 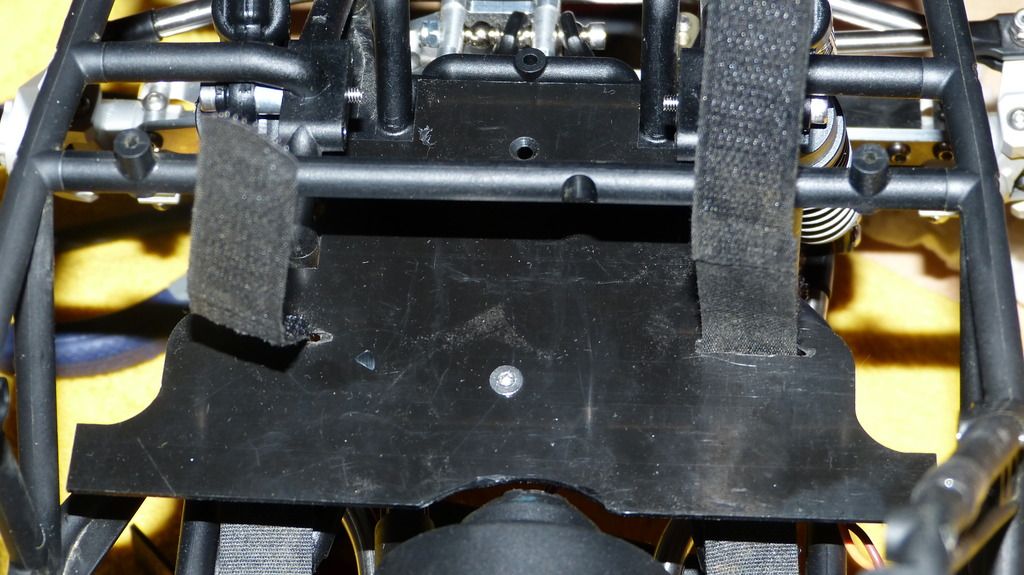 This is a tall 5000 mah 3S lipo. The nice thing is with the new hood, it's raised a little, so this actually fits well. 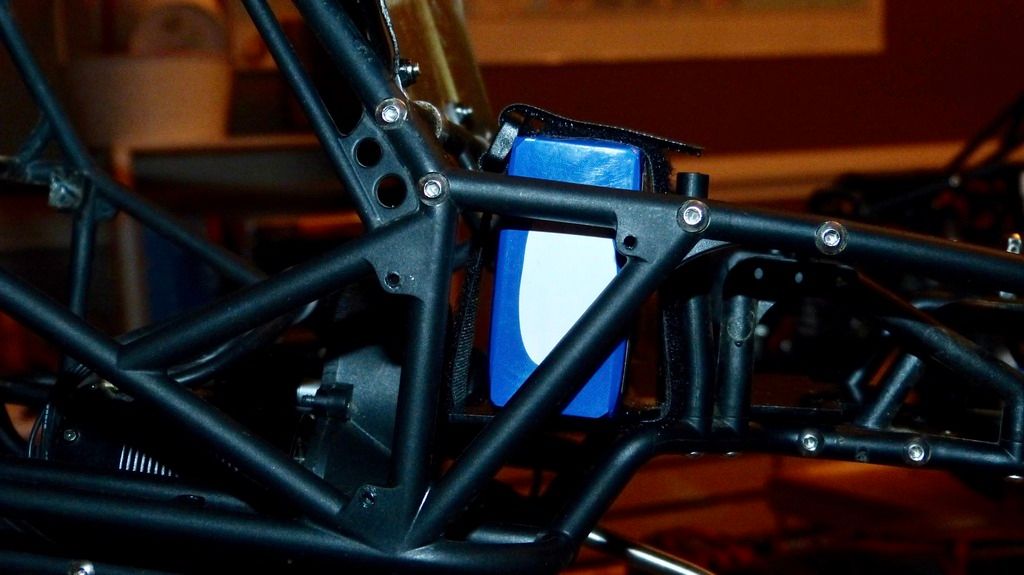 I'm now able to locate the electronic box forward to allow the wires to run behind it. RTV the hole up top to seal it up. Used velcro to secure it to the new tray.  |
| |  |
| | #16 |
| Quarry Creeper Join Date: Oct 2016 Location: Hanover
Posts: 304
|
DMG Stiffy time!! I mentioned a few times how soft, flexy and weak the Axial Wraith plastic is. I wanted to add some rigidity to it. Went to my favorite vendor, DMG, and ordered up their Long Back Stiffy Cage. DMG sells this in variety of flavors and can custom it to your liking. Showed my son his options and we both really like the "Fast Back" look, so that's what we went with. Here is a crack in the stock cage we have. Must've happened during a hard tumble. 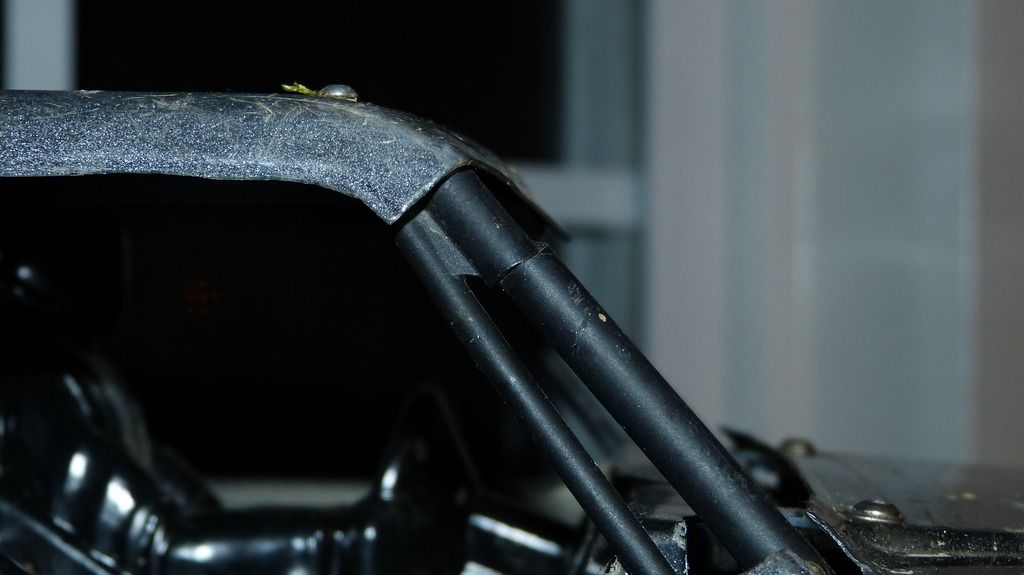 DMG Long Back Stiffy. I'm always so very impressed with DMGs work. This thing just lines up perfectly!  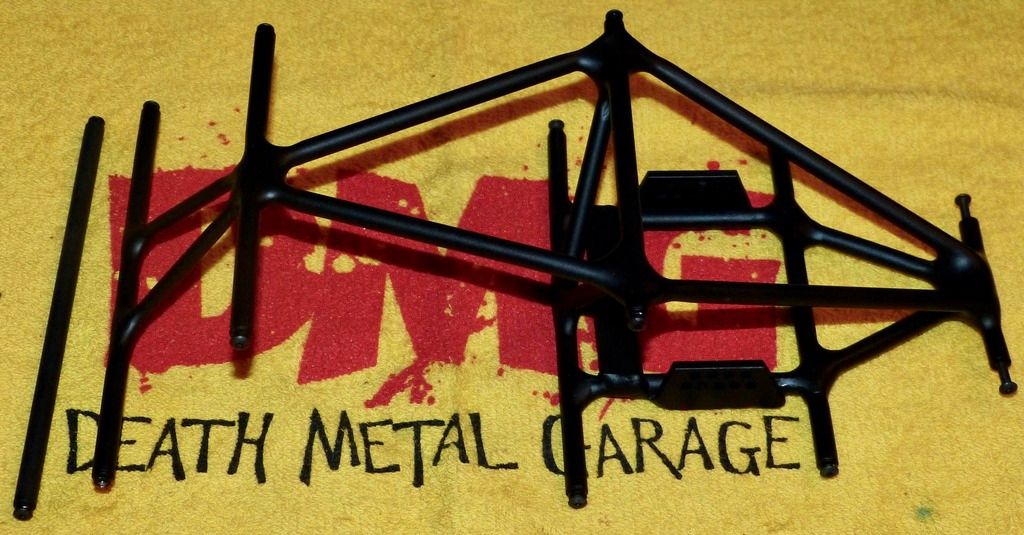 I like how the front has the two angled pillars for added support. The Bombers have these, but not sure why it was never incorporated in the Wraith. 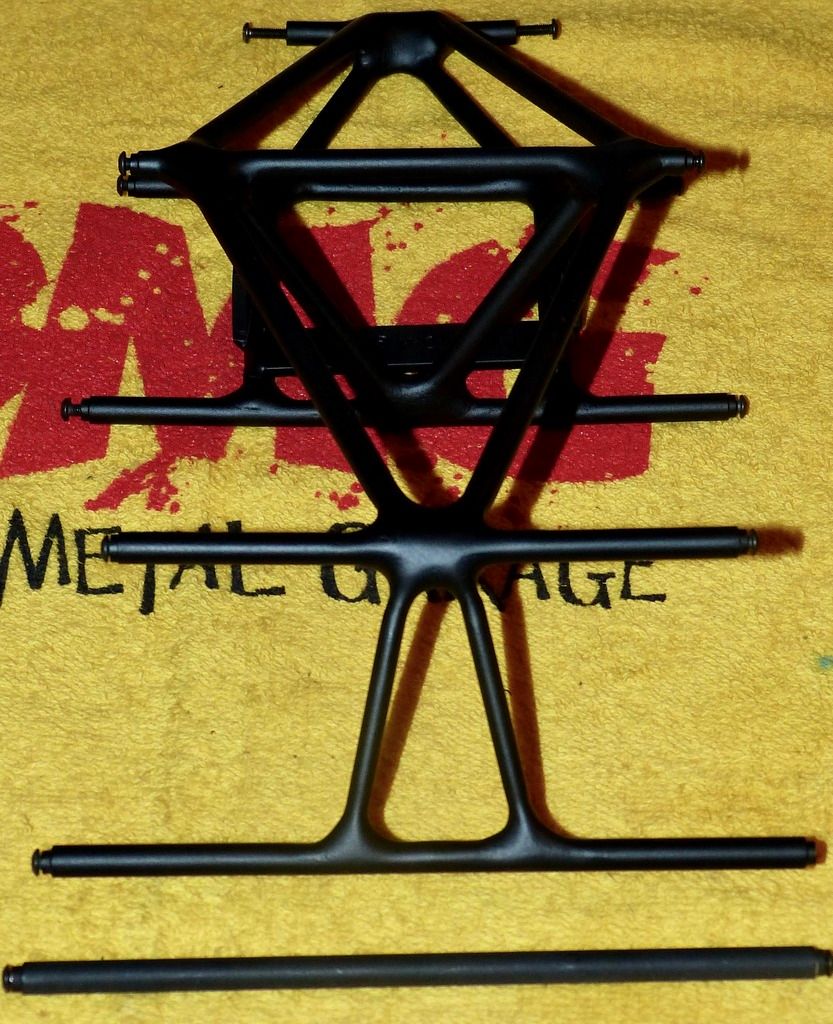 So here is where you need to cut. I originally started cutting with a Dremel, but then just switched to your standard wire cutters. This plastic is so soft, it will cut easily. 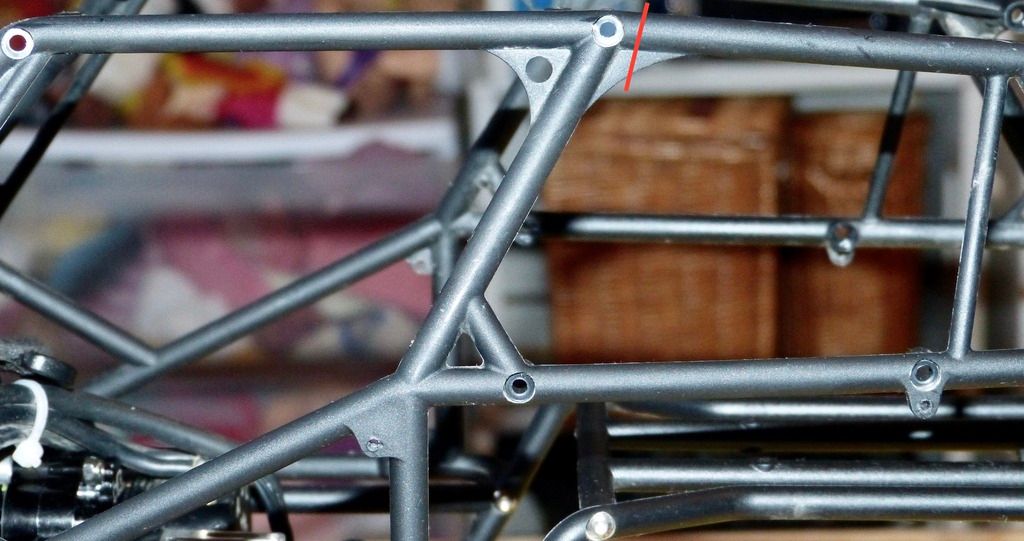 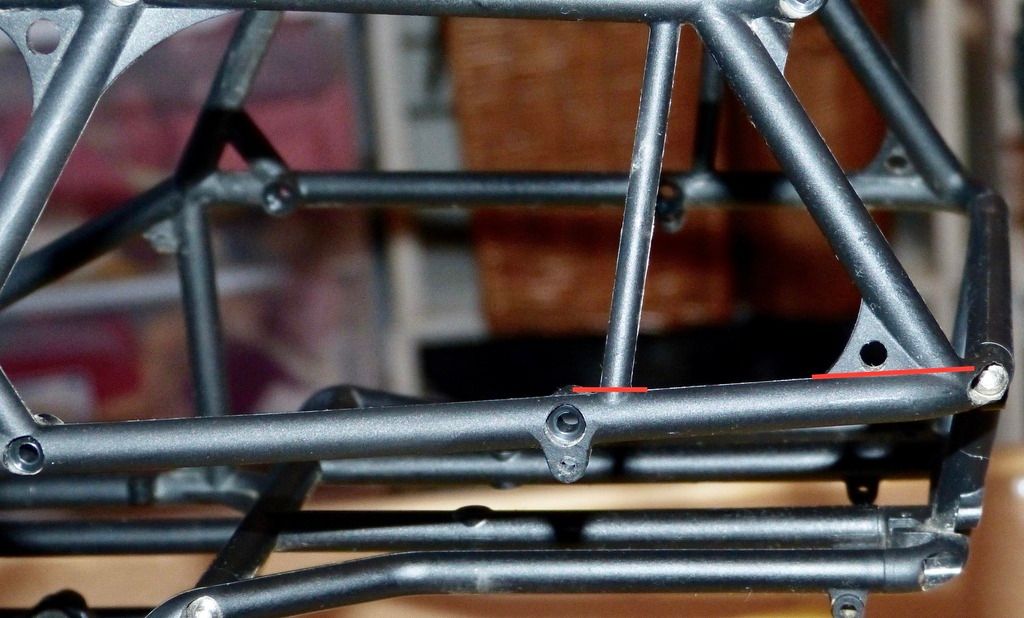 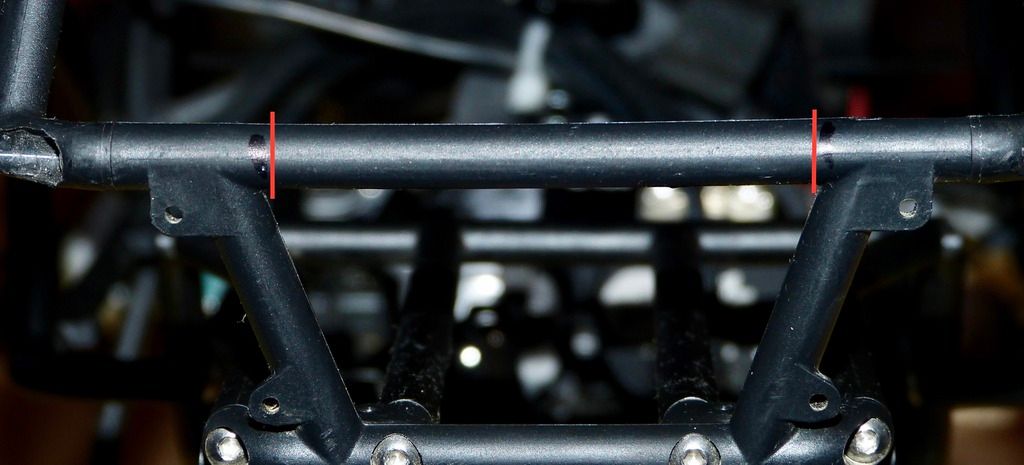 Cleaned up the cuts with a razor. 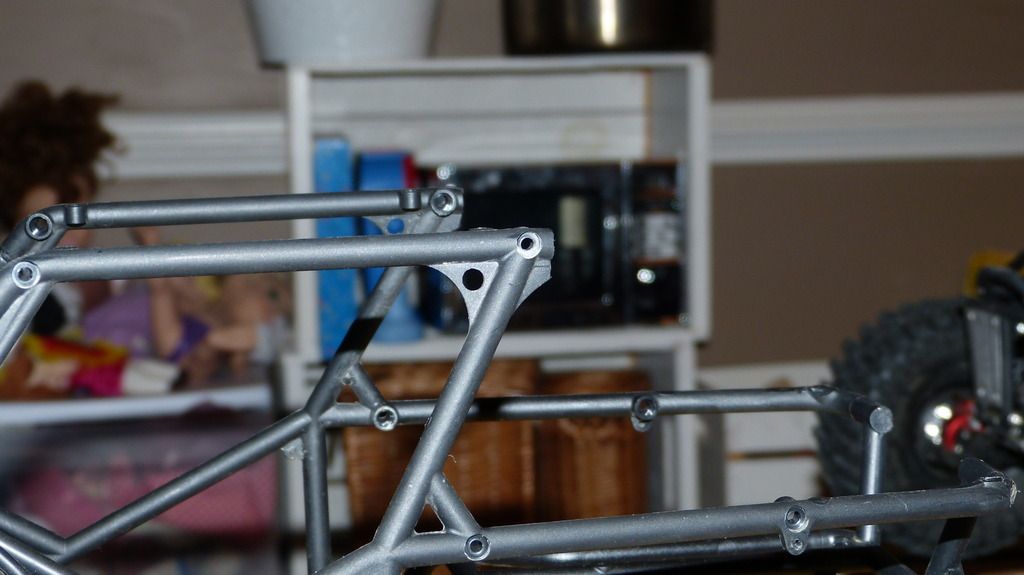 For the rear, you'll need to drill through the plastic so the screw can past through into the DMG cage.  Here is all the removed and cutout stock pieces. It weighs 2.8oz 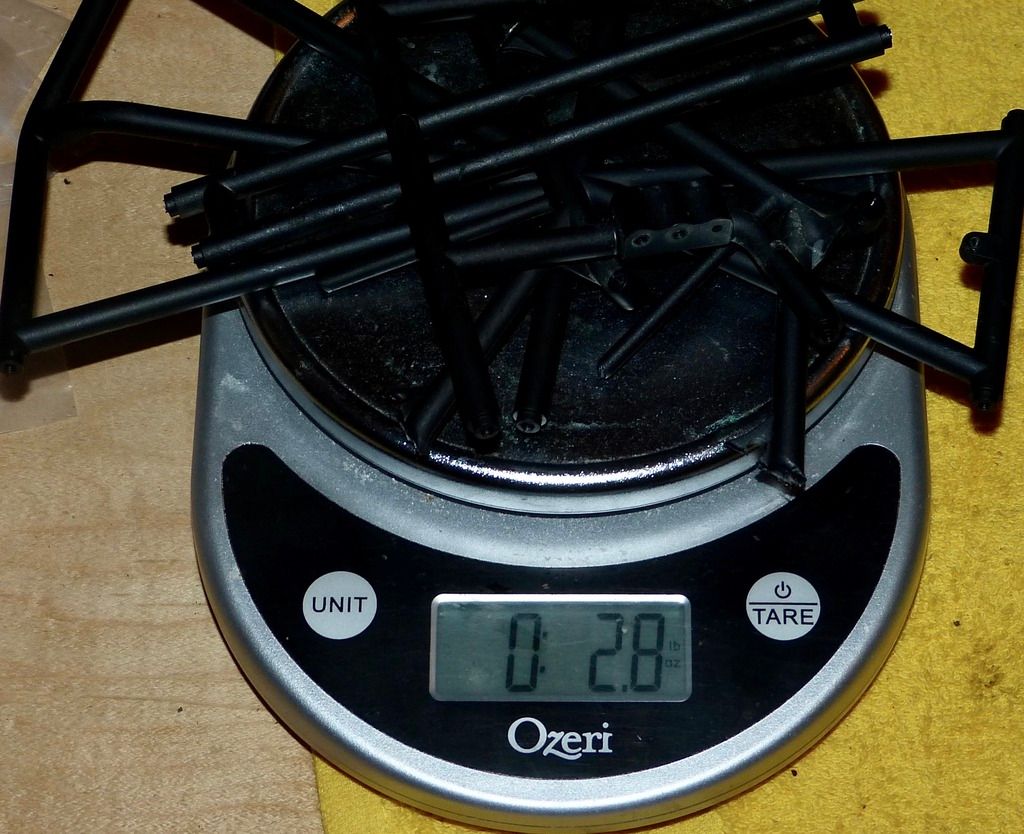 The DMG Cage is 6.8oz, so you're adding 4oz total. 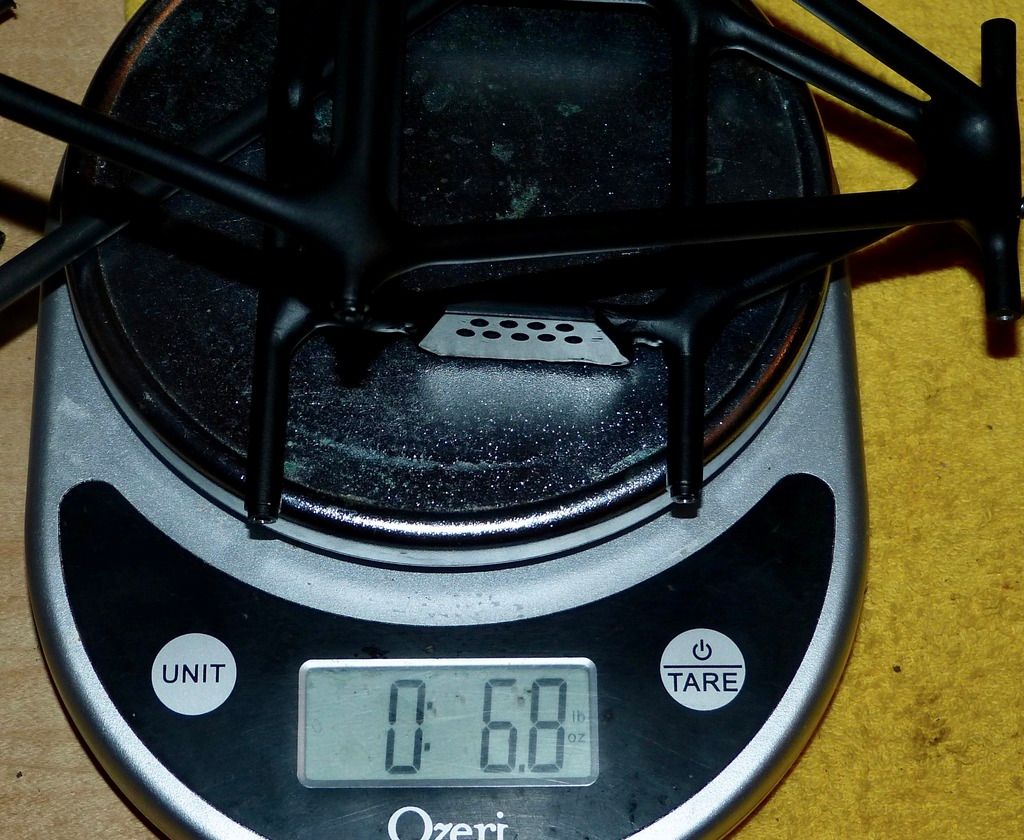 Added a rear bumper I made out of 3/8" aluminum rod. 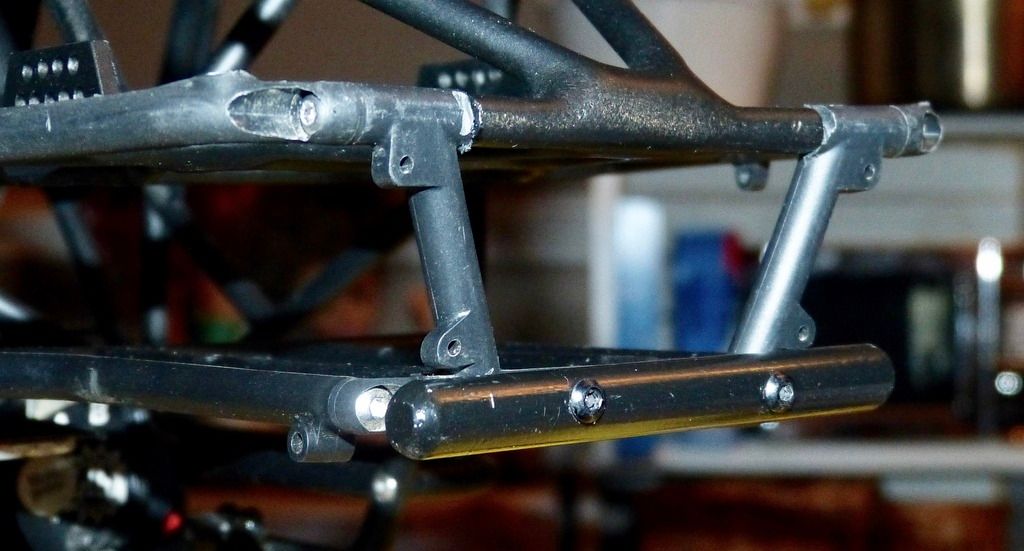 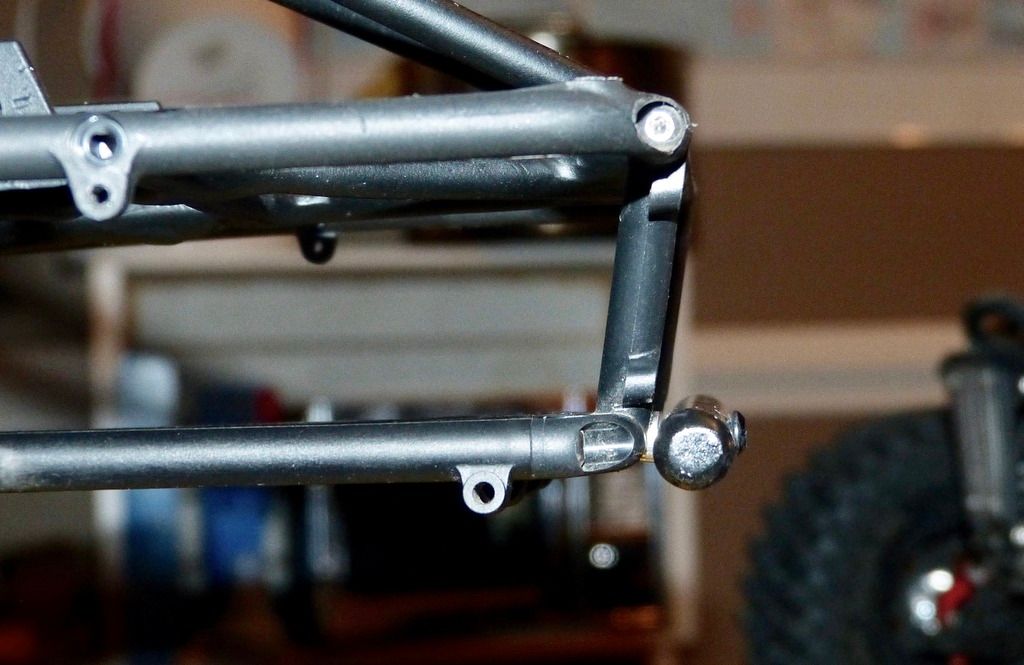 Here it is all put together! 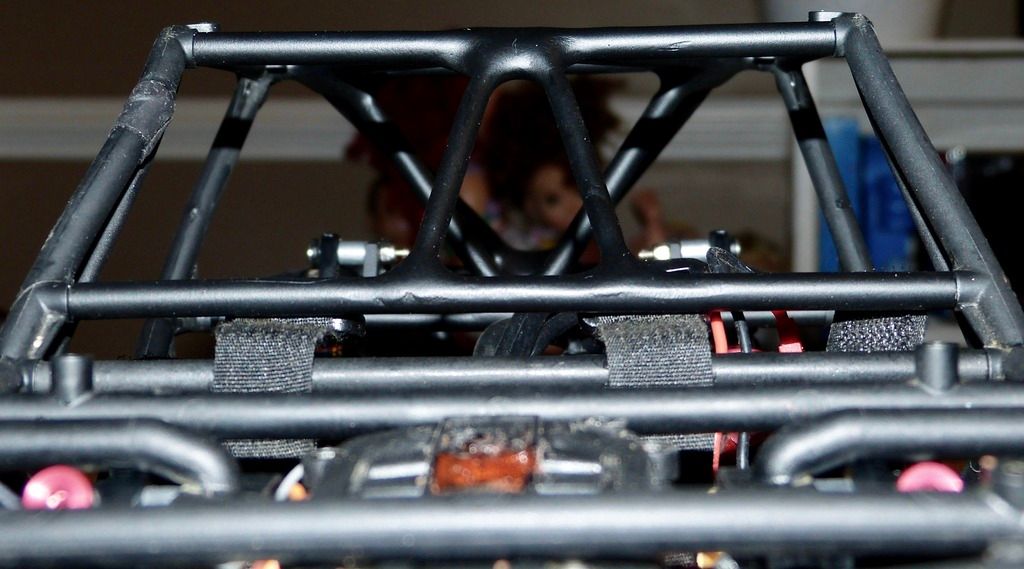 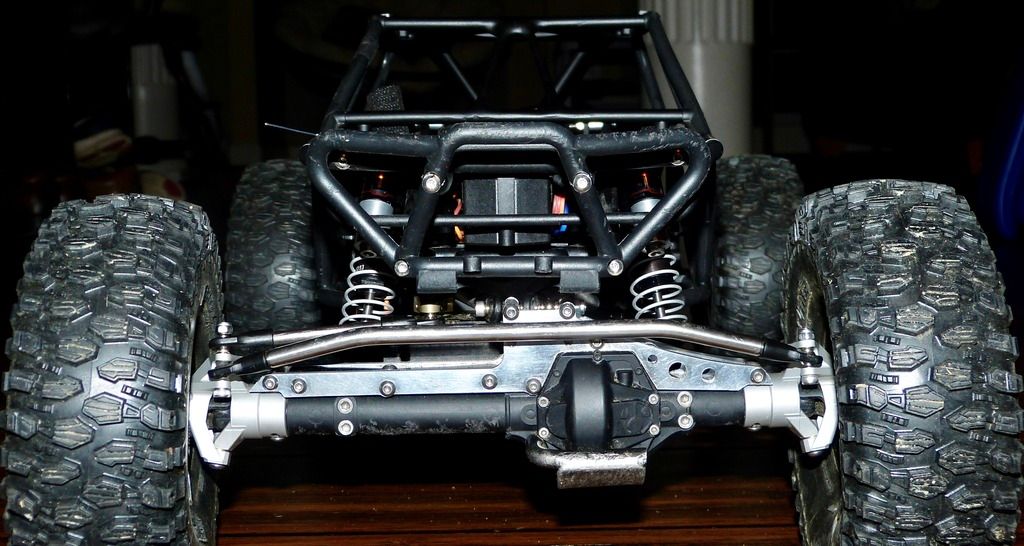 Nice low stance! 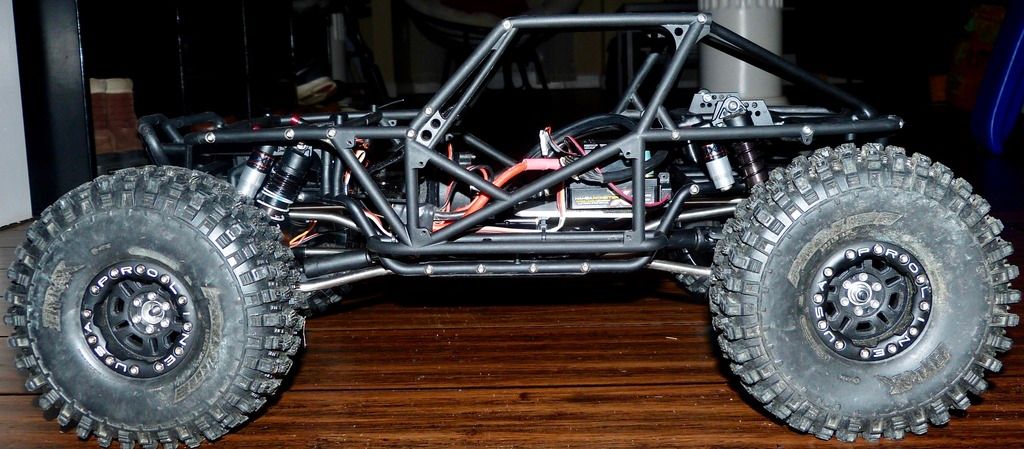 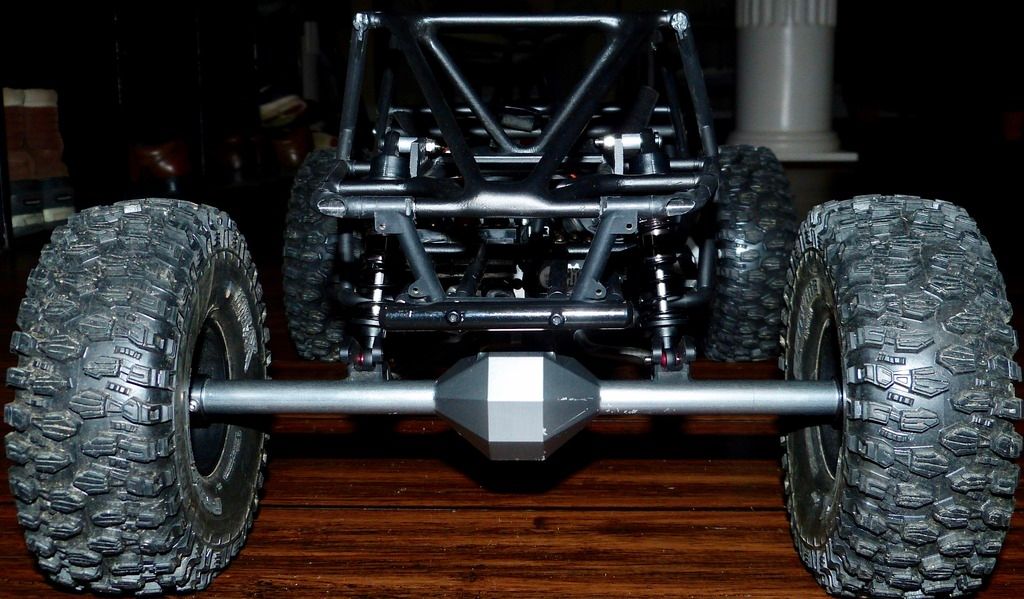 Last edited by *Old*; 05-26-2017 at 01:11 PM. |
| |  |
| | #17 |
| Quarry Creeper Join Date: Oct 2016 Location: Hanover
Posts: 304
|
Wanted to post a quick review on the HR 12mm clamping Hex Hubs # WK1008. I know Vanquish gets a lot of love here, as they should, but I was curious about these HRs b/c they're coming in at 1/2 the cost of the VP. I run the VP clamping hex hubs on one my other rigs, with no issues. What I like about the clamping option is, the stock hex hub uses a grub screw to hold it in place. This then distorts the stub axle making removing and installing bearings very difficult at times. So I want to switch all my rigs over to the clamping option. VP on left (Black), HR on right (Silver). The VP uses 2.5mm cap screw for the clamp, while HR uses 2mm cap. 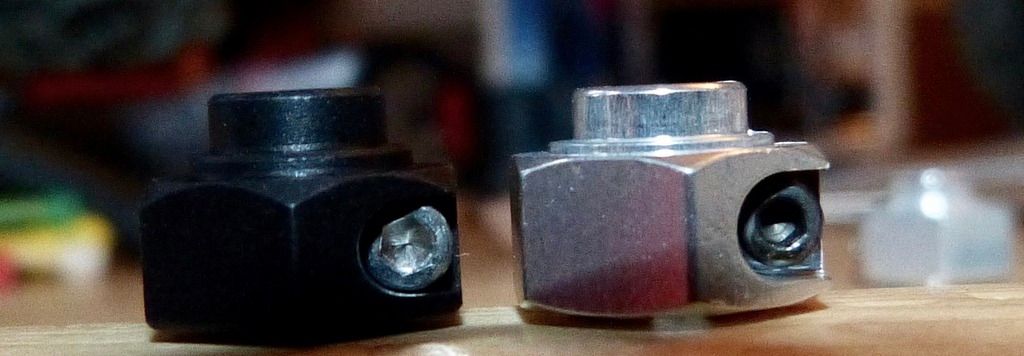 What I found with the VP supplied screw is, when tighten down, it will stick out a little, which can make it difficult to put the wheel hub on. The HR is much shorter, so you won't encounter this problem, however I hope there is enough bite here. I think there is. 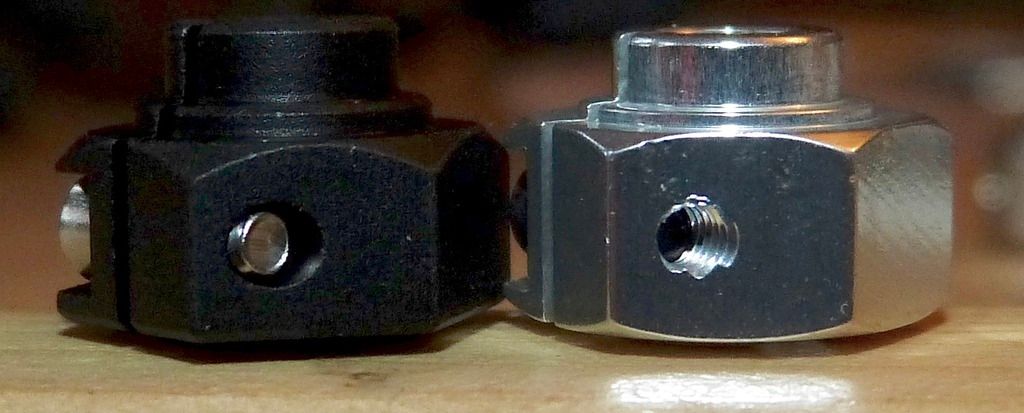 The HRs do come with their own 2mm pins, while the VP does not. The VP is designed to use the Axial 2x11mm pins. The HR comes with a shorter pin. but it's slightly too short. 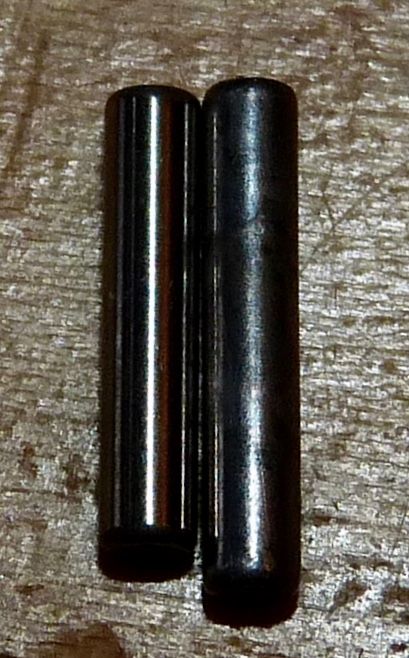 Here is the stock Axial 2x11mm with the HR - too long 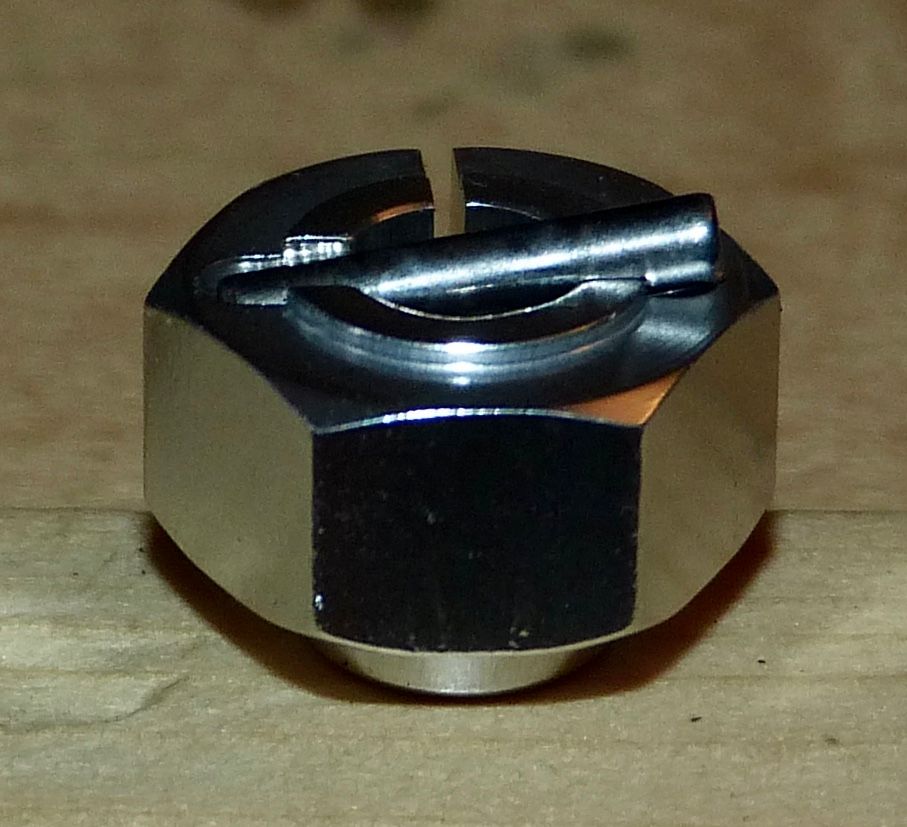 Here is the HR 2mm pin, has a small gap there. 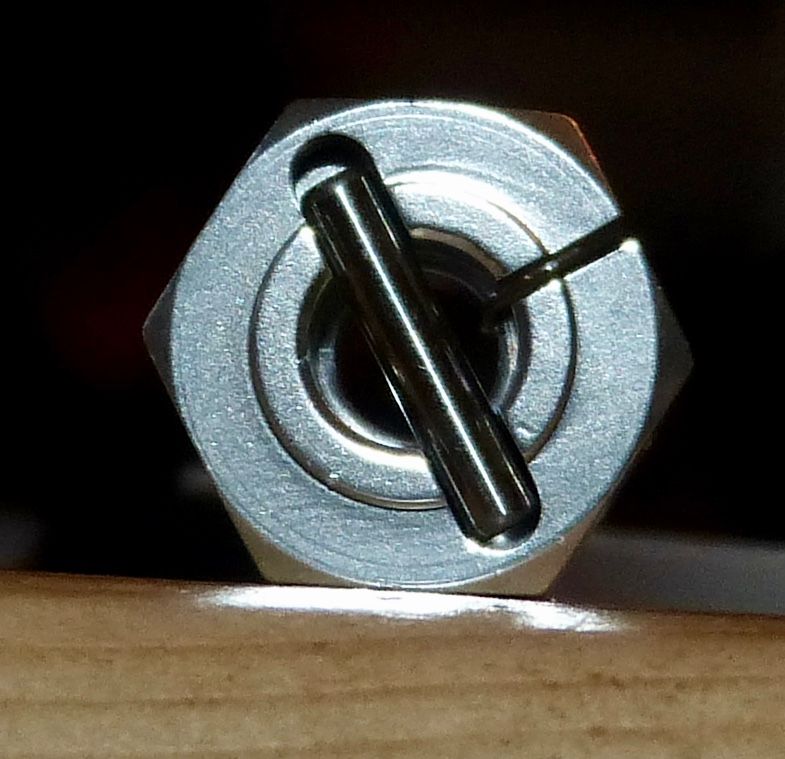 The HR slides in and out easily like the stock hex hubs do. For the VP hex, I have to screw on the wheel flange nut to press it in place and use a flat screw to pry it off. So the VP fits much more snug. But all-in-all, for the price of the HR, you can't complain. It's a step above the stock. Will come back and edit after a few hard runs with them. 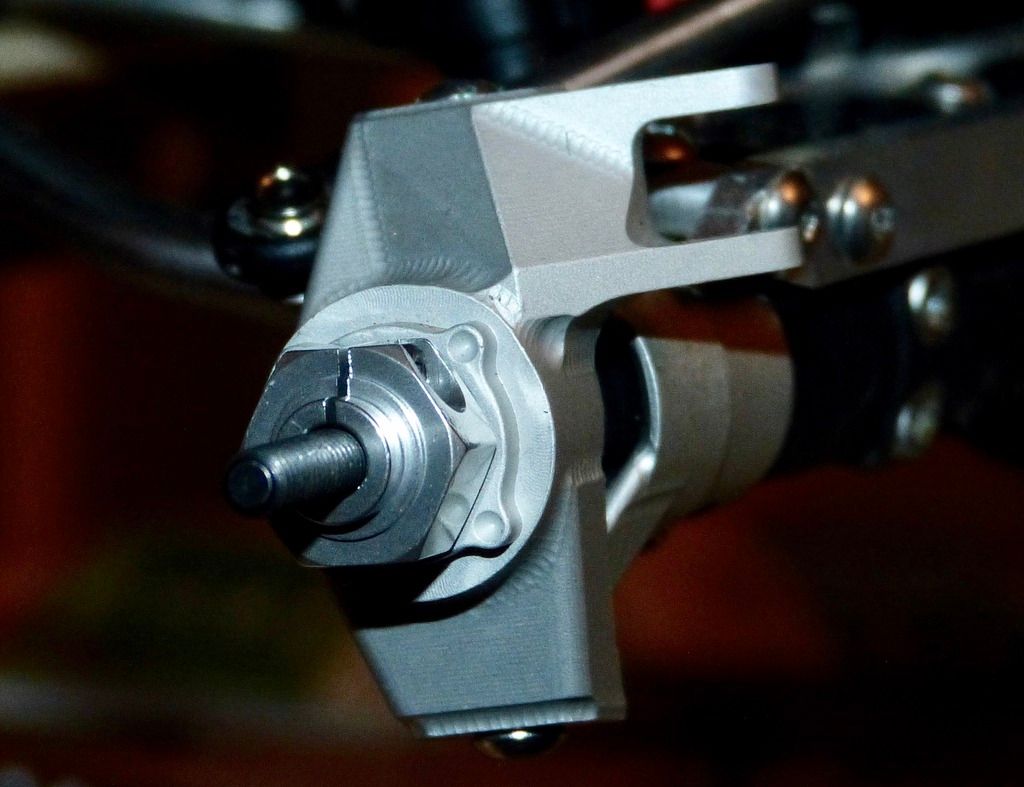 |
| |  |
| | #18 |
| I wanna be Dave Join Date: Jun 2016 Location: Deep in the Everglades
Posts: 5,818
|
I've run the HR blue slash flavor for years I've had a few that the supplied heads were too wide , they don't have the center lip either, flush Hang up and Drive |
| |  |
| | #19 |
| Quarry Creeper  Join Date: Jun 2013 Location: San Francisco
Posts: 260
|
Seeing it sitting on all fours, under its own weight, it looks much more balanced. Hard to see exactly, with the wheel on, but judging by the links, etc, the caster angle does appear closer to correct. Well done!  |
| |  |
| | #20 |
| Quarry Creeper Join Date: Oct 2016 Location: Hanover
Posts: 304
|
Alright, paint is all dried up and cut up the body. I stated earlier, about what I like about the Axial AX04027 body is the hood is already separate from the body. Makes doing the "hood mod" much easier and cleaner looking. I'm using body mount from Traxxas # 3727A. Had to drill out the hole to accept the 3mm size screw. 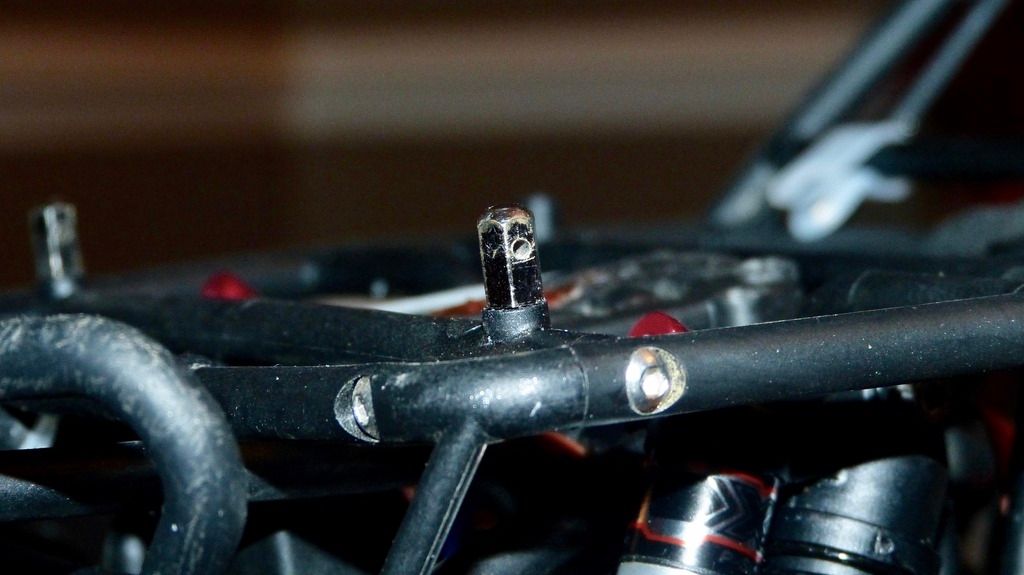 Using the Axial body clip puller I had spare from the Bomber Axial # AX31332 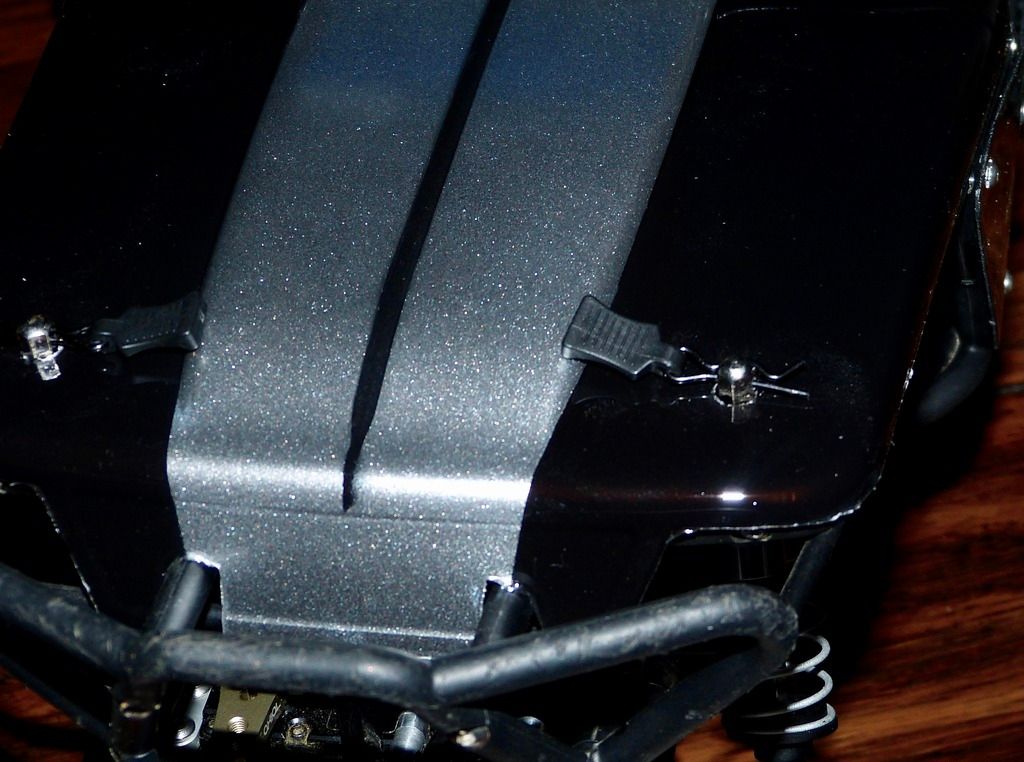 Used 1/4" wire clamps for the hood. 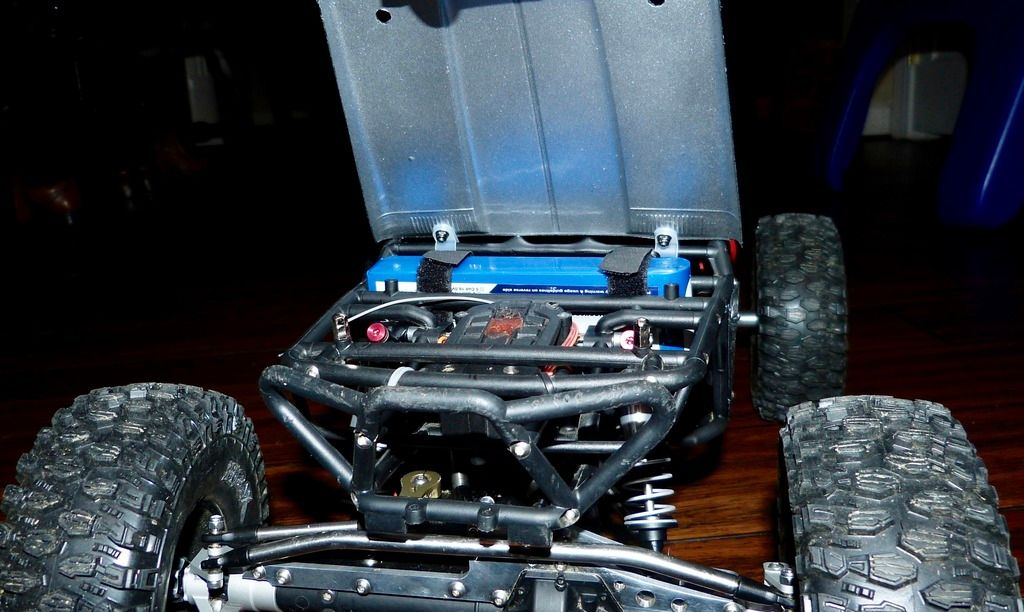 Finally using the right kind of paint - for Polycarb - from Duratrax. This paint won't crack when the body is getting banged around. 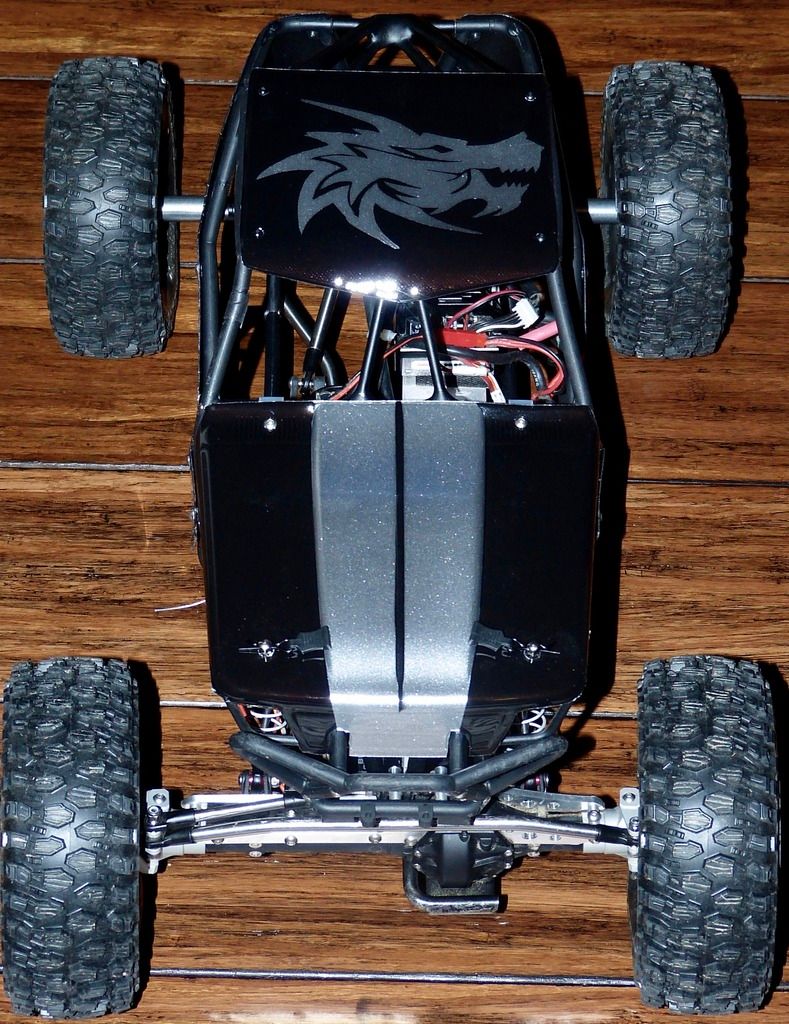 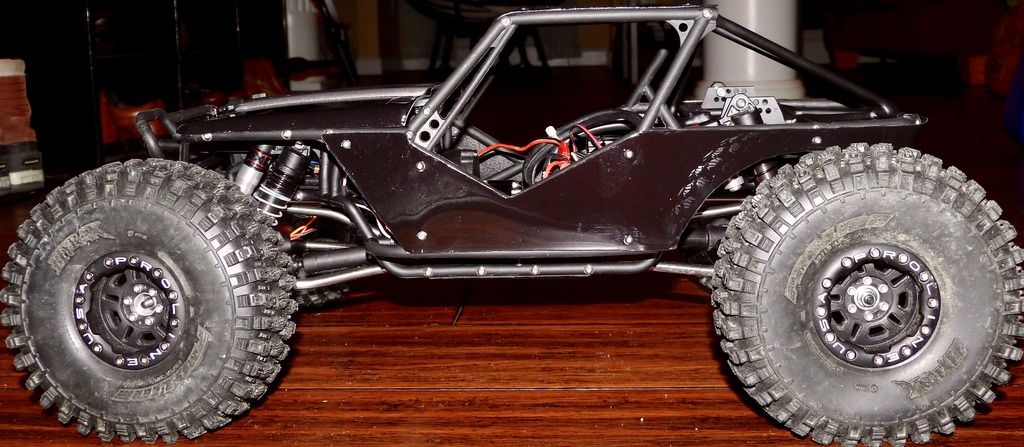 At 7lbs 5.5oz (no battery), this is the lightest rig I have. 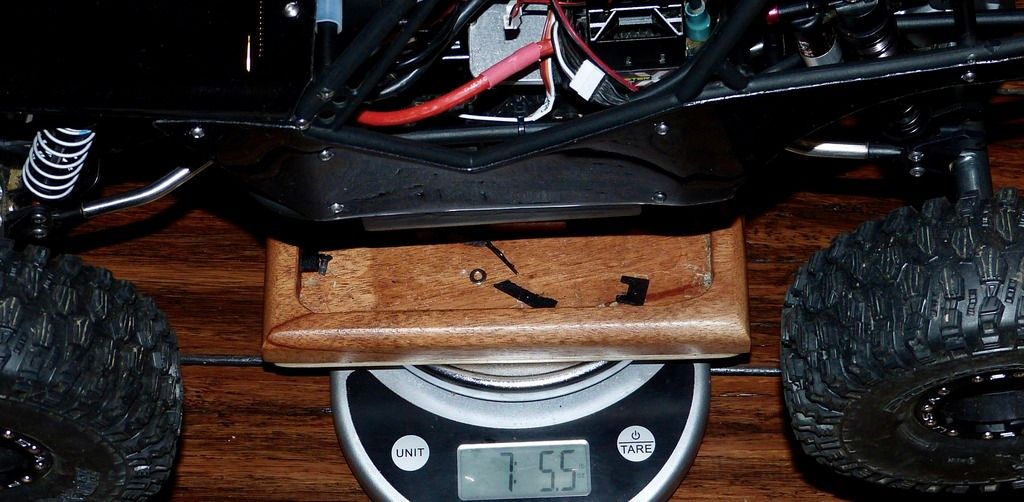 |
| |  |
 |
 My Wraith Build - Similar Threads
 | ||||
| Thread | Thread Starter | Forum | Replies | Last Post |
| 1.9 wraith build or scx10 build? | Cork | Newbie General | 13 | 06-08-2015 08:17 AM |
| Why not 1.9 wraith build | greengoblin | Axial Wraith | 24 | 03-02-2015 11:48 PM |
| |