| |
 08-11-2010, 06:13 AM
| #61 |
| Quarry Creeper Join Date: May 2008 Location: Clarkston
Posts: 277
|
I don´t know if I´d just missed it, but what oil did you start out with, just regular 30wt? I´m picking up my box tonight at the LHS and might as well pick up some new oil with it. Thanks, Uli |

|  |
| Sponsored Links | |
| | |
|
08-11-2010, 09:35 AM
| #62 |
| Im Brandon   Join Date: Feb 2005 Location: Colfax, CA
Posts: 8,156
|
Awesome pictures Badger! Nice job on the wiring too. Cant wait to see that body wrap.
|
|
| |
|
08-11-2010, 09:44 AM
| #63 |
| I wanna be Dave Join Date: Oct 2005 Location: EvilCrawlerDesigns@comcast.net
Posts: 3,510
|
Just curious. I'm assuming that the plate toward the front is a battery tray. How large of a battery will fit?
|
|
| |
|
08-11-2010, 11:25 AM
| #64 |
| I wanna be Dave Join Date: Sep 2005 Location: USA
Posts: 11,196
|
Very Nice Pic's... These axles kickass... Seems they thought of everything. Even thou it's all plastic. It looks like they braced everything to be strong.
|
|
| |
|
08-13-2010, 10:49 AM
| #65 |
| Diggin' the new SCX10 II!   Join Date: Mar 2004 Location: Norcal
Posts: 11,402
|
Dave and I finished the build last night by installing the electronics (Holmes Hobbies 45T TorqueMaster Pro Handwound motors , 13T pinions, Castle BEC, Futaba receiver) and then installing the Freq E Tag RCC theme Skin. The XR10 is definitely a compact rig to work in, even with the dual motor and ESC setup it was easy to cleanly route all the wiring. The Futaba receiver and Castle BEC both easily fit into the XR10's receiver/electronics tub.        This was the first skin I installed, it went pretty easy until I figured out that I needed to line up the skulls so it looks right. I re-applied the lower panels and used a heat gun to make it a little more pliable and easier to install, the hood panel also needed a little heat to get it around the cowl. Turned out awesome, thanks Neal!     |
|
| |
|
08-13-2010, 10:53 AM
| #66 |
| I wanna be Dave  Join Date: Dec 2005 Location: Happiness is a warm AK.
Posts: 12,563
|
That looks bad ass!  |
|
| |
|
08-13-2010, 10:57 AM
| #67 |
| Ex Nor-CalRCRC slave  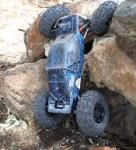 Join Date: Dec 2008 Location: San Mateo, CA.
Posts: 2,242
|
Your build came out great as always, and the skins are incredible. Will you be making some kind of motor protection (energy drink bottles/PVC pipe) for it?
|
|
| |
|
08-13-2010, 11:03 AM
| #68 | |
| Diggin' the new SCX10 II! Join Date: Mar 2004 Location: Norcal
Posts: 11,402
| Quote:
| |
|
| |
|
08-13-2010, 11:35 AM
| #69 |
| Im Brandon Join Date: Feb 2005 Location: Colfax, CA
Posts: 8,156
|
Nice work on finishing it up. The electronics look clean! Not sure if you tried or not but the slot on the battery plate is for the velcro strap. It might be harder to work with but it wont slide off that way |
|
| |
|
08-13-2010, 11:48 AM
| #70 | |
| Diggin' the new SCX10 II! Join Date: Mar 2004 Location: Norcal
Posts: 11,402
| Quote:
| |
|
| |
|
08-13-2010, 11:56 AM
| #71 |
| Pebble Pounder Join Date: Jul 2010 Location: Nor*Cal
Posts: 115
|
Dang it, my chin needs stitches, I just drooled all over my keyboard, and the worst part, now I gotta change my underwear. Is it Sept yet!?!
|
|
| |
|
08-13-2010, 12:03 PM
| #72 |
| I wanna be Dave  Join Date: May 2006 Location: HONDURAS...ROCK HEAVEN
Posts: 5,076
|
Very nice Badger, those skins look awesome |
|
| |
|
08-13-2010, 02:39 PM
| #73 |
| Rock Stacker Join Date: Apr 2008 Location: Virginia Beach
Posts: 50
|
The body is the one thing I don't like but in black and with understated skins yours looks pretty darn good!
|
|
| |
|
08-13-2010, 10:07 PM
| #74 |
| Diggin' the new SCX10 II! Join Date: Mar 2004 Location: Norcal
Posts: 11,402
|
dpdsurf ran the rig for the first time up at Genentech tonight, from what I heard he was pleased with the performance. Here are the pics he texted me during the run.
|
|
| |
|
08-13-2010, 10:50 PM
| #75 |
| RCC Addict Join Date: Aug 2007 Location: Rohnert Park
Posts: 1,093
|
Looks great guys, nice work! Not what I expected at all from Badger, but I guess he had a lot of help! Nice pics too! |
|
| |
|
08-14-2010, 12:15 AM
| #76 |
| I wanna be Dave Join Date: Mar 2008 Location: Pacific Ocean
Posts: 2,342
|
Amazing! Bone stock, RCTV build with no tuning and it pulled all but one of my hardest Berg lines (which frankly I can't make every day with the Berg or with new tires anyway). But the lines it did pull seamed easier. And I've had almost 2 years to perfect and tune my Berg. It really seamed to excel in technical off cambers/sidehills where you need to hook it around while staying high or when you have to dig up hill. The only true test I would say that I did not take it to 100% on is getting it bound up. I did a few times and was able to work it out. But I did not want to take the risk and push it too far because I have no spare parts as niether do the hobby shops. This is also almost a pound lighter than my Berg at 5.73 lbs vs the Berg at 6.48. In some circumstances a little weight in the rear may be desired but after a few minutes I was used to the descents with the lighter rig. It seamed to work best with all of the weights that came with the kit in the front wheels plus 3 slugs each and no weight in the rear. Total front wheel weight is 400 grams or 14.11 ounces each. The ride height was lower than I'm used to at 2-3/4". But with the lighter weight it cruised over the break-overs. Tonight I adjusted the chassis shock mounts to bring the ride height up to 3-1/4". I did this by moving the rear down 1 hole. I initially lowered the front 1 hole too but that seamed to bring the front to 3-1/2", so I put it back to what I'm calling the #3 hole which is the 3rd one up from the front. The rear is the 2nd hole from the rear. I also replaced the rear lower links with some Axial bent links and clocked the rear axle by adding 6mm spacers to the upper links. Be certain to install longer set screws if you add spacers, otherwise there isn't enough meat which could cause future link failure. I also added 1mm(?) cone spacers to the rear lower bent links to get the wheelbase back to 12.5". If anything it's a hair short. When doing these suspension adjustment you will need to change the body mounts. Piece of cake though, you only need to remove 1 screw on one side, slide out the spline and clock the body post back to vertical. Then reinstall the screw. This truck has some very familiar handling characteristics and is easy to drive from the start. GREAT JOB AXIAL! We really couldn't have asked for more. P.S. Badger, I know you only loaned this to me but if you want it back you'll have to pry it from my cold dead corpse. I also took some video. I'll work on that later though. Some poser shots before I started; 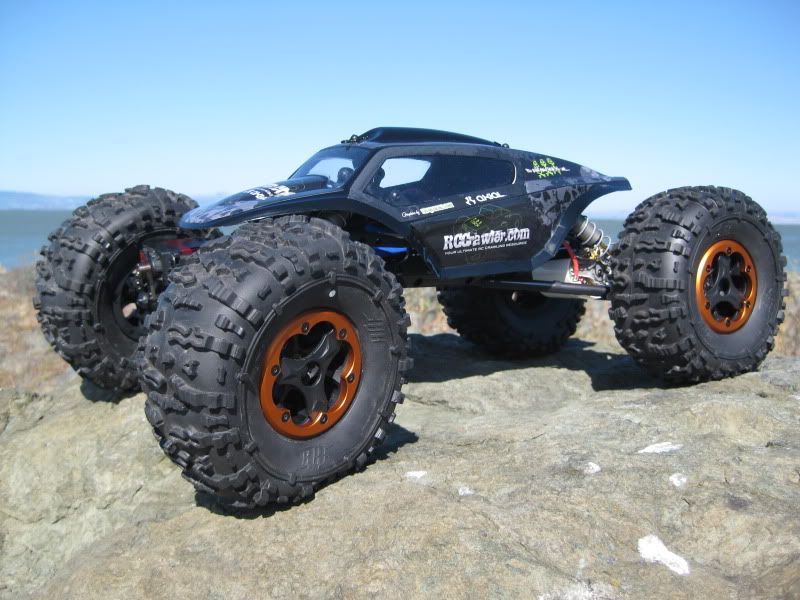 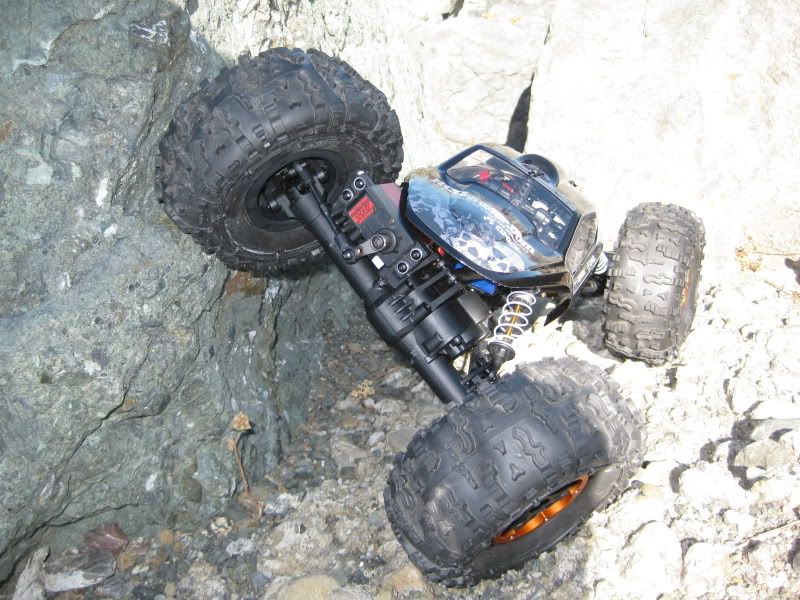 Don't be surprised if the following pictures get deleted because they are nowhere near up to badger's standards. 6MM spacers added to clock rear axle; 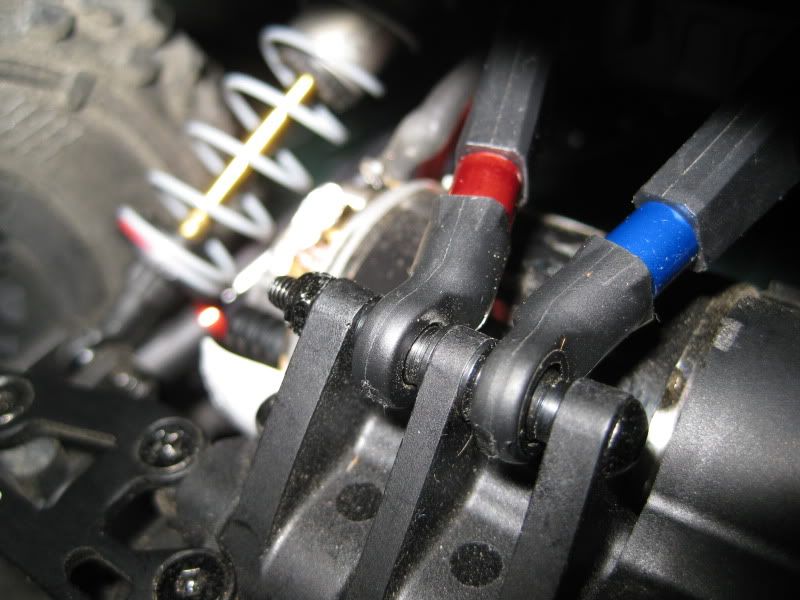 Bent rear lowers;  Vanquish slugs added (Also note, I did not have to remove a single bead lock screw to add the wheel weights. It flexes right in and out no problem. This made tunig real easy.); 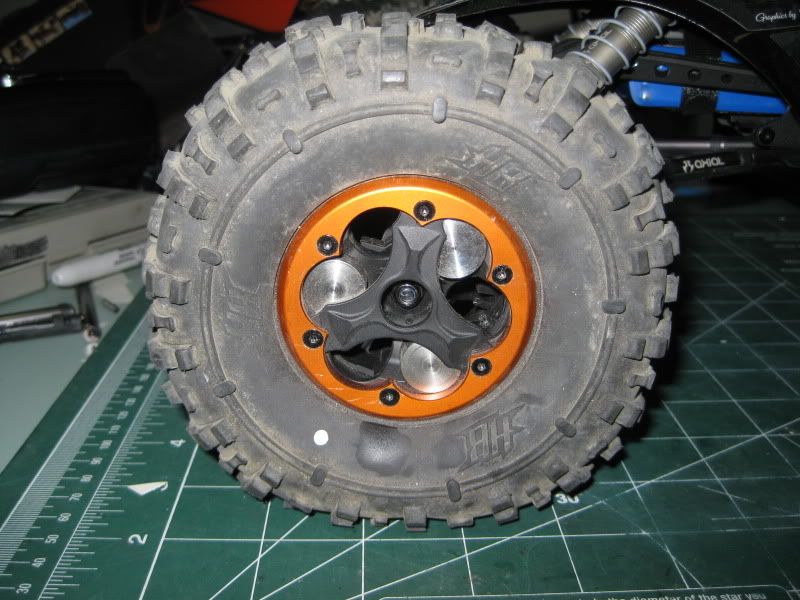 Last edited by dpdsurf; 08-14-2010 at 12:18 AM. |
|
| |
|
08-14-2010, 04:37 AM
| #77 |
| I wanna be Dave Join Date: Mar 2008 Location: In the Dark Edges of your Mind
Posts: 6,386
|
The axles are clockable correct? Did you use spacers because the axle was already clocked to the max with the factory adjustable clocking feature and you wanted more? |
|
| |
|
08-14-2010, 08:15 AM
| #78 | |
| I wanna be Dave Join Date: Mar 2008 Location: Pacific Ocean
Posts: 2,342
| Quote:
 Last edited by dpdsurf; 08-14-2010 at 08:21 AM. | |
|
| |
|
08-14-2010, 09:06 AM
| #79 |
| I wanna be Dave Join Date: Aug 2007 Location: *
Posts: 2,274
|
Hmmm, traction compound?   |
|
| |
|
08-14-2010, 09:08 AM
| #80 | |
| I wanna be Dave Join Date: Mar 2008 Location: Pacific Ocean
Posts: 2,342
| Quote:
| |
|
| |
 |
 LinkBacks (?)
LinkBack to this Thread: http://www.rccrawler.com/forum/axial-xr10/263295-badgers-xr10-build.html | ||||
| Posted By | For | Type | Date | |
| AX90017 Axial XR10 - 1/10th Scale Electric 4WD Rock Crawler Competition Kit - Pagina 16 - Scalers & Crawlers | This thread | Refback | 03-05-2013 03:34 PM | |
| |


 Linear Mode


