| |
 08-14-2010, 09:49 AM
| #81 |
| Quarry Creeper Join Date: Dec 2008 Location: Santa Mira
Posts: 342
|
Wow can't wait to get my hands on the XR10.
|

|  |
| Sponsored Links | |
| | |
|
08-15-2010, 06:17 PM
| #82 |
| Rock Crawler Join Date: Oct 2008 Location: Somewhere near the lake in IL
Posts: 975
|
Sweet build looking foreward to mine landing on the doorstep..
|
|
| |
|
08-16-2010, 02:44 AM
| #83 |
| Pebble Pounder Join Date: Jun 2010 Location: Burien
Posts: 133
|
I love the little pictures on the box for suggested terrain and speed.
|
|
| |
|
08-16-2010, 11:09 AM
| #84 |
| Pebble Pounder Join Date: Oct 2009 Location: Spanish Fork
Posts: 151
|
How did the body hold up without a cut out for the steering servo? Did it bind up with the body very much or is it just mild twisting in the hood? Just wondered since everyone seems to be doing the cut out..
|
|
| |
|
08-16-2010, 11:47 AM
| #85 | |
| RCC Addict Join Date: Jun 2008 Location: Amish Buggy PA
Posts: 1,100
| Quote:
| |
|
| |
|
08-16-2010, 01:46 PM
| #86 | |
| Ex Nor-CalRCRC slave  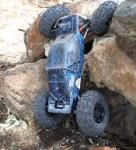 Join Date: Dec 2008 Location: San Mateo, CA.
Posts: 2,242
| Quote:
| |
|
| |
|
08-16-2010, 03:26 PM
| #87 | |
| RCC Addict Join Date: Jun 2008 Location: Amish Buggy PA
Posts: 1,100
| Quote:
| |
|
| |
|
08-16-2010, 07:31 PM
| #88 | ||
| I wanna be Dave Join Date: Mar 2008 Location: Pacific Ocean
Posts: 2,342
| Quote:
Quote:
 You also have the option to do a single mount in the back just like the front as they supply enough additional parts for this. You also have the option to do a single mount in the back just like the front as they supply enough additional parts for this.
| ||
|
| |
|
08-16-2010, 07:42 PM
| #89 | |
| RCC Addict Join Date: Jun 2008 Location: Amish Buggy PA
Posts: 1,100
| Quote:
| |
|
| |
|
08-16-2010, 07:50 PM
| #90 | |
| I wanna be Dave Join Date: Mar 2008 Location: Pacific Ocean
Posts: 2,342
| Quote:
| |
|
| |
|
08-18-2010, 09:46 AM
| #91 |
| Diggin' the new SCX10 II!   Join Date: Mar 2004 Location: Norcal
Posts: 11,402
|
I added the parts/specs list and created a table of contents in my first post of this tread with links to all of my posts with pics or important tech posts to make it easier to find.
|
|
| |
|
08-18-2010, 11:42 AM
| #92 |
| Pebble Pounder Join Date: Jul 2010 Location: Seattle
Posts: 167
|
Great info, badger. Thanks! What size Nova foams did you use? They have a lot of options on their website. |
|
| |
|
08-20-2010, 10:01 PM
| #93 |
| I wanna be Dave Join Date: Mar 2008 Location: Pacific Ocean
Posts: 2,342
|
I've been out of town for a few days and didn't have time to report on my comp and experience last weekend. I went to a casual local comp that NBRCC put on up in Santa Rosa, CA. There were about 30 drivers there. On my first course I quickly realized that in a comp situation I was not used to this rig. Of course my adrenaline was a little out control as all eyes were on me for the first run. By course 2 I had settled into more of a rhythm and was able to tune into what the rig was doing. I definitely need to work on the suspension as it unloaded surprisingly in some areas. I was once again a gate magnet but managed to finish the course. When I lined up for the 3rd course only one driver had finished the course so far. There were 5 out 10 gates that were pretty tough and any one of them could be hit. I managed to walk clean through the first 5 gates (one of them that many had hit) and was feeling pretty good. I ended up hitting 2 silly gates as it was all my error, but finished the course. So it was not the best day for me but I was one of only 4 or so to complete all 3 courses. Tire setup was a huge issue. We really didn't take the proper time to dial in the foams. We added air vents to the wheels but it's still not right and the rig was bouncing all over the place and traction was a challenge. After the comp a few of us were driving this crazy crack climb where at the 1/2 way point you had to use rear dig to push it through the crack. While I was doing this I heard a really load SNAP and that was it, rear axle broken. Upon taking the axle apart both the drive and final drive gears were missing teeth. The final drive had one full tooth missing along with a couple of teeth only 1/2 way missing on the passenger side.  I spoke to Brandon at Axial and later read Brandon's post and blog on this very same issue that the German's were having. I immediately inspected the housing and noticed that it had a small bur in the plastic and a slight pin hole. Evidence that at one time the wrong screw had been inserted. 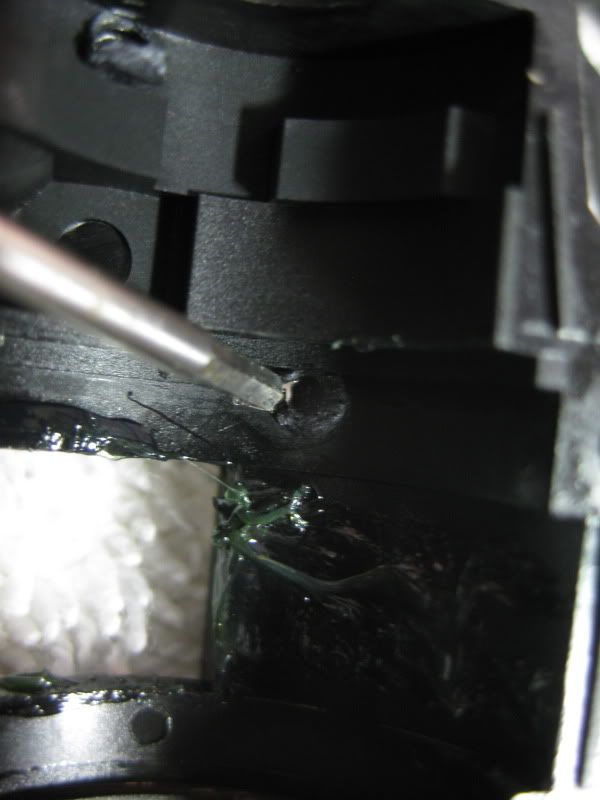 I had already built the axle 3 times. Once on RCCTV, then tore it down for photos and re-built. When badger and I finally finished it and tested it there was a clicking in the rear axle when under any strain. I tore it apart again, carefully inspected and re-built it again while carefully following the instructions. After that it worked fine without issue in my initial testing and for 3 comp courses and some test drives by a bew of the locals last Sunday. So I am 99% certain that the correct screw was in when it failed, but that small burr did not allow the bearing to fully seat therefore causing the failure. Axial sent me new gears. 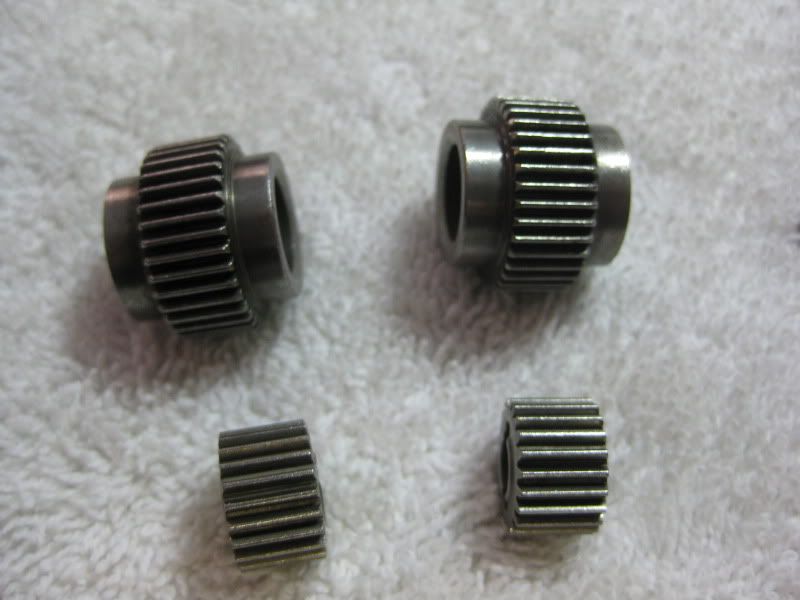 I first sanded the burr down to insure that the bearing was sitting flush. I used the Dremel manually (did not turn on) to do this as I did not want to remove too much material too fast. 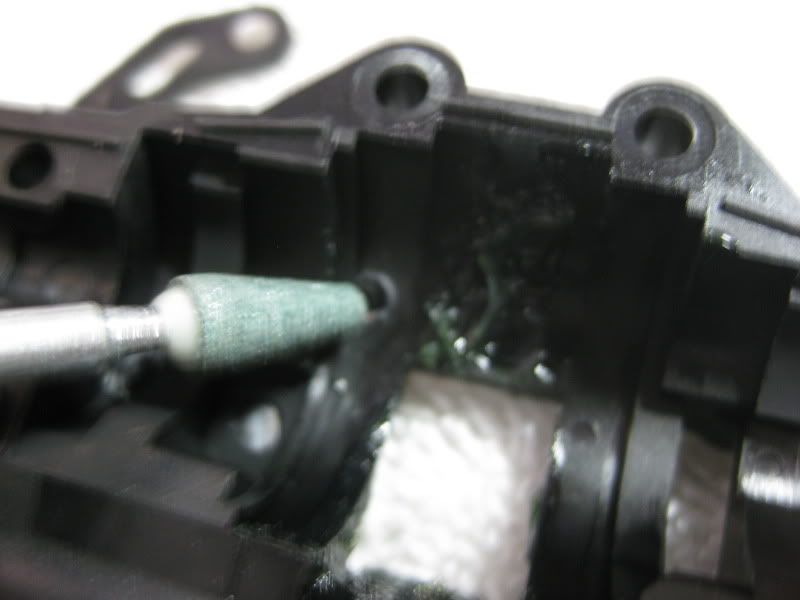 It's nice and flush now. 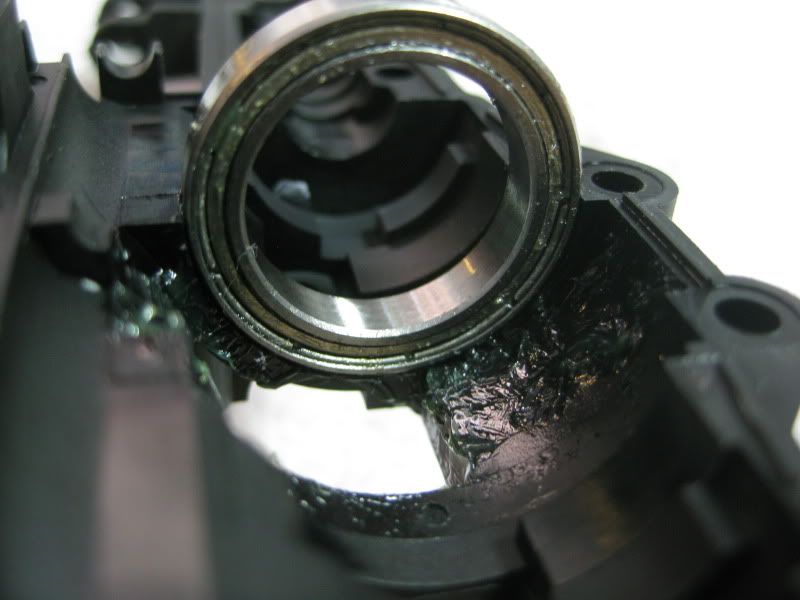 While I was at it I decided to use Brandon's tech tip. I had already found this to be a nuisance in my several disassemblies so this is a great idea. 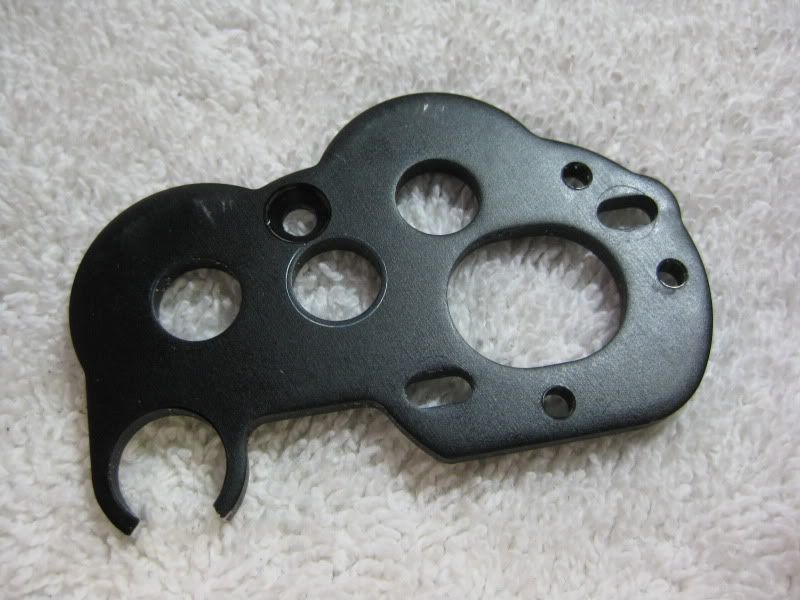 I liked this e-clip tool so much badger let me take it home. 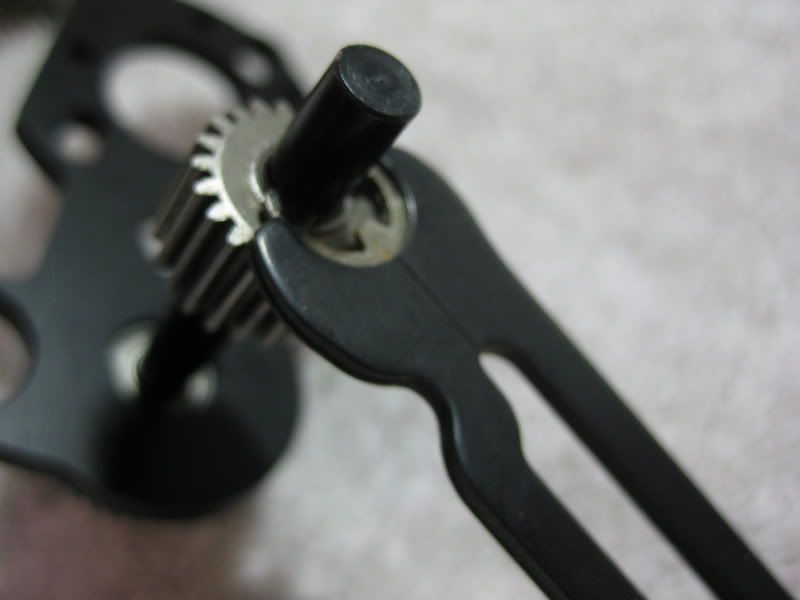 There have been some rumblings about the triangles on the idler gears having some significance. I don't think there is as the instructions show it one way on the front axle and the other on the rear. The slot accepts the pin freely on either side. 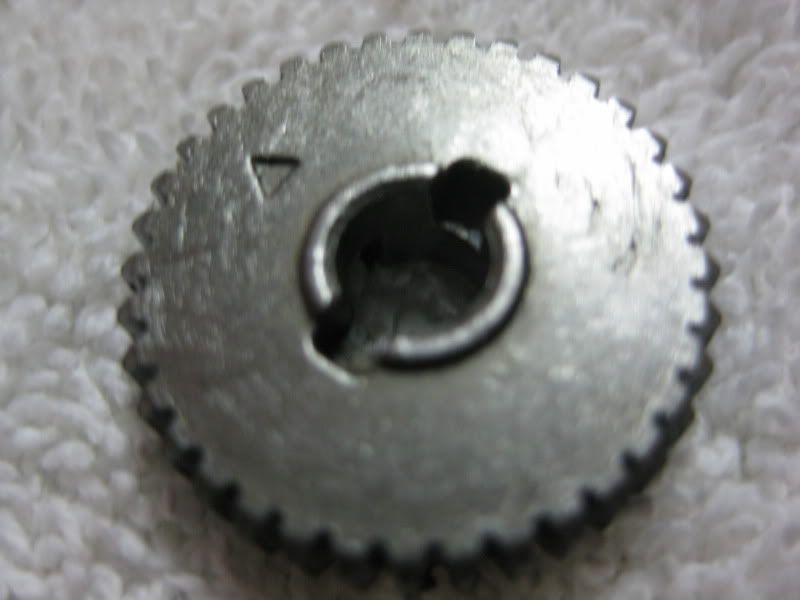 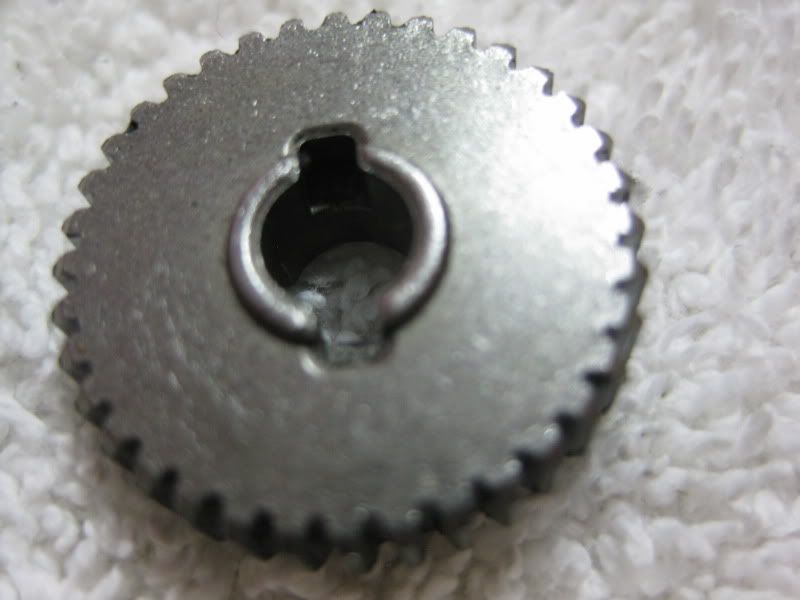 In closing up the housing I paid close attention to the screw types. Pay special attention to AXA465! 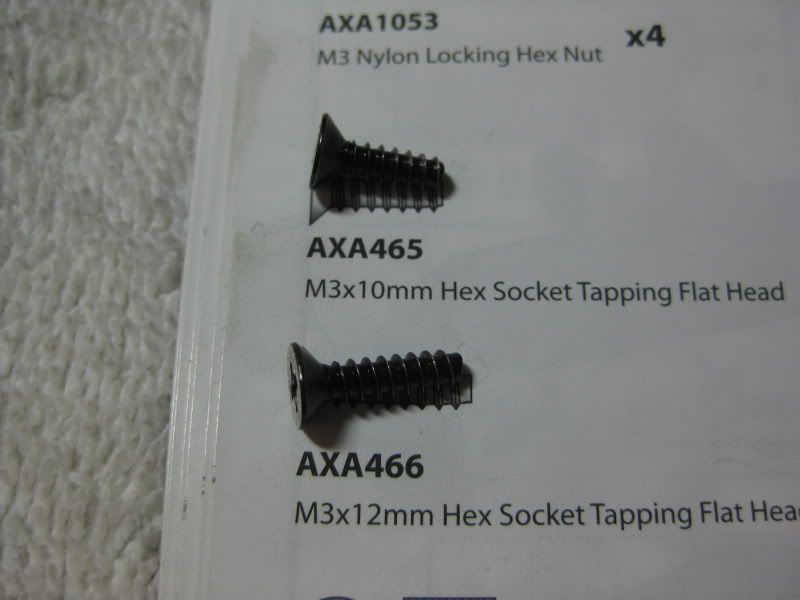 You also want to give a little more torque than you would think on these two. 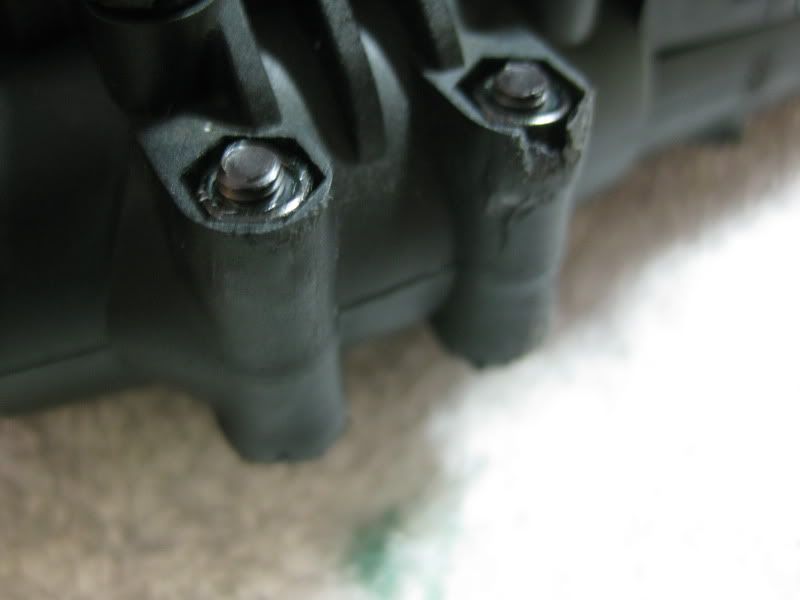 After getting it all back together I immediately bound up the rear pretty good and gave it the throttle. So far so good. So I have to say that Brandon completely nailed the diagnosis of this problem in an extrememly timely manor! So don't be like me and screw-up when building your axles! |
|
| |
|
08-23-2010, 05:27 AM
| #94 | |
| RCC Addict Join Date: Jan 2005 Location: Germany north
Posts: 1,669
| Quote:
| |
|
| |
|
08-24-2010, 12:55 AM
| #95 |
| I wanna be Dave Join Date: Mar 2008 Location: Pacific Ocean
Posts: 2,342
|
I did not get that great of a measurement, maybe .1 But it's best to just follow as shown in the instructions and you should have no worries. |
|
| |
|
08-27-2010, 01:49 AM
| #96 |
| I wanna be Dave Join Date: Mar 2008 Location: Pacific Ocean
Posts: 2,342
|
I finally got around to uploading some video from my first run with this thing. Sorry about the wind noise (not really http://www.youtube.com/watch?v=T1limtbGMNw Last edited by dpdsurf; 08-27-2010 at 09:31 AM. |
|
| |
|
08-27-2010, 01:57 AM
| #97 |
| RCC Addict Join Date: Jan 2005 Location: Germany north
Posts: 1,669
|
nice thing |
|
| |
|
08-27-2010, 08:23 AM
| #98 |
| TN State Champ 11,12,13 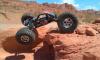 Join Date: Oct 2008 Location: KTM Talk.com
Posts: 1,796
|
Dammit where is mine I love the jump at the end. |
|
| |
|
08-31-2010, 12:06 AM
| #99 |
| I wanna be Dave Join Date: Mar 2008 Location: Pacific Ocean
Posts: 2,342
|
After binding it up several times to see how much abuse it could take, a couple of blown bearings caused the small transfer gear to fail. Possibly bushings could be the answer if you're going to be this hard on the rig. http://www.youtube.com/watch?v=J_NBC8ELiQY |
|
| |
|
08-31-2010, 12:10 AM
| #100 |
| RCC Addict Join Date: Jan 2005 Location: Germany north
Posts: 1,669
|
the flanged from the aluminium plate?
|
|
| |
 |
 LinkBacks (?)
LinkBack to this Thread: http://www.rccrawler.com/forum/axial-xr10/263295-badgers-xr10-build.html | ||||
| Posted By | For | Type | Date | |
| AX90017 Axial XR10 - 1/10th Scale Electric 4WD Rock Crawler Competition Kit - Pagina 16 - Scalers & Crawlers | This thread | Refback | 03-05-2013 03:34 PM | |
| |


 Linear Mode


