| |
| |||||||
 |
| | LinkBack | Thread Tools | Display Modes |
 10-02-2010, 11:40 AM
| #1 |
| I wanna be Dave Join Date: Mar 2008 Location: Pacific Ocean
Posts: 2,342
| 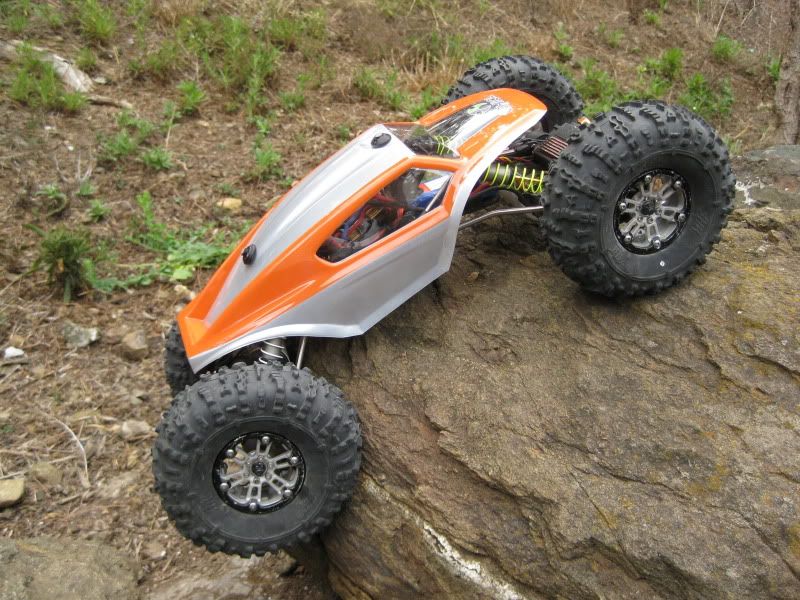 Because we can't have too many XR10 setup threads. So far I really like the XR10 and have about 5 comps with it under my belt including the LCQ and Nationals. I really like it more than my Bergt right now. Maybe because it's something new???, but it flat out performs and is only getting better with time. So far I broke the drive gears and a transfer gear, all in the rear axle. I also noticed that 2 of the stock flange bearings in the front axle had blown but no gear failure occurred. Since replacements and the addition of Avid flange bearings I have had zero issues. And I have bound this up several times. I was going to mod to 5x10mm bearings but I may hold out on this as it would be nice to know that after market bearings in the stock size are a sufficient enough upgrade. Base Specs: CHASSIS: Axial XR10 MOTORS: Holmes hobbies 45T Torquemaster Pro Handwound ESC's: Dual Tekin FXR's BEC: Castle (set at 6v) SERVO: Hitec 7950TH RADIO: Futaba 6EX RECEIVER: Futaba R6106HF WHEELS: Vanquish Products SLW V3 w/ 225 offsets front & rear (optional 350s for rear) TIRES & FOAM: HB Rovers (white) / Crawler Innovations 5.5 2 stage foams Upgrades: LOWER LINKS: Custom bent Lunsford Titanium Rock Grinders w/ 4mm Revo rod ends UPPER LINKS: Custom bent Lunsford Titanium Rock Grinders w/ 4mm Revo rod ends BODY MOUNTS: Gunnar body mount kit SUSPENSION: Stock XR10 shocks w/ Losi yellow springs (front) / white springs (rear) / JeepinDoug spring cups (front), RPM (rear) BEARINGS: Avid 5x10x2 metal shield flange bearings in both gear cases, Avid 5x10x2 ceramics at drive gear shaft Things that are great: - Out of the box the XR10 performs great and if you have prior MOA experience you should quickly realize that this can do some of the hardest lines youre already used to doing. - Proven competition contender based on its MOA platform. - Ability to have dual ESC setup to take full advantage of independent motor control. - Narrow chassis that has proven to be capable and has adjustability. - Stock wheel system that took 6th overall at Nationals (you cant argue with success). - Lightweight Axles with small gear boxes, adjustable caster, and high clearance. - Body that is small, light and performs penalty free rollovers pretty easily. - Familiar feel if you have prior MOA experience. - Anticipated strong after market support. - Good steering out of the box with only minor improvements recommended. - Universal joints that have proven reliability. - Excellent customer service from a company that has a strong presence in this segment of the hobby. - Its an MOA! Things that aren't so great: - 3mm rod ends that will wear out or break easier than 4mm. - Upper links are a flexible plastic that becomes more flexi over time. - Short steering arm on the knuckle for the drag link causes excessive servo heat and steering binds. - Great wheel system that I wish were available in a 1 width. - Stock flange bearings have been subject to failures causing broken gears. - Multiple screws and sizes for assembling the axles. Easy to make an assembly error. - Stock electronics tray is a nice start but the battery is mounted too high and the upper links can hit the receiver box. Link to my current setup used at Nationals. http://www.mediafire.com/?h4z3d54e5g93e39 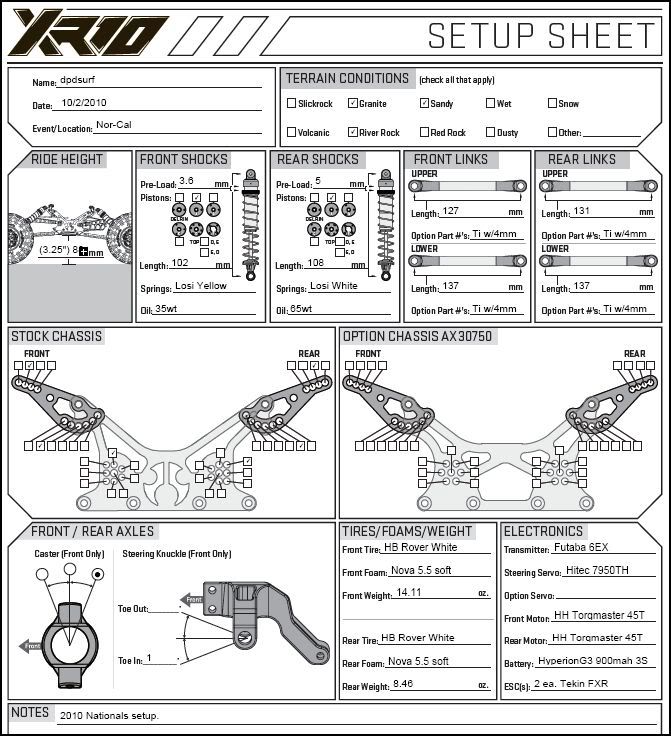 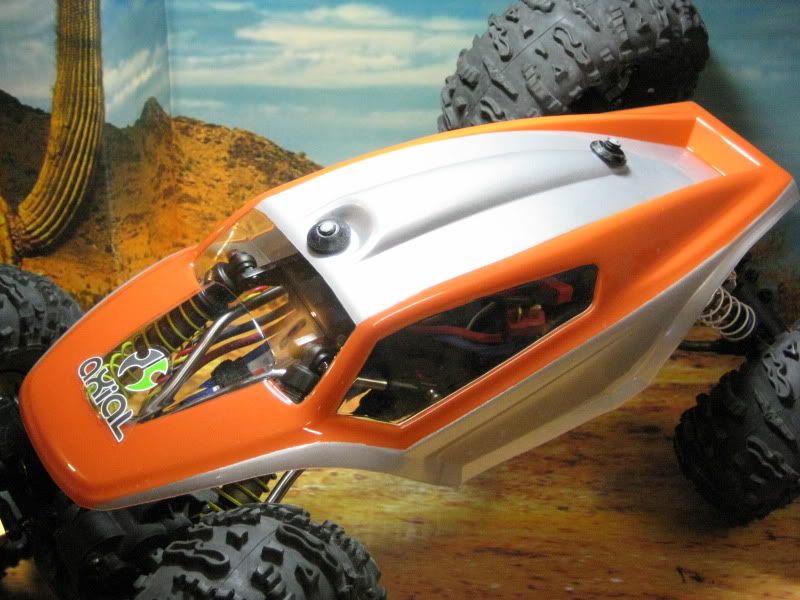 Last edited by dpdsurf; 10-02-2010 at 07:51 PM. |

|  |
| Sponsored Links | |
| | |
|
10-02-2010, 11:41 AM
| #2 |
| I wanna be Dave Join Date: Mar 2008 Location: Pacific Ocean
Posts: 2,342
|
Sorry for the reposts, wanted to get all my tech in one thread. I have found that 4mm Revo rod ends on lower links are almost bullet proof. For the lower links I am using Lunsford TI rock grinders. The fronts are 125mm with a 30* bend in the front to accommodate the horizontal link mount unique to the front axle. They are bent 30*+ at the main bend. (The rod end that mounts to the axle had to be shaved a little to fit.) Total i2i = 137mm The rears are 130mm bent 45* at the main bend. I also added the 30* lower bend here as well so it ramps up at the motor better. Total i2i = 137mm Wheelbase is exactly 12.5" measured per USRCCA rules. 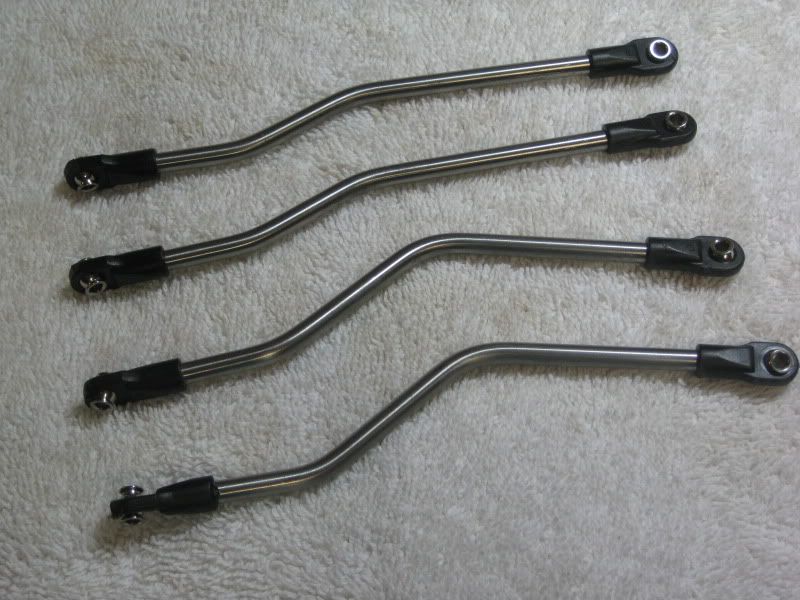 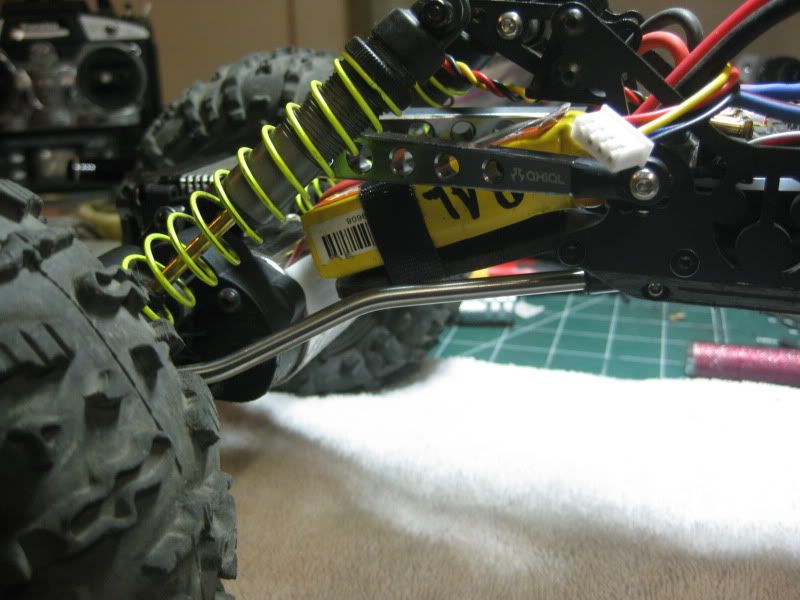 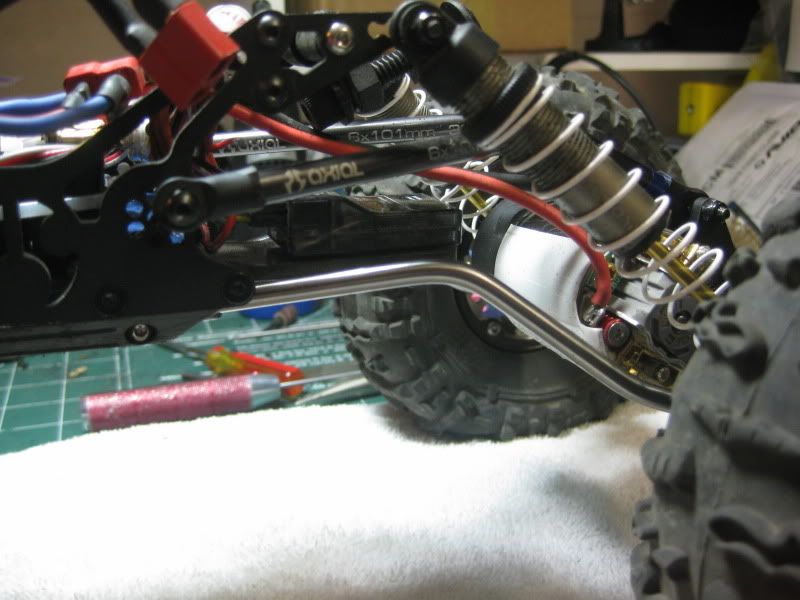 I also made a new electronics tray to get everything as low as possible. 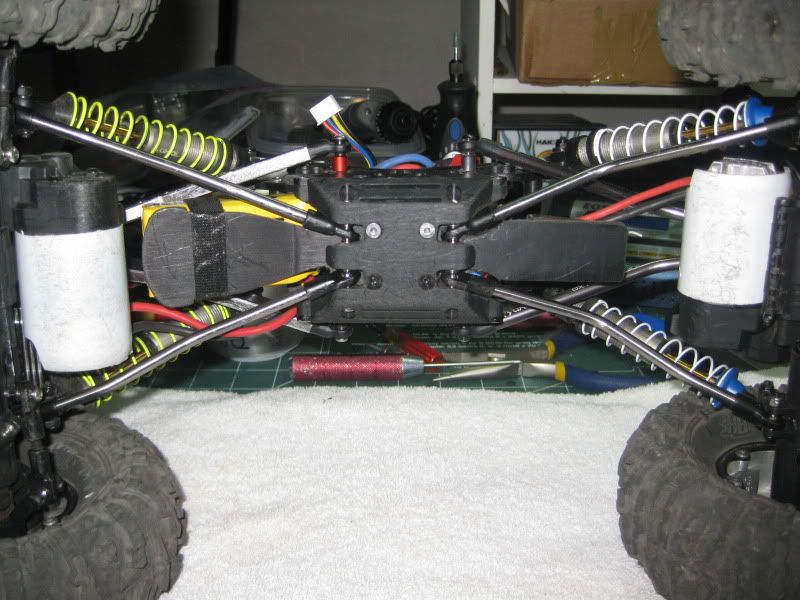 I had to grind my electronic tray a little more due to the extreme bend in the rear links pushing them up further. 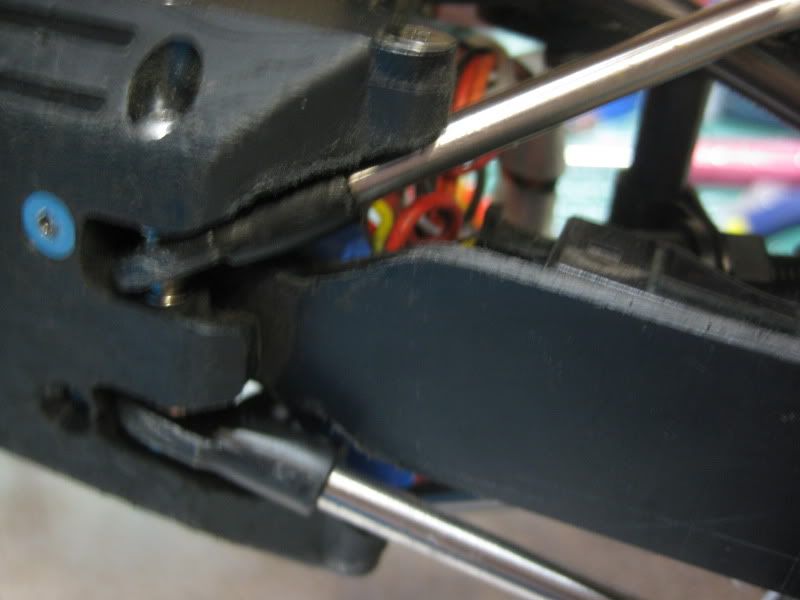 I really like the stance and it's breaking over things it was hanging up on with ease now. 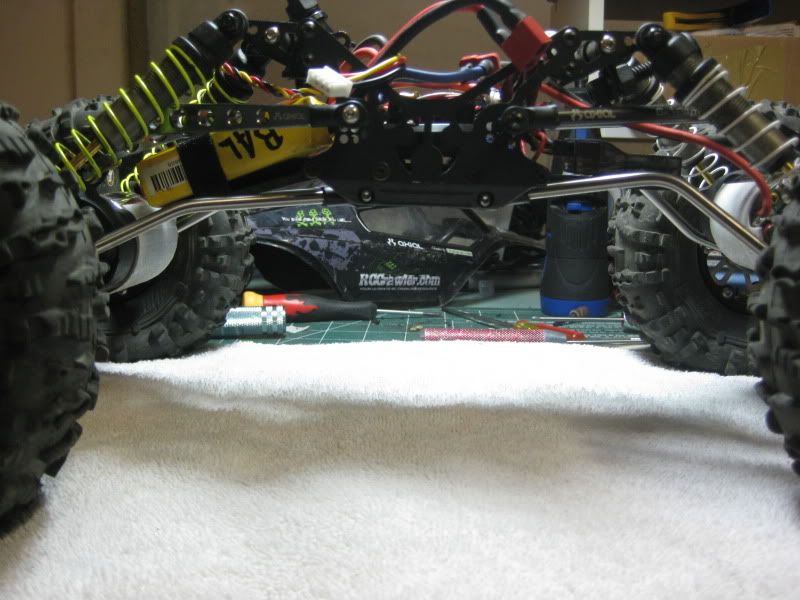 |
|
| |
|
10-02-2010, 11:47 AM
| #3 |
| I wanna be Dave Join Date: Mar 2008 Location: Pacific Ocean
Posts: 2,342
| Last edited by dpdsurf; 10-02-2010 at 11:56 AM. |
|
| |
|
10-02-2010, 11:52 AM
| #4 |
| I wanna be Dave Join Date: Mar 2008 Location: Pacific Ocean
Posts: 2,342
| (Originally posted on 8/13/10) Amazing! Bone stock, RCTV build with no tuning and it pulled all but one of my hardest Berg lines (which frankly I can't make every day with the Berg or with new tires anyway). But the lines it did pull seamed easier. And I've had almost 2 years to perfect and tune my Berg. It really seamed to excel in technical off cambers/sidehills where you need to hook it around while staying high or when you have to dig up hill. The only true test I would say that I did not take it to 100% on is getting it bound up. I did a few times and was able to work it out. But I did not want to take the risk and push it too far because I have no spare parts as niether do the hobby shops. This is also almost a pound lighter than my Berg at 5.73 lbs vs the Berg at 6.48. In some circumstances a little weight in the rear may be desired but after a few minutes I was used to the descents with the lighter rig. It seamed to work best with all of the weights that came with the kit in the front wheels plus 3 slugs each and no weight in the rear. Total front wheel weight is 400 grams or 14.11 ounces each. The ride height was lower than I'm used to at 2-3/4". But with the lighter weight it cruised over the break-overs. Tonight I adjusted the chassis shock mounts to bring the ride height up to 3-1/4". I did this by moving the rear down 1 hole. I initially lowered the front 1 hole too but that seamed to bring the front to 3-1/2", so I put it back to what I'm calling the #3 hole which is the 3rd one up from the front. The rear is the 2nd hole from the rear. I also replaced the rear lower links with some Axial bent links and clocked the rear axle by adding 6mm spacers to the upper links. Be certain to install longer set screws if you add spacers, otherwise there isn't enough meat which could cause future link failure. I also added 1mm(?) cone spacers to the rear lower bent links to get the wheelbase back to 12.5". If anything it's a hair short. When doing these suspension adjustment you will need to change the body mounts. Piece of cake though, you only need to remove 1 screw on one side, slide out the spline and clock the body post back to vertical. Then reinstall the screw. This truck has some very familiar handling characteristics and is easy to drive from the start. GREAT JOB AXIAL! We really couldn't have asked for more. P.S. Badger, I know you only loaned this to me but if you want it back you'll have to pry it from my cold dead corpse. I also took some video. I'll work on that later though. Some poser shots before I started; 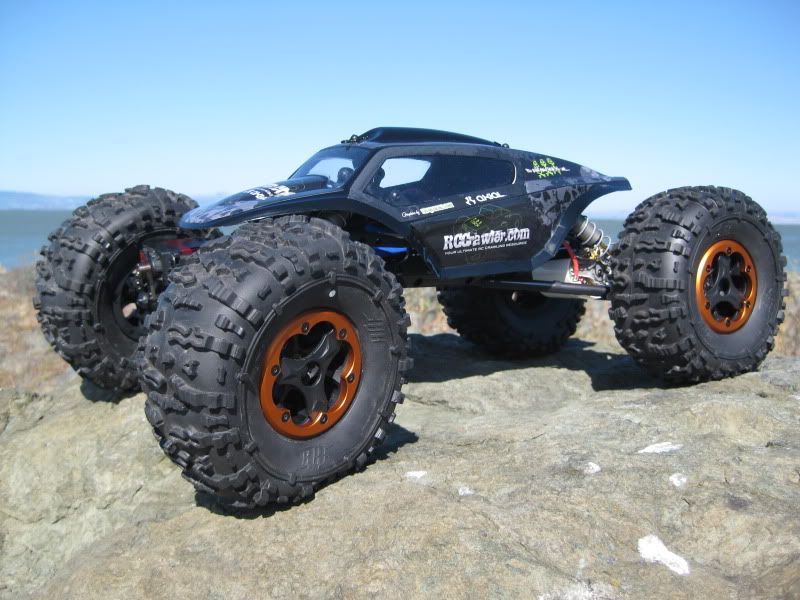 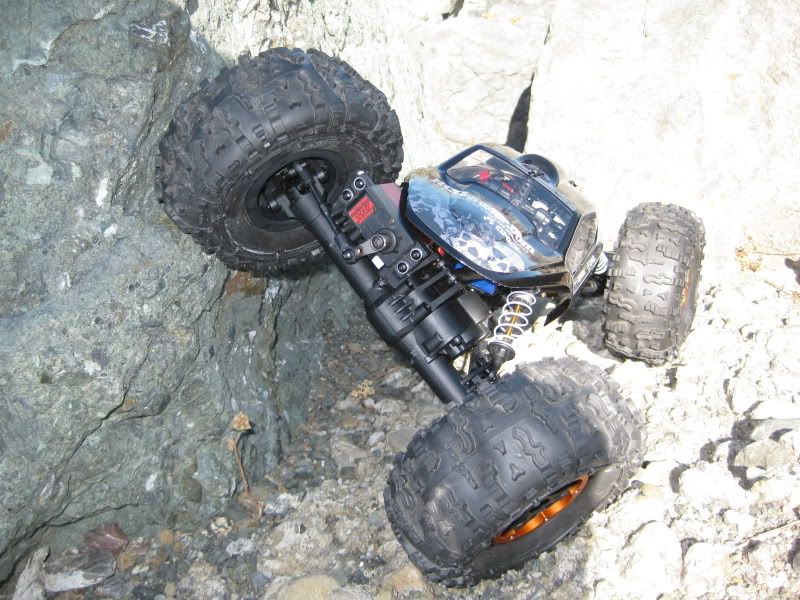 Don't be surprised if the following pictures get deleted because they are nowhere near up to badger's standards. 6MM spacers added to clock rear axle; 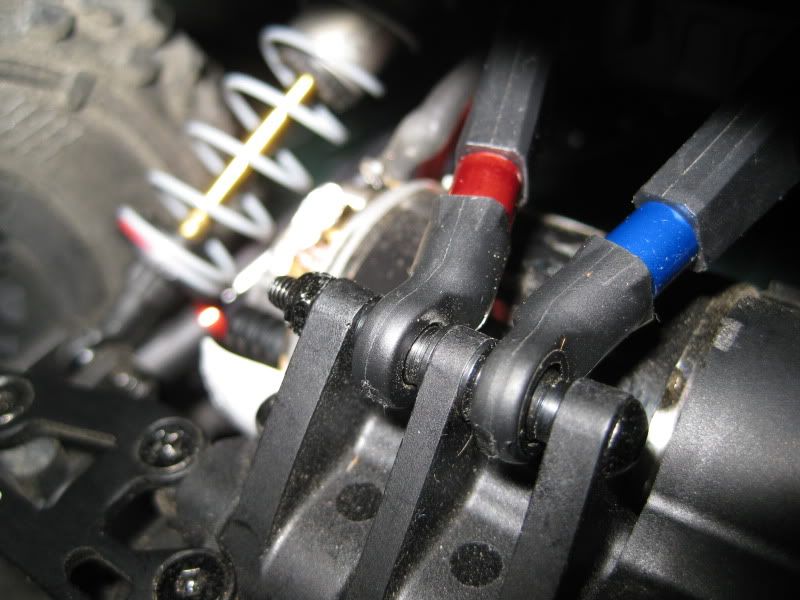 Bent rear lowers; 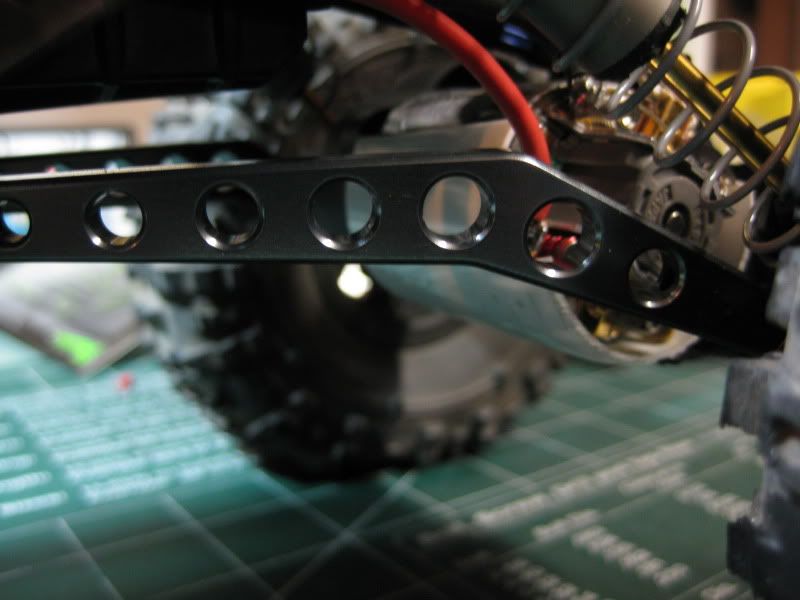 Vanquish slugs added (Also note, I did not have to remove a single bead lock screw to add the wheel weights. It flexes right in and out no problem. This made tunig real easy.); 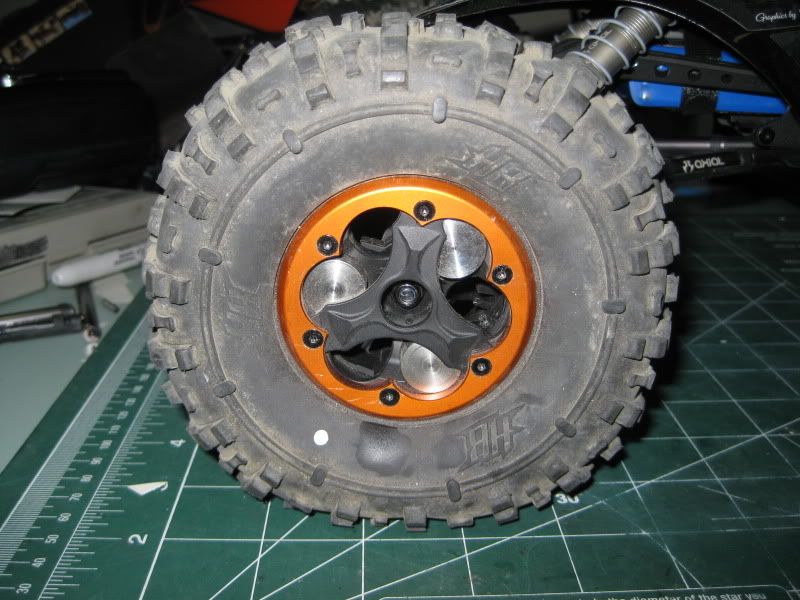 Last edited by dpdsurf; 10-02-2010 at 06:26 PM. |
|
| |
|
10-02-2010, 11:54 AM
| #5 |
| I wanna be Dave Join Date: Mar 2008 Location: Pacific Ocean
Posts: 2,342
| (Originally posted on 8/20/10 I've been out of town for a few days and didn't have time to report on my comp and experience last weekend. I went to a casual local comp that NBRCC put on up in Santa Rosa, CA. There were about 30 drivers there. On my first course I quickly realized that in a comp situation I was not used to this rig. Of course my adrenaline was a little out control as all eyes were on me for the first run. By course 2 I had settled into more of a rhythm and was able to tune into what the rig was doing. I definitely need to work on the suspension as it unloaded surprisingly in some areas. I was once again a gate magnet but managed to finish the course. When I lined up for the 3rd course only one driver had finished the course so far. There were 5 out 10 gates that were pretty tough and any one of them could be hit. I managed to walk clean through the first 5 gates (one of them that many had hit) and was feeling pretty good. I ended up hitting 2 silly gates as it was all my error, but finished the course. So it was not the best day for me but I was one of only 4 or so to complete all 3 courses. Tire setup was a huge issue. We really didn't take the proper time to dial in the foams. We added air vents to the wheels but it's still not right and the rig was bouncing all over the place and traction was a challenge. After the comp a few of us were driving this crazy crack climb where at the 1/2 way point you had to use rear dig to push it through the crack. While I was doing this I heard a really load SNAP and that was it, rear axle broken. Upon taking the axle apart both the drive and final drive gears were missing teeth. The final drive had one full tooth missing along with a couple of teeth only 1/2 way missing on the passenger side.  I spoke to Brandon at Axial and later read http://www.rccrawler.com/forum/showpost.php?p=2592029&postcount=74"]Brandon's post and blog on this very same issue that the German's were having[/URL]. I immediately inspected the housing and noticed that it had a small bur in the plastic and a slight pin hole. Evidence that at one time the wrong screw had been inserted. 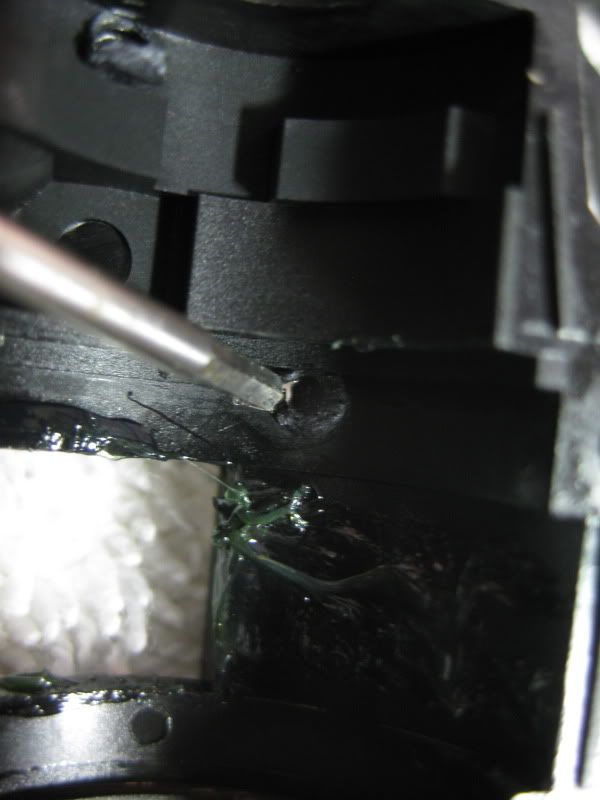 I had already built the axle 3 times. Once on RCCTV, then tore it down for photos and re-built. When badger and I finally finished it and tested it there was a clicking in the rear axle when under any strain. I tore it apart again, carefully inspected and re-built it again while carefully following the instructions. After that it worked fine without issue in my initial testing and for 3 comp courses and some test drives by a bew of the locals last Sunday. So I am 99% certain that the correct screw was in when it failed, but that small burr did not allow the bearing to fully seat therefore causing the failure. Axial sent me new gears.  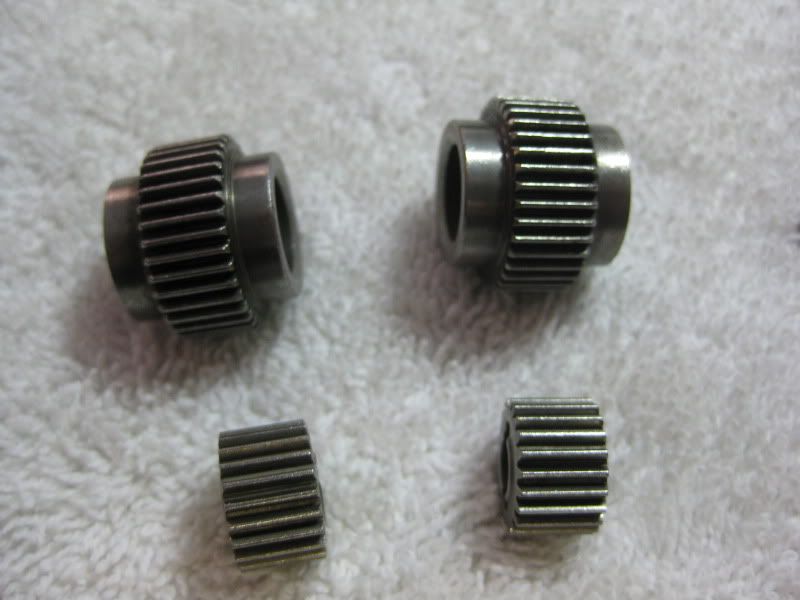 I first sanded the burr down to insure that the bearing was sitting flush. I used the Dremel manually (did not turn on) to do this as I did not want to remove too much material too fast. 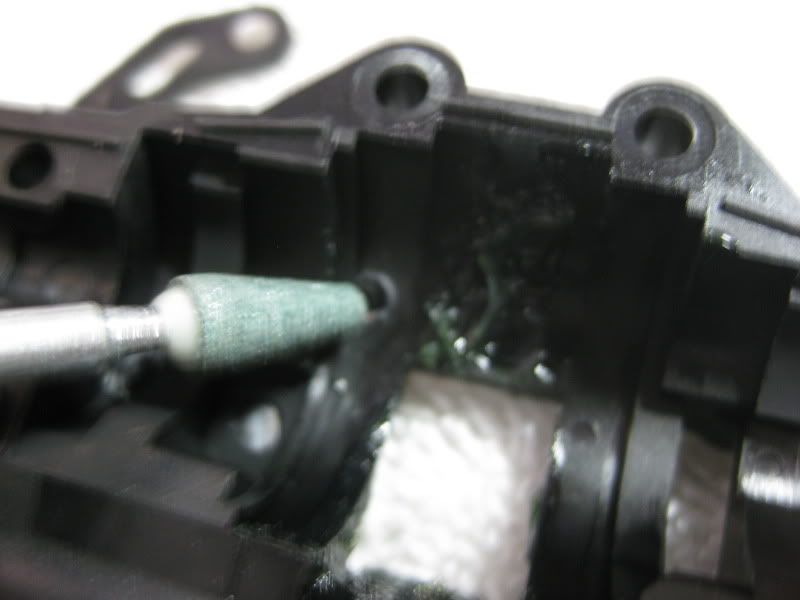 It's nice and flush now. 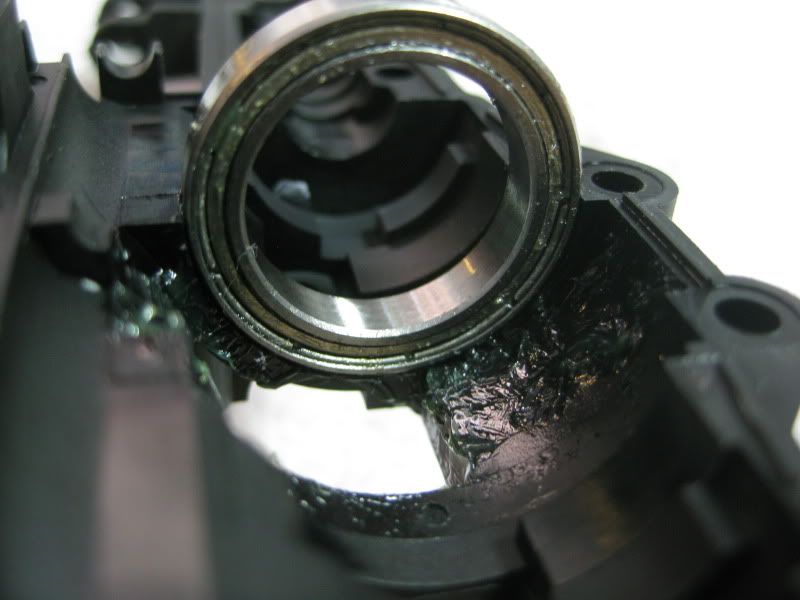 While I was at it I decided to use Brandon's tech tip. I had already found this to be a nuisance in my several disassemblies so this is a great idea. 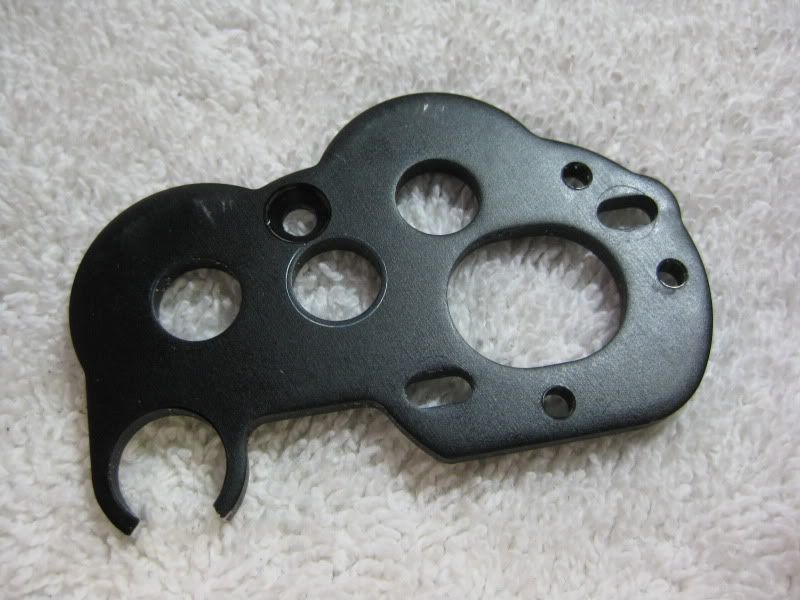 I liked this e-clip tool so much badger let me take it home. 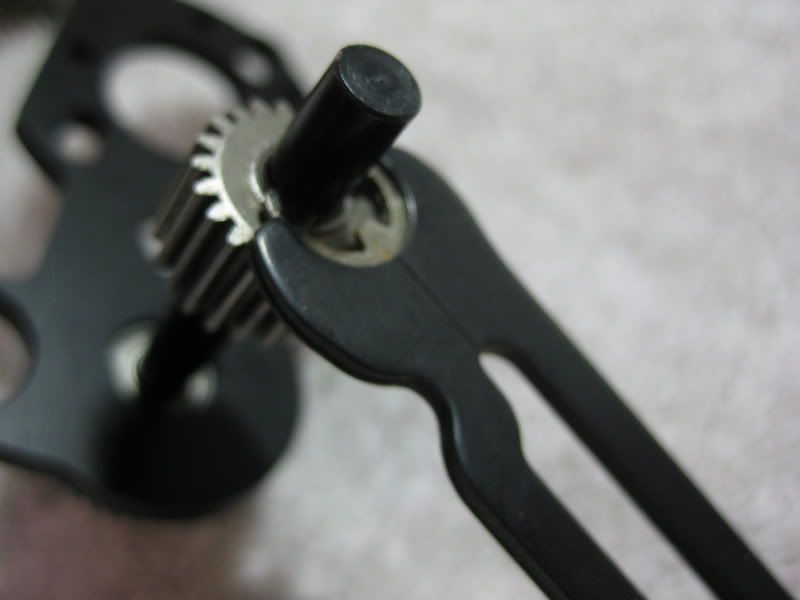 There have been some rumblings about the triangles on the idler gears having some significance. I don't think there is as the instructions show it one way on the front axle and the other on the rear. The slot accepts the pin freely on either side. 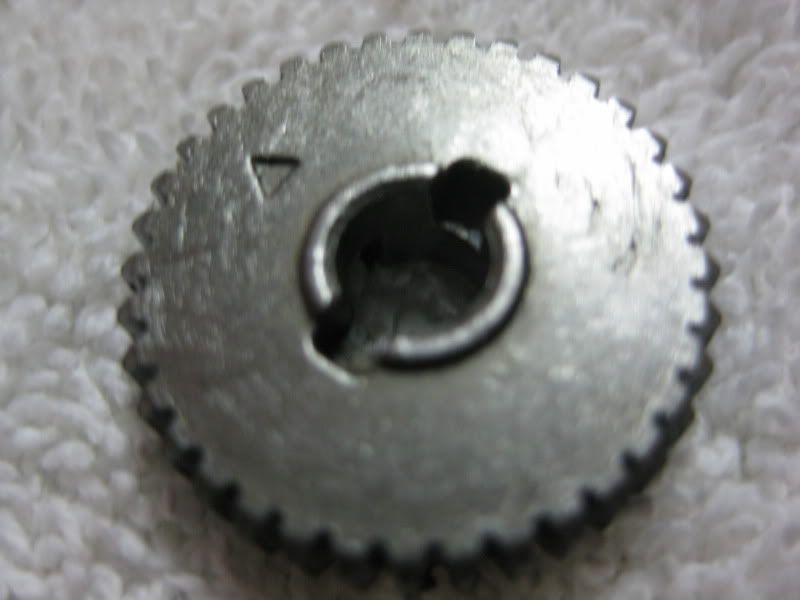 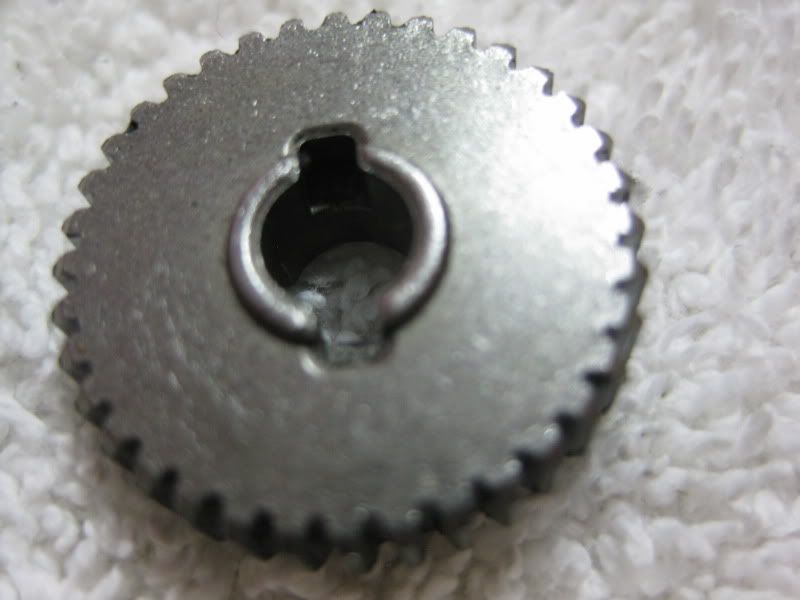 In closing up the housing I paid close attention to the screw types. Pay special attention to AXA465! 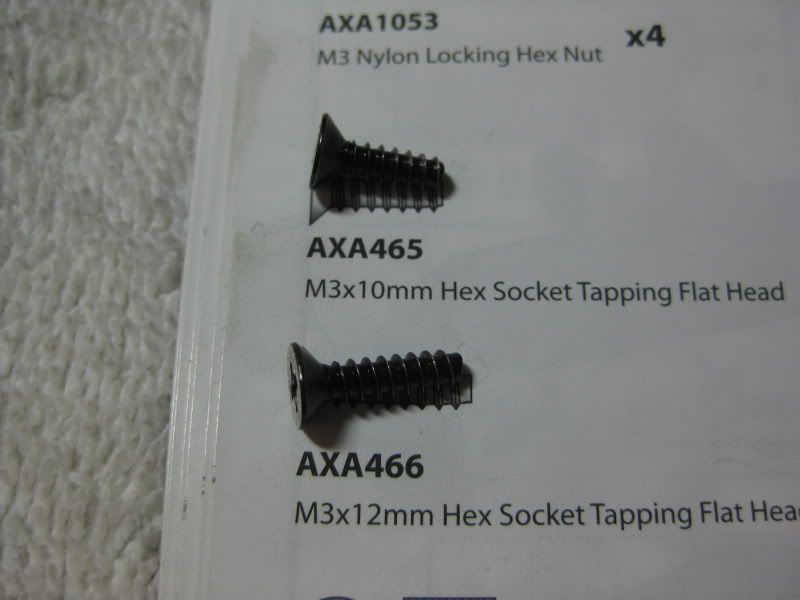 You also want to give a little more torque than you would think on these two. 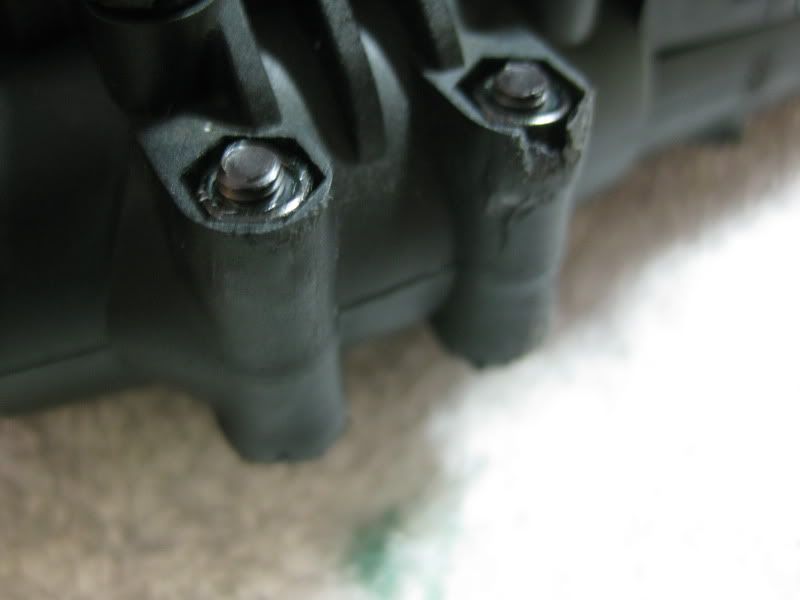 After getting it all back together I immediately bound up the rear pretty good and gave it the throttle. So far so good. So I have to say that Brandon completely nailed the diagnosis of this problem in an extrememly timely manor! So don't be like me and screw-up when building your axles! Last edited by dpdsurf; 10-02-2010 at 06:26 PM. |
|
| |
|
10-02-2010, 11:55 AM
| #6 |
| I wanna be Dave Join Date: Mar 2008 Location: Pacific Ocean
Posts: 2,342
| |
|
| |
|
10-02-2010, 12:00 PM
| #7 |
| I wanna be Dave Join Date: Mar 2008 Location: Pacific Ocean
Posts: 2,342
|
Several people have asked how I bent the links. JeepinDoug was kind enough to let me barrow this. It made bending the Ti links an easy and precise project. Ridgid 36117 for 3/16" tube size and 5/8" bend radius  Last edited by dpdsurf; 10-03-2010 at 10:16 AM. |
|
| |
|
10-02-2010, 12:02 PM
| #8 |
| I wanna be Dave Join Date: Mar 2008 Location: Pacific Ocean
Posts: 2,342
|
Replacement bearings. So far the $1.00 5x8x2.5 Avid bearing are holding up. Metal shield is what comes from the factory which makes the most sense. You're not going to get much dirt inside the gear box and they withstand heat better. I just ordered these which is the stock size (5x8x2.5 flanged, 3 ea. per axle); http://www.avidrc.com/product/8/metr...-bearings.html I also ordered these for the shaft (going with ceramic made me feel better, I don't know if it's necessary though)(5x8x2.5, 1 ea. per axle) ; http://www.avidrc.com/product/8/metr...-bearings.html ...and after EGRESSor's sugestion, I just ordered these which will require drilling out the holes in the aluminum motor plate. (5x10x4 flanged, 3 ea. per axle); http://www.avidrc.com/product/8/metr...-bearings.html |
|
| |
|
10-02-2010, 12:45 PM
| #9 |
| Rock Crawler Join Date: Jul 2008 Location: grand rapids, bay area, nyc.
Posts: 945
|
wow very thorough thread. thanks for the updates and video footage! so do you think replacing all the bearings will eliminate the gear breaking problem? i think ill order some vp brass bushings and see how they do when i get my xr. def gonna keep up on this thread |
|
| |
|
10-02-2010, 01:01 PM
| #10 |
| Moderator Rule Breaker   Join Date: Feb 2004 Location: Austin, Tx
Posts: 5,970
|
I would like to know where on-line you can that e-clip tool.
|
|
| |
|
10-02-2010, 01:28 PM
| #11 |
| Like a boss...   Join Date: Feb 2008 Location: NorCal
Posts: 1,008
|
Nice paint! I like that you went and visited HPI Trophy Truck Land too. |
|
| |
|
10-02-2010, 02:06 PM
| #12 |
| MODERATOR  Join Date: Jul 2004 Location: Ohio
Posts: 18,928
|
I grant you the ever so exclusive, super rare RCC green screwdriver title!  Congrats! |
|
| |
|
10-02-2010, 06:22 PM
| #13 | ||||
| I wanna be Dave Join Date: Mar 2008 Location: Pacific Ocean
Posts: 2,342
| Quote:
Quote:
Quote:
Quote:
| ||||
|
| |
|
10-02-2010, 06:26 PM
| #14 | |
| Moderator Rule Breaker Join Date: Feb 2004 Location: Austin, Tx
Posts: 5,970
| Quote:
 | |
|
| |
|
10-02-2010, 06:37 PM
| #15 | |
| I wanna be Dave Join Date: Mar 2008 Location: Pacific Ocean
Posts: 2,342
| Quote:
 I guess he lost his buzz I guess he lost his buzz | |
|
| |
|
10-02-2010, 09:49 PM
| #16 | |
| Rock Crawler Join Date: Jul 2005 Location: Rathdrum, ID USA
Posts: 549
| Quote:
| |
|
| |
|
10-02-2010, 10:46 PM
| #17 |
| Quarry Creeper  Join Date: Dec 2009 Location: San Jose
Posts: 265
|
here is a neat-o one on amazon.... http://www.amazon.com/Ultimate-E-Cli...6080920&sr=8-2 that e-clip tool made me smile...very cool indeed. |
|
| |
|
10-03-2010, 01:35 AM
| #18 |
| I wanna be Dave Join Date: Mar 2008 Location: Pacific Ocean
Posts: 2,342
|
Here's some pics of the upper links. Going to the revo rod ends on the uppers really cleaned up the lateral slop that I was getting using the stock rod ends. Everything is really tight now. The fronts took some creative bending. I think I may try it again, they work fine but I have something in mind to get it just right. Front (These are 115mm Lunsford with two 30* bends. Totsl I2I = 127mm) 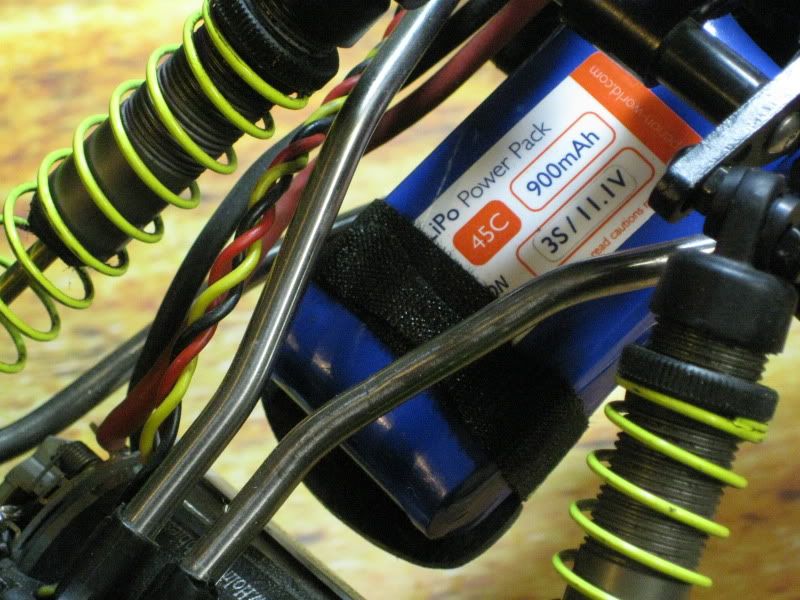 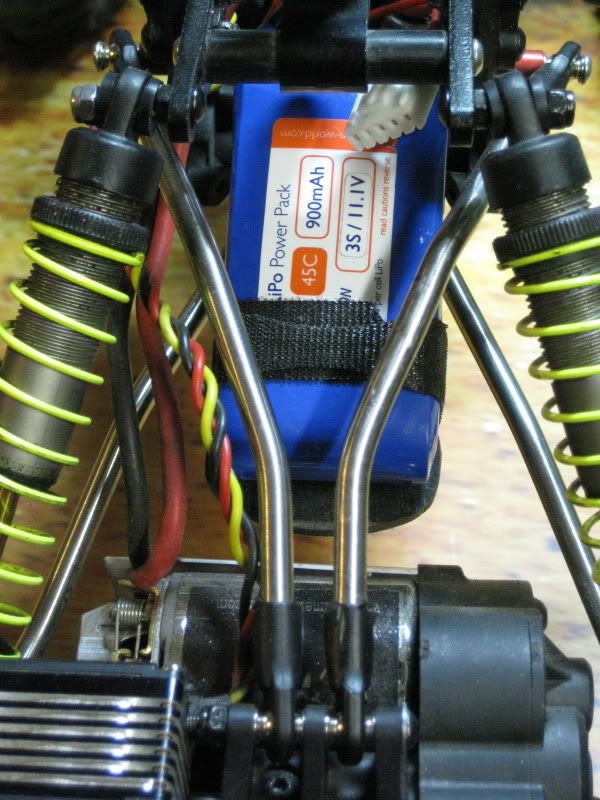 Rear (These are 120mm Luinsford with one 30* bend. Total I2I = 131mm) 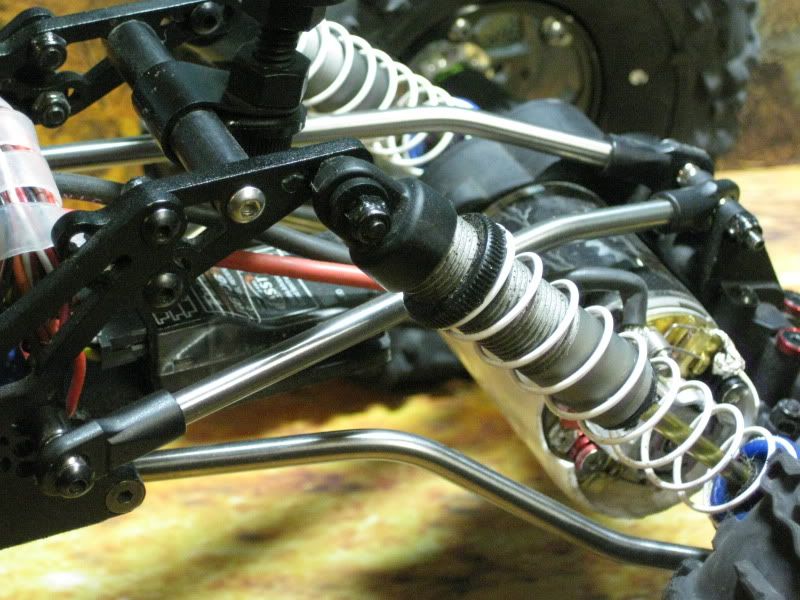 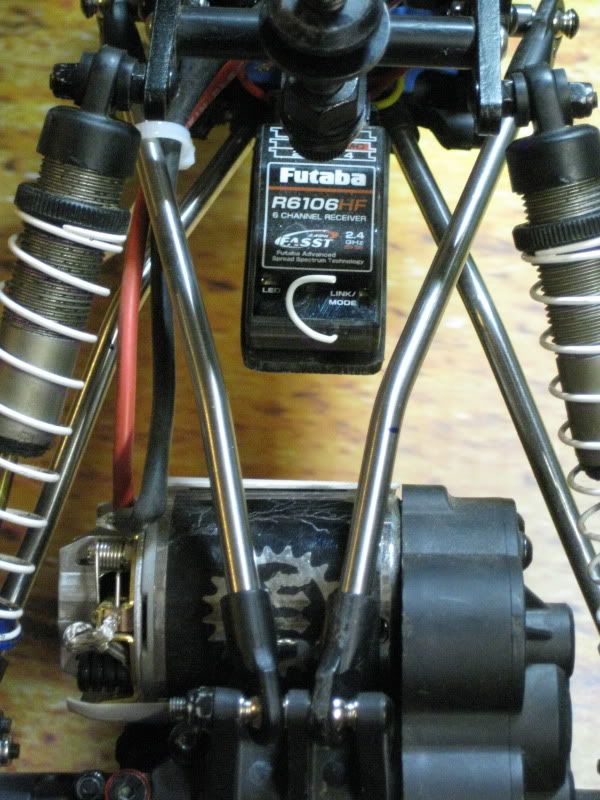 Also for the lower links, the revo rod ends fit snug in the skid. There is no slop. 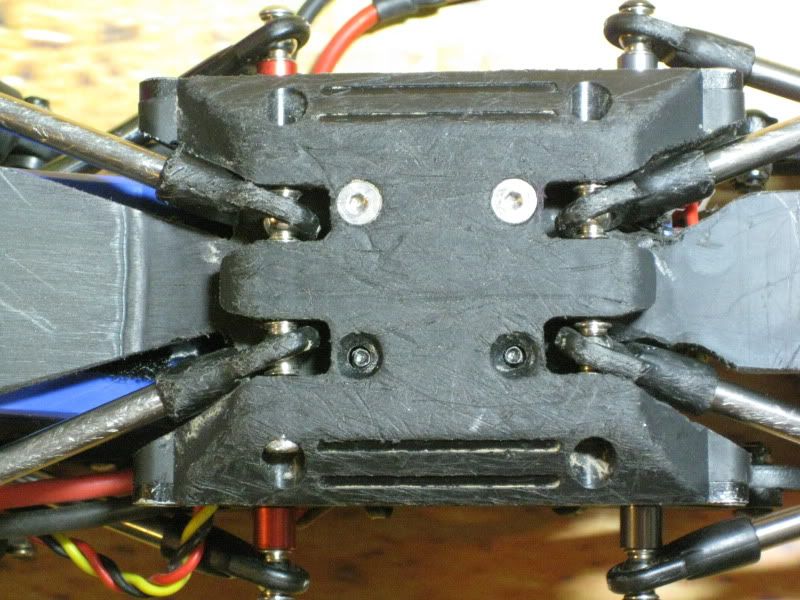 I also made new steering turnbuckles to complete my 4mm rod end upgrade. 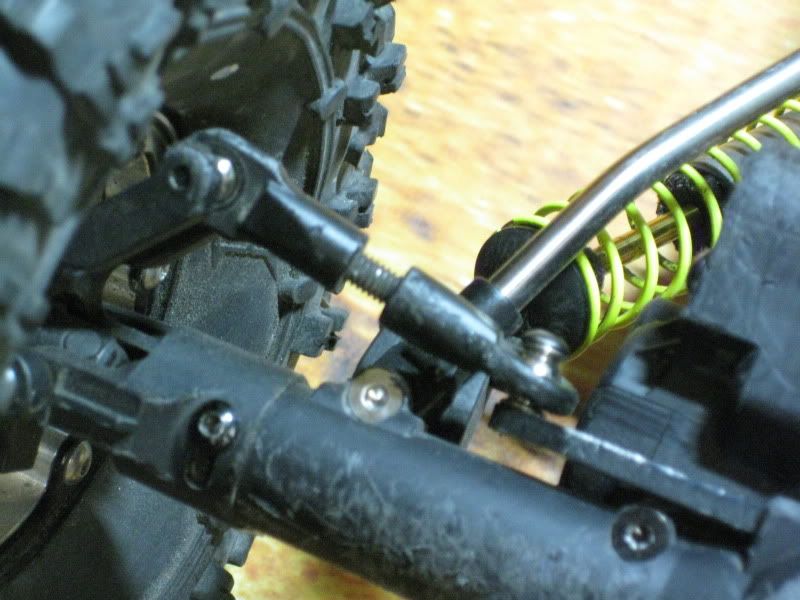 I also highly recommend doing something about the drag link mount on the knuckle. Extending helps the servo run cooler and the steering is not locking when bound up anymore. BIG improvement! 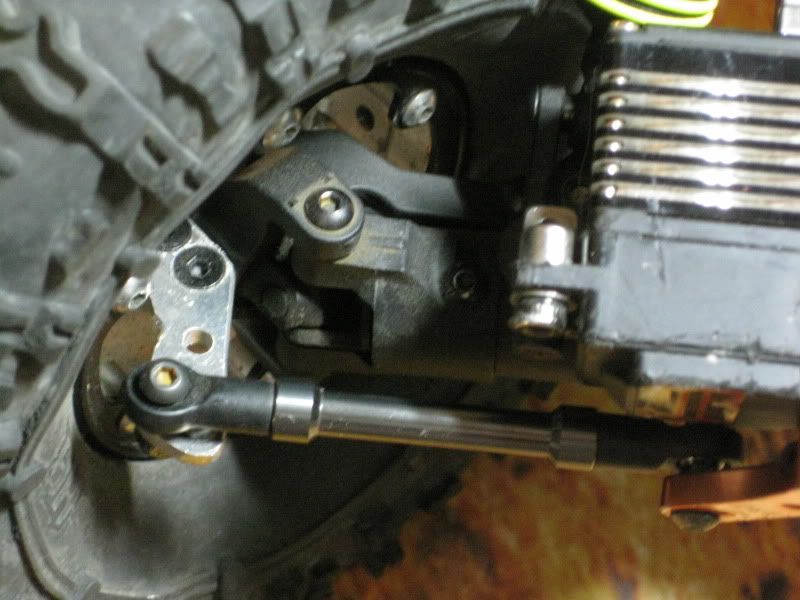 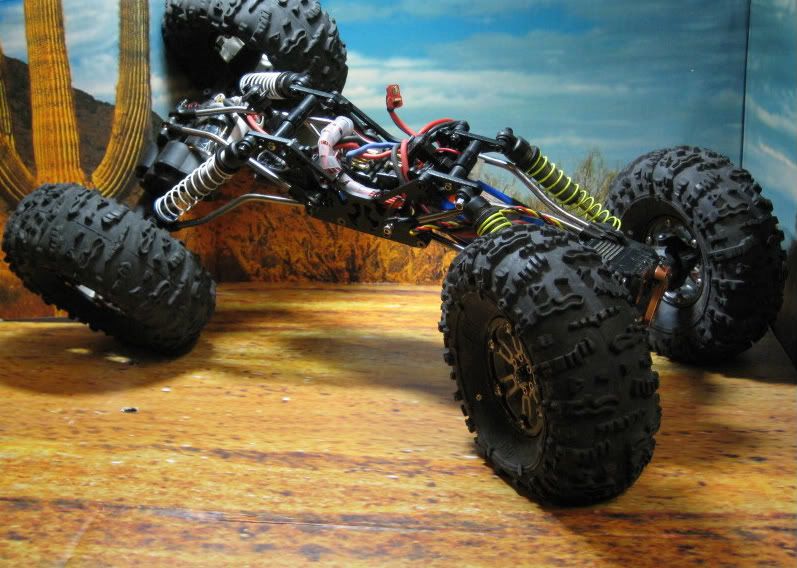 Last edited by dpdsurf; 10-03-2010 at 08:43 AM. |
|
| |
|
10-03-2010, 08:04 AM
| #19 | |
| Pebble Pounder Join Date: Jan 2009 Location: italy
Posts: 113
| Quote:
Where can i buy this link? | |
|
| |
|
| Tags |
| dpdsurf |
| |


 Linear Mode


