| |
| |||||||
 |
| | LinkBack | Thread Tools | Display Modes |
 03-05-2017, 12:47 PM
| #1 |
| Pebble Pounder Join Date: Jan 2016 Location: Worthing, England
Posts: 157
|
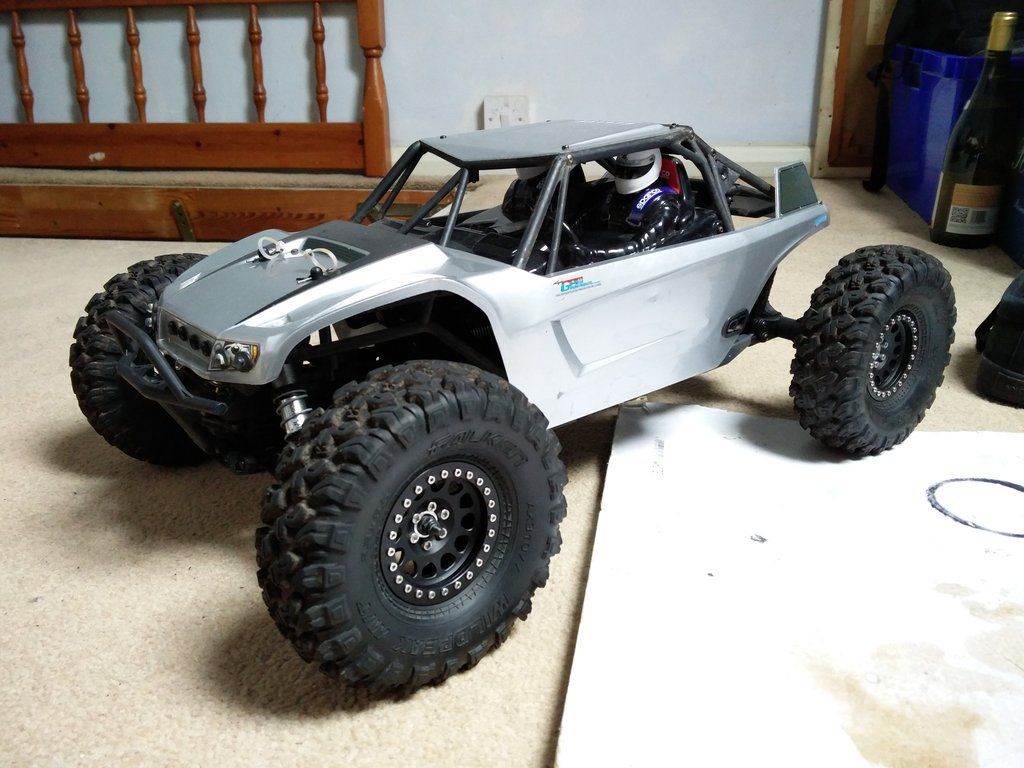
So I traded my Proline Pro-MT for an Axial Yeti kit version. It needed some TLC and this will be a thread about the Yeti and relevant upgrades etc... Firstly I started stripping it all down, cleaning and replacing worn or seized parts. Turns out the slipper pads were installed incorrectly, and the slipper plates had fused with the top shaft, so new top shaft and slipper plates were needed (dremmel to the rescue). Most bearings needed replacing which is fairly normal, the front hinge pins were also quite badly bent, also the front camber links were not equal lengths. I'm still waiting for the top shaft and plates to arrive, and new o-rings to try and build leak free axial shocks (don't laugh). The front diff was filled with fresh 7k oil, greased and put back in, the rear was cleaned, shimmed and put back in. I have shimmed away play in the pinion gear so it cannot move forwards or backwards which helps them rotate better and not change mesh under acceleration. Electrics wise it'll be running a Hobbywing Max10 SCT ESC, Hobbywing 3660 4000kv motor, Castle BEC, Hitec 7950th servo, Spekky DX4C Tx. Vanquish bell crank will be fitted with the relevant rack, going to stick with 2s lipo as that's what I currently have, closed cell foam for the wheels (so they don't fold when cornering, or balloon), Robinson Racing Gen3 slipper and spur, SSD Trailing arms, Incision spool and upper rear links and cheap method copy beadlocks. This Yeti will be a basher, not a crawler, as much as I would have liked a sensored setup, I think this sensorless setup will be fine. When I first got it: 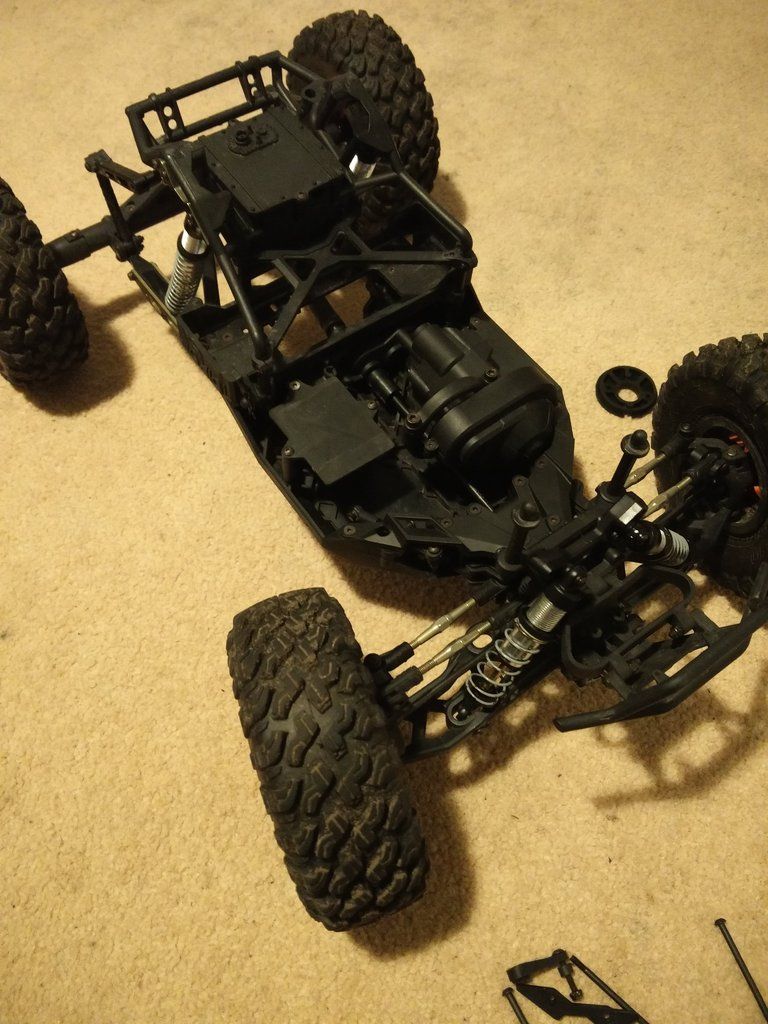 Clean diff (was grey before) 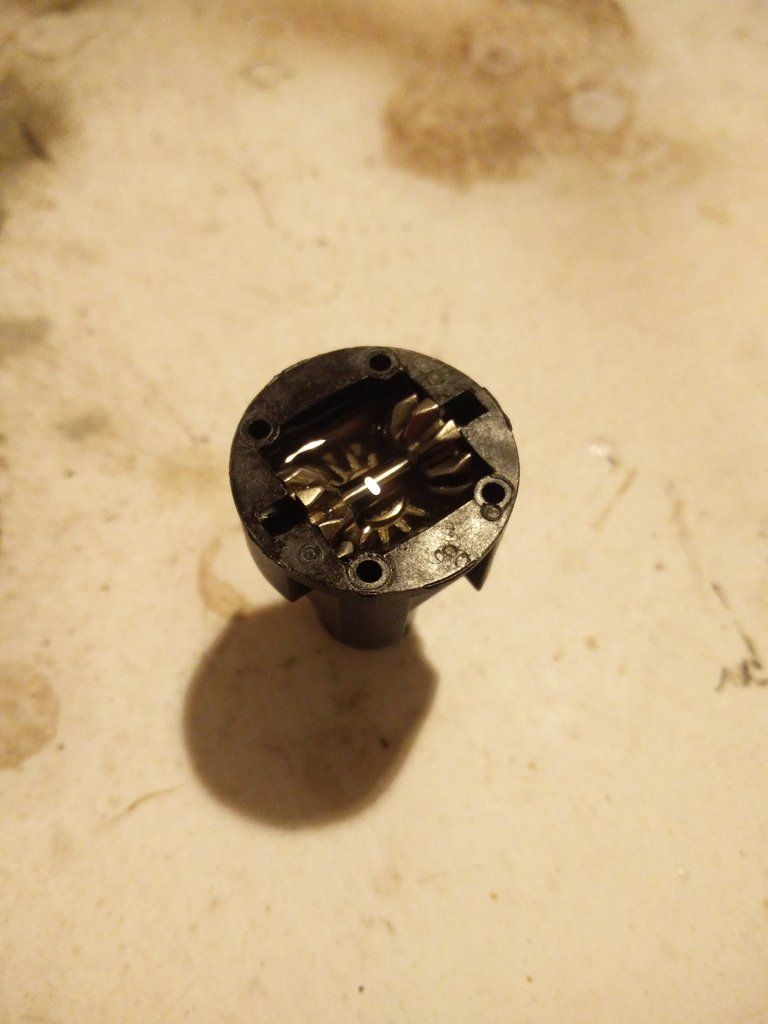 Hitec 7950th servo, Hobbywing Max10 SCT http://i1057.photobucket.com/albums/...psjneppijk.jpg |

|  |
| Sponsored Links | |
| | |
|
03-05-2017, 12:49 PM
| #2 |
| Pebble Pounder Join Date: Jan 2016 Location: Worthing, England
Posts: 157
|
Now just waiting on o-rings for the shocks and it'll be a runner Lightly greased transfer box, the main gearbox looks the same, as do the diffs (white marine grease)  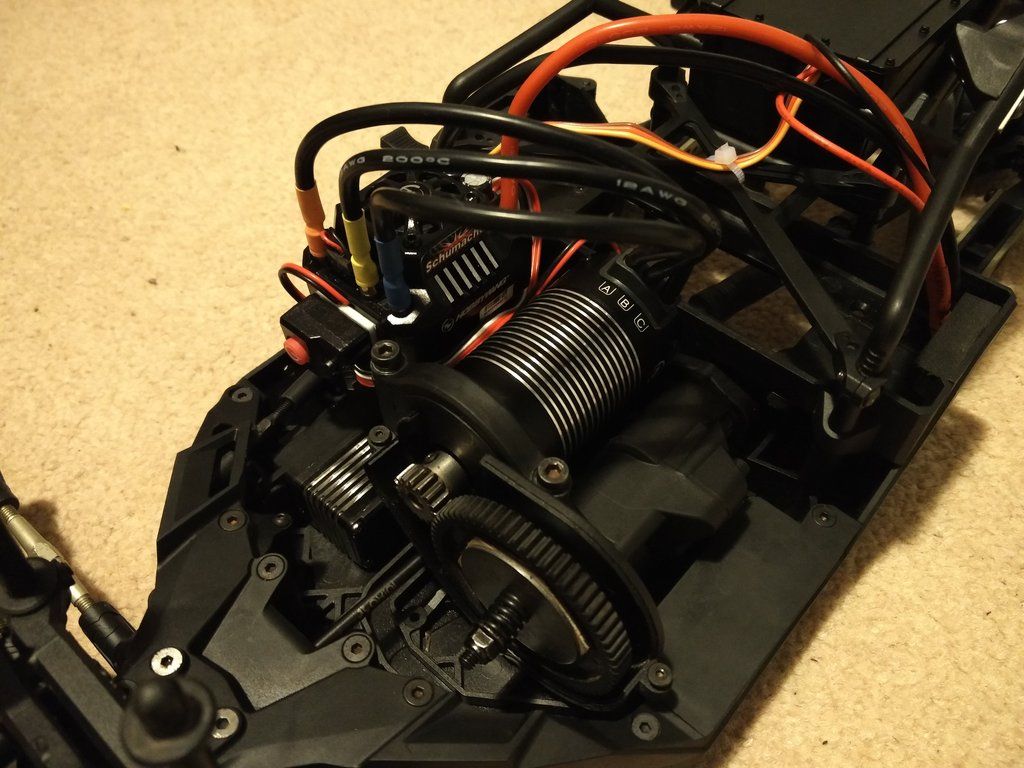 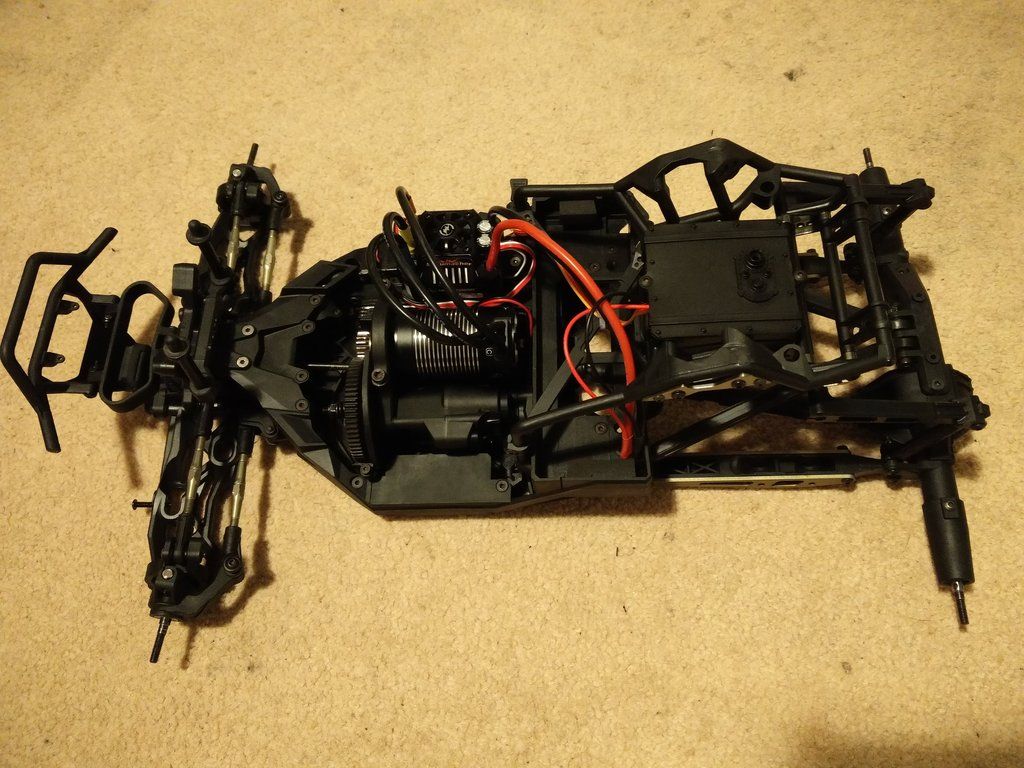 |
|
| |
|
03-05-2017, 12:50 PM
| #3 |
| Pebble Pounder Join Date: Jan 2016 Location: Worthing, England
Posts: 157
|
Got it finished today, used 3 HPI o-rings in each shock (o-ring replacing the spacer), all built with green slime, 30wt rear, 40wt front. Gave it some negative camber, and a little toe out. 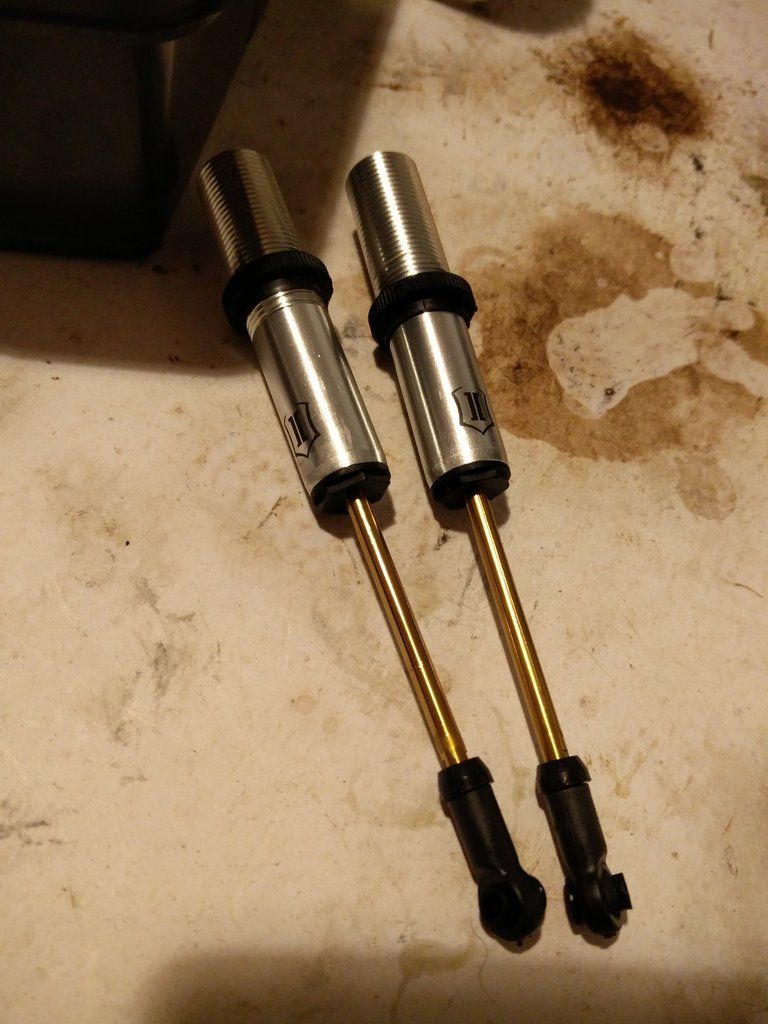 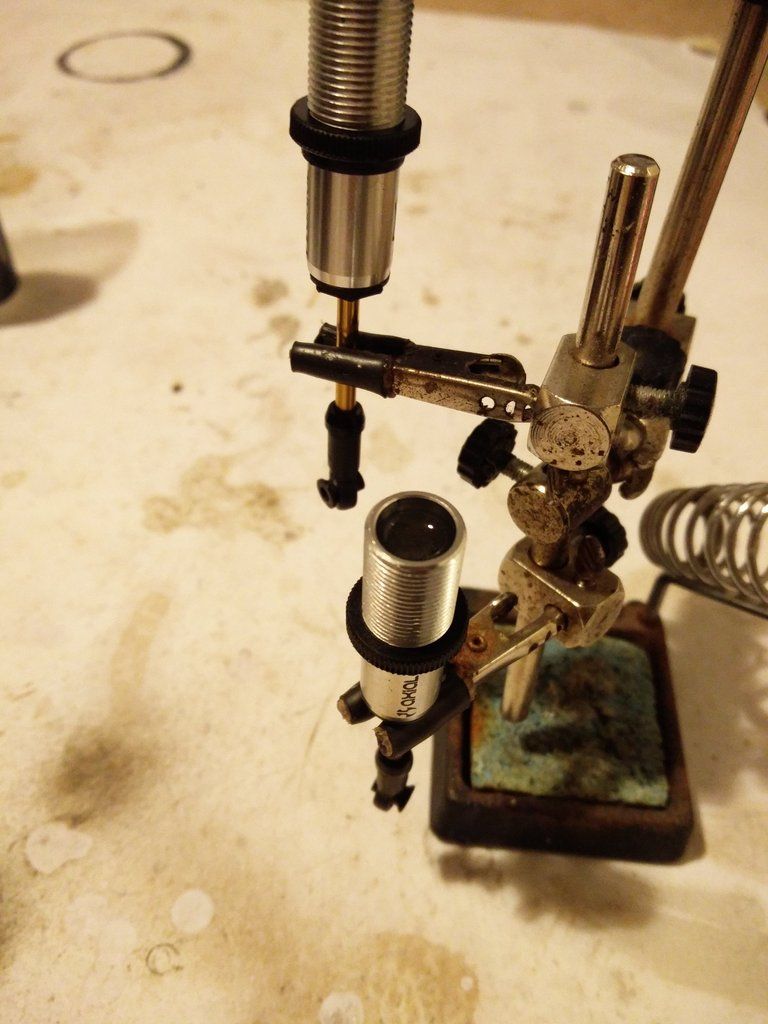 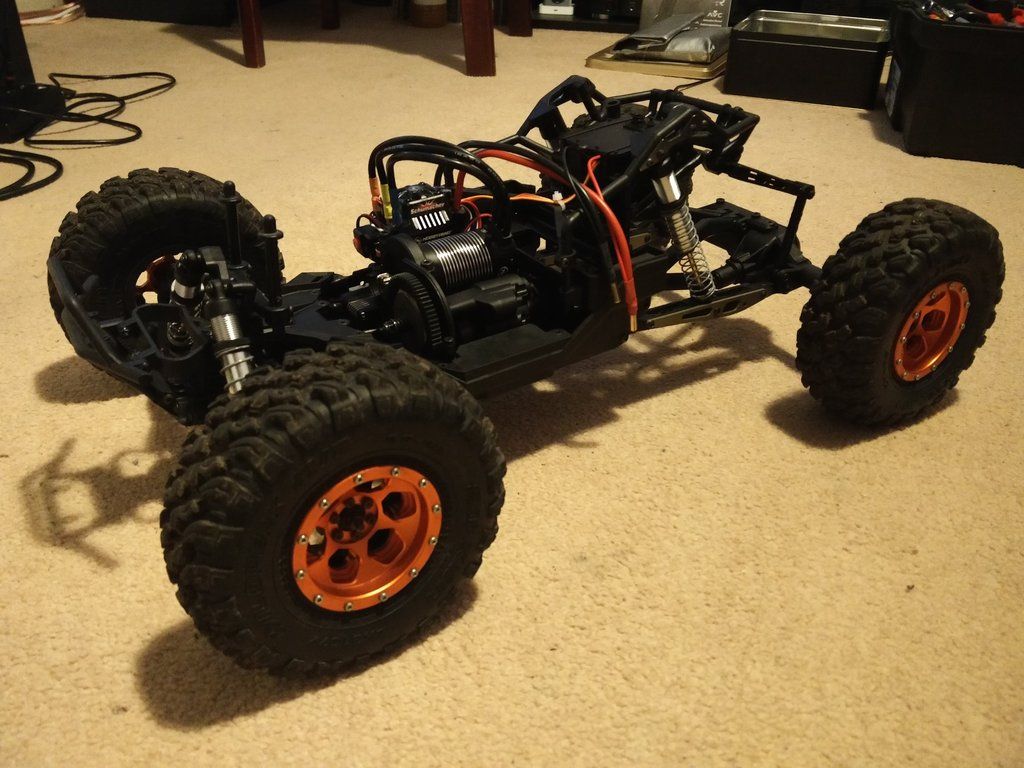 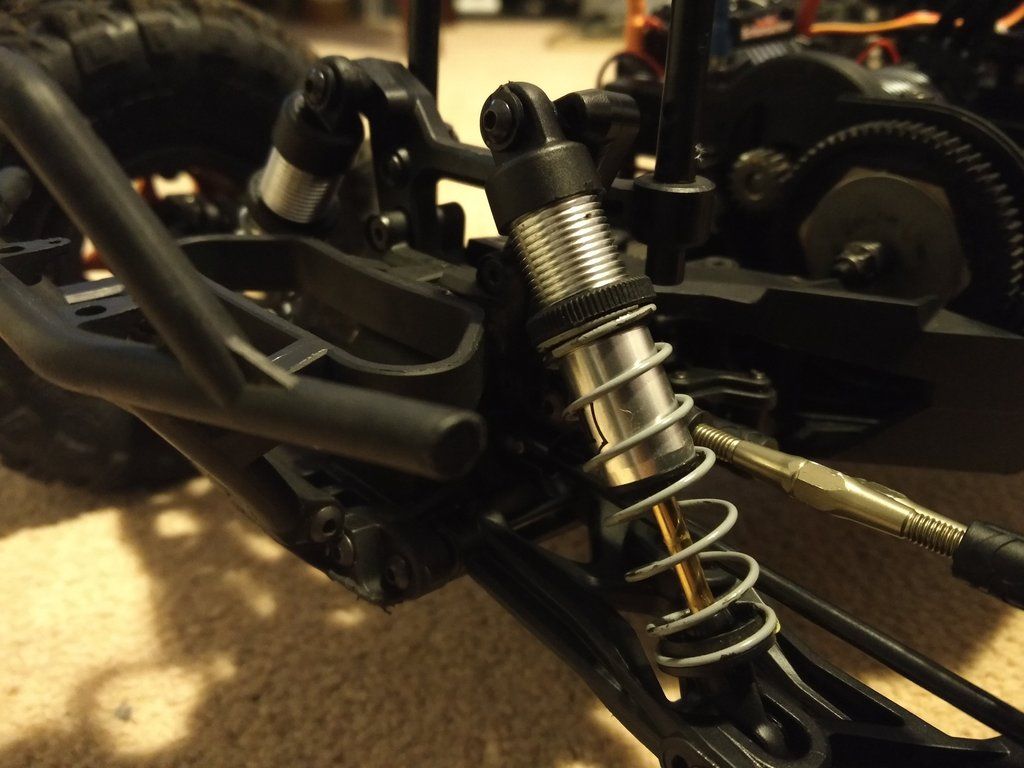  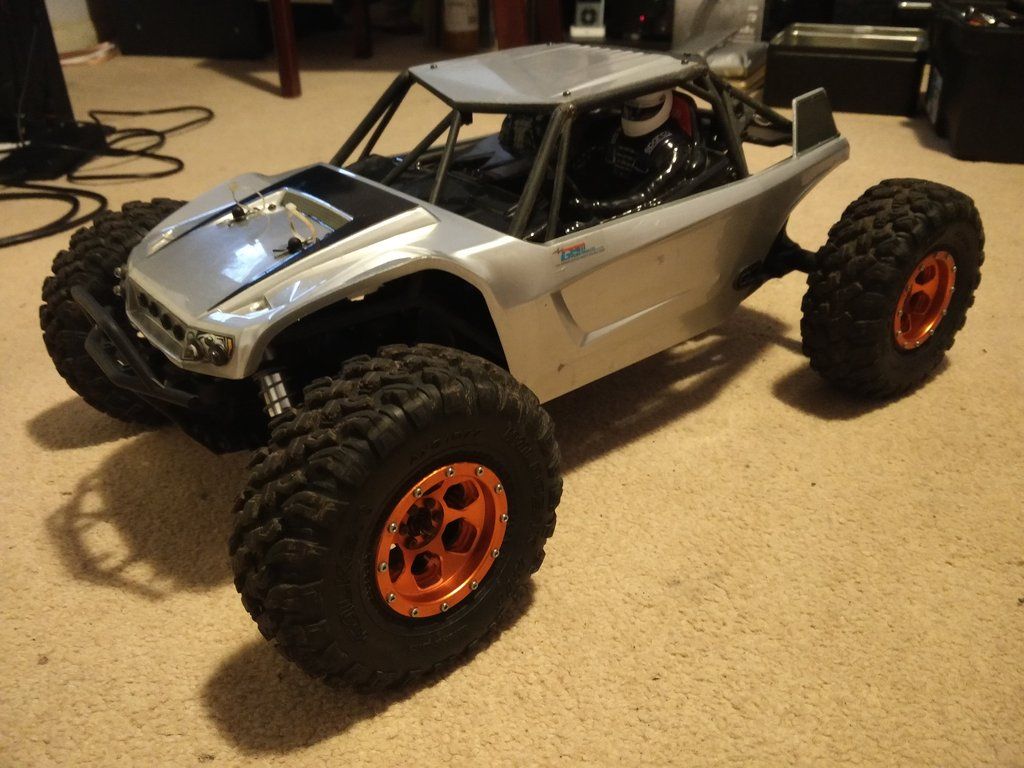 |
|
| |
|
03-05-2017, 12:52 PM
| #4 |
| Pebble Pounder Join Date: Jan 2016 Location: Worthing, England
Posts: 157
|
Beefy: incision spool and upper arms, VP steering rack (no more sloppy steering), SSD trailing arms, Robinson spur. 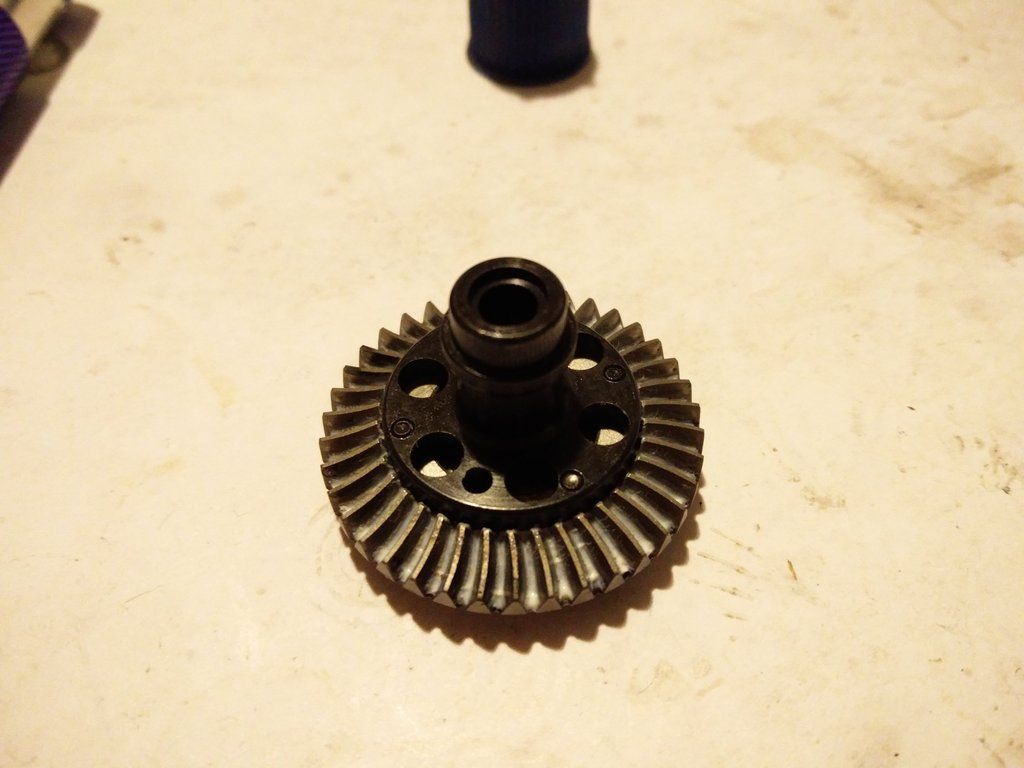  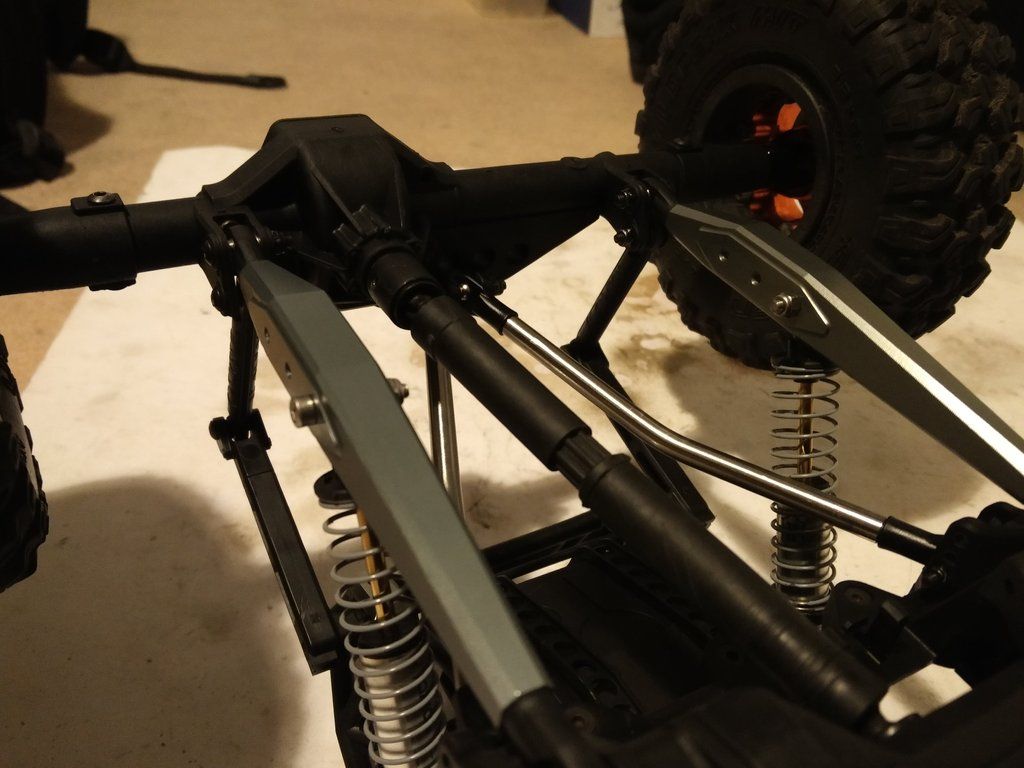 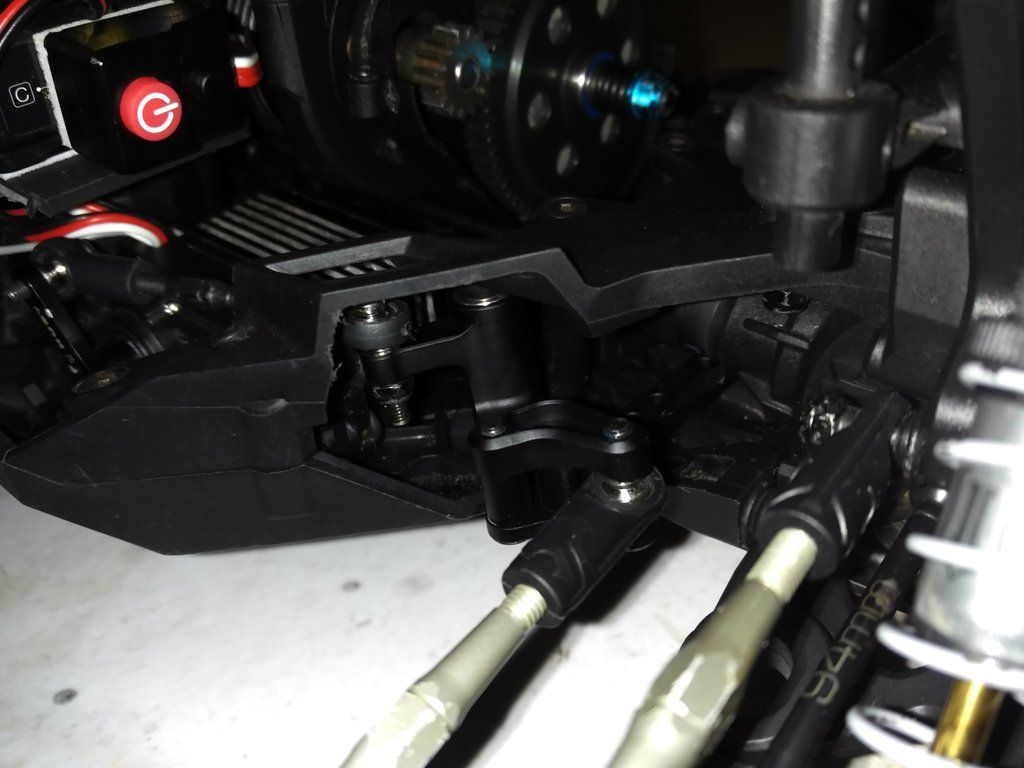 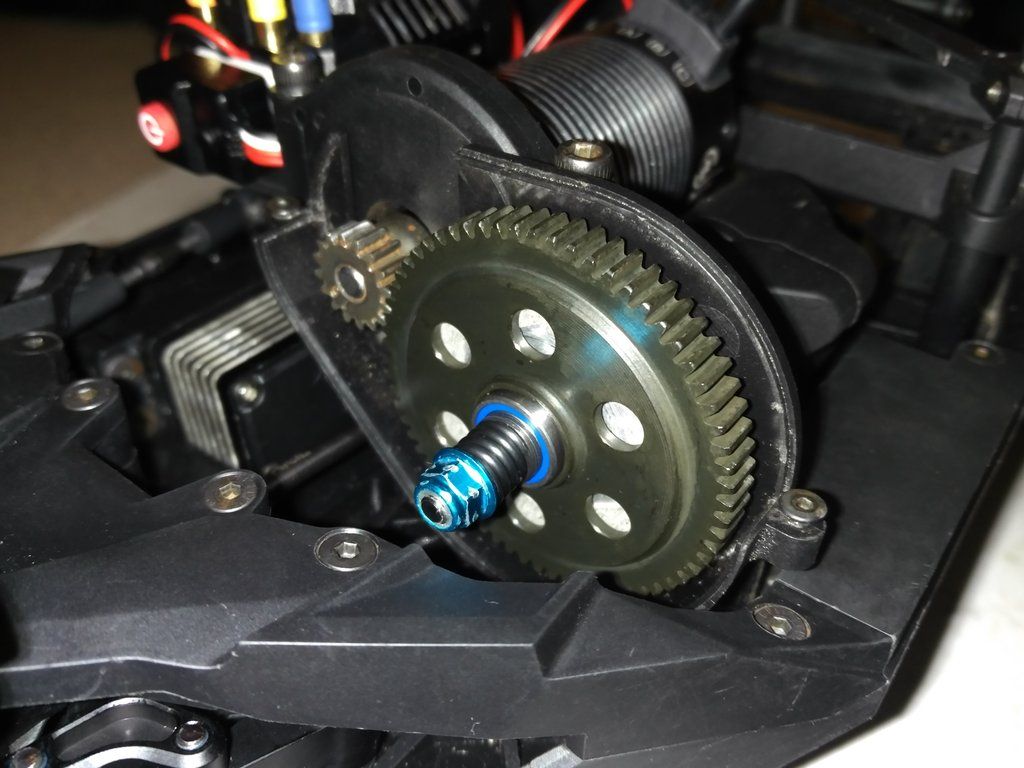 Still waiting for pinions to arrive, and wheels. The plastic motor mount doesn't allow as fine adjustment of the mesh as metal ones do, so that's on the list to get, the plastic one also flexes quite a bit. |
|
| |
|
03-05-2017, 12:53 PM
| #5 |
| Pebble Pounder Join Date: Jan 2016 Location: Worthing, England
Posts: 157
|  Vanquish method chinese copy wheels fitted, accidentally ordered the narrow ones, so they were a pain to fit but look good. If I want to used the closed cell foams I have with other tyres I will need the wider ones. |
|
| |
|
03-05-2017, 12:55 PM
| #6 |
| Pebble Pounder Join Date: Jan 2016 Location: Worthing, England
Posts: 157
|
Well it was bound to happen, on it's maiden voyage it was destined to break. Highlighted weak parts at least, and also I had spares to repair it sitting in my spares box. This thing is awesome though. Kind of what I was looking for, relatively fast but can get up fairly difficult inclines and just flies over rough ground. Also it broke from doing a small jump, nose diving and cartwheeling... not a surprise really. Had to tighten the slipper clutch down too as it was slipping quite a bit. Bits you cannot see in the photos: Geared up to 17/64, VP bearing holders in the rear axle, and VP axle shafts.  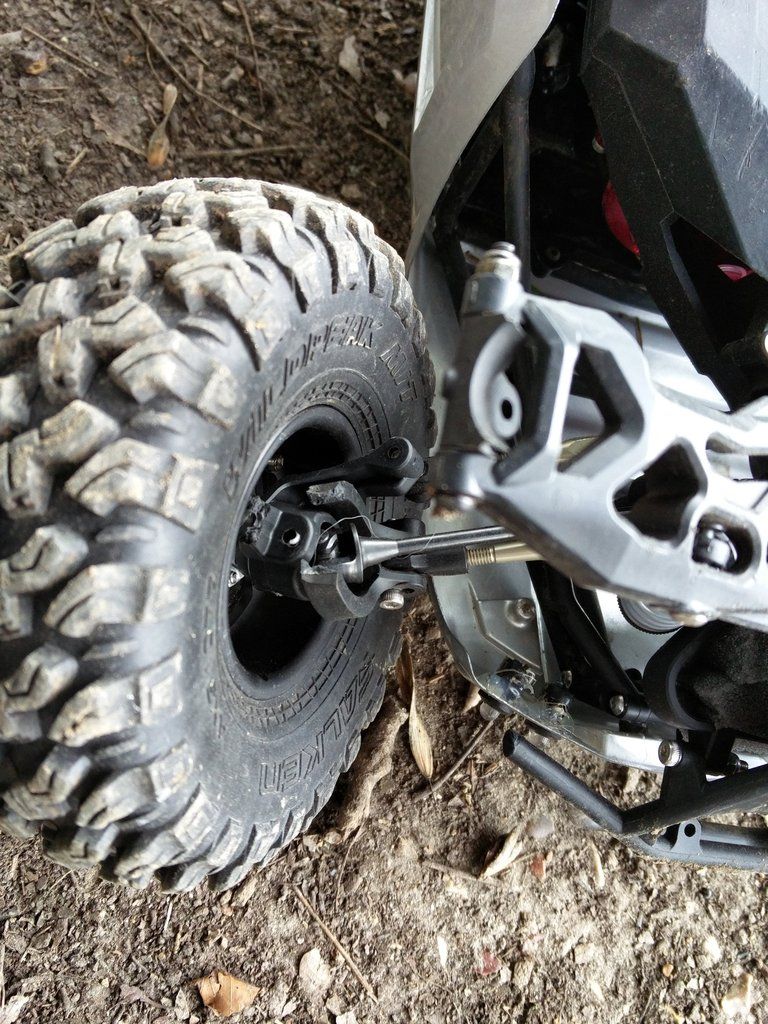  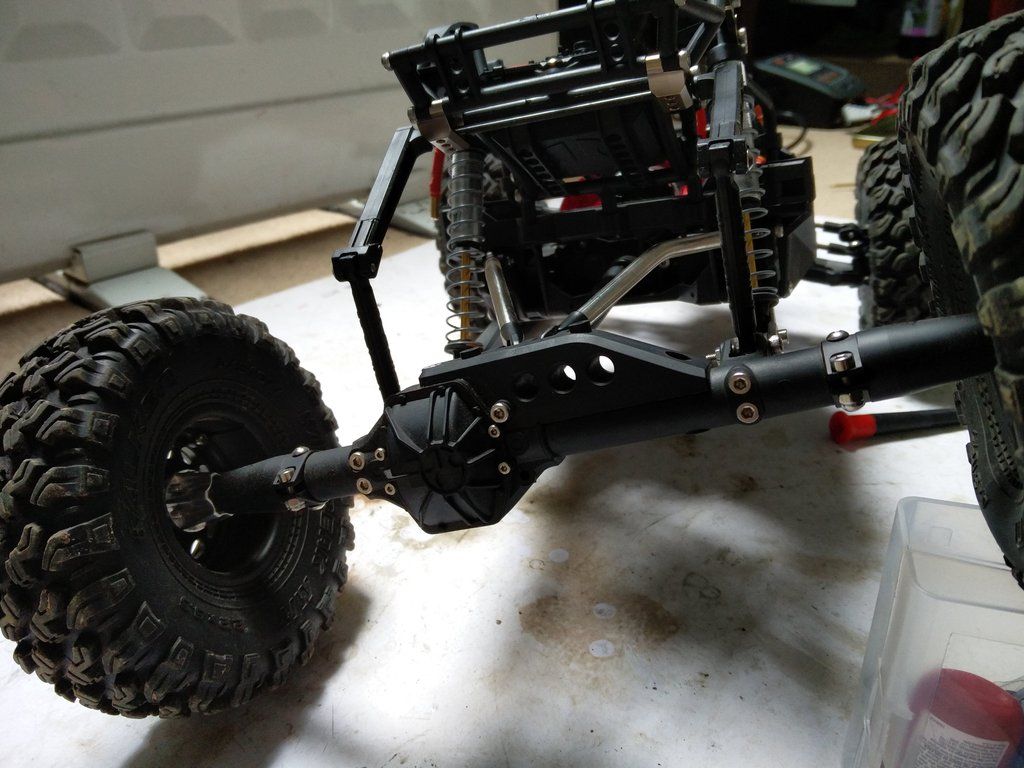 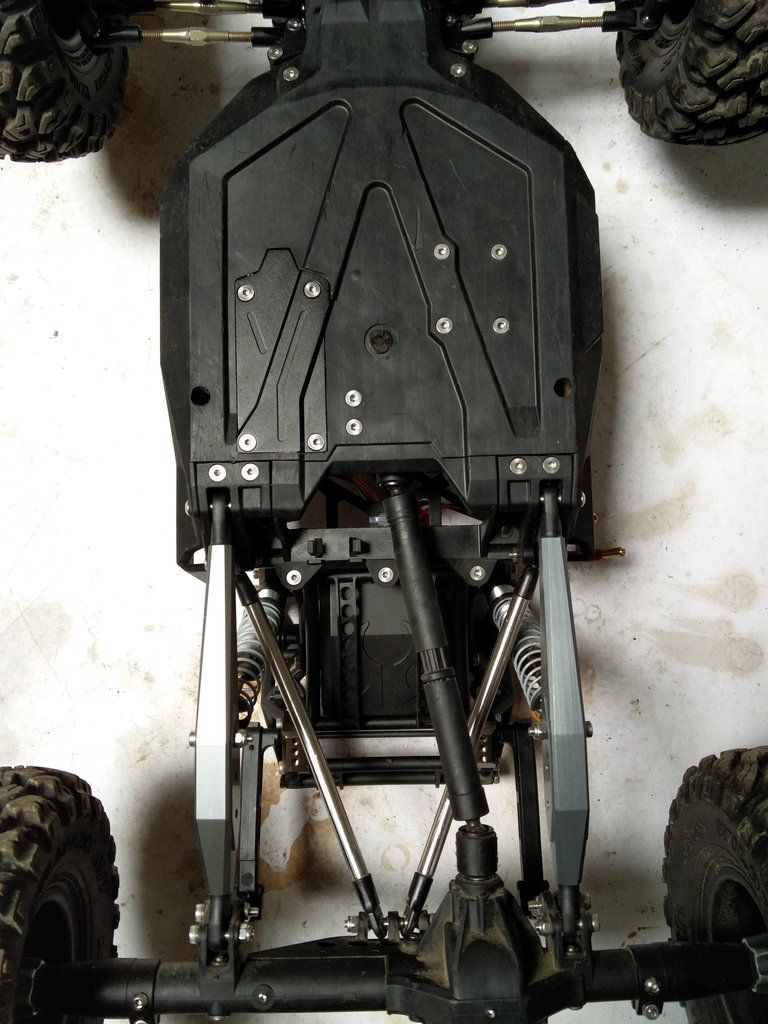 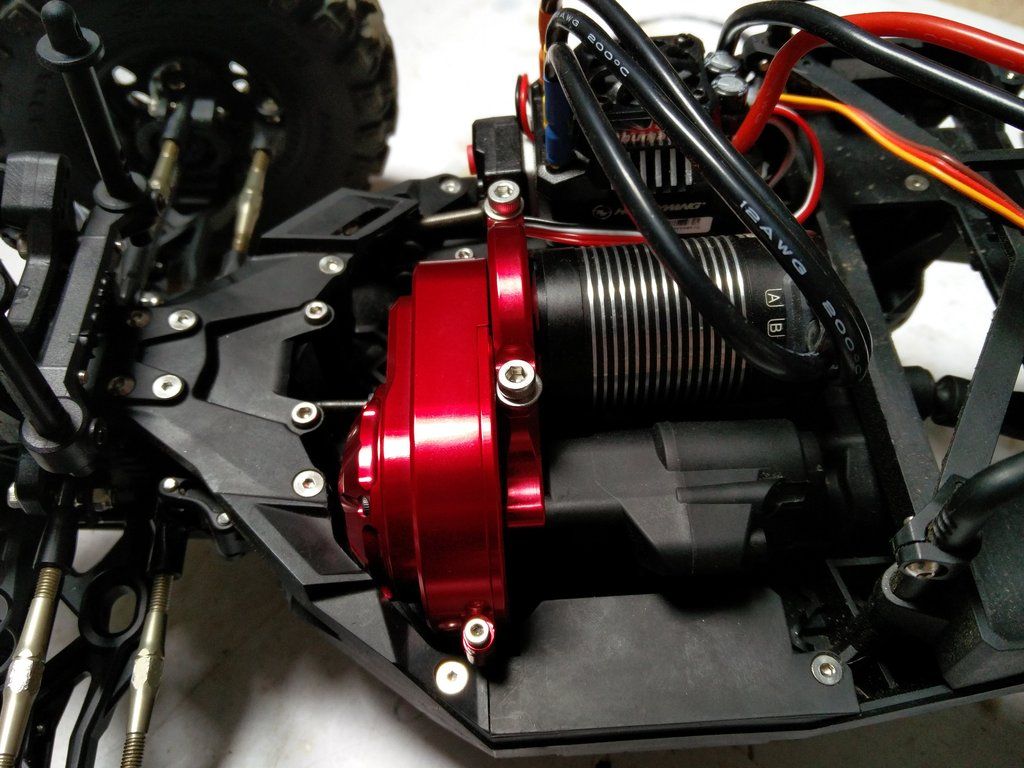 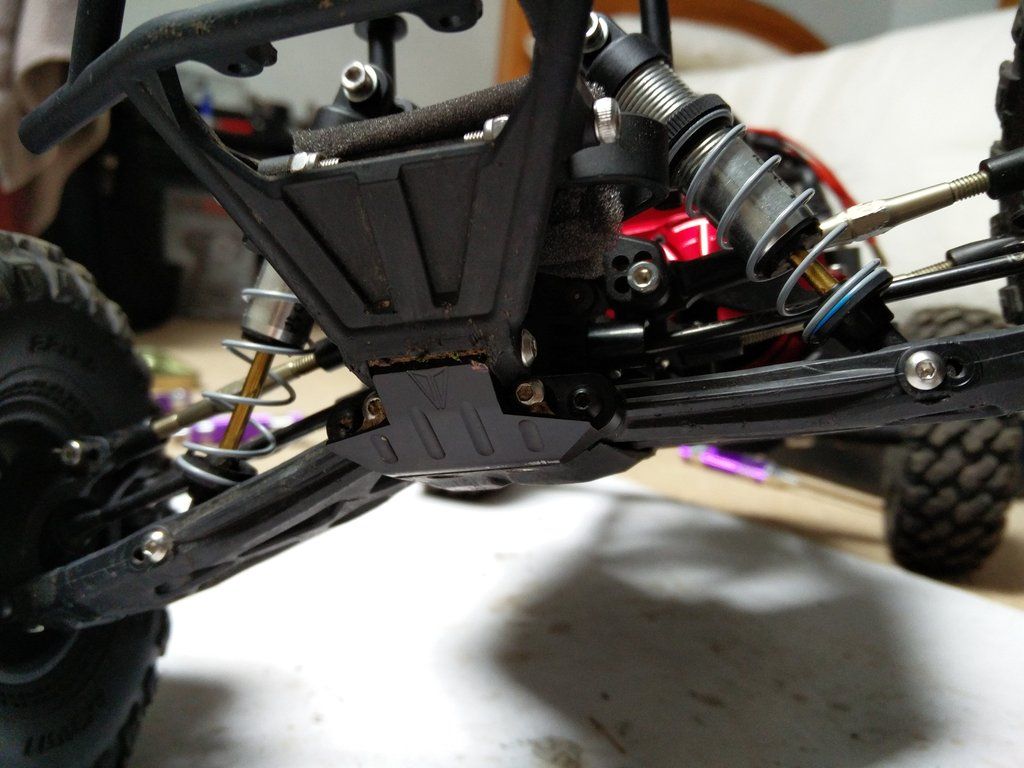 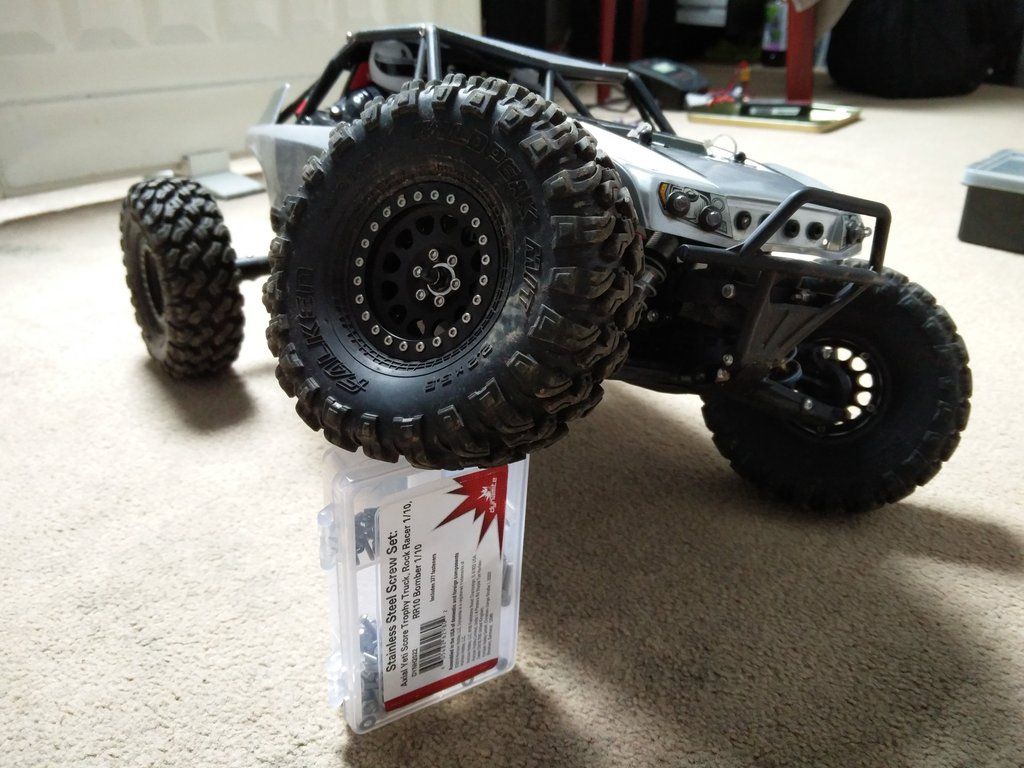 |
|
| |
|
03-05-2017, 12:57 PM
| #7 |
| Pebble Pounder Join Date: Jan 2016 Location: Worthing, England
Posts: 157
|
Took it out for 2 packs with no breakages yesterday, 4000kv on 2s, geared 17/64 is the sweet spot, doesn't get hot and runs plenty fast. Again I am not running sensored, not really looking to crawl this.
|
|
| |
|
03-05-2017, 02:06 PM
| #8 |
| Pebble Pounder Join Date: Jan 2017 Location: Kalispell
Posts: 106
|
I have a question. To shim the pinion, can I use a washer that only contacts the inside of the bearing, like where the pinion contacts the bearing? Anymore information you can give on that procedure? I have my rear axle apart and noticed quite a bit of play, and that can not be good for longevity with the mesh always changing. Also, were the orange rims the GPM outers that fit the kit wheels? |
|
| |
|
03-06-2017, 01:47 PM
| #9 | |
| Pebble Pounder Join Date: Jan 2016 Location: Worthing, England
Posts: 157
| Quote:
On the front I found no shim was needed, but on the rear I used 1 shim. Then once the inner part is shimmed, install shims between the driveshaft and the bearing until it is tight when you screw in the set screw. This then means the pinion gear cannot move in and out. It make take a couple of shims to get right, again trial and error. This in theory will help prevent excessive wear due to the pinion gear being held at a constant distance from the ring gear. | |
|
| |
|
03-08-2017, 03:02 PM
| #10 |
| Pebble Pounder Join Date: Jan 2016 Location: Worthing, England
Posts: 157
|
Much better, proline closed cell inserts with Flat Iron XL tyres, hopefully they won't fold on every corner like the stock ones: 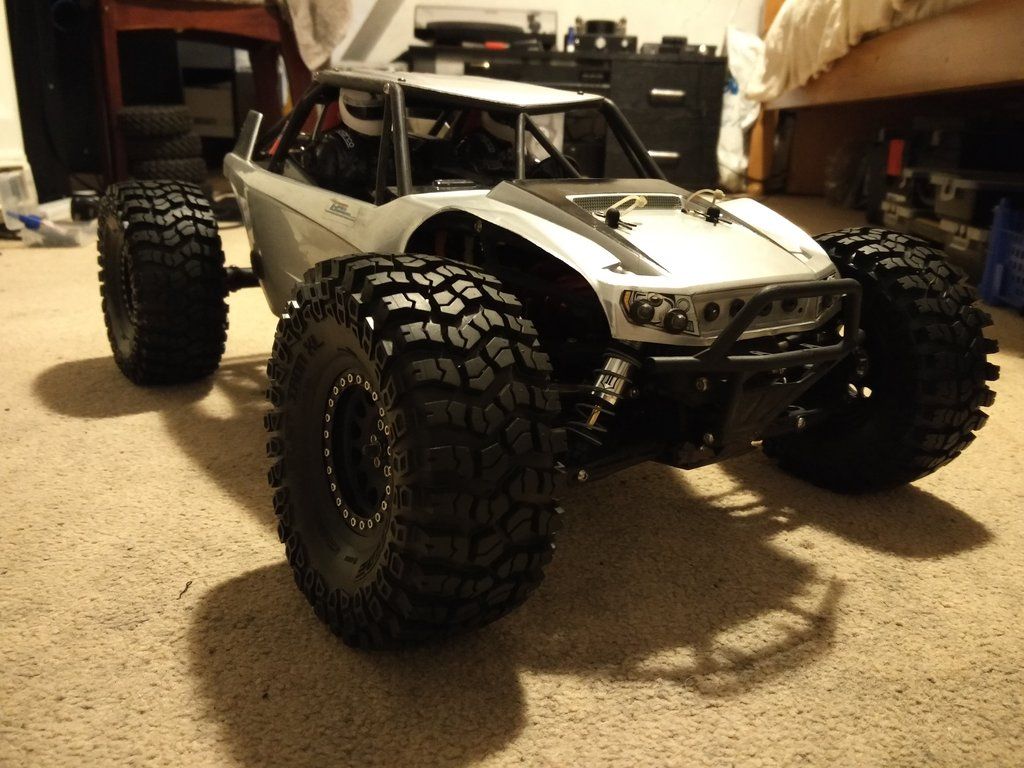 |
|
| |
|
03-08-2017, 05:34 PM
| #11 |
| Rock Crawler Join Date: Mar 2016 Location: HB
Posts: 946
|
The closed cell foams will get rid of that for sure. It's one of the best changes you can make. The stock foams are junk.
|
|
| |
|
03-09-2017, 12:23 AM
| #12 |
| Pebble Pounder Join Date: Jan 2016 Location: Worthing, England
Posts: 157
|
Better picture of the wheel/tyre combo 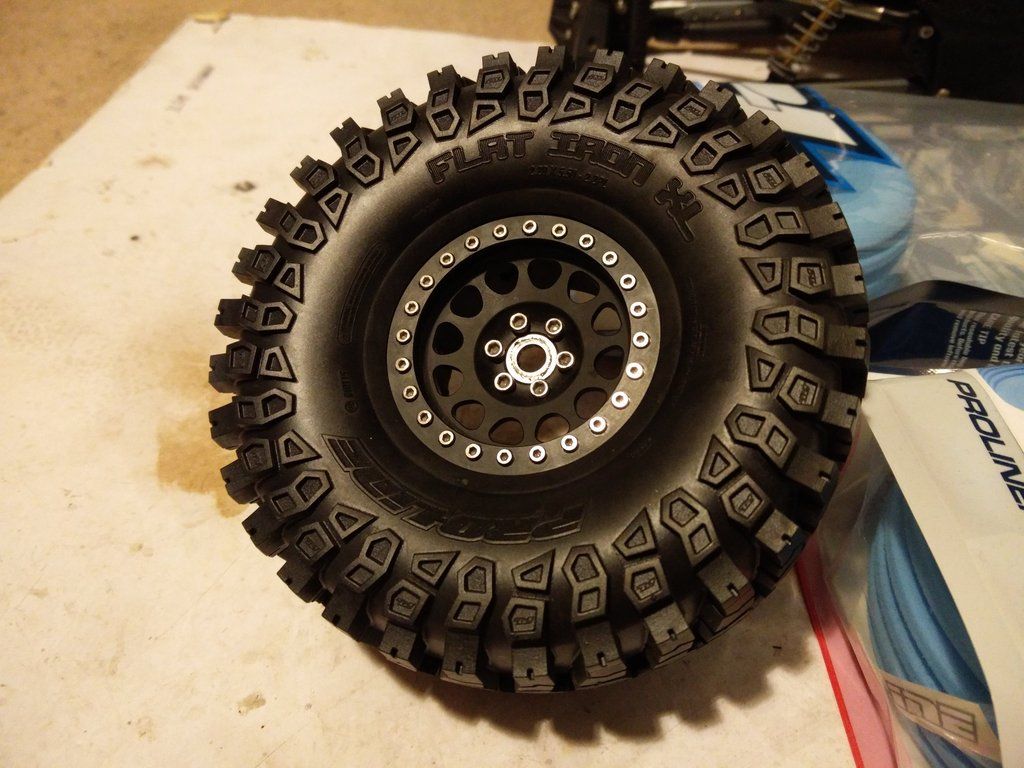 |
|
| |
|
03-11-2017, 10:51 AM
| #13 |
| Pebble Pounder Join Date: Jan 2016 Location: Worthing, England
Posts: 157
|
a few more packs through this today, holding up well. 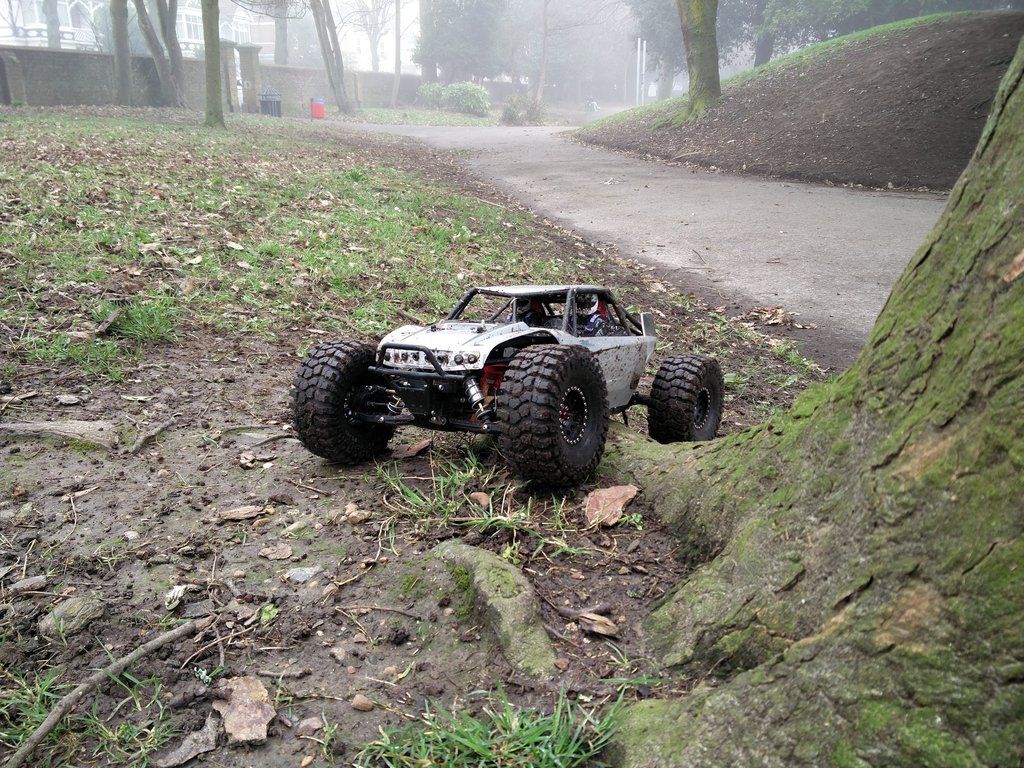 |
|
| |
|
03-11-2017, 11:26 AM
| #14 |
| Quarry Creeper Join Date: Aug 2008 Location: Sweden
Posts: 214
|
Yeti the aftermarket is Skickat från min iPhone med Tapatalk |
|
| |
|
03-11-2017, 05:39 PM
| #15 |
| Pebble Pounder Join Date: Jan 2016 Location: Worthing, England
Posts: 157
|
Forgot to mention, managed to bend one of the stock aluminium steering links, so I replaced them with Losi turnbuckles, still using Traxxas revo rod ends: Losi: Turnbuckles 4mmx60mm w/Ends:8B: Losi (LOSA6542) |
|
| |
|
03-11-2017, 11:22 PM
| #16 |
| Pebble Pounder Join Date: Jan 2016 Location: Worthing, England
Posts: 157
|
Please excuse the terrible quality (and questionable driving) but here is some footage; https://youtu.be/9K7aWpBc63M |
|
| |
|
03-18-2017, 11:43 AM
| #17 |
| Pebble Pounder Join Date: Jan 2016 Location: Worthing, England
Posts: 157
|
So, GPM bulkhead has been de-anodized (it was bright green), the bearings don't fit as snugly as I would like but I may be able to thicken the holders with lacquer or something like that, any ideas? Stainless axle tubes fitted, but due to having to grind down the collars on my axle shafts (circled in red), there was a lot of inwards movement, so what I have had to do for now until I sort some spacers out is to use a few bearings where the arrow is pointing, to keep the axle shaft from moving inwards and fowling the lockouts. I plan to use just stainless spacers in the future. 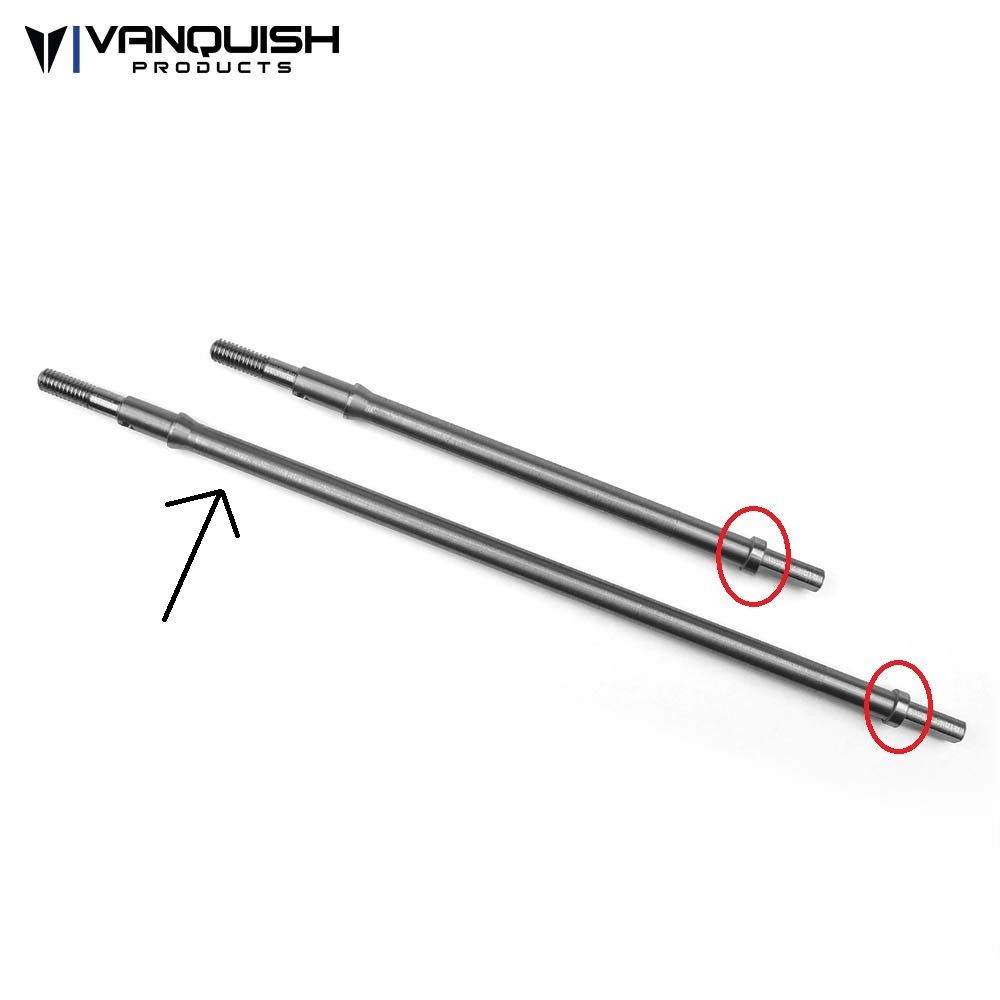 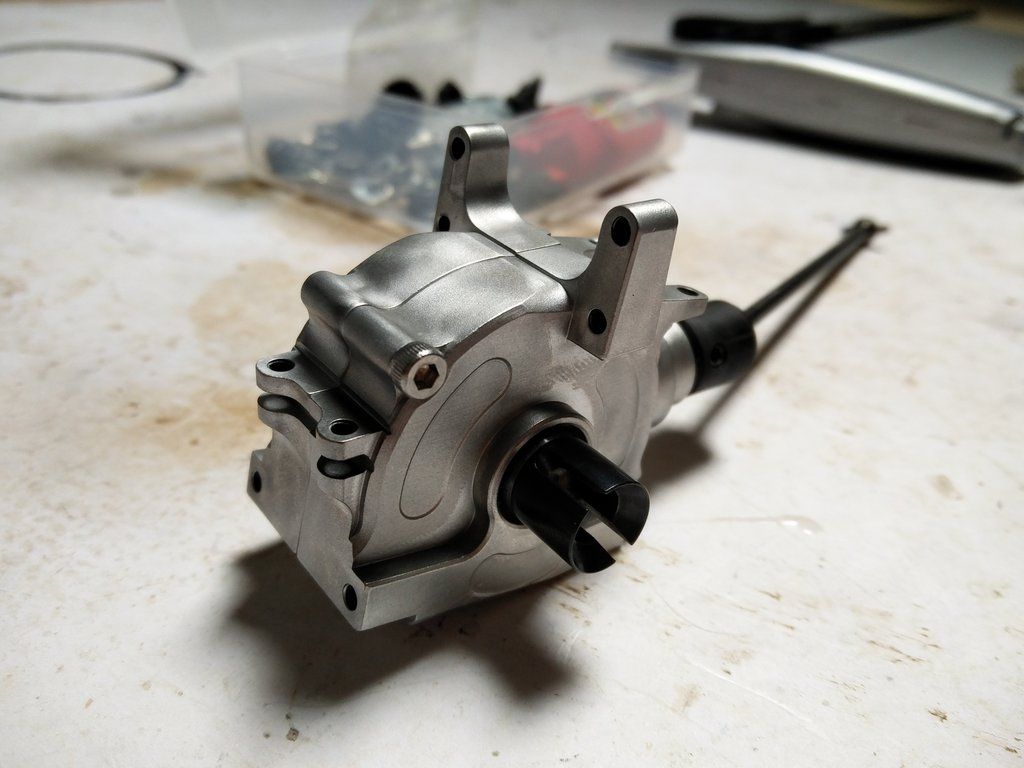 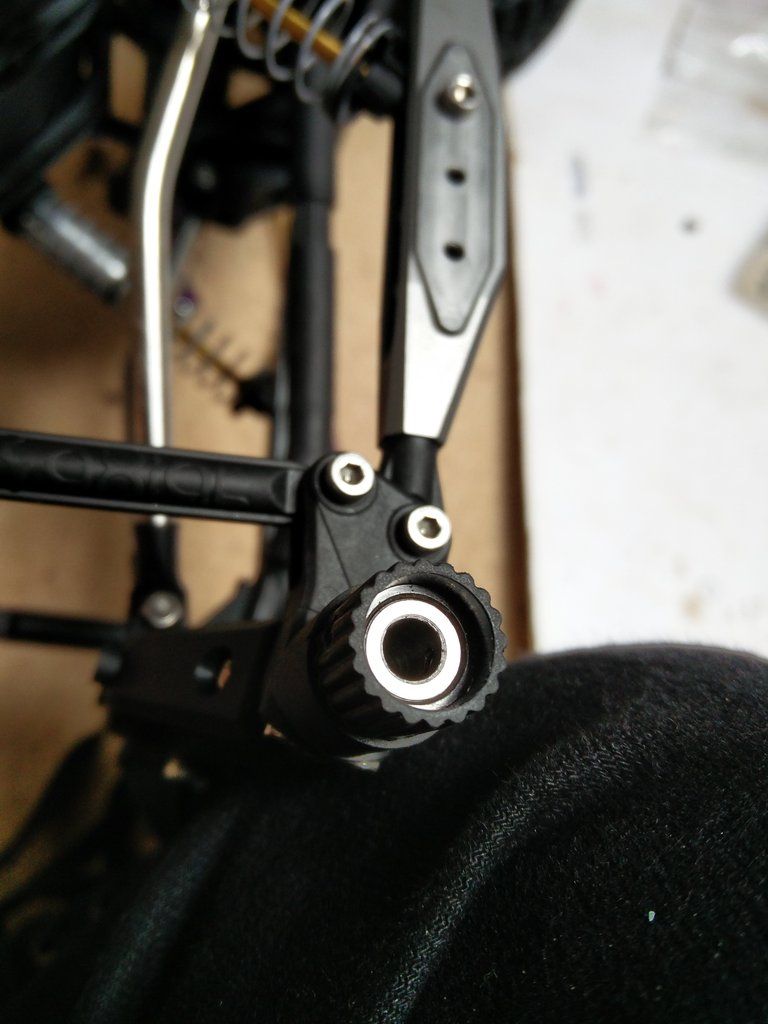 |
|
| |
|
03-18-2017, 11:54 AM
| #18 |
| Pebble Pounder Join Date: Jan 2017 Location: Kalispell
Posts: 106
|
Good idea with the bearings to limit the axle shaft movement. I cut some M2 screws and used the threaded part in the spool/locker to stop the axles moving in.
|
|
| |
|
03-19-2017, 10:49 AM
| #19 |
| Pebble Pounder Join Date: Jan 2016 Location: Worthing, England
Posts: 157
|
Not having much luck with the SSD trailing arms, I broke a rod end a while back, easy to replace as they give you an extra 2, then this happened today: 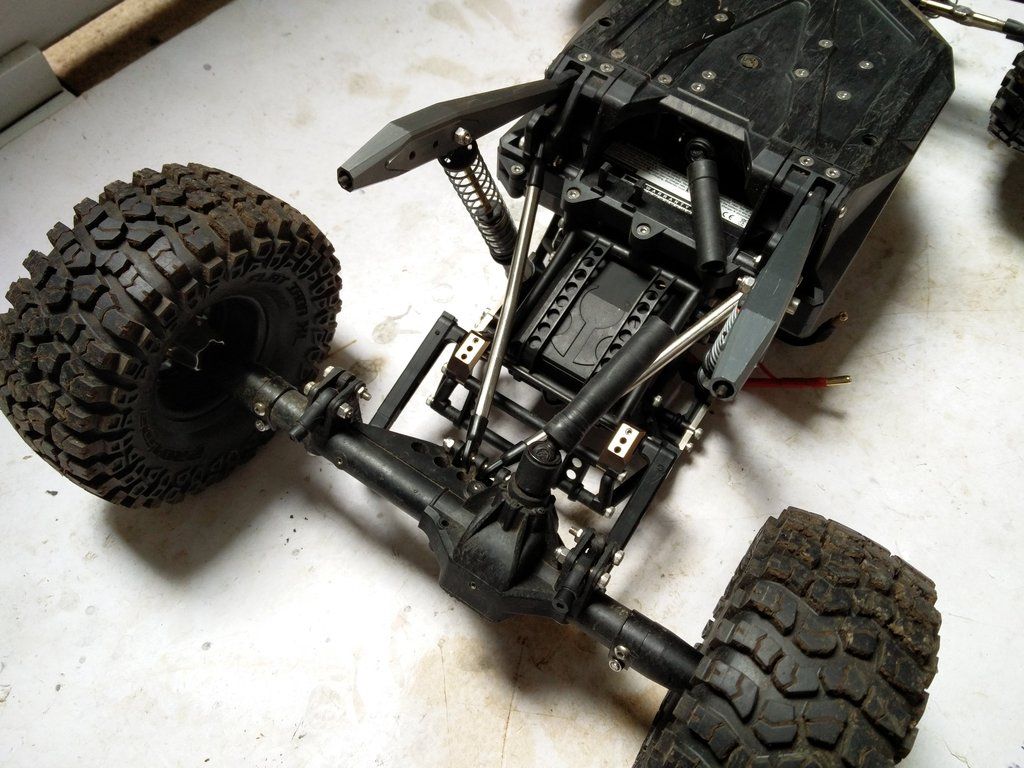 Yeti posing before it broke: 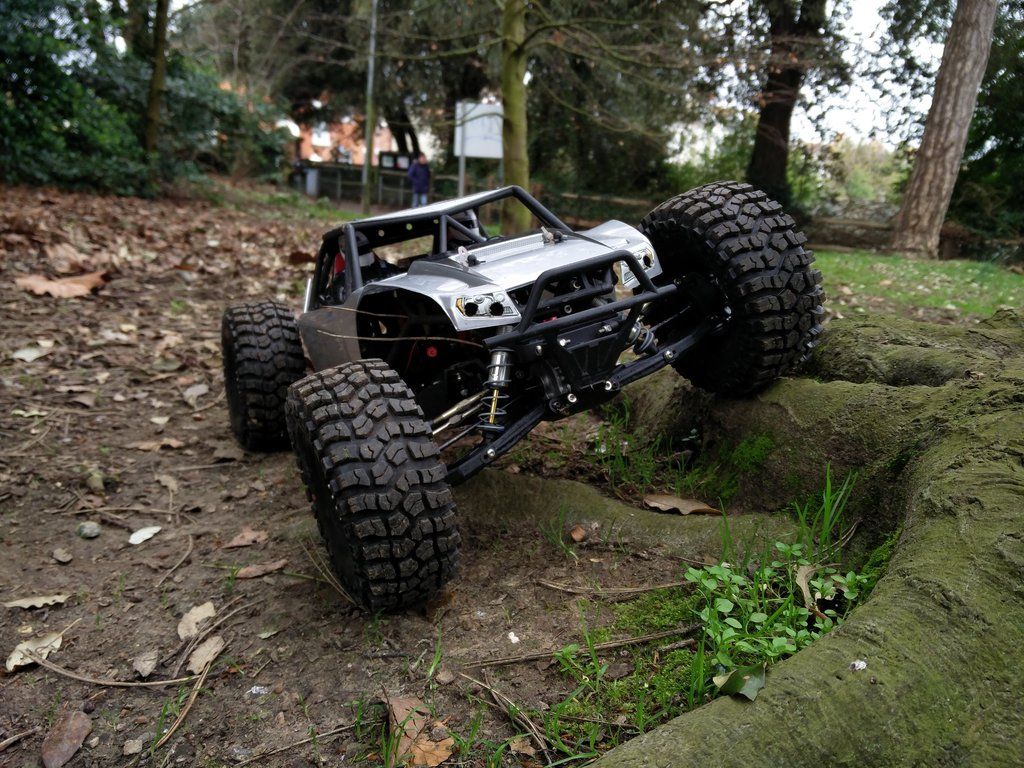 |
|
| |
|
03-22-2017, 05:34 AM
| #20 |
| Rock Crawler Join Date: Jan 2017 Location: DownUnner
Posts: 521
|
I just picked up a HW MAX10 SCT 120 and first impressions are excellent. Keeps cool on 3S with the stock motor in mild 22C weather. Didn't matter if it was going really slow or being thrashed flat out or thrashed fairly slowly (loads of wheel spin). No doubt I'll find out what it's like trailing very soon in 30C temps but I'm very optimistic it'll be great. Thanks for posting about it! |
|
| |
|
| Tags |
| hobbywing, yeti, yeti 1/10 kit |
 OStewart's Yeti Build (UK) - Similar Threads
 | ||||
| Thread | Thread Starter | Forum | Replies | Last Post |
| OStewart's British Bomber | ostewart | Axial RR10 Bomber | 87 | 11-01-2018 03:40 AM |
| Life of one YETI - Tom Frajer's Axial Yeti build log | TomFrajer | Axial Yeti | 320 | 05-22-2017 09:01 PM |
| My yeti build | PileDriver | Axial Yeti | 23 | 01-22-2017 05:56 AM |
| Yet Another Yeti Build | Sh0rtBus | Axial Yeti | 120 | 11-03-2015 09:55 AM |
| Just got a used Yeti build | Smonkman | Axial Yeti | 7 | 11-01-2015 06:09 AM |
| |


 Linear Mode


