| |
| |||||||
 |
| | LinkBack | Thread Tools | Display Modes |
 10-03-2008, 01:09 AM
| #1 |
| Quarry Creeper Join Date: Sep 2008 Location: Petaluma
Posts: 282
|
Hi All in the Nor Cal (Marin/Sonoma) area.  I'm building a unique scale 1.9 F350 (unlike any I've seen in pics this year) which I hope to have done by early December 08. Looking for a bunch of other scale'ers for some driving fun when it's finished but just can't seem to hook up with anyone. The sport/hobby doesn't seem to have taken off just yet in this area or it might just be me not finding the right group. Was thinking of starting or joining a club or group. Lemme know if your interested. Now - if someone could help me out on how to post pics... |

|  |
| Sponsored Links | |
| | |
|
10-03-2008, 07:51 AM
| #2 |
| RCC Addict Join Date: Aug 2007 Location: Rohnert Park
Posts: 1,093
|
Dave: Stop bye the crawler comp at JPH on the 11th. Ask for Erik, he's our local "Scaler Guy" and on top of everything scaler in our area. Crawling is big time in our area, you just gotta stop bye the comp and check it out. As for pics, make sure they are the right file size. Most problems stem from too big a file. Jake |
|
| |
|
10-03-2008, 07:55 AM
| #3 |
| RCC Addict Join Date: Aug 2007 Location: Rohnert Park
Posts: 1,093
|
Oh yeah ... scan down below this thread, there's another "Sonoma County" thread going. Petaluma is included! Hope to see you at the comp! |
|
| |
|
10-03-2008, 11:11 AM
| #4 |
| Quarry Creeper Join Date: Sep 2008 Location: Petaluma
Posts: 282
|
I might be out of town on the 11th but in case I'm back by then - I'll certainly stop in. I "had" Tim's e-mail address from the last crawler comp but my kids used the paper to paint on and it's gone. He sold me his 2.2 rims at the comp several weeks ago. He's got an f350 custom build - was hoping to contact him and let him know I have recently aquired a spare set of windshield wipers for his truck he can have. If you see him at the shop - give him my addie (speedproteam@yahoo.com). Thanks! Dave Last edited by FodigoDave; 10-03-2008 at 03:35 PM. |
|
| |
|
10-04-2008, 01:33 PM
| #5 |
| RCC Addict  Join Date: Mar 2007 Location: Penngrove
Posts: 1,809
|
Glad to see some more interest in scalers here in the north bay! I've recently found a couple cool spots in Novato that may be worthy of a scale run. One spot is at the end of Fairway and the other is in Indian Valley behind the COM campus. Both are creek beds so I will need to go back soon with a rig to try them out becasue once it starts raining they will be unpassable. Since you are in Petaluma you can PM if you ever want to come check out my rigs, I have 3 scale trucks and another on the way. I also have a small rock course in my backyard. The best way to post up pics is to get a photobucket account and upload all your pics there. Then all you have to do is copy the links from photobucket and paste them into your posts. Here is a link to a How-To: Posting Pics For Dummies Erik |
|
| |
|
10-13-2008, 10:30 AM
| #6 |
| Quarry Creeper Join Date: Sep 2008 Location: Petaluma
Posts: 282
|
Just got back from a trip and will be getting down to business shortly. Thanks for the photo bucket idea and to Jake too! Sry couldn't make it to the comp - was still in the air waiting for ground clearance to SFO. While I was away- thought of a great idea for the suspension. Will hope to post some pics within the next week. |
|
| |
|
10-13-2008, 11:13 AM
| #7 |
| Quarry Creeper Join Date: Sep 2008 Location: Petaluma
Posts: 282
|
Im trying the photo bucket idea - this is a test and the beginning construction of the roof rack idea. Here's to hoping the IMG works!  |
|
| |
|
10-13-2008, 11:58 AM
| #8 |
| Quarry Creeper Join Date: Sep 2008 Location: Petaluma
Posts: 282
|
Sry - figured out the pic but now to figure out the size. may not be able to resize with the pics already posted in the photo bucket so this might be a long thread when its set and done. Using a screwdriver and a vice- the radius for the turns are is easily made 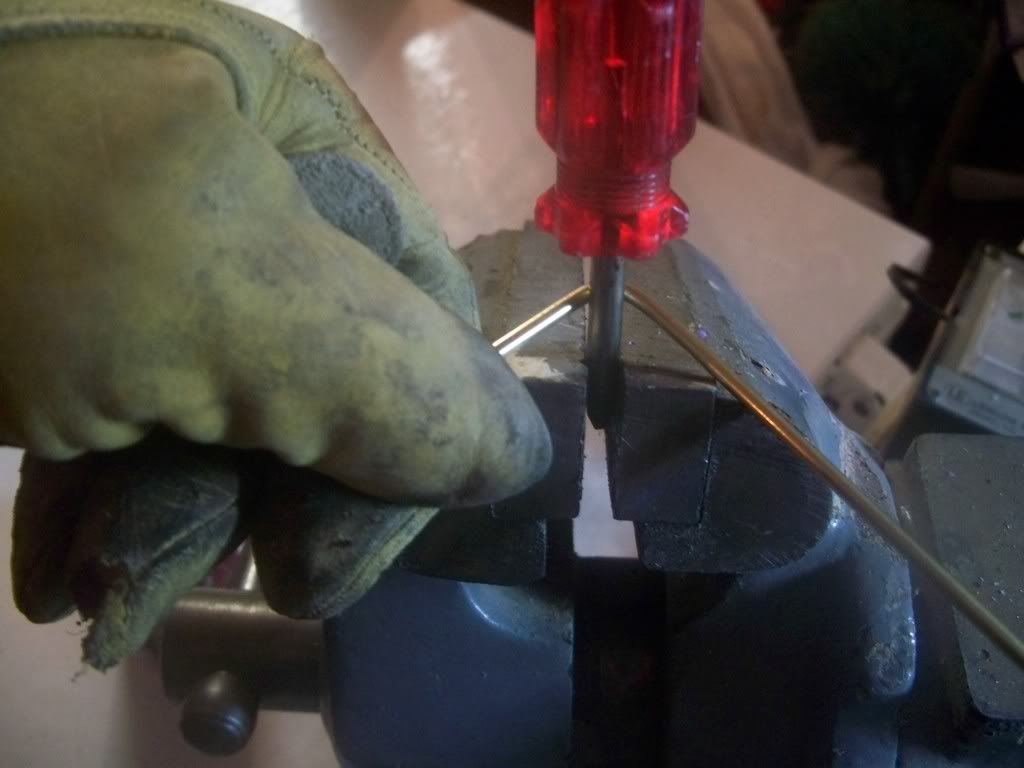 I continued doing this while tracing the roof line one bend at a time until I reached the half way mark. Doing it this way I was able to get the right bends and gave it a custom look by adding a little extra bend to accent the roof line. 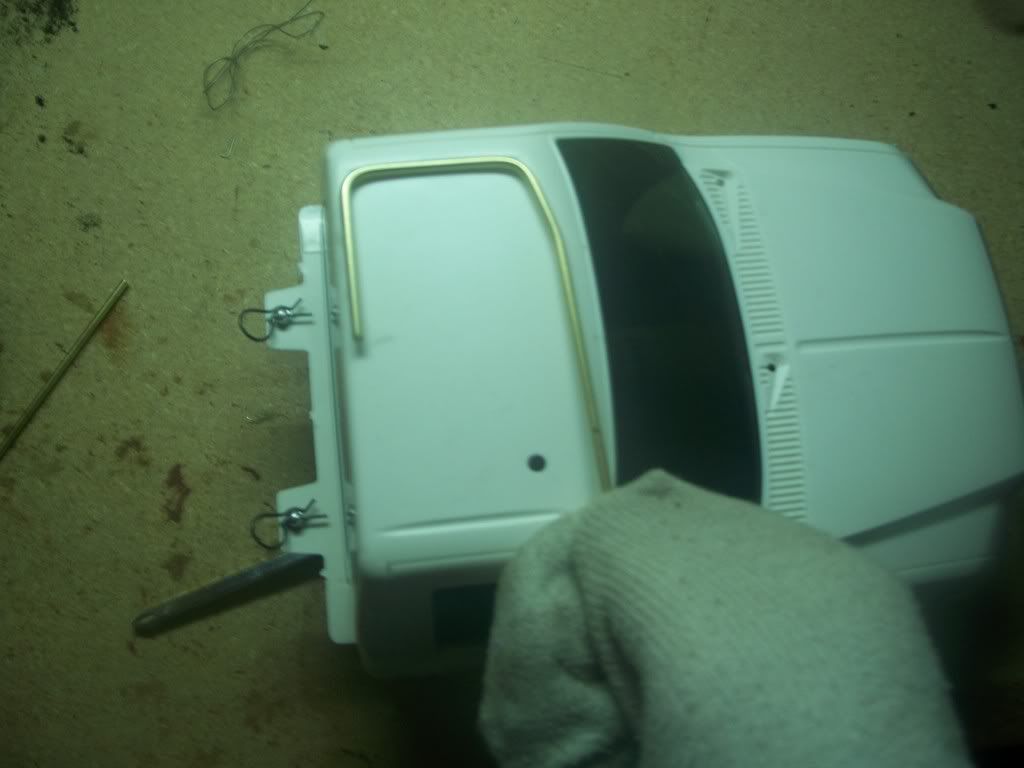 With 50% done - it was a matter of duplicating it on the other side. I just outlined the already made bend tube and matched it to the other side by flipping the metal around. 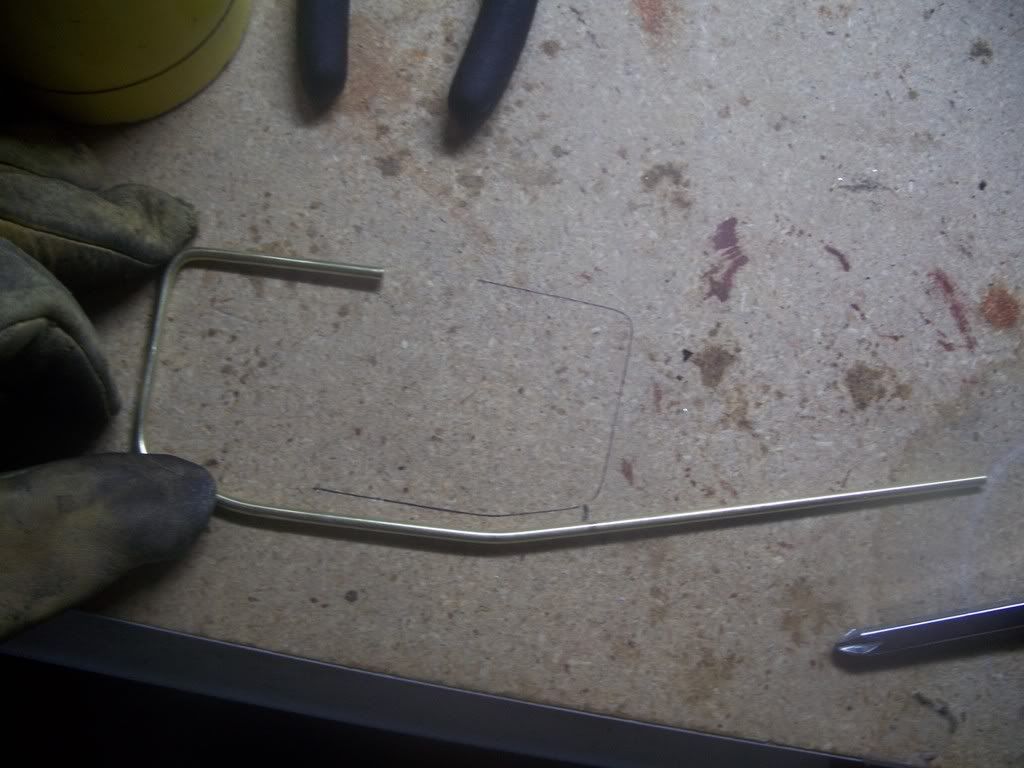 Sometimes you get lucky and without measurments - things turn out just about right. A little snip of the end to reduce the overlap and braze and one tube construction was finished. Although never brazed before - it was a bit messy... 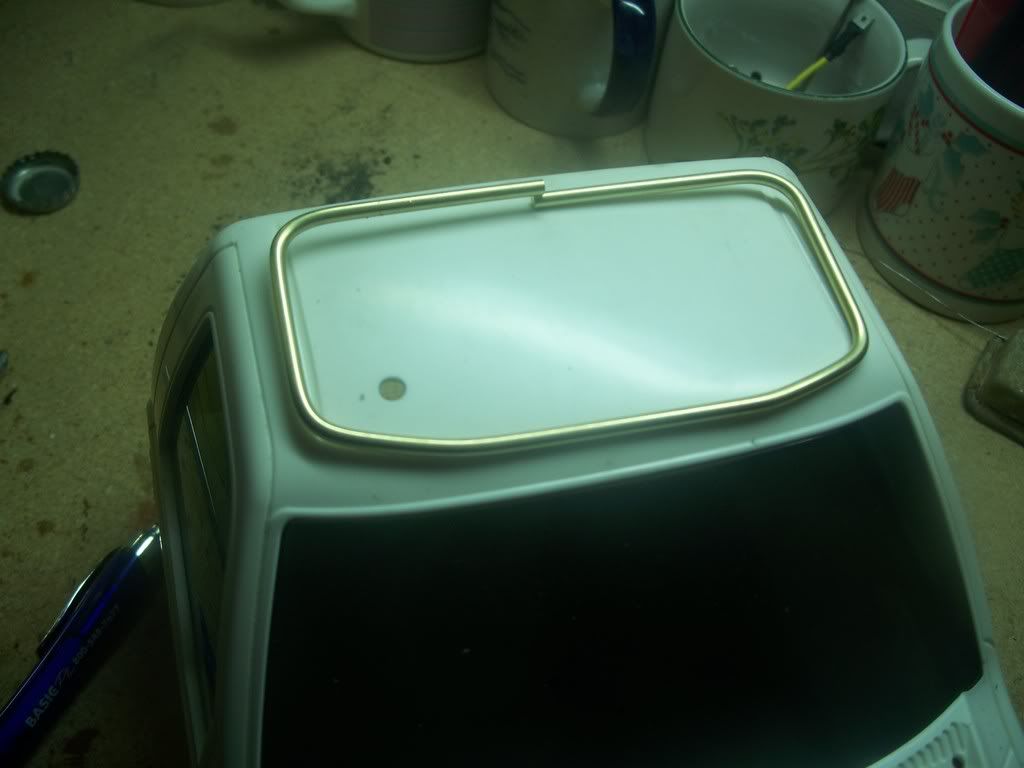 Now to duplicate it onto another piece using the first one as a template. By wireing the new to the old, I was able to replicate the second level of the roof rack very easily and it was done in no time at all. 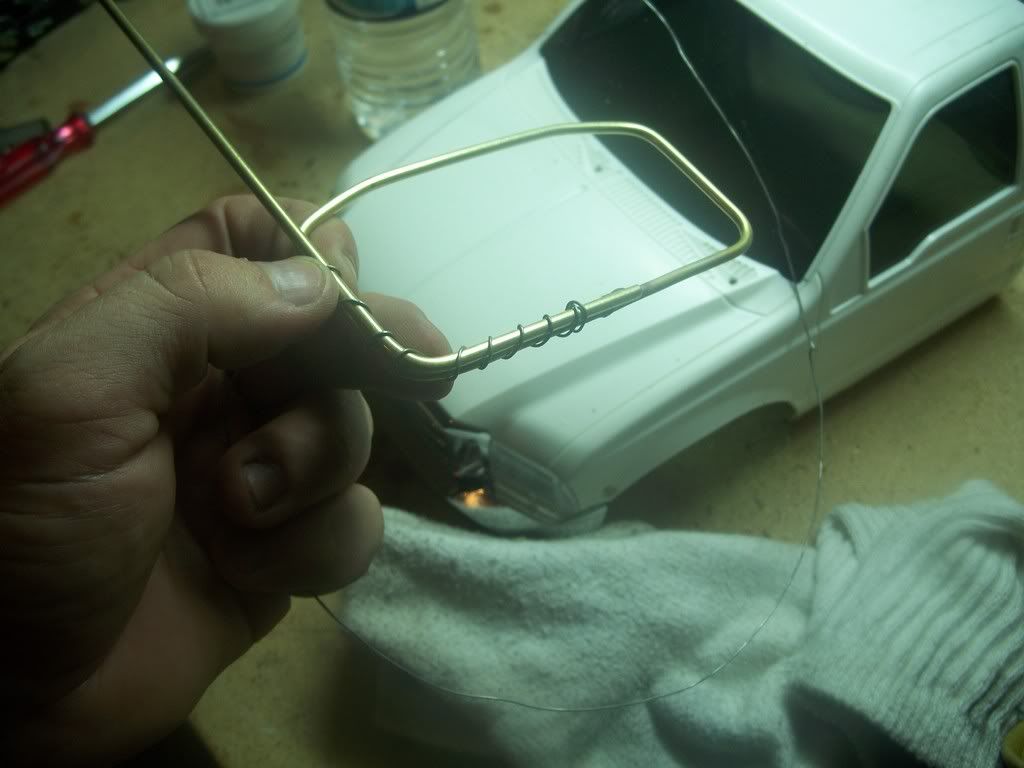 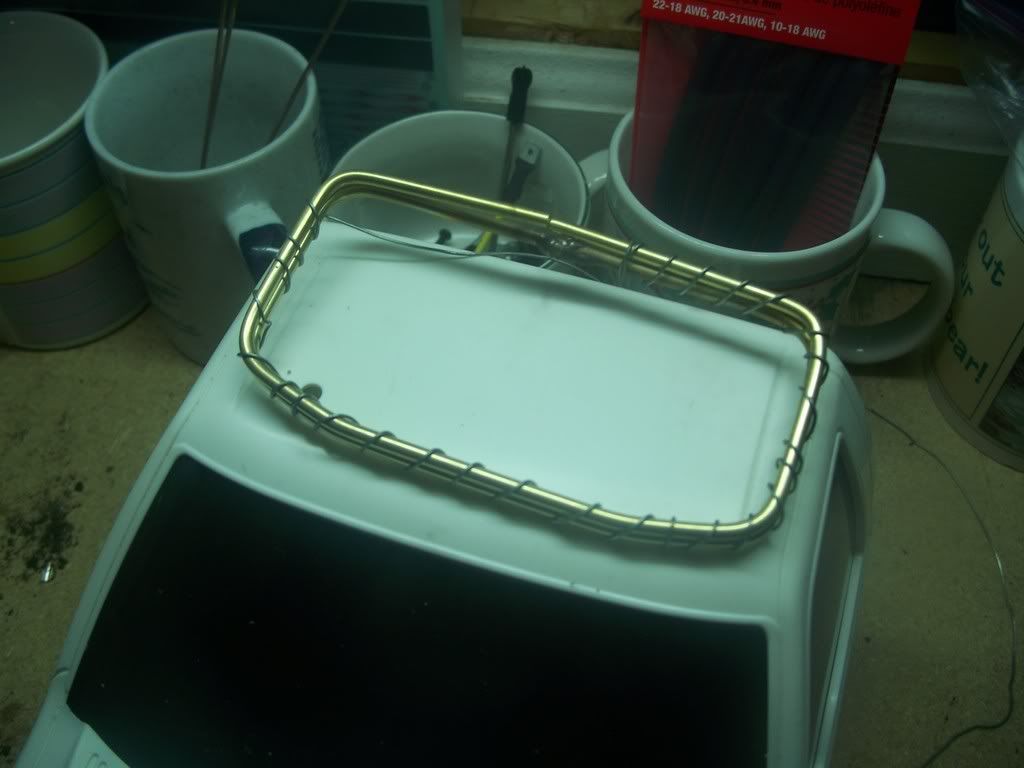 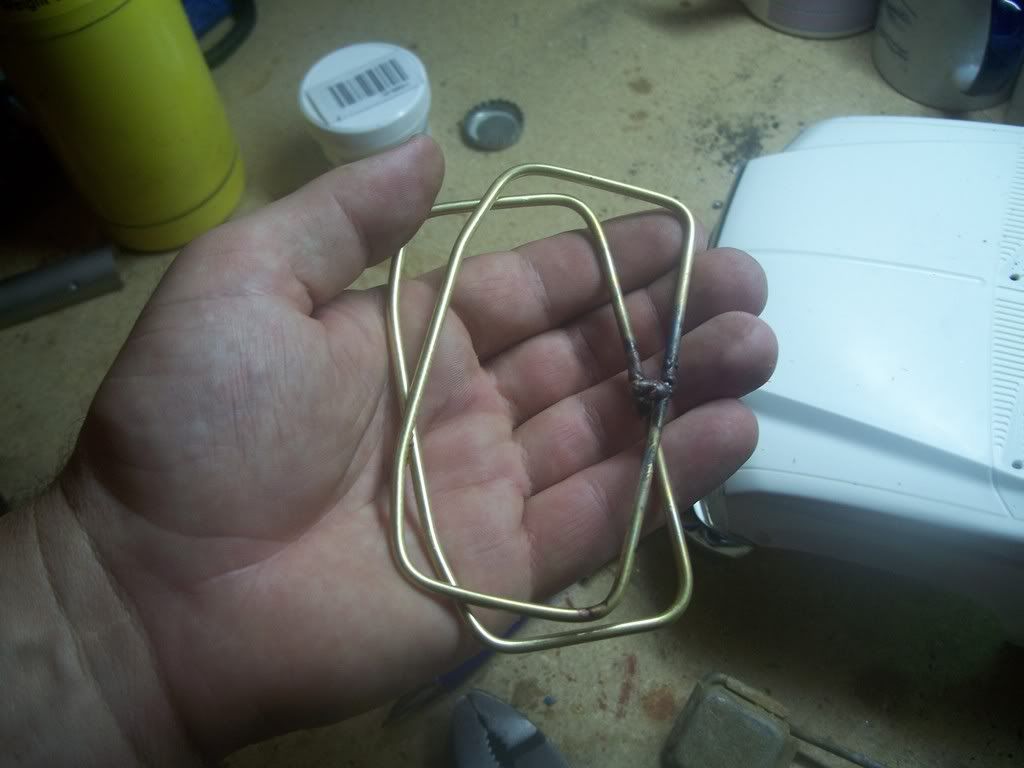 A sloppy brazing job for the first attempt but after a $19.95 dremmel tool with a grinding wheel from Harbor Freight Tools, it looked pretty seemless. Now to measure the height - but who needs a ruler - lets just size it up by looks. 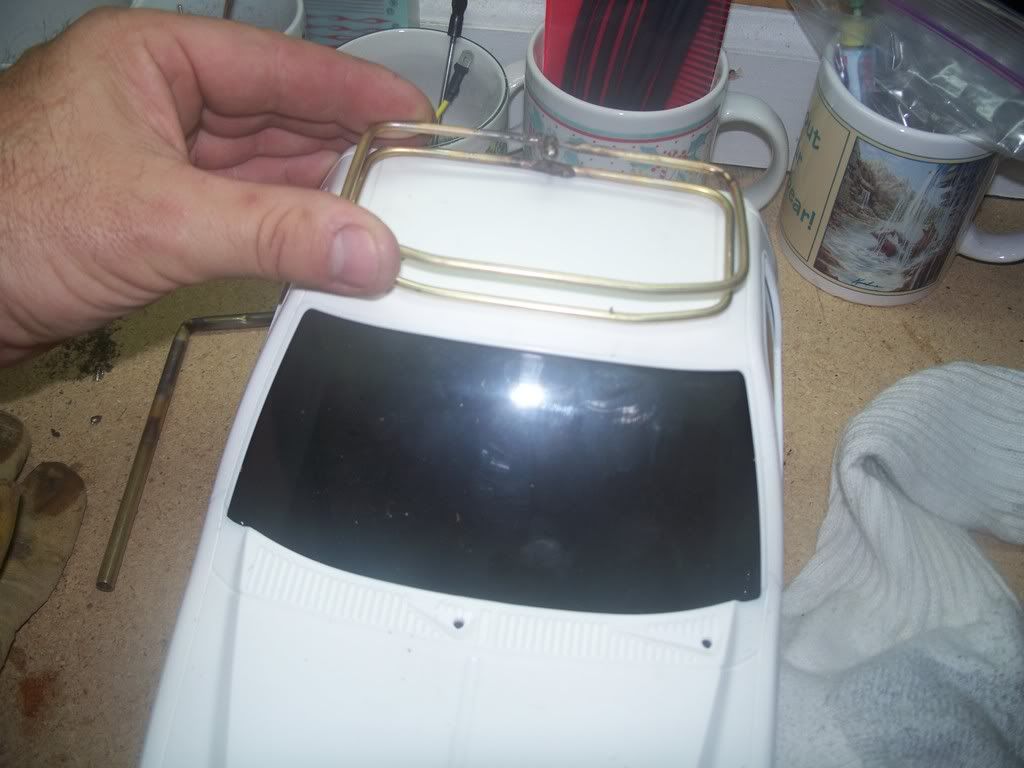 Sorry for the out of focus pics but you get the idea. I used another stock piece of brass from the hobby store and nipped a section out. It seemed like the right size so I duplicated it for a total of 4 pieces. This was to support the RT and LFT sides and back. The front - I decided to just double the size of one piece so it was a bit consistant in size. 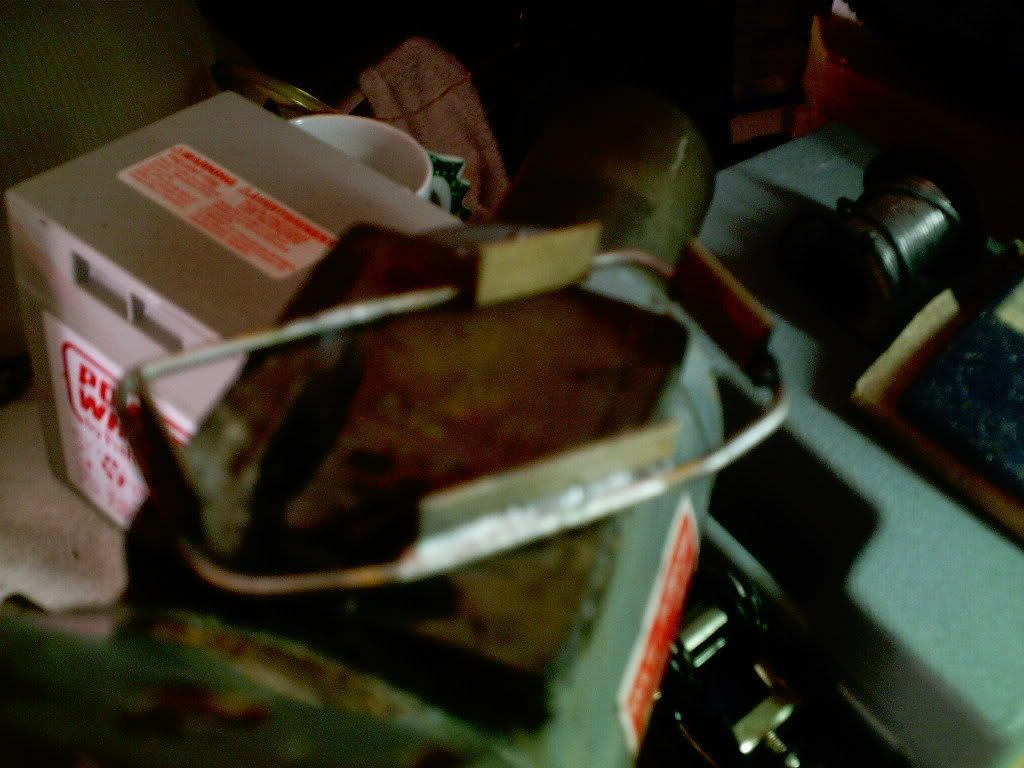 With a few sides brazed on, I was able to slip the top rail on and the supports held it in place without needing to be held so the second level of the roof rack was a bit easier to weld. 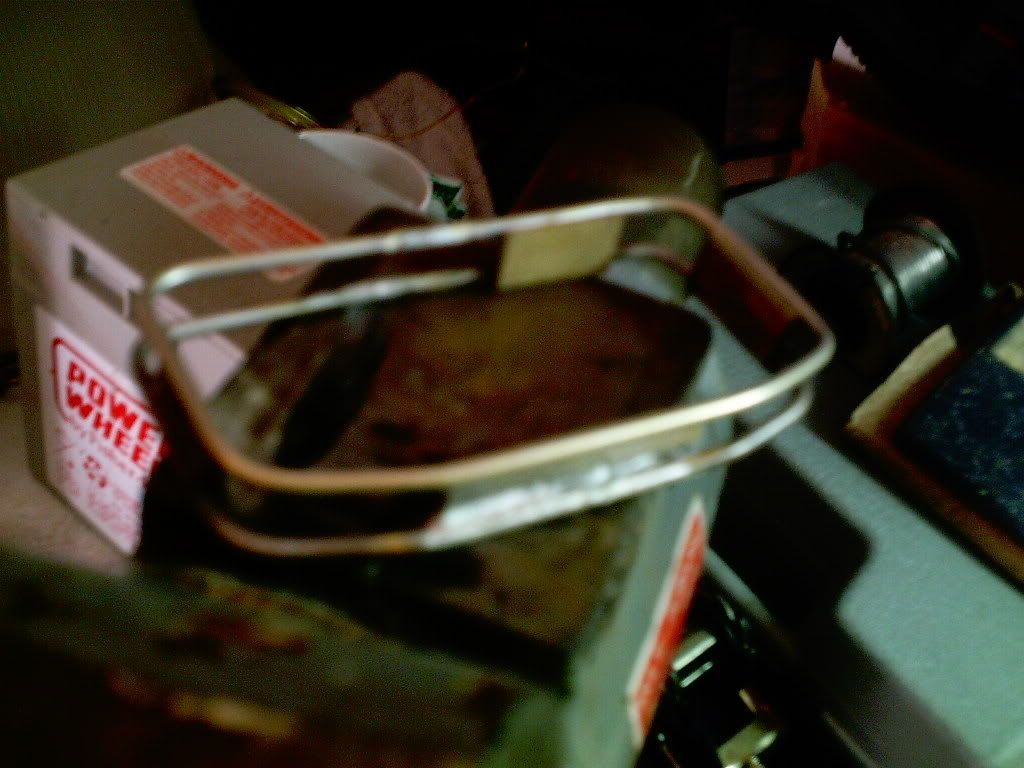 Now I added the back piece and the basic construction was finished. Pretty easy but I think it needs more. 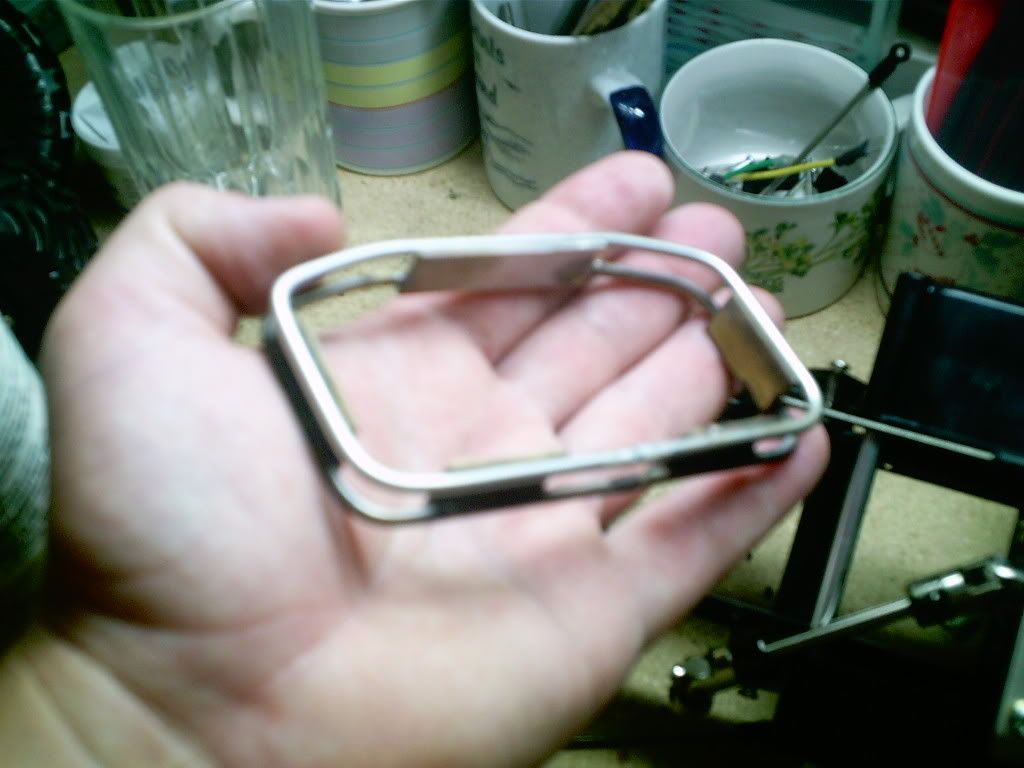 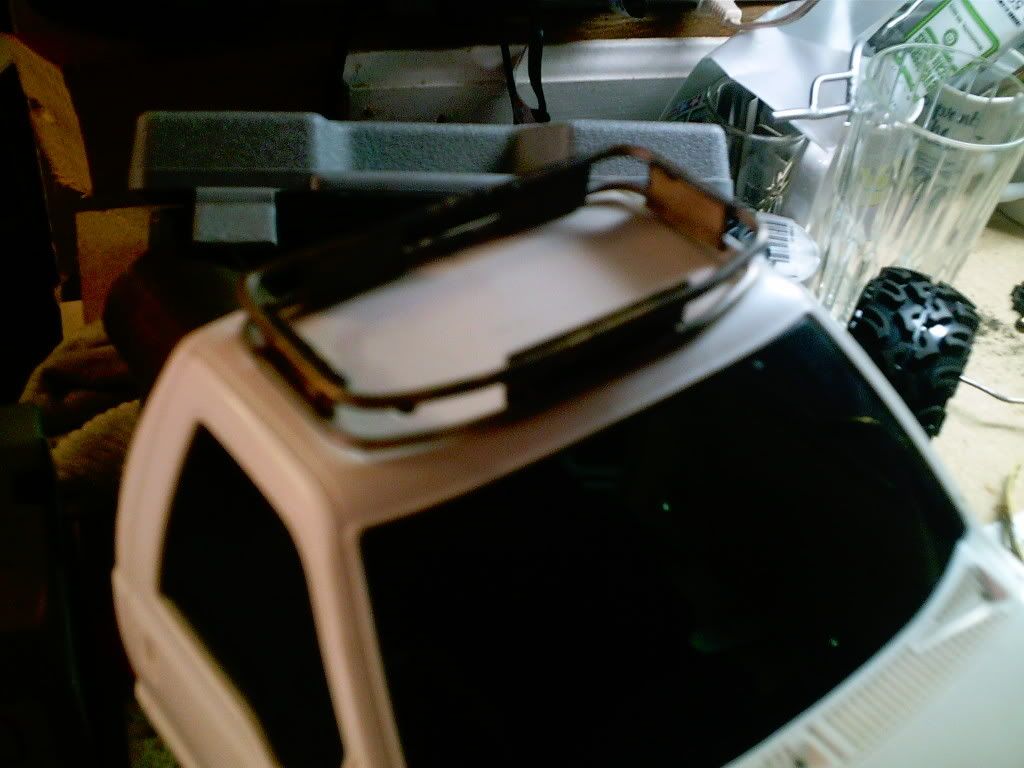 How about some lights? 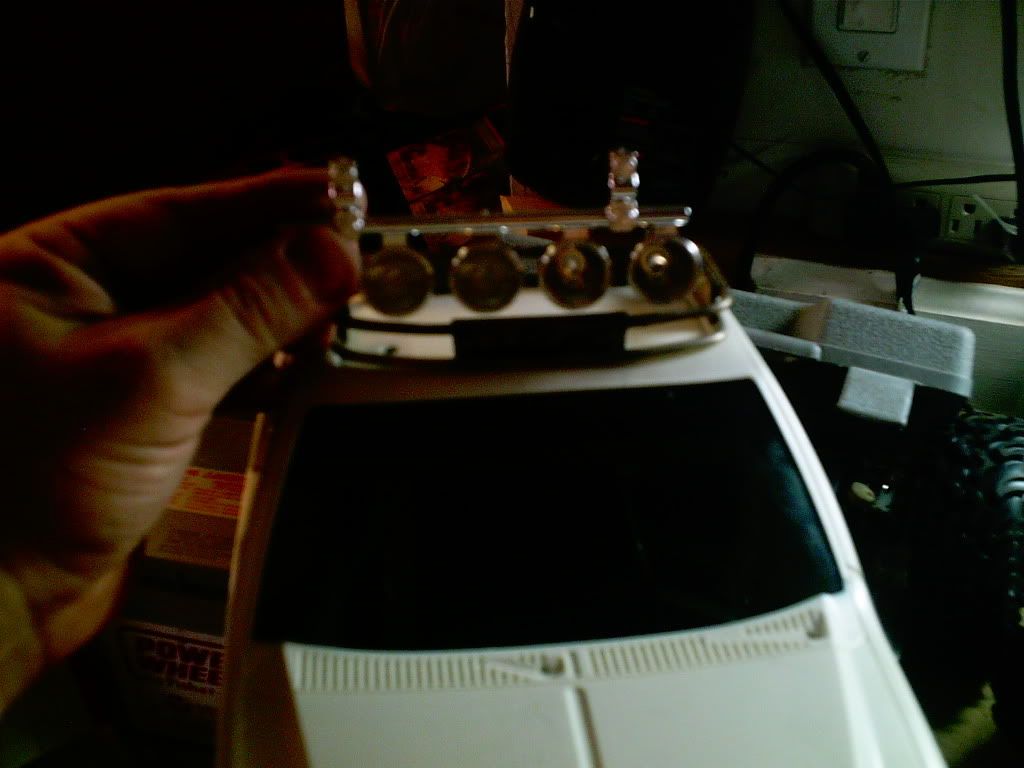 4 lights looks pretty cool - maybe just 2 - not sure... the only way was to cut the lights from the roll bar and pray ! After several bleeding seconds of cutting, I seperated the lights and placed a few here and there to try and figure out the best configuration. The idea of placing a hard top crossed my mind but after searching and searching for a hard top for the bed - the idea was to fabricate a soft top and go ahead and use the cargo roof rack to support the off raod lighting. I decided to go with 4 lights but after placing the lights to the rack - the lights needed a bit of protection from low lining trees and such. 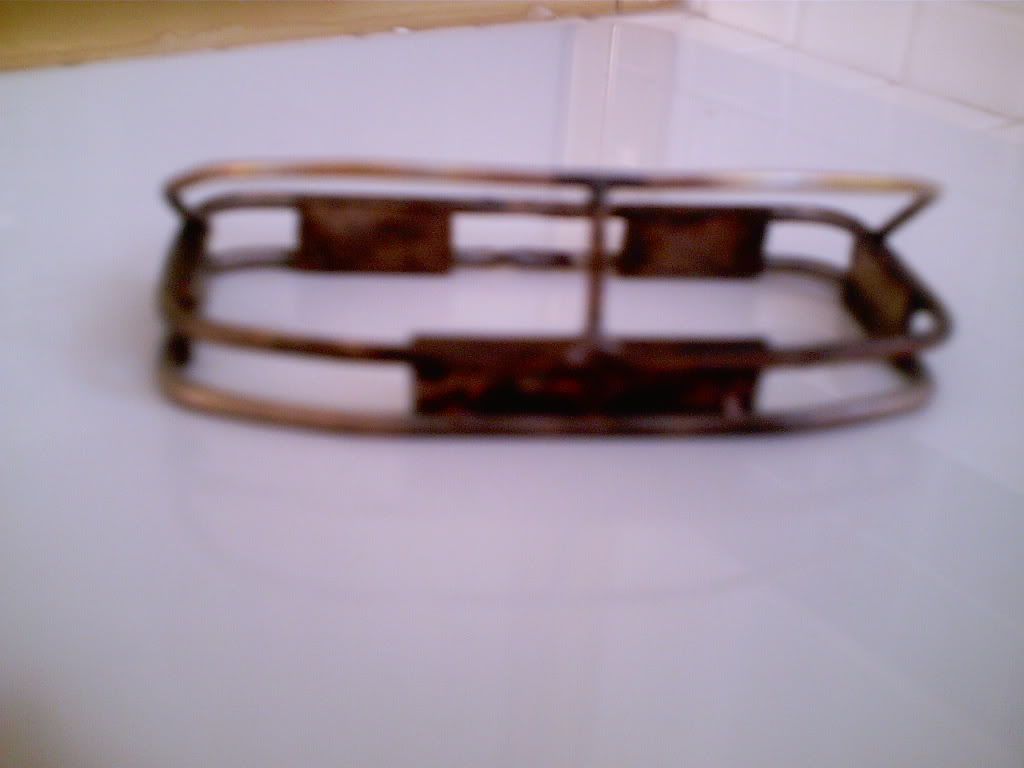 lastly a couple supporting brackets for the top light protection bar and slap on some flat black paint. At least the idea is cool. 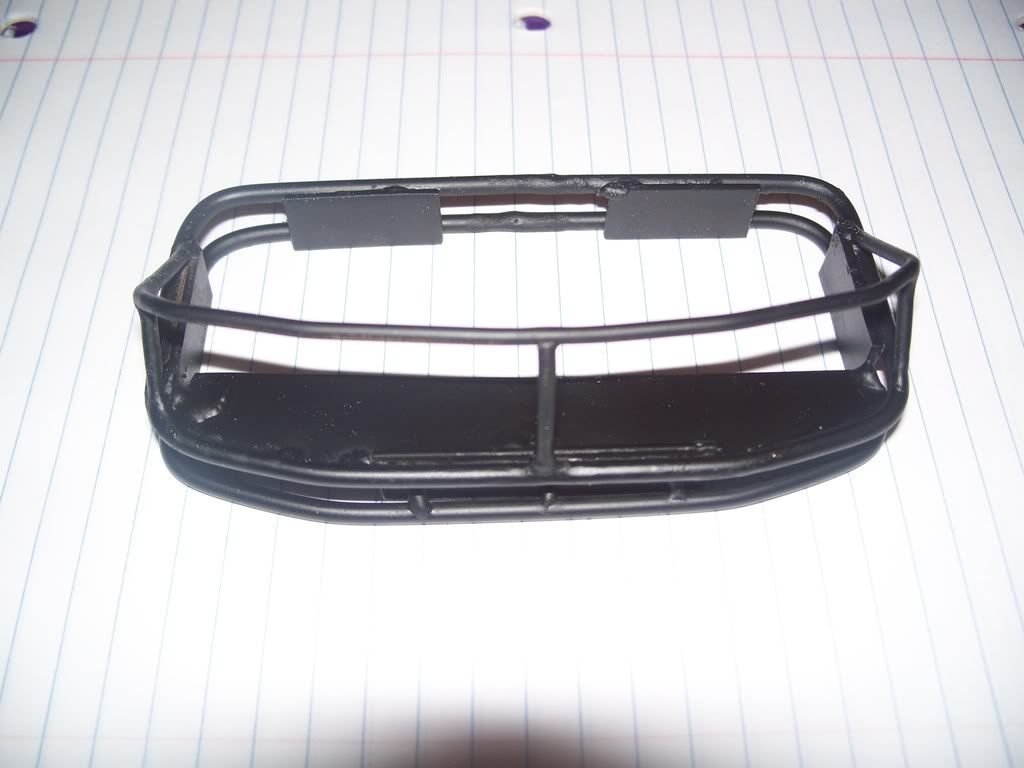 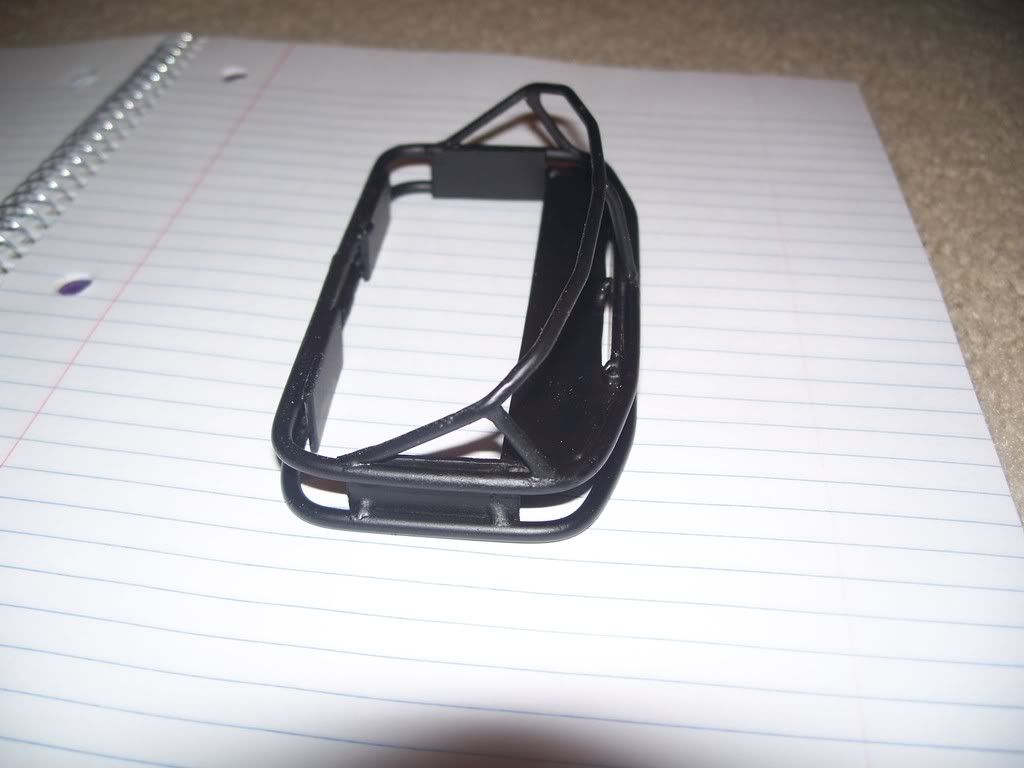 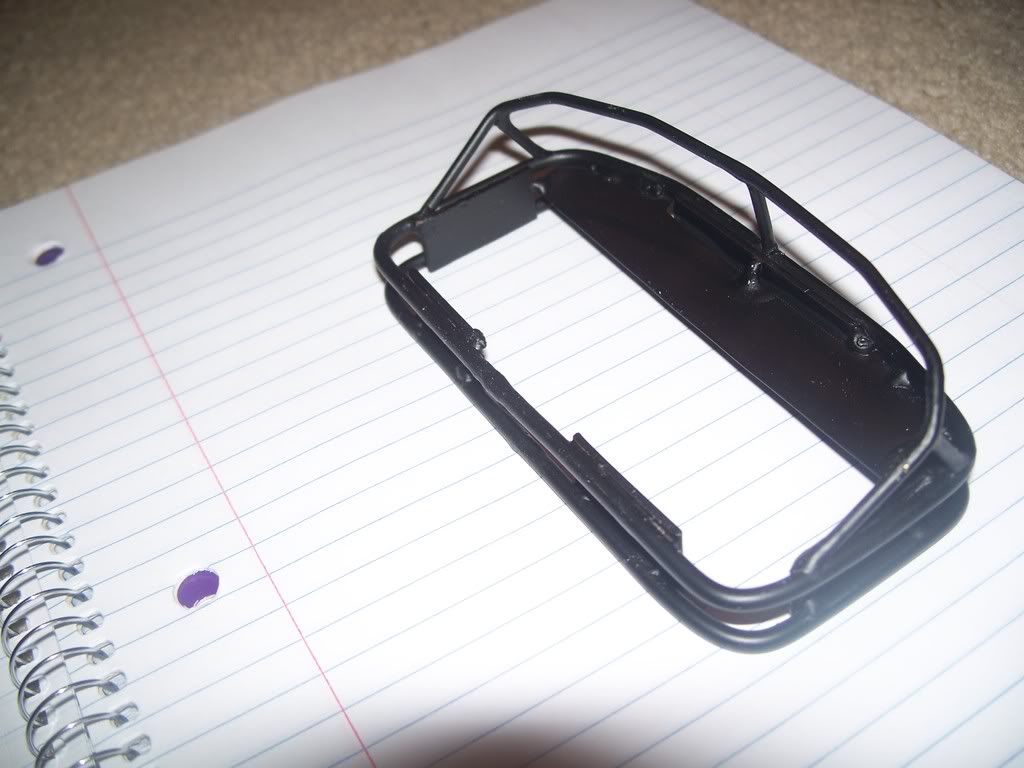 By adding a thin brass cross member and cutting the lights down to just about the nub - I can drill a hole in the cross brass sheet and screw it into the light from the bottom to hold them in place. The lights will later get a MFC-02 unit to bring them to life. Next is working on the bed soft top rails. 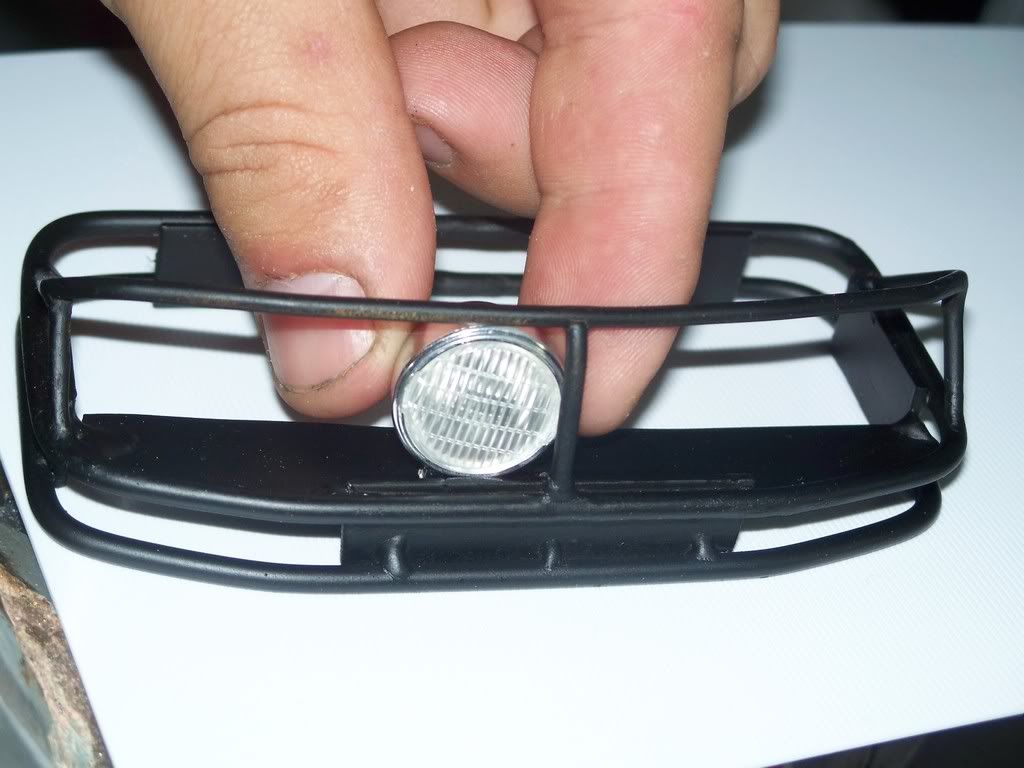 Last edited by FodigoDave; 10-13-2008 at 09:56 PM. |
|
| |
|
10-13-2008, 10:28 PM
| #9 |
| Quarry Creeper Join Date: Sep 2008 Location: Petaluma
Posts: 282
|
Working on the framing was pretty much the same concept as the roof rack. Place the wire next to the bed and bed it according to what looks about right. No need to do any extensive measurments - just freehand the bends the first go round and see what happens. The next is to place it to the end of the cab (just at the front of the bed) to make sure the bends are consistant with the truck and start duplicating. Afterwords - run a single brass rod up the middle to hold the support tubes in place and braze. I couldn't find the early pics so I'll start in the middle of construction.  The next thing to do was to add the addition of the opposing inner flat rail and then take a single rod - bend it a few times and braze it to the sides.  this took a little bit of finessing to get the bends exactly where you wanted them. 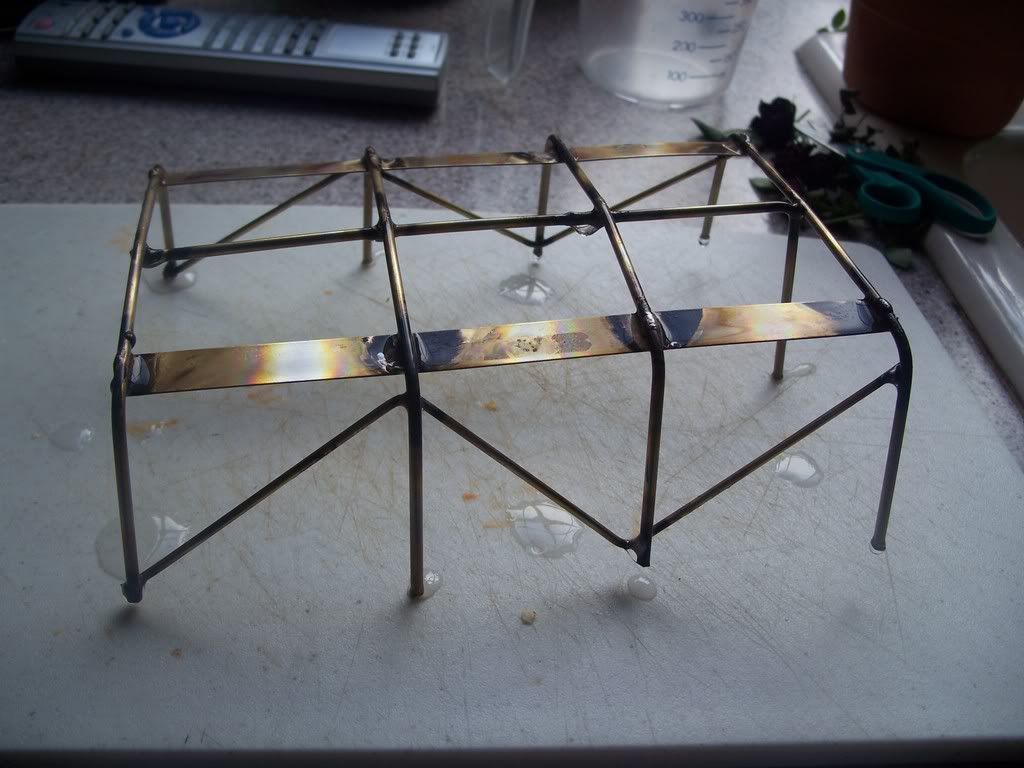 I used a couple of wire ties to hold the rods in place while brazing which worked out fine. I couldn't wait to get it up on the truck and see how the combo of the roof rack and soft top are going to look. 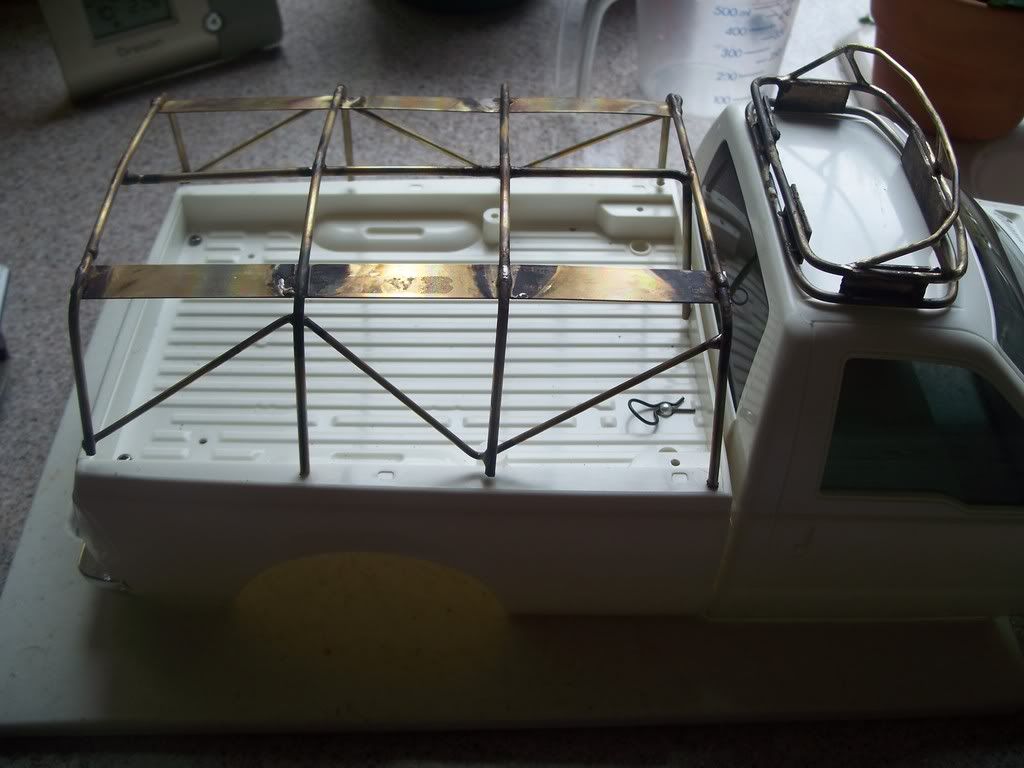 After I thought about it for a while, The new plan is to place the MFC-02 unit inside the bed and possibly hide some other things in tehre as well seeing it will be covered but that's for later... Here are a few more pics of the combo. 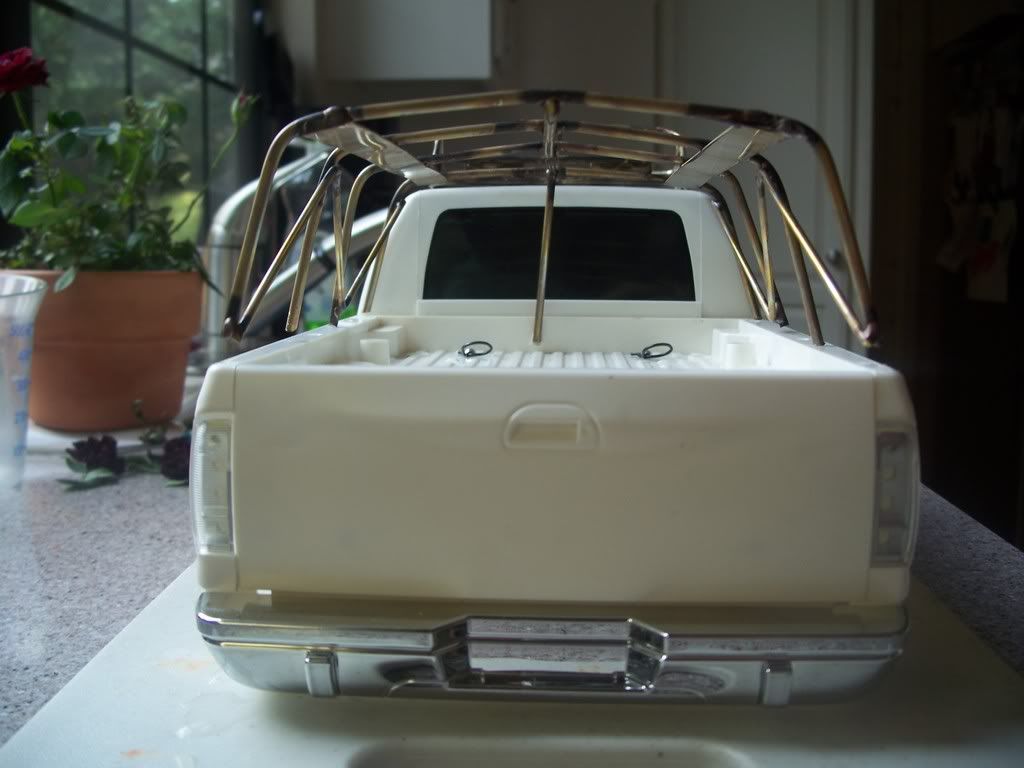  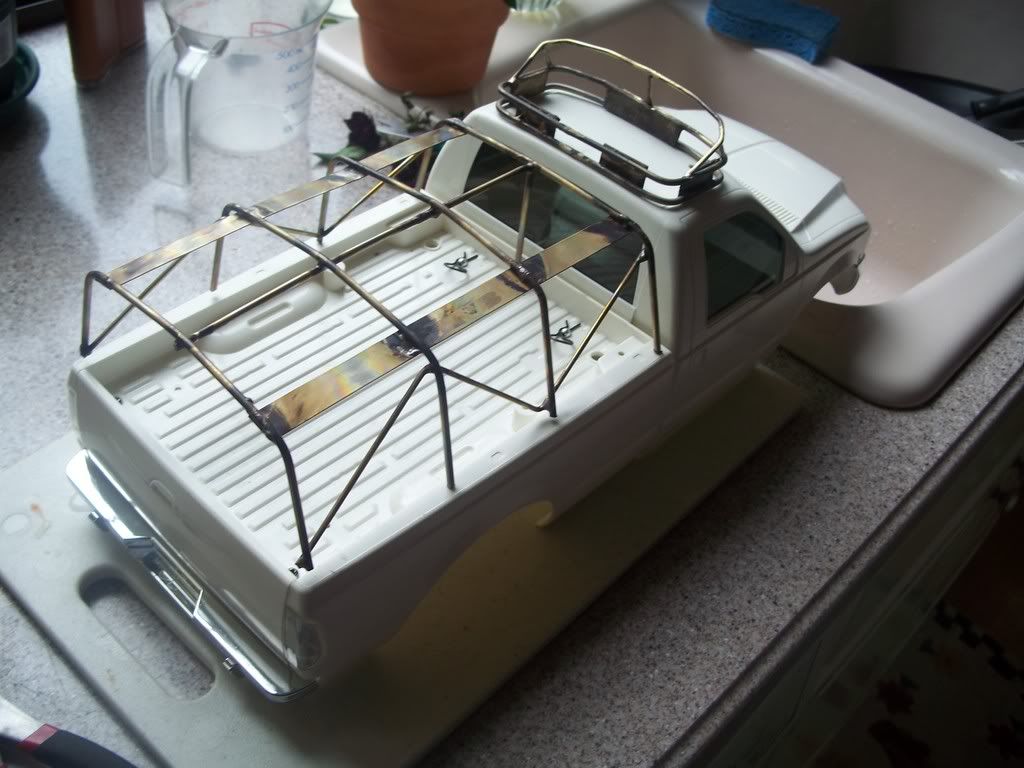 I've already hit the grinding wheel to the bottoms of all the supporting beams and leveled them out with painting black but haven't taken any pics yet. Will post those a bit later after I do a bit more modification to the front of the frame. There is an additional piece I want to add. Then I'll work on learning how to be domestic and sew to make the top. (LOL) |
|
| |
|
10-14-2008, 10:49 PM
| #10 |
| Quarry Creeper Join Date: Sep 2008 Location: Petaluma
Posts: 282
|
Pulled the axle off - D/C'd the leaf springs and started an idea of a 4 point system to the rear. Not having anything available for the f350 high lift - I decided to look around and then make my own. The first idea was to run something over the top. 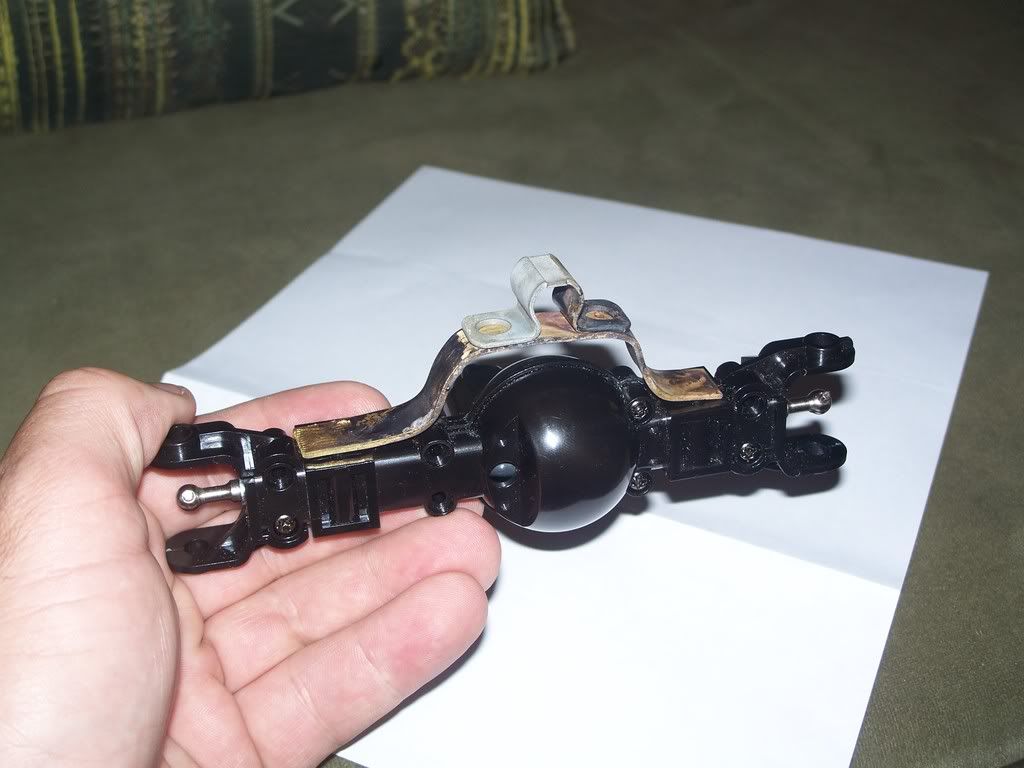 Then decided to go with something a little different and then later add a skid plate for the axle. I used a decking bracket from the local hardware store (.$99) a hack saw, a grinder, vice, a drill and pain. I used the f350 truck bed supports for the swing arm brackets - now to figure out how to mount the truck bed 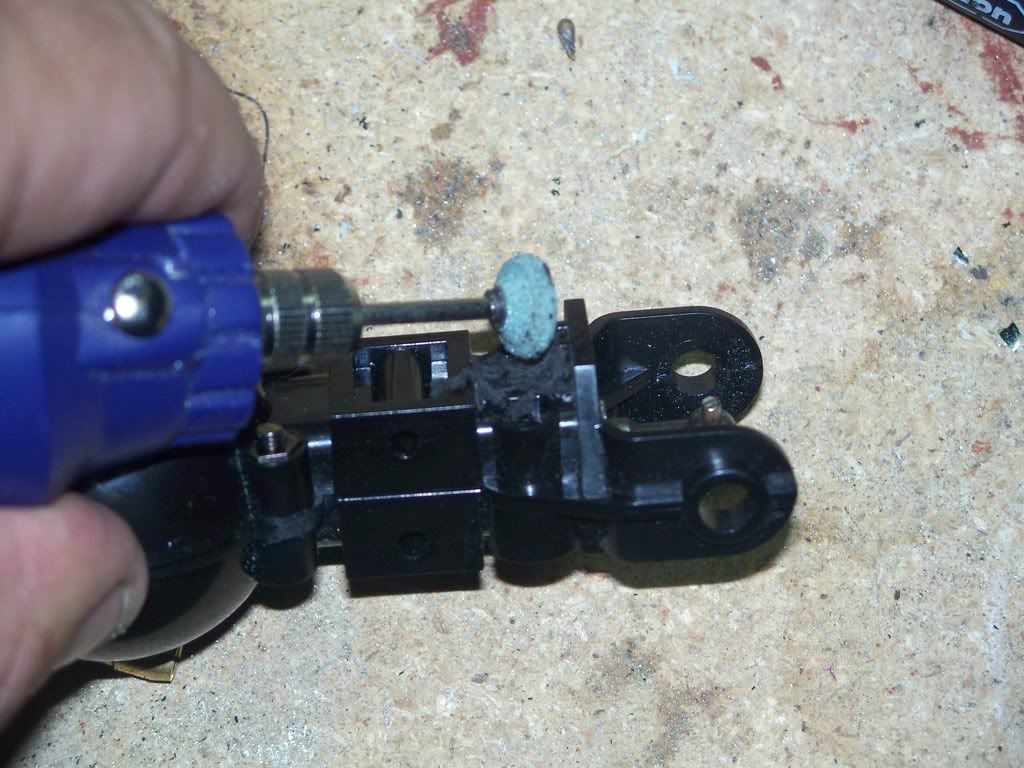 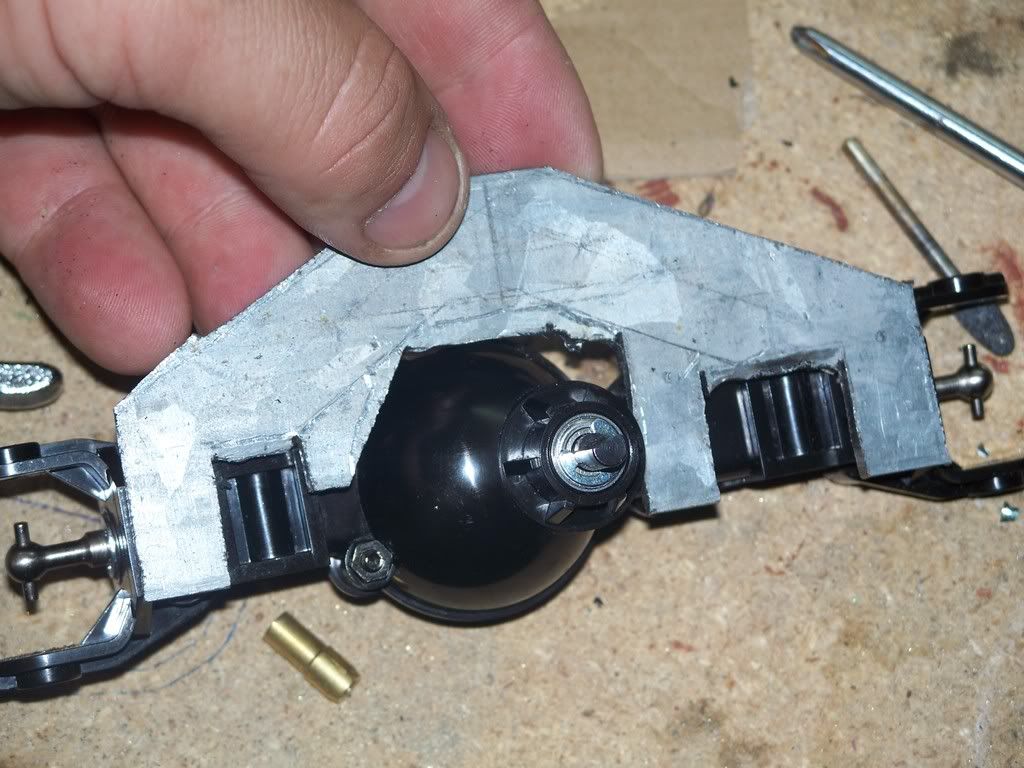 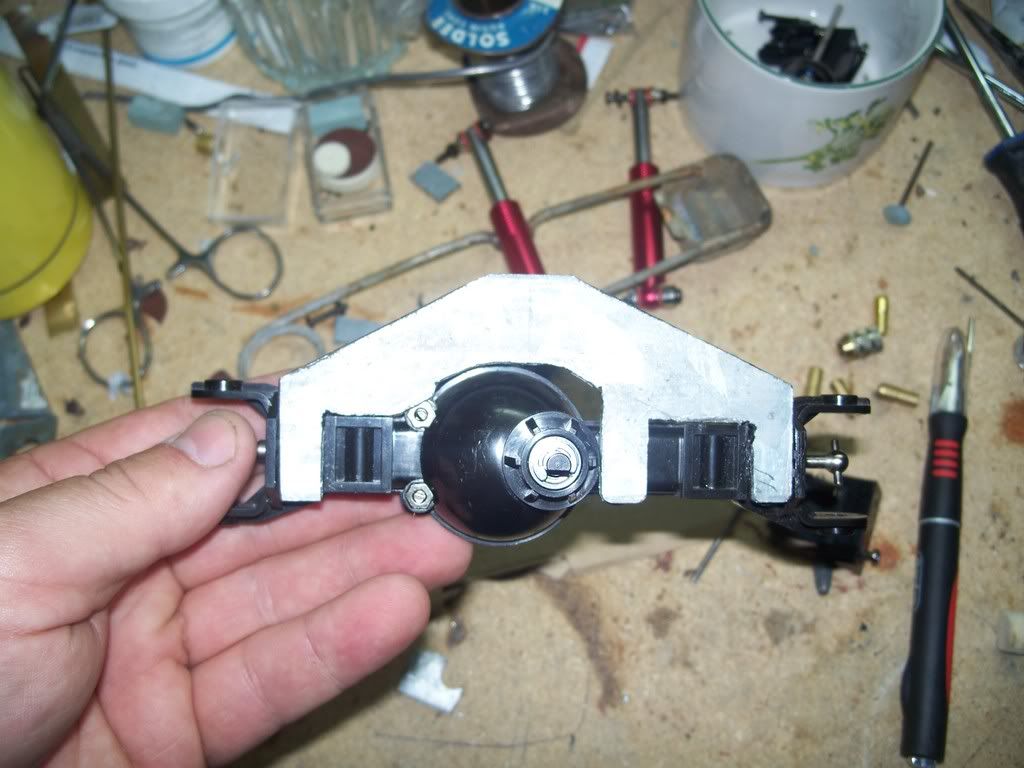 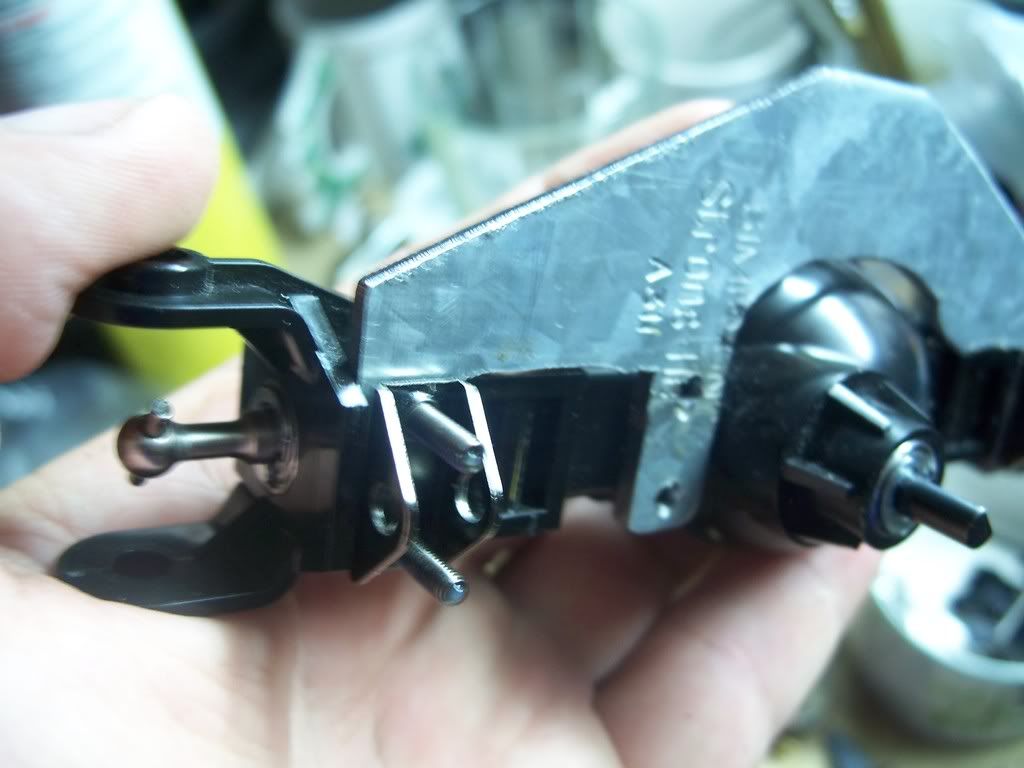 |
|
| |
|
10-15-2008, 10:22 AM
| #11 |
| RCC Addict Join Date: Mar 2007 Location: Penngrove
Posts: 1,809
|
Dave, this is not a tech section, you should start a new tread in the 1.9 scaler section. Cool build though I like to see more deatils |
|
| |
|
10-15-2008, 09:59 PM
| #12 |
| Quarry Creeper Join Date: Sep 2008 Location: Petaluma
Posts: 282
|
10-4 - thx sry
|
|
| |
|
10-15-2008, 10:07 PM
| #13 |
| RCC Addict Join Date: Mar 2007 Location: Penngrove
Posts: 1,809
|
no need to be sry, i just wanted to guide you to a spot where others can appreciate you nice work as well keep it up bro, I'll look for your build thread! |
|
| |
|
10-18-2008, 07:29 PM
| #14 |
| Quarry Creeper Join Date: Sep 2008 Location: Petaluma
Posts: 282
|
Thank you
|
|
| |
|
| |


 Linear Mode


