| |
 10-09-2008, 09:10 PM
| #1 |
| RCC Addict Join Date: Jan 2008 Location: Lake Michigan
Posts: 1,898
|
I was looking for a mini to climb couch cushions and some home made rocks this winter while the snow flies. So I bought 'Sniders1975' ARTR Cliff Climber. Great seller - thx! I love my BMVII 2.2 Crawler, so I couldn't leave the Couch Climber (CC) stock. Parts:
Right now has bushings and plastic gears. Bearings in outer stub axles. Replaced over-wide hexes (adds 1.5" to width) with TLT style hex's. Have not replaced stub axles yet, so used spacers on outside of wheels to make up space. DIG: Followed this build thread dig setup and wiring?
Used small dia PVC to hold fold so body does not tear(provides bumper bar under body skin). Heat will not remove the tires?? Not sure what glue was used? Needs BB's to get weight down lower. Lead around inside of rims for now. Vented rims with 4 larger holes. Need to trim the foams. Any ideas how to get these tires off? 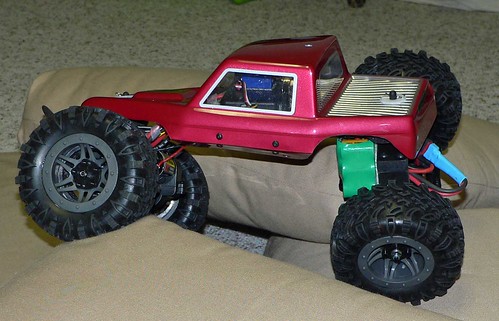 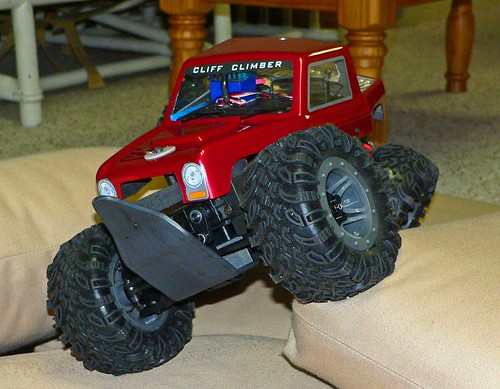 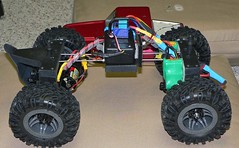 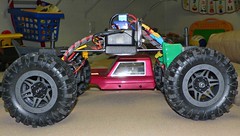 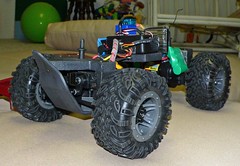 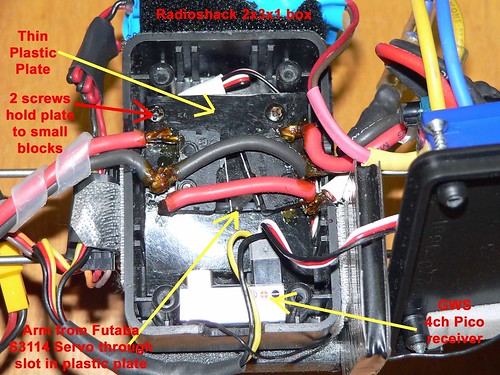 I'll have new motors in, this weekend, and try and post some video. Velcro sticks to the carpet in my basement really well, so I'm planning on fabbing some styrene rocks for winter crawling with my sons (4 and 6). Last edited by sweli; 10-15-2008 at 11:58 AM. |

|  |
| Sponsored Links | |
| | |
|
10-15-2008, 09:33 AM
| #2 |
| RCC Addict Join Date: Jan 2008 Location: Lake Michigan
Posts: 1,898
|
Hmmmm. This must be pretty plain jane to warrant no responses?
|
|
| |
|
10-15-2008, 10:27 AM
| #3 |
| RCC Addict Join Date: Mar 2006 Location: Xxx
Posts: 1,118
|
You should really post pics of how the axles are mounted to the "BMV style" chassis . And from the pictures you post ed so far, Looks like there is alot going on in the middle. Is there anyway to spread that weight across the chassis? |
|
| |
|
10-15-2008, 11:45 AM
| #4 |
| I wanna be Dave  Join Date: Aug 2007 Location: JERSEY BOONDOCKS
Posts: 3,360
|
Pretty RAD man...coolest cliff climber I have seen!  |
|
| |
|
10-15-2008, 11:53 AM
| #5 | |
| RCC Addict Join Date: Jan 2008 Location: Lake Michigan
Posts: 1,898
| Quote:
HDPE plate the box is mounted on is heaviest middle pc. It is necessary for BMV (piano wire torsion) concept to work. I'll get some pics of the piano wire/delrin/axle interface. Last edited by sweli; 10-15-2008 at 01:31 PM. | |
|
| |
|
10-15-2008, 01:33 PM
| #6 |
| RCC Addict Join Date: Jan 2008 Location: Lake Michigan
Posts: 1,898
|
Thx Turbofest! My ego feels better. Not out for comps with this. Its a couch climber to keep my 6yr old and I busy this winter. I want to start fabbing the styrene blocks/rocks for this thing to climb. |
|
| |
|
10-15-2008, 04:58 PM
| #7 |
| Quarry Creeper Join Date: Jul 2007 Location: 517
Posts: 341
|
For the wheels, try boiling them, that might get the glue off, idk if it would melt the plastic?
|
|
| |
|
10-19-2008, 11:33 AM
| #8 |
| RCC Addict Join Date: Jan 2008 Location: Lake Michigan
Posts: 1,898
|
Just like on a BMV, the piano wire goes through a hole, into the Rod Clamp that sits in a pocket. I only have a dremel to fab this pocket with, so its crude. One side had to be shimmed with washers because of slop. Top of front HDPE plate with duck-bill to support skid plate. 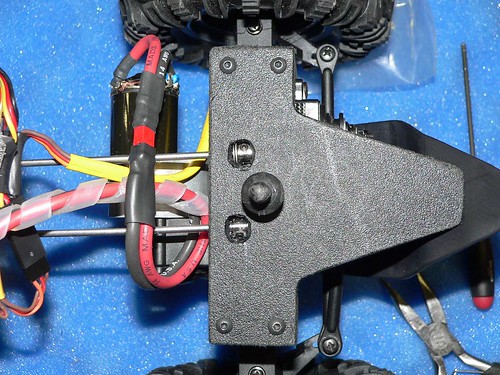 Top of rear plate: 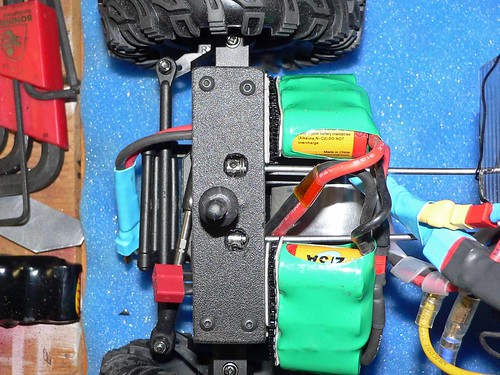 The wires pass through an HDPE center plate that is clamped on one side only, with same rod clamps. |
|
| |
|
10-19-2008, 11:43 AM
| #9 |
| RCC Addict Join Date: Jan 2008 Location: Lake Michigan
Posts: 1,898
|
Tinker tinker tinker........... So the stock gearbox's seem to be about 28:1 when using an 11T pinion. 8 or 9T pinion would only bring it into the 35(ish):1 range. Enter a GreatPlanes 2.4:1 airplane gearbox(s). Brass pinion, nylon spur between two alum or powdered metal plates.
Metal gears on order for one axle for now. 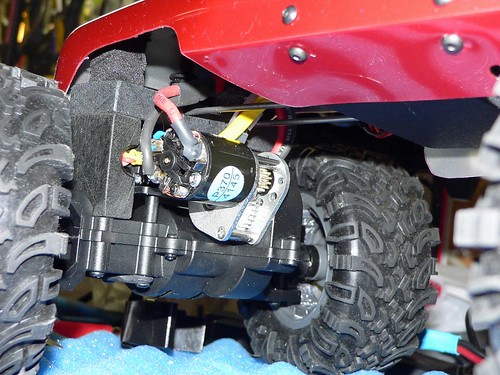 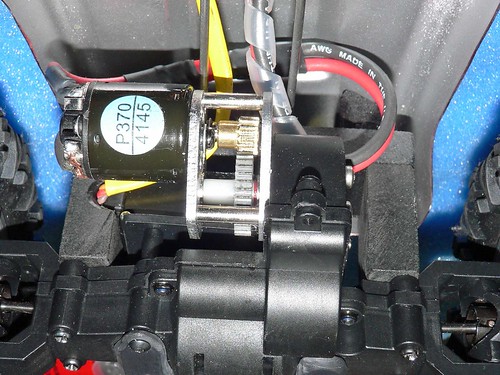 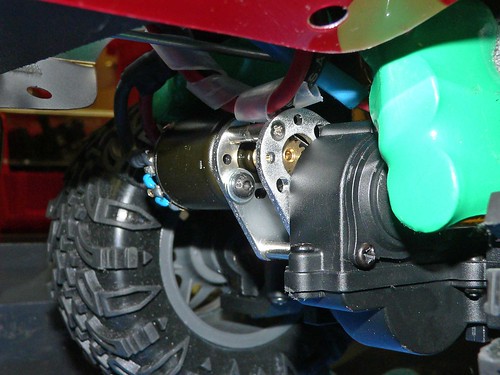 Right now I am running Promax 3145 motors (neodym, 45T, 370). I have since fab'd an alum wrap around guard. Not dirtproof, but will keep most things out including my kids fingers. As soon as I get the new front gears I'll post some vids. Last edited by sweli; 10-19-2008 at 06:45 PM. |
|
| |
|
10-19-2008, 01:58 PM
| #10 |
| Rock Crawler Join Date: Jul 2004 Location: OC, Oregon
Posts: 803
|
Looks good, what is your flex like? You may be better off spreading the wires out, it will be alot more stable.
|
|
| |
|
10-19-2008, 05:07 PM
| #11 |
| Pebble Pounder Join Date: Sep 2008 Location: usa
Posts: 168
|
so it looks like that with what u have done u cant use the stock chasis anymore
|
|
| |
|
10-19-2008, 06:43 PM
| #12 | |
| RCC Addict Join Date: Jan 2008 Location: Lake Michigan
Posts: 1,898
| Quote:
Somehow when in the HDPE its too much. Not sure if the wire binds less, hole size changed, not sure. With body off, TOO much flex. Could twist itself 110deg. Body has foam blocks under four corners that act as shocks to the twist and limit the roll. I will rebuild the blocks on some upcoming, un-busy [never happen] winter weekend. thx | |
|
| |
|
10-20-2008, 05:49 PM
| #13 |
| Rock Crawler Join Date: Aug 2005 Location: Illinois
Posts: 809
|
Sweli You are doing an awesome job and totally taking the CC to the next level. I look forward to more on this build. Good job with the GP gear reductions. J |
|
| |
|
10-20-2008, 07:38 PM
| #14 |
| RCC Addict Join Date: Jan 2008 Location: Lake Michigan
Posts: 1,898
|
Thanks Jdawg! I need to try the metal gears in the front axle, as something is making a bit of noise. Bearings and gears should be here Wed. Got some quick wrap around alum. shrouds to keep kids fingers from becoming part of the drivetrane. (sorry, bit blurry)  I have moabs on some old wheels, with reduced dia foams and BBs, but need something for the winter couch climbs. Pc by pc as funds allow. |
|
| |
|
10-24-2008, 09:07 PM
| #15 |
| Quarry Creeper Join Date: Jun 2008 Location: Lapeer
Posts: 390
|
Yup, I now I see how I'm, going to make up a "BURG" like lil' Crawler, for my grandson to use this winter for just indoor's too... I'm going to fab-up a chassis using this wire twist set-up, that will be something like you got going on this lil' BEAST... To which you have really done alot of stong thinking, As to what all could be done to one of these lil' able climber's, to make them very Much able & Comp-Worthy.....That's some Great thinking there brotha'.!!! ....Ol' Scoot'er... "P.S this has been a great Tread also dude" & Please keep us posted as this come's along too & thank's for sharing all this with me too ..!!!.
Last edited by scootertrash; 10-24-2008 at 09:12 PM. |
|
| |
|
10-25-2008, 10:10 AM
| #16 |
| RCC Addict Join Date: Jan 2008 Location: Lake Michigan
Posts: 1,898
|
Thanks Scooter. Post up your plans as you get them going. Some other findings of mine are:
Last edited by sweli; 10-25-2008 at 10:12 AM. |
|
| |
|
11-01-2008, 10:00 PM
| #17 |
| RCC Addict Join Date: Jan 2008 Location: Lake Michigan
Posts: 1,898
|
Well this is a mainly indoor Carpet and Couch Cushion Crawler, so I now have some crazy tires on this thing.
OK on the rocks with some old Moabs, but now this thing climbs couches, boxes and over kids with the ease of my full 2.2. |
|
| |
|
11-02-2008, 06:50 AM
| #18 |
| Rock Crawler Join Date: Aug 2005 Location: Illinois
Posts: 809
|
but now this thing climbs couches, boxes and over kids with the ease of my full 2.2. Thats awesome |
|
| |
|
11-02-2008, 07:46 AM
| #19 | |
| RCC Addict Join Date: Jan 2008 Location: Lake Michigan
Posts: 1,898
| Quote:
Looks like when someone takes a decent 4x4 truck and slaps 17" lowpros on it that do not fill the wheelwells. | |
|
| |
|
01-17-2009, 06:01 PM
| #20 |
| Pebble Pounder Join Date: Jan 2007 Location: Bulgaria, Sofia
Posts: 128
|
Hey, sweli! I really like that design... And more pics (higher res too) would be great.. Last edited by ccbg; 01-17-2009 at 06:04 PM. |
|
| |
 |
| Thread Tools | |
| Display Modes | |
| |


 Linear Mode


