| |
| |||||||
 |
| | LinkBack | Thread Tools | Display Modes |
 05-08-2009, 11:26 PM
| #1 |
| Rock Crawler Join Date: Jan 2007 Location: Tuscaloosa
Posts: 855
|
First, let me start by saying, I know there are better crawlers out there, there are better ways of setting up the batteries, and the RTR electronics are considered junk by most. Ok we all understand that so lets move on.  My brother has driven my crawlers and wanted one for himself. I have 2 TLT scalers and a Pajero. He enjoys those but doesn't have the time to build up a TLT based rig because of his work. He looked at the Pajero but didn't want to spend that much money. His R/C stash is made up of a Slash, 2 batteries, and a charger so he didn't have electronics and stuff laying around that he could use. He called and asked me about the Cliff Climber after he saw the $119 price on Tower. I had actually been looking at them myself after seeing some of the builds on here and seeing the really cheap price. I told him that if he bought one, I would. We placed our order with Tower Tuesday. Not long after the order was placed I realized that I misread and that a standard 6-cell battery would not fit in the battery box. After talking with the bro we decided that these were budget builds and we would make them work. They came in today. My initial impression out of the box was good. The Cliff Climber looked like a cool little R/C. Then I popped the body off, oh crap! These things are smaller than I thought. I was afraid the battery deal was going to send me looking for batteries in the morning. Then 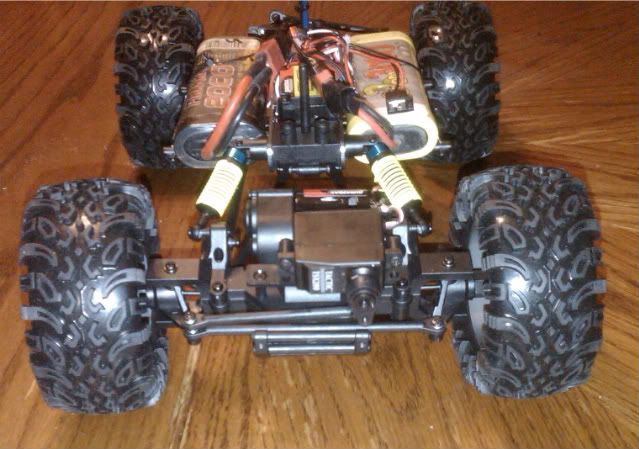  It worked! With the battery placement worked out I cut off the stock connectors and replaced them with Dean's. Then, I drilled new holes for the body posts and mounted them about 1/2 inch lower than stock. 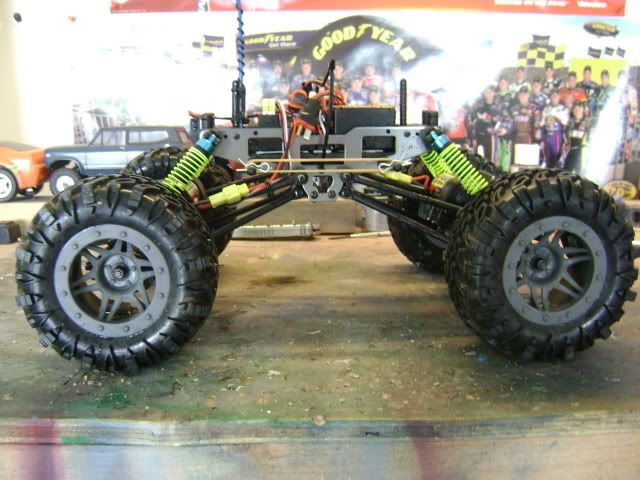 After that I went and conversed with the family while decaling the body. The stock body is actually pretty cool. Kinda old school Bronco'ish. I went with the racer theme with the decals and to be different cut the 2 off the numbers and just went with 17. An orange 17, an ode to the Daryl Waltrip Tide car maybe. 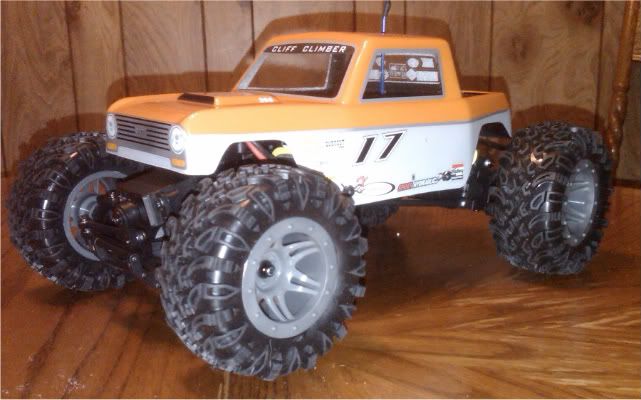 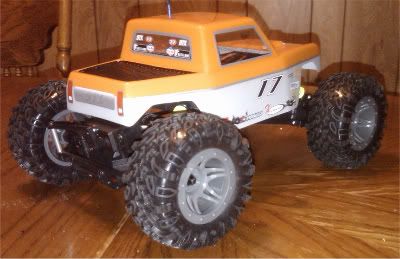 With the conversation over and the body decaled it was back to the kitchen table to work on the chassis. Since the stock battery tray wasn't being used I relocated the electronics into it so they would be lower and help with the center of gravity. Then, I cleaned up the mess of wires and zip tied the motor and servo wires to the top link so they wouldn't be floppin' in the breeze. With that done, I added some weight to the wheels. A whopping 3/4 of an ounce to the front and 1/2 an ounce to the rear. I'm visiting Mom for Mother's Day and working out of a toolbox so that is all I had with me. Since I had things up and running I figured it was time for some pillow crawling. I was impressed. I was hoping that it would be kinda fast for a crawler and it is. The standard batteries are so heavy that it almost compresses the springs completely so it has a really low ride height and is basically working a droop set up but still has plenty of flex. When you gun it full throttle the back end squats like a monster truck. I bet it will tote the front wheels over some rocks if you hit it right. A couple things I still need to get to are removing the axle bumpers. Then, I will probably break the plastic linkages and need to make some new ones with some threaded rod and ball ends. Next time I place an order from Tower I will probably order a set of stiffer springs to help with the weight of the batteries. Eventually it will probably need stronger servos. No its not a super comp rig like a berg or AX10 and no its not a wicked realistic looking scaler like a High Lift or SCX10 but for a $119 basher its a ton of fun. I feel like I got my money's worth and can't wait to get it outside and do some crawl bashing tomorrow. Last edited by nascarkeith; 05-11-2009 at 07:09 AM. |

|  |
| Sponsored Links | |
| | |
|
05-08-2009, 11:30 PM
| #2 | |
| Rock Crawler  Join Date: Mar 2009 Location: West of Eugene, OR
Posts: 942
| Quote:
The rig looks good. | |
|
| |
|
05-09-2009, 07:10 AM
| #3 |
| Newbie Join Date: Apr 2008 Location: DeBary
Posts: 33
|
I like it, looks pretty cool. And I agree with you on the body. Saved mine for a future project. Thought it was just to cool to get rid of. And for $120 you can't beat it. I love mine.
|
|
| |
|
05-09-2009, 05:39 PM
| #4 |
| Rock Crawler Join Date: Jan 2007 Location: Tuscaloosa
Posts: 855
|
Little Bro got home from work this morning and we got his up and running. He left the body posts in the stock position and used rubber bands in an X pattern hooked on the body posts to hold the batteries in. It worked really well. We also took his electronics and lowered them down into the stock battery compartment. He is running Team Orion 2400mah batteries and they must be lighter than mine because it doesn't compress the suspension as much. He also added 2 clips to each spring. That plus the body being in the stock position keeps things a lot higher than mine. 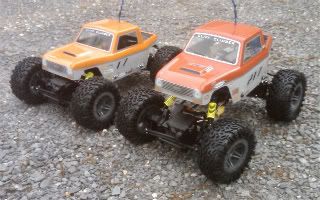 We took them out this morning and had a blast. Mine did not try to flip backwards when climbing at all. I went off a drop to fast and rolled over forward but that was driver error. When sidehilling mine stayed planted. Never barrel rolled except one time when I rolled off a ledge and that again was driver error. The Little Bro's sidehilled good but the higher weight on his caused him to flip backwards when climbing a time or two but he doesn't have his wheels weighted either. We both had issues with clod stall but it wasn't even to keep us from having fun. We kinda just got used to it. The servos could be stronger but the servo saver problem needs to go and that might help. The motors could definetly us a little more torque but for the price we paid we had a blast and are both very happy with our Cliff Climbers. 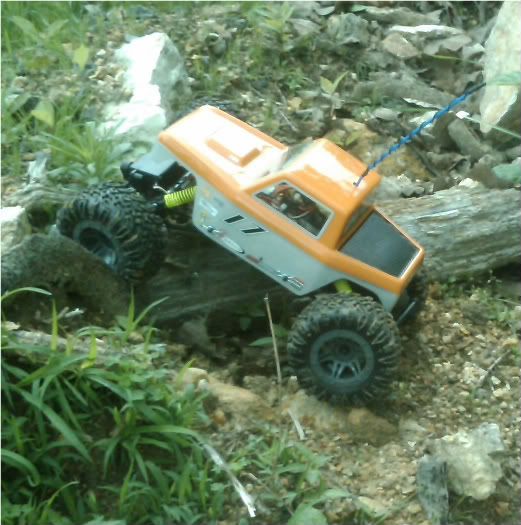  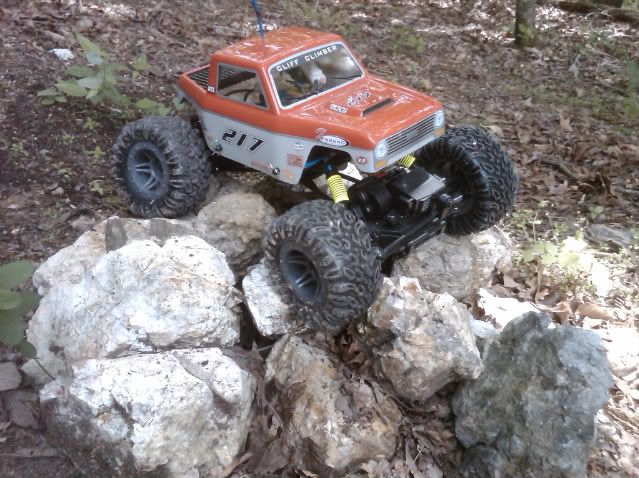 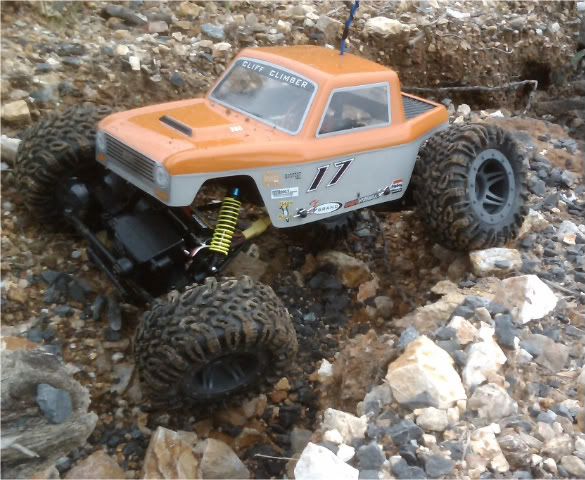 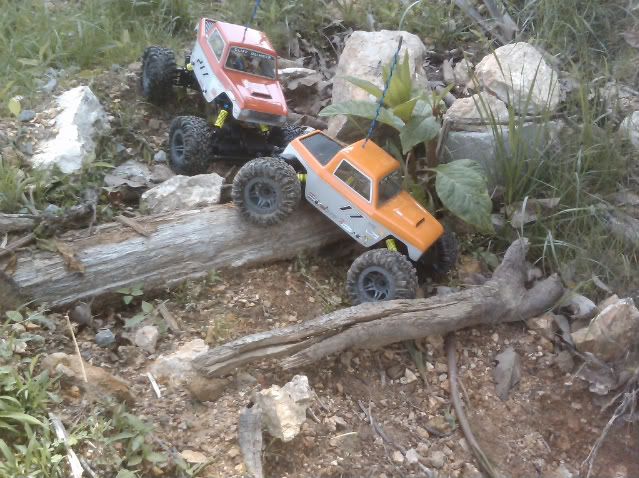 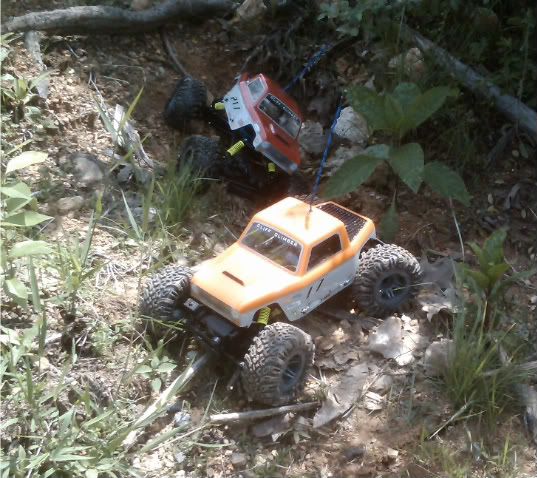 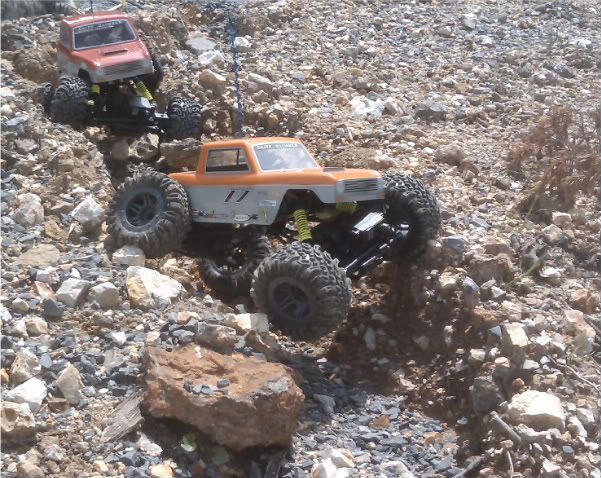 My brother is already talking about things he wants to mod. Its cool to see someon new get the crawling bug. I am definetly going to look into that 10 tooth pinion for the rear to work on the clod stall and maybe think about some bent links. Last edited by nascarkeith; 05-10-2009 at 07:52 AM. |
|
| |
|
05-09-2009, 07:49 PM
| #5 |
| RCC Addict Join Date: Aug 2005 Location: Naoma, WV
Posts: 1,479
|
How much does the wheelbase increase being squatted down like that? Can't measure mine since it's in the mail. I really like the stance of yours though and it's making me consider droop.
|
|
| |
|
05-10-2009, 07:55 AM
| #6 | |
| Rock Crawler Join Date: Jan 2007 Location: Tuscaloosa
Posts: 855
| Quote:
| |
|
| |
|
05-10-2009, 10:04 AM
| #7 |
| RCC Addict Join Date: Aug 2005 Location: Naoma, WV
Posts: 1,479
|
Yup, lower and longer is my plan. Though it may be easier just to start from scratch with chassis and link, as opposed to trying to run the stock geometry. Yours has a great stance.
|
|
| |
|
05-11-2009, 07:22 AM
| #8 |
| Rock Crawler Join Date: Jan 2007 Location: Tuscaloosa
Posts: 855
|
I made it home and had some time to tinker after church Sunday. I, like many people, was bothered by the look of the steering spacer on the rear so here is my entry for scary steering.  I also switched the 2 Venom 3000mah batteries for 2 Duratrax Piranha 2000mah batteries that seem to be a little lighter. Here are the specs on it so far: Stock RTR Cliff Climber Body post relocated to a lower mounting point on chassis plate Electronics lowered into battery compartment Rear steering rod reworked Wheels weighted 3/4 ounce up front and 1/2 in the rear 2 Duratrax Piranha 2000mah standard 6 cell packs Droop suspension from the weight of the batteries I got a chance to take it crawling on some real rocks. For the $119 price and the cheap simple mods I have made to it, I was really impressed. Clod stall was a small problem but you kinda get used to it. It really didn't hinder me from going to many places that I wanted to go. The tires grip pretty good on rocks. Tires are not so great in dirt but good enough on rocks that I am not worried about changing them. Side hilling was pretty good. Now on to the pics. 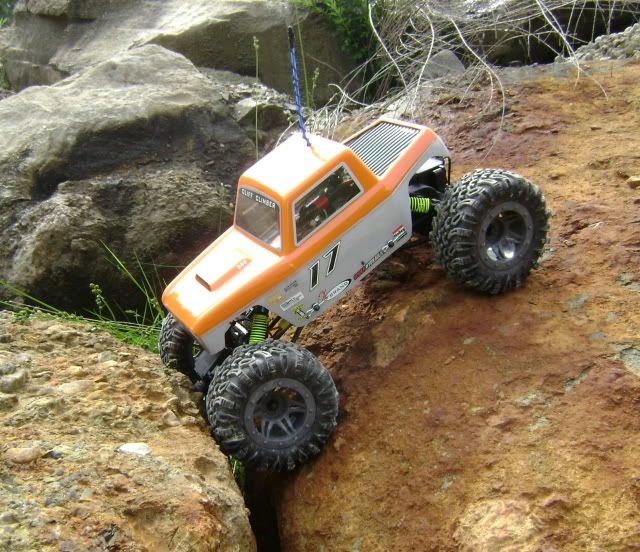 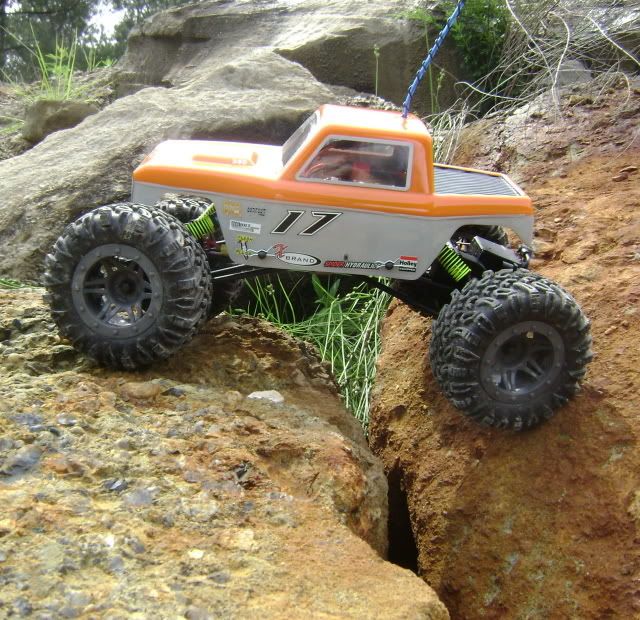 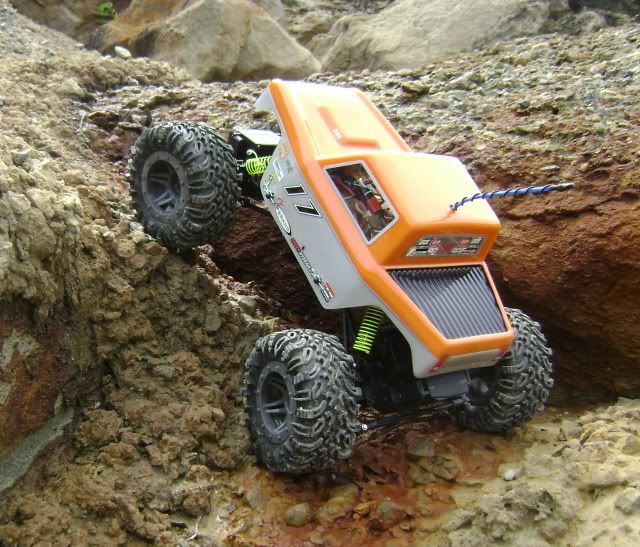 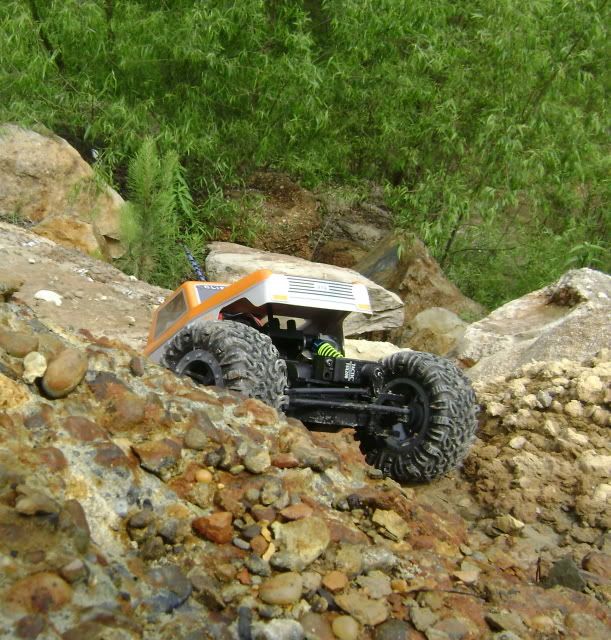 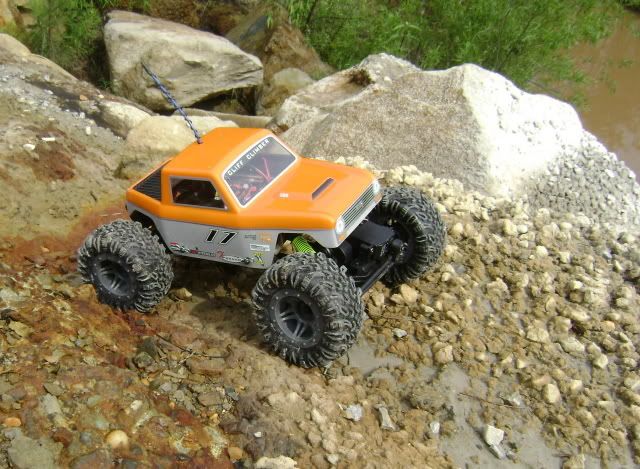 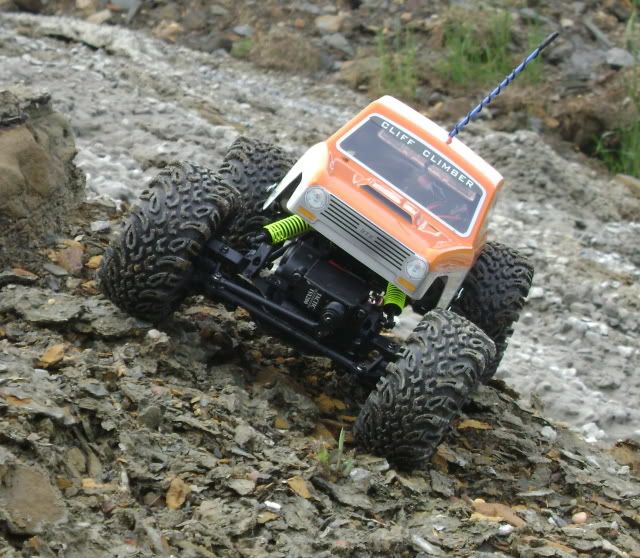 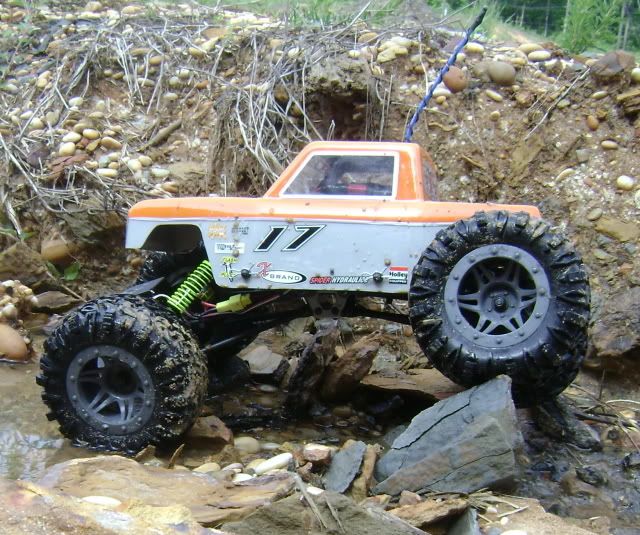   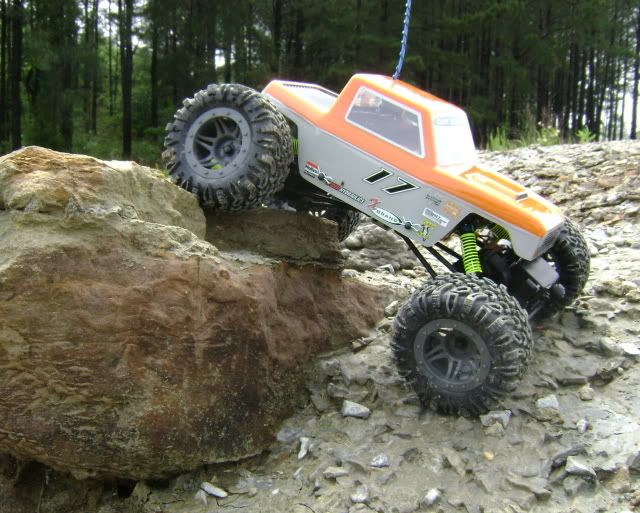 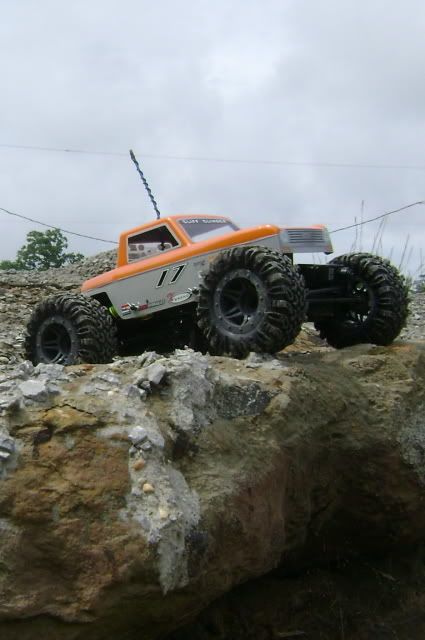 With the speed and the way these things swing around with the rear steer they kinda remind me of monster trucks so here is a donut just for fun. 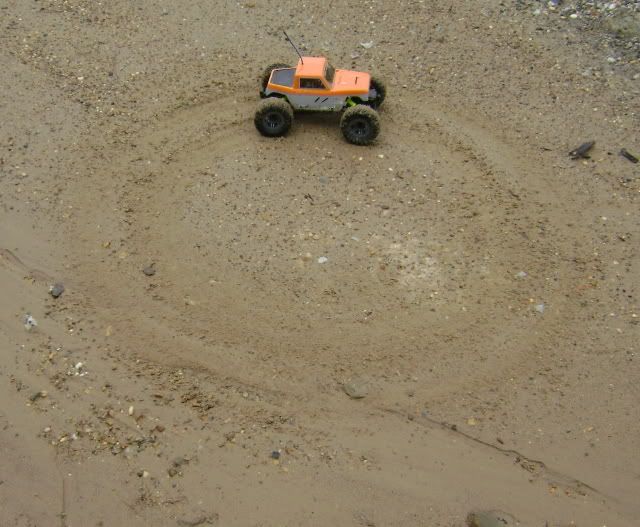 Last edited by nascarkeith; 05-11-2009 at 07:32 AM. |
|
| |
|
05-11-2009, 02:45 PM
| #9 |
| RCC Addict Join Date: Aug 2005 Location: Naoma, WV
Posts: 1,479
|
Hey, this is RC not the real thing. That scary steering will work fine and you aren't going to kill a bus load of nuns and orphans. Actually a dogleg link is probably stronger than the stock plastic link.
|
|
| |
|
05-11-2009, 04:43 PM
| #10 |
| Pebble Pounder Join Date: Mar 2009 Location: San Diego
Posts: 109
|
thats cool man. i just sold my cc but i had a blast with it and i learnd a ton about crawlers. i dont know why people like to HATE on the CC but you just cant beat the cost and fun factor you will have with the CC. i just might have to get another down the road, who knows? |
|
| |
|
05-18-2009, 07:24 AM
| #11 |
| Rock Crawler Join Date: Jan 2007 Location: Tuscaloosa
Posts: 855
|
I had some time to tinker Sunday so I clocked the axles. I took the stock links and cut them in half. Then, I drilled a 4/32 hole in the ends. After that, I used 6/32 threaded rod to extend them. 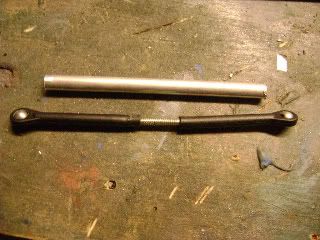 Finally, I slid some aluminum tube over them and reinstalled the extended links on the rig. 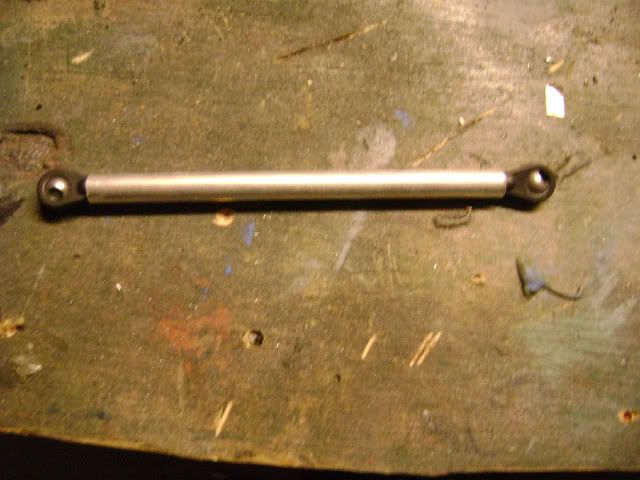 The new links are nice and strong thanks in large part to the aluminum sleeve. They also look really nice like an upgrade part. 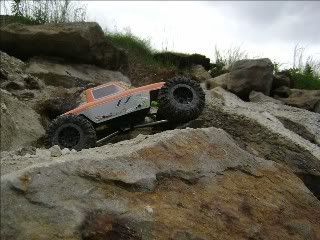 I also added a little spacer between the two steering rods on the front to try to get the link coming from the servo more level to get more steering strength. 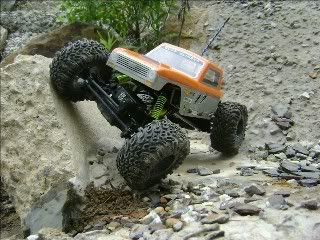 With the addition of some new mods it was time to go for a test run and shoot some video. 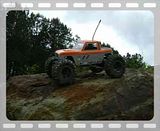 |
|
| |
|
05-18-2009, 08:41 AM
| #12 |
| RCC Addict Join Date: Aug 2005 Location: Naoma, WV
Posts: 1,479
|
Cool, I was just going to toss the stock links since they are so flexible. I may try your trick on mine though, stock links have a little more range of motion that some of the traxxas rodends I have. Fixing that front axle angle was a huge improvement on my truck. By the way, does anyone know how to save photobucket videos to your computer? Last edited by Jamus; 05-18-2009 at 08:48 AM. |
|
| |
|
05-21-2009, 12:49 PM
| #13 |
| Rock Crawler Join Date: Jan 2007 Location: Tuscaloosa
Posts: 855
|
Jamus, I think you just right click to download. Clocking the axles seems to be a good improvement but the new rear steering link has made the most noticable difference on mine. I have had a blast with my CC and have been thinking about getting another body for it that I could paint myself. I have had an idea in my head that I wanted to try out for about a week now. I did some pretty hardcore crawling/bashing the other day and got a lot of rock rash on the stock body so they persuaded me to get to looking for a replacement. I actually really like the look of the stock body so that's what I started looking for. I lucked up and got one on ebay shipped for $12.94. With the new body on the way I decided to put my idea on paper. I usually do that before painting a body because it is cheaper to decide you don't like something on paper than it is on lexan. Here is what my idea looks like on paper.  Any opinions? |
|
| |
|
05-21-2009, 01:38 PM
| #14 |
| RCC Addict Join Date: Aug 2005 Location: Naoma, WV
Posts: 1,479
|
Looks good, racey. The one thing I would like is dome real Bronco grill/headlight stickers. I bet the HPI Bronco decals would work. The stock CC decal looks like a Chevy LUV grill on a dovetailed Bronco, haha.
|
|
| |
|
05-21-2009, 02:25 PM
| #15 |
| Rock Crawler Join Date: Apr 2008 Location: pittsburgh
Posts: 536
|
Body ships in the mo'nin! Glad your gonna paint something original. Flames with the checker scheme looks good in your drawing.
|
|
| |
|
05-22-2009, 12:35 PM
| #16 | |
| Rock Crawler Join Date: Jan 2007 Location: Tuscaloosa
Posts: 855
| Quote:
| |
|
| |
|
05-27-2009, 07:09 AM
| #17 |
| Rock Crawler Join Date: Jan 2007 Location: Tuscaloosa
Posts: 855
|
The spacer I added to the front steering created the problem the stock set up has in the rear. The steering had too much wiggle or slop. I tried a bent link set up but it didn't help much either. Eventually I found a longer servo horn that I had in the tool box so I put that on without a servo saver. That seemed to help. I also put some o-rings in the cups to fix the dogbone slop. It had gotten to where I only had 3 wheel drive if I got in a bind but the o-rings fixed that. 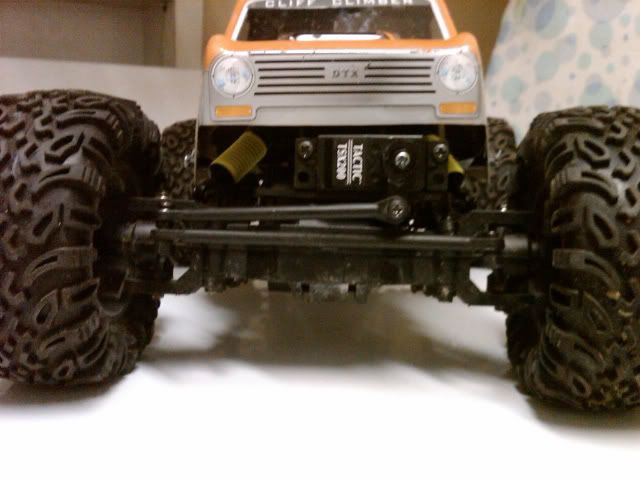 I got home yesterday and had a box from the good ol' U.S. Postal Service. I was expecting anything for another day or so but there was the new body I had bought. Thanks Rag6 for the quick shipping and throwing those stock decals in the box for me. I was glad to have it and had to get to work! Someone had mentioned to me using HPI Bronco decals for the grill but when I looked at the body it had panel lines in it for a Bronco'ish grill. I guess they must have ran into licensing issues or something so they made the decals different. I decided to do a little cutting on the stock decals and paint my own Bronco'ish grill. This is what I've got done on the paint so far. 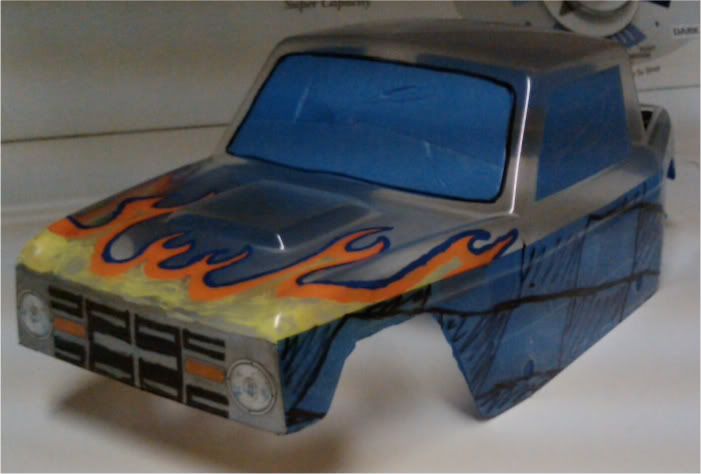 I've also got some stick ons ordered so I can get some more weight on those front wheels to help with climbing and clod stall. |
|
| |
|
05-27-2009, 10:43 AM
| #18 |
| Rock Crawler Join Date: Apr 2008 Location: pittsburgh
Posts: 536
|
glad you received it. I love ordering parts and winning auctions, But I hate waiting for the mail. I just painted one of the other bodies. Pearl grape on top, backed with white, and white on bottom. Looks nice. I am going to have to make a new chassis for it cause I used up all three I had on the scaler and I have 4 axles lying around. Well anyway, enough rambling. show us the finished body when it is done! BTW: Was wondering if you left fb? |
|
| |
|
05-27-2009, 12:08 PM
| #19 | |
| Rock Crawler Join Date: Jan 2007 Location: Tuscaloosa
Posts: 855
| Quote:
| |
|
| |
|
05-28-2009, 08:01 AM
| #20 |
| Rock Crawler Join Date: Jan 2007 Location: Tuscaloosa
Posts: 855
|
I noticed that the front axle was clocked a little too much so I shortened the links just a tad to get the steering link just about level. I got the body finished up and mounted. I am pretty happy with it. I think I could have done a little better on the flames but overall it turned out ok. I also really liked RCer4life's custom sharpied wheels so I painted the spokes of mine black. Here is the finished and decaled body. 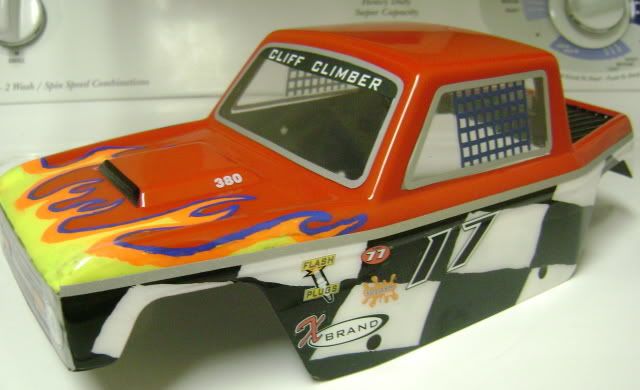 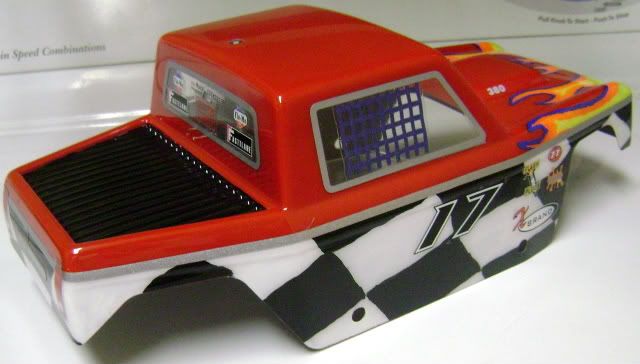 Pics of it mounted with the new look on the wheels.   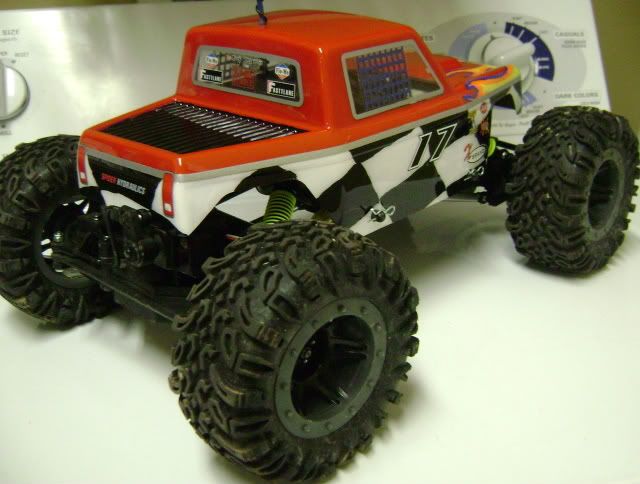 |
|
| |
|
| Thread Tools | |
| Display Modes | |
| |


 Linear Mode


