| |
| |||||||
 |
| | LinkBack | Thread Tools | Display Modes |
 08-08-2011, 09:57 AM
| #41 |
| Pebble Pounder Join Date: Sep 2010 Location: Brussels/Belgium
Posts: 196
|
Hello, So the 25 AWG is ordered and I'll try to make between 48 and 50T . I still have some questions... Can the wire from one section touch wire from an other?? Do you use special tools ? Do you use some holding device for the rotor while winding the wire? |

|  |
| Sponsored Links | |
| | |
|
08-08-2011, 10:21 AM
| #42 |
| owner, Holmes Hobbies LLC   Join Date: Nov 2004 Location: Volt up! Gear down!
Posts: 20,290
|
Since the wire is insulated (you did get magnet wire, right?) they can touch each other from section to section. I would recommend you gather a hobby knife to scrape insulation for the comm connection, some wooden chopsticks to pack wire if you won't pattern wind, and a small vice to hold the armature while you wind it. the vice will help greatly, although just holding the arm in your hand is acceptable too. |
|
| |
|
08-08-2011, 10:29 AM
| #43 |
| I wanna be Dave Join Date: Apr 2007 Location: Arlington, Washington
Posts: 2,303
|
If you mean wire from segment to segment, yes they can touch, which often happens on arms that are packed well. The insulation will stop any shorts, but be careful to not scratch it as your winding. As for special tools, something that is hard but won't scratch the wire that you can use to shift the wire as you wind is helpful. We've always used a very dull and rounded flat blade screw driver. For the winder, while you can setup something more efficient, if you are just gonna do one arm, I would just rig it up in a vice or something to hold it still, but be careful to not crush the arm. If you think you are gonna wind a lot of arms, probably worth the time to buy or make a handwinder. I use a powerwinder, but also have a manual winder.....Peter and Garrett always used the manual, I hate it, but I think it's because of my wrists and the fact they both learned to wind lefthanded, because thats how Big Jim set it up for us, cause he was lefthanded. I am very dominant right handed, so I have the power winder set up that way. For your use a manual winder would work fine. I would try to buy a slot car one, cause its probably really close in size and you can find them for under $100 pretty easy. You might need to order customs holding heads unless you have someone who can make them. The heads are pretty easy to make. Should look like this... |
|
| |
|
08-08-2011, 10:44 AM
| #44 |
| owner, Holmes Hobbies LLC Join Date: Nov 2004 Location: Volt up! Gear down!
Posts: 20,290
|
Making a winder is a pretty big undertaking for doing a few motors!
|
|
| |
|
08-08-2011, 11:20 AM
| #45 |
| I wanna be Dave Join Date: Apr 2007 Location: Arlington, Washington
Posts: 2,303
|
I wouldn't make one either, but if he plans on making more....a slot car winder may be the ticket. Though in crawling, I've seen guys make some crazy stuff for limited use... Later EddieO |
|
| |
|
08-08-2011, 11:52 AM
| #46 |
| Pebble Pounder Join Date: Sep 2010 Location: Brussels/Belgium
Posts: 196
|
@ EddieO By anny chance would you have a video or some pics of that manual winder. From the drawing I think I could make one my self...but to be sure... |
|
| |
|
08-08-2011, 12:04 PM
| #47 |
| I wanna be Dave Join Date: Apr 2007 Location: Arlington, Washington
Posts: 2,303
|
If you have the right tools, its really a simple device. A drill press, tap and some type of bandsaw is all you would really need to make one. This is a slot car one....mines a lot more rugged and overkill. |
|
| |
|
08-09-2011, 02:07 AM
| #48 |
| Pebble Pounder Join Date: Sep 2010 Location: Brussels/Belgium
Posts: 196
|
Now I see how it should really look like thanks... But I can't figure how it's supposed to be used Could post some pics of your winder "in use" with a little "how to" explanation. Thank you for your help.  |
|
| |
|
08-09-2011, 02:16 AM
| #49 |
| I wanna be Dave Join Date: Apr 2007 Location: Arlington, Washington
Posts: 2,303
| 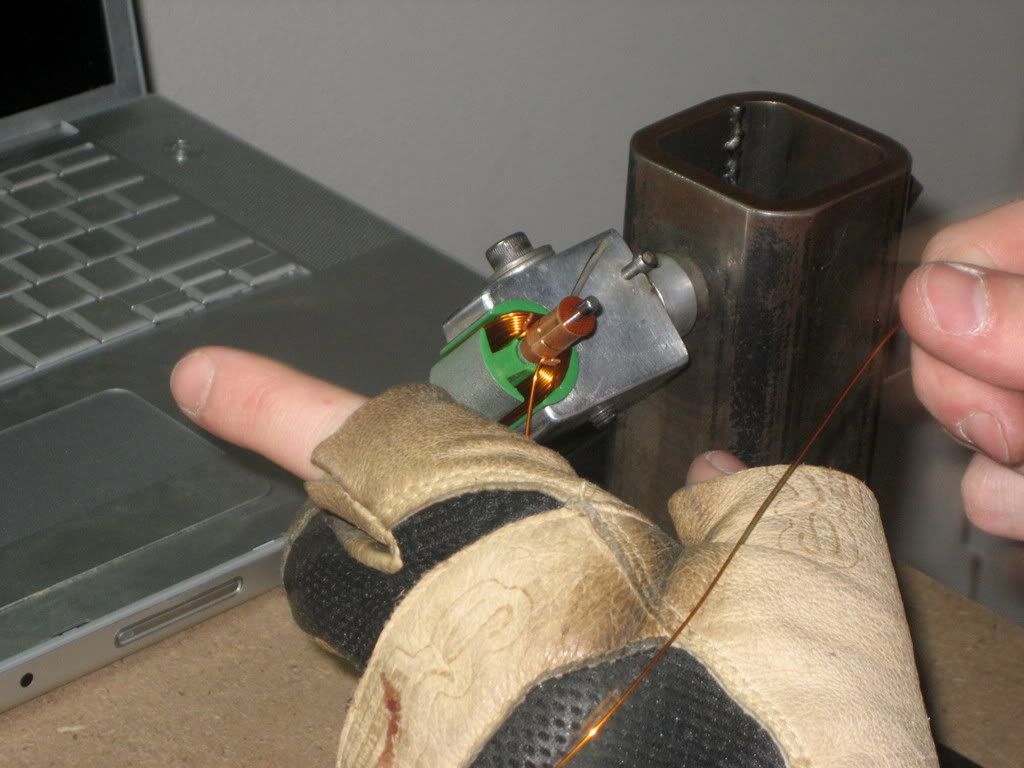 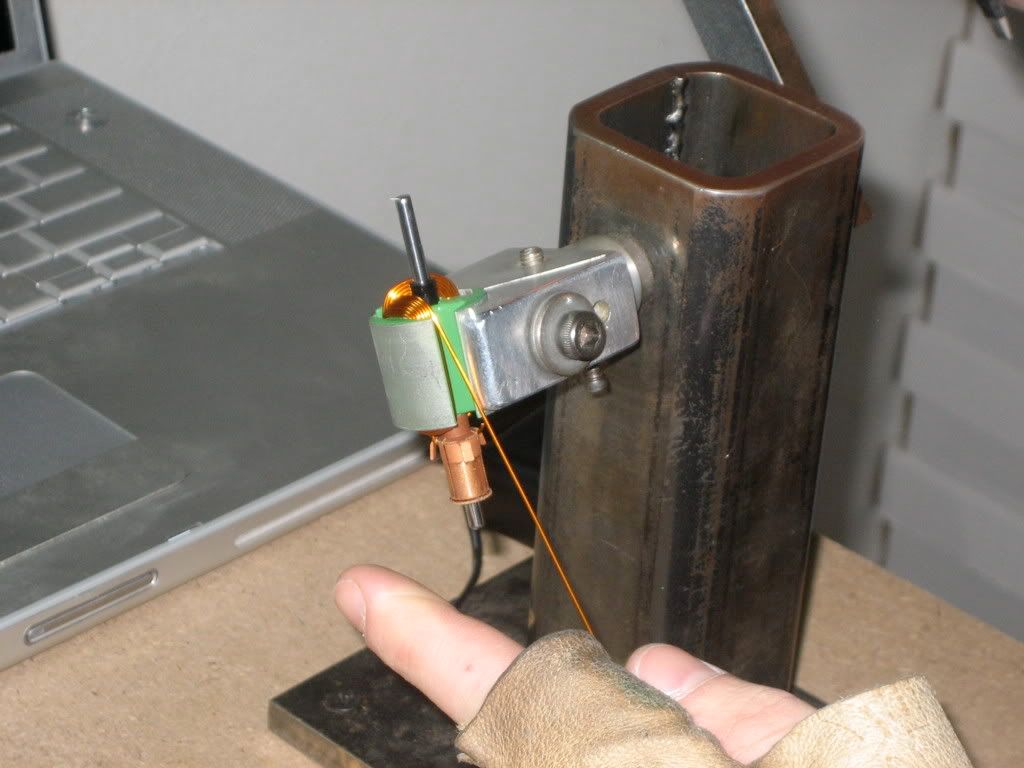 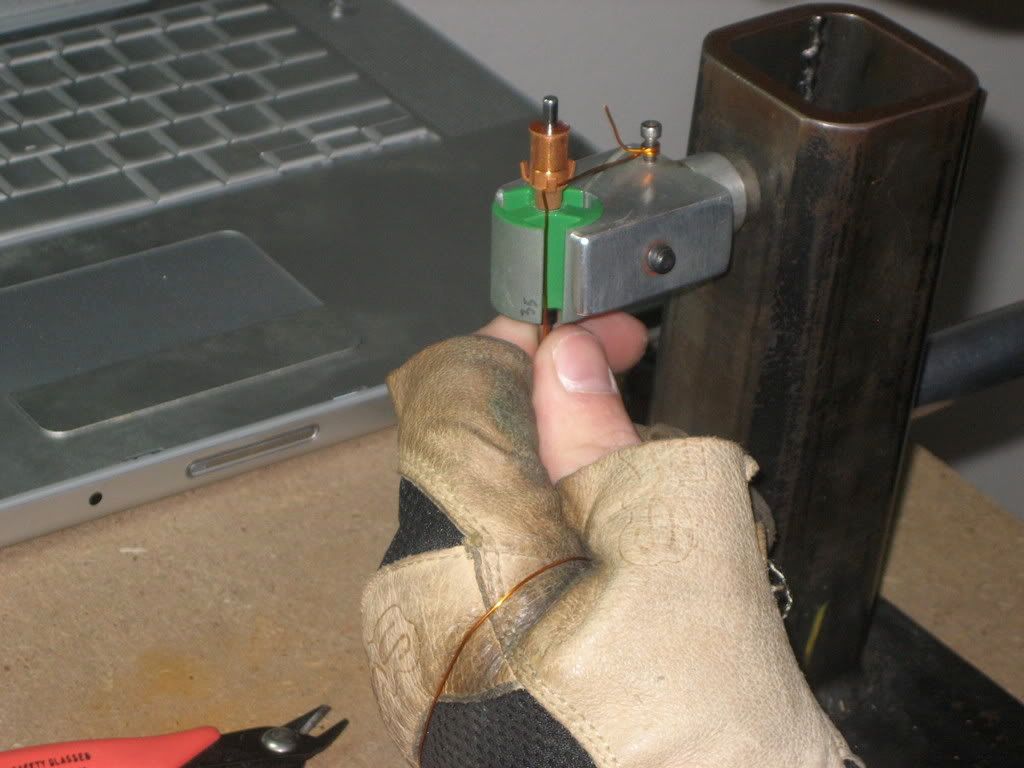 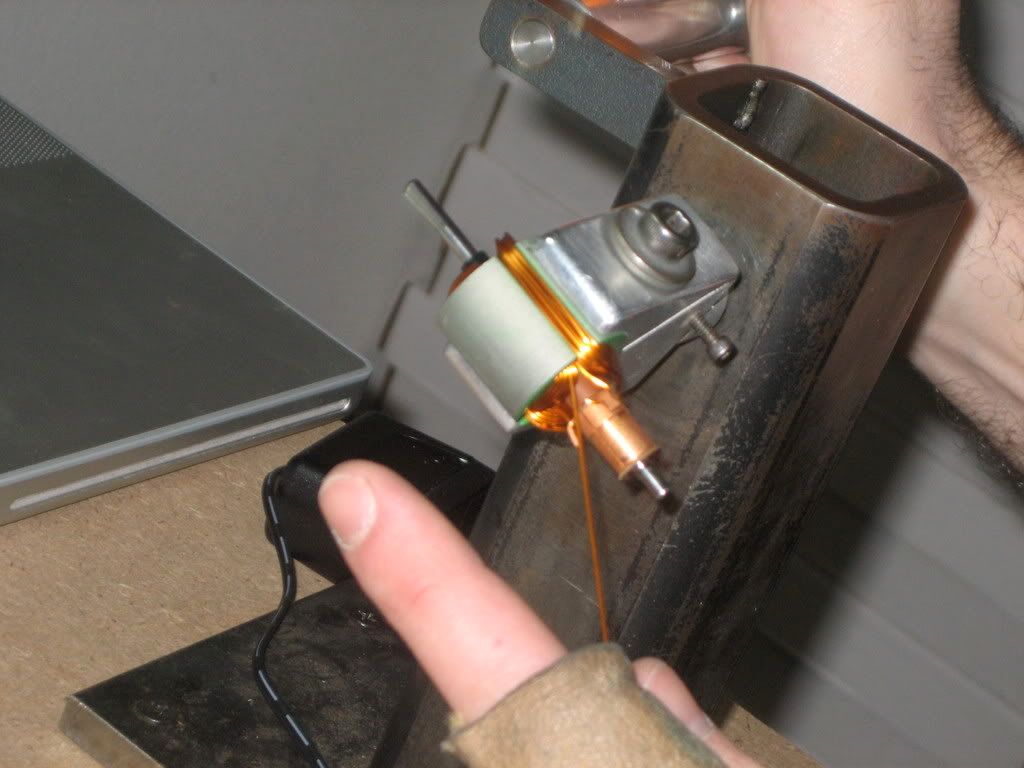 Basically you put in the winding head.....wind that segment.....scrape the wire at the end, then undo the arm, rotate it so you can do the next segment......do until done. The big key is keeping the wire extremely tight....you cannot see it the photo, but the wire is wrapped around garrett's leg to provide tension, along with being wrapped around the leather glove. The power winder uses a tensioner I built, but sorry I won't release photos of it......way overkill for this anyways, we don't even use the tensioner for mini arms, its not hard to keep the little wire tight, just one wrap around the hand is more than enough. Later EddieO |
|
| |
|
08-09-2011, 02:54 AM
| #50 |
| Pebble Pounder Join Date: Sep 2010 Location: Brussels/Belgium
Posts: 196
|
Thank you, now it's clear. In those pics I see that the wire seems to be winded more times on the inside of the arms that on the outside... The reason is? Last edited by Big Pitt; 08-09-2011 at 03:04 AM. |
|
| |
|
08-09-2011, 08:14 AM
| #51 |
| owner, Holmes Hobbies LLC Join Date: Nov 2004 Location: Volt up! Gear down!
Posts: 20,290
|
Probably just the view of the pattern. Most patterns are fairly symmetrical. An easy to make wire brake can be made from two bits of board and two slices of leather attached to the table. Use wing nuts to screw the assembly together pinching the wire down between the leather. A more custom brake can be made from non rotating discs or drums of leather. Situate two drums next to each other with a frame and snake the wire through them, wrapping more times for more tension. For a tiny armature you won't need a brake. I don't use a brake on anything, just a glove. |
|
| |
|
08-11-2011, 06:53 AM
| #52 |
| Pebble Pounder Join Date: Sep 2010 Location: Brussels/Belgium
Posts: 196
|
So here is my junkyard winding stand. From bits an pieces I've made this:   Everything is held well in place... I'll have to wind the wire by going around the arms and not rotating the motor. I hope that it still would do the trick... Next step...try to wind those little guys. |
|
| |
|
08-11-2011, 08:05 AM
| #53 |
| owner, Holmes Hobbies LLC Join Date: Nov 2004 Location: Volt up! Gear down!
Posts: 20,290
|
That is a great start, and smart thinking on the little stand! Consider your arm a flyer winder, much more advanced than a standard winder |
|
| |
|
08-11-2011, 10:24 AM
| #54 |
| I wanna be Dave Join Date: Apr 2007 Location: Arlington, Washington
Posts: 2,303
|
Looks functional and the wood will be nice as it would not be hard enough to dent the arm. Winding the way you are is totally functional, its just slower than spinning the arm. It's how the slot car guys used to do it back in the day. Later EddieO |
|
| |
|
08-11-2011, 11:26 AM
| #55 |
| Rock Crawler Join Date: Oct 2007 Location: Grants Pass
Posts: 806
|
Ahhh the glove |
|
| |
|
08-12-2011, 10:44 AM
| #56 |
| Pebble Pounder Join Date: Sep 2010 Location: Brussels/Belgium
Posts: 196
|
Hello, The wire arived this morning and here is what I've manage to do: It's a 50T with 26AWG wire:   Originaly it looked like that:  But after putting everything back together I have a PROBLEM I hooked up the motor to an battery to try it and at first it started, I tryed again and it was not working... I hooked it to a 500mA current transformer (4V up to 12V possibilities) and try it at 6v and 7.5V, half the time it's not sarting on his own... If I turn the shaft it start turning, but as soon as I gently pinch it it's stops...so, almost no torque... I've reopened it and checked the wires, the com and brushes everithing seem in place and not damaged... What could be wrong and how could I check it?? I'm not going to start the second motor until I find what's wrong. Need some more help Last edited by Big Pitt; 08-12-2011 at 10:55 AM. |
|
| |
|
08-12-2011, 10:54 AM
| #57 |
| owner, Holmes Hobbies LLC Join Date: Nov 2004 Location: Volt up! Gear down!
Posts: 20,290
|
Check for continuity between the comm segments and the armature body. You may have some shorts there. Also check the resistance of each phase from the comm to be sure they are all similar and have solid terminations. If you have an LCR meter you could check inductance too.
|
|
| |
|
08-12-2011, 11:12 AM
| #58 |
| I wanna be Dave Join Date: Apr 2007 Location: Arlington, Washington
Posts: 2,303
|
Scratching the wire is often the culprit here.....though a bad solder joint could be in too. Did you make sure to scrap the insulation off the wire where it attches to the comm? If you didn't, thats your problem. Later EddieO |
|
| |
|
08-12-2011, 11:42 AM
| #59 |
| Pebble Pounder Join Date: Sep 2010 Location: Brussels/Belgium
Posts: 196
|
@EddiO Yes I've scraped the insulation on the attachement section of the wire. @John What do you meen by: "Check for continuity between the comm segments and the armature body." And how am I supposed to check that? Also how am I supposed to check the resistance of each phase from the comm to be sure they are all similar and have solid terminations. I'm not an electronician and have no electronician devices... I'm afraid that i've started something that I will never be able to finish |
|
| |
|
08-12-2011, 12:31 PM
| #60 |
| owner, Holmes Hobbies LLC Join Date: Nov 2004 Location: Volt up! Gear down!
Posts: 20,290
|
You need to get a multimeter! What you are checking from the arm to winding is whether there is a connection. There should not be one.
|
|
| |
|
| |


 Linear Mode


