| |
| |||||||
 |
| | LinkBack | Thread Tools | Display Modes |
 12-26-2019, 05:47 PM
| #1 |
| I wanna be Dave Join Date: Jul 2005 Location: North Idaho
Posts: 3,648
|
Well, the wife and I had a quiet Christmas, which was a big contrast to Thanksgiving where I cooked for 25 people. Anyhoo... We go simple for Christmas, and just got each other one gift. Back in October we purchased a PS4, and ever sense she has ranted about getting a VR headset, so that is what I got her for Christmas. She got me a robe, it was great robe, has a 49ers logo on it, but for some reason she felt it didn't compare to what I had gotten her. I like the robe, and I got her something she really wanted, so I figured it for a win-win. But, for some reason she still felt bad... Me- "I really do like the robe. And, I REALLY like the other present you got me..." Her- "What other present?" Me- "The new RC kit I am picking up at the hobby shop tomorrow, thank you!"  Untitled by Scott O, on Flickr Untitled by Scott O, on FlickrMy goal for this rig is to build it as a C1 comp rig. I did a good amount of research and landed on this one. From what I could see it had the most bang for the buck. Here is what I have planned so far: Mamba-X HH Revolver 1800kv Savox Servo 1.55 tires. Comanche hard body. I really haven't used servo winches, so I will have to decide if I am going to buy one or build one. If the stars do not align right and I need a body before the Comanche body is ready, I will use a PL Power Wagon body I have on the shelf. This body was built for my TRX4, and never like the way it sat on the chassis. It should be a better fit on the Element with the 1.55 tires.  TRX4 Roll Bar by Scott O, on Flickr TRX4 Roll Bar by Scott O, on Flickr
|

|  |
| Sponsored Links | |
| | |
|
12-26-2019, 06:35 PM
| #2 |
| Go Buckeyes!   Join Date: Jun 2017 Location: Mid-Ohio
Posts: 4,135
|
I like how you was able to slip in the "other present"!  I've tried that before, but did not have great success! Congrats on the new Christmas gift! Can't wait to see the build! |
|
| |
|
12-26-2019, 07:48 PM
| #3 |
| I wanna be Dave Join Date: Jun 2016 Location: Deep in the Everglades
Posts: 5,818
|
I like that work. I packed clothing in about 4 boxes for my new PC Each box also had a computer component packed inside( she didnt need those) ( I saved them) She was ecstatic when her Robot Vac arrived, and wasnt too upset when the new monitor showed its box..... WIN!!! Hang up and Drive |
|
| |
|
12-27-2019, 10:13 PM
| #4 |
| I wanna be Dave Join Date: Jul 2005 Location: North Idaho
Posts: 3,648
|
So, the build begins... Laid everything out, organized my tools, and popped the top on the beer...  Untitled by Scott O, on Flickr Untitled by Scott O, on Flickr Untitled by Scott O, on Flickr Untitled by Scott O, on FlickrSo far I have the chassis, transmission and axles built. These are not the worst instructions I have seen, but there is lots of room for improvement too. • There are six holes on each side of the chassis where the skid plate goes, but they only have you install four screws. Given the length of the screws you kind of make a guess as to where they go. • There are three mounting locations for the shock towers on the back of the chassis, there is no explanation as to where the towers should go. Knowing that this truck was made for three WBs, and given the longest is 313mm, I put the towers in the furthest set of holes. • The instructions for the steering arms are terrible. The only saving grace here is knowing that both sides should match. • The transmission instructions could be a lot better. Just putting it together takes a lot of attention to detail making sure the right parts go in the right places. Having to jump to the back of the manual for the alternate configurations just serves to add that much more challenge to the whole process. They should have a complete building instruction set for each transmission configuration. I wouldn't have minded it if they would just given better instructions for the "normal" build, then had you go online for the alternate builds. Hopefully I got the build right, I went with the 11% over drive. • There are bad instructions in the book... - The book tells you to clamp the knuckles so that the plastic touches, when you do that the plastic on the knuckle fails. The online instructions show the part with the plastic not touching, but doesn't say why. - I didn't tighten the second one nearly as far and still have cracking. - Someone on FB said that AE will sent new parts. While I am hoping this is true, I am thinking this would be a good opportunity to upgrade to brass. The first knuckle... 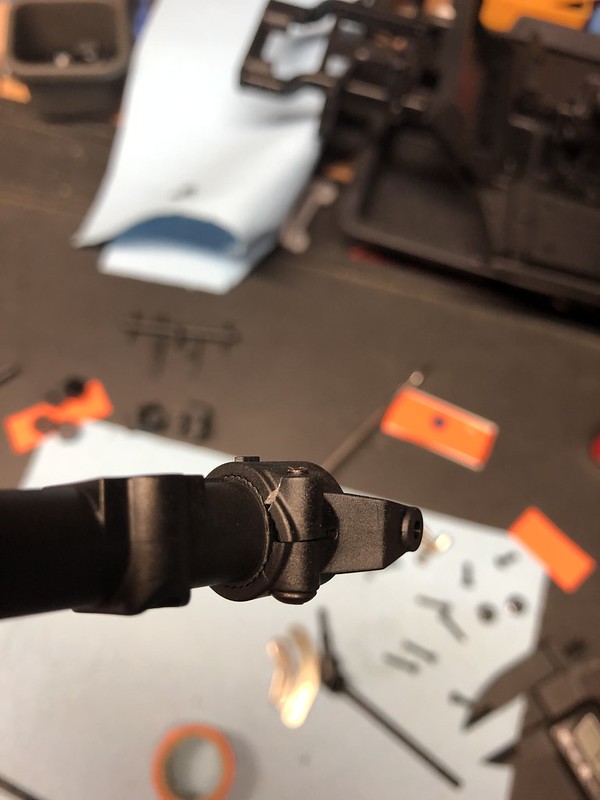 Untitled by Scott O, on Flickr Untitled by Scott O, on Flickr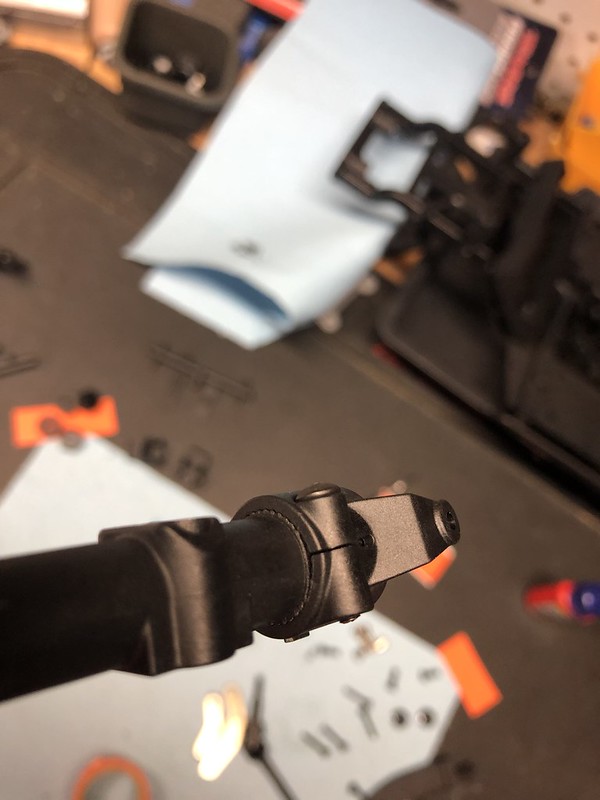 Untitled by Scott O, on Flickr Untitled by Scott O, on FlickrHere it is, right before I assembled the front axle...  Untitled by Scott O, on Flickr Untitled by Scott O, on FlickrPro-tip... Do not throw away the plastic bags or the parts trees until the build is completely finished. In the heat of the battle, it is entirely possible to miss a part in the plastic bag, or think you have all of the parts off of a tree and miss one. Its a lot easier (and nicer) to dig through the box your kit came in instead of digging through a trash can. 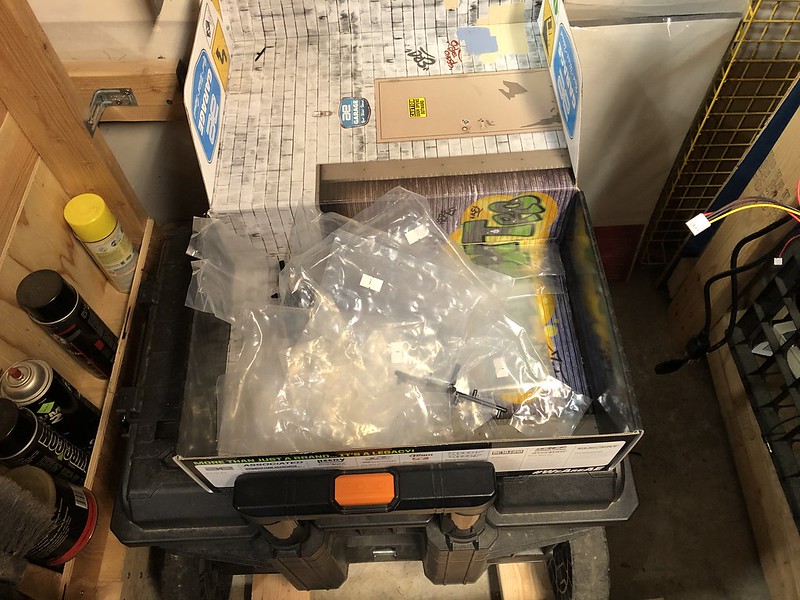 Untitled by Scott O, on Flickr Untitled by Scott O, on Flickr
Last edited by Greatscott; 12-28-2019 at 08:13 AM. |
|
| |
|
12-28-2019, 09:17 AM
| #5 |
| Slow is the new Fast   Join Date: Nov 2013 Location: Winterpeg
Posts: 2,906
|
I am currently building the Element kit as well. I completely agree with your review on the instructions. I was also going back and forth on the manual to decide how to configure the transmission. In the end i believe I set up option 2 with the 'stock' topshaft. I hope this is the 12% option...lol . I cant say I was left feeling 100% confident. Also found the same issue on the skid mount instructions. I have searched my garbage can more times than I care to think about...lol Enjoying your thread Scott, thanks. |
|
| |
|
12-28-2019, 09:54 AM
| #6 |
| Rock Stacker Join Date: Jan 2017 Location: Barrington IL
Posts: 63
|
This looks like a great kit can’t wait to see more of your progress.
|
|
| |
|
12-28-2019, 08:22 PM
| #7 |
| I wanna be Dave Join Date: Jul 2005 Location: North Idaho
Posts: 3,648
|
Success, the chassis is put together. Sadly, the rest of the progress will be a little slower. I am intending on putting a hard body on this rig, but was going to use a body I built for my TRX4. After fitting it up with the tires, I don't like it at all; so, looks I'll wait for the hard body. I'll need to get someone else to paint it though, I have discovered I have no talent at all for painting ABS. The rest of the build process went fairly smoothly, but there were a number of places where the manual could have used a bit more explanation. The funny part about it is the manual went into very good detail for the shock build and bleeding. Here are some photos of the rest of the built with some build tips... Link building... - This is fun for the first couple, then the whole mess gets tedious. Kudos to the manual, it said to put grease on the link threads, which is something I have never done in any build (in fact, I have avoided getting grease on the threads), this did make them easier to put together. - These have to be some of the beefiest links I have seen on a crawler, and it is a toss up as to which are better, these or the TRX4 links. - For putting the rod ends on to the links, I put electrical tape on the links and hold them with a small set of channel locks; this reduces the amount of marring that will be done to the links. I thread the rod end on by hand until I get two or three threads caught, then I use a 3.5mm hex driver to spin them the rest of the way on.  Untitled by Scott O, on Flickr Untitled by Scott O, on Flickr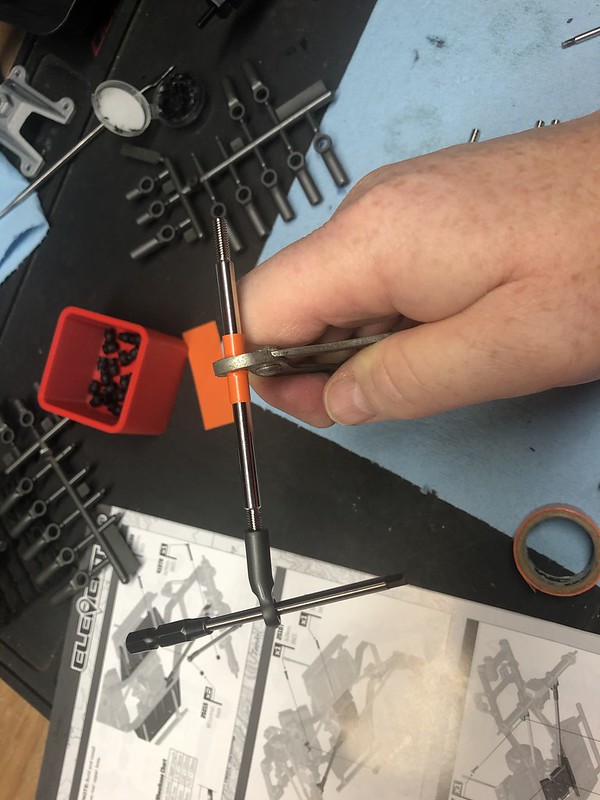 Untitled by Scott O, on Flickr Untitled by Scott O, on FlickrFor assembling the rod end, I use a 4-way wrench.  Untitled by Scott O, on Flickr Untitled by Scott O, on Flickr Untitled by Scott O, on Flickr Untitled by Scott O, on FlickrTo make sure the link length right I trim up the flashing on the rod ends. Depending on how the rod end is taken off of the tree there could be a couple of millimeters of material that will throw the rod end length off.  Untitled by Scott O, on Flickr Untitled by Scott O, on FlickrShock building... This is my least favorite thing to do in RC, build or rebuild. As much as RC is a DYI hobby, I would almost prefer to pay someone to do this. In light of this, my only tips here are to have everything organized, and having a shock stand helps. I have come to realize that E-clips hate me, and the feeling is, for the most part, mutual.  Untitled by Scott O, on Flickr Untitled by Scott O, on Flickr Untitled by Scott O, on Flickr Untitled by Scott O, on FlickrAnd, after two days and four beers... I am claiming victory here... Not only does the front and back spin in the same direction, but it appears as though I assembled the transmission the way I wanted it.  Untitled by Scott O, on Flickr Untitled by Scott O, on Flickr Untitled by Scott O, on Flickr Untitled by Scott O, on FlickrFitting the body up to it did tell me that this rig is a little taller than what I want for my C1, so most likely I'll put 5mm spacers in the shocks. Last edited by Greatscott; 12-28-2019 at 08:27 PM. |
|
| |
|
01-12-2020, 09:42 AM
| #8 |
| I wanna be Dave Join Date: Jul 2005 Location: North Idaho
Posts: 3,648
|
The slow motion build continues... I am going with a Comanche hard body, and going nude for the paint, keeping it it white and painting up various areas satin black. The bed will be painted up so that it looks like bed liner. For this I tried a little different technique, I am using liquid mask with regular mashing tape to get nice crisp lines (theoretically). The green is five coats of liquid mask.  Untitled by Scott O, on Flickr Untitled by Scott O, on FlickrElectronics are coming along slowly. I am planning on using a servo winch, I haven't decided if it will internally or externally spooled; or if I am going to build it or buy one. I am going with a 1800kv HH out runner and a SW4, just waiting for the out runners to get back in stock. The only thing I don't like about the SW4 is the BEC, what the heck is Castle thinking here? So, I will dump a 10A BEC into the mix as well. Picking up the SW4 this weekend, I doodled around a bit on Fusion and made a mount for the SW4. The tricky thing was the power switch (I know, cut it off...), and ended up running it under the ESC to eat up its cabling. I also like putting rails on my ESC mounts to give a place to tidy up the wiring. I might tweak the design a bit when I get the out running installed, but everything works fine with a regular brushless motor.  Untitled by Scott O, on Flickr Untitled by Scott O, on Flickr Untitled by Scott O, on Flickr Untitled by Scott O, on Flickr Untitled by Scott O, on Flickr Untitled by Scott O, on Flickr Untitled by Scott O, on Flickr Untitled by Scott O, on Flickr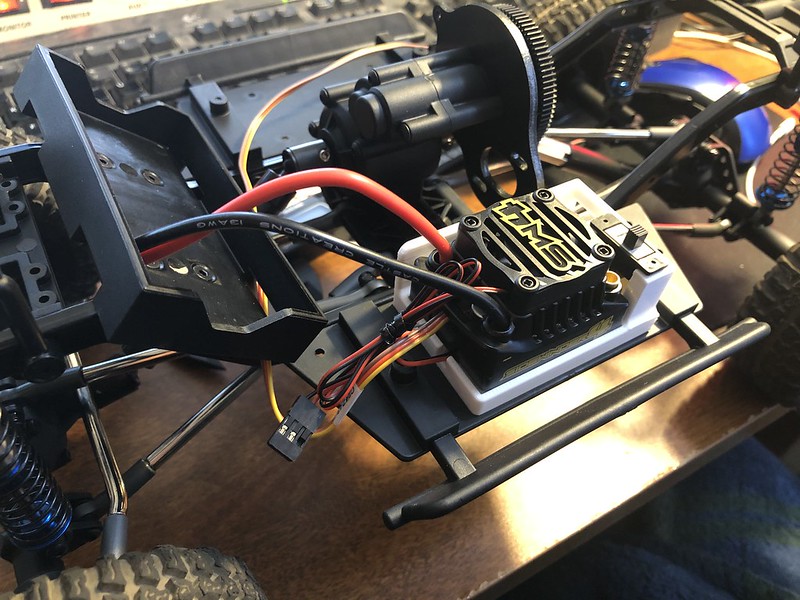 Untitled by Scott O, on Flickr Untitled by Scott O, on Flickr
|
|
| |
|
01-18-2020, 11:14 PM
| #9 |
| I wanna be Dave Join Date: Jul 2005 Location: North Idaho
Posts: 3,648
|  Untitled by Scott O, on Flickr Untitled by Scott O, on FlickrProgress on this rig has been painfully slow, and nonexistent last week. This is my first week back to college, we got three months worth of snow in four days, and I am the go-to guy for a couple of projects at work, and they went to me with lots of OT... But, this slow-motion build has allowed me to think about what I am doing a bit more. Also, I am waiting on parts, I am hoping Jon Holmes will get off of his lazy butt and start producing 1800kv out runners again. One of the things I have been giving a good amount of thought to is the routing of the wires from the ESC side to the RX side. I am looking at one of two options. 1. Design a custom battery box that has tie points for the wires, making the mess less of a mess. 2. Resigning a back bracket (like the battery brace bracket) specifically made for routing wires. Either option will be easy to design and print out... Thoughts? |
|
| |
|
01-27-2020, 09:02 PM
| #10 |
| I wanna be Dave Join Date: Jul 2005 Location: North Idaho
Posts: 3,648
|
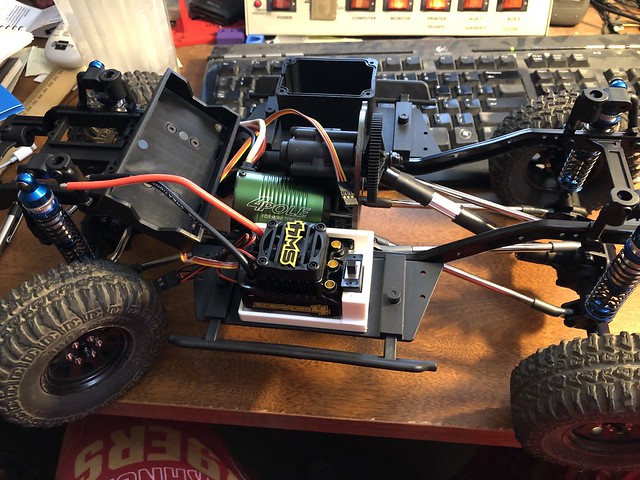
More progress, slow but steady... I have most of the parts and pieces to finish putting this thing together. Like an idiot, I decided to go back to college, so that is where a lot of my spare time is going these days. I am using RC as a reward for getting my class work done. Right now I am going with an Integy 35T motor, at least until HH gets his 1800kv revolvers back in stock. I have to modify one of my 300oz servos for the winch, and will use a HW1060 to push it. I designed and printed a chassis brace to hold the HW1060... I made three different flavors... Plan...  Untitled by Scott O, on Flickr Untitled by Scott O, on FlickrHoly...  Untitled by Scott O, on Flickr Untitled by Scott O, on Flickr...and HW1060.  Untitled by Scott O, on Flickr Untitled by Scott O, on Flickr Untitled by Scott O, on Flickr Untitled by Scott O, on Flickr Untitled by Scott O, on Flickr Untitled by Scott O, on FlickrI am also super excited, I painted up the parts and pieces on my hard body, and the paint actually adhered properly!!! |
|
| |
|
01-28-2020, 09:41 AM
| #11 |
| Go Buckeyes! Join Date: Jun 2017 Location: Mid-Ohio
Posts: 4,135
|
Nice chassis brace! Great job on the design. That is a great idea to mount the ESC there. I'm getting ready to add a servo winch to my Enduro and was looking for a place to add the ESC. Problem solved! Thanks for sharing that tip. Build is looking good so far! |
|
| |
|
01-28-2020, 10:08 AM
| #12 | |
| I wanna be Dave Join Date: Jul 2005 Location: North Idaho
Posts: 3,648
| Quote:
| |
|
| |
|
01-28-2020, 02:10 PM
| #13 | |
| Go Buckeyes! Join Date: Jun 2017 Location: Mid-Ohio
Posts: 4,135
| Quote:
I appreciate you taking the time to design and share! | |
|
| |
|
01-28-2020, 06:37 PM
| #14 | |
| I wanna be Dave Join Date: Jul 2005 Location: North Idaho
Posts: 3,648
| Quote:
Here is a link. https://www.thingiverse.com/thing:4130716 | |
|
| |
|
01-29-2020, 06:59 PM
| #15 | |
| Quarry Creeper Join Date: Nov 2008 Location: The land of bagged milk
Posts: 260
| Quote:
| |
|
| |
|
02-01-2020, 11:22 AM
| #16 |
| I wanna be Dave Join Date: Jul 2005 Location: North Idaho
Posts: 3,648
|
More work... Looking for a front bumper for my Element build, and really like the VS4-10 bumper, but I have been unable to find it in anything but plastic. SSD makes a bumper like it, but it is only for the SCX10ii, and the mount is not compatible with the frame of the Element, so I make a mount to put the SSD bumper on to the Element. I made two versions, one in a 'U' shape, like the Element's bumper mount, and one flat to allow for things to be mounted on it. Both have the pass-through for winch line. If you want to print your own, here are the files: https://www.thingiverse.com/thing:4139238 Here it is all mounted up...  Untitled by Scott O, on Flickr Untitled by Scott O, on Flickr Untitled by Scott O, on Flickr Untitled by Scott O, on FlickrHere is the mount, I only printed the one I wanted, and took a screen shot of the other...  Untitled by Scott O, on Flickr Untitled by Scott O, on Flickr Untitled by Scott O, on Flickr Untitled by Scott O, on Flickr Untitled by Scott O, on Flickr Untitled by Scott O, on FlickrHere is the bumper as it comes in the package. Thankfully the mount is held on by four screws, once removed you have a nice clean surface to mount up to...  Untitled by Scott O, on Flickr Untitled by Scott O, on Flickr Untitled by Scott O, on Flickr Untitled by Scott O, on Flickr Untitled by Scott O, on Flickr Untitled by Scott O, on FlickrThe bumper with the SCX10ii mount removed...  Untitled by Scott O, on Flickr Untitled by Scott O, on FlickrThe bumper with the Enduro mount on it...  Untitled by Scott O, on Flickr Untitled by Scott O, on Flickr Untitled by Scott O, on Flickr Untitled by Scott O, on Flickr Untitled by Scott O, on Flickr Untitled by Scott O, on Flickr
Last edited by Greatscott; 02-01-2020 at 11:28 AM. |
|
| |
|
02-01-2020, 01:24 PM
| #17 |
| Rock Crawler Join Date: Dec 2005 Location: Marietta
Posts: 917
|
Love the mount. Well done.
|
|
| |
|
02-01-2020, 05:54 PM
| #18 |
| Newbie Join Date: Jan 2020 Location: dayton
Posts: 17
|
Looks sweet. I'd like to see it all put together with your body on it.
|
|
| |
|
03-04-2020, 09:29 PM
| #19 |
| I wanna be Dave Join Date: Jul 2005 Location: North Idaho
Posts: 3,648
|
My Element is getting closer, working on the lights. Trying something new (to me) for the wiring. If it works right there will be nothing to plug in from the chassis to the body, just drop the body on.  Untitled by Scott O, on Flickr Untitled by Scott O, on Flickr Untitled by Scott O, on Flickr Untitled by Scott O, on Flickr Untitled by Scott O, on Flickr Untitled by Scott O, on Flickr Untitled by Scott O, on Flickr Untitled by Scott O, on Flickr
|
|
| |
|
03-05-2020, 07:35 AM
| #20 |
| Pebble Pounder Join Date: Jan 2020 Location: Kent, UK
Posts: 105
|
Now that I like, be interested in how well it works because the wires really annoy me.. but I might try something similar.. Element Sendero 1/10. Crawler/Trailer. Scx24 crc. Crawler 1/24. Wltoys a212. Shortcourse 1/24. Wltoys k969. Drifty 1/28 |
|
| |
|
 GreatScott's Element Kit - Similar Threads
 | ||||
| Thread | Thread Starter | Forum | Replies | Last Post |
| NEW MIP X-Duty Center Drive Kit for Element RC Enduro - In Stock! | RPP Hobby | RPP Hobby | 0 | 10-25-2019 01:48 PM |
| |


 Linear Mode


